25 Little Sewing Habits That Make Your Work Look Better
Two people can sew a tote bag from the same pattern, using the same fabric, and end up with bags that look surprisingly different. One has smooth seams, neat corners, and even topstitching. The other has a few puckers, bulky corners, and a lining that doesn’t quite sit where it should.
The difference usually isn’t experience. It isn’t an expensive machine either. (Sorry. I know you were hoping for an excuse to buy one.) It’s a handful of tiny habits.
Prefer to read without ads?
I created a PDF version of this guide for anyone who likes to keep sewing guides saved, printed, or easy to read without ads. It includes the same helpful information in a simple format you can download and use whenever you need it.
The PDF is available in my shop for a small fee. It’s a nice option if you want to support my work and keep this tutorial close to your sewing machine.
Here are 25 little sewing habits that help your work look better, from the first test seam to the final thread check.
This is not a beginner rules list. Nobody here is going to tell you to read your manual. It’s also not a list of sewing hacks. Nothing below involves a pool noodle.
These are the small things experienced sewists do almost without thinking: where they stop, when they press, how they start a seam. None of them need fancy equipment or hours of extra work. Most take a few seconds. Together, they make a very noticeable difference.
Part 1: Before You Start Sewing
1. Sew a Test Seam on Your Actual Fabric
A few minutes of test stitching saves an hour of unpicking.
Your machine has no idea what you’re about to feed it. Two layers of canvas with interfacing feel completely different under the needle than one layer of quilting cotton. Tension, stitch length, and needle size all react to what’s under the foot. A test seam shows you what’s going to happen before it happens on the good stuff.
Test on scraps that match the real seam. Same fabric, same interfacing, same batting, same number of layers. Then check both sides. The top can look lovely while the underside quietly builds a bird’s nest.
Keep a few scraps from your current project until you’re finished. They are useful for testing seams, buttonholes, decorative stitches, and pressing temperatures. A small test piece is usually a better sacrifice than a cut project piece.
Here’s my cautionary tale. I recently made a no-buckle elastic belt with small pieces of leather on it. Being a responsible sewist, I tested the stitches on elastic and leather first. Everything looked great.
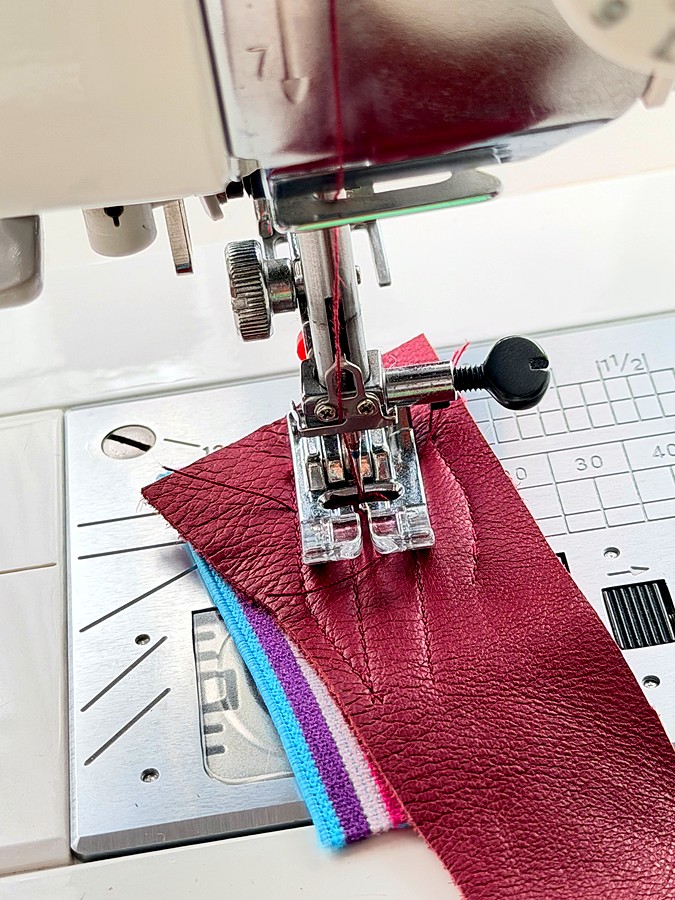
But I didn’t test on the actual leather. The real piece was a gorgeous blue metallic leather, and I couldn’t bring myself to cut into it for a test. So I tested on regular leather. Same thickness. Same softness.
On the real project, my machine flat-out refused to topstitch. The metallic leather stuck to the presser foot and would not move forward. By the time I switched to a walking foot, two pretty pieces were spoiled. I saved one tiny scrap and lost two good pieces. Excellent math.
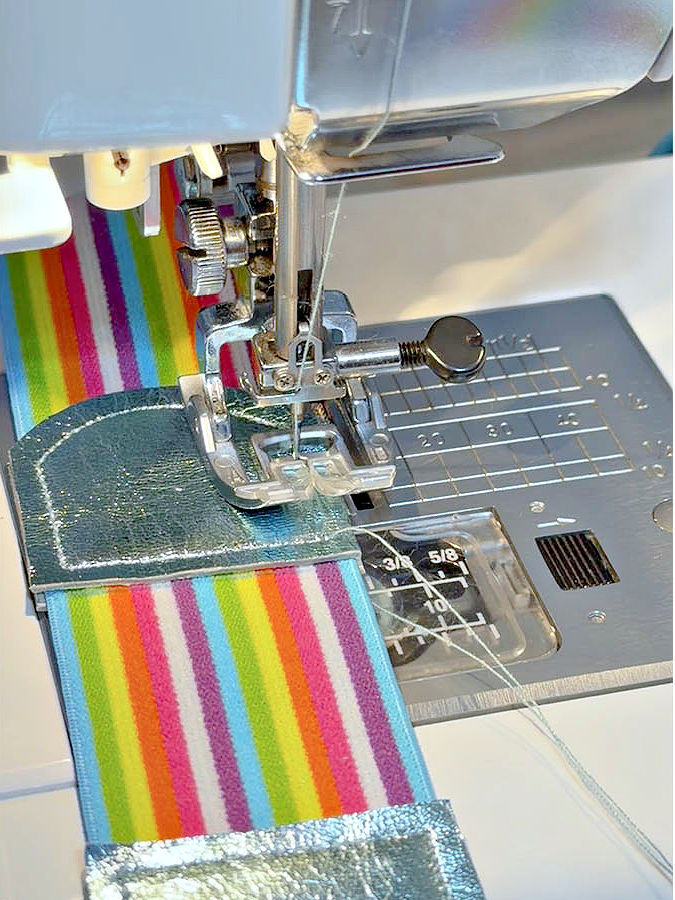
The lesson: “similar” fabric is not your fabric. Test on the real thing.
✅ Related tutorials:
- 17 Fun And Unique Fabric Scrap Projects (for the scraps that survive testing)
- How to sew thin leather easily with a regular sewing machine
- How to use a walking foot
Note: Some of the links on this page are affiliate links. This means I will receive a commission if you order a product through one of my links. I only recommend products I believe in and use myself.
2. Start a New Project With a Fresh Needle
Needles go dull quietly and they don’t send a memo.
A dull or slightly bent needle doesn’t announce itself until things go wrong. Skipped stitches. Pulled threads. Little snags. That thumping sound when the needle punches through thick layers like it’s knocking to be let in.
Don’t wait for a popping sound or a row of skipped stitches. Start each new project with a fresh needle that matches the fabric:
- Universal for most woven cottons
- Jeans/denim for canvas, denim, and thick bag layers
- Microtex for tightly woven fabrics like batiks and silk
- Leather for real leather only (vinyl and faux leather prefer a sharp needle)
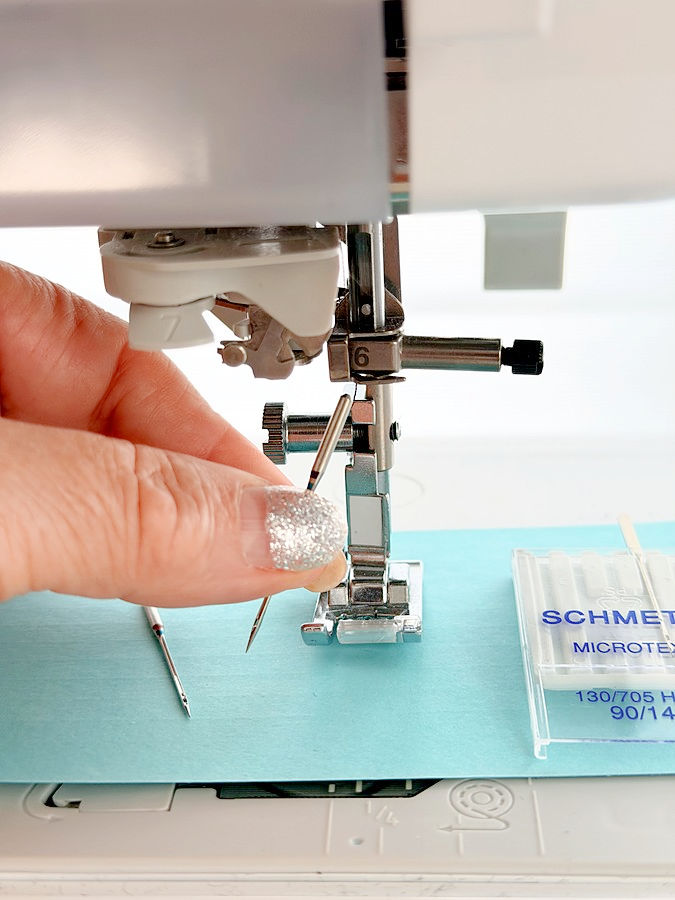
A fresh needle at the beginning of a project is an easy habit to remember, especially before a substantial project or work with delicate fabric. If you’ve only sewn a few inches with the right needle, you don’t need to throw it away because you’re starting another small item. The point is to know what is in the machine and how much use it has had.
Some projects (like bag sewing) burn through needles faster. Interfacing, vinyl, cork, and those six layers at the end of a strap all wear down the point. If you sew bags, your needles retire early.
And if you can’t remember when you last changed it? That’s your answer.


3. Wind a Full Bobbin
The bobbin always runs out two inches before the end of the topstitching. It’s practically a law.
Running out on a hidden construction seam is annoying. Running out in the middle of visible topstitching is a whole other level of annoying. Restarting leaves a bump, a gap, or a little doubled patch, right where everyone will look.
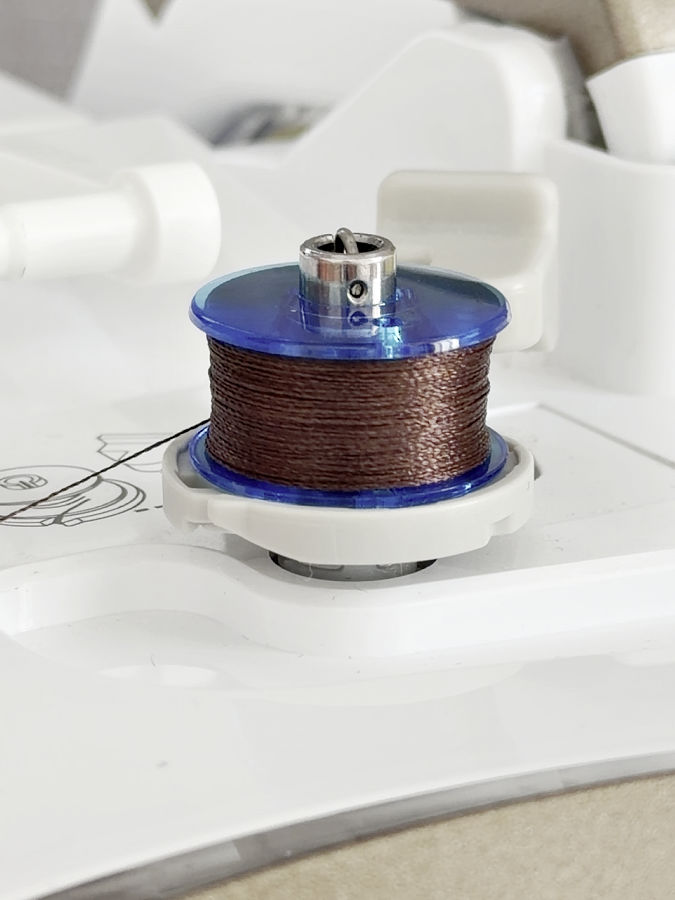
Check the bobbin before topstitching, binding, or any seam that shows. If it’s less than half full, wind a new one. The half-empty bobbin can go do the construction seams nobody sees.
✅ Watch: my Facebook reel on winding a bobbin
✅ Related tutorial: Common Sewing Machine Bobbin Problems And Solutions (+Videos)
4. Read the Entire Pattern Instructions Before You Start
Sewing patterns are the only stories where reading the ending first is a good idea.
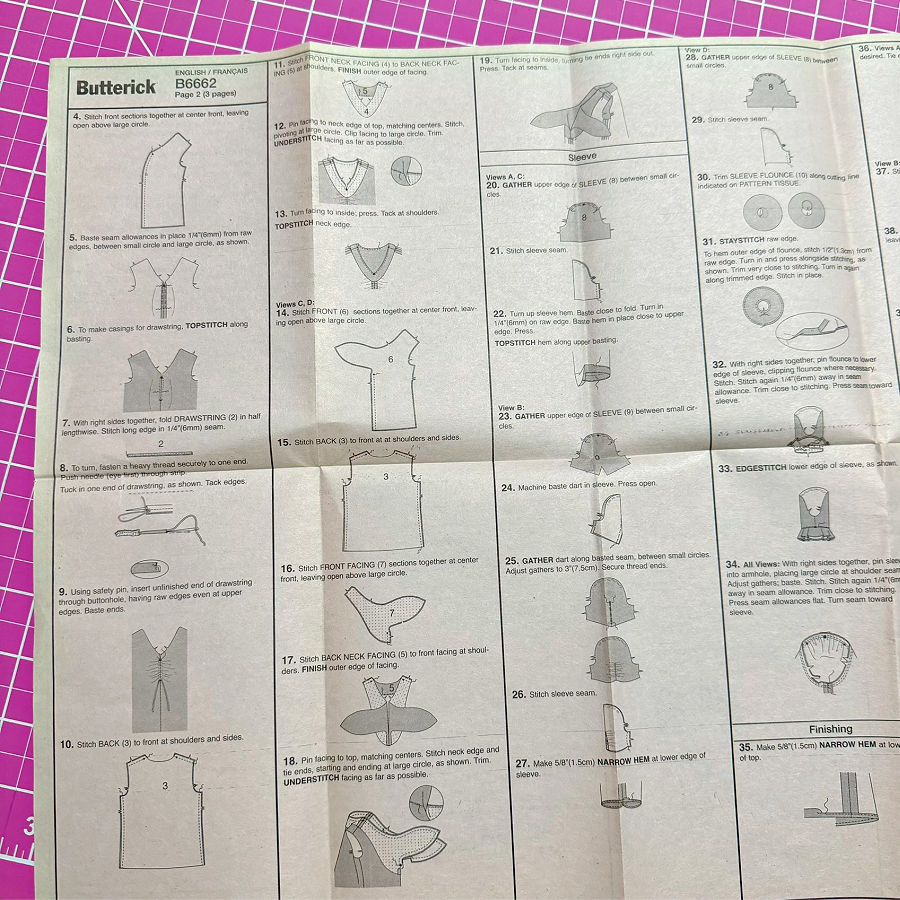
Don’t read one step at a time as you sew. Read the instructions from beginning to end so you understand how the project comes together.
You may discover that some pieces need interfacing before assembly. Certain edges should be finished early. One seam needs to stay open until much later, and step 7 will be very upset that you sewed it shut in step 3.
Knowing what’s coming saves you from mistakes and a lot of seam ripping. It also gives you a chance to spot a special presser foot or notion you need before you’re halfway in.
✅ Related tutorial: Top 10 Things Sewing Patterns Don’t Tell You (But You Need to Know)
5. Gather Everything You Need and Keep It Organized
Half of sewing time is sewing. The other half is looking for the zipper you bought specifically for this project.
Before you start, collect your fabric pieces, matching thread, needles, interfacing, zippers, buttons, and any special presser feet or tools. Keep it all in one place. A project box or a tray works great.
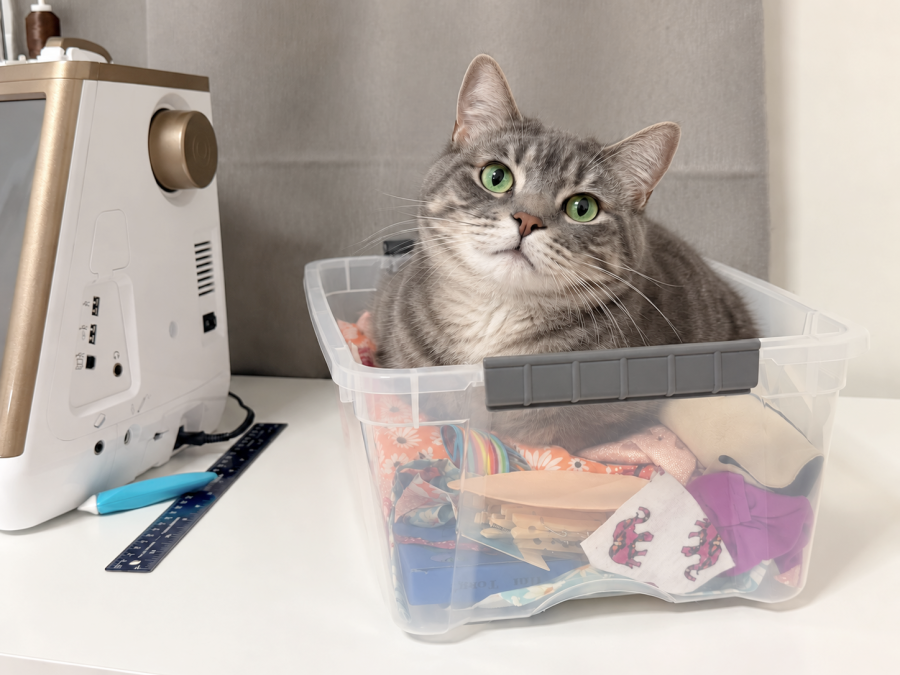
If you have a cat, choose a box with a lid. My daughter’s cat treats an open project tray as a bed with a view.
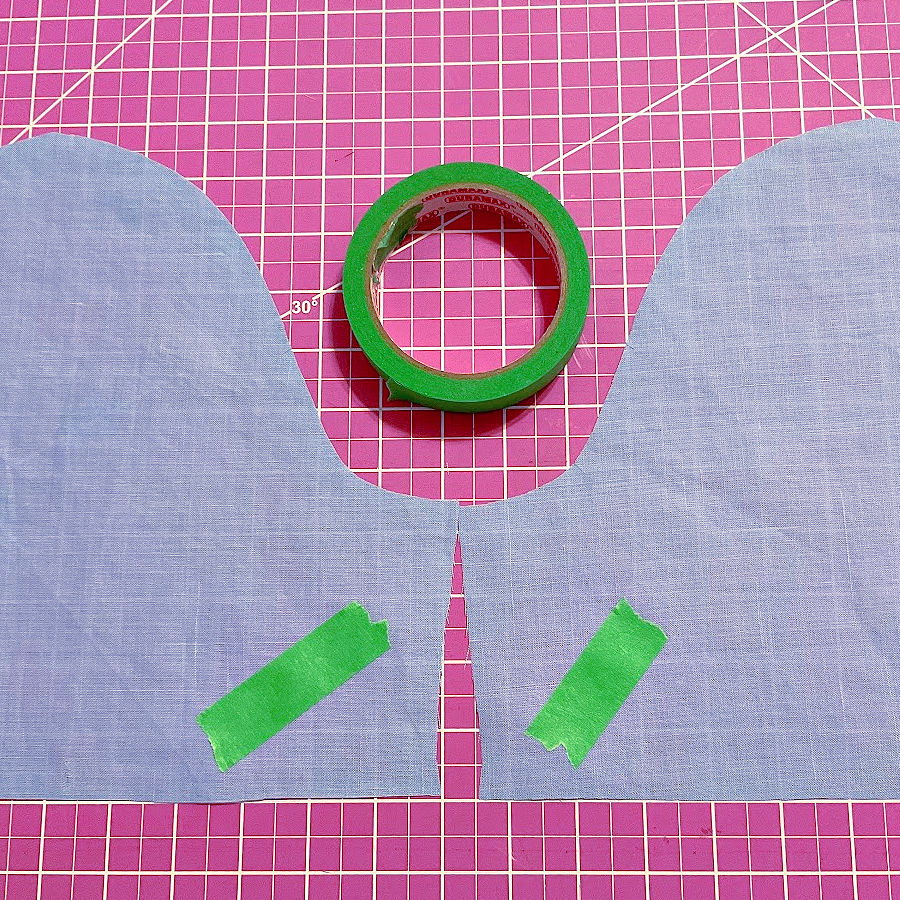
Label cut fabric pieces when they look alike. Left and right sleeves from solid color fabric look identical at 10 p.m. A sticky tape pinned to each piece, or a chalk mark on the wrong side, solves that mystery before it starts.
✅ Related tutorials: How To Declutter Your Sewing Space Step-by-Step: A Simple Guide To Organized Crafting
6. Take a Minute to Pin, Clip, or Baste Before Sewing
Two hands, four slippery layers, one zipper – the math doesn’t work.
Experienced sewists sometimes skip pinning because they think they can hold the layers together while sewing. And often they can! But slippery fabrics, matching seams, zippers, and curved pieces are another story. Those layers start drifting apart the second you blink.
A few well-placed pins or clips, or a quick line of basting stitches, keep everything where it belongs.
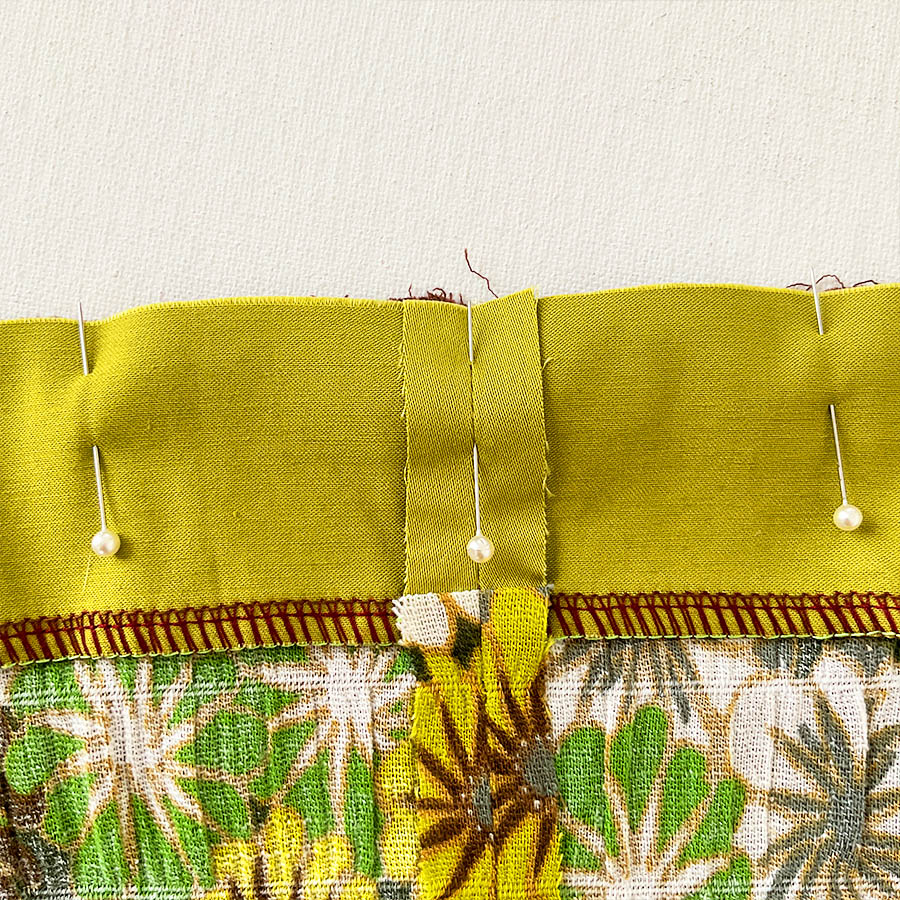
The habit isn’t pinning everything. The habit is noticing when fabric needs extra control before it goes under the needle:
- Pins for most woven fabrics and matching seams
- Clips for vinyl, leather, cork, and thick layers, where pins leave holes or won’t go through
- Basting for zippers and slippery fabrics that laugh at pins


Part 2: Small Habits While You’re Sewing
7. Hold the Thread Tails for the First Few Stitches
The tangled nest under your first stitch has a very simple cause.
Well, it’s not a curse.
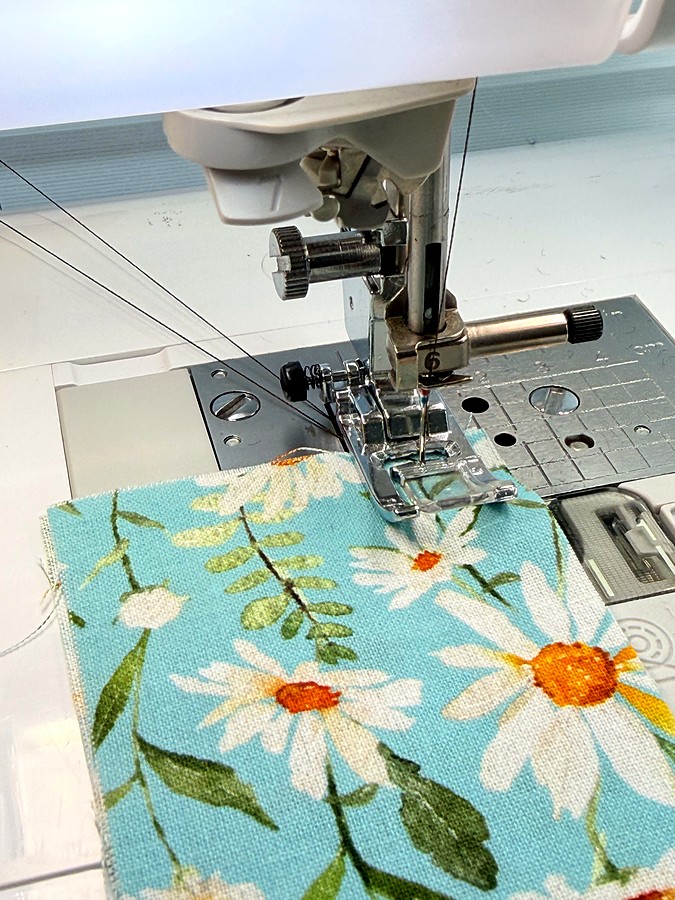
Loose thread tails get pulled down into the bobbin area on the first few stitches. They jam there and build a cozy little nest under your fabric.
Hold both tails gently toward the back of the machine for the first 2–3 stitches. Lower the needle into the fabric by hand before you press the pedal. Then let go and sew.
One exception. Many modern machines have a thread-cutter button. If you use it to cut your threads, this habit doesn’t apply. The cutter leaves short tails, and the machine is designed to start the next seam without you holding anything. So if you’re a happy button-presser, skip ahead. The next habit is for you.
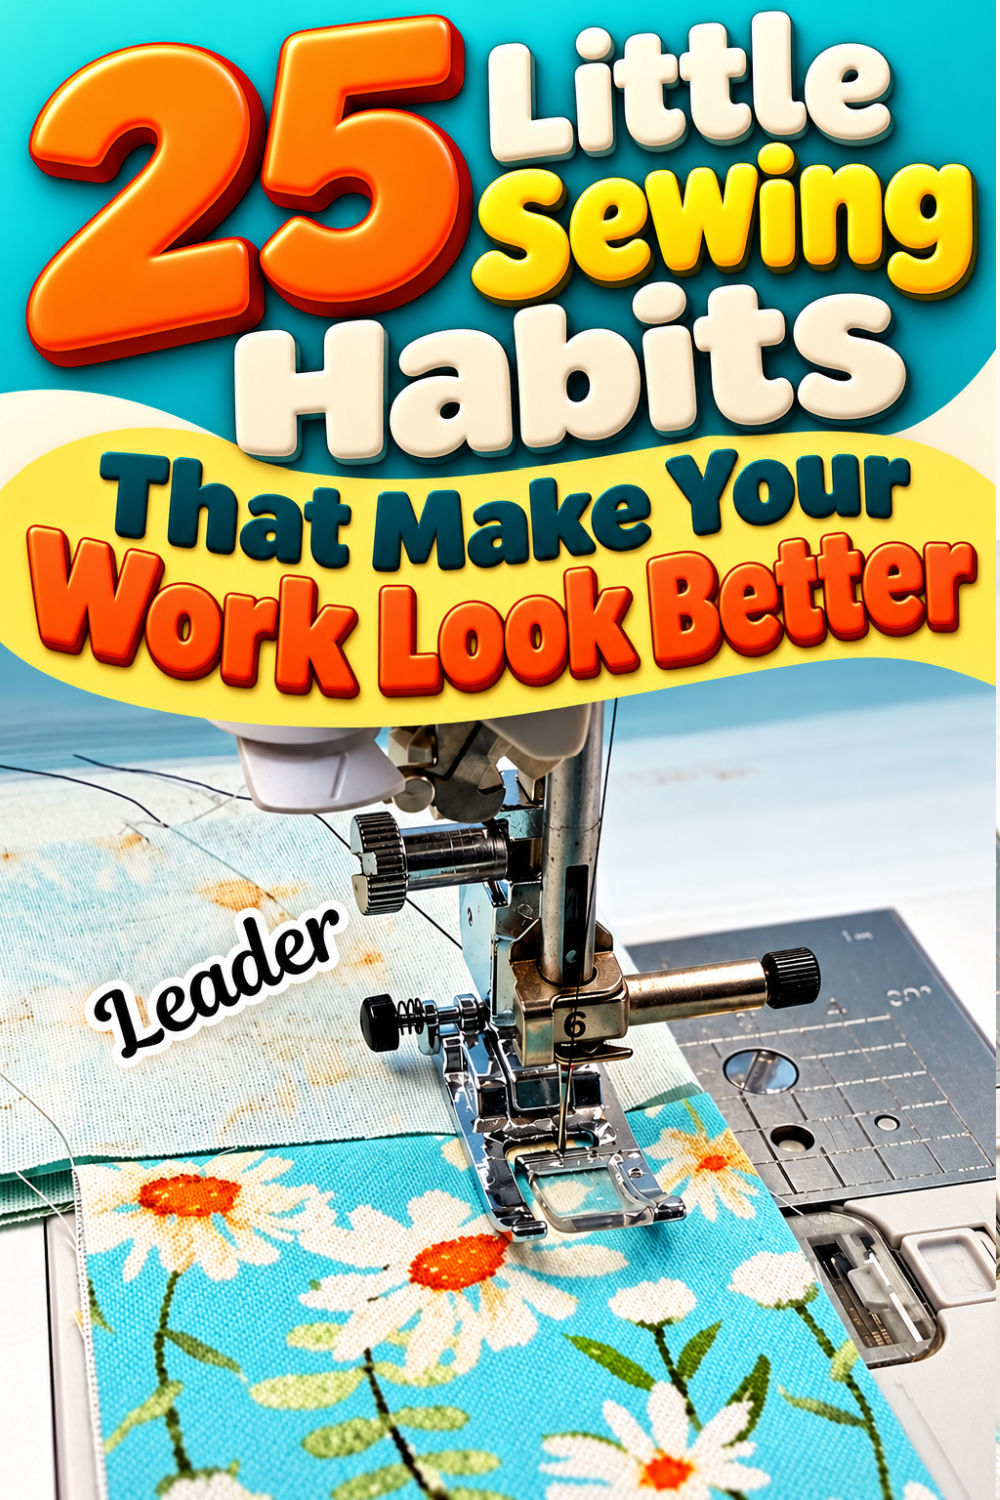
8. Use a Small Fabric Leader
Every good show has an opening act but nobody remembers the opening act.
Starting right at the edge of thin fabric can go wrong fast. The needle pushes the fabric down into the throat plate hole, and your first stitches turn into a knot. Starting on a bulky seam has its own drama. The presser foot tilts, and the fabric doesn’t want to move.
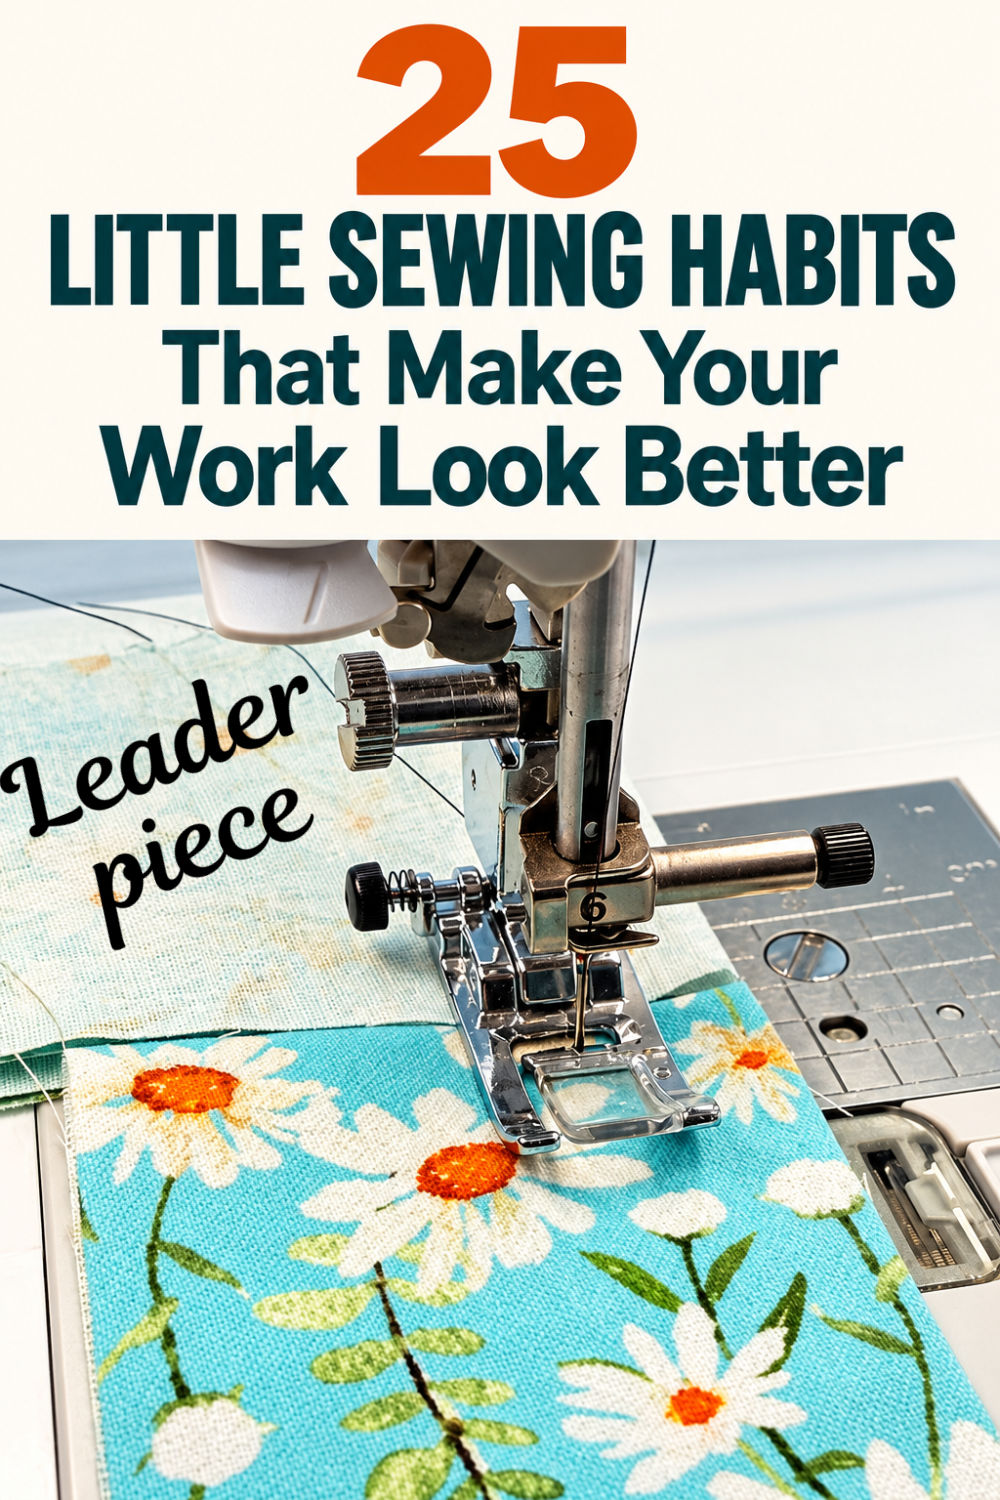
The fix is a leader. That’s just a small folded scrap of fabric. Sew a few stitches on the scrap, then keep sewing straight off it onto your project. Don’t lift the foot or cut the thread. The scrap takes the messy first stitches. Your project gets the nice ones. Snip the scrap off afterward.
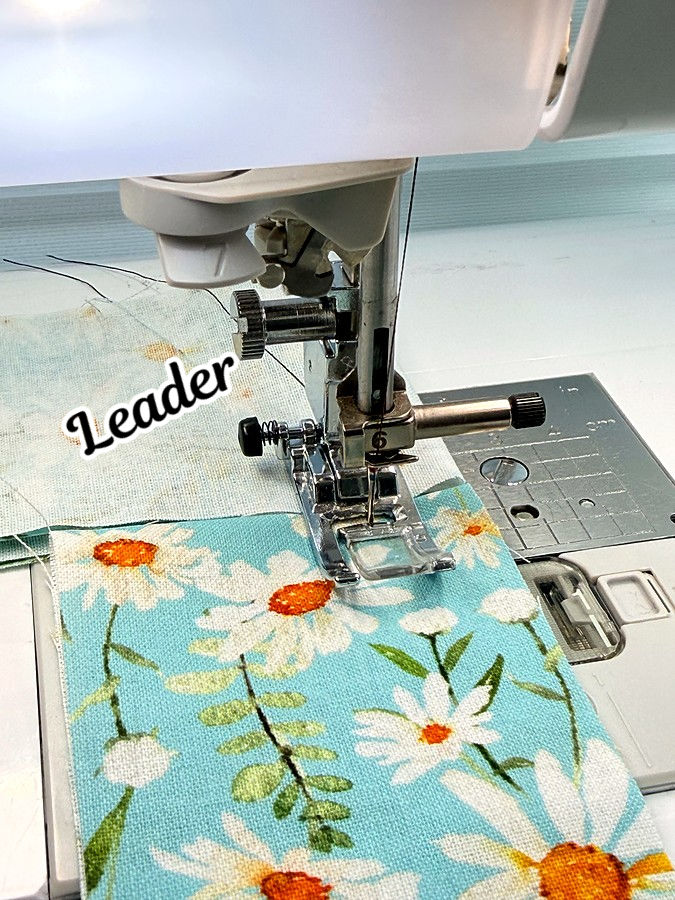
For a bulky start, the same trick works a little differently. Place a folded scrap about as thick as your seam under the back of the presser foot. The foot sits level, and the fabric feeds instead of stalling.
✅ Related tutorial: Why Is My Sewing Machine Pulling Fabric Into The Machine? (Causes + Solutions)
9. Secure Your Stitches Without the Thread Lumps
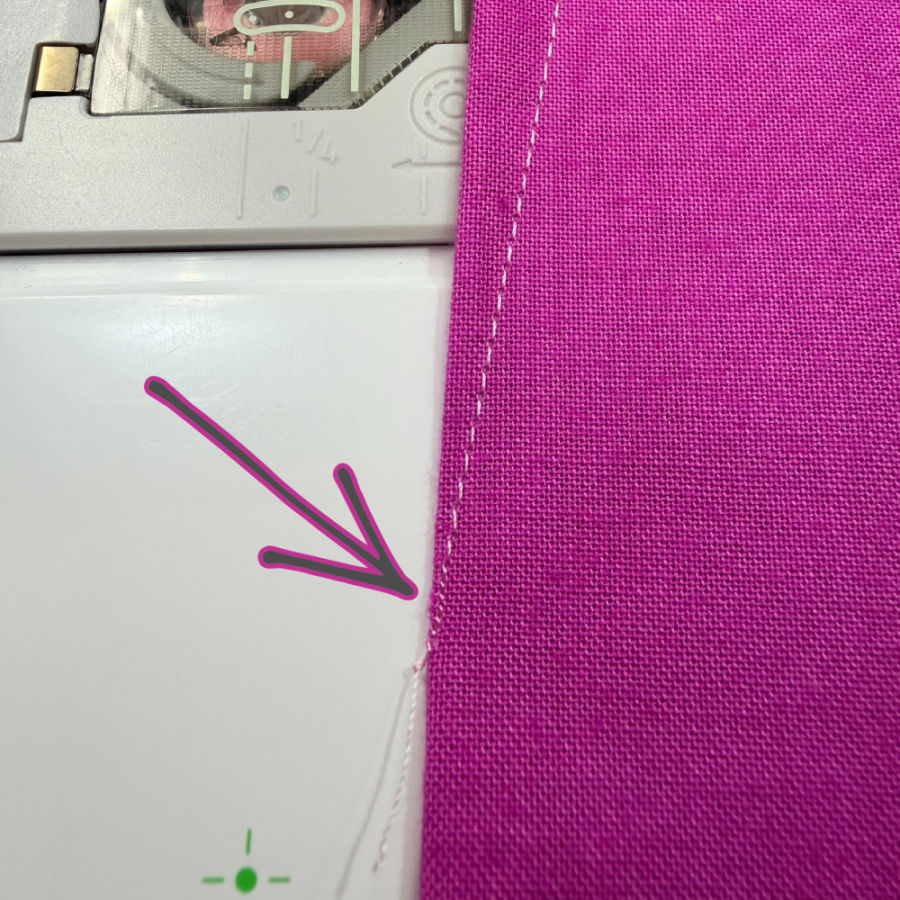
Three stitches forward, three back. A big lump of thread is not extra security. It’s just a lump.
Seams often need to be secured at the start and the end. How you do it is what shows. There are three good ways, and each has its place.
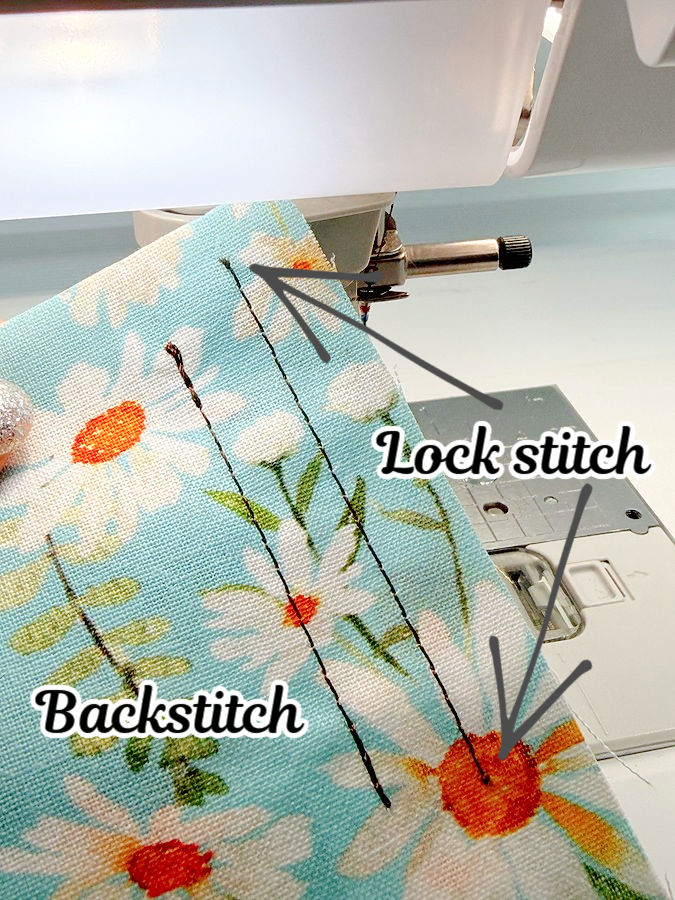
Short backstitching. Sew 3–4 stitches in reverse, directly on top of the seam line. Long or crooked backstitching shows on topstitching. It also leaves stiff lumps in seam allowances.
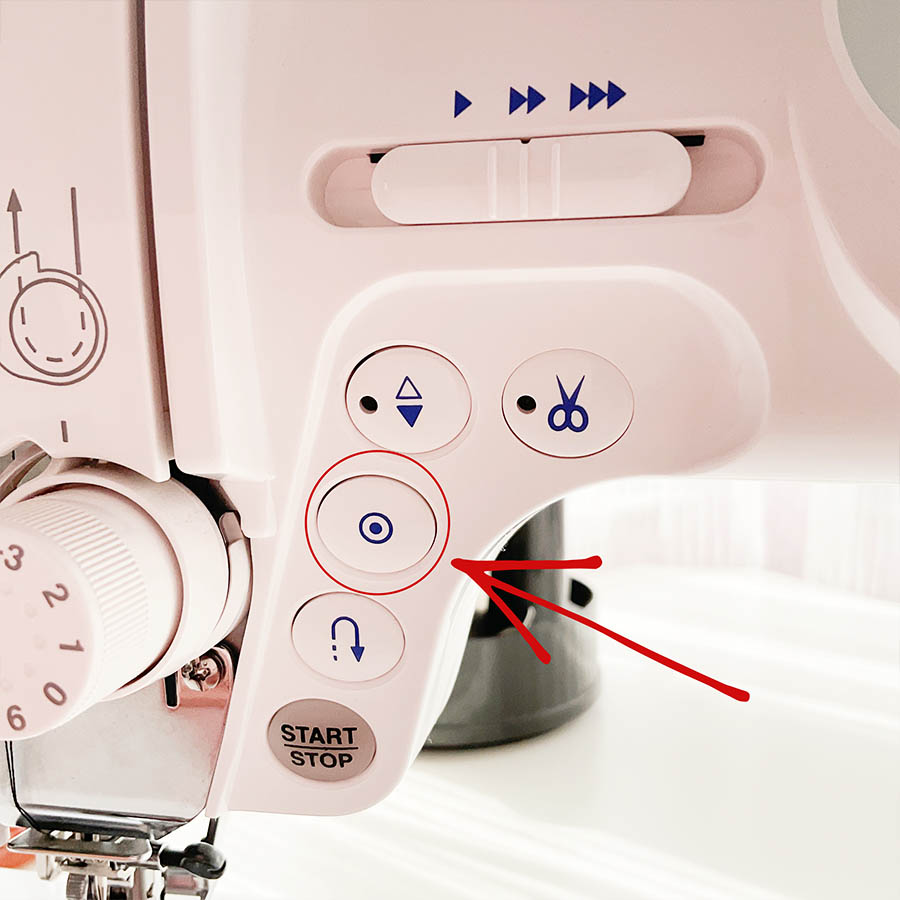
The lock stitch button. Many machines have one. Instead of sewing in reverse, the machine makes a few tiny stitches in place. It’s neat, small, and stays right on the seam line. If your machine has this button, it’s worth making friends with.
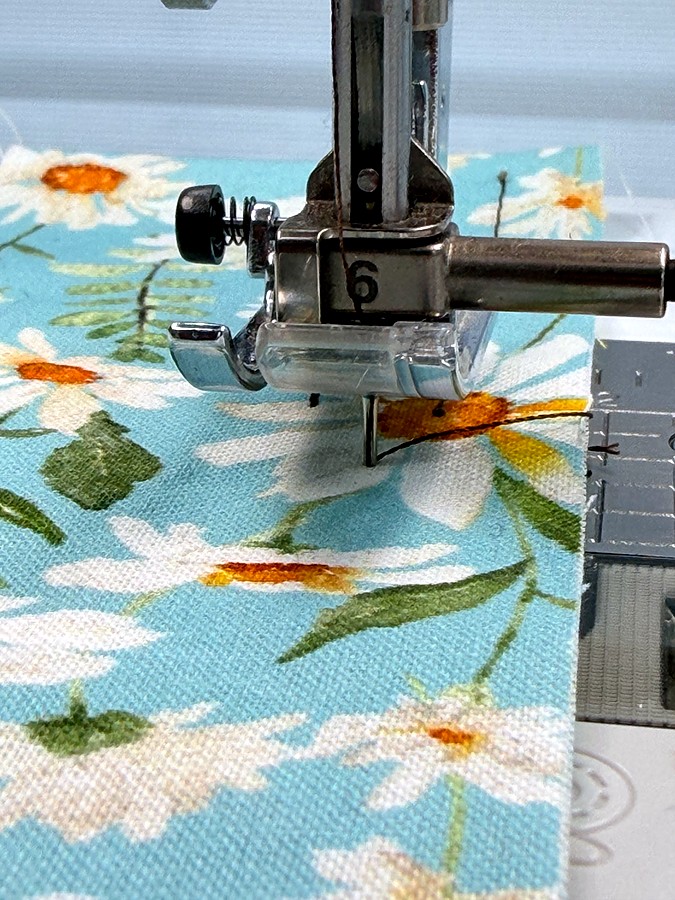
Tying off. On the outside of a bag, every stitch shows. Backstitching on visible topstitching looks heavy and rarely lines up. Instead, leave long thread tails at the start and end. Tug the bobbin thread on the back, and a loop of top thread will pop through. Pull it all the way to the back, tie a knot, and bury the tails between the layers with a hand needle. A self-threading needle makes that last step quick, even with short tails.
10. Watch the Seam Guide, Not the Needle
Your eyes belong in front of the presser foot. The needle doesn’t need supervision. It only goes up and down.
Steering by the needle makes wobbly seams. By the time you see the stitch, it’s already sewn. You’re correcting after the fact.
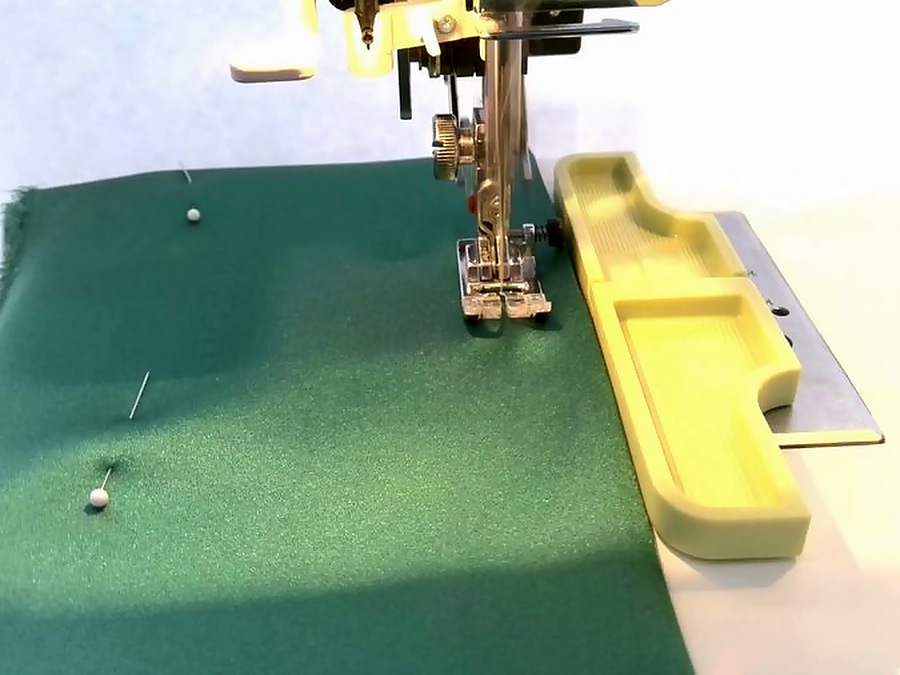
Watch the fabric edge against the guide line on the throat plate or the edge of the presser foot instead. Wherever the edge goes, the seam follows. For widths that aren’t marked, stick a magnetic seam guide or a strip of painter’s tape on the machine bed. For 1/4″ seams, a 1/4″ foot does the measuring for you.


11. Stop With the Needle Down
Pausing with the needle up is how a perfectly straight seam picks up a tiny jog.
Fabric shifts the moment you move your hands, pivot, or adjust the layers. With the needle down, the fabric stays anchored exactly where it was.
Use the needle-down setting if your machine has one. Turn it on once and forget about it. On long seams, stop every few inches to reposition your hands. Don’t stretch your arms out like you’re reaching for the last cookie on the top shelf. Stretching pulls the fabric along with you.
✅ Related tutorial: 5 Sewing Machine Settings Nobody Mentions (But Should)
12. Stop Before the Pin, Not on It
Sewing over pins is a gamble.
Hitting a pin can break your needle, bend the pin, and even knock your machine’s timing off. Even the pins you miss can nudge the layers as the presser foot rides over them. That’s where little puckers come from.
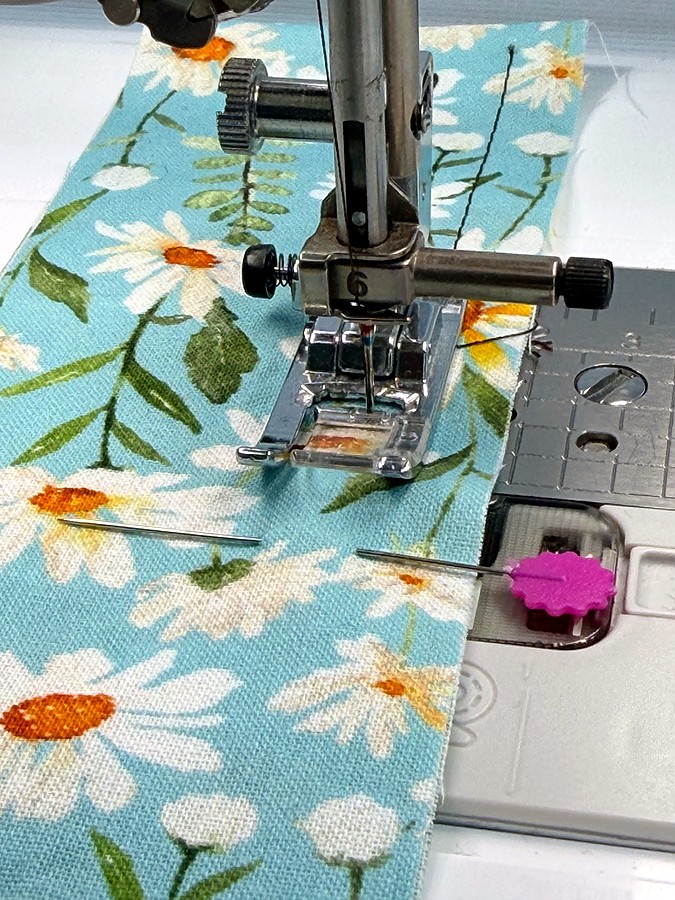
Pull each pin out just before it reaches the presser foot. If one is in an awkward spot, stop with the needle down, remove it, and carry on. For thick layers and vinyl, use clips instead. And if you love pins, glass head pins are a nice choice. They won’t melt when the iron finds them, and the iron always finds them.
13. Mark Where to Stop and Stop There
“About here” isn’t a stopping point. It’s a wish.
Corners, turning openings, and boxed corners only line up when each seam ends exactly where it should. Stop too early and you get a hole. Stop too late and the corner puckers.
You can mark your stopping points with a small dot. At a corner, place the dot where the two seam lines cross. Measure your seam allowance in from each edge. For a 1/4” seam, the dot sits 1/4″ from both edges. For a 3/8″ seam, it sits 3/8″ from both edges.
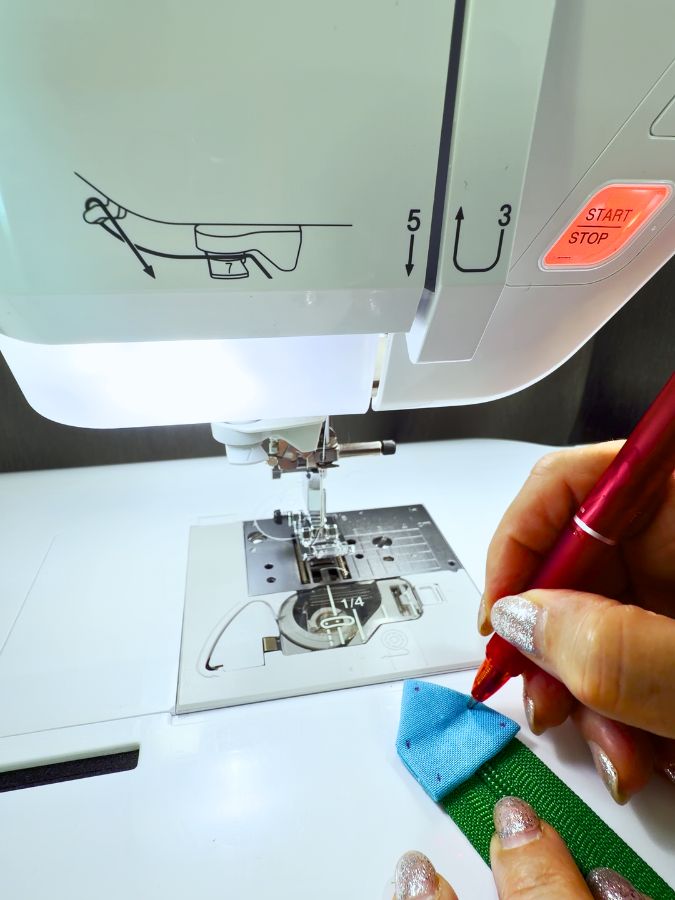
Mark both ends of a turning gap too. Almost everyone has sewn a turning gap closed at least once, out of pure habit, at the very end of a project. Slow down for the last inch and stop right on the mark.
14. Use the Hand Wheel for the Last Stitch Into a Corner
Your foot pedal has two speeds: not yet and way too far.
One stitch too far or too short at a corner shows up after turning. You get a blunt corner or a puckered one.
Slow down about a quarter inch before the corner. Turn the hand wheel toward you for the last stitch or two. Stop with the needle down exactly at your mark. Lift the presser foot, pivot the fabric, lower the foot, and keep going.
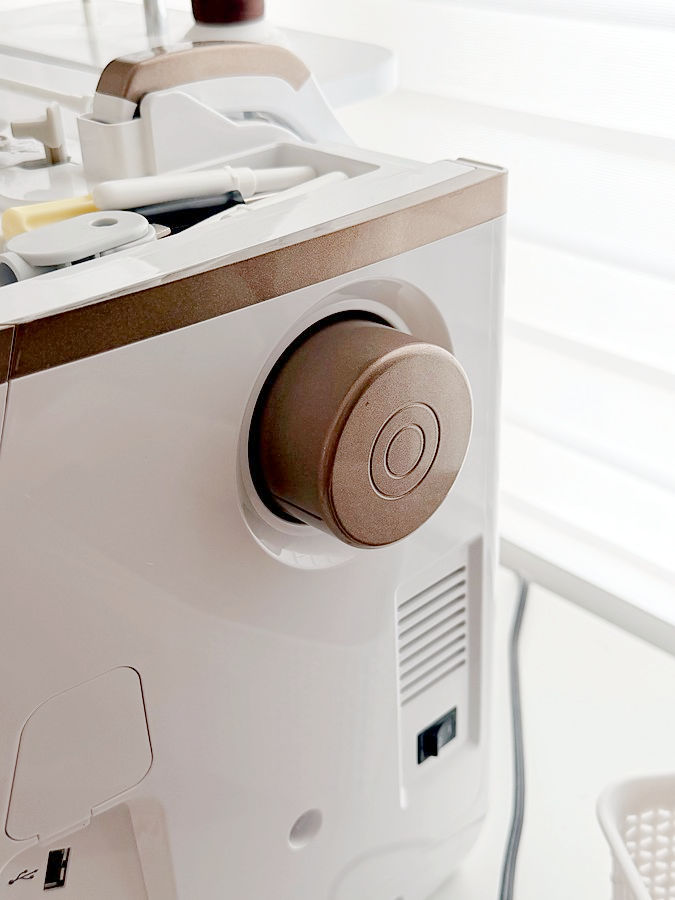
On many computerized machines, tapping the needle up/down button does the same job as the hand wheel, one half-stitch at a time.
✅ Related tutorials: Basic sewing techniques: How to sew corners and curved seams
15. Lengthen or Shorten Your Stitch Length
The default 2.5 mm stitch is a good stitch. It just isn’t the right stitch for everything.
Stitch length is one of the easiest settings to change and one of the most forgotten. Three places where it makes a visible difference:
Topstitching: go longer. Standard stitch length looks thin and timid on top. A longer stitch, roughly 3–3.5 mm, lies flatter and looks intentional. If you switch to heavier topstitching thread, switch to a topstitch needle too. Its bigger eye lets the thick thread pass through without fraying.
Tight curves: go shorter. Shorter stitches, around 1.8–2 mm, follow a tight curve more smoothly. Each stitch is a tiny straight line, so more stitches make a rounder curve. It’s a small adjustment that makes curved seams much easier to control.
The end of a dart: go shorter. Shorten your stitches for the last 1/2″ or so before the dart point. The tiny stitches secure the point without a bulky backstitch at the tip.
16. Support the Weight of the Project While Sewing
Gravity is not on your side. Gravity has never been on a sewist’s side.
Large garments, quilts, and heavy fabric pull against the needle when they hang over the edge of the table. So do big totes with canvas and fusible fleece. That drag distorts stitches, changes your seam allowance, and makes straight lines wander off.
Keep the weight of the project supported on the table, behind and to the left of the machine. Fold or roll large pieces so they feed freely. An extension table helps. So does an ironing board set at table height right next to you.
✅ Related tutorial: How to Choose the Best Sewing Table
17. Stop and Realign Fabric Layers Before They Shift Too Far
If the top layer starts creeping ahead of the bottom layer, the two will not meet up at the end. They’ll meet as a little tuck of extra fabric.
This happens because the feed dogs grab the bottom layer while the presser foot pushes the top layer along. Long seams, slippery fabric, and thick layers make it worse.
Don’t keep sewing and hope for the best. Stop with the needle down, lift the presser foot, and smooth both layers back into line. Lower the foot and continue. On long seams, use pins, clips, or basting to keep things honest. For thick or slippery layers, a walking foot feeds the top layer along with the bottom one.
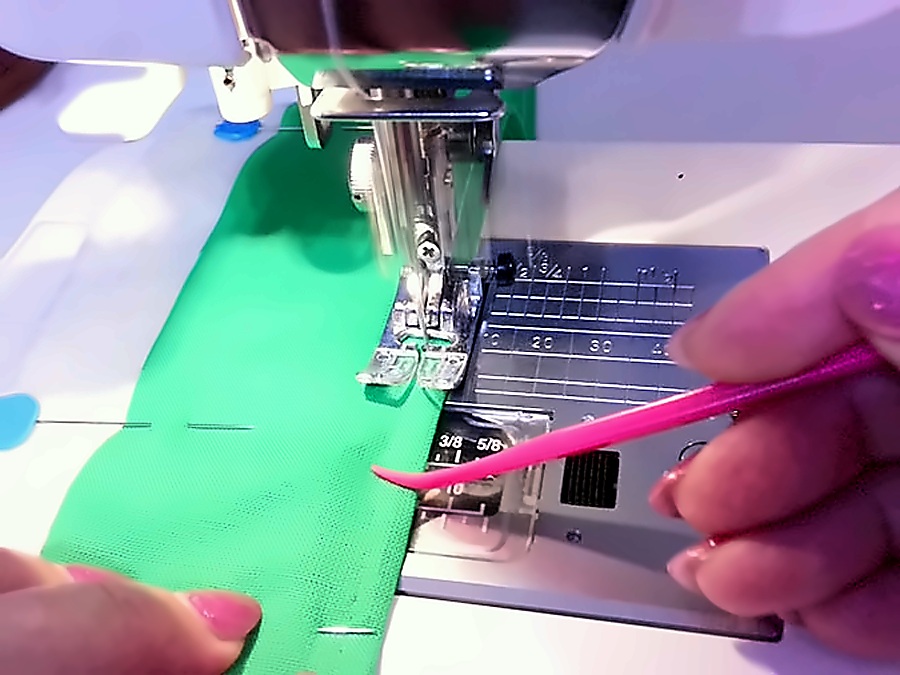
This is also where a funny little tool called the Purple Thang earns its keep (even if it’s pink it’s still purple, that is). It’s a flat stick with a small curved end. While you sew, rest the tip on the top layer just in front of the presser foot. Then gently push that layer toward the needle, so it feeds in at the same speed as the bottom layer. It also holds the layers together right at the needle, and your fingers stay at a safe distance.


Part 3: Pressing
18. Press Each Seam Before You Cross It With Another
A pressed seam is a flat seam.
Unpressed seams add bulk, shift around, and make intersections lumpy. When a second seam crosses an unpressed one, that bump gets sewn in for good.
Small projects count too. On pouches and bags, press after each seam, not once at the very end. By the end, the iron can’t reach the inside of a finished bag anyway.
✅ Related tutorials:
19. Set the Stitches Before You Press Open
One extra press. Two seconds. Your seams will look nice.
Before you open a seam, press it flat exactly as it was sewn. The heat settles the thread into the fabric and smooths out tiny puckers left from stitching. Then press the seam open or to one side. It opens more smoothly and lies flatter.
✅ Related tutorial: Pressing Matters: 15 Common Ironing Mistakes to Avoid
20. Press, Don’t Iron
Pressing is up and down. Ironing is back and forth.
Sliding the iron across a seam stretches it and distorts the edges. Curves and anything cut on the bias stretch the most. So lift the iron, set it down, hold it for a moment, and lift again.
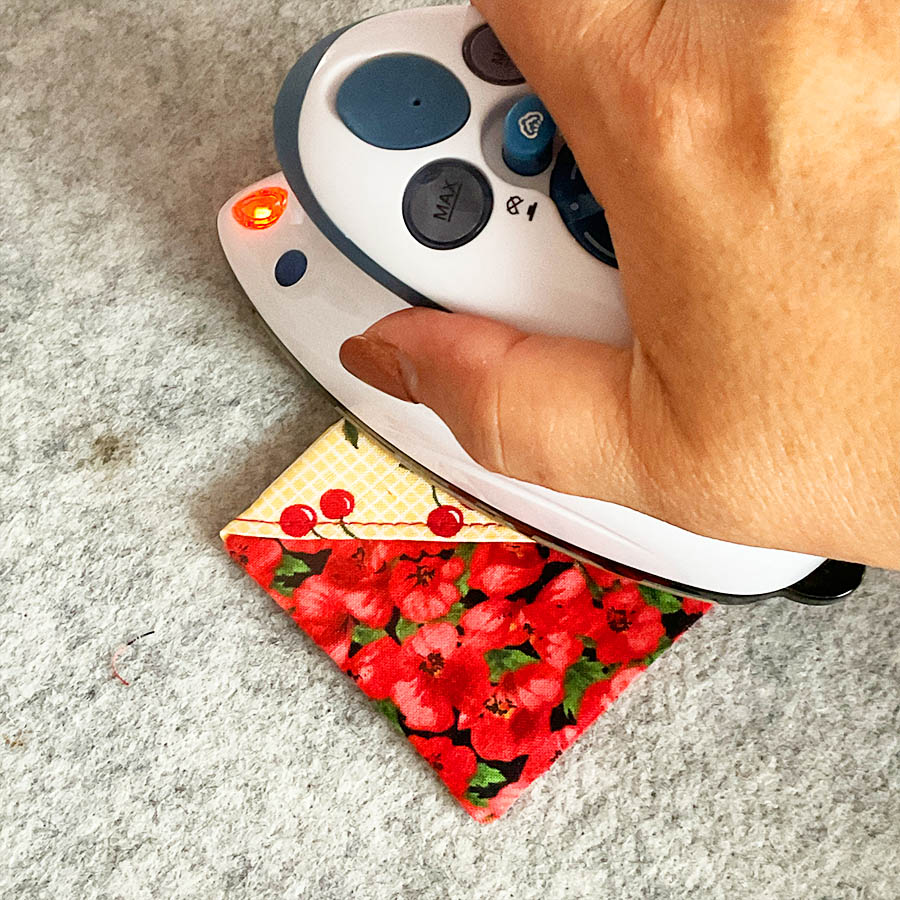
Use a pressing cloth on vinyl, cork, and fusible interfacing. A pressing cloth is a lot cheaper than a new soleplate, and it smells much better than melted vinyl.
For thick seams that refuse to lie flat, try a wooden tailor’s clapper. Press the seam with steam, then hold the clapper on it until the fabric cools. The wood absorbs the heat and moisture, and the seam stays flat.
21. Turn On the Iron When You Turn On the Machine
If the iron is cold, you’ll skip the pressing. Everyone does.
Most skipped pressing happens for two reasons. The iron isn’t hot yet, or it’s in another room. So make it hot and make it close.
Turn on the iron the moment you turn on your machine. Keep it, or a mini iron, right next to where you sew. A small tabletop pressing board within arm’s reach counts too. If you can press without standing up, you’ll press a lot more often. That’s not laziness – that’s smart planning.


Part 4: Checking and Finishing
22. Clip Threads as You Go
Thread tails are easy to clip now. Later, they’re sewn into a seam and part of the family.
Loose tails get caught in the next seam. They show through light fabrics. And a finished project covered in little tails looks fuzzy, even when the sewing underneath is great.
Clip threads after each seam. Keep thread snips or small scissors right beside your machine. Not in the drawer, not across the room, not “somewhere.” Right there. Keep a small bin or a lint roller nearby for the clippings, so they don’t end up stuck to your next project, your sweater, and your cat.
✅ Related tutorial: Cutting Tools For Sewing: The Ultimate Guide
23. Flip It Over and Check the Underside
The top looks fine. The bottom is where the secrets are.
Tension loops, skipped stitches, and folds caught in the seam all show up on the side facing the feed dogs. You won’t see them from above.
Check the underside after the first few inches of any important seam, not after the whole thing. Loops on the underside usually point to a top tension or threading problem. Rethread the top thread with the presser foot up, and test again. Little tucks underneath mean the bottom layer folded as it fed in.
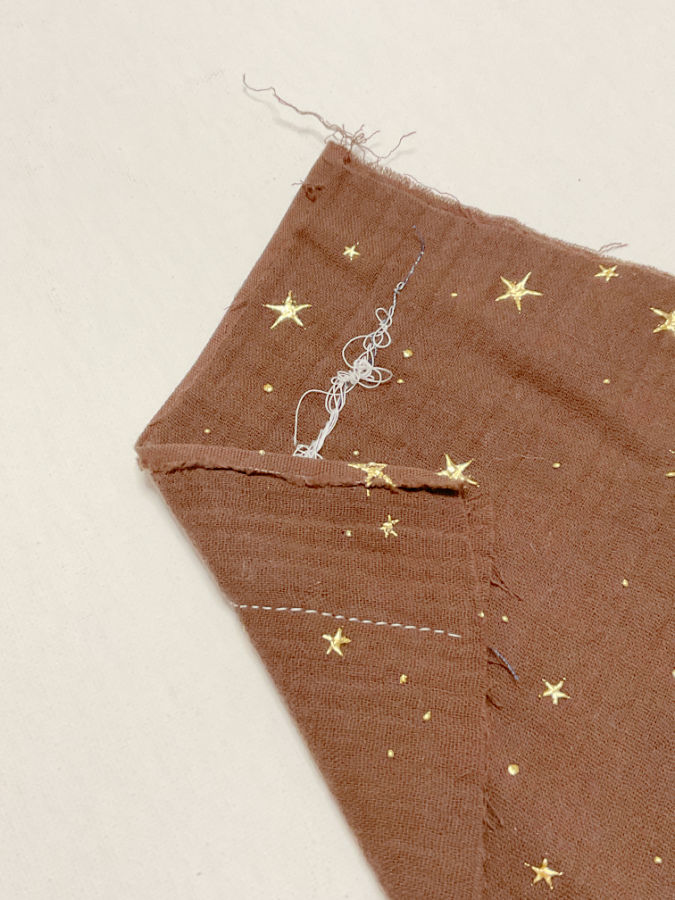
There’s a special feeling reserved for finishing a whole bag, turning it right side out, and finding a neat row of loops across the bottom. Two seconds of peeking at inch three would have caught it.
24. Reduce Bulk Before Turning Corners or Edges
Whatever bulk you leave inside a seam will show up on the outside.
Before turning collars, cuffs, straps, or bag corners, take out the extra fabric that doesn’t need to be there:
- Trim corners diagonally, close to the stitching but never through it.
- Grade seam allowances. Trim each layer to a slightly different width, so they step down instead of stacking into one thick ridge.
- Trim interfacing out of the seam allowance on thick projects.
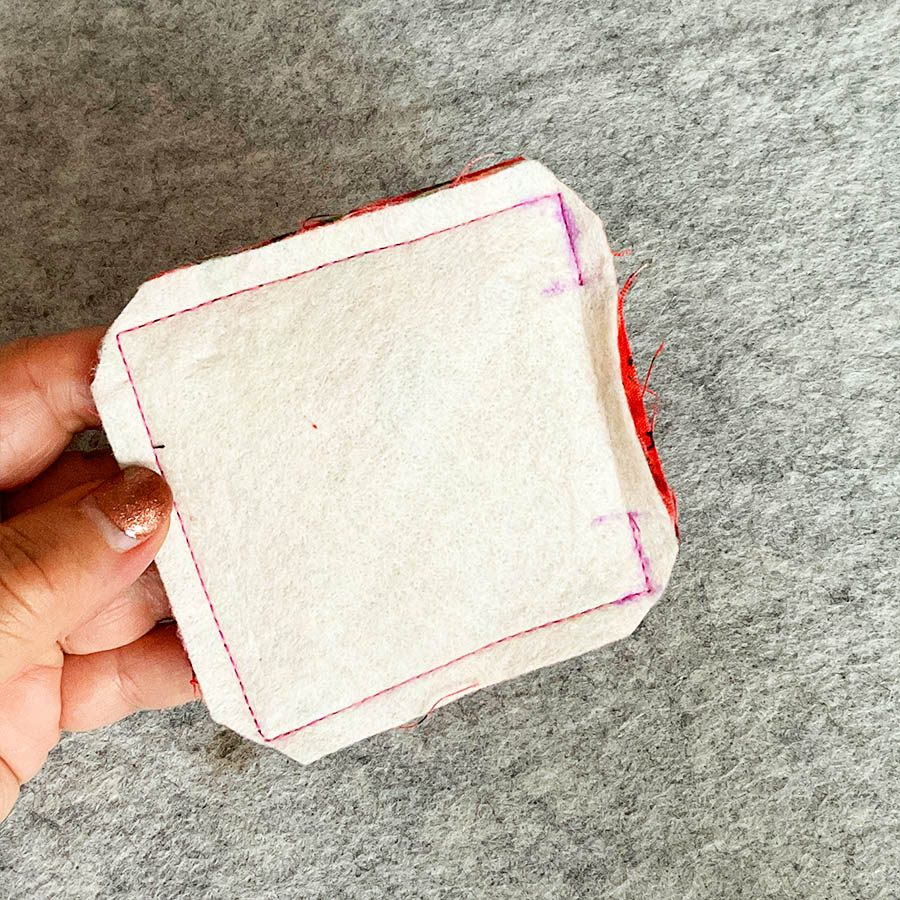
Then push the corners out with a point turner, not the tip of your scissors. Scissors poke through corners. Ask any corner.
25. Clip and Notch Curved Seams Where Necessary
A curved seam can be stitched beautifully and still look lumpy. The fix happens with scissors, not the machine.
The seam allowance on a curve needs help lying flat after turning. Two moves handle it:
- Clip inward curves. Make small straight cuts into the seam allowance so it can spread open.
- Notch outward curves. Cut out small V-shaped wedges so the allowance can fold in without bunching.
Stop each cut less than 1/8″ from the stitching. Never cut into the stitches. The tighter the curve, the closer together the cuts.
Pinking shears on an outward curve, notch it for you in one pass.
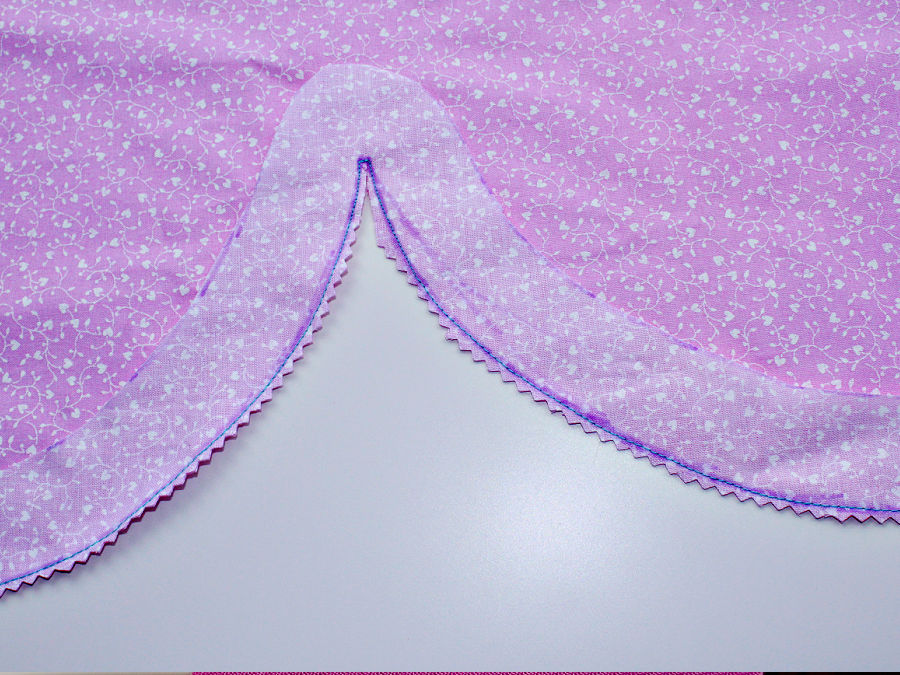
✅ Related tutorial: How To Sew Curved Seams: 21 Helpful Ideas for Sewing Round Edges
The Little Things Add Up
Remember those two tote bags? Same pattern, same fabric, two very different results. Now you know the difference wasn’t magic or talent. It was probably a fresh needle, a pressed seam, a clipped thread, and a quick peek at the underside.
None of these habits is hard. Most of them take seconds. The real trick is doing them often enough that you stop noticing you’re doing them. Start with two or three. Add more once those feel automatic.
And when a project still comes out a little homemade? That’s actually allowed. Have a piece of chocolate, clip the threads, and start the next one.
Did you find this article informative? If so, save this pin to your sewing board so these habits are right there the next time you sit down at the machine. Future you, holding a very nice tote bag, will be glad you did. Don’t forget to follow me on Pinterest for more tips and tutorials!
latest posts
- 25 Little Sewing Habits That Make Your Work Look Better
- How to Sew a Pointed Fabric Zipper End Tab
- 15 Sewing Machine Parts You See All the Time — But Probably Ignore
- Adjustable No Buckle Elastic Belt DIY: Sewing Tutorial
- 23 Useful Things to Watch for on Amazon Prime Day
- Sewing Thread Secrets: 8 Tiny Details You Probably Never Noticed — But Should
- Bias Tape Tutorial: How to Make Bias Tape With a Bias Tape Maker
- 10 Easy-to-Miss Features on Sewing Supplies You Should Be Using
- Twin Needle Sewing: My First Try Was a Mess, But Here’s What Worked