Adjustable No Buckle Elastic Belt DIY: Sewing Tutorial
For a long time, I didn’t wear belts with my jeans. I needed something to keep them comfortably in place, but I didn’t particularly like having a belt buckle sitting right in the front of my waist.
Then I found a very different kind of belt.
Prefer to read without ads?
I created a PDF version of this guide for anyone who likes to keep sewing guides saved, printed, or easy to read without ads. It includes the same helpful information in a simple format you can download and use whenever you need it. It also includes the pattern for the small pieces of leather used in the project
The PDF is available in my shop for a small fee. It’s a nice option if you want to support my work and keep this tutorial close to your sewing machine.
Not interested in the PDF version but want the pattern for the leather piece?
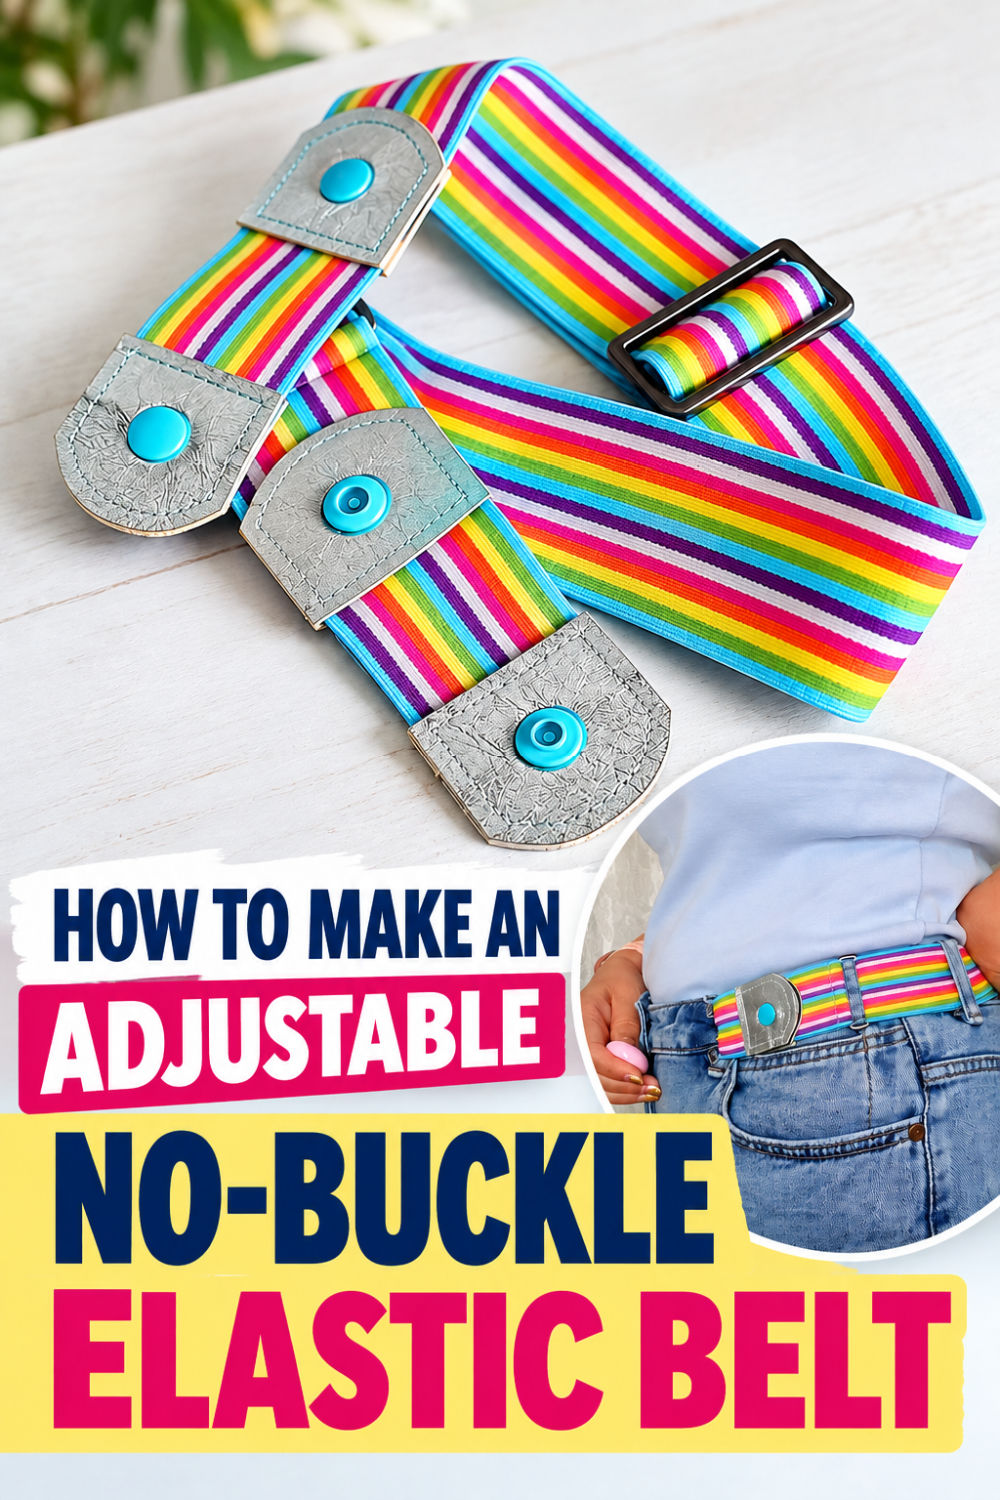
Instead of going all the way around your waist and fastening in the front, this belt attaches to the belt loops on either side of your jeans. The front is left open — no buckle, no extra layer of belt, and nothing pressing against your stomach.
And I liked it immediately.
It still does what I need a belt to do: it keeps my jeans from slipping down and helps them sit better. But it’s much more comfortable, especially when I’m sitting for a long time — or after a good meal when I suddenly appreciate a little extra breathing room.
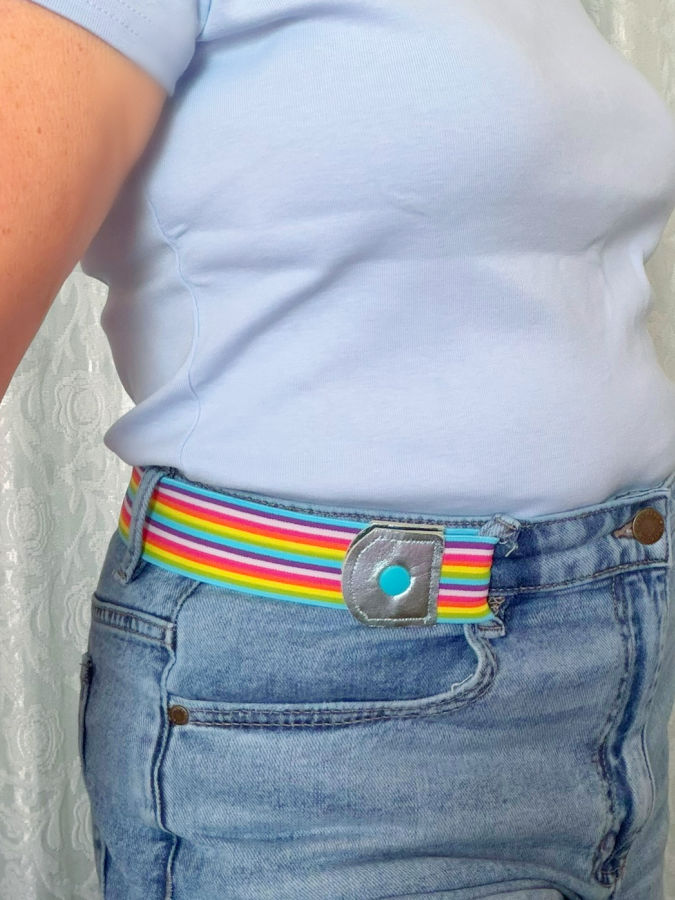
I bought my first one on Amazon and started wearing it all the time. Then, of course, the sewist in me looked at it and thought: I can make this.
And I did.
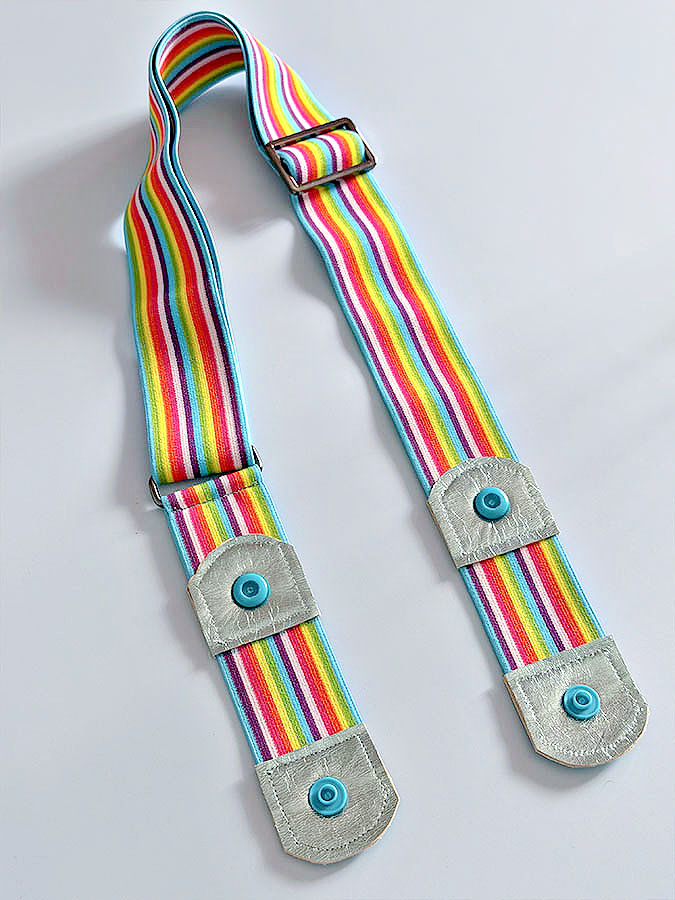
The construction is surprisingly simple. You need elastic, a few small pieces of leather, snaps, and two pieces of belt hardware. The project doesn’t take much fabric or much time, either.
The most challenging part is probably getting neat stitching around those tiny leather pieces. But I have a few tips for that too.
Note: Some of the links on this page are affiliate links. This means I will receive a commission if you order a product through one of my links. I only recommend products I believe in and use myself.
What Is This Type of Belt?
You may see these sold under names such as no-buckle elastic belt, buckle-free belt, invisible belt, or no-show belt.

Unlike a traditional belt, it doesn’t close in the center front.
Each end snaps around a belt loop near the front of your pants. The elastic then runs around the back of your waist. This means there is nothing across the front between those two belt loops.
The elastic is adjustable, so you can make the belt tighter or looser as needed.
I especially like this design with jeans. The belt provides enough tension to keep them where I want them without the bulk of a regular buckle under my shirt.
And because we sew, there is another advantage: we can make one ourselves.
Supplies
For my belt, I used:
- Wide elastic, mine is 1 ½ inches
- One longer piece of elastic — around 39 inches
- One shorter piece of elastic — around 7 inches
- Six small pieces of thin leather
- My printable leather piece pattern
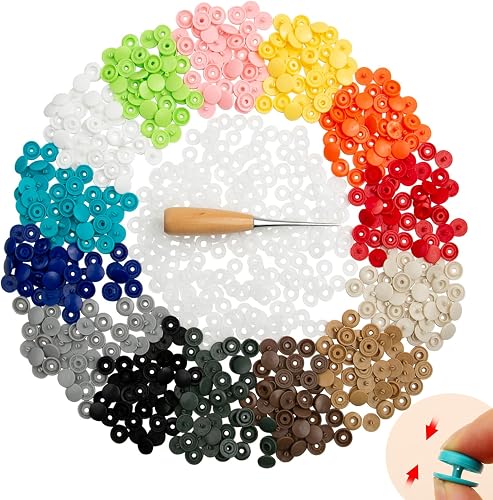
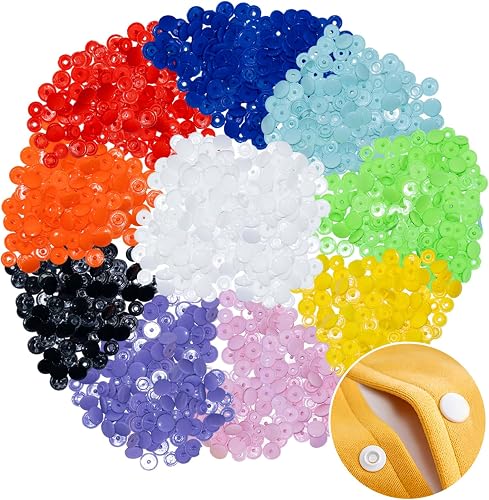
- Two sets of snaps
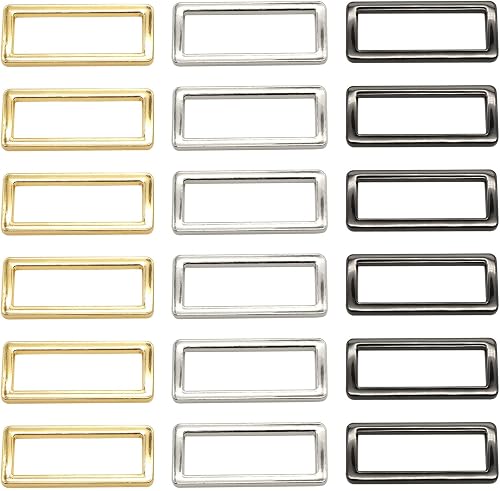
- One rectangular metal ring
- One tri-glide/slider adjuster
- Fabric glue stick
- Strong sewing thread
- Leather sewing machine needle
- Walking foot or another foot suitable for feeding leather evenly
- Awl
- Sewing machine

I used leather for the ends because it doesn’t fray and gives the snaps a sturdy base.
The leather doesn’t need to be thick. In fact, thinner leather is easier for this project because some areas will have many layers.
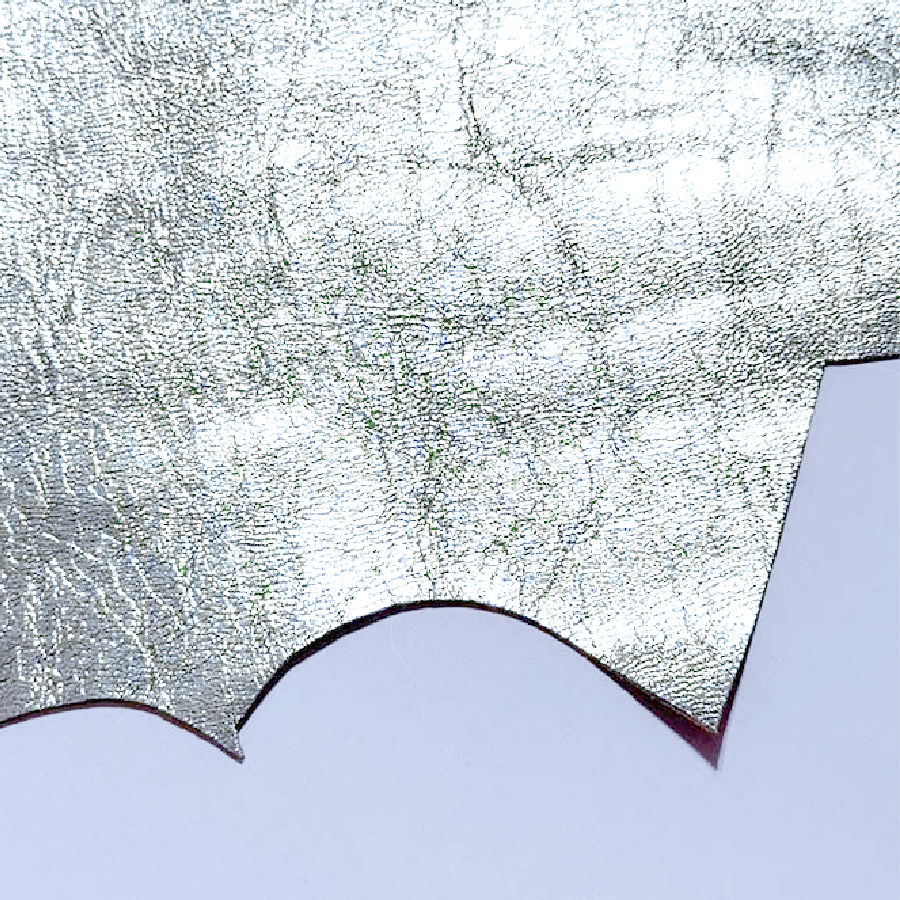
You could experiment with another strong, non-fraying material, such as vinyl or felt, provided it is sturdy enough to hold the snaps securely.
Step 1: Cut the Elastic and Leather Pieces
Start by cutting two pieces of elastic: one longer and one shorter.
Long elastic: about 39 inches
Short elastic: about 7 inches
The two pieces will eventually be joined with the belt hardware to form one adjustable belt.
Next, cut 8 identical small pieces of leather using my pattern.
Mine are approximately 2 inches by 1½ inches with rounded edges, but I provide the exact pattern so you don’t have to guess at the shape.
Why 8 pieces?
Each reinforced area uses two pieces of leather — one on each side of the elastic. You will make two reinforced areas on one elastic piece and two reinforced areas on the other, for a total of eight leather pieces.
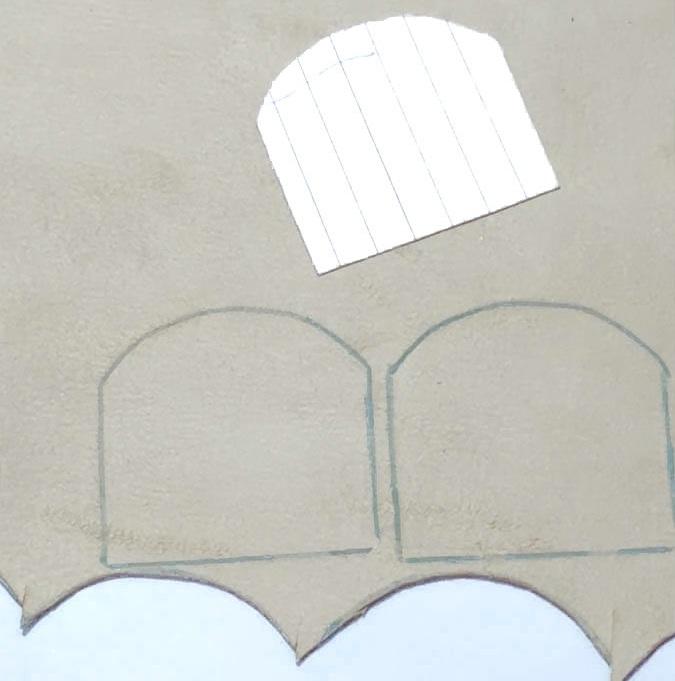
Make the First Leather End
Start with one end of the elastic.
This end needs a reinforced leather section that will eventually hold one part of the snap.
Place one leather piece underneath the elastic.
Here I made one small modification that made installing my snaps much easier.
My snaps weren’t long enough to comfortably go through two layers of leather plus the elastic; the leather was too thick. So I trimmed away a small section of elastic where the snap would eventually be installed.
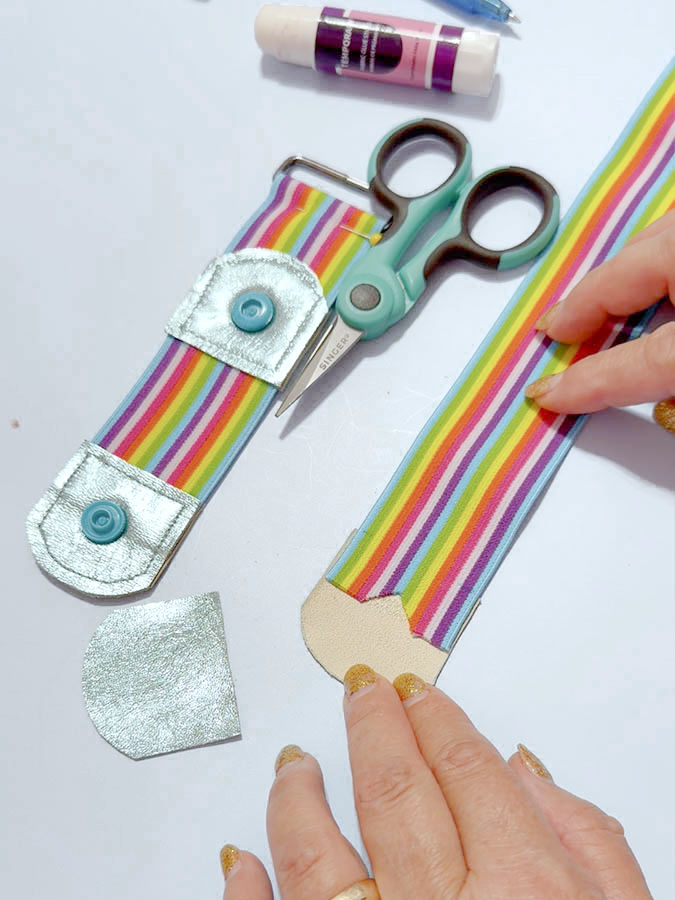
The elastic extends approximately halfway into the leather section, but it does not continue underneath the spot where the snap will go.
That way, when I install the snap later, its post has to pass through only the two layers of leather — not leather, elastic, and leather.
I used a fabric glue stick to temporarily secure the elastic to the first piece of leather.
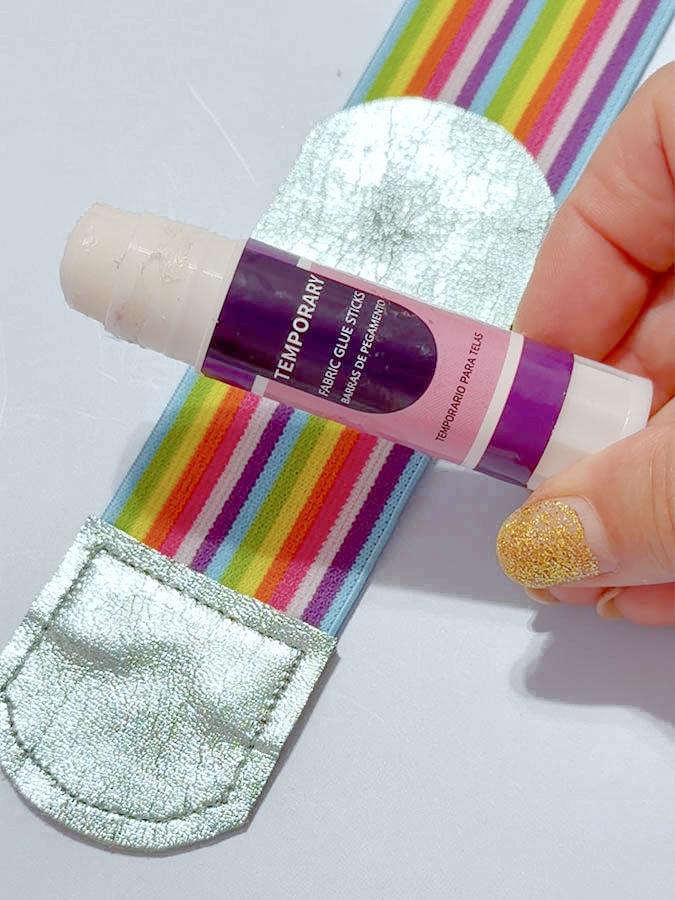

Then I placed the second matching leather piece on top.
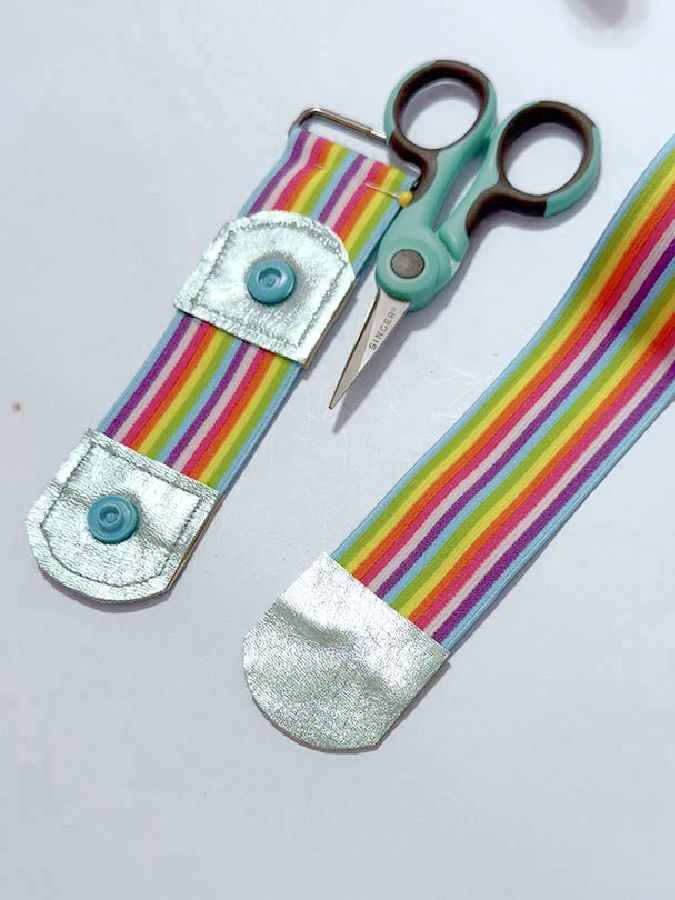
Set Up the Sewing Machine for Leather
Before sewing these pieces together, I made a few changes to my sewing machine setup.
✅ Related tutorial: How to sew thin leather easily with a regular sewing machine
Even though my leather is thin, I still prefer a leather needle.
✅ Related tutorial: Leather Sewing Needles | What They Are And How To Use Them

A leather needle has a specially shaped cutting point designed to penetrate leather. It makes a noticeable difference compared with trying to push a regular universal needle through it.
I also used a walking foot.
✅ Related tutorial:How to use a walking foot
My Janome has a built-in walking foot system that works very well for this, but if your machine doesn’t have one, you can use a regular walking foot compatible with your sewing machine.
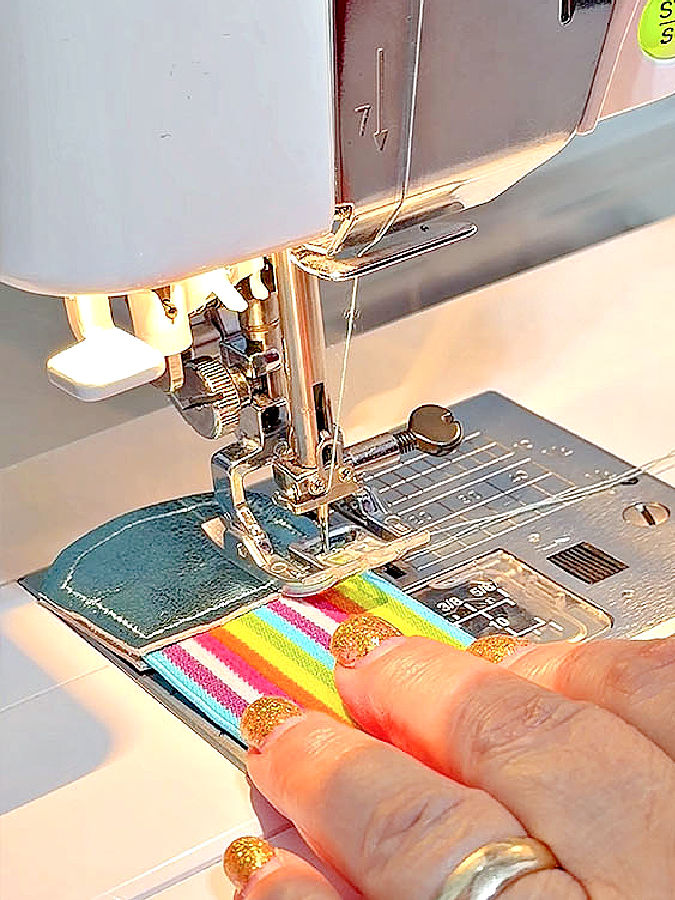
The important thing is to keep those little layers moving together without the top leather shifting away from the bottom layer.
I also used strong thread because these pieces aren’t purely decorative. They will hold the snaps and take some stress every time the belt is worn.
For the stitch length, I set my machine to 5 mm. On the finished leather piece, though, the stitches are closer to about 3 mm. With several layers under the presser foot, the actual stitch length can be shorter than the setting on the machine.
I still prefer a longer stitch setting for leather. Every needle penetration leaves a permanent hole, so I don’t want lots of tiny stitches close together. The longer setting also gives me a nice topstitching look.
✅ Related tutorial: More tips, tricks, and techniques for sewing leather
Stitch Around the Leather
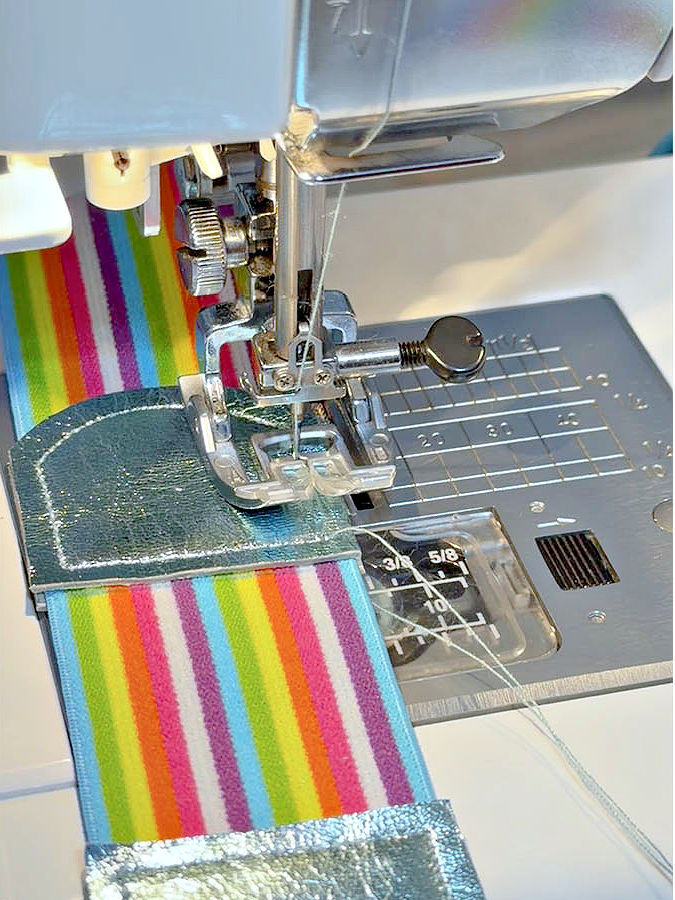
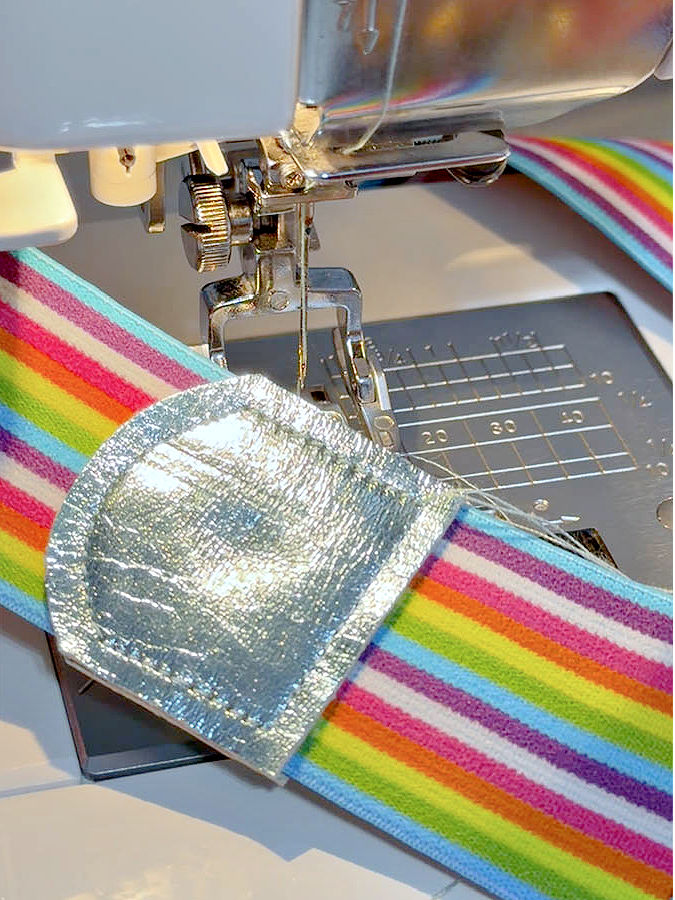
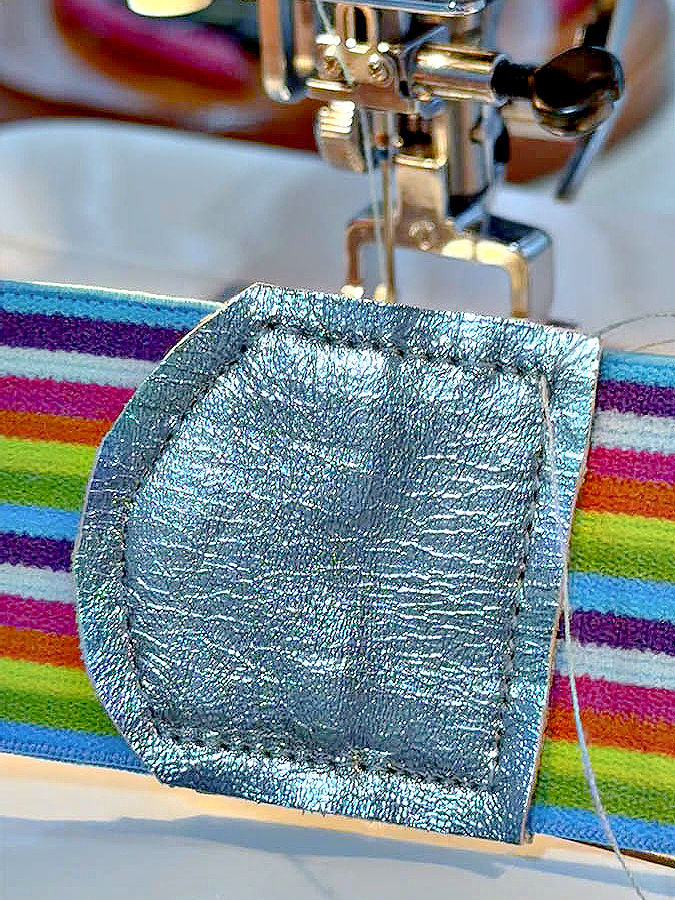
Now stitch slowly around the leather piece.
I stitched approximately 1/8 inch (3 mm) from the edge, keeping the distance as consistent as possible all the way around.
This is one of those times when sewing slowly pays off. The stitching is visible, so I wanted it to look like deliberate topstitching rather than simply a seam holding everything together.
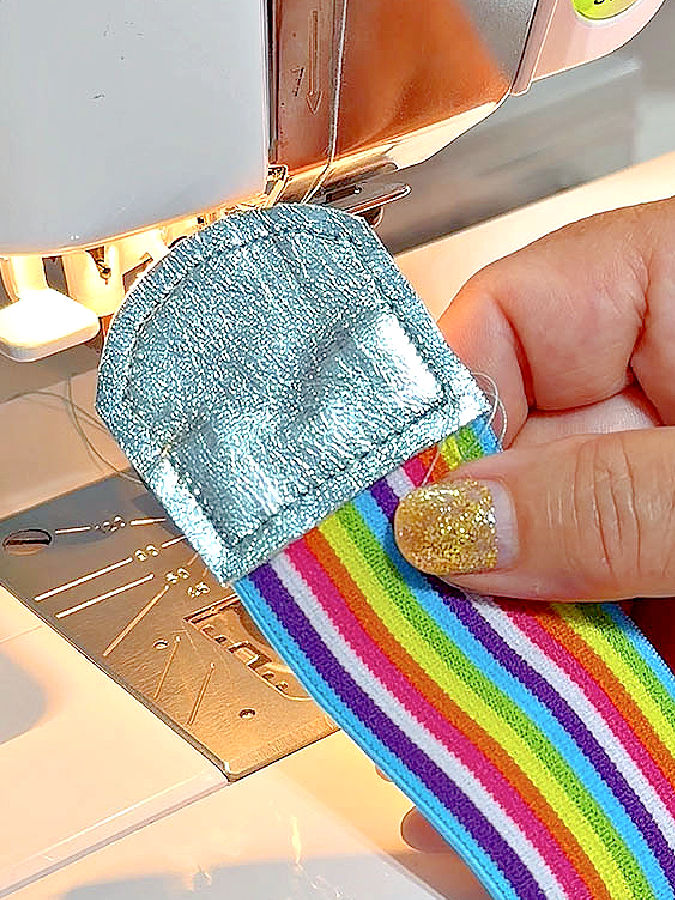
Once you finish, the elastic should be securely enclosed between the two leather pieces.
Add the Second Reinforced Leather Section
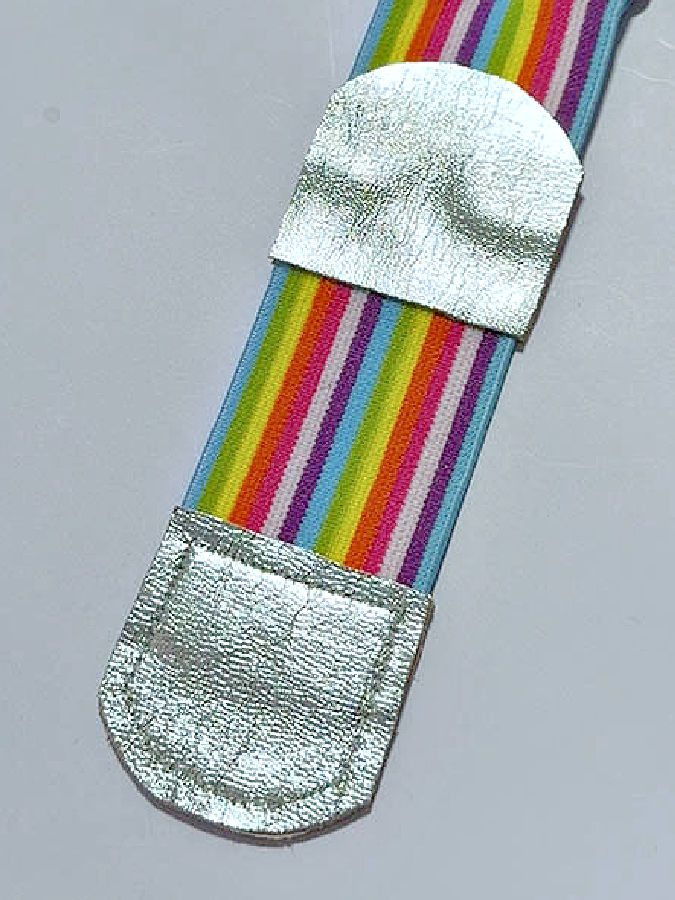
Now we need another pair of leather pieces farther along the same elastic.
This section will hold the mating part of the snap.
I positioned mine 1 3/4 inches (4.5 cm) from the first leather section.
This time, we don’t want to cut across the elastic because it needs to remain continuous.
Instead, I made a small hole in the elastic only where the snap post would pass through.
Again, this was because of the snaps I happened to be using. Their posts weren’t long enough to go easily through leather + elastic + leather.
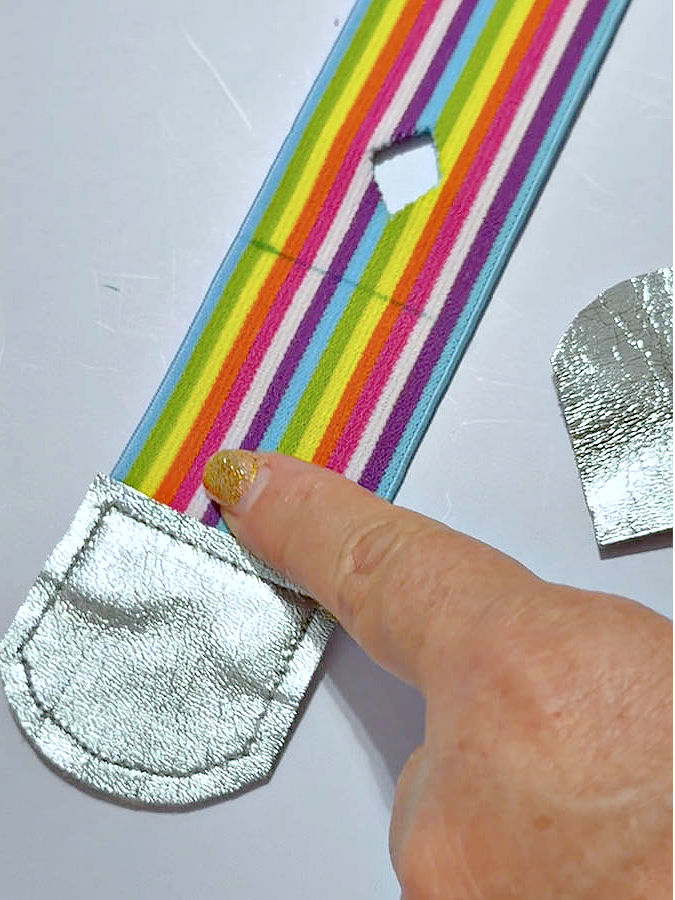
The hole allows the snap hardware to pass through the leather layers without also having to go through the elastic.
Important: I am not cutting through the width of the elastic. I’m only removing a small area where the snap itself will sit.
Place one leather piece underneath the elastic and another directly over it.
I again used my fabric glue stick to keep everything aligned.
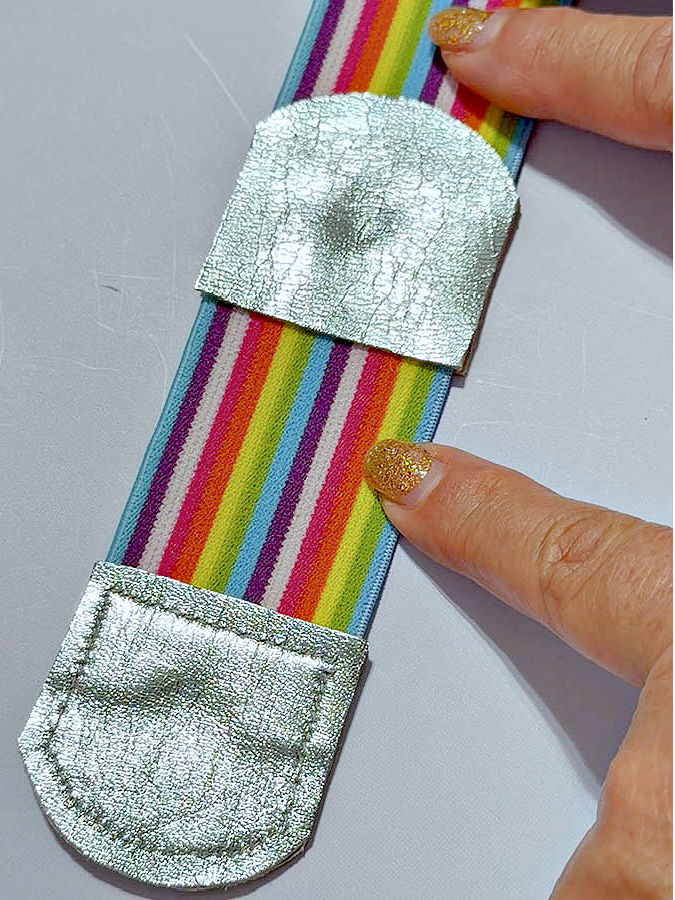
Then stitch around the leather approximately ⅛ inch (3 mm) from the edge, just as you did with the first section.
Now you have two reinforced leather sections on this elastic piece.
Prepare the Second Elastic Piece
The smaller piece of elastic is prepared in essentially the same way.
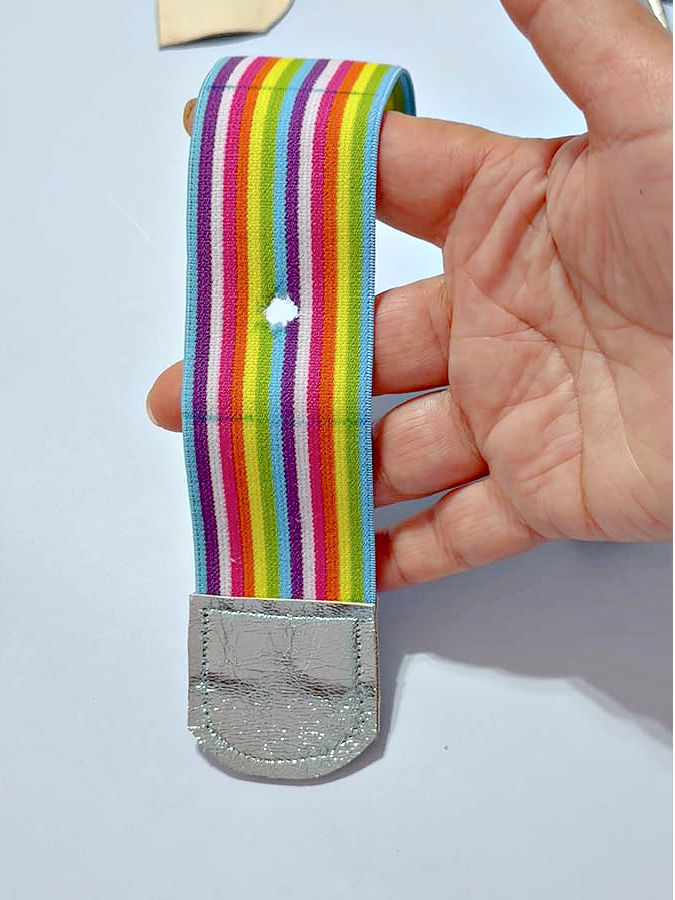
Add the leather reinforcement needed for the snap, using the same leather-elastic-leather construction.
Glue the pieces temporarily, then stitch carefully around the edges using the same machine settings.
At this point, all the leather reinforcement pieces should be attached and you’re ready to install the snaps.
Mark the Snap Positions
I wanted the two sides to line up properly when snapped together, so I didn’t mark their positions separately.
Instead, I put the corresponding leather sections together exactly as they would sit when the belt was fastened.
Then I used an awl to make the holes through the leather.
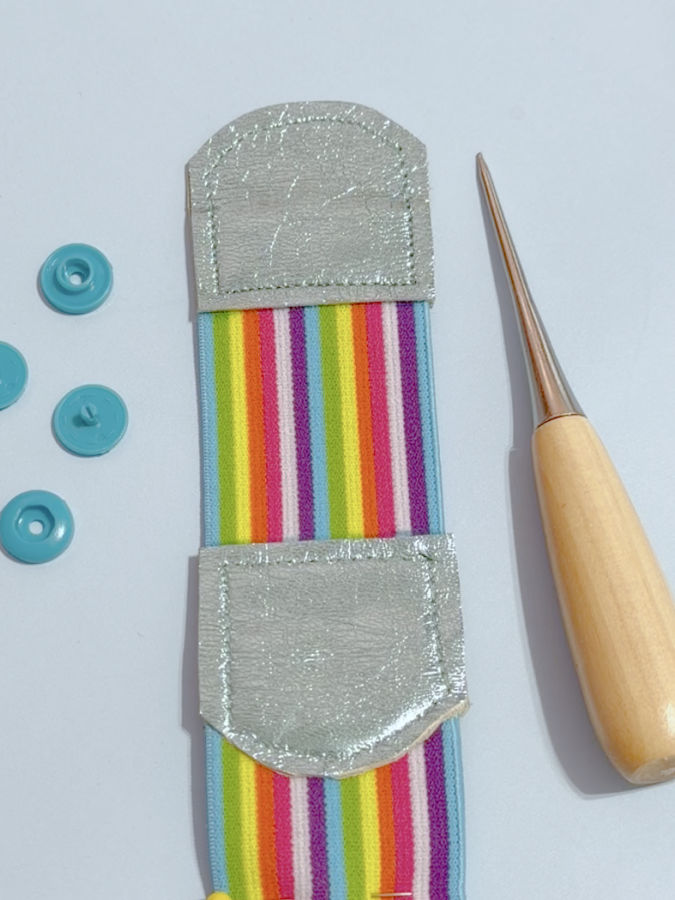
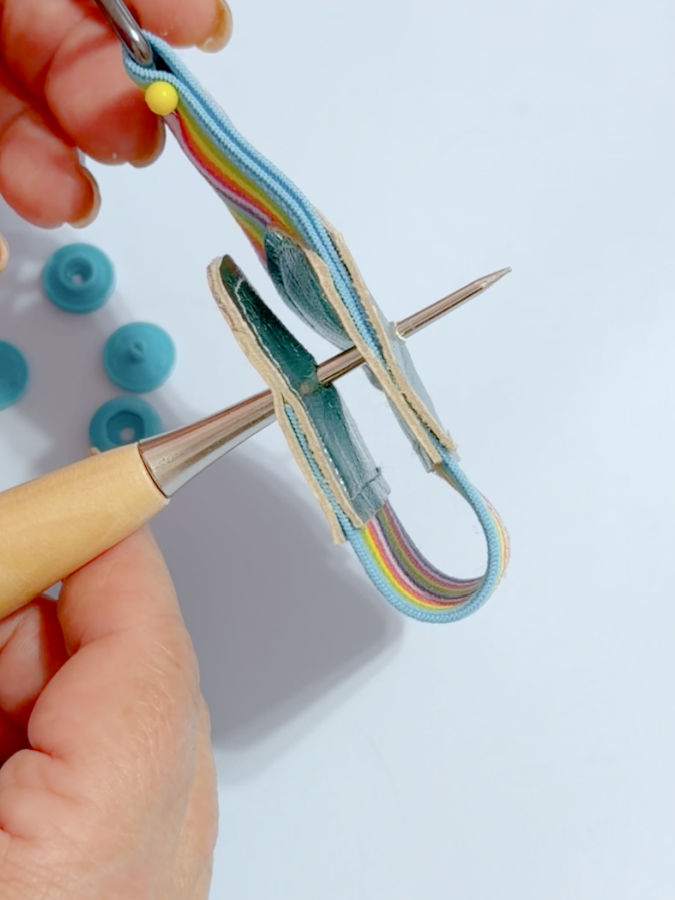
This gave me matching snap positions without having to measure each one independently.
It’s a tiny detail, but it makes it much easier to get the two sides aligned.
Install the Snaps
I used an interesting type of plastic snap for this project that requires no special snap-setting tool.
You insert the pronged portion through the hole, position the corresponding snap piece over it, and press the pieces together until they click into place.
Beware that you will need to install different types of snaps at the two ends: one end male, the other end female.
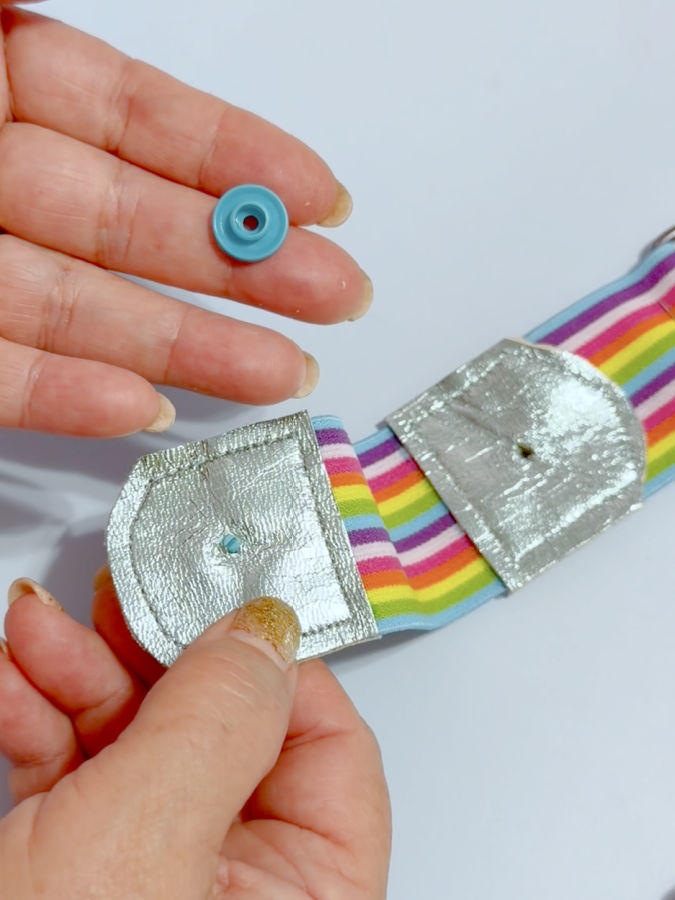
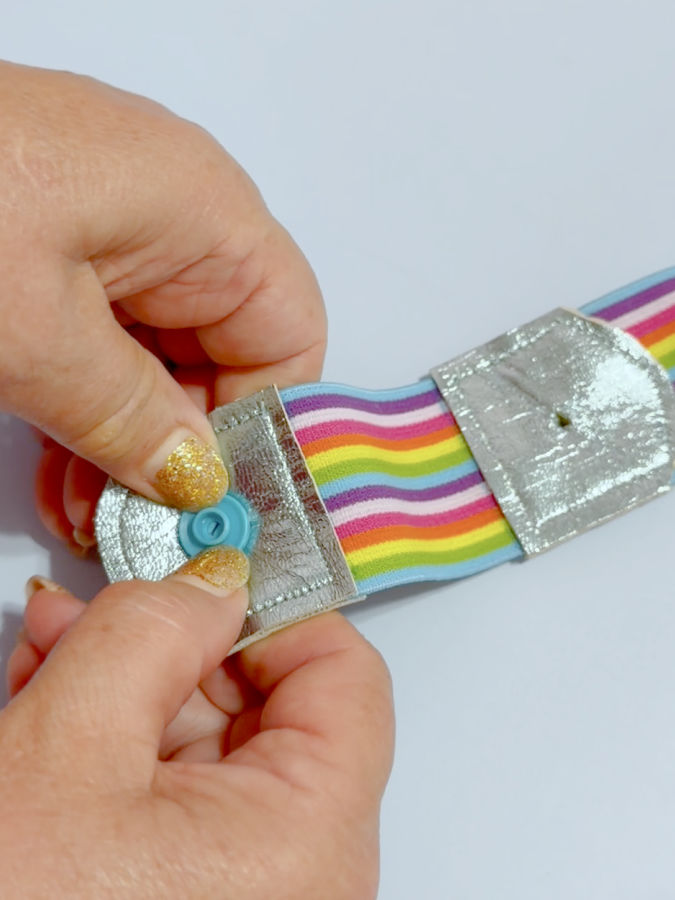
That was it. I was surprised by how well they worked.
Install the corresponding snap components in the prepared leather sections.
Make sure you pay attention to which components need to face each other before pressing everything permanently into place.
Once installed, test the snaps several times to make sure they close properly and the leather pieces align nicely.
Add the Belt Hardware
Now we can turn our two separate pieces of elastic into one adjustable belt.
You need two pieces of hardware:
A rectangular ring and a tri-glide slider/adjuster. I have mentioned the exact items I used at the beginning, here they are again
The rectangular ring joins the two sides of the belt.
The tri-glide allows you to change the length, much like the slider you see on an adjustable bag strap.
Attach the Short Elastic to the Rectangular Ring
Take the unfinished end of the shorter elastic and pass it through the rectangular ring (left of the below image).
Fold the end back onto itself and pin it securely.
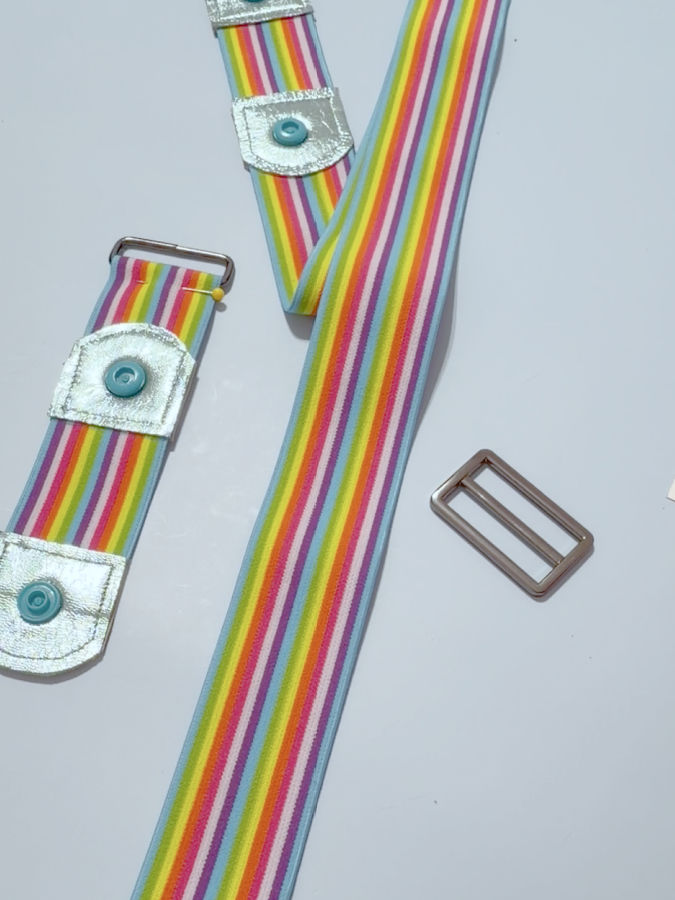
Thread the Long Elastic Through the Adjuster
Now take the unfinished end of the longer elastic and thread it through the tri-glide adjuster.
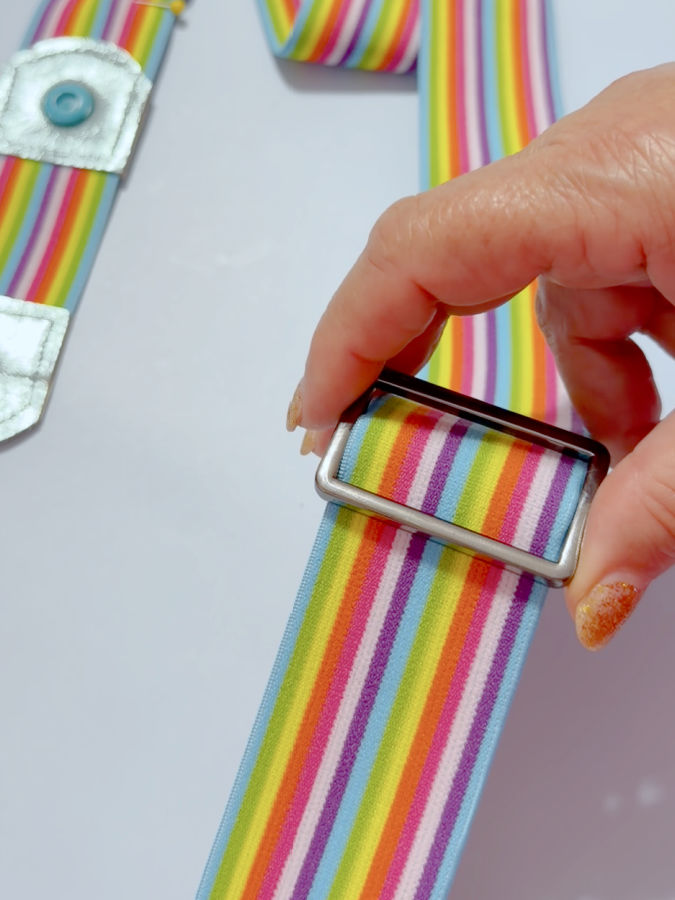
Next, pass the end through the rectangular ring attached to the short elastic.
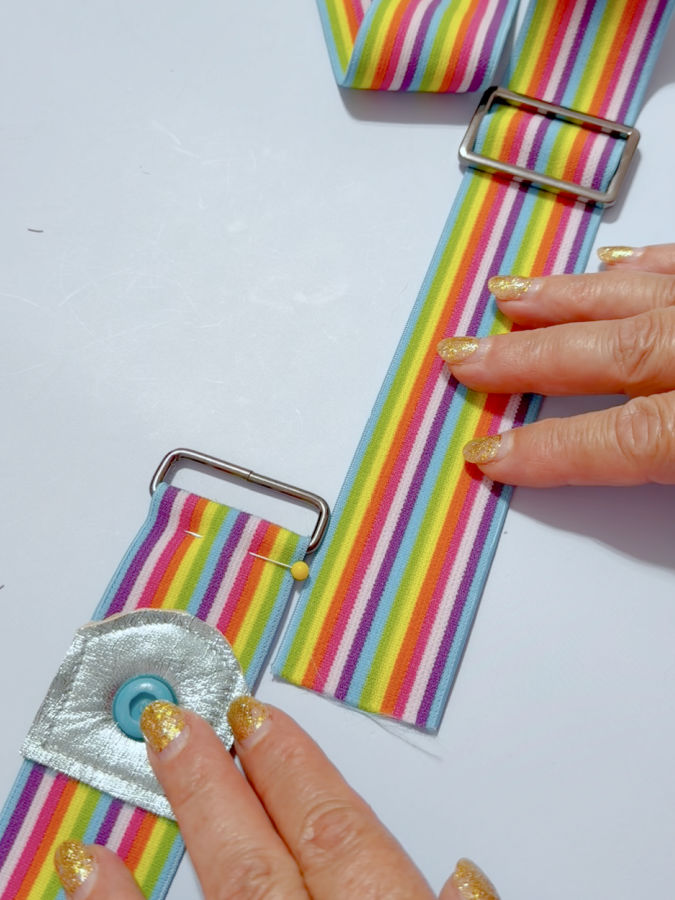
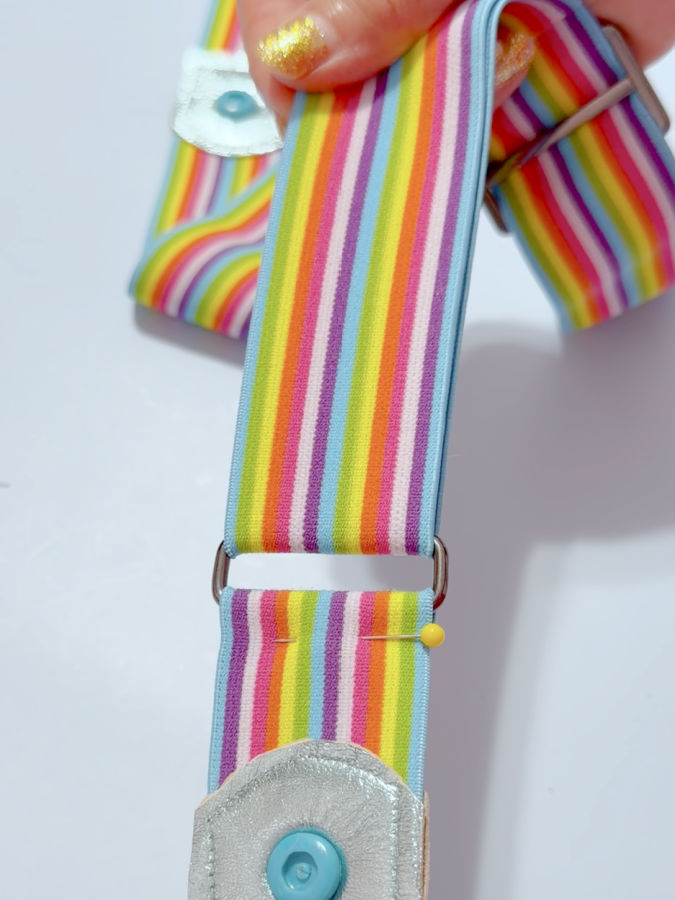
Then bring the elastic end back and thread it through the tri-glide again.
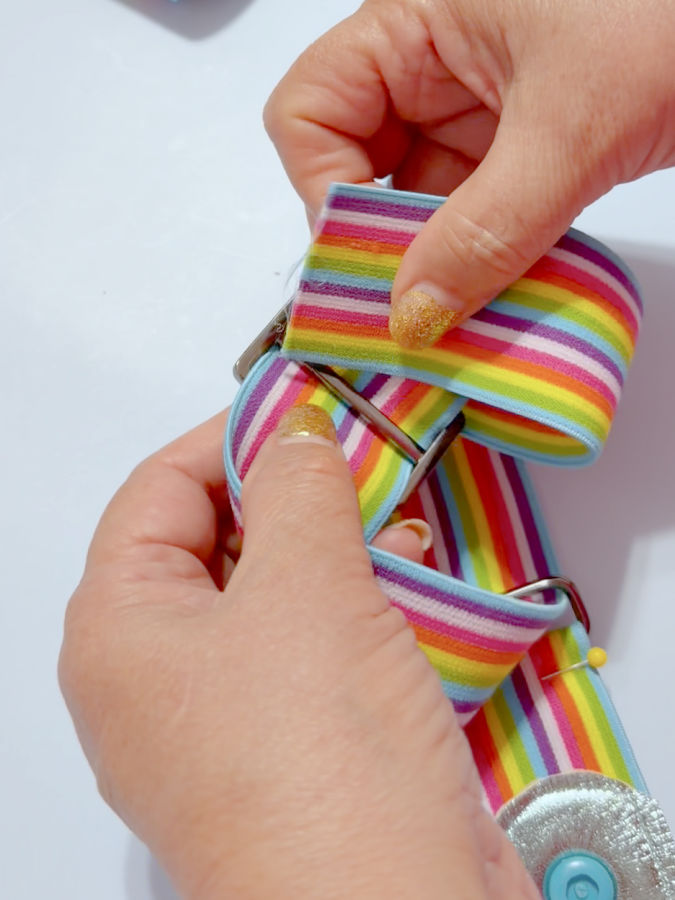
This creates the familiar doubled section of elastic that allows the belt to slide through the adjuster.
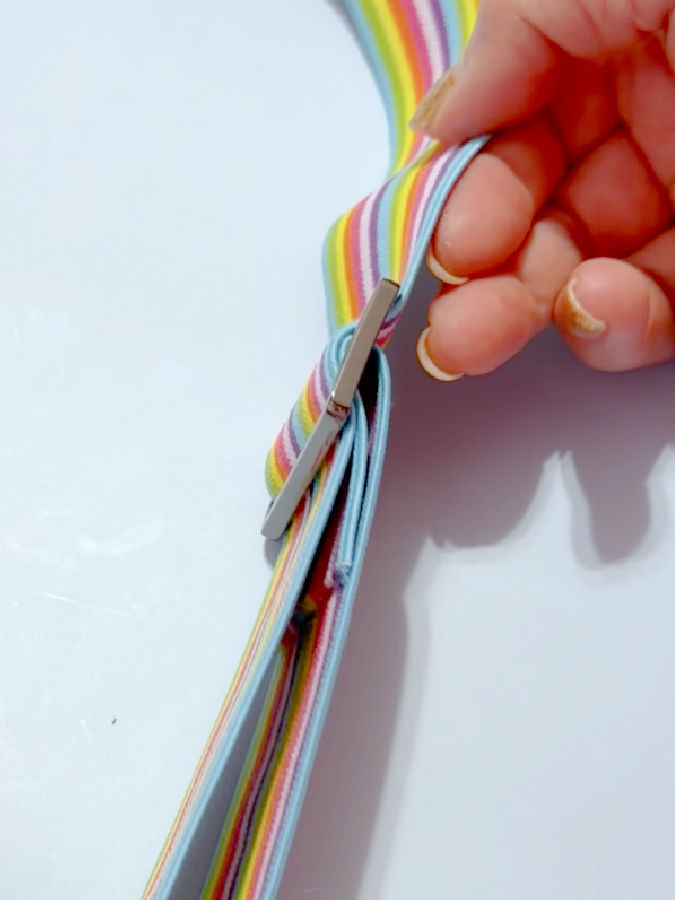
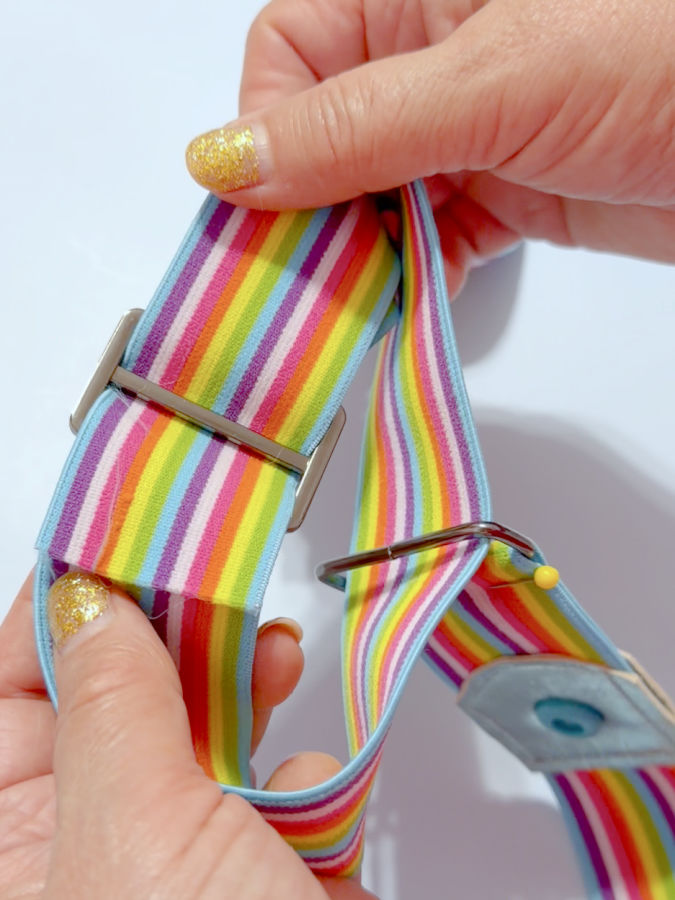
Secure the appropriate ends as shown in the photos.
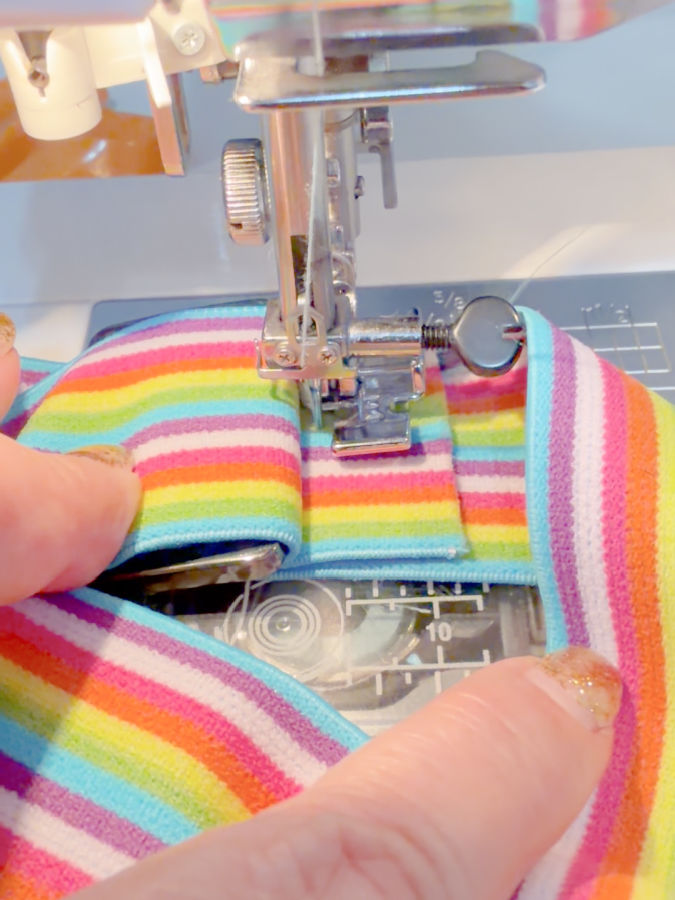
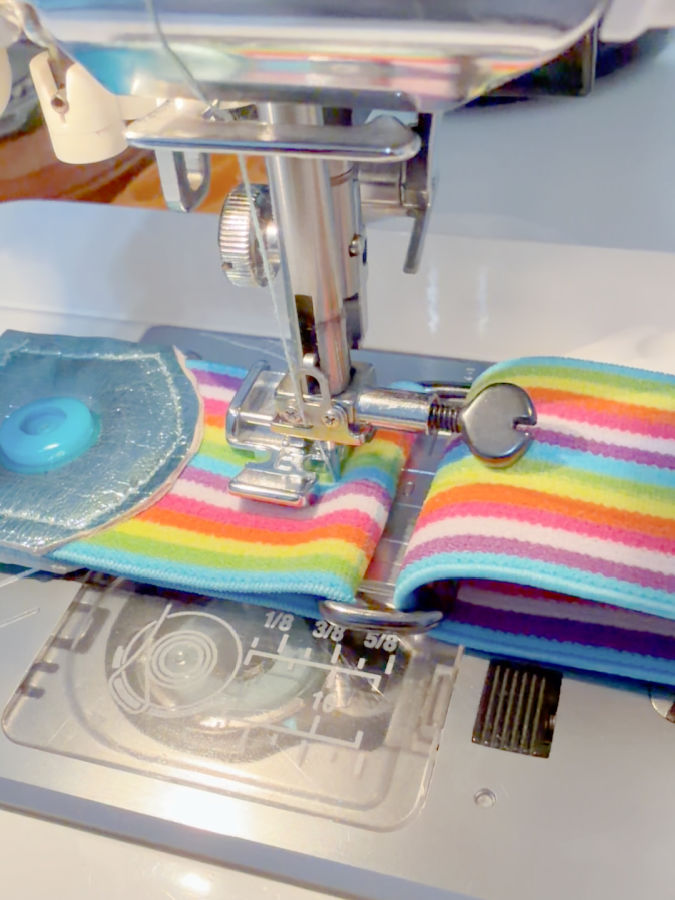
Now you can slide the tri-glide in either direction to make the belt longer or shorter.
And that’s it — the two elastic pieces have become one adjustable belt.
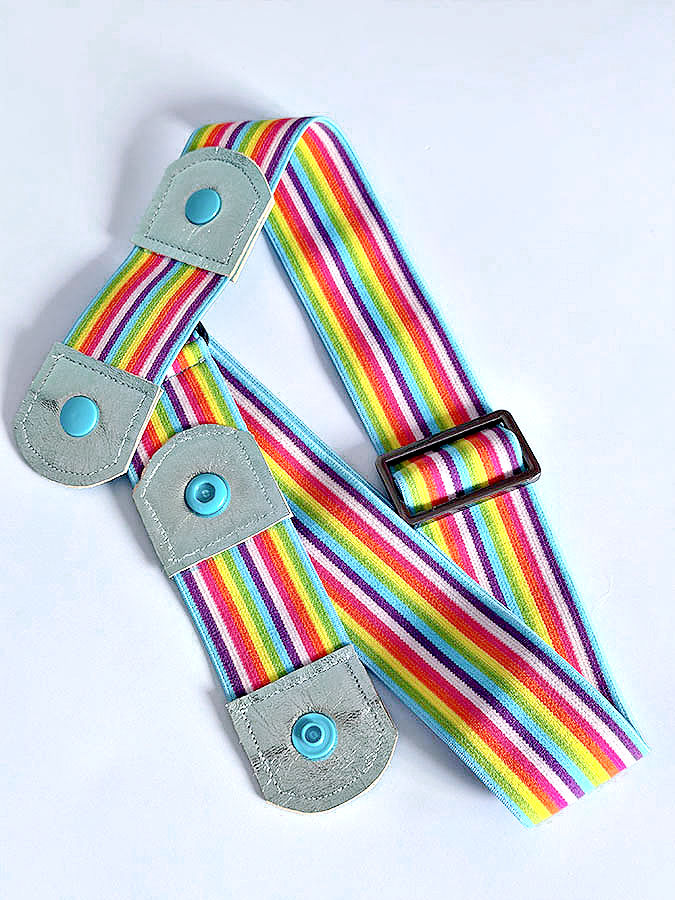
Try It On
Snap each end around the appropriate front belt loop on your jeans.
The belt should run from one front belt loop, around your side and back, and finish at the corresponding belt loop on the other side.
The entire center front remains open.
Use the slider to adjust the elastic until the jeans feel secure without the belt pulling too tightly.
That’s one of the things I like most about this design. I don’t need a belt squeezing my waist to keep my jeans where they belong.
A Few Tips Before You Make One
This is a quick project, but there are a few details that make a difference.
Use a leather needle even with thin leather. Use a longer stitch so you aren’t perforating the leather with lots of closely spaced holes. Sew slowly around the rounded edges because this stitching will be visible.
And don’t rely on glue alone. I use the glue stick as a temporary helper to prevent those tiny pieces from shifting; the stitching provides the strength.
Most importantly, check your snap post length before cutting anything away from the elastic. If your snaps have long enough posts to go through leather + elastic + leather, you may not need to make the openings in the elastic that I made.
My method was simply the solution that worked with the snaps I already had.
Don’t Want to Make One?
I know what some of you are thinking.
“This is clever, but I’d rather spend my sewing time making something else.”
That’s fair.

I originally bought this type of belt before deciding to make one myself, and they aren’t expensive. The set I found on Amazon included several belts for under $20.
So you have two options: make one yourself and customize the elastic, leather, and hardware — or buy one and start wearing it immediately.
After avoiding belts with my jeans for quite a while, I now wear this style regularly. It keeps my jeans where I want them without putting a buckle in the center front, and I find it especially comfortable when sitting for a long time.
And yes, it’s also much more forgiving after lunch.
Sometimes the simplest sewing projects start with looking at something useful and thinking, I could make that.
If you found this tutorial helpful, save the pin below to your sewing board so it’s easy to find when you’re ready to make your own belt. And follow me on Pinterest for more sewing tips, tutorials, and project ideas.

latest posts
- Adjustable No Buckle Elastic Belt DIY: Sewing Tutorial
- 23 Useful Things to Watch for on Amazon Prime Day
- Sewing Thread Secrets: 8 Tiny Details You Probably Never Noticed — But Should
- Bias Tape Tutorial: How to Make Bias Tape With a Bias Tape Maker
- 10 Easy-to-Miss Features on Sewing Supplies You Should Be Using
- Twin Needle Sewing: My First Try Was a Mess, But Here’s What Worked
- 10 Rules That Made Me a Better Sewist
- How to Make a Lightweight Summer Neck Scarf with a Lettuce Hem
- What Sewists Hate About Sewing: Common Complaints and Practical Fixes