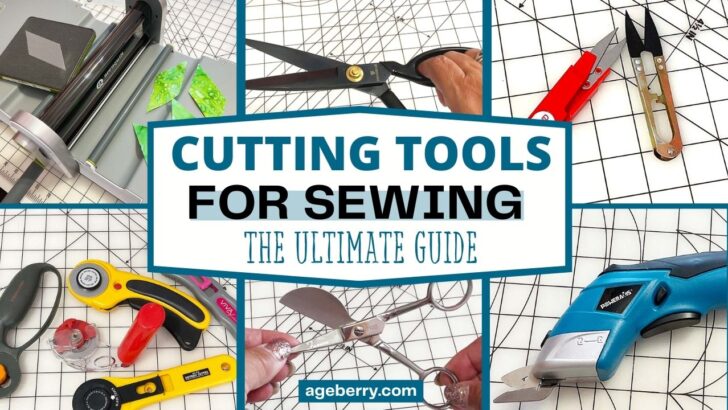
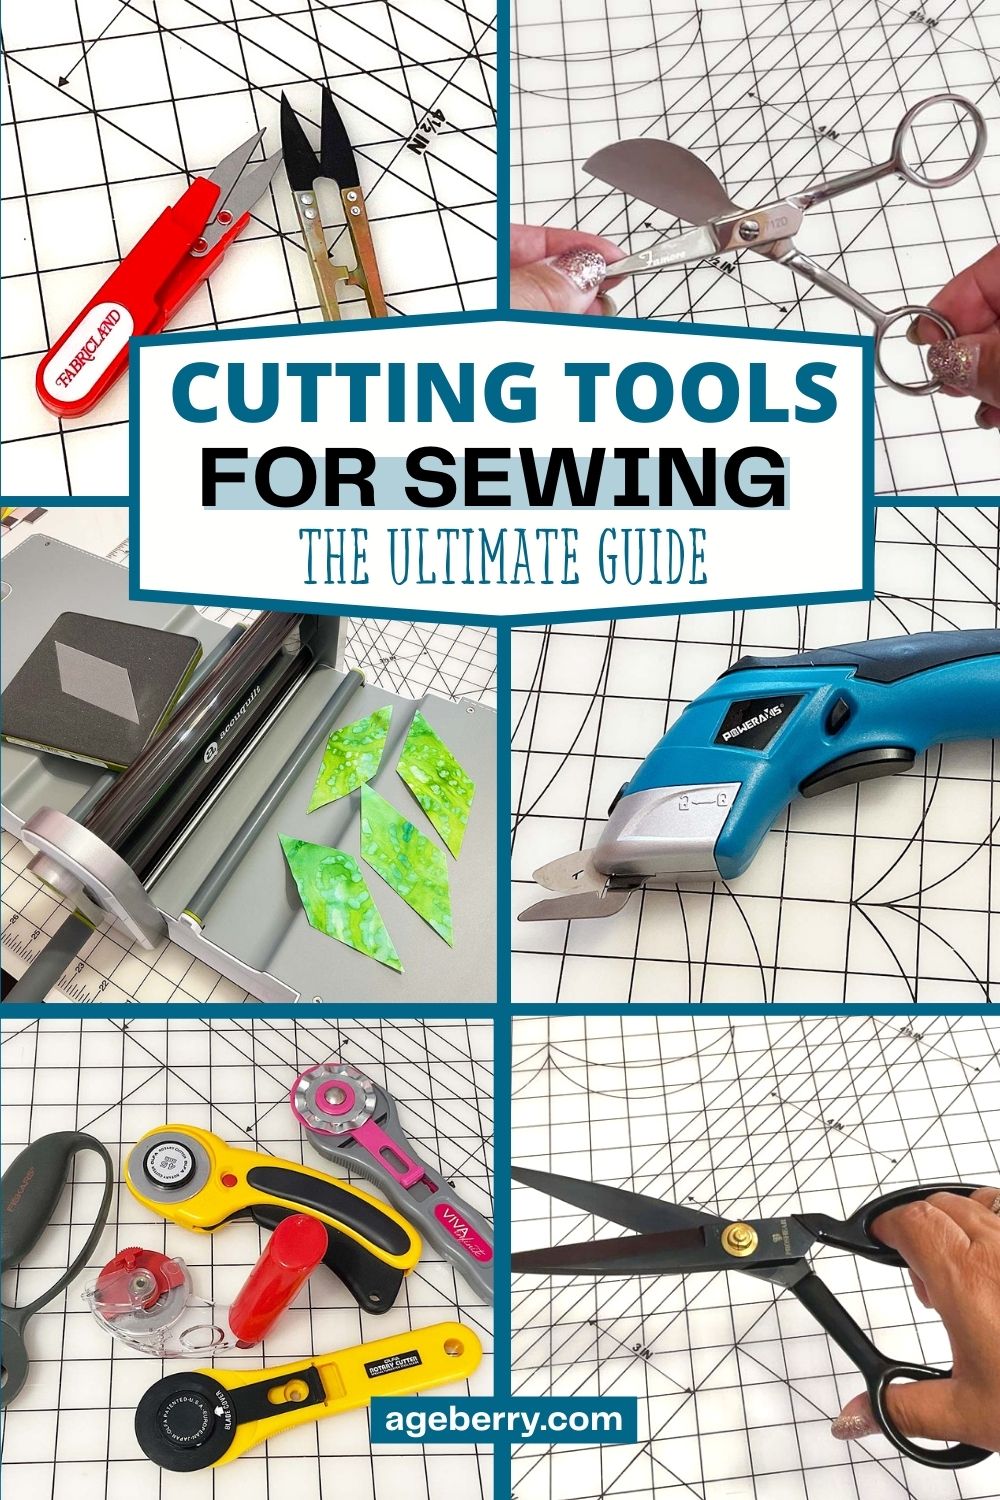
Cutting Tools For Sewing: The Ultimate Guide
There are many different types of cutting tools that can be used for sewing. These include scissors, rotary cutters, pinking shears, thread snips, seam rippers, and more. Each type has its own unique purpose which is crucial to your project’s success. Let’s learn more about each tool so you can make an informed decision on which ones will work best for your next project.
Table of contents
Cutting Tools For Sewing #1: Scissors
- Proshear
- Fiskars Amplify
- Fiskars Razoredge
- Kai Professional Shears
- Gingher Dressmaker Shears
Small sewing scissors for cutting threads, trims, ribbons, elastic
Bent handle embroidery scissors
Cutting Tools For Sewing #2: Rotary Cutters
Martelli Rotary Cutter
Olfa Rotary Cutters
Rotary Cutter Blades
Cutting Tools For Sewing #3: Cutting Machines
AccuQuilt Go die cutting machine
Cutting Tools For Sewing #4: Seam Rippers
If you are a complete beginner and want to know what cutting tools you must have to start your sewing hobby then read first about fabric shears, rotary cutters, seam rippers, and thread snips.
But this guide is not only for beginners but also for experienced sewists. You may believe that if you’ve been sewing for 30 years, you know all there is to know about cutting tools for sewing. After all, you’ve been using them for quite some time.
For someone who has been sewing for a while, these things might not sound very interesting.
Well, guess what? There are actually many things you can still learn about scissors and other cutting tools! Everyone who has used scissors for a while knows that there are some things that can be improved. We live in a world where there are many new inventions every month. Sewing is no different.
Have you ever wondered what new types of cutting tools are available? Do you know how they can benefit your sewing and crafting projects?
I’ve been using scissors for 30 years and I still learn something new about them once in a while. There is always another type that will make your life easier.

So here is a list of all the latest and greatest updates to cutting tools for sewing and quilting.
Sewing is a great way to express your creativity. But if you want to get the most out of your sewing experience, it’s important that you have the right tools for the job. That means having all of the right equipment on hand so that your project goes smoothly from start to finish.
There are many different types of cutting tools used in sewing and quilting – some are designed specifically for certain tasks while others can be used interchangeably depending on what type of cut you need at any given time. If you don’t know which ones are best suited for each task, then it might take longer than expected to complete your project or even result in an unfinished product altogether.
Don’t let this happen – check out this guide below and learn more about what each tool does, why it’s needed for different types of projects, how to choose which one is best for you and how these cutting tools work together to make every sewing project easier than ever before.
Moreover, you don’t have to spend hours searching through reviews on Amazon or going back and forth between different fabric stores trying to figure out which cutting tools are worth buying – I’ll recommend some great options.
Cutting Tools For Sewing #1: Scissors
Let’s start with the basics.
Sewing scissors come in many shapes and sizes with varying blade lengths depending on what you need them for.
Fabric scissors are specially designed for cutting fabrics and threads. Fabric scissors are very sharp, they should cut most fabrics with ease. Whether it’s delicate chiffon or thick denim, you’ll need to be able to cut easily through the material. Their tips are usually narrower than the blades to help create crisp edges on fabric pieces once cut.
Never, ever, EVER cut anything else with them except fabric. Cutting paper and other non-fabric things with your sewing scissors makes them dull faster.
Regular household scissors are not good for cutting fabric and will dull rapidly and produce a jagged, ragged edge or fail to cut at all when used on fabric.
If you want to get the best results possible from your fabric scissors then make sure that they stay sharp! Dull blades will only lead to frustration when trying to cut something delicate like a piece of lace or chiffon. To keep your fabric scissor in tip-top shape we recommend sharpening the blades when needed.
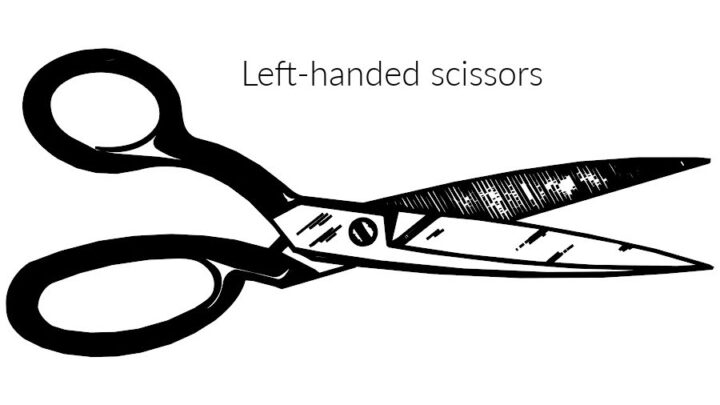
What is the difference between right and left-handed fabric scissors?
Do you know that there are right and left-handed sewing scissors? Back in the day, left and right-handed scissors were not differentiated. Nowadays we have both types of fabric scissors.
The way the blades are connected is the primary difference between left-handed and right-handed scissors. With right-handed scissors, when you open them, the blade on the right side is up and the blade on the left side is down.
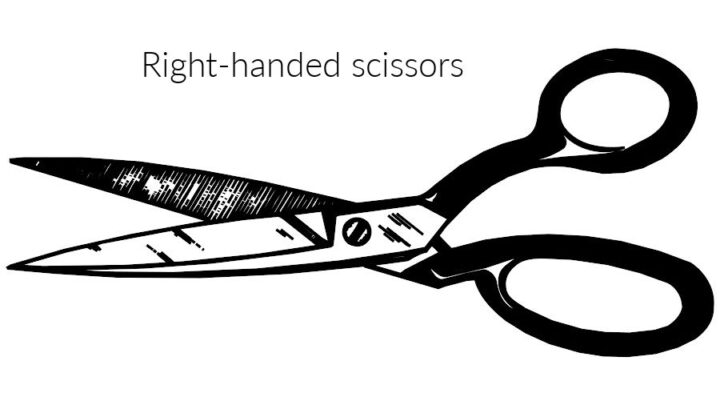
And this doesn’t change if you take right-handed scissors in your left hand: when you open them the blade’s position remains the same: the blade on the right side will still be up and the blade on the left side will be down.
Scissors for left-handed individuals are different. When you open them, the blade on the left side of the scissors is up, whereas the blade on the right side is down.
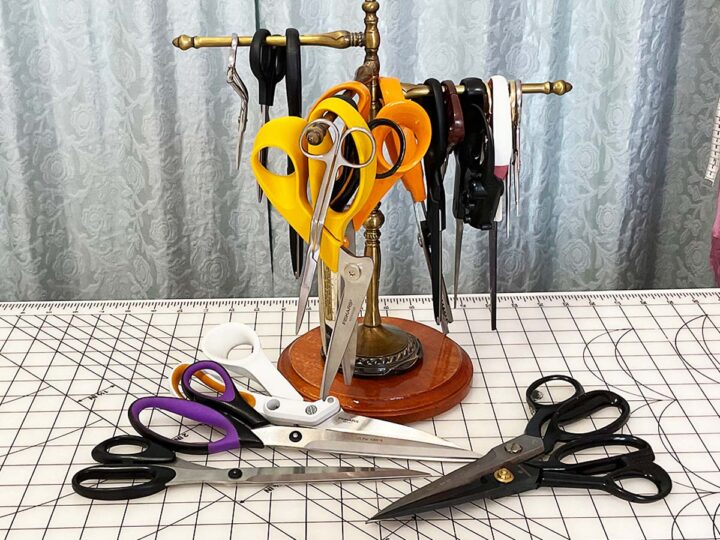
Fabric Shears
Fabric scissors (or dressmaking scissors) are also known as fabric shears.
They have sharp blades that can cut most fabrics with ease.
Fabric shears usually have longer blades than all-purpose scissors because they need to be able to cut through thicker materials like denim or leather and through many layers of fabric. When you purchase fabric shears, make sure to read the length of each one. Some scissors come with an 8″ length and others offer 6, 7, 10 inches, or 12. It’s good to have shears with long blades because they maximize efficiency when cutting fabric in one long cut. The shorter the fabric shears’ blades, the more cuts you’ll have to make. Often buying longer blades would help but they’re not always necessary.
The handle of the tool is also designed differently. Regular household scissors tend to have round handles while fabric shears may have ergonomic grips with finger holes so you can hold them more comfortably if you are cutting fabrics all day long. The shear’s handle has a larger space for your fingers, which provides better control when cutting fabric and you don’t get tired from holding up all that weight throughout the day.
The best fabric shears to buy
I’ve tried a variety of fabric shears over the years, and I can tell you what types and brands I like the most.
Note: Some of the links on this page are affiliate links. This means I will receive a commission if you order a product through one of my links. I only recommend products I believe in and use myself.
Proshear
Recently I bought these scissors and now I am sure these are the best fabric scissors I have ever had. These aren’t just any fabric scissors. These are the heavy-duty fabric sheers you won’t want to be without. It’s written PROSHEAR on them. They are black because they are made of high carbon steel, a stronger metal than stainless steel. They make clean cuts through multiple layers of fabric–they’re sharper than anything else out there!
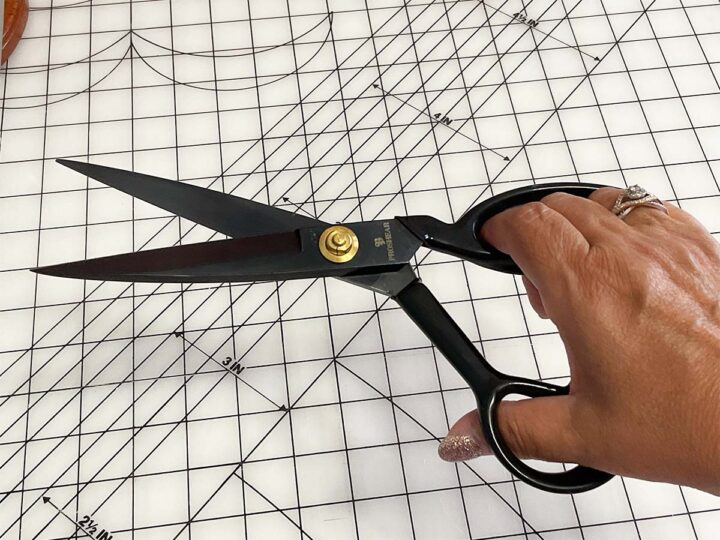
And they are not expensive! So go to this link on Amazon and see for yourself – it’s well worth investing in this product with all its benefits! They have almost 5000 5-star reviews!
The popular brands of fabric scissors are Fiskars, Kai, and Gingher. You might want to check them out.
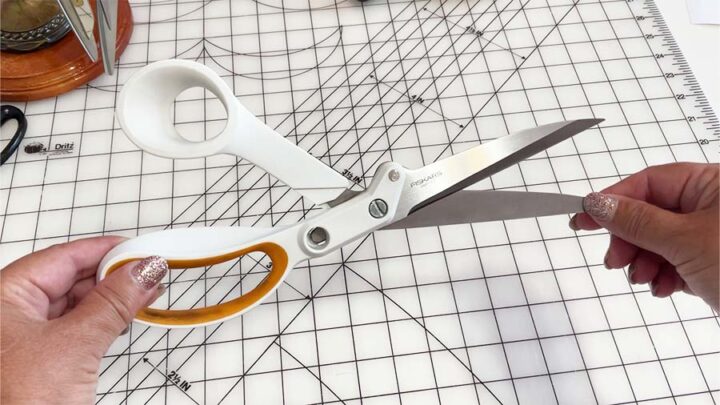
Fiskars Amplify
One of my favorite fabric shears is these Fiskars Amplify. I use them on a regular basis. They cut through multiple layers of fabric and thick fabric with such ease and precision. The blades are made of high-quality stainless steel, which means that they cut cleanly all the way to the tip and remain sharp for a long time. The ergonomic handle and thumb rest feel good in my hand.
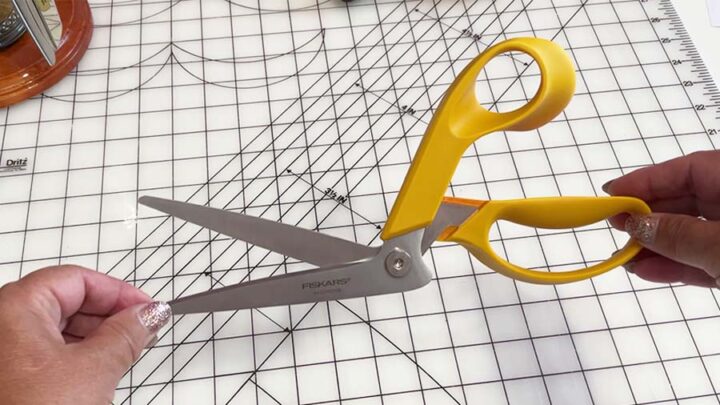
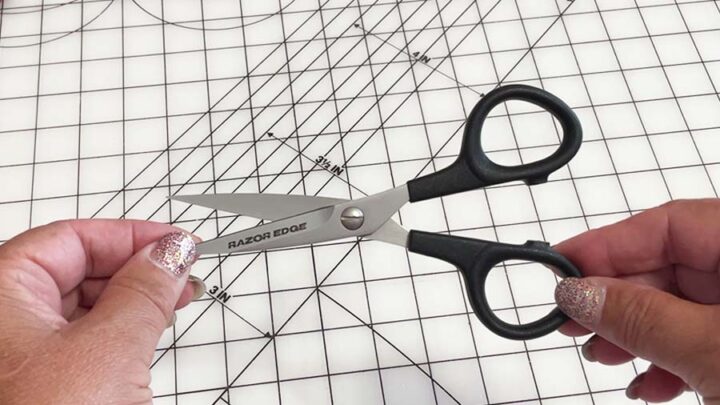
Fiskars Razoredge
I also like Fiskars Razoredge scissors.
The handle is designed with a unique shape that allows you to keep the fabric flat and minimize lifting while cutting, resulting in more precise tabletop cutting. They are comfortable, lightweight, and also razor sharp. And when I cut fabric with them I use fewer pins to secure the pattern because the scissors almost don’t disturb the fabric as I cut.
Kai Professional Shears
My friend has Kai Professional Shears and thinks they are the best.
High carbon stainless steel blades of Kai shears are the strongest and sharpest type of blade that you can buy and will cut all fabrics without snagging or tearing them.
Kai fabric shears are also well balanced, which helps you to cut with less strain on your hands. They are lightweight enough for long cutting sessions without causing fatigue. This makes them a great choice for sewists who may sew for several hours at a time.
These types of shears also have an ergonomic design for smooth, comfortable use and superb cutting control.
Kai fabric shears last a long time because they are corrosion resistant and don’t rust under normal circumstances. They take longer to get dull, which is another advantage.
Gingher Dressmaker Shears
I also have Gingher 8″ Dressmaker Shears and they are a good choice for sewists who want a sharp, lightweight pair of scissors. My Gingher 8″ Dressmaker Shears are very lightweight compared to my other fabric shears. And they are called GINGHER-Featherweight Shears because they weigh only 2 ounces!
They are so easy to handle, which is important for me because I use these Gingher shears a lot for cutting natural silk fabric.
Gingher shears are very sharp and also come with an ergonomic handle that will reduce hand fatigue, even during long cutting sessions.

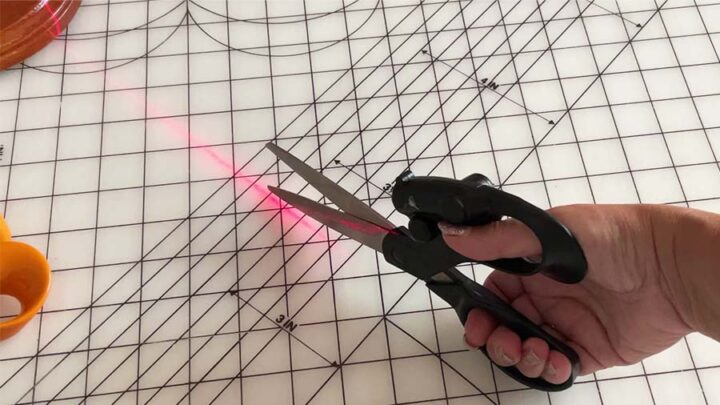
Laser Guided Scissors
I also have scissors with a laser guide. I had them for a few years but didn’t like to use them. And now as I am writing this guide I decided to mention them. They are great if you have a clear flat surface in front of you. These scissors will provide you with a straight line to cut along. They are supposed to work perfectly for accurate straight cuts by following the red line projected from the laser.
If you want to use these scissors make sure you make a mark on the opposite side of the fabric being cut, rest the bottom blade of scissors on the surface and align the laser with the mark on the opposite side, carefully cut while keeping the laser aligned with the mark.
Maybe purchasing laser-guided scissors is a good choice for some people but I didn’t find them helpful.
Pinking shears
Pinking shears leave zigzag-like cuts along the edges of your fabric rather than smooth ones. They are ideal for cutting a zigzag pattern along a fabric edge to limit the length of frayed threads, preventing unraveling. They can be used to quickly finish raw fabric edges instead of serger stitches or zigzag stitches.
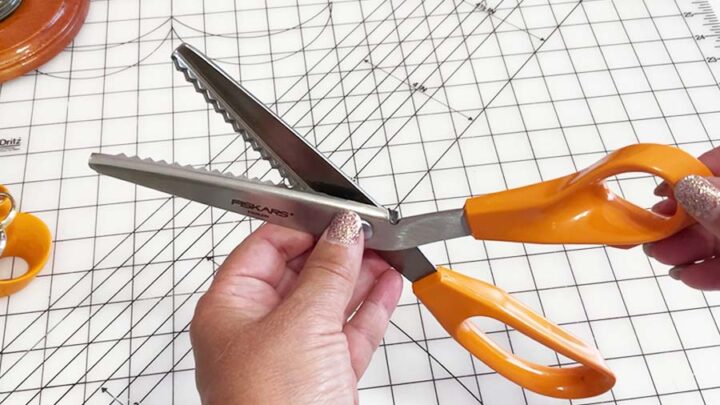
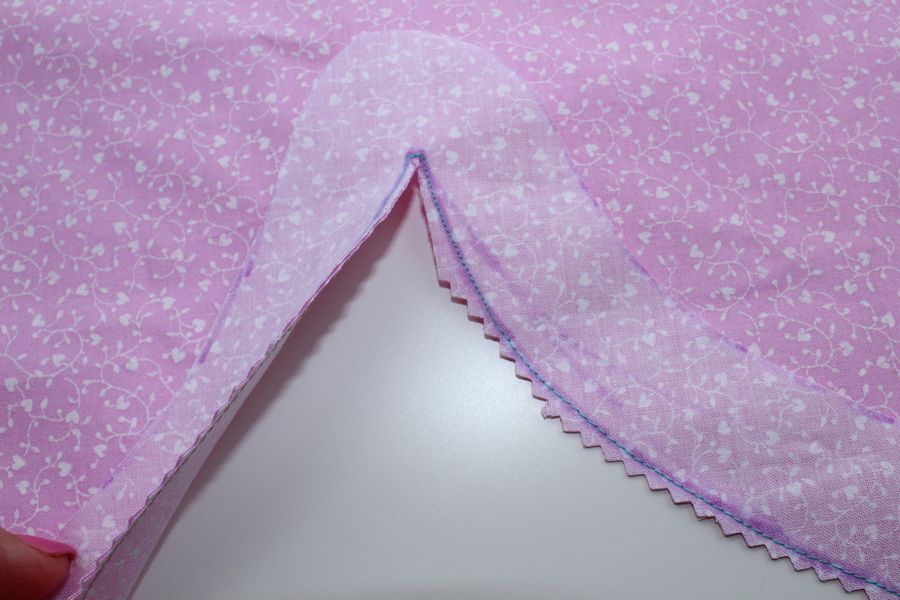
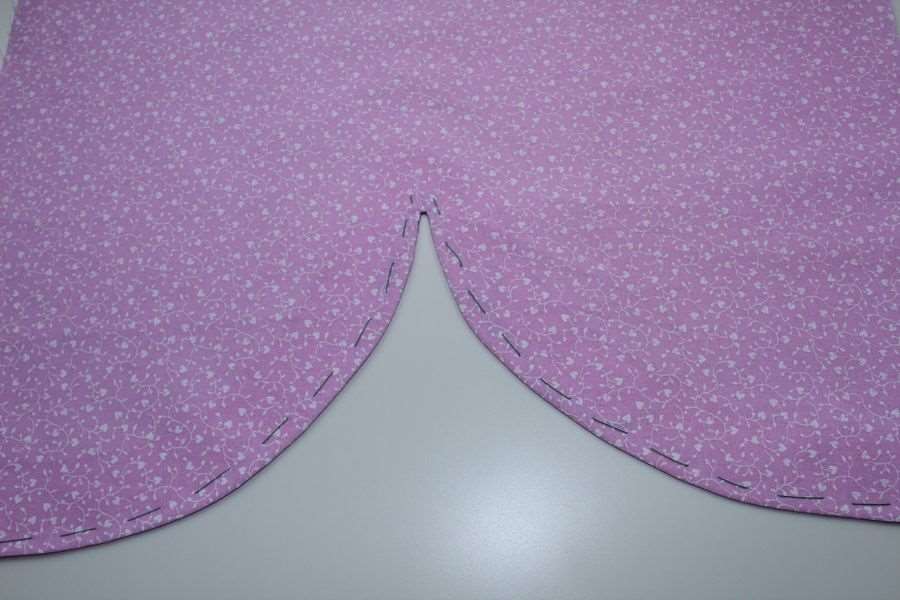
But they can be used also to make notches fast. When we sew a facing to a curved edge we need to cut small notches in the fabric approximately every 2 inches to remove bulk from the insides of seams and keep curved hems and edges flat and even. Notches are those little triangles on the seam allowances that look like V’s. If you turn the facing right side out without those notches, you will have too much fabric in there jamming it up.
Usually, we cut these notches in the fabric with sharp small scissors, but now I learned to cut them differently. It’s a time-consuming job to cut many of them at once when following the curved lines. It’s also really easy to accidentally cut past a notch and break your stitches. But cutting notches can be done in a simpler way just by using pinking shears.
My pinking shears are Fiskars. They stay sharp for a long time and their high-grade, stainless-steel blades offer a lasting sharp edge that cuts all the way to the tip.
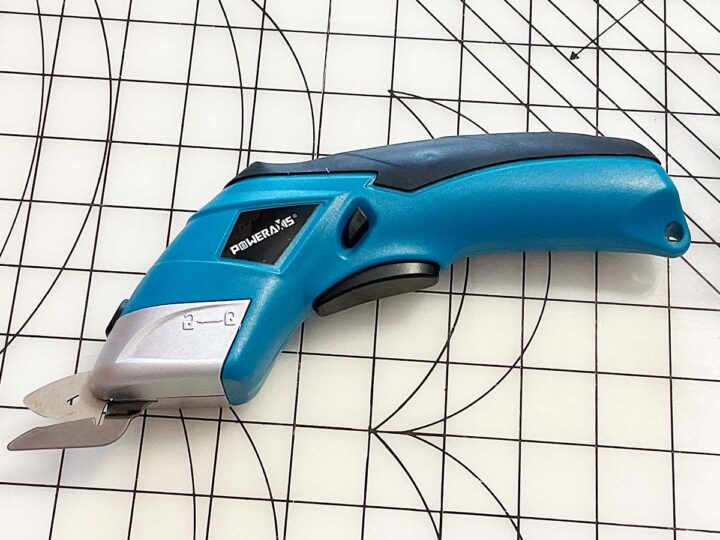
Electric scissors
Now let’s talk about electric scissors. Electric scissors are a convenient and time-saving cutting tool for any sewist. They come in both corded and cordless models, with the latter being ideal for home sewers who want a seamless experience without worrying about cords getting in their way. Electric fabrics shears can be perfect for those looking to save some time on sewing projects.
Why did I feel the need to write about them? Very simple: as I age cutting is no longer easy, especially with thicker fabrics and longer cuts. Does your hand get tired? Perhaps you, like me, have some problems with your joints sometimes? If you answered “yes”, it’s time to consider one of these tools. The good ones really work and if used properly, they can be of great help. My article “Electric Scissors For All Your Crafting Needs” will answer some questions: what they are, how they work, and what you can cut with them. I hope you will find it interesting and informative.
There are many reasons why people rely on electric shears to cut their fabric, but one of the most prominent is that they tend to be faster than traditional fabric scissors.
No matter if you prefer a corded or cordless model, electric fabric shears can be much easier to use when cutting through multiple layers of fabric at once.
These fabric cutting tools come with a variety of blades and options, so do your research to find the best electric scissors for your style!
My electric scissors are these: POWERAXIS Electric Scissors Cordless
Small sewing scissors for cutting threads, trims, ribbons, elastic
These sewing scissors are sometimes called embroidery scissors but you don’t use them only for embroidery projects of course.
Every seamstress needs a pair of these scissors for trimming the ends of the threads, for cutting trims and ribbons or elastic, etc. These sewing scissors are designed with shorter blades that won’t get in the way of your cutting job. They also have a smaller ergonomic handle and come with very sharp pointed blades.
I use these scissors all the time to snip threads. They are nice and sharp, feel nice in my hand, and are easy to use. They are also great for small areas and opening buttonholes.
I would also like to recommend these stork-shaped scissors for your sewing kit.
I use them for little jobs and these do the work perfectly. They look so cute and are super sharp, which is exactly what I need.
Duckbill scissors
This is a funny-looking accessory that for a very long time baffled me: the duckbill scissors. When I was younger I saw them, but not having done any machine applique I didn’t really know what they were. Except for funny-looking, that is. Well, for the last two years I have written a number of articles about embroidery and applique and I got to use this funny-looking tool. A lot. And it was very useful. One of my girlfriends visited me at some point and she remarked “you know, I never saw these in action”. And she is not a beginner. So I decided to write about the duckbill scissors, and I hope you will find it interesting: Duckbill Scissors: What They Are And How To Use Them

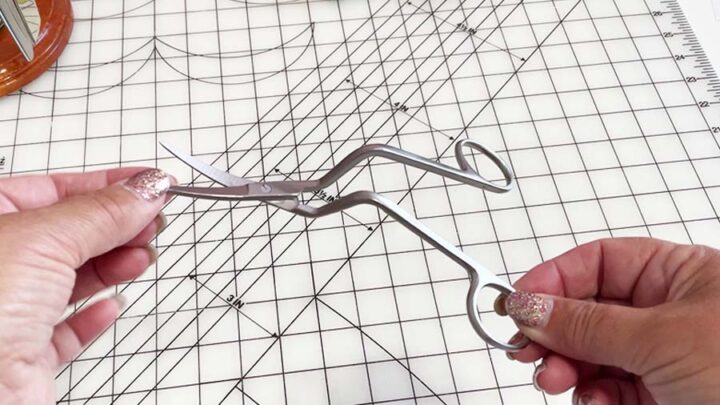
Bent handle embroidery scissors
Bent handle embroidery scissors are lightweight, durable, and ergonomically designed for easy handling. It is perfect for cutting threads inside an embroidery hoop or hard-to-reach corners in clothing so you don’t end up with lots of short threads sticking out of your designs. They come with polished blades that stay sharp even after numerous uses.
These bent handle embroidery scissors come with a curved handle for easy gripping. You can achieve optimal results by holding your hand at an angle while you snip the threads.
Make sure that the tips of these scissors are sharp enough.
Regular household scissors
Fabric shears should never be used for cutting paper but we need to cut paper patterns, embroidery stabilizers, etc. therefore we need to use regular household scissors for sewing projects as well.
But there is also another reason I always have a few all-purpose scissors in my sewing room. Why? Because my husband and my kids are often coming to my room to use my scissors and I obviously don’t want them to use my favorite fabric shears to cut paper or cardboard and plastic. So I always give them scissors I use to cut paper. I keep them sharp too so everybody is happy.
Cutting Tools For Sewing #2: Rotary Cutters
A rotary cutter is a small handheld device with a circular blade attached at one end that allows users to quickly slice through layers of fabric without needing much force applied by the user during operation (unlike scissors). Scissors are cut with both blades but rotary cutters use just one blade to cut fabric held taut on a cutting mat. This makes rotary cutters more accurate and less tiring to use. Using a rotary cutter you will be able to easily cut several layers of fabric at once.
A good rotary cutter for home sewists should have the following characteristics:
- Ergonomic design (ergonomics is basically how comfortable it feels in your hands)
- Comfortable handle providing an easy grip so they don’t slip out of your hands easily during use (the grip used when holding onto the device)
- Easy blade replacement
- Blades are retractable (they pop right back into place and lock tightly so that you don’t cut anything accidentally), or have a built-in cover slot.
The best choice would be a rotary cutter that suits your needs and is comfortable to use so the whole cutting process doesn’t become tedious. Rotary cutters are also available in left-handed versions.
Rotary cutters are very sharp so always use caution when cutting with a rotary cutter.
Before using a rotary cutter, always make sure the blade is properly attached and fixed so it won’t slip out as you cut. Always cut away from yourself, not towards yourself. Put the blade cover on when you’re not cutting. Store your rotary cutter in a safe place away from children and pets.
Rotary cutter blades can’t be sharpened – so be sure to keep an eye on the condition of the blade and replace it before it becomes too blunt.
The blades for home sewists come in various sizes ( from 18mm to 65mm) depending on how big or small you want them but regardless of size all blades should be replaced once dulled since dull blades lead to poor cuts and you might end up cutting yourself instead of what you’re trying to cut.
The most used size of rotary cutter blades for home sewists is usually 45mm. For more on choosing the right blade, check this link.
For years I thought that a rotary cutter is a tool for quilters and used to cut fabric for quilts. But a few years ago I started to cut fabric with a rotary cutter for the garments I make. And I can tell you it was a great decision, I often prefer to cut some fabrics with a rotary cutter and not fabric shears.
The benefits of using rotary cutters for clothes are twofold: firstly they cut much faster and they are easier on your hands than fabric shears because there isn’t as much pressure needed; secondly, the cut is very precise and much cleaner without any fraying threads. Also, you don’t need to lift fabric from the cutting table if you use a rotary cutter and this is so helpful for cutting fabric on the bias. I even made a tutorial to show you how to cut fabric on the bias successfully.
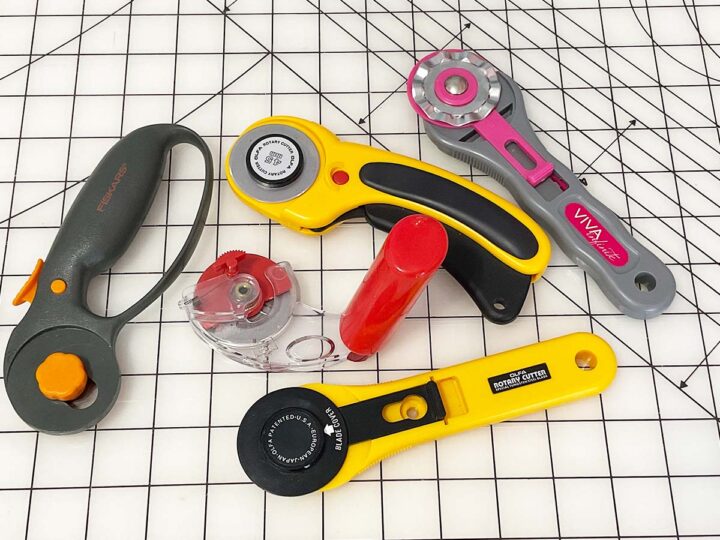
There are many types of rotary cutters out there, though, most with their own special designs/purposes so make sure to weigh out your options carefully before deciding on which one is the best for you.
Martelli Rotary Cutter
Most will agree that the Martelli rotary cutter is a great buy for those who want something simple, sleek, and easy to use.
This is a very special rotary cutter: it has an unusual shape. The way the handle is designed is the key to its popularity among quilters. There are two versions: for the right hand and for the left. I use the right-hand version.
They say it can cut up to 15 layers of fabric at a time without creating tension in your hand and wrist. I didn’t try to cut 15 layers at once but I can tell you that I really like this fatigue-free cutting. Moreover, this rotary cutter allows perfect cutting even while sitting down.
There is a learning curve and it takes some time to figure out how to properly use it. So after a few mistakes, I have learned that the blade angle should be kept straight to avoid running over or away from the ruler’s edge.
The Martelli Rotary Cutter has a lightweight ergonomic design and also features a spring-loaded guard for added protection and the guard lifts automatically when you place the cutter on fabric for added safety. It uses a standard 45mm blade.
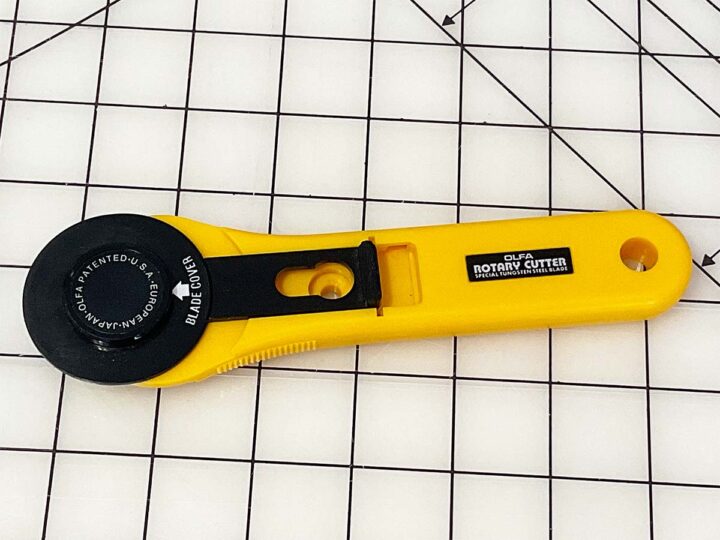
Olfa Rotary Cutters
But before buying my Martelli rotary cutter I successfully used an Olfa rotary cutter.
This rotary cutter can also cut through multiple layers of fabric at once. This makes your cutting process quick as opposed to having to go through each layer individually. It has a blade cover for additional safety. The Olfa rotary cutter comes with built-in grooves so that your fingers do not slip while you are cutting. This rotary cutter has a quick-blade change feature so that you do not have to worry about having to use too much force while trying to change the blade.
Rotary Cutter Blades
You will need to buy replacement blades for your rotary cutters. I usually buy Olfa blades. They are manufactured to fit any Olfa 45-millimeter rotary cutter. You can read more about rotary cutters on my site.
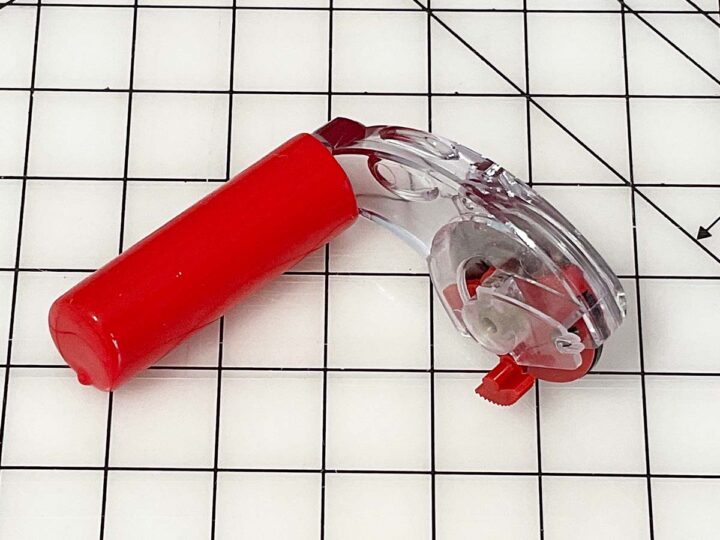
Olfa blades are made of high-quality tungsten tool steel, which means they won’t rust or bend during use. They are very sharp and can cut through six layers at once and last much longer than regular no-name rotary blades. Blades are stored in a plastic blade storage/blade disposal case.
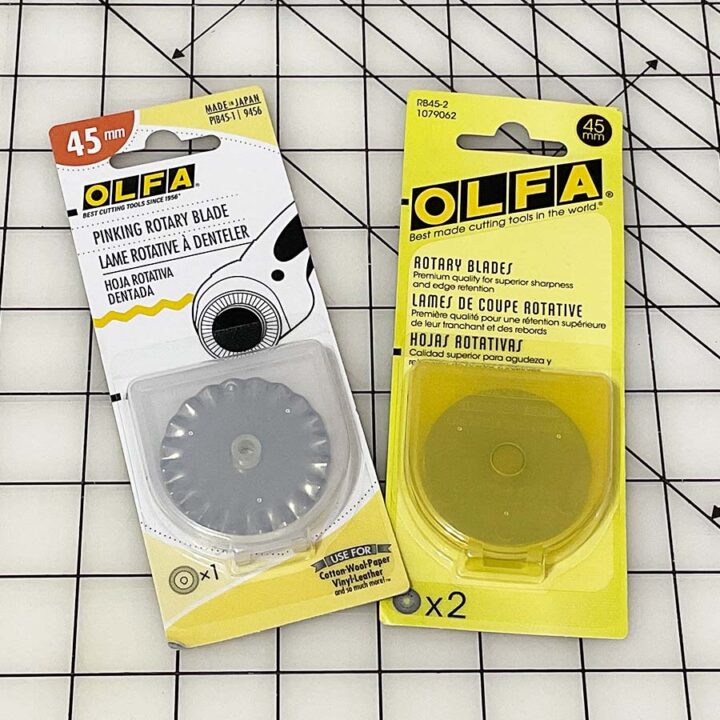
Do you know that there are pinking rotary blades? I bought 2 pinking blades: one is a no-name blade and another one is Olfa. So I couldn’t cut anything with the no-name blade but the Olfa pinking blade works just fine and is perfect for cutting a zigzag edge on different types of fabric preventing fabric edges from fraying. Have in mind that pinking makes raw edges less likely to fray but does not eliminate fraying entirely.
Consider also buying a self-healing cutting mat that has a range of lines on it to keep your cuts straight and neat. A non-slip backing also helps prevent the mat from slipping and sliding on the table.
Cutting Tools For Sewing #3: Cutting Machines
Modern home cutting machines can cut fabric for sewing and quilting projects very well. I have used both Cricut and Brother Scanncut and this is what I have learned.
It’s very easy to cut fabric with these cutting machines and they are fast. But there are some drawbacks. You need special fabric cutting mats and special fabric cutting blades. And the fabric will leave threads and lint on the cutting mats right away. For example, I used this special fabric cutting mat only once to cut 5 pieces from quilting cotton fabric and the mat is completely covered with threads and lint.
So I prefer to use these cutting machines only for cutting intricate pieces of fabric for appliques. And I also prefer to use fabric that doesn’t leave threads or lint on cutting mats – faux leather for example.
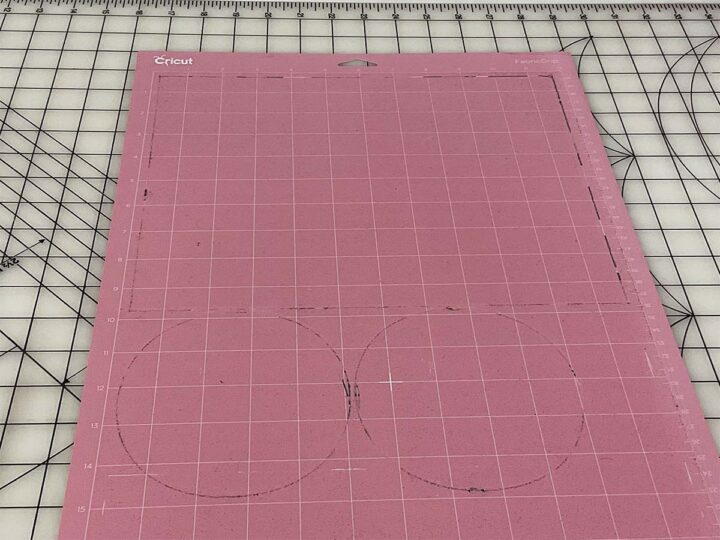
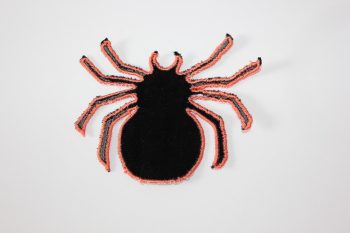
Cricut can cut cotton fabric for quilts but if you need 80 half-square triangles for your quilt you don’t cut them with Cricut. But when I needed to cut a spider applique for my Halloween project I used my Brother scanncut. So if you need a very precise intricate cut to fit a pattern or template, then a cutting machine will be the best tool to use.
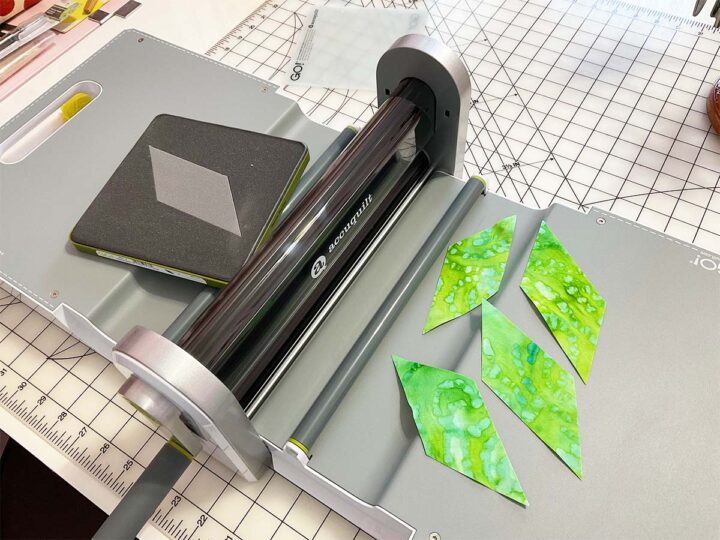
AccuQuilt Go die cutting machine
But if you need to cut large amounts of fabric for quilts at once, then you can use the AccuQuilt Go die cutting machine. It’s very useful for cutting a lot of the same shapes at once, which is perfect for making quilt blocks.
AccuQuilt cutting machine is a modern device that makes it easier to cut fabric. This machine replaces the need for fabric scissors or rotary cutters and cuts 90% faster than these tools. In addition, AccuQuilt cutting machines are accurate every time which reduces fabric waste. It also eliminates any injuries associated with using traditional cutters such as backaches, sore hands from holding the cutter for too long, and even cuts on fingers from accidents when trying to use a rotary cutter. AccuQuilt machine can cut a wide variety of fabrics: cotton, batiks, wool, flannel, fleece, denim, leather, batting, felt, silk, etc.
Finally, this device allows you more time to sew and quilt because you have saved so much time in the cutting process!
The blades are very sharp and the machine can cut up to 6 layers of quilting cotton at once, but it will not cut your fingers because the blades are hidden within the machine which reduces any safety concerns. With these features, AccuQuilt machines enable you to save time, reduce fabric waste, and produce more accurate cuts.
AccuQuilt cutting machines work with so-called AccuQuilt dies which can be purchased separately.
Cutting Tools For Sewing #4: Seam Rippers
I guess everybody knows what a seam ripper is – a handy little tool for taking out seams and removing stitches. But did you know there’s now an even better way to rip stitches? Before, I used the standard version of this tool. Now I have one called “magic eraser” – what does its name mean? I never knew such a thing existed until I bought this. It turns out this particular model is perfect for those of us who don’t want tiny pieces of threads all over our sewing area while we work on something important like finishing my maxi dress before a pool party.
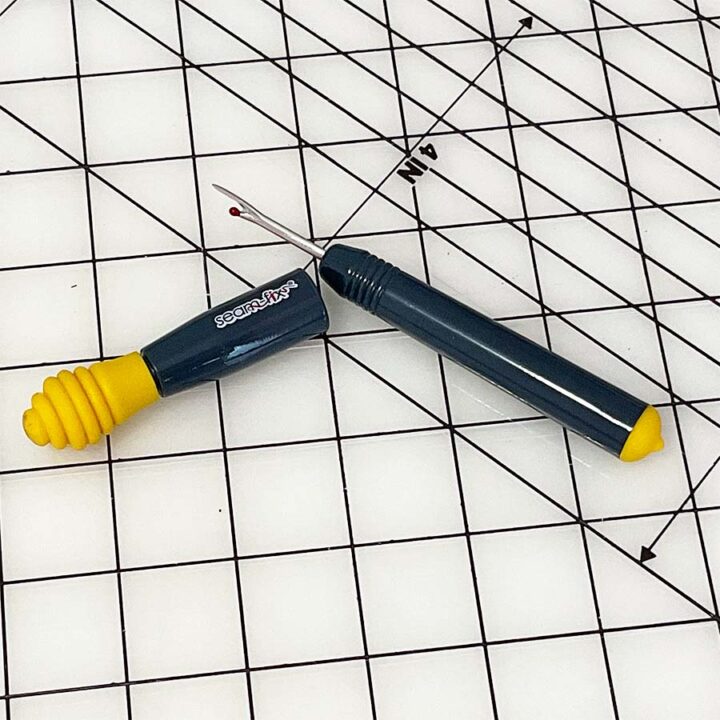
So, you rip a seam, and you are left with many tiny pieces of threads. Before I spent so much time picking those little threads, but now I use this yellow rubber tip and all I have to do is rub it over my fabric for an instant fix.
When not in use, keep your seam ripper in its plastic case and away from kids.
Cutting tools For Sewing #5: Craft Knife Set
A craft knife set may come in useful for a variety of reasons, but most notably because it can be used to open buttonholes.
The chisel-shaped tool is usually used for cutting out buttonholes and it does this job very well, giving you a sharp neat cut with minimal effort. Sometimes these tools come with small mats so you don’t scratch your table while using the tool to open buttonholes.

I also use a sharp craft knife to cut fur fabric.
When you cut fur fabric with fabric shears, it is almost inevitable that lots of it will shed. The fibers will naturally adhere to the table and the fur cuttings, giving the impression of unending shedding. So, if you don’t want flying fibers from the fur, cut it with a knife.
For me, a sharp craft knife is sufficient since I don’t use fur fabric very often. When cutting the faux fur using the knife, cut from the fabric side and don’t press the fur against anything. You’ll just be cutting the fabric, without any loose fur fibers flying around.
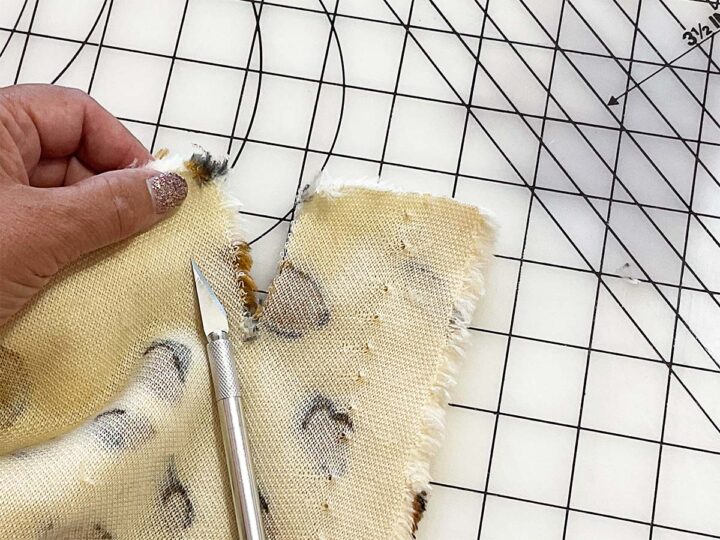
But there are special fur knives designed especially for cutting furs (faux and real), hides, leather, and skins. The fur knives are extremely sharp, cutting through leather, fur, hides, and skins like it is butter.
Cutting Tools For Sewing # 6: Thread Snips
Thread snips are very small and easy-to-use cutting tools that help you quickly cut threads and make clean cuts each time. The thread snips usually have two blades about an inch long with some kind of a handle on one side and a sharp point at the end of it. You may have seen them used in a sewing class, or maybe you’ve even asked your grandma where she keeps her thread snips.
It’s always good to have a pair of thread snips on your sewing table or near your machine.
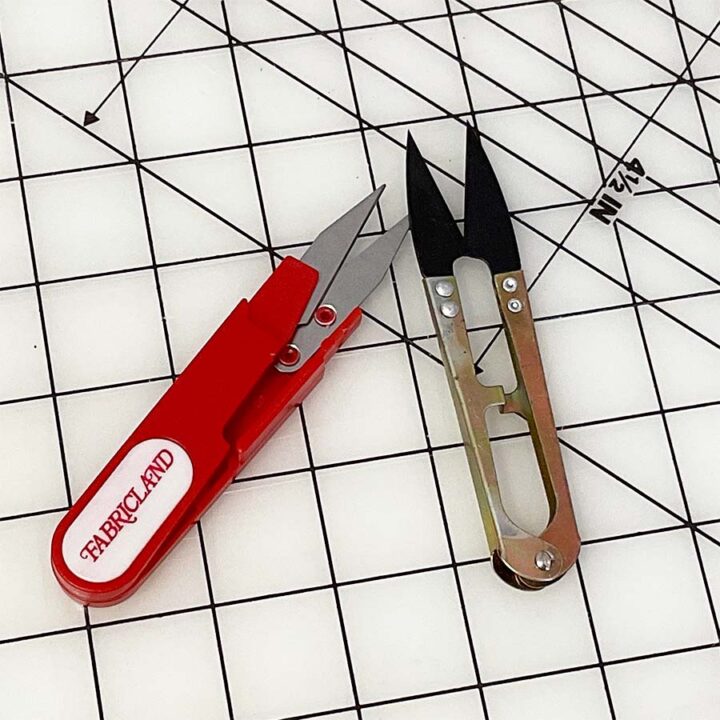
Thread snips don’t have regular handles (like scissors) and because of this, you snip threads much faster: you don’t need to get your thumb and fingers in/out of scissors every time you want to cut a thread. Just flip them right up into your hand and in an instant, you will be ready to trim any thread. Just don’t stick your fingers in their path as they are usually very sharp.
The added advantage of thread snips is that they are great for cutting the ends of stitching close to the fabric.
The added benefit of thread snips is that they can be used to trim the thread tails very close to the fabric.
Thread snips are inexpensive and you don’t need to buy brand-name snips. They are a huge time saver. Thread snips are a handy cutting tool worth investing in because they help you work more efficiently.
Did you find this tutorial helpful? If so, save this pin (see below) on your sewing board so you can come to this tutorial later when you need this information on cutting tools for sewing, and follow me on Pinterest for more tips, tutorials, and inspiration!
latest posts
- Butterfly Quilt Block Tutorial – Foundation Paper Piecing
- How To Sew Quilt Squares So The Corners Match
- Sewing With Fork Pins: How They Help With Pattern Matching, Slippery Fabric, And Seams
- How Much Fabric Do I Need? 21 Helpful Tips For Calculating Fabric Yardage
- Easy Simple Sewing Project: Fabric Jar Opener
- DIY Oven Mitts: Step-by-Step Sewing Tutorial
- Easy DIY Potholder: New Design
- Tailor’s Clapper: What It Does, Why It Works, And How To Use It Right
- Heat Resistant Batting for Sewing: What It Is, How It Works, and What Makes a Difference