10 Rules That Made Me a Better Sewist
For most of us, sewing is no longer a necessity. We do not have to sew our own clothes because there is no other option. We can buy shirts, dresses, curtains, bags, and plenty of other things ready-made — and very often, buying them costs less than making them ourselves.
But that is not really the point anymore.
Prefer to read without ads?
I created a PDF version of this guide for anyone who likes to keep sewing guides saved, printed, or easy to read without ads. It includes the same helpful information in a simple format you can download and use whenever you need it. But wait! As a bonus, you’ll also get a printable PDF of the article Why Does Your Seam Ripper Have a Red Ball? Discover Its Purpose!
The PDF is available in my shop for a small fee. It’s a nice option if you want to support my work and keep this tutorial close to your sewing machine.
For many of us, sewing has become a hobby. We sew because we enjoy fabric. We like trying different techniques, using our sewing machines, testing new tools, solving little sewing problems, and ending up with something we made ourselves.
That also changes what it means to become a better sewist.
I am not talking about becoming a professional tailor or seamstress. A hobby sewist does not need to master every sewing technique or produce perfectly finished garments every time. For me, becoming better at sewing has meant understanding more of what I am doing, making better choices, avoiding some unnecessary mistakes, and getting more consistent results.
Over time, I found that certain habits and ways of thinking made a noticeable difference in my sewing. These are the ones I try to follow.
1. Keep Learning What You Don’t Know
Sewing is a huge subject. The more you sew, the more obvious that becomes.
There are different fabrics, needles, threads, presser feet, stitches, seam finishes, stabilizers, interfacings, machines, tools, and construction methods. Then there is garment sewing, quilting, machine embroidery, home decor, alterations, bag making, and many other areas that each come with their own techniques.
Nobody knows all of it.
That is why one of the most useful sewing habits is simply being willing to look something up when you do not know the answer.
I still use sewing books. I read tutorials on my tablet, watch videos, check sewing machine manuals, and look at how other people approach a technique.
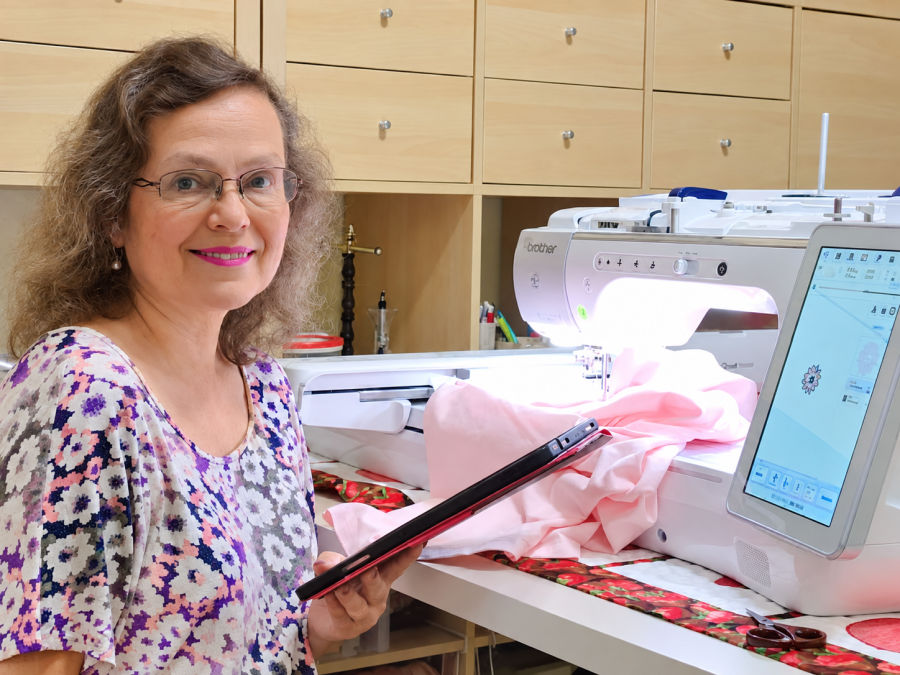
Classes can be useful too, especially when you want to see a process demonstrated instead of trying to understand it from a few written instructions.
And sometimes the best teacher is a scrap of fabric.
Testing a stitch, changing a needle, trying another presser foot, adjusting the tension, or sewing the same seam two different ways can tell you quite a lot. Experimenting is part of sewing, especially when you are working with a fabric or technique you have not used before.
I think experience changes the way we handle what we do not know. A beginner may not even realize there is something to check. With more experience, you start recognizing those moments: I am not sure this is the right needle. I have never sewn this fabric before. Maybe there is a better foot for this. Why is this seam behaving differently?
And instead of guessing, you stop and find out.
That habit alone can prevent a surprising number of sewing problems.
For example, suppose you are having trouble with topstitching. Instead of continuing to fight with it, stop and look for an answer. I have three detailed articles about topstitching on Ageberry, as well as a video showing the technique.
How To Topstitch | 17 Topstitching Tips Every Beginner Should Know
All About Topstitching Thread: Types, Brands, How To Use
Topstitching Troubles? This Simple Trick Will Turn It Around Instantly!
And this applies to much more than topstitching. If you run into a sewing problem or come across a technique you don’t understand, try searching Ageberry.com directly. I have hundreds of tutorials about sewing machines, needles, presser feet, fabrics, threads, seams, hems, tools, troubleshooting, and sewing techniques.
Web searching has changed quite a bit. Search engines now often show AI-generated answers before you ever reach the original articles, and those summaries do not always get every sewing detail right. When you already know a sewing site whose information you trust, it can be more useful to search that site directly and read the complete explanation.
So when you don’t know something, don’t guess. Search for it, read about it, test it on your own fabric, and then decide what works for your project.
2. Know Your Fabric Before You Sew It
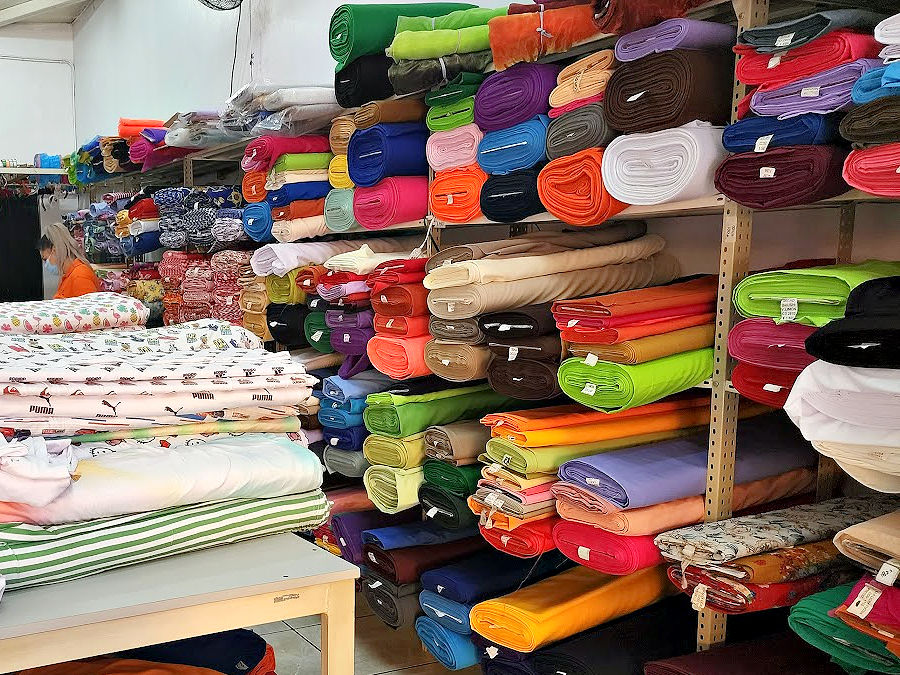
A lot of sewing problems begin before the fabric ever reaches the sewing machine.
The more I sew, the more I pay attention to the fabric itself before deciding how I am going to work with it. How much does it stretch? Does it recover after stretching? Does it fray badly? Is it slippery? Does it shift while cutting? Is it thick or very lightweight? Does it press well? Can it tolerate much heat? Does it curl at the edges? Does it have enough drape for the project I have in mind?
Those details affect almost every decision that comes afterward.
The fabric can determine which needle I use, which thread works best, what stitch I choose, which presser foot helps, how I finish the seams, how I press it, and sometimes even which machine I reach for.
It also helps to test things before starting the real project. Sew a seam on a scrap. Press it. Stretch it if the finished project will be stretched. Try the seam finish you plan to use. See what happens before you have already cut and sewn half the project.
And don’t assume two fabrics that look similar will behave the same way. I have had fabrics that looked almost identical on the table but behaved very differently under the presser foot.
Knowing your fabric doesn’t mean memorizing every fabric name or becoming a textile expert. It means paying attention to what the fabric is doing and adjusting your sewing accordingly.
I wrote more about the fabric lessons that tend to come from experience rather than basic sewing instructions in What Sewing Lessons Don’t Tell You About Fabric — But Should. If fabric sometimes seems to be the source of mysterious sewing problems, that article is a good place to continue.
Note: Some of the links on this page are affiliate links. This means I will receive a commission if you order a product through one of my links. I only recommend products I believe in and use myself.
3. Match the Needle to the Fabric and the Job
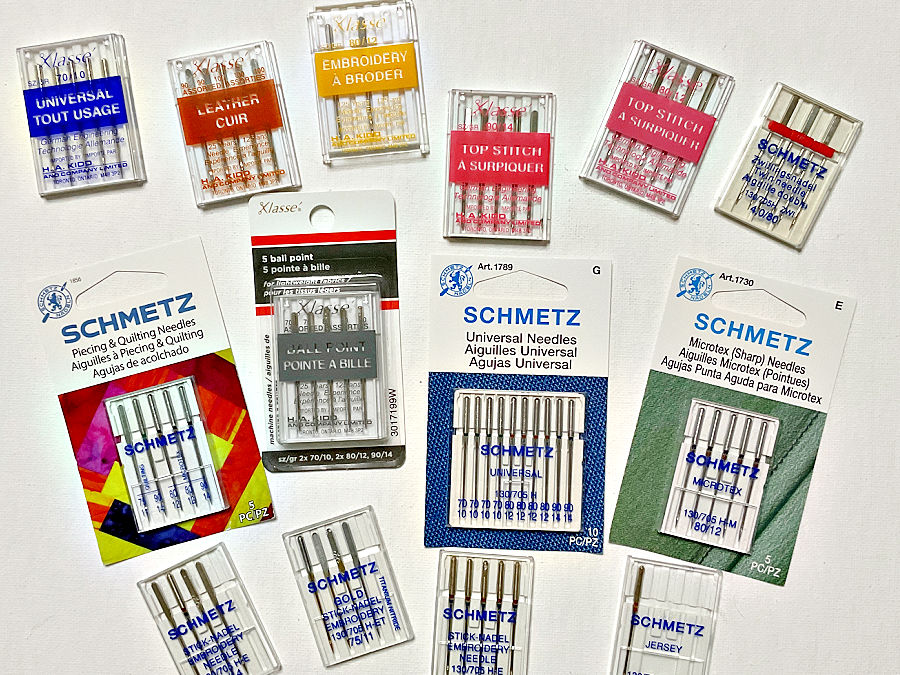
A new needle is important, but a new needle is not automatically the right needle.
The needle has to match what you are sewing. Fabric type, fabric weight, the kind of construction, and even the thread can all affect which needle will work best.
That means thinking about both the needle type and the needle size.
A Universal needle may be perfectly fine for many everyday woven fabrics, but it is not always the best choice. Knits may need a Jersey or Stretch needle. A tightly woven or delicate fabric may sew better with a Microtex needle. Denim needs something stronger. Embroidery, topstitching, metallic thread, and other specialty sewing may call for needles designed specifically for those jobs.


Size matters too. A needle that is too large can leave visible holes or damage a lightweight fabric. One that is too small may struggle with a heavy fabric or thicker construction.
I also pay attention to the needle when a machine suddenly starts producing skipped stitches, puckering, thread breaks, or stitches that simply do not look right. The needle is often one of the first things worth checking — not only whether it is dull or damaged, but whether it is the correct type and size for the fabric.
There is no need to memorize every needle available. What matters is knowing that the choice matters and checking before automatically reaching for whatever happens to be in the machine.
If you are not sure where to start, I have a detailed guide on how to choose the right sewing machine needle for your project. I also have a guide on 19 types of sewing machine needles and a separate explanation of sewing machine needle sizes.
4. Use the Presser Foot Designed for the Job
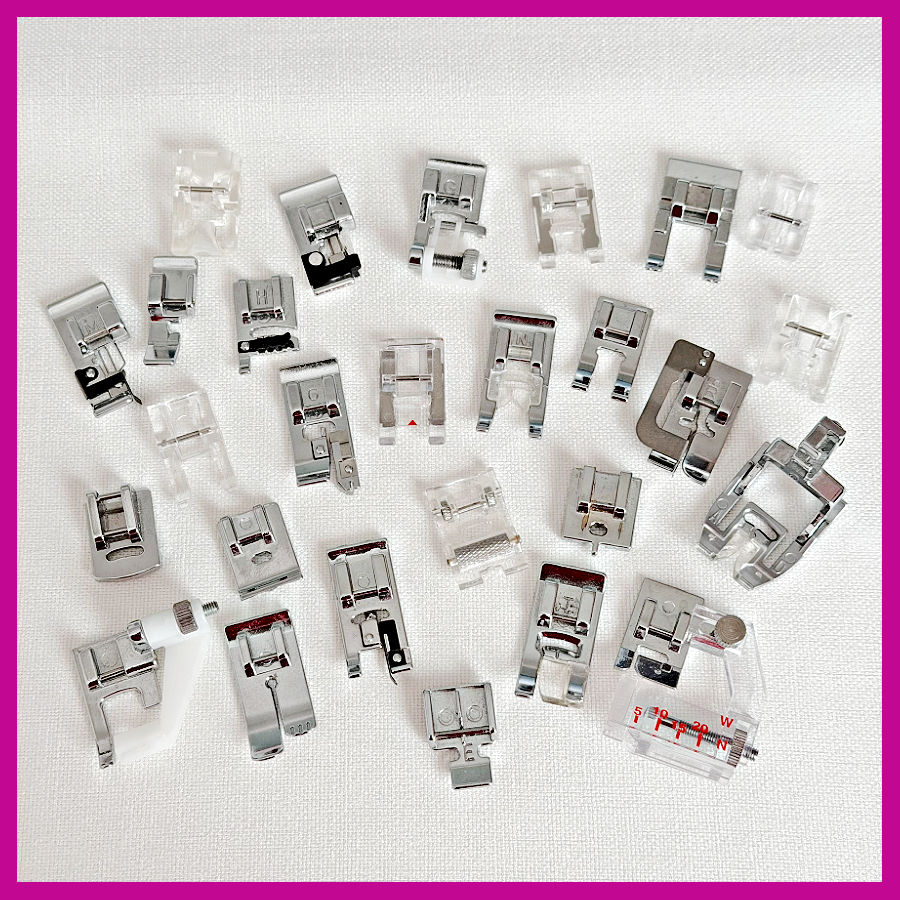
The standard presser foot can handle a surprising amount of sewing. But just because it can sew something doesn’t mean it is always the best foot for the job.
Presser feet are designed to solve very specific sewing problems. A walking foot helps feed multiple layers or slippery fabrics more evenly. A zipper foot lets you stitch close to a zipper or piping. A blind hem foot guides the fabric so you can make a much neater blind hem. A rolled hem foot turns a narrow edge while you sew. A buttonhole foot helps control the size and placement of buttonholes.
Then there are feet for jobs that can be especially frustrating with a regular foot. A knit presser foot can help control stretchy fabric as it feeds through the machine. A piping foot has a groove underneath that holds the piping cord in position while you stitch. And a walking foot can make a noticeable difference when layers want to shift while you sew.
I have also used a gathering foot, ruffler, elastic foot, roller feet, open-toe feet, and quite a few others. Some I use often; others come out only for a particular project. That is fine. A specialty presser foot doesn’t have to be used every week to be useful.

For me, the important habit is asking myself: Is there a presser foot made for what I am trying to do?
Sometimes changing one small attachment makes a difficult sewing operation much easier, faster, or more accurate. It can also save a lot of unnecessary struggling with the fabric.
You certainly don’t need to buy every presser foot you see. Start with the feet that came with your sewing machine and find out what they are meant to do. You may already own exactly the foot you need and have never used it.
If you want to see what different feet can do, I have a large guide on types of sewing machine presser feet and their uses. It can also help you identify an unfamiliar foot by looking at the photos and comparing its shape and features with the feet in the guide.
5. Choose the Stitch for the Job — Not Just the Stitch You Always Use
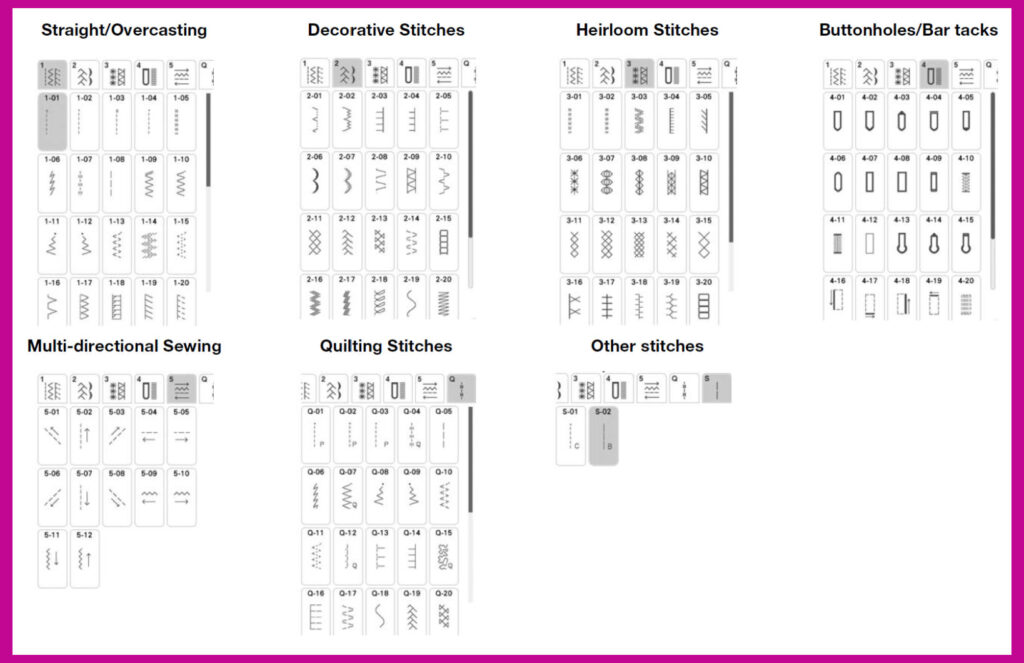
It is very easy to get comfortable with one or two stitches and use them for almost everything. For many of us, that means a straight stitch most of the time, with an occasional zigzag when we need something different.
But the stitch is another sewing choice that should depend on what you are making.
A straight stitch is still the stitch I use most often, but it is not right for every situation.
Stretchy fabric may need a lightning stitch, narrow zigzag, or another stretch stitch so the seam can move with the fabric.
An overcasting stitch can help finish a raw edge.
A blind hem stitch can make a hem much less visible.
And buttonholes have their own specialized stitches.
Then there are decorative stitches. Modern sewing machines may have dozens or even hundreds of them. You certainly don’t have to find a reason to use every stitch on your machine, but some of those stitches can be useful for much more than decoration. And when you do want embellishment, they can turn a very simple project into something much more interesting.
The important thing is not how many stitches your sewing machine has. It is knowing which stitch makes sense for the particular fabric and sewing task in front of you.
The settings matter too. Stitch length and stitch width can completely change how a stitch behaves and how it looks. The same zigzag can be narrow enough to sew a stretchy seam, wider for finishing an edge, or very dense for another purpose.
Even a basic straight stitch may need to be shorter or longer depending on the fabric and what you are sewing.
So before automatically using whatever stitch is already selected on the machine, I try to ask: What does this seam or sewing operation need the stitch to do?
If you want to become more familiar with the choices on your machine, start with my guide on different types of sewing machine stitches. I also have a detailed guide on stretch stitches and when to use them and another tutorial explaining stitch length and how to adjust it for different fabrics.
And if all those decorative stitch symbols on your machine mostly sit unused, you can see some practical ways I use them in Decorative Sewing Machine Stitches: Ideas, Projects and Inspiration.
6. Match the Thread to the Fabric and the Job
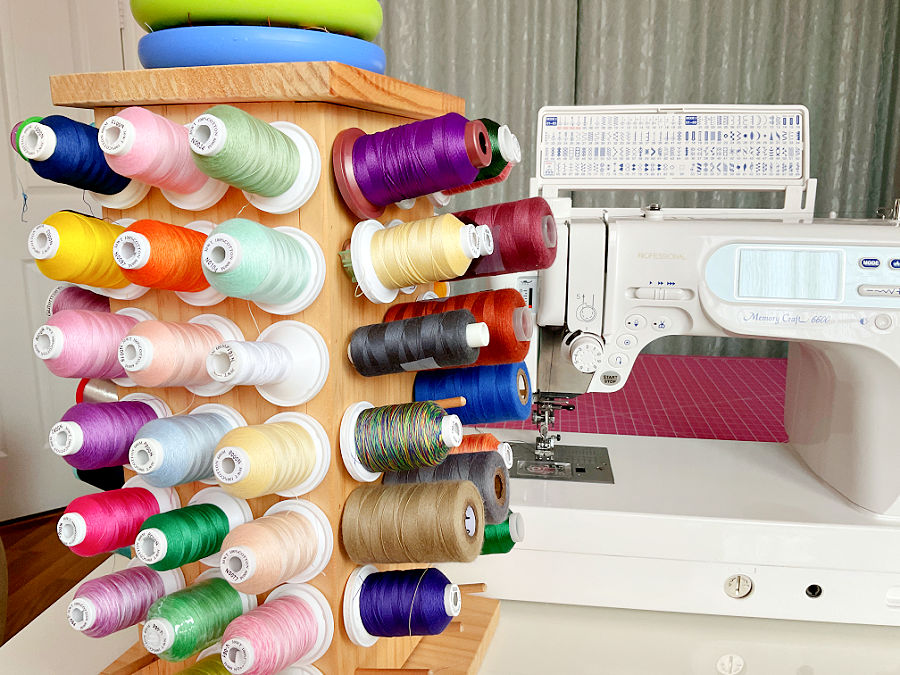
When we choose thread, color is often the first thing we think about. We hold a spool against the fabric, decide whether it matches well enough, and start sewing.
But color is only one part of choosing thread.
The thread also has to suit the fabric and what you are asking that seam to do. Fiber, thickness, strength, stretch, and purpose can all matter.
For general sewing, a good polyester thread works for many projects. Cotton thread is often used for quilting and other projects where cotton is a good match for the fabric and the type of sewing. But once you start working with more specialized fabrics or techniques, other threads become useful.
Stretch fabric is a good example. Sometimes regular polyester thread combined with the right stretch stitch is enough. But there are also stretch threads made specifically for sewing fabrics that need to move, including Eloflex and wooly nylon.


I use wooly nylon thread especially with very stretchy fabrics and with my serger. It behaves very differently from ordinary sewing thread and can give a soft, flexible seam or edge.
Other sewing jobs have their own thread requirements. Machine embroidery thread is designed to produce smooth, decorative stitching. Topstitching may look better with a heavier thread that makes the stitches more visible. Very lightweight fabric may need a finer thread, while some heavier projects can handle something thicker and stronger.
And thread size is another thing worth paying attention to. Two spools may look similar at first glance but behave very differently when sewn. I have a separate guide explaining sewing thread sizes and how to choose them.
You don’t need a different thread for every project, and there is no reason to make thread selection unnecessarily complicated. But matching the color perfectly does not help much if the thread itself is wrong for what you are sewing.
When I choose thread now, I try to think beyond “Does this color match?” and ask “Will this thread work well with this fabric and this particular construction?”
If you want a broader overview, my guide on sewing thread types and their uses explains the differences between common thread fibers, constructions, and specialty threads.
7. Read First, Cut Second
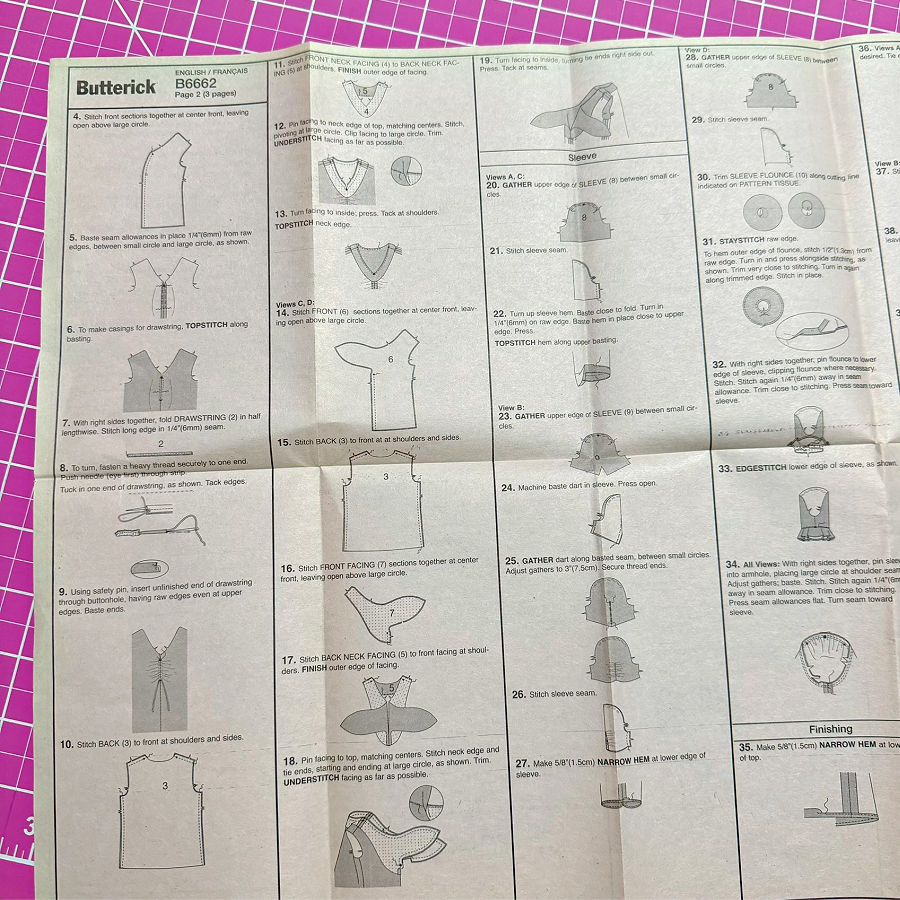
Before I cut fabric for a project, I like to know where the instructions are taking me.
That means reading through the pattern or tutorial first — not studying every sentence until I have it memorized, but getting a good idea of the construction order and noticing anything that might affect cutting or preparation.
Are the seam allowances included in the pattern? Are they the same throughout the project? Do any pieces need interfacing? Are there markings or notches that need to be transferred? Is there an unfamiliar construction step that I should understand before I start? Do I have the zipper, elastic, buttons, stabilizer, or other supplies the project will need later?
Some details on a pattern piece can look almost unimportant when you first see them. A little notch, dot, line, extra extension, or tiny pattern piece may not make much sense yet.
Then you reach step 12 and suddenly understand exactly why it was there.
Unfortunately, fabric is much easier to remove than to put back.
Seam allowances are a good example. Before cutting, check whether they are included and what width the pattern expects. Different patterns handle them differently, and even one project can use more than one seam allowance. I explain this in much more detail in my guide on seam allowances in sewing patterns.
Markings deserve the same attention. Notches, dots, grainlines, fold lines, pleat lines, and placement marks are there to help pieces line up correctly later. In my tutorial on how to sew a dress using a pattern, you can see how I transfer the pattern markings before cutting and construction begin.
And if the instructions call for interfacing, find out where it goes before you get too far into the project. Some pieces are much easier to interface while they are still flat. I have a separate tutorial on using fusible interfacing if that is one of the steps you are unsure about.
Reading ahead also gives you time to investigate an unfamiliar technique before you are halfway through the project with cut fabric sitting on the table.
You do not need to understand every construction step perfectly before you begin. Sometimes a step becomes much clearer once the pieces are in your hands. But you should know enough about what is coming that you don’t accidentally cut away, skip, or forget something you will need three steps later.
For me, read first, cut second has become a very useful sewing rule.
8. Finish Seams According to the Fabric and the Project
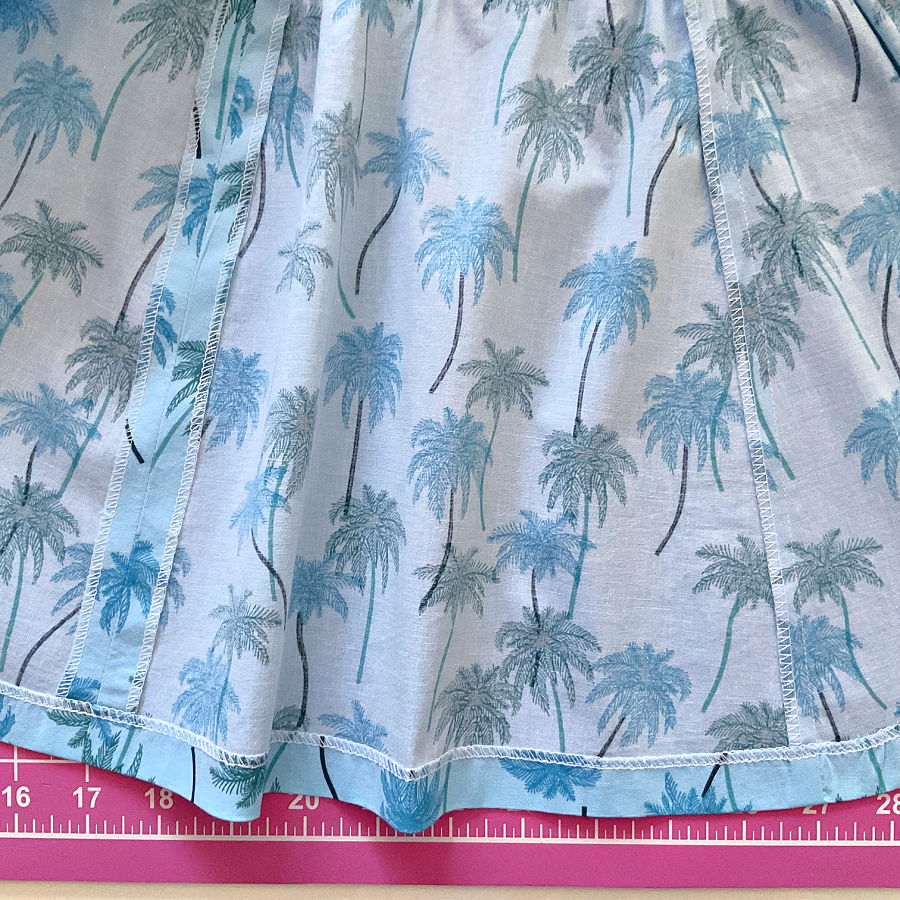
Not every seam needs the same finish.
Some fabrics fray so badly that the raw edges need attention almost immediately. Others barely fray at all and may not need a separate finish, especially if the seam allowances will be completely enclosed inside the project.
The project matters too. A garment that will be washed and worn often may need a more durable seam finish than a decorative item. A sheer blouse may look much better with French seams, while a heavier fabric might become unnecessarily bulky if you use the same technique.
There are many ways to finish seams: pinking shears, a zigzag stitch, an overcasting stitch on a regular sewing machine, a serger, French seams, bound seams, flat-felled seams, and others. Sometimes leaving the seam unfinished is also a perfectly reasonable choice.
The important part is choosing rather than automatically finishing every seam the same way.
I usually look at how much the fabric frays, whether the seam allowances will be visible, how often the item will be washed or worn, and how much bulk the finish will add.
For example, a serger is fast and gives a clean, durable edge, so I use mine often. But it isn’t always the best answer. A French seam can be much nicer on lightweight or sheer fabrics because the raw edges are completely enclosed. A bound seam can look beautiful inside an unlined garment. And sometimes a simple zigzag or overcasting stitch is all that is needed.
There are also times when I don’t finish the seam allowances at all. If the fabric doesn’t fray and the edges will be safely enclosed, adding another layer of thread can serve no useful purpose and may only add bulk.
There isn’t one “correct” seam finish for every project. The better question is: What does this particular fabric and this particular project need?
If you want to compare different options, my guide on types of seams and seam finishes shows several methods, including serged, bound, pinked, and other seams.
For fabrics that unravel easily, I also have a detailed guide on how to stop fabric from fraying, with several ways to deal with raw edges.
If you don’t have a serger, see my tutorial on finishing raw edges with overcasting stitches and an overcast presser foot.
And for lightweight fabrics, especially silk, chiffon, and organza, my French seam tutorial shows how I make a clean enclosed seam without exposed raw edges.
9. Use Tools That Make Your Sewing Better
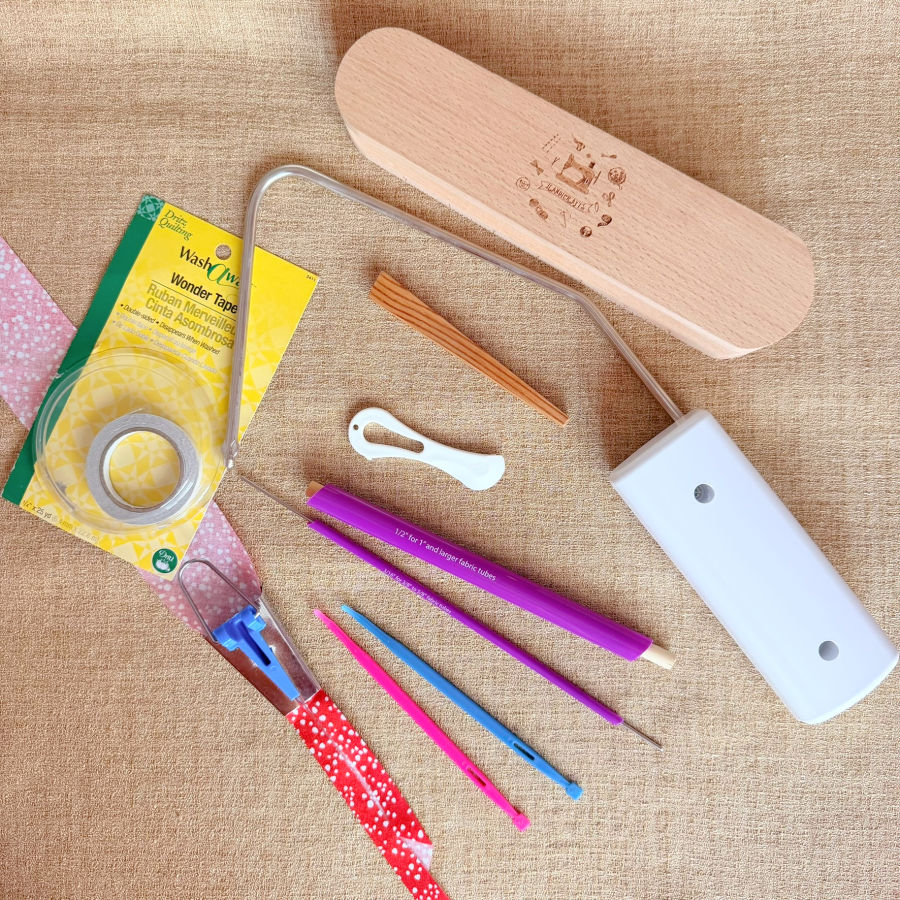
You do not need every sewing tool, every specialty machine, or every new gadget that appears in a sewing store.
But you also do not have to make a task harder just because you have always done it one particular way.
As hobby sewists, we are sewing because we enjoy it. If a tool makes a job easier, faster, more accurate, or simply less frustrating, I see nothing wrong with using it.
That applies to small tools and big ones.
A good rotary cutter may make cutting much easier for you. The right marking tool can save time and give you more accurate lines. Rulers and seam guides can help with consistency. A pressing tool can make a difficult area much easier to shape. Specialty presser feet can take over jobs that are awkward with a regular foot.
And sometimes the tool you outgrow is the sewing machine itself.
Your first sewing machine may be perfectly good, but your sewing can change. Maybe you start sewing more knits, quilting larger projects, working with heavier fabrics, or wanting features you did not even know existed when you bought your first machine. At that point, upgrading is not about becoming a “serious” sewist. It is simply about choosing a machine that fits the sewing you do now.
I recently wrote about exactly this in my sewing machine buying guide — including what to look at when your current machine no longer matches the projects you are making.
The same is true for specialty machines. You certainly do not need a serger to sew, but if you sew a lot of garments or knits, a serger can become extremely useful. If you are considering one, my serger buying guide explains what these machines can do and which features are worth considering.


A coverstitch machine is another good example. You can hem knits without one, but if knit garments become a large part of your sewing, a coverstitch machine can make that particular job much easier and give you another option beyond a twin needle or stretch stitch.
The same principle applies to much smaller purchases. I have a whole guide on cutting tools for sewing because scissors are only one option. Rotary cutters, specialty scissors, snips, pinking shears, and other cutting tools each have jobs they handle particularly well.
Marking tools are another category where having choices helps. Chalk, disappearing markers, soap, a Hera marker, and other methods behave differently on different fabrics. I compare many of them in my guide on fabric marking tools.
And some of my favorite sewing tools are not expensive at all. In fact, I have a list of sewing tools under $20 that solve everyday sewing problems and another collection of sewing tools and notions that are easy to overlook.
The important part is not owning more. It is recognizing when a tool exists for a problem you keep having.
Sometimes we struggle through the same sewing task for years simply because that is how we learned to do it. Then we find a presser foot, ruler, guide, pressing tool, cutter, or machine designed for exactly that task and think, Where was this thing five years ago?
You do not need everything at once. Add tools as your sewing changes and as you find a real reason to use them.
For me, that is a much better approach than either extreme: buying every sewing gadget available or proudly doing everything the hard way.
10. Don’t Just Fix Mistakes — Find Out Why They Happened
Mistakes are part of sewing. I still make them, and I don’t expect that to change.
But I think there is a big difference between simply fixing a mistake and figuring out why it happened.
If a seam puckers, why did it pucker? Was the tension wrong? Was the needle too large? Was the thread too heavy for the fabric? Did the fabric stretch while sewing?
If the machine starts skipping stitches, don’t just sew over the area again and hope it behaves better. Check the needle, threading, thread, presser foot, tension, stitch settings, and fabric. There can be quite a few causes, which is why I wrote a whole troubleshooting guide about sewing machines skipping stitches.
The same thinking applies when a neckline stretches out, two seams don’t match, a knit hem becomes wavy, or the fabric suddenly gets pulled down through the throat plate.
A wavy knit hem might mean the fabric stretched as you sewed, the layers were feeding unevenly, or the stitch and setup were not right for that particular knit.
If the fabric gets pulled into the machine, there are several things worth checking instead of assuming the sewing machine is simply misbehaving. I have a complete guide on why a sewing machine pulls fabric into the throat plate and how to fix it.
Sometimes the solution is very simple. Sometimes it takes several tests on scraps before you figure it out. And sometimes you realize that the fabric, technique, or tool you chose simply wasn’t a good combination.
That is still useful information.
I think this is one of the biggest differences experience makes in sewing. Instead of thinking, This didn’t work, you start asking, Why didn’t this work?
And once you know the reason, you have something useful to take to the next project.
If you are dealing with a problem and don’t know where to begin, my guide on common sewing machine problems and solutions is a good starting point. It covers many of the problems that can interrupt an otherwise perfectly good sewing afternoon.
A mistake on one project doesn’t have to be wasted. Sometimes it becomes exactly the bit of sewing knowledge that prevents the same problem on the next one.
Better Doesn’t Mean Perfect
Becoming a better sewist does not mean sewing like a professional.
You do not need to own every machine, master tailoring, know every technique, or make every project look factory-made inside and out. For most of us, sewing is a hobby, and the goal is not perfection.
What matters more is gradually understanding your fabric, tools, machine, thread, needles, stitches, and techniques well enough to make better choices.
Sometimes that means knowing which needle to use. Sometimes it means reaching for a different presser foot, testing a stitch on a scrap, changing the thread, reading the instructions before cutting, or stopping to figure out why something went wrong.
And there will always be more to learn. That is part of what keeps sewing interesting.
The more we understand why things work — and why they sometimes don’t — the easier it becomes to handle unfamiliar fabrics, new techniques, and the inevitable sewing problems that show up along the way.
What sewing rule have you learned through experience? Is there something you do now that has made a noticeable difference in your sewing?
Did you find this article helpful? Save the pin below to one of your sewing boards so you can easily find it again when you need it, and follow me on Pinterest for more tips, tutorials, and inspiration!

latest posts
- 10 Rules That Made Me a Better Sewist
- How to Make a Lightweight Summer Neck Scarf with a Lettuce Hem
- What Sewists Hate About Sewing: Common Complaints and Practical Fixes
- Knit Presser Foot: How It Works, How to Use It, and My Sewing Tests
- How to Sew Neat Mitered Corners at Acute Angles
- Sewing Machine Needle Organization: A Clever System I Tried
- DIY Car Armrest Organizer: Sewing Tutorial
- Easy DIY Potholder Sewing Tutorial: Better Shape, Better Grip, Smart New Design
- How to Buy a Sewing Machine (Even If You Already Have 10)