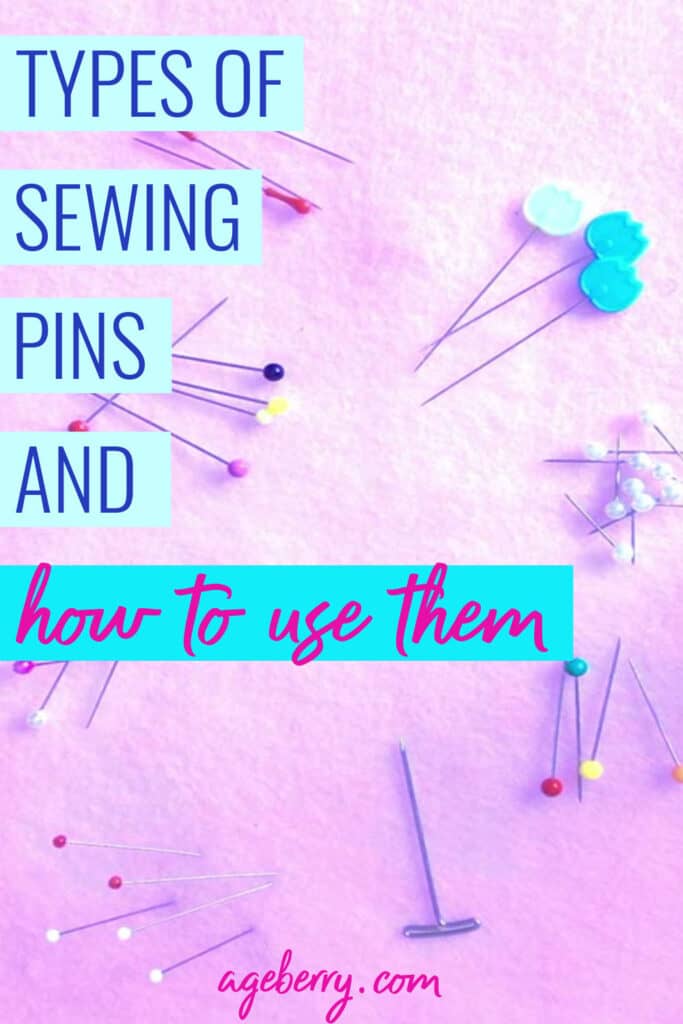
Types of sewing pins and their uses: all you need to know about straight pins for sewing
Today we are going to learn about different types of sewing pins and their uses.

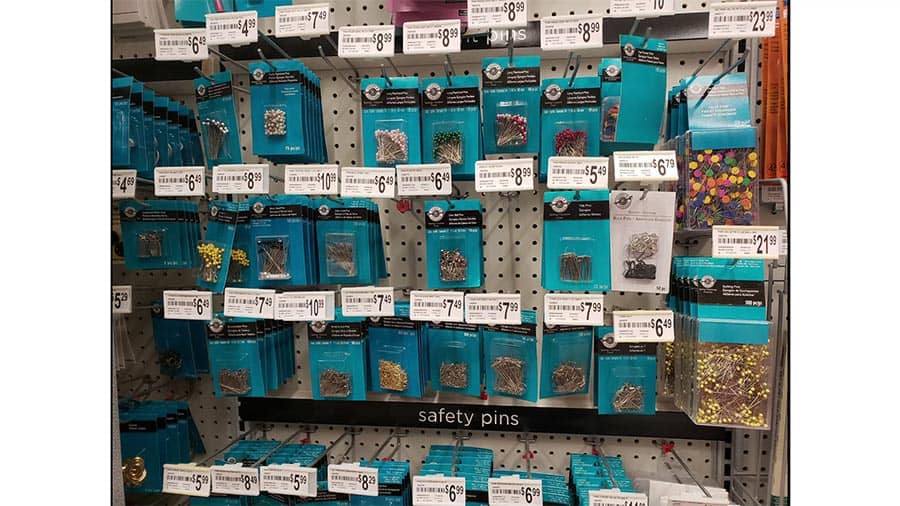
A few years ago I walked into Michael’s store (it was in Canada) to buy some pins for sewing and was surprised to find an entire aisle full of different types. Which kind do I need? It was a daunting experience, to say the least. And I left without buying anything because I truly couldn’t decide in the store and wanted to go online to read about different types of sewing pins.
But the next day I was in a dollar store and they had pins for sewing – only ONE type! So it was easy to decide and I happily bought these nice sparkling pins that had large bright heads. I thought they would be great for my projects and their big heads would make it easy for me to pull them out as I was sewing.
But soon I learned the hard way that there are different types of sewing pins for a reason. Those dollar store pins were too thick for most of my projects, and they had very blunt tips.
If you ask any sewist about sewing pins, you’ll find out they are a must-have tool for sewing as they perform many crucial tasks. While it is possible to sew without using pins for every single project, they help tremendously with:
- Holding the pattern to the fabric to prevent shifting during cutting
- Temporarily holding fabrics and materials together while you sew
- Mark places in the fabric where you need to start or stop stitching
- Holding trim in place while you stitch
- Pinning up hems to keep them in place
With the responsibility of all these jobs sitting on their figurative shoulders, it makes sense that no one-kind-fits-all approach will work. So we have different kinds of pins to do different jobs.
You’ll find sewing pins that come in different thicknesses and lengths, pins that have different tips, or pinheads that are made of different materials. Each style has a specific purpose, and I’m going to share that with you in this post because (as with any project) using the right tool for the job at hand will yield the best results.
Keep reading to learn about the different types of sewing pins, the part of sewing pins and how they vary, and how to choose the best pin for your project.
Note: Some of the links on this page are affiliate links. This means I will receive a commission if you order a product through one of my links. I only recommend products I believe in and use myself.
Straight Pins For Sewing
Straight pins are the most commonly used pin for sewing, also known as basting pins or hemming pins. You’ll choose which option to use based on:
- The type of head
- Length of the pin
- Thickness
- The pin tip
- The pin material
When you factor in different ways to combine those options, you end up with a lot of possible combinations. And that’s why you have so many different types of sewing pins for purchase at the sewing store.
Here’s how to tackle this potentially daunting situation: Before you start your project, decide what qualities you need for each of the pin parts. Then, put them together and go find the pin that fits your needs.
What is The “Head”
The head of the pin is the piece at the end that you can grab and hold onto. Heads can vary in shape, size, color, and materials. Just like everything with sewing pins, there are reasons for this. Let’s dive in.
Pins can have plastic heads, glass heads, or flat metal heads. Each one has a different purpose. In order to know which head you need, you need to know the pros and cons of each style.
Plastic Heads
Pros: This common style comes in a large variety, easy for grabbing and seeing the pins against your fabric.
Cons: These heads can melt from the heat of the iron, and potentially ruin both your fabric and your iron.
Notes: These are a good all-around pin as long as you don’t need to iron your project. You can also find the heads in different shapes (such as a heart), which can help make them easier to grab.
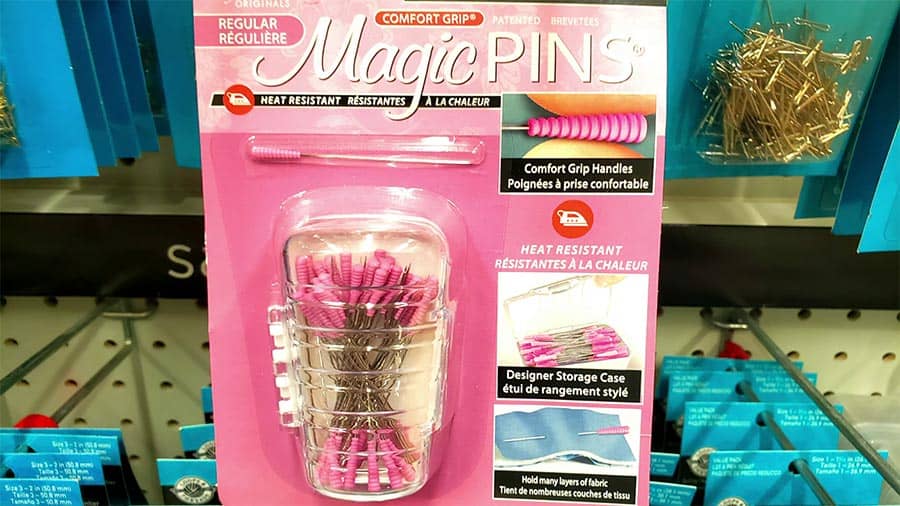
Recently they made NOVELTY pins with plastic heads that are heat resistant. In stores, they are called magic pins. These heads have a cylindrical shape. They are called magic pins I guess because they are heat resistant and easy to grab.
Glass Heads
Pros: Glass head pins are practically identical to plastic heads except that the glass head won’t melt when ironed. This style is often a thinner pin, making them good for use with fussier fabrics that show holes more easily – like silk.
Cons: They can bend more easily, making them harder to use for beginners. Also, they were more expensive.
Notes: These pins offer the best of both the plastic head and flat head pins.
Flat Head (aka Dressmaker) Pins
Pros: Flat head pins have been around the longest and are good for hand sewing and for use when ironing your project.
Cons: They can be difficult to spot when used on textured or patterned fabrics.
Notes: These pins are usually made of stainless steel and should be rust-proof. Plus, they are strong but thin enough that they will hold most fabrics together without creating large holes.
20 years ago I used mostly this type of pins but now I don’t even have them and prefer glass head pins.
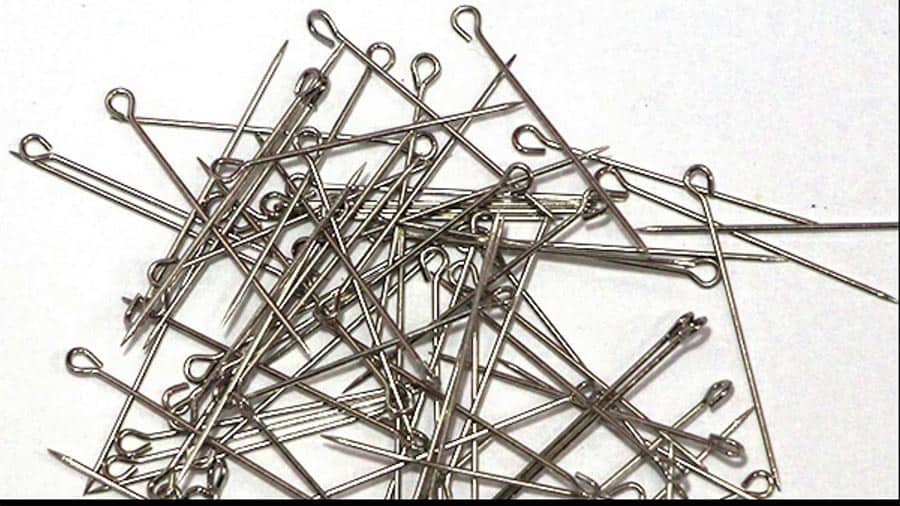
The metal head can also resemble a nail head. Extra-fine silk pins have this kind of head. So if you sew a lot with natural silk fabric it makes sense to use them.
Pin Length and Why it’s Important
The shaft of a sewing pin is that skinny metal part that extends from the head of the pin to the tip of the pin, and it can vary in length.
Some sewing projects need long pins while others require short pins.
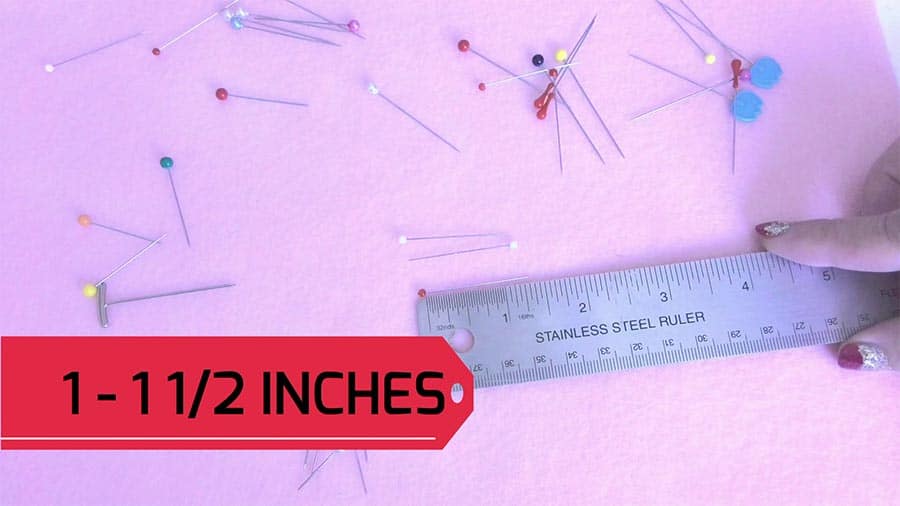
How do you know which pin length to use for what project? Basically, for most projects using light to medium-weight fabrics, you’ll likely use medium-length pins that are between 1 and 1½ inches long.
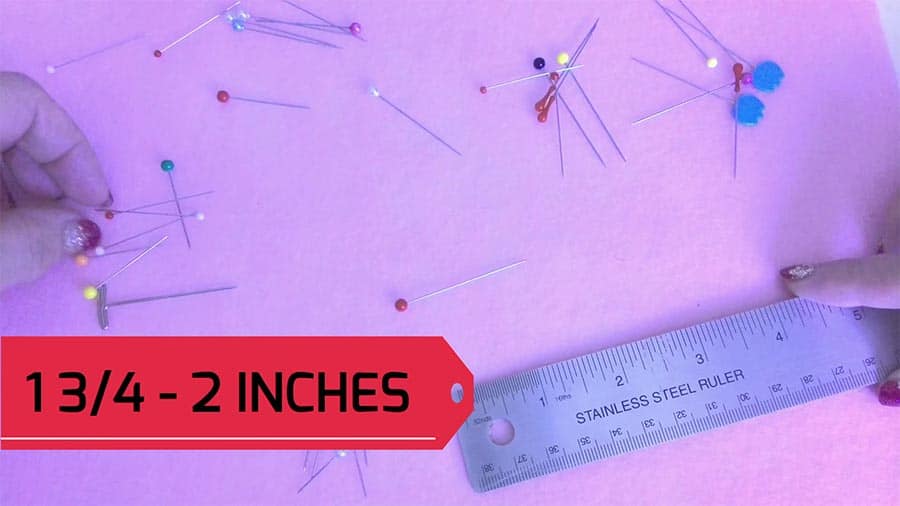
Quilting and other multi-layered projects require longer pins in order to pin through several layers of fabric without being concerned that the pins will fall out. Common quilting pin lengths are 1½ to 2 inches.
Short pins are best for very small projects or attaching appliqués, sequins, or trims. They are even called applique pins sometimes.
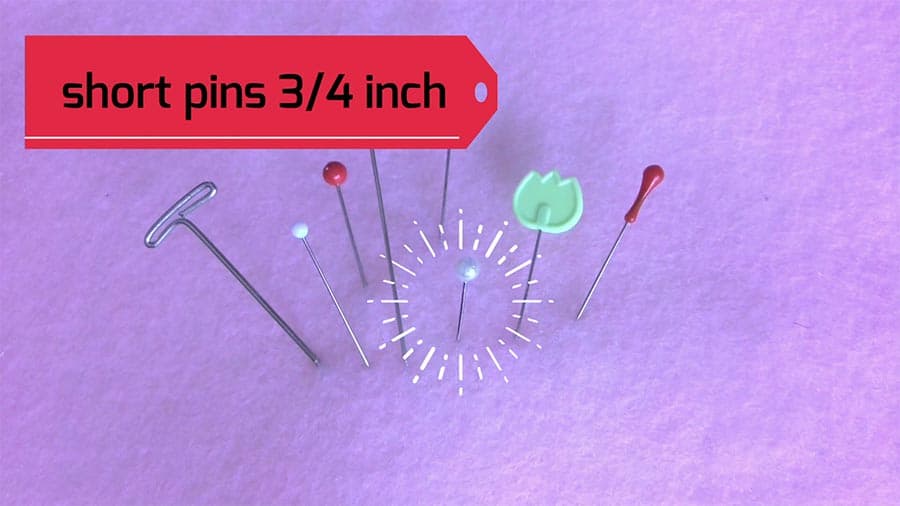
You can use them to position and hold appliques in place. Their short length is great for close pinning of small appliques. They are small but secure the layers well and are tough enough to go through the appliqué, the stabilizer, and the fabric.
But basically, any project where you need pins very close together and long pins may overlap awkwardly is a good one for short pins.
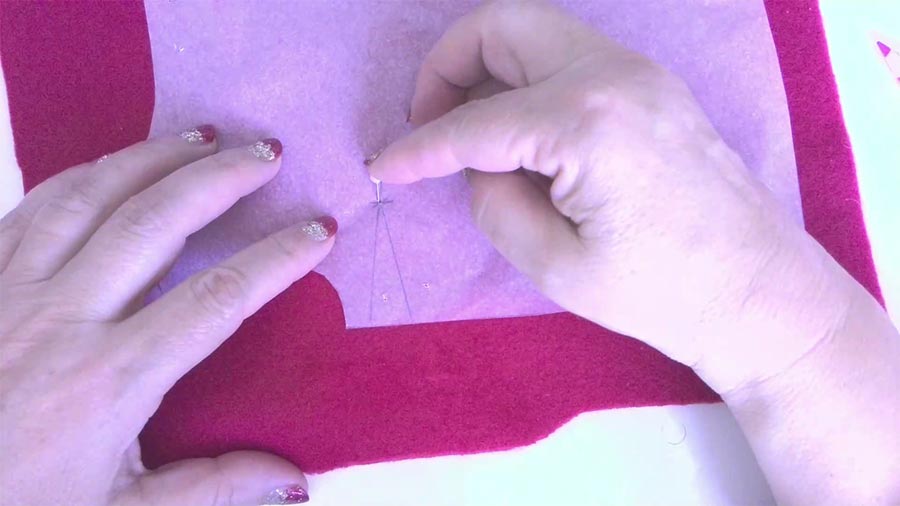
I like to mark my fabric with short pins and transfer pattern lines to my fabric because sometimes you just can’t mark fleece or fur with a regular marker because they don’t leave any visible lines, so I use short pins instead with big heads. I don’t use longer pins because they scratch me easily. So pin exactly in the dart’s point and afterward mark the point on both pattern pieces.
✅ Related tutorial: How To Sew Darts: Tips And Techniques For Different Types Of Darts
What is Pin Width (or Thickness)?
The goal is to use the thinnest pin you can to accomplish the project you are working on to avoid leaving unsightly holes. The type of fabric you are using as well as the project you are doing will determine your pin thickness.
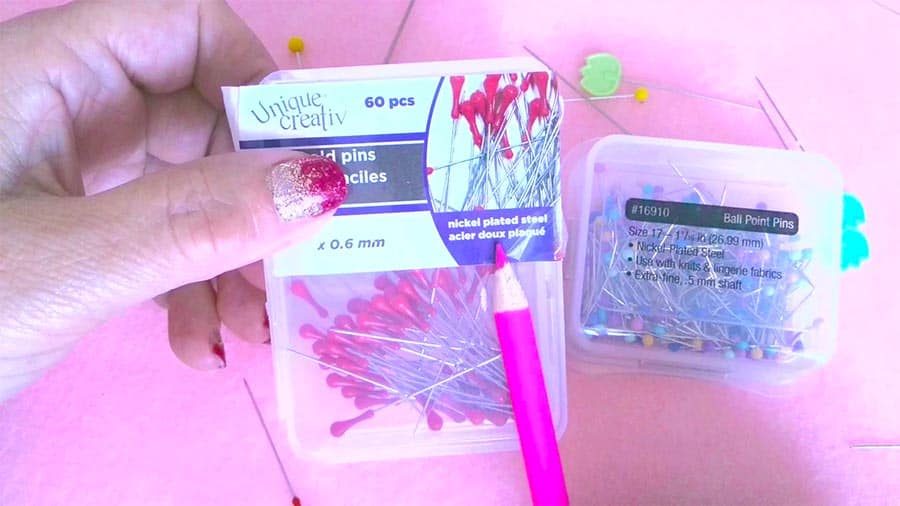
Use “regular” pins for most projects; those pins will measure 0.6mm in thickness.
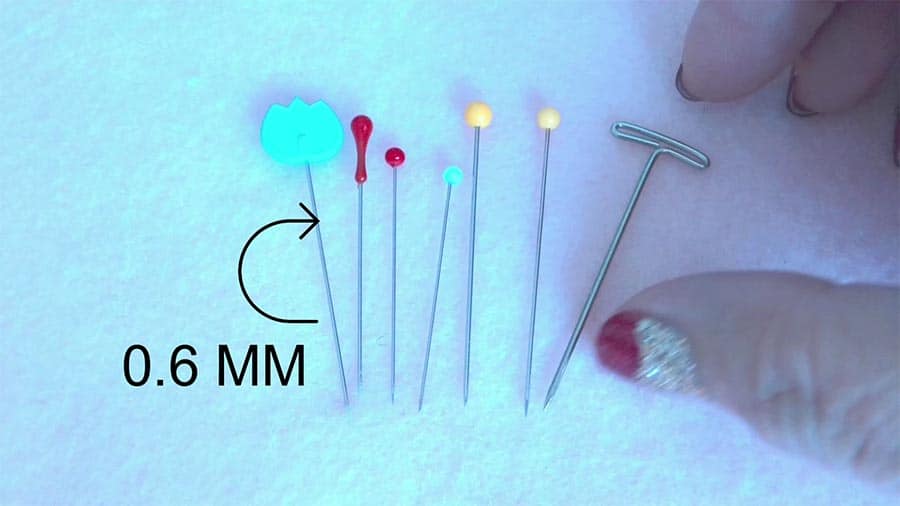
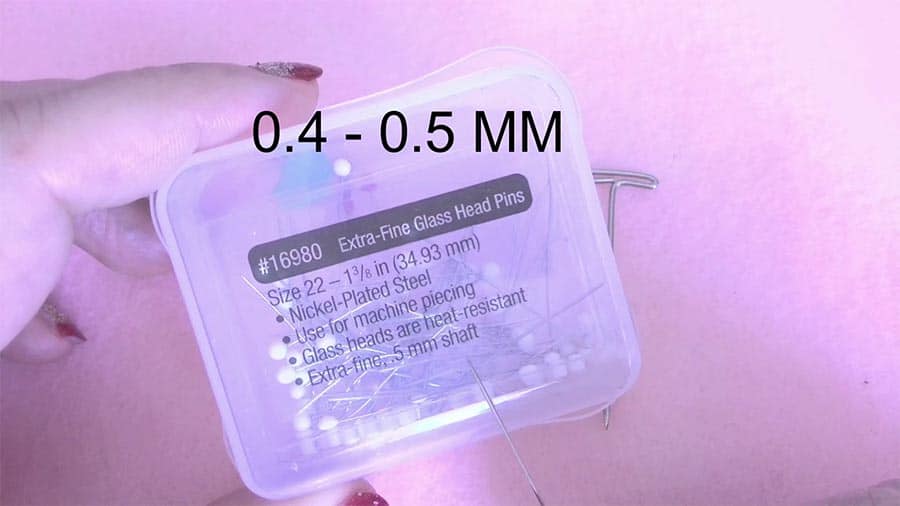
When working with less forgiving fabrics, like silk, use thinner silk pins that measure 0.4 or 0.5mm in thickness.
✅ Related tutorial: How to sew silk/tips/ types of stitches and seams / how to hem silk fabric
Finally, when working with heavy fabrics, you may need to use pins that measure 0.7 or 0.8mm thick.
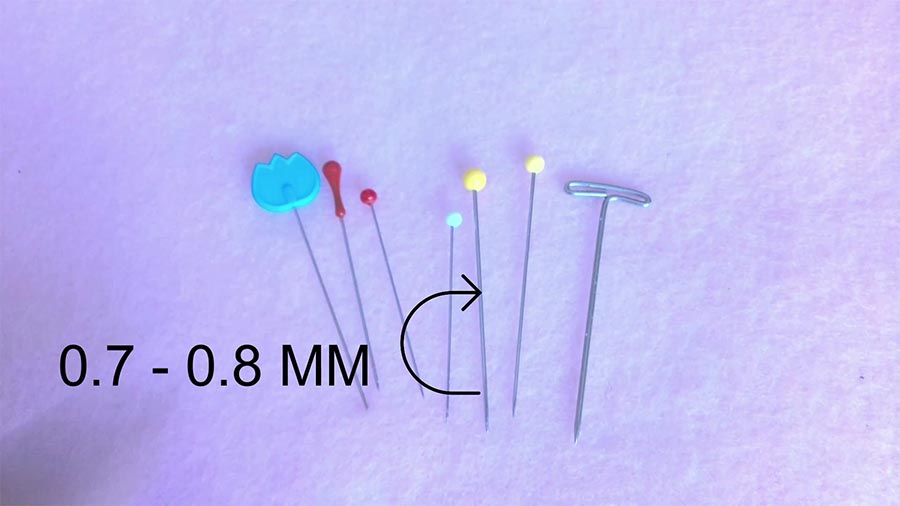
Make sure to test the pins in your fabric first before committing to a thickness.
Thicker pins will leave holes in delicate silk fabric, for example.
But if you use thin pins for the heavy fabric they will bend easily. Look what happens to a thin pin if I use it for a quilt project. Heavier fabrics require thicker pins.
What is the Pin Tip?
Just as the head, length, and width of pins can vary, so can the tip. You can find sharp, extra-sharp, or ballpoint (rounded, blunt).
Sharp tips are the most common kind, which you will use for the majority of your projects. You’ll only need different tips for a few projects.
Extra-sharp (or extra-fine) points are usually on very thin pins and are meant to be used on projects using satin, silk, and other delicate projects.
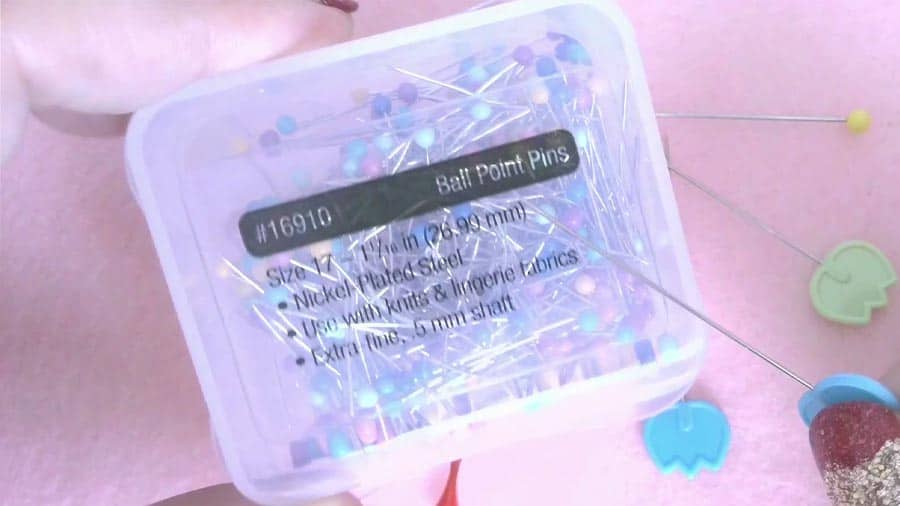
Ballpoint tips are more rounded or blunt, and these tips are used for stretchy fabrics and knits so that the tips don’t snag the fabric. These tips push the fibers aside instead of piercing them.
They are like ballpoint sewing needles. These pins are great for very delicate knit fabric, they will leave no holes.
✅ Related tutorial: How to sew knit fabric | 23 expert tips for beginners
You have to remember that a pin can become blunt in time. Dull pins are no good to use, they can pierce the fabric, break the fibers, and leave big holes. So from time to time, you will need to change your pins and buy new ones.
How can you determine that the pin became dull? I usually hear a punching sound when the bad pin enters the fabric. I usually throw away pins like this so they don’t break my fabric. And the good sharp pin doesn’t make any sound.
Sewing Pin Materials
It’s important to be aware of the metal content of sewing pins in case you are allergic to certain metals or live in a humid area. Sewing pins can be made of stainless steel, nickel-plated, chrome-plated, or brass.
Nickel is a common allergen, Nickel is one of the most common causes of allergic contact dermatitis: a skin rash or irritation caused by touching nickel. So make sure you are not allergic to nickel if you use nickel-plated pins.
But if you are not the pins that contain nickel as nickel-plated pins are the most rust resistant.
Most pins that I have are nickel-plated steel.
Let’s continue our talk about Types of Sewing Pins
The confusing thing about sewing pins is that when you walk into an aisle in the store, you see dozens of different names for pins. However, when you break it down into simple terms, those varieties are just variations of straight pins.
And now that you know about the parts of the pin, I can break down the different types of sewing pins in a way that makes sense.
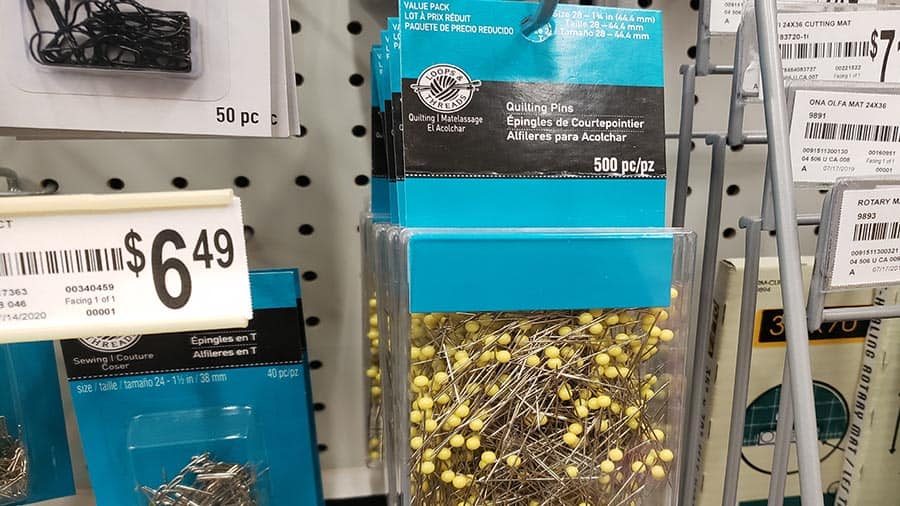
Quilting Pins
Quilting pins are longer and stronger than normal plastic head pins so that they can hold multiple layers of a quilt together. They have big, brightly colored heads to make them easy to spot. As these pins are longer and thicker than other pins, take care to only use them with fabric that can handle them
Since ironing usually occurs before or after pinning, melting the plastic heads isn’t normally a problem or concern.
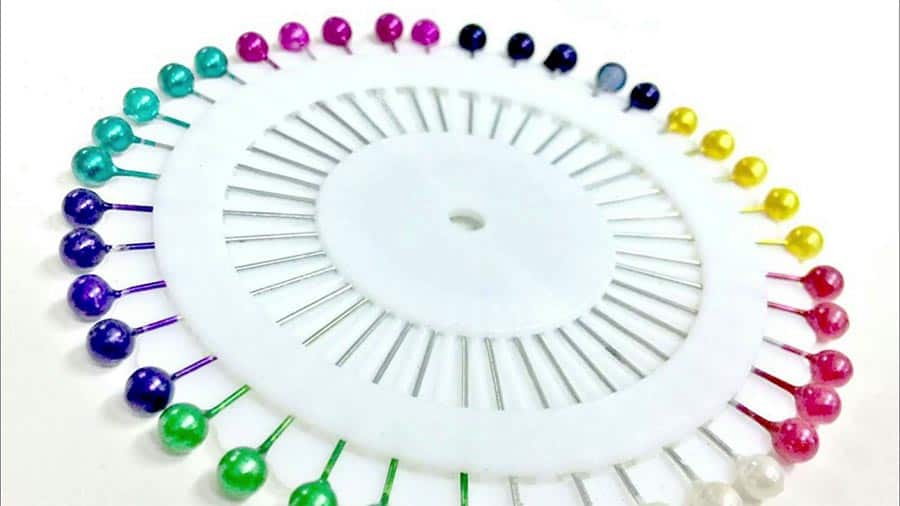
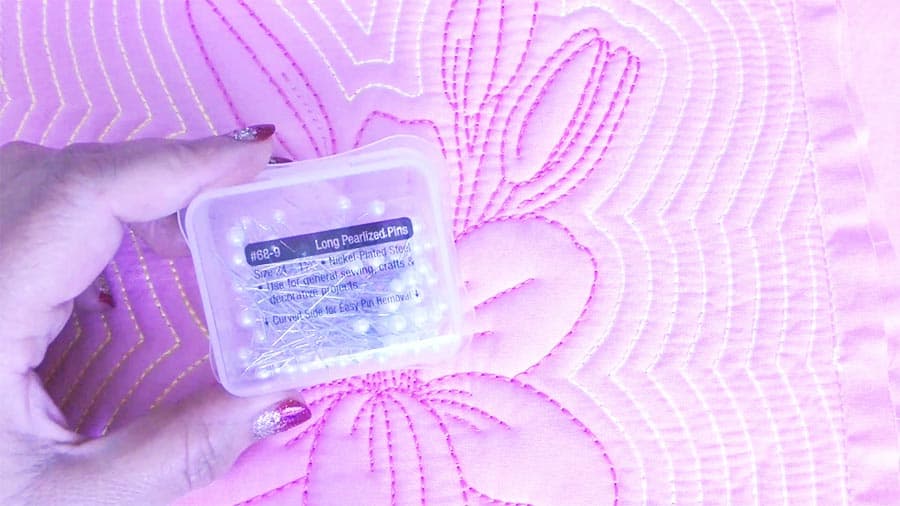
Pearl Head Pins
Pearl head pins are shaped similar to plastic head pins but look nice.
Let me tell you a fun story. Once I bought a box of pearlized pins but in the description, it was a typo and it was written “paralized“. And I am not the only one. I found this question on Amazon
The last detail in the description says pins are paralized. How are pins “paralized”?
And the seller wrote the answer: “Paralyzed” is just an unfortunate typo for “pearlized” referring to the heads. We’ll contact Amazon to help get that fixed, thanks for pointing it out!
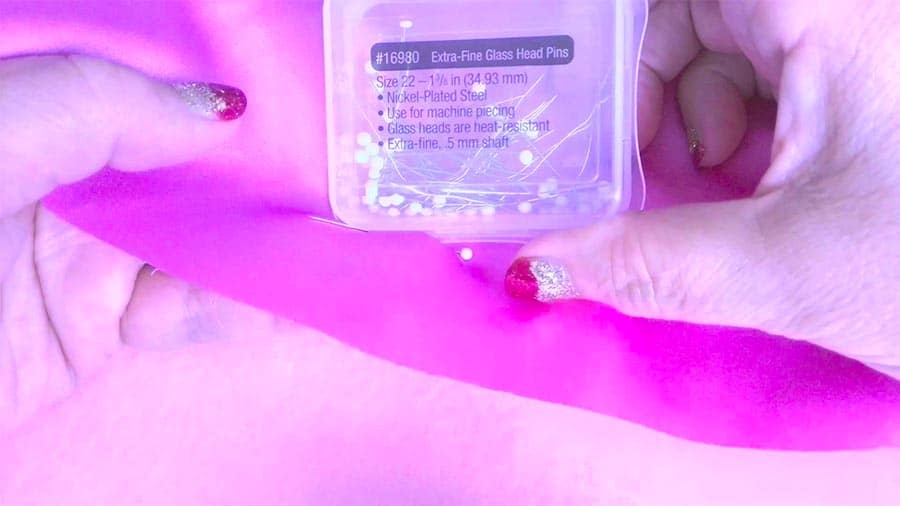
Silk Pins
Silk isn’t a self-repairing fabric, so you’ll want to use extra-fine pins when working with SILK to prevent large, noticeable holes in your finished product. Most of the time silk pins are all metal and come in a variety of weights.
But I have silk pins with small glass heads. They are easier to grasp and don’t leave holes in silk fabric so I prefer to use them.
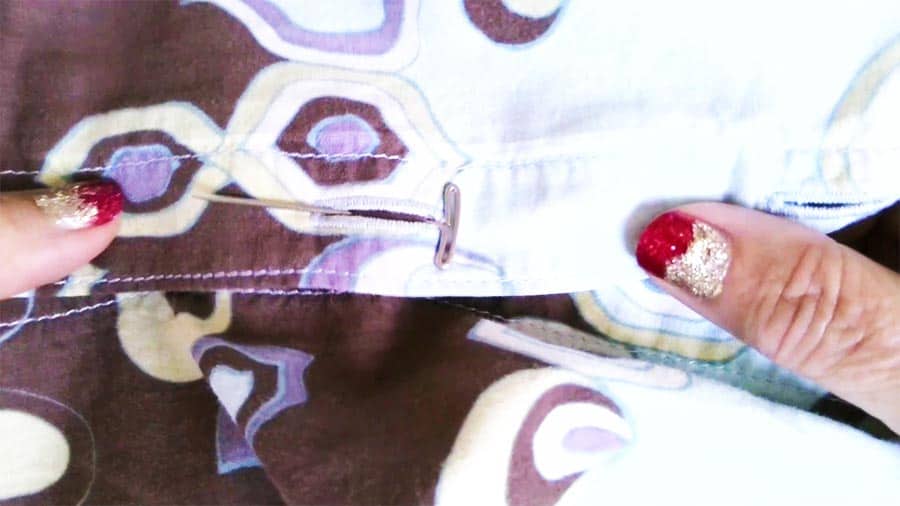
T-Pins
Featuring a T-shaped head, these heavy-duty pins are great to use with upholstery, tough fabrics or pinning through buttonholes.
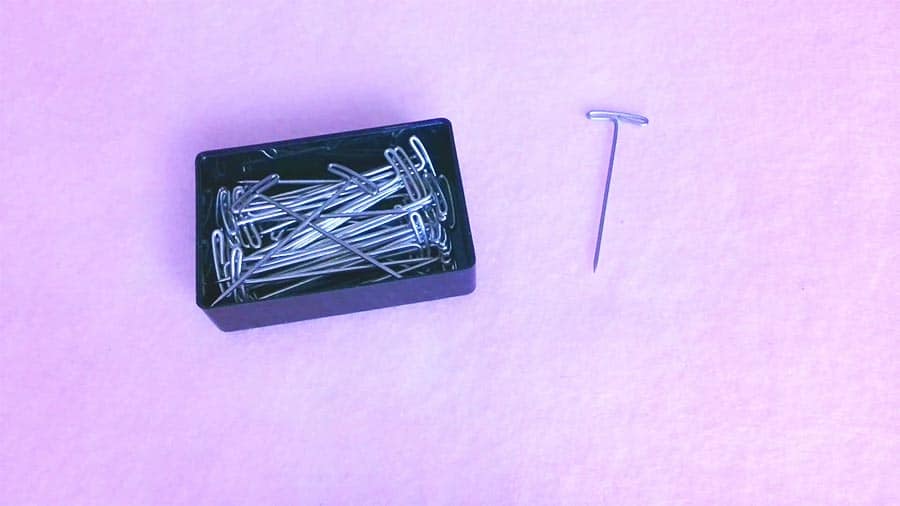
If you pin the t-pin like this in the image below the layers will stay put and the buttonhole can’t be open, you need it sometimes, right?
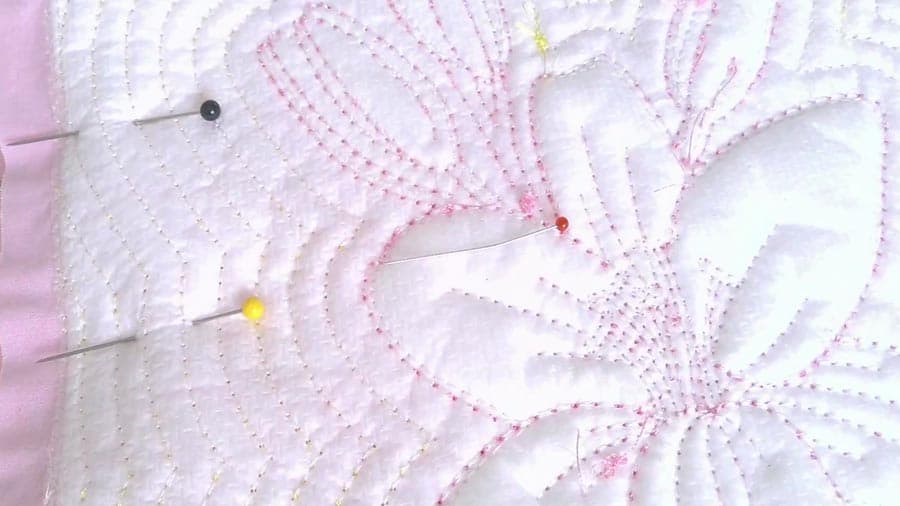
But I use t-pins in my embroidery projects, especially with big hoops. Let me show you. So, you take a big hoop, not like this, but bigger. Hoop an embroidery stabilizer. And now I pin like this, very close to the hoop sides, so during embroidery, the stabilizer doesn’t SHRINK especially when the embroidery design is very dense.
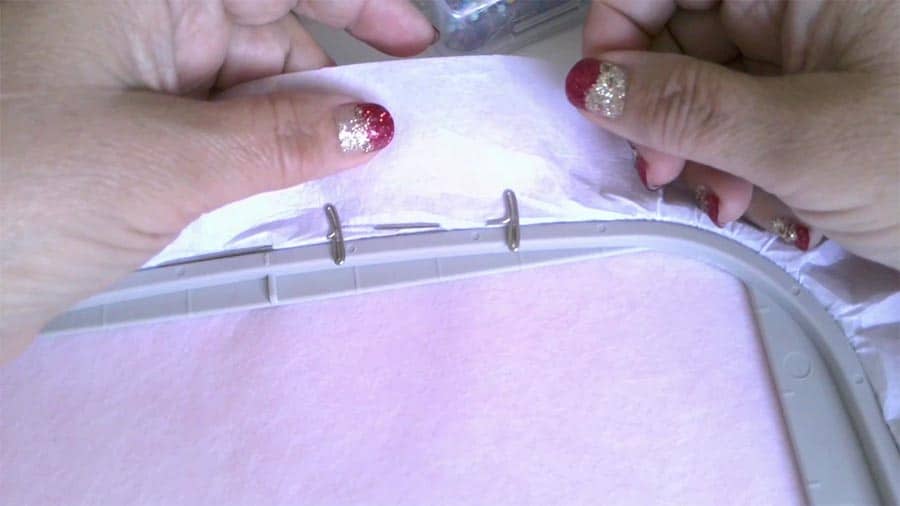
If you would like to see how I use these pins for my embroidery projects check out this tutorial
In The Hoop Embroidery Designs: Halloween Treat Bags
Decorative Straight Pins
Usually, have bigger heads to make it even easier to see them. Plus, they’re just fun to use.

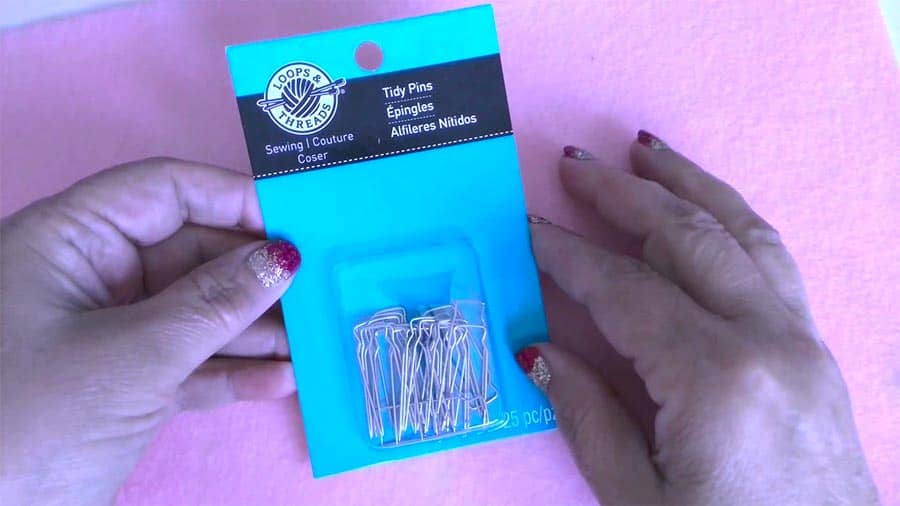
Tidy Pins
Let me show you also these pins called tidy pins. What are these? Do you know? They are used for holding different covers in place: arm covers on a couch or chair, slipcovers, and bed skirts. So if you sew these kinds of covers you can use these pins.
Common Sewing Pin Manufacturers
Dollar store pins – they are not suitable for sewing, they are very BAD quality, and they break the fabric.
I like Dollar Store products as much as the next person – except when it comes to sewing. I have found that Dollar Store pins are not of good quality and tend to break the fabric.
Instead, it’s worth paying a little more for truly good quality. I recommend these brands:
✅ Related post: Types of Hand Sewing Needles and Their Uses: A Guide for Modern Sewists
How to Safely Use and Discard Bent Sewing Pins
To safely use pins while sewing, use these tips:
- Always store pins in a safe place (pin cushion, magnetic box, etc)
- Use a thimble to protect your fingers
- Discard rusty pins
- Discard broken pins
- When using pins in your projects, always keep the sharp tip pointed away from you
To safely discard pins, wrap the tip in a piece of tape and throw it away. Or, you could put the pins in an old, empty medicine bottle and throw it away when it’s full.
IMPORTANT SAFETY TIP
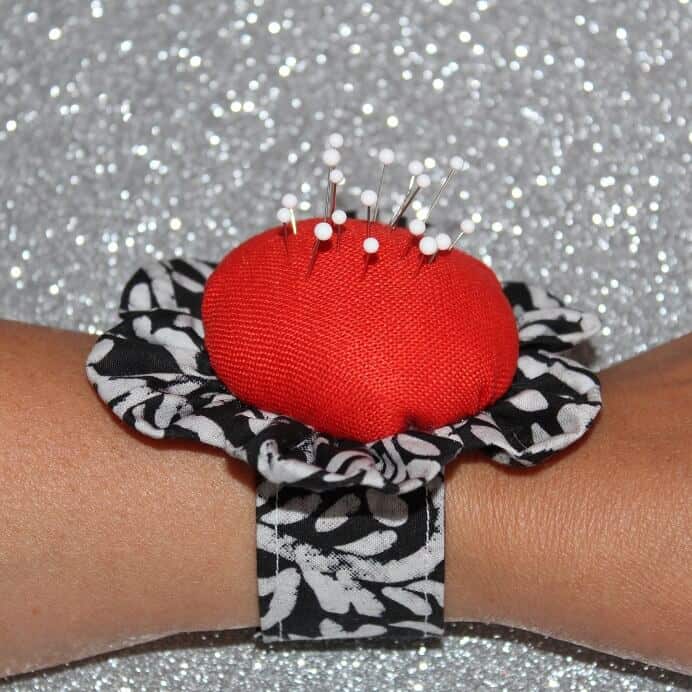
As my friend Kathy observed (see the comments below) you should NEVER place pins in your mouth. Never. There is a precedent that may convince you why this is not a good idea: A teen has a pin in his heart surgically removed. I use instead an easy-to-access pincushion which can be attached to the wrist and is very handy while you sew.
Do You Sew Over Pins?
Well, 20 years ago I would say definitely yes. You see when I learned to sew I was told that it’s perfectly fine to sew over pins because they are thin. And I did it all the time and liked it.
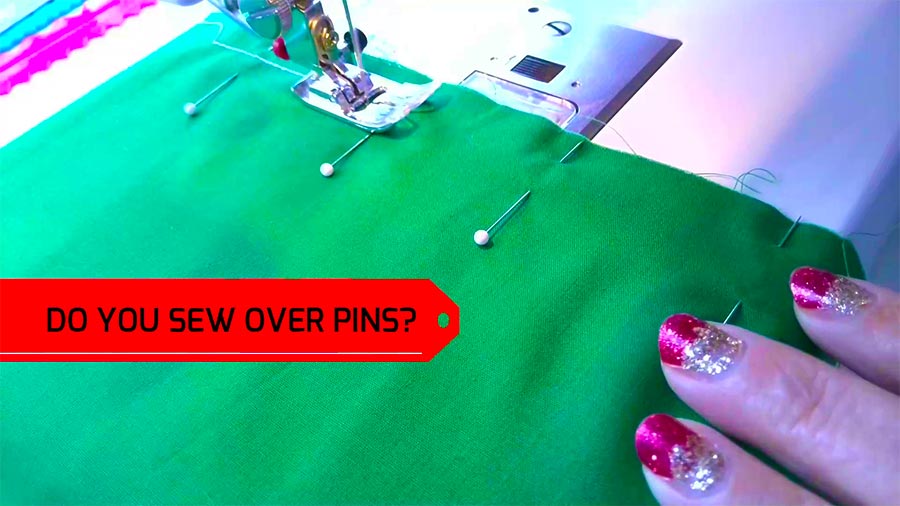
But now, after so many sewing projects, I will say – don’t do it, don’t sew over pins, it’s quite dangerous.
Look what happens to pins and the sewing machine needle when the needle steps on a pin. At the same time, the fabric goes in the hole in the needle plate under the presser foot and you can’t take it out of there without cutting your project. Yes, it doesn’t happen very often, only once in a while, but it does happen. So no, don’t sew over pins. Take them out as soon as your presser foot reaches them.
Sewing pins, while not an absolute necessity, are a vital tool for sewists. By knowing the qualities of the fabric you’re using in your project, you can determine the type of sewing pin you’ll need to use. It all seems very complicated from the beginning, but with a little practice, you’ll soon be practically an expert.
If you’d like to watch the video version, hit the Play button below.
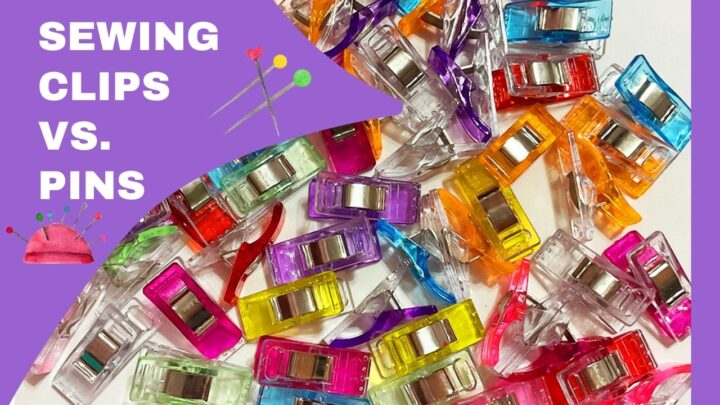
Using sewing pins is the time-tested standard, but we also have sewing clips that many sewists now prefer over pins. You might be interested in my article Sewing Clips vs Pins | Which To Choose?
Did you find this tutorial helpful? If so, save this pin (see below) on your sewing board so you can come to this tutorial later when you need to know the types of sewing pins and follow me on Pinterest for more tips, tutorials, and inspiration!
latest posts
- Butterfly Quilt Block Tutorial – Foundation Paper Piecing
- How To Sew Quilt Squares So The Corners Match
- Sewing With Fork Pins: How They Help With Pattern Matching, Slippery Fabric, And Seams
- How Much Fabric Do I Need? 21 Helpful Tips For Calculating Fabric Yardage
- Easy Simple Sewing Project: Fabric Jar Opener
- DIY Oven Mitts: Step-by-Step Sewing Tutorial
- Easy DIY Potholder: New Design
- Tailor’s Clapper: What It Does, Why It Works, And How To Use It Right
- Heat Resistant Batting for Sewing: What It Is, How It Works, and What Makes a Difference