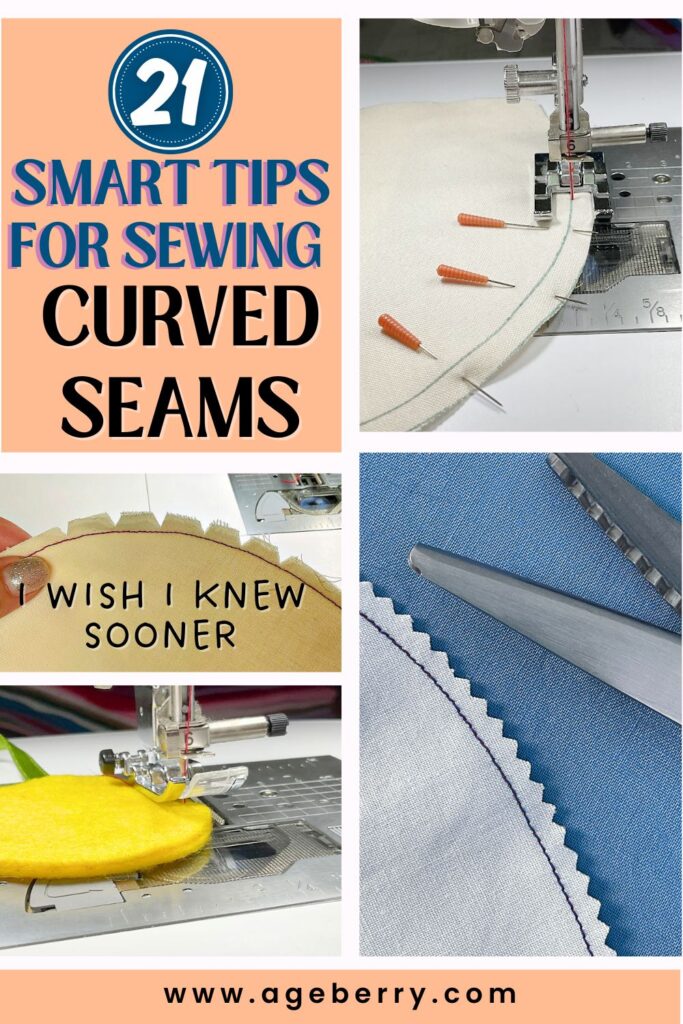
How To Sew Curved Seams: 21 Helpful Ideas for Sewing Round Edges
Curved seams show up everywhere in sewing—necklines, armholes, princess seams, collars, bags, softies, and more. But ask any sewist (beginner or seasoned), and they’ll likely admit the same thing: curves are tricky. They can pucker, stretch, twist, or just not lie quite right.
I’ve had curves that looked perfect until I turned the fabric right side out … and suddenly the seam looked wavy, bulky, or off-balance. Over time, I found that there isn’t one big secret to perfect curves—it’s all the small things that make a difference.
In this guide, I’m sharing 21 simple, reliable tips to help you sew curves without pleats, puckering, or warping. These are habits I use again and again, from adjusting stitch length to pressing with a mini iron.
This is not a list of fancy tricks. It’s a guide for real-life sewing, with tools and techniques that work whether you’re making a summer dress or a stuffed toy.
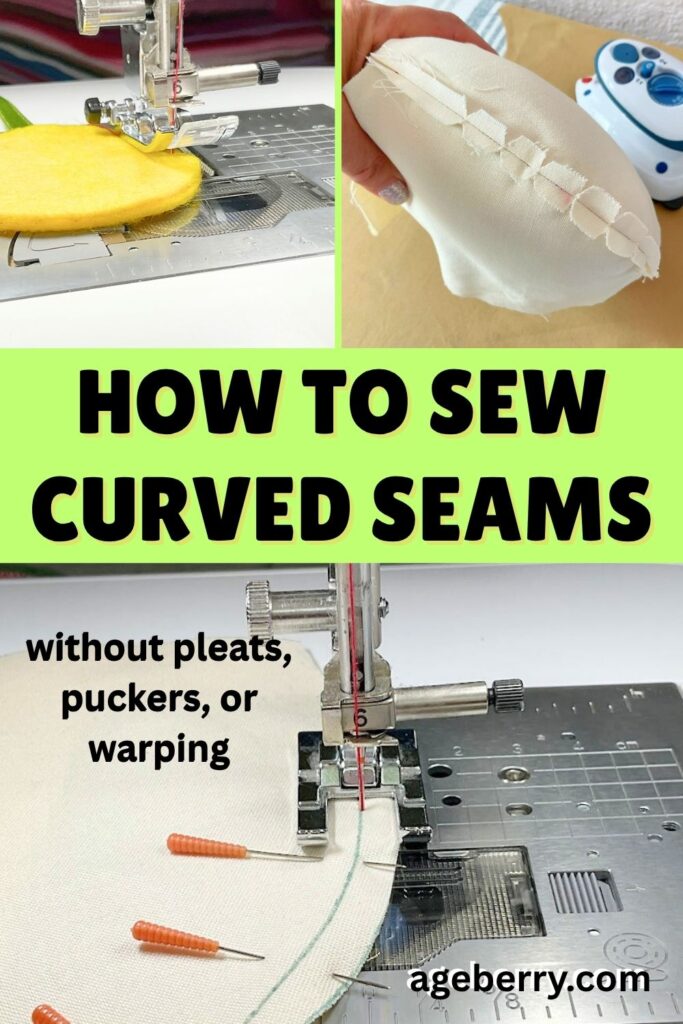
#1. Shorten the Stitch Length
Set your stitch length to around 1.8–2.0mm when sewing sharp curves. This gives you more control and helps shape the curve without jagged angles.
For wider, gentle curves, you might not need to shorten the stitch length. A standard 2.4–2.6mm often works just fine in those cases.
But don’t go too short. Very short stitches can lead to a few problems:
- Tight puckering: Fabric may bunch up along the seam because the stitches are packed too closely.
- Weakened seam: A line of very short stitches becomes more perforated. This makes the fabric easier to tear, especially if the seam is under stress.
- Harder to remove stitches: If you need to unpick the seam, tiny stitches are much more difficult and time-consuming to rip out cleanly.
Tip: Adjust stitch length based on the curve. The tighter the curve, the shorter the stitch – but only to a point.
Before sewing your final piece, test different stitch lengths on a scrap fabric. Curve the fabric as you would in your project and see how the stitch length changes the smoothness of the line. You might find that even a slight adjustment improves the curve’s appearance dramatically.
✅ Related tutorial: What is the stitch length and how to adjust it for different fabrics
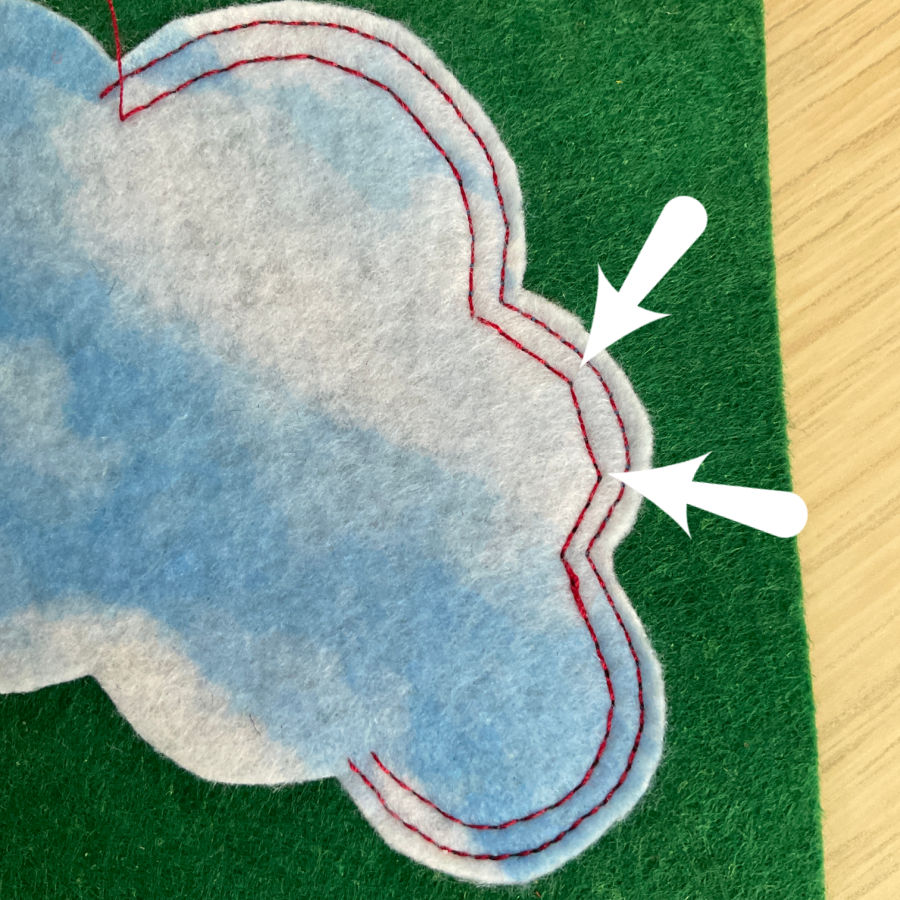
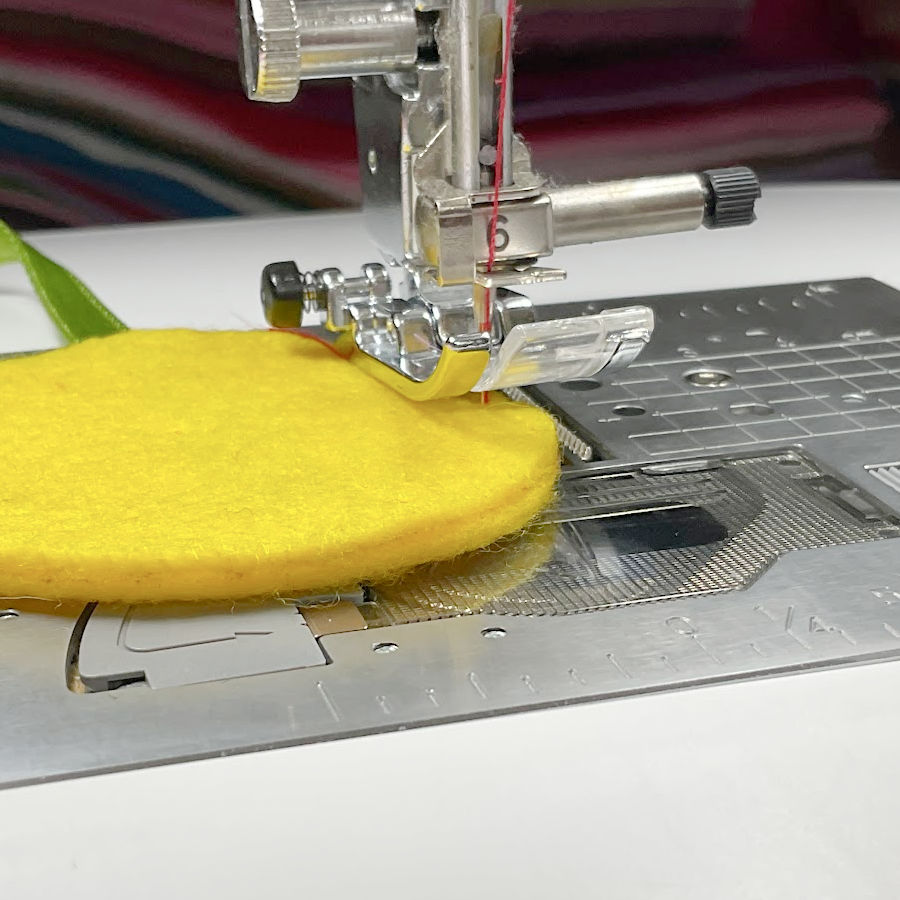
This image is an example (a bit exaggerated though) to show the effect of stitch length on curved seams: it’s easier to follow the curve with a shorter stitch.
The inner stitch line, sewn with a longer stitch length – 3 mm, looks jagged and angular. It can’t follow the curve smoothly because the stitches are too far apart to adjust gradually.
The outer stitch line, made with a shorter stitch length – 2 mm, hugs the curve more evenly. The smaller stitches allow the line to shift direction little by little, resulting in a much smoother shape.
While this project is done in felt and meant for demonstration, the principle holds true in real projects too—especially on tight curves like collars, appliqué edges, or toy details.
#2. Staystitch Curves First
Staystitching means sewing a single line of stitches just inside the seam allowance before you join any pieces together. This simple step keeps curved edges from stretching out or becoming wavy as you work with them.
Use stay stitching when you’re sewing garments or larger structured projects. Necklines, armholes, and curved seams like princess seams benefit the most. These areas are often cut on the bias or partial bias, which makes them prone to stretching with every touch and pin.
Skip stay stitching on small, tightly curved pieces that won’t experience much stress. If you’re sewing a tiny softie or the head of a toy cat, you don’t need to staystitch.
Tip: Use a regular straight stitch with a standard length (around 2.5mm). Sew just inside the seam allowance, about 1/8 inch from the edge. Staystitch each curved edge immediately after cutting, before you handle the fabric too much
For a full tutorial on how and where to staystitch, see my guide on staystitching – Stay Stitching 101: Essential Techniques for Fabric Stabilization.
Note: Some of the links on this page are affiliate links. This means I will receive a commission if you order a product through one of my links. I only recommend products I believe in and use myself.
#3. Use Lightweight Interfacing
Some curved areas need support. Collars, facings, and shaped hems often benefit from lightweight fusible interfacing.
Choose a thin, flexible interfacing that adds stability without making the fabric stiff or bulky. This keeps the curve smooth while helping it hold its shape over time.
Apply the interfacing before sewing, following the manufacturer’s instructions. Press gently and evenly, using a pressing cloth to protect delicate fabrics.
Tip: Test your interfacing on a scrap first. It should blend with your fabric not fight against it.
On knit fabrics I usually use knit stay tape to prevent neckline and armhole edges from stretching. But I also use it on woven fabrics sometimes instead of stay stitching. It’s quick to apply and prevents distortion before it starts.
You can read more about how I use it in my full guide Knit Stay Tape | Why And How To Use It.

#4. Adjust Sewing Speed
Slow down when sewing tight curves. It helps you stay in control and keeps the fabric from slipping or bunching under the presser foot.
Fast stitching can cause your machine to overshoot the curve, especially on small curves like armholes or stuffed toy limbs.
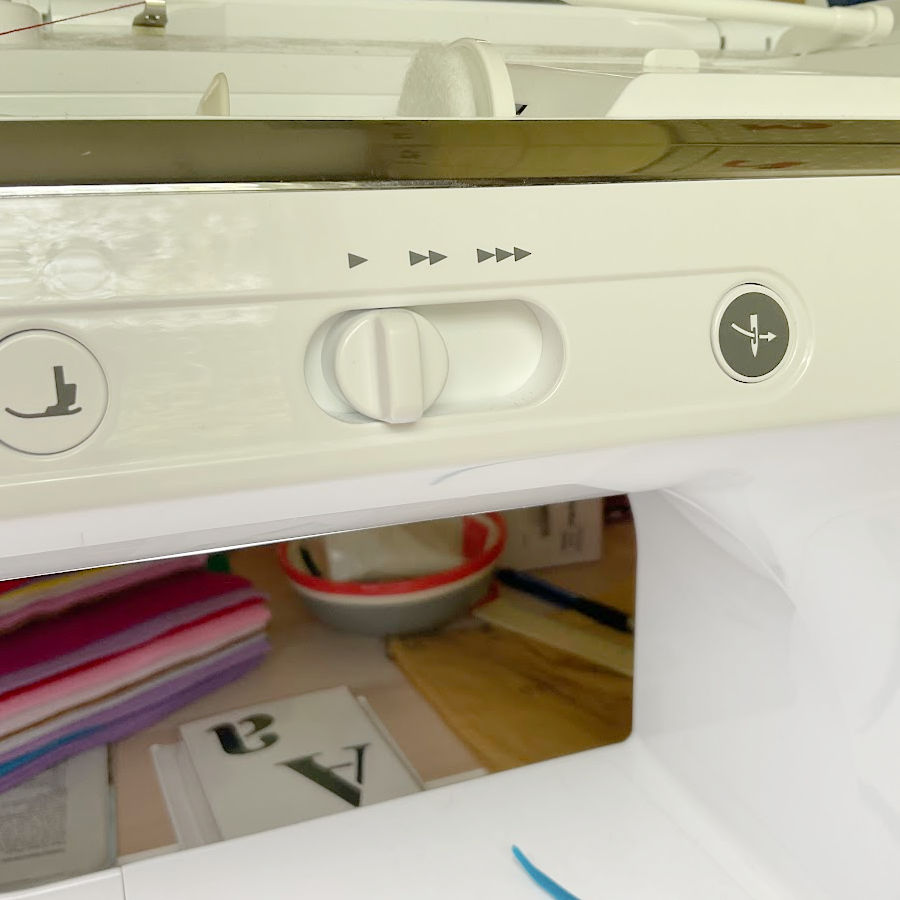
If your machine has a speed control slider, set it lower. If not, ease up on the foot pedal. Let the machine move at a steady, manageable pace.
#5. Pivot Frequently Around Very Tight Curves
Tight curves need special care. Instead of trying to steer the fabric in one long motion, stop and pivot often.
Keep the needle down in the fabric. Lift the presser foot just enough to adjust the fabric slightly.
Lower the foot and sew a few more stitches. Then repeat. These small, steady pivots help the stitches hug the curve smoothly.
This technique is especially useful for tiny pieces, doll clothing, appliqué, or detailed decorative curves.
Tip: Don’t rush the pivots. Moving the fabric too far at once can create angles instead of curves.
#6. Try an Open-Toe or Clear-View Foot
An open-toe or clear-view presser foot gives you an unobstructed view of the needle and stitching path. This makes it easier to follow curved lines with precision.
You can see the curve as it approaches the needle, which helps you guide the fabric more confidently. This is especially helpful when sewing along marked seam lines or handling intricate curves.
✅ Related tutorial: Presser Foot Guide: How To Use An Open Toe Presser Foot
If you don’t have a specialty foot, a regular presser foot still works. You may just need to slow down and pivot more often. Or you could consider one of the below (just make sure it fits your machine!):
Tip: Pair these feet with strong work area lighting to improve visibility even more
✅ Related tutorial: Sewing Room Lighting Ideas


#7. Don’t Stretch the Fabric
Let the machine do the work. When sewing curves, avoid pulling or tugging the fabric. Stretching it can distort the seam and cause ripples or waves.
Gently guide the fabric with your hands, keeping it steady. The feed dogs should move it through the machine at an even pace.
This matters most on stretchy fabrics. A little tension in the wrong place can reshape the curve before you’re even finished sewing. And the worst part? You won’t even notice this until you take the material out of the machine!
Tip: If the curve feels like it’s slipping or the fabric is stretching, reduce the presser foot pressure slightly. Lower pressure allows the fabric to feed more freely. Too much pressure can cause the fabric to press hard against the feed dogs and stretch as it moves.
You’ll usually reduce the pressure by turning a dial or loosening a screw, depending on your machine.
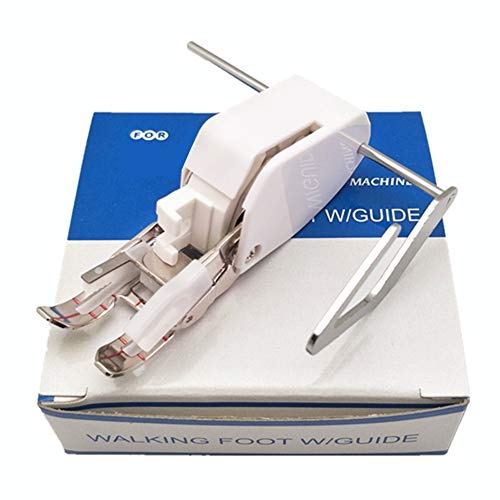
On some fabrics, switching to a walking foot also helps.
✅ Related tutorial: How to use a walking foot
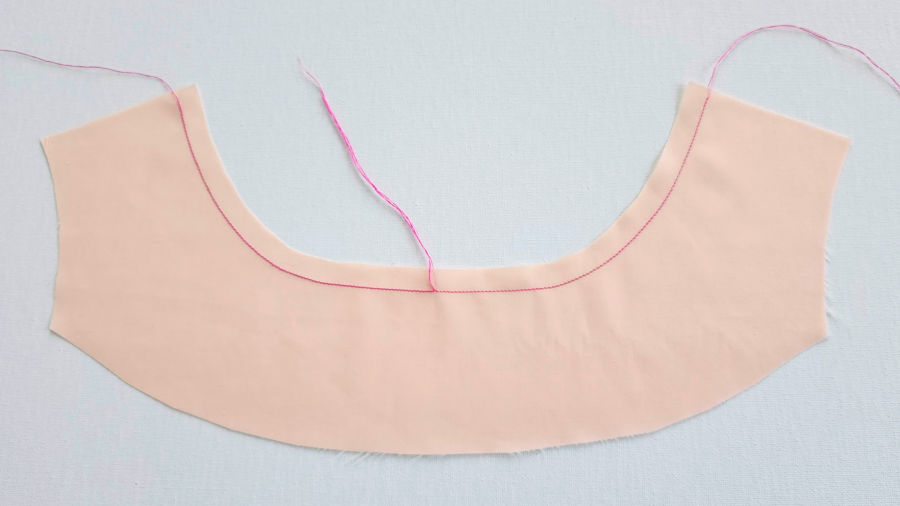
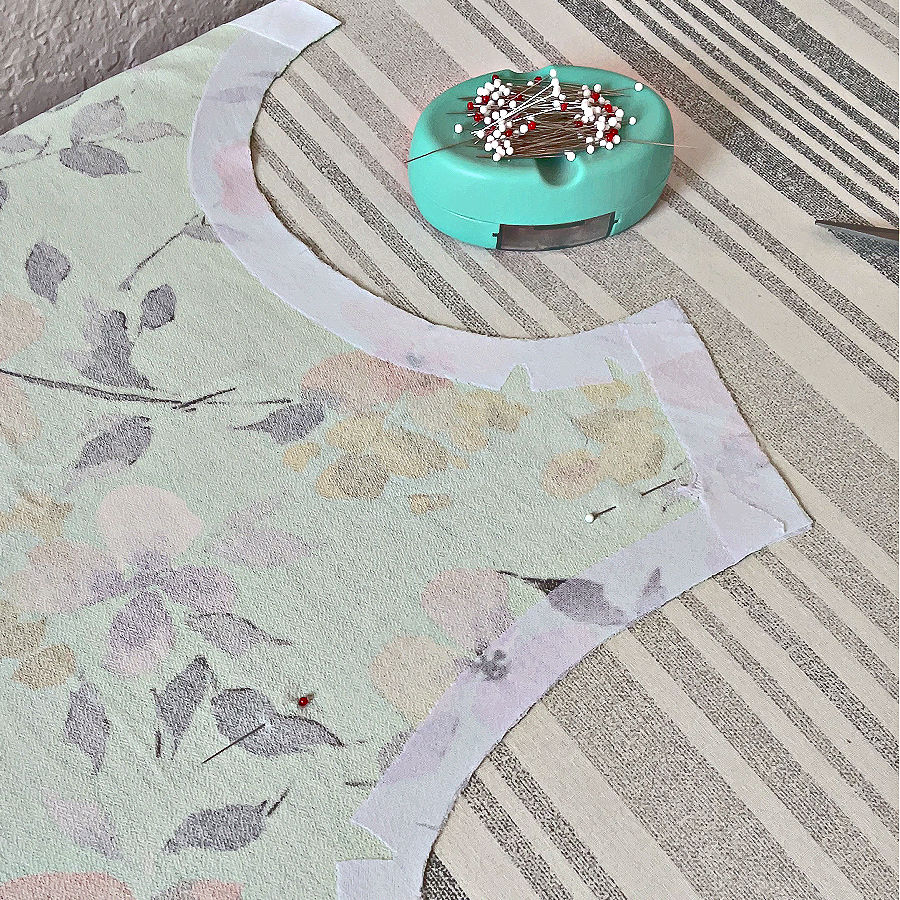
This image shows how easily the curved sleeve section stretches when it’s cut on the bias—even though the fabric is linen, which isn’t usually thought of as stretchy.
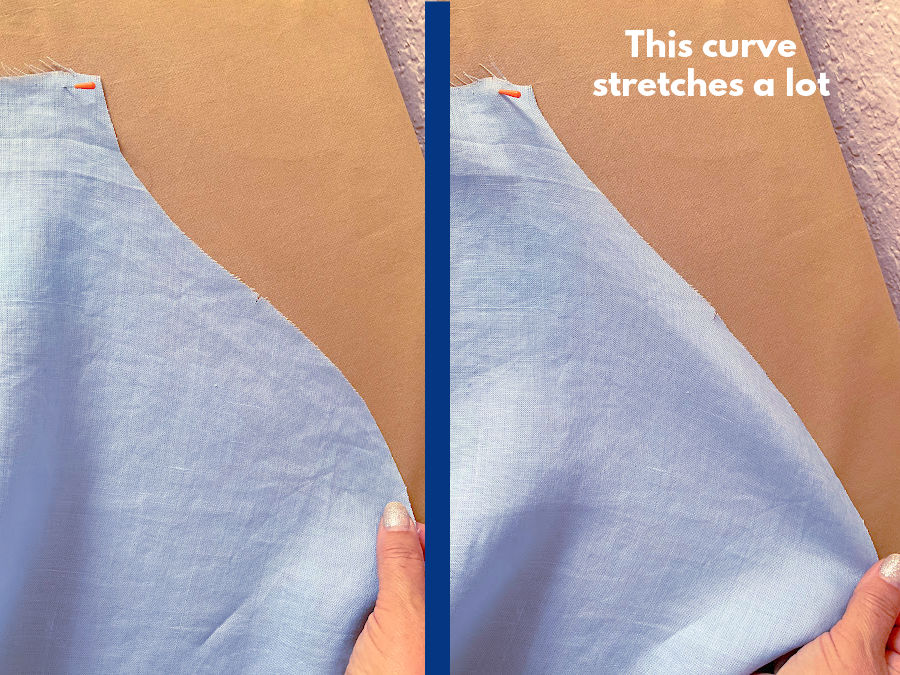
Without proper stabilization, even a stable fabric like linen can distort during handling or pressing. That’s why it’s important to treat them gently and support them before sewing—either by stay stitching or applying lightweight interfacing. This helps maintain the shape and prevents stretching out of place.
#8. Use a Fabric Marker for Precision
Draw the seam line with a fabric marker before you sew, especially on tight or intricate curves.
Choose a marking tool that suits your fabric. Test it on a scrap first to make sure it erases or washes out cleanly.
Tip: A marked line is especially helpful when sewing two mirrored pieces, like princess seams or curved yoke seams. It ensures both sides match.
For more tips on tools and techniques, see this guide – 15 Creative Ways to Mark Fabric for Sewing Projects
#9. Use More Pins or Sewing Clips
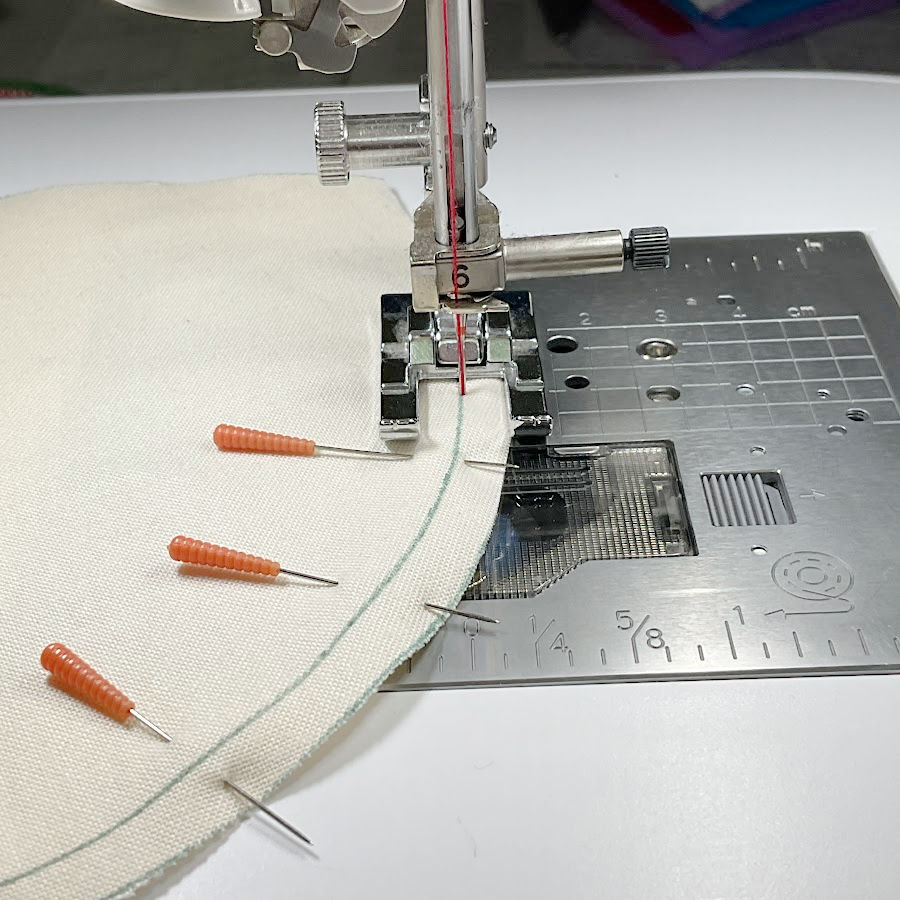
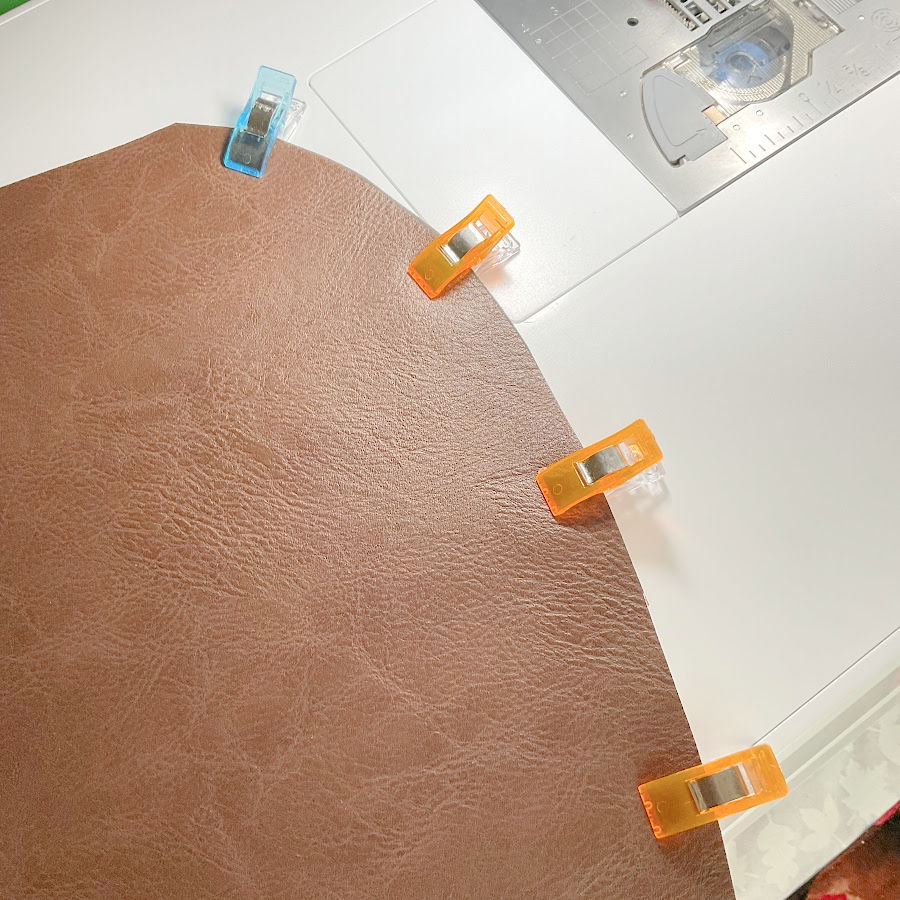
Use extra pins or sewing clips when working on tight curves to secure the layers.
Place pins perpendicular to the seam line to help hold the fabric in place. This keeps layers aligned and reduces shifting or distortion.
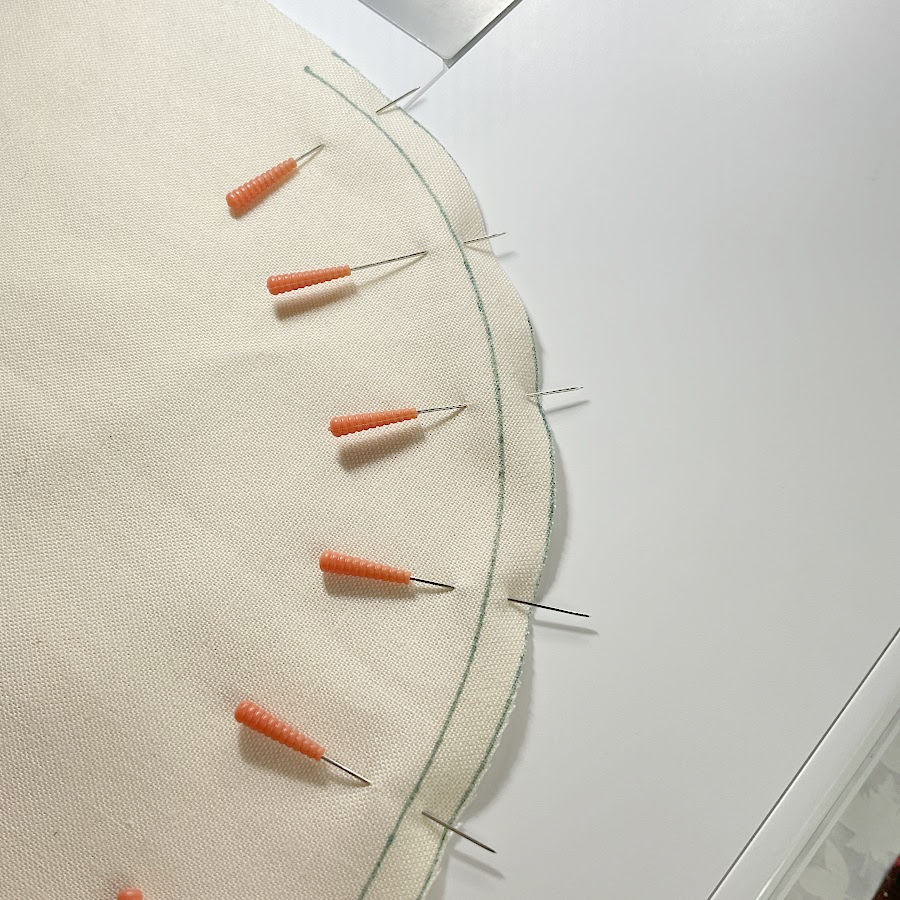
Clips work well too, especially for thicker fabrics or materials that don’t tolerate pinholes.
For very tight curves, add a pin right at the curve’s sharpest point. This anchors the fabric and gives you more control as you stitch around it.
✅ Related tutorial: Sewing Clips vs. Pins | Which To Choose?

#10. Hand-Baste Difficult Curves
Some curves need a little extra attention. Slippery fabrics like silk, tricky shapes like collars, or seams with layers often benefit from hand-basting.

For example, I always hand-baste set-in sleeves. This helps shape the sleeve cap and also gives a chance to check the fit before final stitching.
Use a contrasting thread so it’s easy to see and pull out. When you sew the final seam, stitch close to the basting line—about 1 mm away. Try not to sew directly over the basting thread, but don’t worry if you do. You can still remove it afterward.
✅ Related tutorial: How To Sew Set In Sleeves
#11. Practice Directional Sewing
Directional sewing means stitching seams in the same direction on both mirrored sides of your garment – like princess seams or necklines—where fabric can easily shift or stretch unevenly. When possible, sew from the same starting point on each side.
When you sew one seam from top to bottom and the other from bottom to top, the fabric can behave differently on each side. Even slight pulling, feed differences, or fabric tension can make curves ripple, stretch, or look mismatched.
With directional sewing, any movement in the fabric happens the same way on both sides. The result is more symmetry and smoother seams.
We’re not naturally trained to do this. Many home sewists simply follow the path of least resistance—start on one end and sew to the other, whichever direction feels faster. But this habit can lead to uneven seams, especially on lighter or stretchier fabrics.
Professional tailors and garment makers often plan their sewing direction carefully—especially on high-visibility areas. They’ll start from the shoulder and sew down toward the bust or hem, or begin at the neckline and sew down each side. For skirt seams, they may sew from the waist down. Their goal is simple: keep both sides consistent.
It might feel awkward at first, but once you get used to it, it becomes second nature—and your finished seams will look more even.
#12. Keep Your Eyes on the Needle
To sew smooth curves, focus on where the needle enters the fabric—not your hands or the presser foot.
Watching the needle helps you follow the seam line more accurately, especially on tight or detailed curves. When your eyes drift too far ahead, it’s easy to veer off course or over-correct.
This small habit improves accuracy and helps you anticipate when to pivot or adjust the fabric.
Let your hands guide gently, but keep your attention on the stitching point.
#13. Cut and Mark Curves with Care
How you cut fabric for curves makes a difference. Pay attention to grainlines, and mark your patterns accurately before reaching for the scissors.
Curves behave differently depending on how they’re cut. A neckline or armhole cut on the bias will stretch more than one cut on the straight grain. Follow the grainline markings on your pattern to maintain shape and structure.
And again – while cutting, mark curved seam lines clearly—especially if they’re deep, narrow, or oddly shaped. This gives you a solid visual guide to follow at the machine and prevents guesswork.
Tip: Use a sharp rotary cutter or fabric shears and take your time around tight curves. Keep the fabric flat and avoid lifting or shifting it during cutting.
✅ Related tutorial: The Ultimate Fabric Cutting Guide: Tips, Tools & Techniques for Every Project
#14. Clip Inner Curves
After stitching an inner curve, clip the seam allowance to help it lay flat when turned right side out.
Make small snips ( about half inch apart) right up to—but not through—the stitching line. This allows the seam allowance to spread and prevents puckering or pulling when the fabric is flipped.
Clipping works best on concave curves, like necklines or armholes, where the seam needs room to open outward.
Tip: Use sharp scissors with a fine point for better control. Avoid cutting too deep—leave a few threads between the clip and your seam.
✅ Related tutorial: Cutting Tools For Sewing: The Ultimate Guide
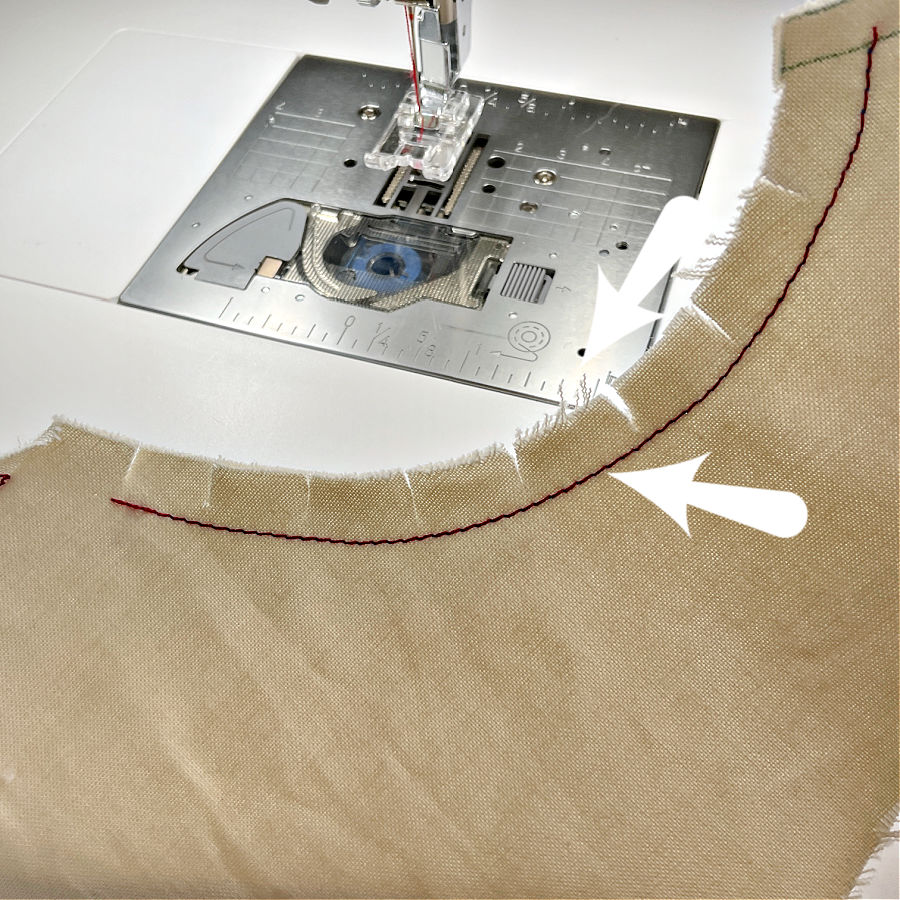
#15. Notch Outer Curves
Outer curves need notching to reduce bulk. After stitching the seam, cut small triangles out of the seam allowance. This helps the curve lay flat and smooth when turned right side out.
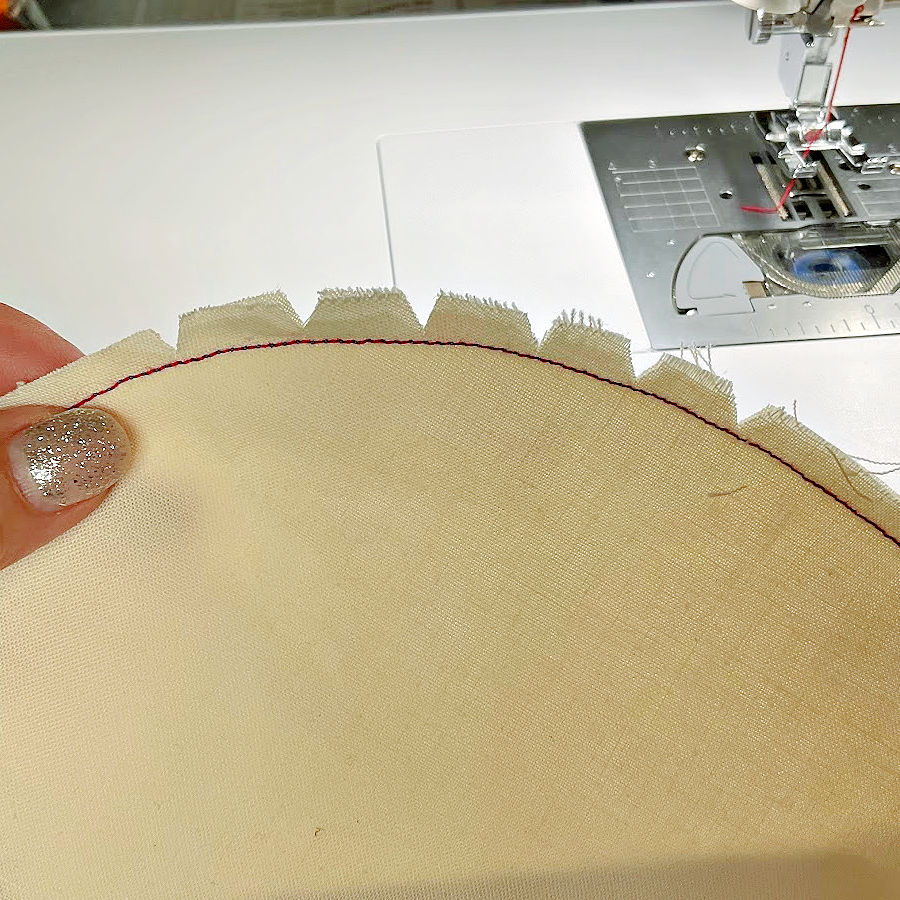
Notching removes extra fabric that would otherwise bunch up along the outer edge.
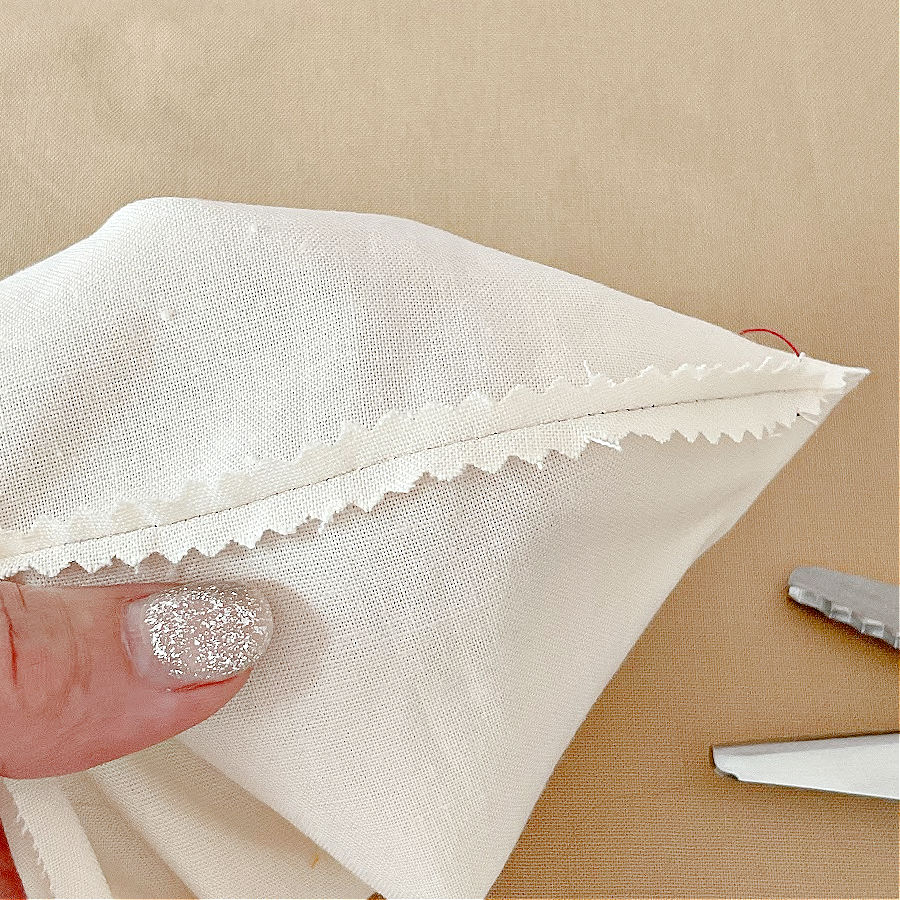
I often use pinking shears instead of cutting individual notches. They trim the seam evenly and quickly, and they reduce bulk just as well.

I actually prefer trimming curved seams with pinking shears instead of cutting individual notches. When I turn the seam right side out, the one trimmed with pinking shears lays noticeably smoother.


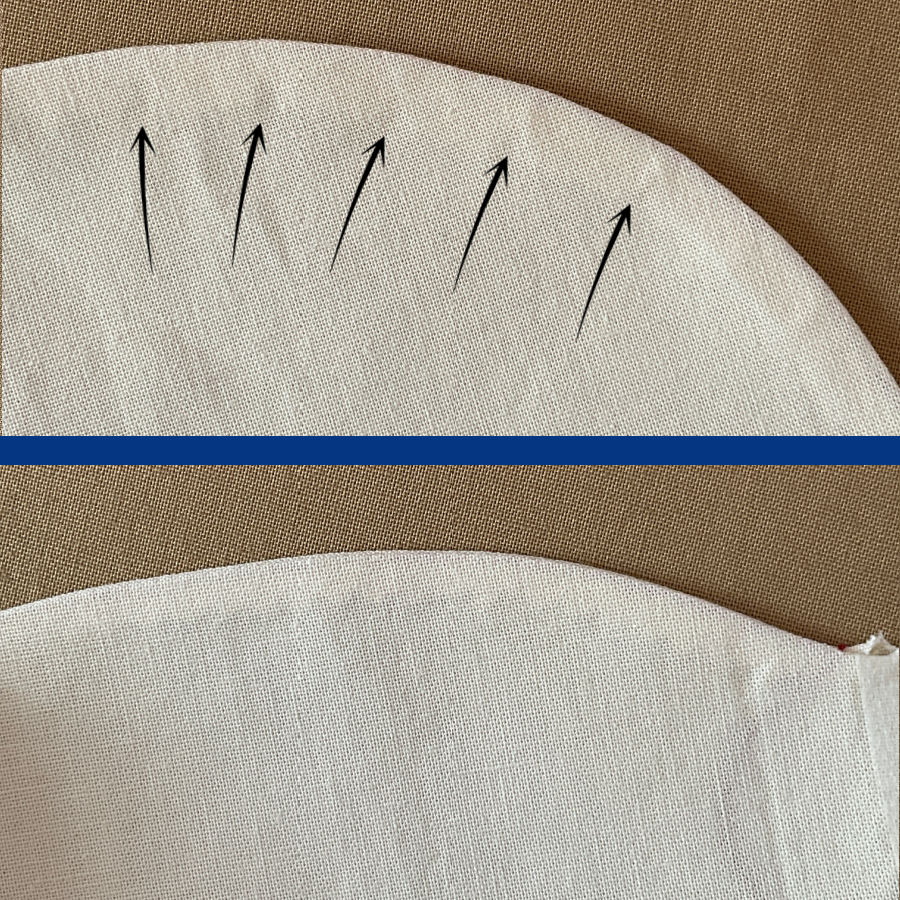
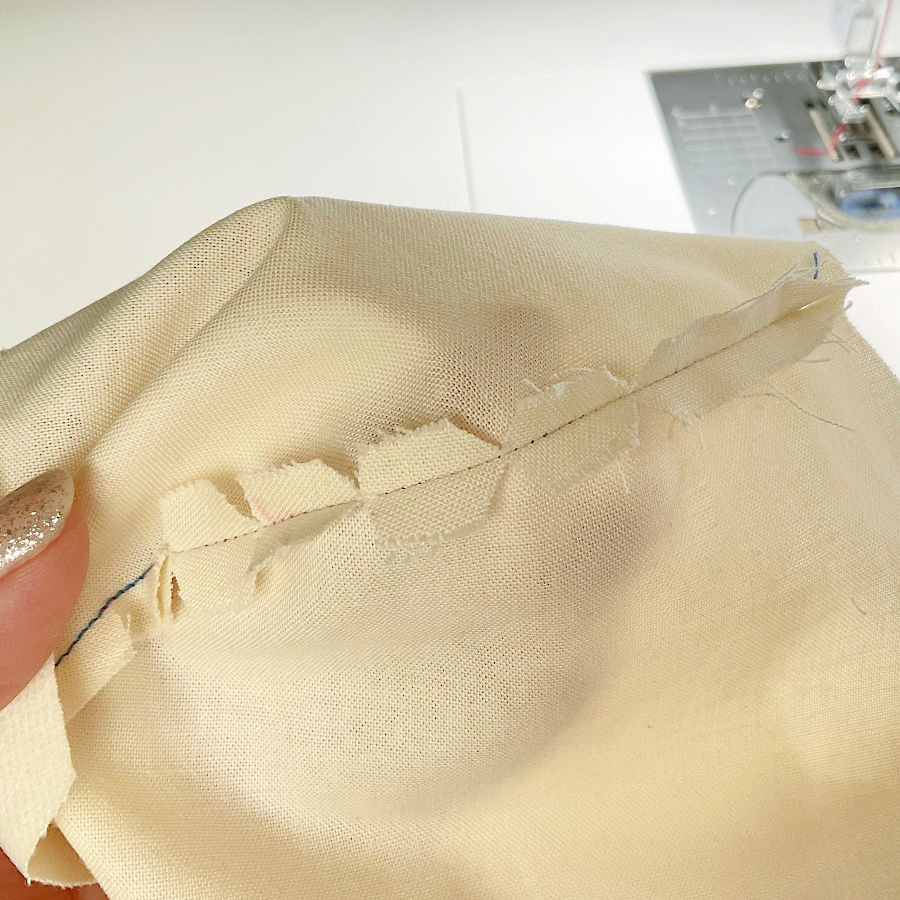
You can see it in this photo:
- The upper half of the image shows a curved seam that was clipped with regular notches. After turning, the edge has some uneven spots or tiny bumps (those little “bumps” are actually where the fabric folds in between the notches).
- The lower half of the image shows the same curve trimmed with pinking shears. The result is much smoother. The zigzag edge allows the seam to relax into shape without the bulk or uneven folding.
Tip: Just make sure to stay a safe distance from your stitch line when trimming with pinking shears. You still want that seam secure.
#16. Use Narrow Seam Allowances
Smaller seam allowances work better for curves. After stitching, trim the seam allowance to about 1/4 inch. This helps reduce bulk and allows the fabric to follow the curve more naturally.
Wide seam allowances can bunch up when the seam is turned. Trimming after sewing gives you a more accurate result and a smoother curve.
Tip: Use sharp scissors and trim evenly. Just be sure not to cut into your stitching line.
#17. Grade Seam Allowances
Grading seam allowances means trimming each layer to a different width. This helps reduce bulk and creates a smoother, flatter curve when the fabric is turned.
After stitching, trim the inner seam allowance (the one closest to the garment) shorter than the outer layer. For example, trim one to 1/4 inch and the other to 3/8 inch. This lets the layers nest inside each other without stacking up at the seam.
Grading is especially helpful on enclosed curves like collars, cuffs, and facings.
#18. Press Seams Before Turning
Before flipping your fabric right-side out, press the seam flat just as you sewed it. This helps set the stitches in place and creates a cleaner, sharper finish.
Pressing before turning also prevents puckering and keeps the seam allowance crisp. It makes the final shape easier to manage and improves the look of the curve.
Press gently without stretching the fabric.
✅ Related tutorial: Pressing Matters: 15 Common Ironing Mistakes to Avoid
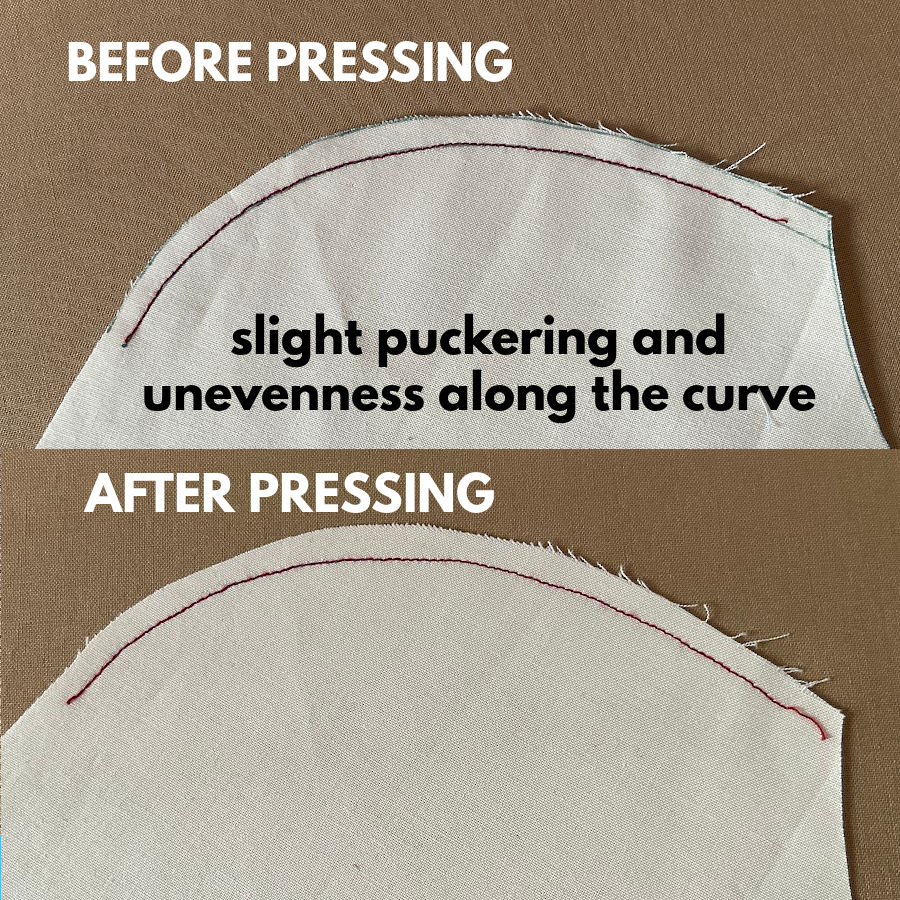
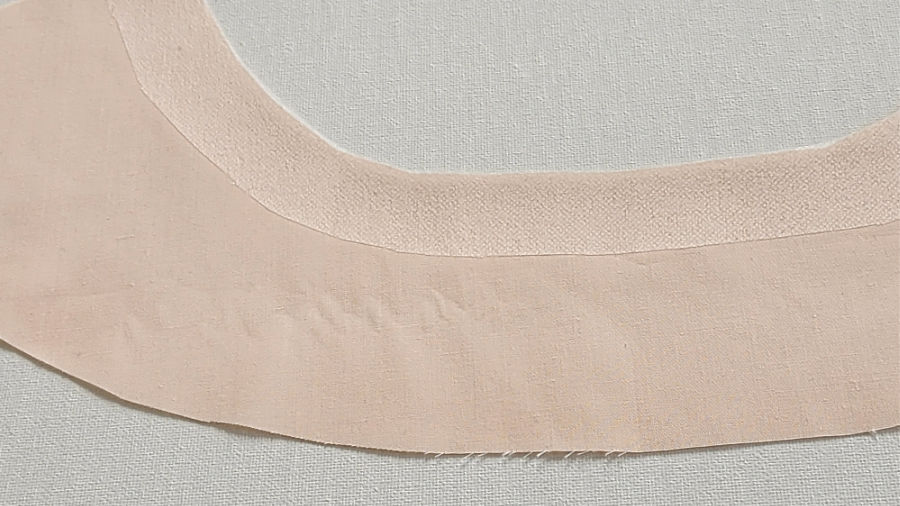
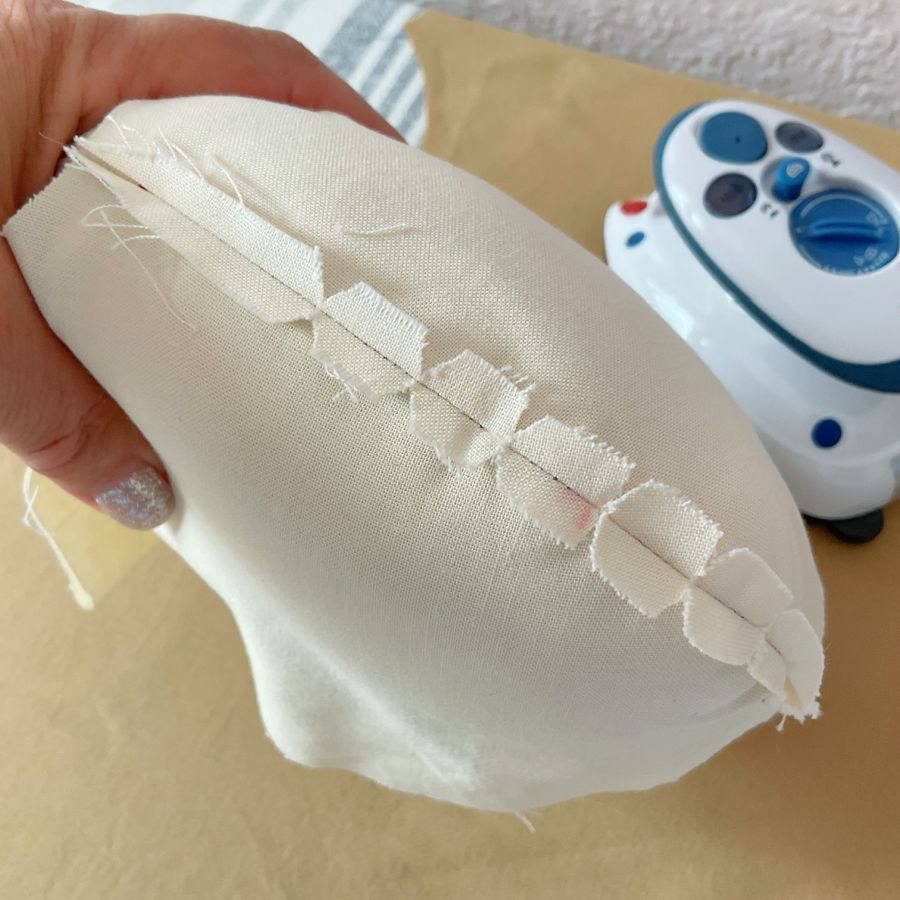
This image shows a comparison of a curved seam before and after pressing:
- Top half: The seam has been stitched, but not yet pressed. You can see slight puckering and unevenness along the curve. The fabric looks a bit wrinkled and lifted, especially near the stitching line. This is common right after sewing, particularly on curves.
- Bottom half: The same seam has been pressed. The fabric now lies flat, and the stitching follows the curve smoothly without any visible puckers.
#19. Finger-Press First
Before reaching for the iron, try finger-pressing your curved seams. Run your fingertip along the seam to open it and shape the curve gently.
This step helps the fabric take on its final shape gradually, especially on small curves where using an iron is awkward. I like to finger-press areas like toy heads or doll limbs. It’s easier to open up seams with your finger than to wrestle them under the iron.
Follow with an iron only if needed.
#20. Use a Tailor’s Ham for Pressing
Curved seams need curved surfaces. A tailor’s ham supports the shape of the seam as you press, helping it lay smooth without flattening or distorting it.
A tailor’s ham is a tightly stuffed pressing tool shaped like a small pillow.
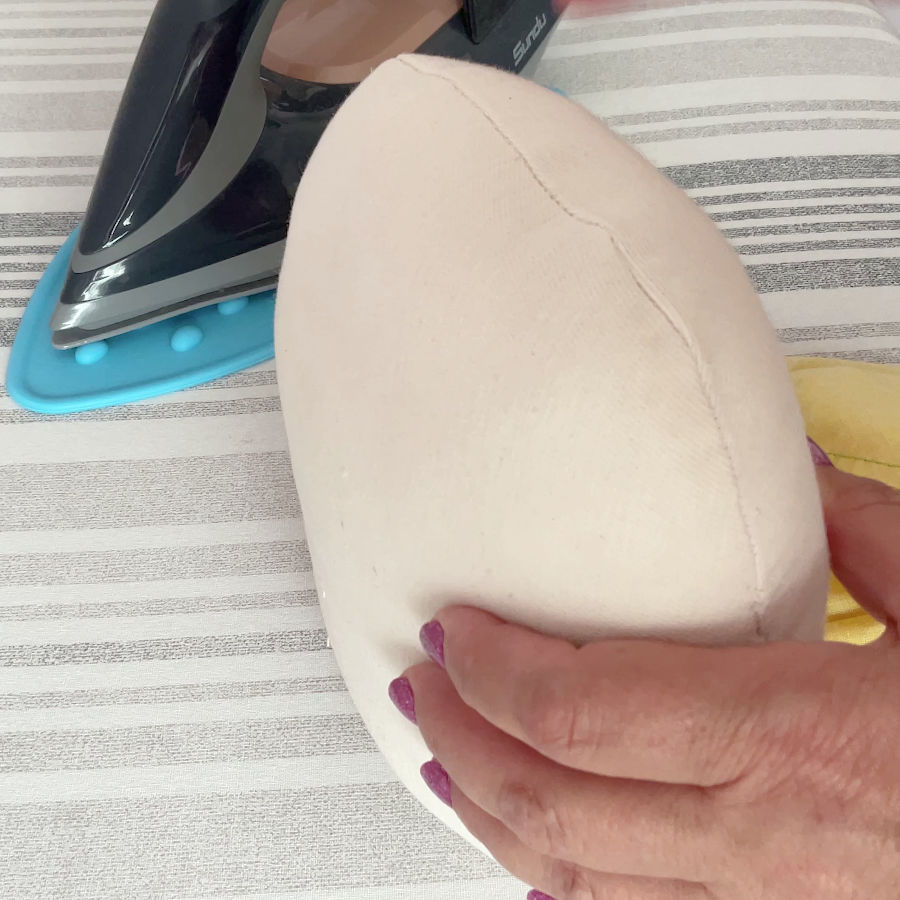
Pressing on a flat surface can crush the shape you just sewed. A ham keeps the curve lifted and rounded, especially on areas like princess seams, bust darts, and sleeve caps.
I also like to use a mini iron when pressing small curved seams. It’s easier to control and fits neatly around tight curves where a regular iron might feel too bulky.
Use steam and gentle pressure to mold the seam over the ham. Let the fabric cool in place to help it hold the shape.
Tip: If you don’t have a ham, try a rolled-up towel as a substitute. Or make your own. Here’s my full tutorial – How to make a tailor’s ham.

#21. Practice on Scraps
The best way to improve your curved seams is to practice—over and over, so here are some final tips:
- Start with stable fabrics like quilting cottons or poplin. These are easier to handle and give consistent results.
- I suggest cutting out some curved shapes from scraps and sewing along the edges again and again. It’s a little tedious, but it’s really the only way to build skill and muscle memory.
- When I was learning to sew curves, I even practiced on plain paper—no thread, just guiding the needle along the lines.
- Change the stitch length and sewing speed to see how it affects the outcome.
Did you find this tutorial helpful? If so, save this pin (see below) on your sewing board so you can come to this tutorial later when you are sewing curved seams, and follow me on Pinterest for more tips, tutorials, and inspiration!
latest posts
- What Do You Call a Person Who Sews? I Asked My Readers and Got 1,408 Opinions
- DIY Round Purse: PDF Sewing Pattern and Detailed Instructions
- Mini Wonder Clips By Clover: Useful Sewing Tool Or Just Another Notion?
- Non-Slip Grips For Quilting Rulers: A Small Notion With A Useful Job
- Fabric Eraser for Sewing: What It Removes and When to Use It
- What Is The Best Thread For Sewing Machine Projects? Let’s Find Out!
- Butterfly Quilt Block Tutorial – Foundation Paper Piecing
- How To Sew Quilt Squares So The Corners Match
- Sewing With Fork Pins: How They Help With Pattern Matching, Slippery Fabric, And Seams