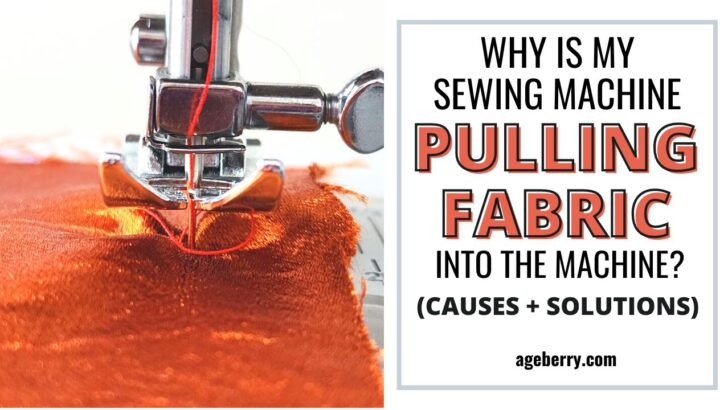
Why Is My Sewing Machine Pulling Fabric Into The Machine? (Causes + Solutions)
Many sewists must contend with this frustrating common problem: watching the sewing machine pull the fabric down into the machine. Before you panic, read this article and learn what to do when your fabric gets stuck in the sewing machine.
Although the idea of your sewing machine “eating” your fabric may sound like something out of a science fiction movie, trust me when I say that scenario is far from entertaining.
If you’ve never experienced it before, it goes a little something like this: you’re happily sewing along on your new favorite project when “wham!” The fabric disappears below the throat plate (into the bobbin case) of the machine.
Okay, it may not actually be quite that dramatic, but this issue is equal parts time-consuming and infuriating. And it will definitely break up your sewing rhythm, which is the worst part of all!
Unfortunately, getting material stuck in the machine is a common problem many sewists face – yes, including me. I’ve encountered this issue enough times that I consider myself somewhat of an expert on troubleshooting it.
So, today I want to pass on all the knowledge I’ve gathered through trial and error over the years. Let’s go through some top reasons why fabric gets stuck in the sewing machine and what to do if you find yourself in that situation.
Top Reasons Your Sewing Machine “Eats” Your Fabric (And Fabric Is Stuck In A Sewing Machine)
If you’re working on a project and notice your material disappearing under the throat plate, your first thought (after a few choice words, perhaps!) will probably be, “why does my fabric get stuck in my sewing machine?”
Here are the nine most common reasons your machine starts eating your project and what to do if the fabric gets stuck in the sewing machine.
1. Your Feed Dogs Struggle Grab Your Fabric
Sewing lightweight knits or silks is an entirely different experience from sewing medium weight cotton or linen. When you work with cotton, the machine’s feed dogs grab your material and pull it through the machine easily.
Unfortunately, they often can’t get traction on fabric that’s too thin (like chiffon or lace), very stretchy (like knits), or slippery (like silk charmeuse) to pull through effectively because they can’t get a good hold on those materials. When this happens, your machine can suck your fabric down through the hole in the needle plate.
In fact, if you’re new to working with knits, I hope it’s reassuring to know that it’s a common problem for stretchy fabric to get stuck in the sewing machine. But there’s a way to avoid it.
✅ Related tutorial: Sewing machine needle sizes explained
Possible solutions:
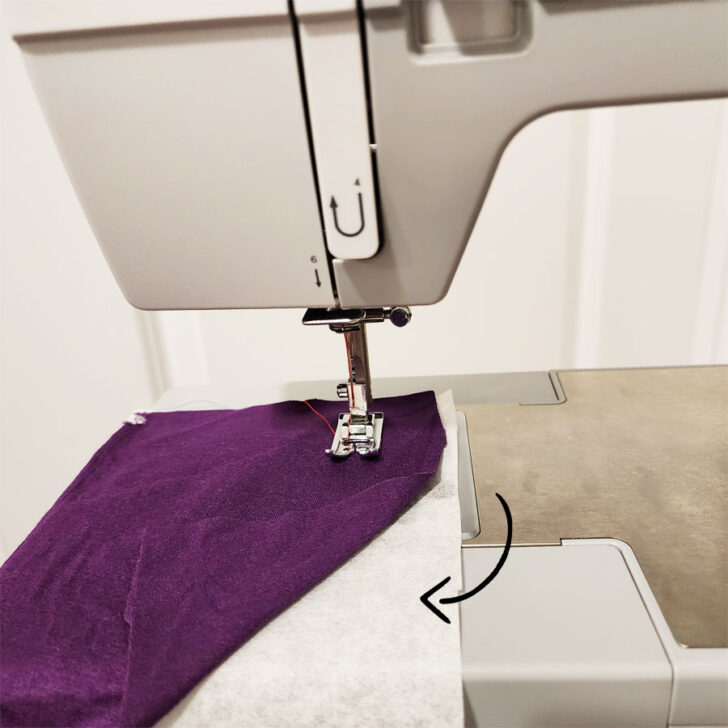
When working with slippery fabrics, very lightweight fabrics, or stretchy knits, stabilize fabric with spray starch, fusible interfacing, or even tissue paper or vellum paper to help your feed dogs grab the material and move it through the machine correctly. Then you can simply remove the stabilizer once you are done.
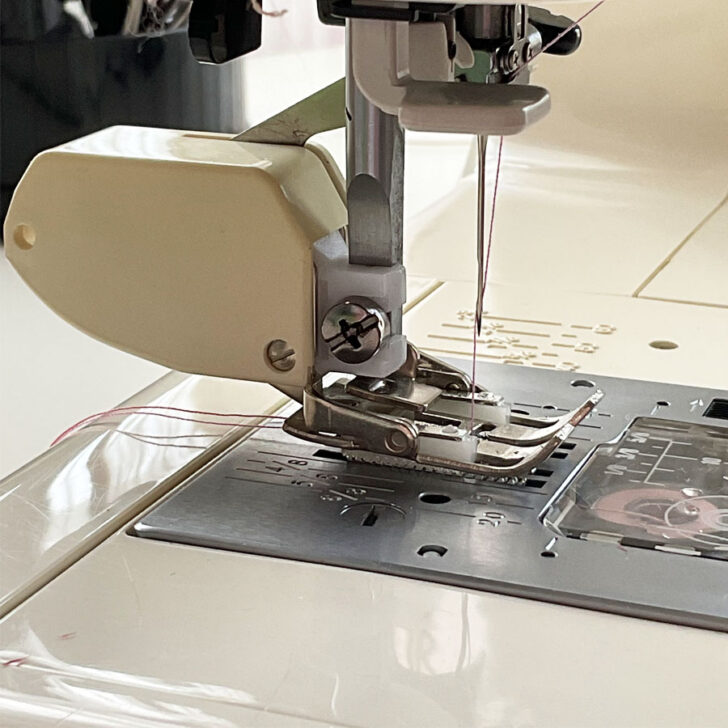
Another thing that can help is to use a walking foot attachment instead of your universal presser foot. A walking presser foot works in conjunction with your sewing machine’s feed dogs to keep the fabric moving forward (instead of stalling and getting it sucked into the device).
2. Your Fabric Has Flimsy Edges
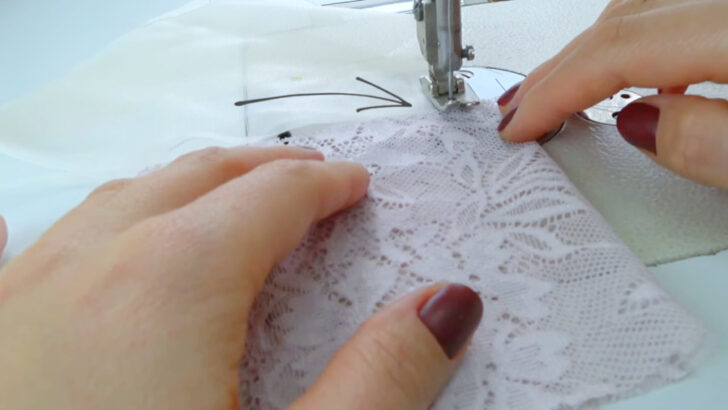
Are you having a problem with your machine pulling your material down under the needle plate as you begin sewing? This can occur with many soft, flexible, slippery, and thin fabrics such as silk, chiffon, lace, and tulle.
Solutions:
Stabilizers (such as tissue paper, spray starch or fusible interfacing) can provide support and traction, making it harder for your sewing machine to eat your fabric.
Alternatively, another option is to sew a few stitches on a piece of paper (a paper starter) or a folded piece of fabric about the same weight and feed your project into your machine immediately after.
I also recommend avoiding placing stitches too close to the edge of your fabric.
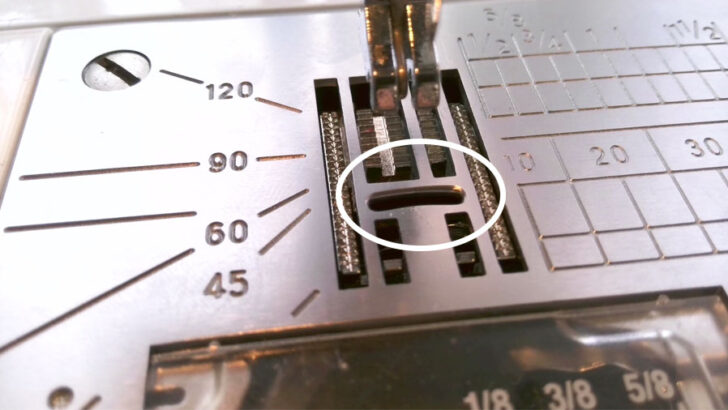
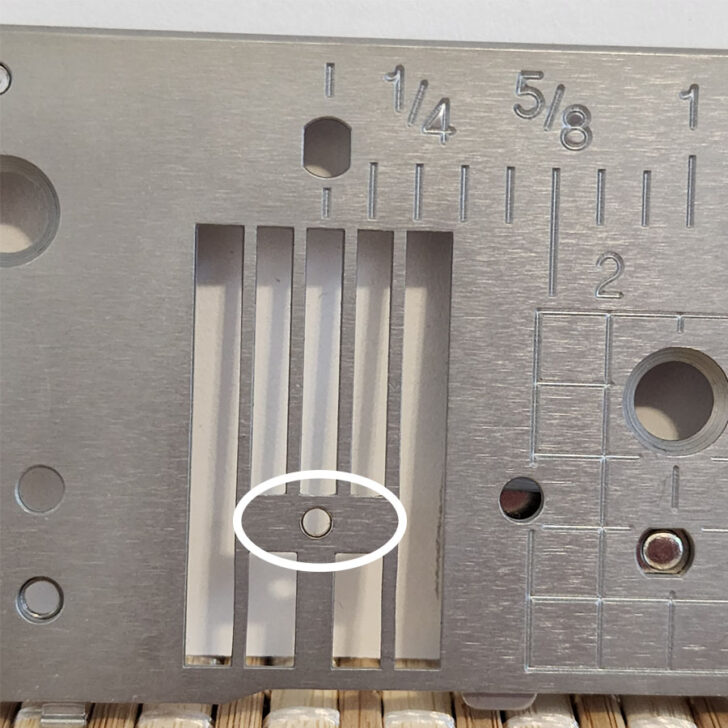
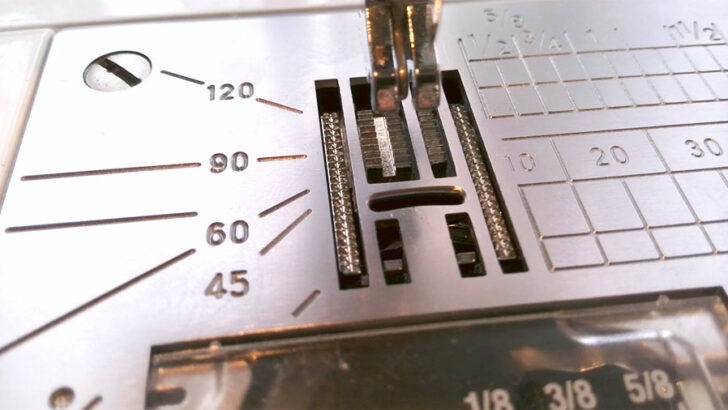
3. Your Throat Plate Hole Is Too Big For The Fabric You Are Using
Many sewing machines come with a throat plate that has a larger opening to accommodate all types of stitches (I think it’s often called a zig-zag plate). This large hole offers the ability to sew various stitches, ranging from zig zag stitches to decorative stitches, without breaking your needle.
Unfortunately, it also provides a place where material can get sucked down into the machine.
Solutions:
Many modern sewing machine models offer a straight stitch plate accessory as an additional purchase. These needle plates have a very small opening that allows the needle to do a straight stitch only but makes it hard for the fabric to get pulled into the machine.
Pro Tip: If you change the throat plate on your machine, remember only to use straight stitches (in the center position), or you’ll break your needle!
✅ Related tutorial: Sewing machine needle sizes explained
As an alternative, if your machine doesn’t have a straight stitch plate option (or it’s not in the budget right now), you could take a small piece of painter’s tape and place it over the needle hole. Make sure to create a small hole for the needle before actually starting to sew AND take care not to cover the feed dogs.
4. You Didn’t Start Sewing With A Scrap Piece Of Fabric
When you begin sewing a piece of fabric, your sewing machine’s feed dogs initially don’t have anything to grab. Going from sewing nothing straight into sewing layers of fabric can result in looped or knotted thread or the machine pulling your material down into the hole under the throat plate.
In other words, the jarring change of sewing a raw edge can cause your needle to push your material down into the needle hole and create problems.
Solutions:
Begin stitching on a piece of scrap fabric (called a stitch starter, leader, header, or thread bunny) to work out all the kinks before you begin sewing your project pieces. If you have any issues (tension, stitch length, etc.), you’ll find that out while sewing the scrap fabric and can make adjustments.
Then butt your project fabric pieces to the stitch starter piece and chain-piece them together. Once you’re done, simply cut off the leader and reuse it the next time you start stitching.
5. The Stitch Length Isn’t Correct For The Fabric
Various materials require different stitch styles, lengths, and widths. Stitches that are too short for your project can cause your needle to push your fabric into the machine.
Solution: Use a scrap piece of fabric to find the ideal stitch length and width for the material that you’re using in your project.
Taking time to learn the correct stitch length for each type of fabric was one of the best things I’ve done as a sewist. This knowledge is incredibly valuable and will help avoid many frustrating issues like this one!
In fact, I wrote an entire article about this. Click here to read what stitch length is and how to adjust it for different fabrics.
6. Your Sewing Machine Is Not Threaded Correctly
Unfortunately, beginner and experienced sewists alike can encounter this problem. It doesn’t take much for your thread to catch somewhere and cause all sorts of issues.
Solution: Your machine threading should be one of the first possibilities to check if your fabric gets stuck in your sewing machine. Go ahead and unthread the top thread and the bobbin thread, then rethread them both from the spools.
This simple solution can solve a lot of problems. If you aren’t sure where to start, I’d recommend making sure your sewing needle is threaded properly.
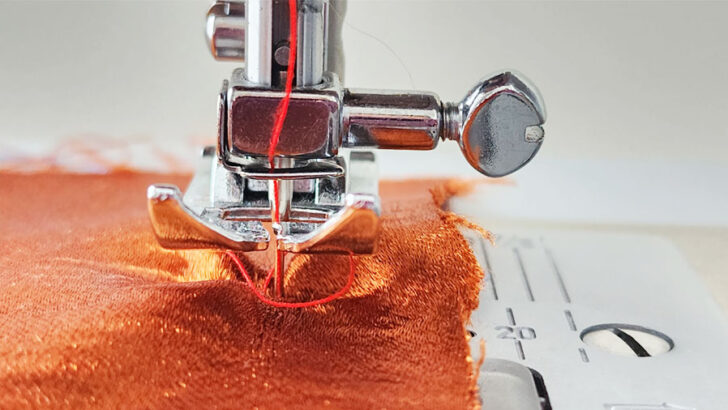
7. Your Needle Doesn’t Pair With Your Fabric
To achieve professional-looking results and prevent damaging your project, your fabric and sewing machine needle needs to be in sync with one another.
If you don’t pair these two things with each other properly, your needle, if it’s too thick for the fabric, can push your fabric down so that it gets stuck in the machine.
Solution:
Take the time to match the sewing machine needle SIZE to the needs of the fabric and save yourself the hassle (and expense) of ruining your project. Ask me how I know to recommend this to you!
✅ Related tutorial: Sewing machine needle sizes explained
8. You Have A Damaged Or Dull Needle
As you sew, your needle gradually dulls. It can also bend or get damaged. Dull, damaged, and bent needles can cause a lot more headaches because they can hit the throat plate, feed dogs, or bobbin case. This can damage (cause burrs) or break your needles.
In addition, damaged and dull needles can also push your material under the throat plate.
Solution: Most sewing machine manufacturing companies recommend changing your machine needle before beginning any new project. This ensures that your needle is sharp and won’t catch on your fabric or get stuck in your machine.
If your needle is well-matched to your project, I don’t always recommend a blanket policy of changing your needle after every project. Modern sewing machine needles, especially Schmetz needles, are very good quality needles and will work many hours without any problem. However, I do suggest checking your needle and changing it at the slightest sign that it might be dull, bent, or damaged.
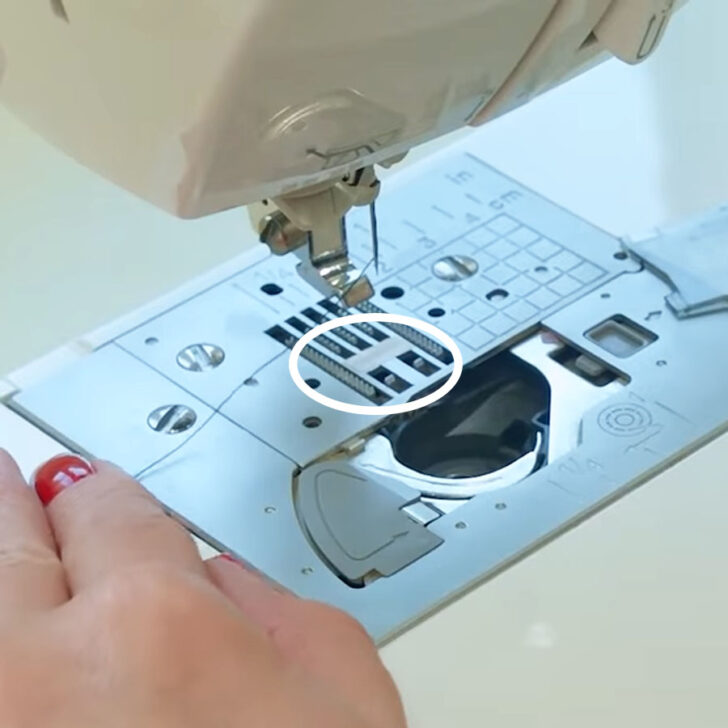
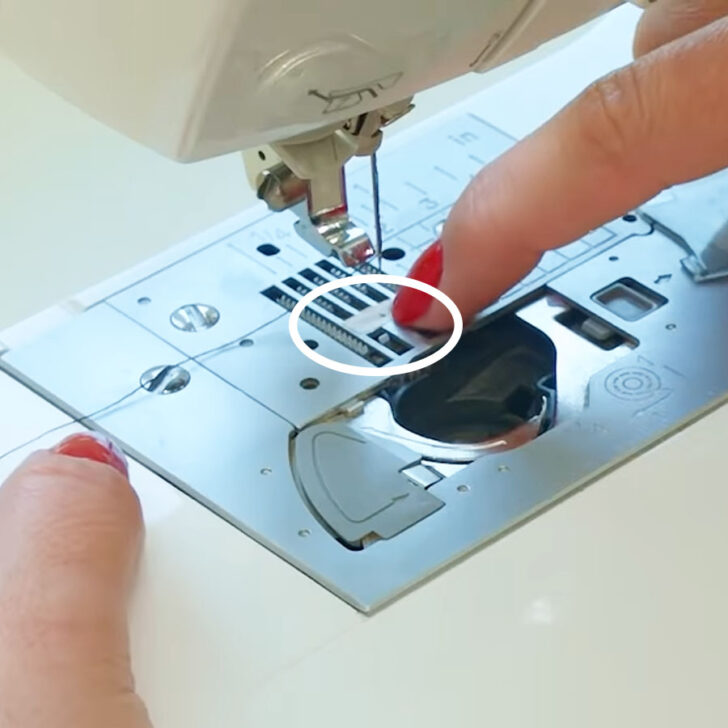
9. Your Feed Dogs Are Down
Your machine’s feed dogs are the “teeth” that come up and out of the throat plate to guide your fabric through the machine. Most of the time, you’ll want to sew with them up. However, you can lower them to do freehand sewing and free motion quilting.
Unfortunately, if you forget to raise the feed dogs back to their normal position, your machine can suck your fabric down under the throat plate rather than push it through.
Solution: Check that your feed dogs are in the normal position and moving as designed. If they are lowered, use the lever on your machine to adjust their height to the correct level.
How To Fix Your Sewing Machine Pulling Fabric Into The Machine Problem
Okay, now you’re familiar with many common reasons that your machine can push your material under the throat plate and the solutions for how to stop fabric from getting stuck in the sewing machine.
But now, it’s time to cover what to do if your fabric gets stuck in your sewing machine before you even start troubleshooting.
Pro Tip: The instinct is just to pull your fabric back out. Don’t do it! This can damage your material and the machine too. Instead, follow these instructions for how to recover your fabric if it does become stuck in your sewing machine.
- Turn off your sewing machine and even unplug it.
- If you can, remove the needle. If you can’t remove the needle, raise it to its highest position to give you at least some space to work.
- Loosen the presser foot screw and try to remove the presser foot.
- Take out the screws holding the throat plate in place and pull it out of the way.
- Try to take out the bobbin.
- Use a seam ripper or small scissors to carefully cut the threads until you can remove the fabric from the machine. With a bit of patience and luck, you’ll minimize the damage to your material so that you can still use it.
- Inspect the area under the needle plate. If there are any remaining pieces of fabric or thread, use a lint brush or vacuum cleaner to remove them.
- Find the reason your machine is doing this (one of the reasons above) and fix it.
✅ Related tutorial: Choosing a Mini Vacuum for Sewing Machine
Is your sewing machine acting up? I created the ultimate troubleshooting guide to help you out and compiled a detailed list of solutions to common sewing machine problems. Many of these problems can be solved with some basic troubleshooting or maintenance. Is your thread getting tangled or breaking? I’ll walk you through the steps to fix it. Are you struggling with tension settings, broken needles, or jammed threads? I have tips for that too. Don’t let sewing mishaps get in the way of your creative flow. Check my guide and show your sewing machine who is the boss – Troubleshooting Common Sewing Machine Problems (+ Solutions)
FAQs About Fabric Getting Stuck In The Sewing Machine
Since this is a common problem for many sewists, I’m never surprised when I see readers online asking questions about this issue. Here, I’m answering a few I see frequently.
Why is my needle stuck in the fabric in the sewing machine?
There could be several reasons your needle becomes stuck in the fabric. It becomes stuck if your sewing machine is pulling the fabric into the hole under the throat plate. Ensure that your needle is the correct size for your fabric and thread and that it isn’t bent or damaged. Check your stitch length because you may need to lengthen it. Check all the reasons I described above. Also, your thread could be knotted up in the bobbin case area.
Depending on what you find and believe to be the cause, follow the solutions suggested above to correct the problem.
What causes fabric to get stuck in feed dogs on a sewing machine?
The most likely cause is that your feed dogs are lowered from their normal position, allowing the fabric to get pushed down beneath the throat plate and get stuck in the feed dogs. Ensure your feed dogs are in the “up” position (using the lever somewhere inside your machine).
If you run into a problem and your machine is eating your material, here’s how to free fabric stuck in the feed dogs on your sewing machine. Loosen the screws on the needle plate and lift it enough to snip any knotted threads. Remove the plate, cut any additional threads if needed, and carefully pull the fabric out. Don’t tug!
If this doesn’t work and your fabric is REALLY stuck, you may need to contact a service professional so you don’t damage your machine.
Why does jersey fabric keep getting stuck in the sewing machine?
Jersey fabric can be very stretchy. If you use a stitch length that’s too short (or too long) or a needle size that is too thick for your fabric, you may find your sewing machine trying to eat your material.
Make sure you are using the correct settings and tools, and you may find it helpful to give your stretchy fabric some support by using a stabilizer or a walking foot attachment.
If you’re struggling with your sewing machine trying to eat your fabric, I hope this post helps you diagnose and find solutions for your sewing machine pulling fabric into the machine so that you can prevent the problem and save your material!
Useful Info – Sewing Machine Troubleshooting
Owning a sewing machine means eventually, you’ll need to learn the ins and outs of troubleshooting it. Some issues may be avoidable, but certain complications are just part of the sewing machine experience. My downloadable PDF eBook guides you through the process of diagnosing and fixing your sewing machine’s problems. It’s a valuable resource for both mechanical and computerized machine models, providing you with the know-how to tackle issues on your own before considering the purchase of a new machine or seeking professional repair services.
Did you find this tutorial helpful? If so, save this pin (see below) on your sewing board so you can come to this tutorial later when you need this information on sewing machine pulling fabric into the machine, and follow me on Pinterest for more tips, tutorials, and inspiration!
latest posts
- What Do You Call a Person Who Sews? I Asked My Readers and Got 1,408 Opinions
- DIY Round Purse: PDF Sewing Pattern and Detailed Instructions
- Mini Wonder Clips By Clover: Useful Sewing Tool Or Just Another Notion?
- Non-Slip Grips For Quilting Rulers: A Small Notion With A Useful Job
- Fabric Eraser for Sewing: What It Removes and When to Use It
- What Is The Best Thread For Sewing Machine Projects? Let’s Find Out!
- Butterfly Quilt Block Tutorial – Foundation Paper Piecing
- How To Sew Quilt Squares So The Corners Match
- Sewing With Fork Pins: How They Help With Pattern Matching, Slippery Fabric, And Seams