This or That? Sewing Machine Settings Explained: Needle Up/Down, Lock Stitch/Backstitch, etc.
Sewing machines are full of choices — tension settings, stitch lengths, needle positions, and more. Some are easy to overlook until something doesn’t look quite right. A puckered seam. A topstitch that won’t lie flat. Or a needle breaks.
Most of these small problems have simple fixes. But only if you know what the settings actually do — and when to change them.

This guide breaks down the most common “this or that” options on your machine. Needle up or needle down? Tight tension or loose? Short stitch or long? For each one, you’ll see what it does, when it matters, and why one setting isn’t right for everything.
Needle Up or Needle Down?
On many modern sewing machines, there’s an option to choose what the needle does when you stop sewing — either stay up or remain down in the fabric. Unsurprisingly, this is known as “Needle Up / Down” setting.
So what’s the “right” choice? Well, it depends. Here’s the breakdown.
What Does “Needle Down” Mean?

When your machine is set to “needle down,” the needle stays inside the fabric every time you stop stitching. This keeps your project anchored in place, which can be very useful. For example:
- When turning corners
- When adjusting fabric mid-stitch
- When sewing curves or applique
- While quilting, especially with multiple layers
With the needle down, the fabric doesn’t shift when you lift the presser foot. It holds everything steady.
What About “Needle Up”?

With this setting, the needle lifts out of the fabric whenever you stop sewing. This can be helpful when:
- You’re removing the fabric from the machine often
- You need to reposition between short seams
- You’re working on chain piecing or sewing straight seams without interruptions
It can save a bit of time and effort, especially when you don’t need the fabric to stay exactly in place between stitches.
Which Setting Should You Use?
Most of the time, I recommend using the needle down position. It adds stability and helps you keep everything aligned, especially for piecing, topstitching, and quilting. It can prevent some common mistakes before they even happen.
But there are moments when needle up makes sense, too — especially if you’re moving quickly between seams or pulling your fabric out frequently.
Some machines let you press a button to override the default. That’s helpful when you want more control in the moment.

Try switching between the two for different tasks, and you’ll start to notice when each one is helpful.
Think of it like heels vs. sneakers. Both have their place — you just need to know when to swap.
Note: Some of the links on this page are affiliate links. This means I will receive a commission if you order a product through one of my links. I only recommend products I believe in and use myself.


Also, if you’re thinking about needle position, it’s also a good time to make sure you’re using the right needle in the first place. There’s more to it than just “universal” or “sharp.” I have a full guide on 19 types of sewing machine needles that explains which one to use for each fabric and technique.
Different sewing machines have their own way of showing this feature. The needle up/down button may look a little different depending on the model. On my Janome 6600, this is what the button looks like.

On vintage sewing machines, the needle position at stop wasn’t something you could control with a button. These machines were entirely mechanical, so the needle simply stopped wherever the machine stopped — usually in the up position, but not always.
To lower the needle manually, sewists had to turn the handwheel to bring the needle down before pivoting or adjusting the fabric. There were no automatic options, no settings to change.
This is why many experienced sewists who learned on older machines still instinctively reach for the handwheel, even on a computerized model that has a needle-down feature. It’s a habit formed when machines didn’t do the thinking for you.
Tight Tension or Loose Tension? Why the Right Setting Depends on the Task
The goal is not to keep the tension tight or loose all the time — it’s to choose the right tension for the fabric, thread, and technique you’re using.
What Is “Balanced” Tension?
In a balanced stitch, the top thread and bobbin thread meet in the middle of the fabric layers. You shouldn’t see the bobbin thread pulled to the top or the upper thread looping on the back. The stitch looks even and smooth on both sides.

But not every sewing situation calls for balanced tension. Some techniques benefit from intentionally adjusting the upper tension.
Beware that tension depends on many factors: your fabric, the needle you use, the thread you use. If you change any of these you might need to test if the tension needs adjustments for the new setting.
When to Use Tighter Upper Thread Tension
Sometimes increasing the upper thread tension gives you a neater result. Use tighter tension when:
- Sewing with a twin needle. If your top tension is too low, the bobbin thread pulls up too much. The result: puckering or a tunneling effect between the two rows of stitching on the top. Increase the tension. If you’d like more details, you can read my tutorial Twin Needle Sewing: My First Try Was a Mess, But Here’s What Worked.
- You see upper thread loops on the underside of your fabric. This usually means the upper thread tension is too low. Tightening it pulls the thread back toward the center of the fabric. This imbalance can happen when you change your fabric, needle, or thread — even if your settings remain the same.

When to Use Looser Upper Thread Tension
Loosening the upper thread tension helps in situations where the stitch needs flexibility or where the top thread is pulling too tightly. Here’s when looser tension works well.
- Basting stitches. For temporary seams, a looser top tension makes it easier to remove the stitches later. It also prevents puckering during assembly.
If you’d like to learn more about basting, I explain it here Basting Stitch: Why, When And How To Baste In Sewing.

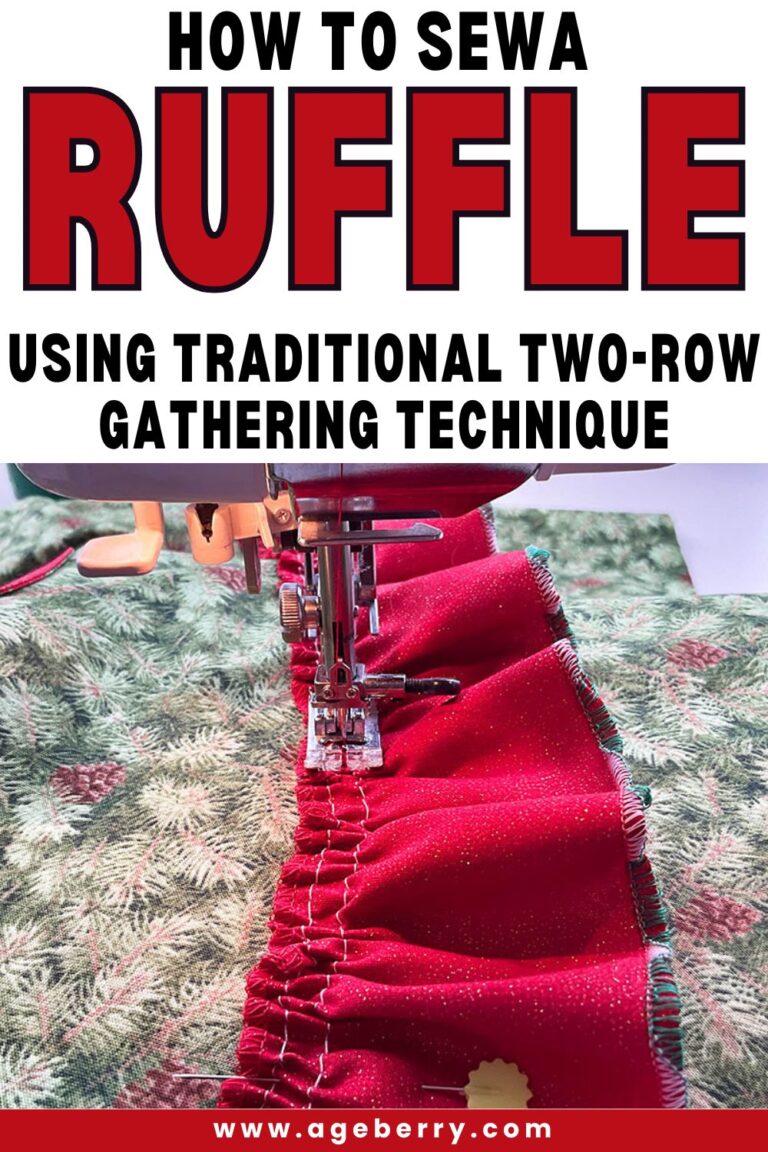
- Gathering fabric with two rows of stitches. To create full gathers using parallel rows of long straight stitches, reduce the upper thread tension to nearly zero. This allows the bobbin threads to pull freely and form even gathers without resistance.
I also have a step-by-step guide on gathering fabric How To Sew A Ruffle Using Traditional Two-Row Gathering Technique. - Sewing with elastic thread in the bobbin. A slightly looser upper tension allows the bobbin thread to stretch and create gathers or shirring without being flattened by the top thread.
I show the full process in this tutorial How to Sew Shirring: A Step-by-Step Guide to Elastic Thread Gathering.


- Sewing thick or heavy fabrics or multiple layers. Less tension on the top thread prevents overly tight seams and helps the needle move through the layers smoothly.
- Working with stretchy or knit fabrics. A looser top tension lets the stitches flex with the fabric and prevents seams from feeling stiff or popping under strain.
For more tips on handling stretch fabrics, you can read this guide 25 Expert Sewing Tips for Working with Stretch Fabric. - When the bobbin thread is visible on the top side of your fabric. This means the upper thread tension is too high. Lowering it helps bring the stitch back into balance.

As with too-tight tension, this imbalance can happen when you change your fabric, needle, or thread.
If you want a deeper explanation of how tension works and how to adjust it properly, I go into detail in this tutorial Sewing Machine Tension Adjustment.
Final Tip
Some modern machines have an automatic tension setting, but it won’t always give perfect results — especially with specialty threads or tricky fabrics. Adjusting your upper tension is not a sign something is wrong. It’s part of sewing with intention.
Always test your tension on a fabric scrap before starting. A small adjustment now can save hours of unpicking later.
Short Stitch or Long Stitch?

Stitch length controls how much fabric moves under the presser foot with each stitch. It’s easy to overlook, but this one setting changes how strong, flexible, or decorative your stitches turn out. There’s no one “correct” stitch length — it depends on what you’re doing.
When to Use a Long Stitch
Longer stitches (usually in the 3.5 mm to 5 mm range) are used when you want your stitching to be removable, decorative, or able to gather fabric easily. Use a longer stitch for:
- Basting. Temporary seams or fitting lines should be easy to remove. A stitch length of 4–5 mm makes that simple and quick.
- Gathering. When you’re sewing two parallel rows to gather fabric, set your stitch length to the longest available (typically 5 mm). This makes it easier to pull up the bobbin threads without resistance.
- Topstitching on thick fabrics. A longer stitch can look cleaner and more professional, especially on denim, canvas, or outerwear.
- Quilting through thick layers. Longer stitches can prevent distortion and keep your quilt sandwich smooth.
- Working with slippery or thick materials. Fabrics like leather, vinyl, or coated textiles benefit from longer stitches that reduce friction and prevent skipped stitches.
In general, longer stitches = less tension in the seam. That’s helpful when you don’t want to distort the fabric or when the seam won’t be under stress.
When to Use a Short Stitch
Shorter stitches (1.5–2.5 mm) make stronger, more secure seams. They’re best for construction and detailed work. Use a short stitch when:
- Sewing seams that take a lot of stress. Garment construction seams, crotch seams, armholes, and curved areas all benefit from shorter stitches that won’t pull apart.
- Sewing lightweight fabrics. Fine fabrics like silk or chiffon hold together better with smaller stitches. Long stitches can snag or look loose.
- Sewing curves. Short stitches follow curves more accurately and make the shape easier to control.
- Reinforcing areas like corners or pocket openings. Small stitches are harder to pull out and help reduce strain on the fabric.
- Topstitching on fine fabrics. On blouses or shirts made from light cotton or rayon, short topstitches are less noticeable and more precise.
Shorter stitches create a tighter seam, but they also leave more needle holes in the fabric. If you’re working with delicate material or need to unpick the seam later, consider whether that extra density will be a problem.
A Good Default?
For general sewing, a 2.5 mm stitch length works well on medium-weight woven fabrics. It’s strong, flexible, and easy to handle. But it’s just a starting point. The fabric, thread, and purpose of the seam should guide your final setting.
If you’re curious about how stitch length affects different fabrics and techniques, I explain it all here What is the stitch length and how to adjust it for different fabrics – a sewing tutorial.
Lock Stitch or Backstitch?
Finishing the beginning and end of a seam is essential. It keeps your stitches from unraveling. Most machines give you two options: the lock stitch or the backstitch. They both secure your thread — but they don’t work the same way, and they’re not always interchangeable.

What’s the Difference?
- Backstitching works by reversing your stitching direction. You sew forward a few stitches, then back over them, then forward again. This creates a small overlapping area that locks the thread in place.
- Lock stitching is a feature on many modern machines that ties off the stitch without reversing. It usually involves sewing in place with very short stitches or with a built-in tie-off pattern. It creates a tidy finish with no visible backtracking.
When to Use a Backstitch
Backstitching is still the most common way to secure a seam. Use it when:
- You’re sewing construction seams that will be hidden inside a garment or project.
- You need a strong hold at the start and end of your stitching.
- You’re working on medium to heavy-weight fabrics that can handle the extra bulk from overlapping stitches.
It’s quick, effective, and nearly universal. But it can sometimes look bulky or be noticeable on lighter fabrics.
When to Use a Lock Stitch
Lock stitching gives a cleaner look with less thread buildup. Use it when:
- You’re sewing topstitching or visible seams and want a neat finish.
- You’re working with lightweight or sheer fabrics where backstitching might cause puckering.
- You’re sewing with decorative thread or stitching that won’t be pressed or hidden later.
Lock stitches are more discreet and often more precise — especially on finer materials. They don’t create extra thread bulk, which helps your seam stay smooth.
One Isn’t Better — Just Better for the Job
Many sewists stick with backstitching by habit, but knowing when to switch to lock stitch can improve both how your project looks and how well it wears. If your machine has a lock stitch button, it’s worth using — especially for topstitching or finishing hems on delicate fabrics.

Needle Position: Center or Left/Right?
Most modern sewing machines let you shift the needle left or right — sometimes just a few steps, sometimes all the way to the edge. While the center position is standard, the ability to move your needle gives you more control over how and where your stitches land.
This setting is especially useful for edgestitching, topstitching, zipper work, and narrow seams where precision matters.
When to Use Center Needle Position

The center position is the standard for a reason. It gives the most balance and aligns with most presser feet. Use the center position for:
- Sewing basic seams and general garment construction
- Following seam allowance markings on your presser foot
- Everyday topstitching and finishing on medium-weight fabrics
Most presser feet are designed around the center needle, which provides the most even feeding and consistent pressure.
Always check that your needle won’t hit the presser foot or the throat plate before you sew. If you change the needle position but forget to switch the presser foot, you can easily break the needle. This is especially important when using a straight stitch foot or any foot with a narrow opening. Even a small shift left or right can make the needle strike metal. Building the habit of checking saves both your needle and your project.
The below images shows the incorrect use of the left needle position with a straight stitch foot where the needle will strike the foot.

I explain how to avoid needles strikes and damage to your machine in this guide How To Prevent Needle Strikes And Burrs On Your Sewing Machine.
When to Use Left Needle Position

Shifting the needle to the left moves the stitch further away from the fabric edge, assuming your fabric is aligned with the right side of the presser foot — which is standard.
Use the left needle position when:
- Topstitching and you want the stitching line to land farther from the edge of the fabric or seam
- Sewing zippers with a regular zipper foot, especially when the zipper teeth are on the left side


- Stitching close to bulky seams — such as around facings or intersections — when you need extra space between the needle and the edge
When to Use Right Needle Position

The right needle position moves the stitch closer to the edge of the fabric, assuming the fabric is aligned with the right edge of the presser foot.
Use the right needle position when:
- Edgestitching close to a fold, hem, or seam
- Sewing zippers where the zipper teeth are on the right and your zipper foot is attached on the left

- Topstitching along the very edge of your fabric or seam allowance
- Sewing narrow fabric strips or small pattern pieces that don’t sit well under the presser foot with the needle in center — shifting the needle right lets you keep more fabric in contact with the feed dogs and still stitch near the edge
Automatic Thread Cutter or Manual Trim?

If your machine has an automatic thread cutter, it’s easy to rely on it without thinking. Press a button, and both the needle and bobbin threads are clipped at once. No scissors, no leaning forward. It feels like a modern luxury — and it can be. But it’s not always the best choice.
Both automatic and manual thread trimming have their place, depending on what you’re sewing.
When to Use the Automatic Thread Cutter
The automatic thread cutter works well for most everyday sewing — especially when speed and convenience matter more than thread tails or seam preparation. It’s especially helpful when:
- You’re sewing basic seams and want to move quickly from one section to the next
- You’re chain piecing quilt blocks or working on repetitive steps
- You’re not worried about thread tails being pulled to the underside (which often happens with automatic trimming)

Some machines also lift the presser foot or pull the threads to the back when cutting automatically. That’s useful for assembly-line sewing, but it can also pull short tails that unravel easily — especially at the start of a seam.
When to Use Manual Trimming
Manual trimming with scissors or snips may take a few seconds longer, but it gives you full control. Use it when:
- You need to leave long thread tails for tying off or hand-knotting — for example, when sewing darts, pintucks, when gathering fabric, etc.

- You’re working with delicate fabrics that can shift or pucker if the thread tails are too short
- You want to avoid loose stitches at the beginning or end of a seam — short tails from automatic trimming can sometimes come undone if not secured
- You’re topstitching or doing visible seams and want to bury threads by hand for a cleaner finish
With manual trimming, you control exactly where and how the thread is cut. This matters more when the fabric, seam, or technique is less forgiving.
Final Thought
Automatic thread cutters are convenient, and for many tasks, they work perfectly well. But don’t forget that manual trimming still has its advantages — especially when finish quality or seam durability matters.
If you’re sewing something delicate, visible, or complex, take a second to reach for the scissors. Sometimes precision is more important than convenience.
Automatic or Manual Buttonholes?
Most modern sewing machines come with an automatic buttonhole function. Press a button, lower the sensor lever, and the machine sews a buttonhole in one smooth cycle. It sounds ideal — and often it is. But manual buttonholes still have a place, especially when precision matters more than speed.
Understanding the strengths of both helps you choose the right method for the fabric, the project, and your expectations.
When to Use Automatic Buttonholes

Automatic buttonholes are quick, consistent, and perfect for everyday garments or projects with multiple buttonholes. Use this setting when:
- You’re sewing on medium-weight, stable fabrics like cotton, linen, or shirting
- You want to make multiple buttonholes of the same size, evenly spaced
- Your machine uses a sensor-based foot that adjusts for the exact length of the button
- The buttonhole won’t sit in a high-stress or tricky area
These are excellent for shirts, pajamas, pillow covers, or anything that benefits from neat repetition.
For a full overview of tools, techniques, and tips, you can read my tutorial Buttonhole Basics and Beyond: Tools and Methods That Work.
But automatic doesn’t always mean perfect. On bulky, textured, or stretch fabrics, auto settings can miscalculate, shift slightly, or create uneven tension — especially at the bar tacks.
When to Use Manual Buttonholes

Manual buttonholes give you more control, one segment at a time. They take longer, but they let you adjust on the fly — stitch by stitch if needed. Use manual buttonholes when:
- You’re sewing on delicate or bulky fabrics (like silk, wool, fleece, or knits) where automatic feed isn’t reliable
- You want to adjust the stitch density or length mid-process — for example, when reinforcing one end of the buttonhole
- You’re working in a tight space or near a seam where the automatic foot doesn’t fit properly
- Your button is too large to fit in the automatic foot — oversized buttons need to be measured and stitched manually
- You prefer to mark and sew each side individually to match a design feature or fabric print
You can see the full method in my tutorial How to Make a Buttonhole with a Zigzag Stitch without a Buttonhole Foot.
Manual buttonholes are also essential on older machines without a one-step or four-step automatic function. While slower, they often give better results on tricky or nonstandard projects.
Final Thought
Automatic buttonholes are fast and convenient, but they rely on the fabric feeding perfectly and the machine making the right tension decisions. Manual buttonholes give you more control and flexibility, especially when the fabric resists consistency.
If you’re sewing a special garment or working with unusual material, try a test buttonhole both ways. It’s not about which is better — it’s about which one works better for that fabric.
Did you find this article helpful? If so, save this pin (see below) on your sewing board so you can come to it anytime you need to, and follow me on Pinterest for more tips, tutorials, and inspiration!

latest posts
- Butterfly Quilt Block Tutorial – Foundation Paper Piecing
- How To Sew Quilt Squares So The Corners Match
- Sewing With Fork Pins: How They Help With Pattern Matching, Slippery Fabric, And Seams
- How Much Fabric Do I Need? 21 Helpful Tips For Calculating Fabric Yardage
- Easy Simple Sewing Project: Fabric Jar Opener
- DIY Oven Mitts: Step-by-Step Sewing Tutorial
- Easy DIY Potholder: New Design
- Tailor’s Clapper: What It Does, Why It Works, And How To Use It Right
- Heat Resistant Batting for Sewing: What It Is, How It Works, and What Makes a Difference