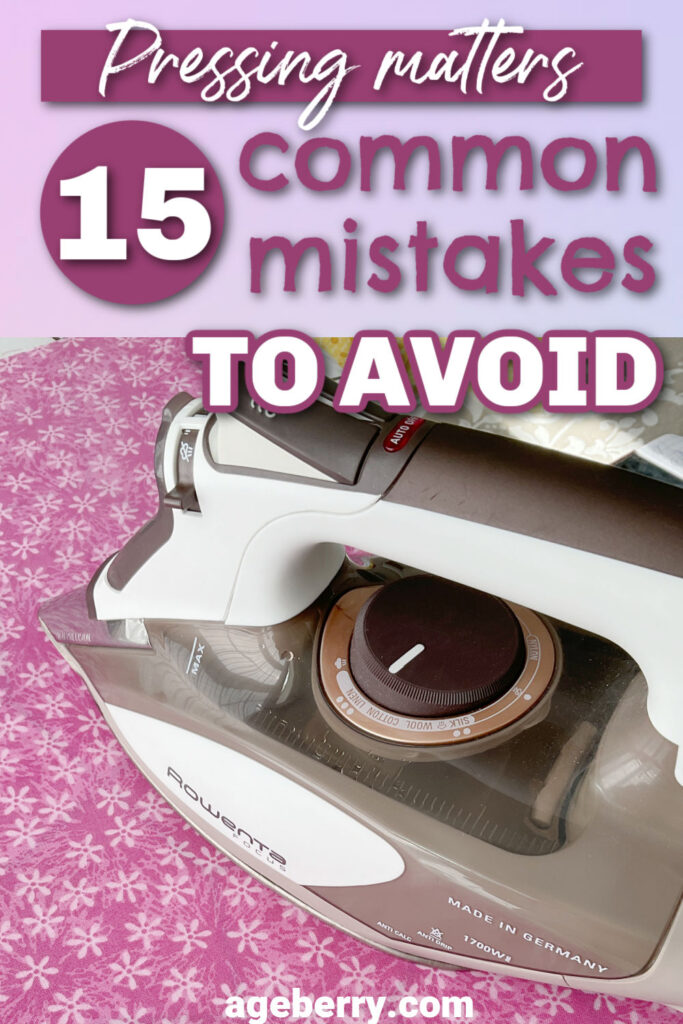
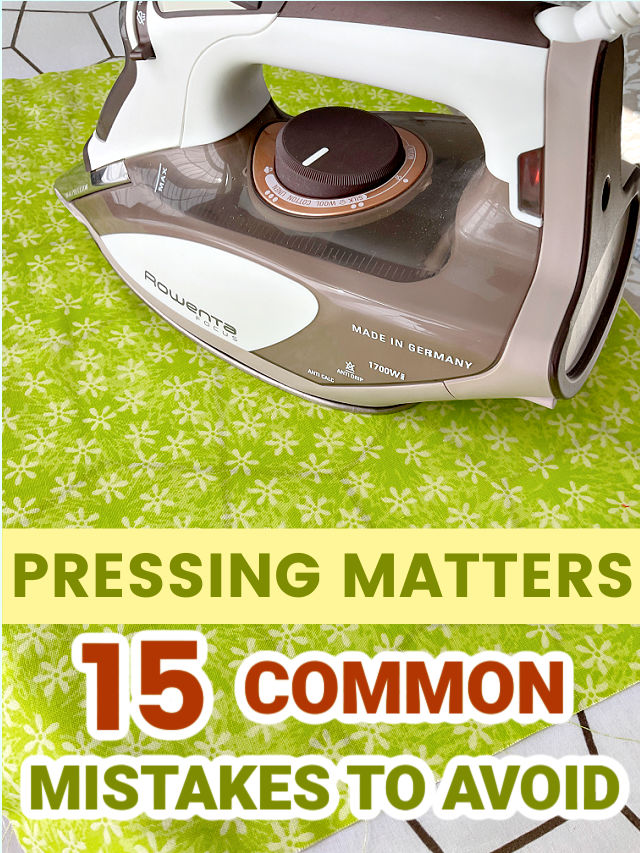
Pressing Matters: 15 Common Ironing Mistakes to Avoid
A beautiful sewing project can lose its charm in minutes – all because of poor ironing habits.
You spend hours picking the perfect fabric, cutting every piece with care, and stitching every seam just right. But if you rush through ironing or skip a few important steps, the final look can suffer. It feels unfair, doesn’t it? After all that hard work, a little too much heat or a careless press can undo the magic.
Ironing is just as important as stitching. With every press of the iron, you either polish your masterpiece or leave it looking less sharp and far less special than you intended.
Through my own experience, I have found that small ironing mistakes can quietly chip away at the beauty of a finished project. That is why I want to share some of the most common missteps that ruin sewing projects – and how to avoid them.
Mistake #1. Skipping Pressing After Every Seam
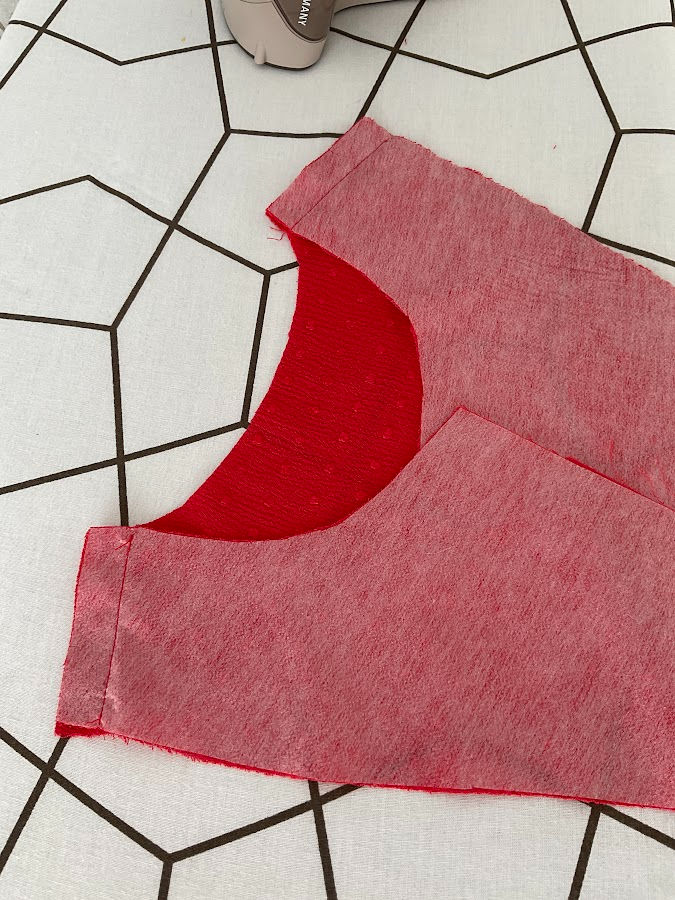
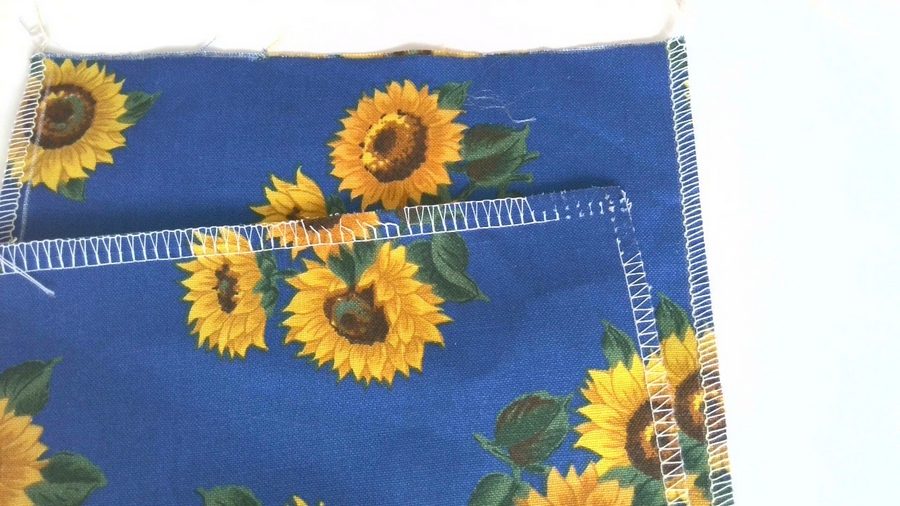
One of the biggest mistakes is sewing seam after seam without stopping to press. Every seam needs to be pressed before you move on. It might feel like an unnecessary extra step, but skipping it can quietly create problems that you will not be able to fix later.
In the image below, you can see a collar that has not been pressed yet. Notice how the seam looks a little puckered? The stitches are pulling slightly, and the fabric feels tight. At this stage, I can’t turn the collar right side out properly. It will not lie flat, and it will not look neat, no matter how carefully I sew the next steps.

After pressing the seam, everything changes. The stitches relax. The seam becomes smooth and flat. Now, when I turn the collar right side out, it will look finished and polished, just like it should.

Mistake #2. Trying to Fix Heavy Puckering with the Iron
When it comes to sewing, a little puckering can often be smoothed out with a careful press. But if you see a lot of puckering along your seams, ironing will not be able to fix it.
In the image below, you can see a seam with heavy puckering. The fabric is pulled so tightly by the stitches that it looks gathered. No matter how much steam or pressure you use, you will not be able to fix it.
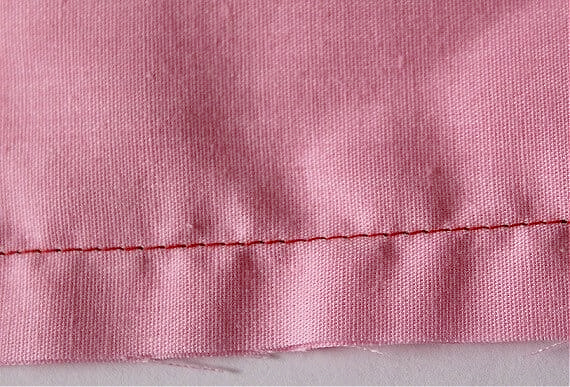
If your seams pucker this much, the problem is not the ironing. It usually means there is something wrong with your stitching. It could be the tension is too tight, the needle is wrong for the fabric, or the fabric was stretched as you sewed, etc.
The only real solution is to rip the seam carefully, correct the problem, and sew it again. It might feel frustrating at the moment, but it is the only way to get a beautiful, smooth result.
Mistake #3. Not Checking Your Seams Before Pressing
One simple habit can save you a lot of time, frustration, and even fabric: always check your seams right after stitching, before you reach for the iron.
When you finish sewing a seam, it is tempting to move straight to the ironing board. But if there is a mistake in your stitching and you press it right away, the heat will “set” the mistake into the fabric.
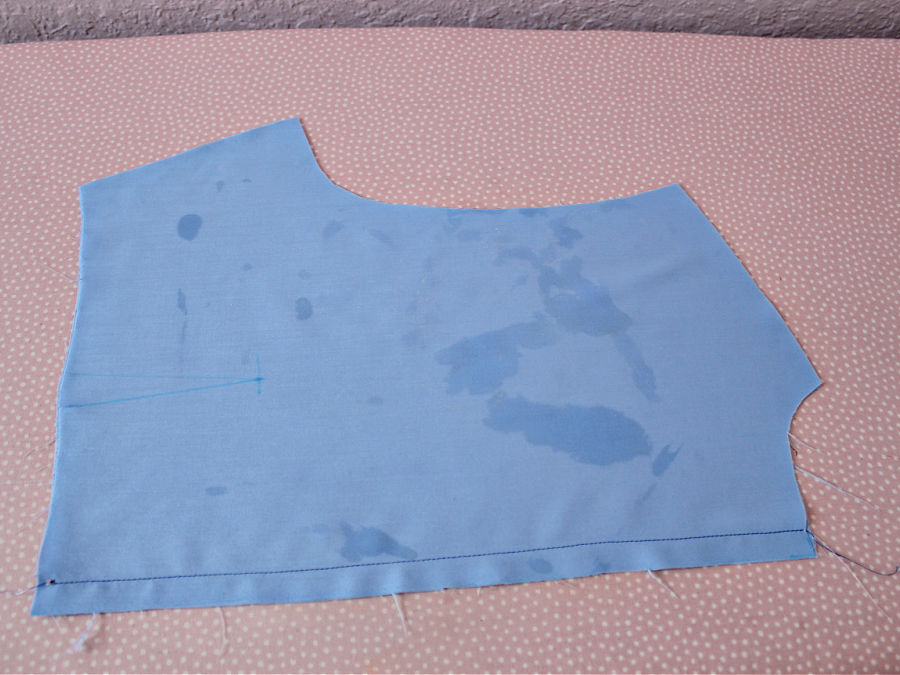
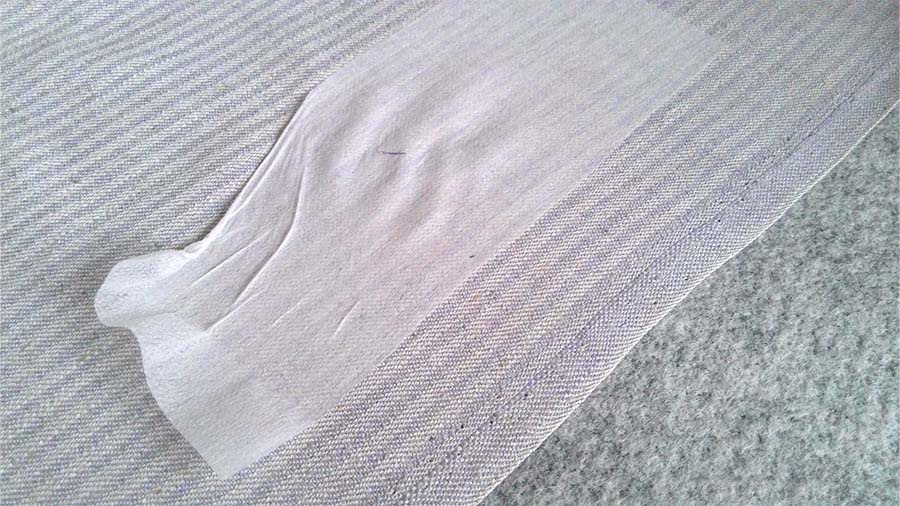
Once that happens, it becomes much harder to fix. The fabric remembers those pressed-in stitches, even after you rip them out. For example, in this image, you can see an easy-to-miss mistake: the two fabric pieces were sewn together with one right side and one wrong side facing by accident – not what you want if your pattern calls for right sides together.
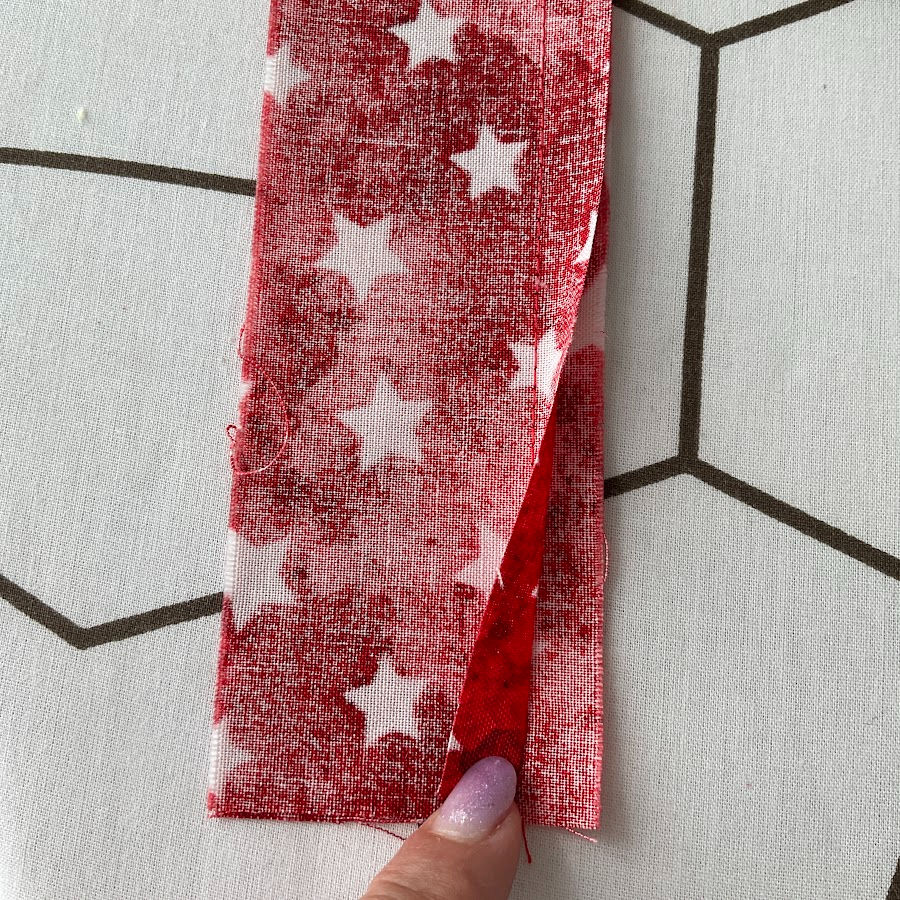
This kind of mistake is much easier to fix before you press. Once you apply heat, the seam starts to set in place. The fibers “memorize” the shape, and even if you rip out the stitches afterward, that line may stay slightly visible, especially on lighter fabrics.
So, take a moment to inspect your work before pressing. Check if the seam is smooth, straight, and even. Look closely for any puckering, skipped stitches, or places where the fabric might have shifted. If something looks wrong, fix it now, while it is still easier to do.
It only takes a few seconds, but this small step can protect your fabric and keep your finished project looking neat.
Mistake #4. Pressing Seams Without Setting the Stitches First
One common mistake is rushing to press the seam allowances open (or to the side) without first setting the seam.
Setting the seam means pressing it flat exactly as it was sewn, before opening it up. This simple step helps the stitches sink into the fabric, strengthens the seam, and gives a more professional finish.
For example, first press these shoulder seams flat on the facing, and only after that – press them open.
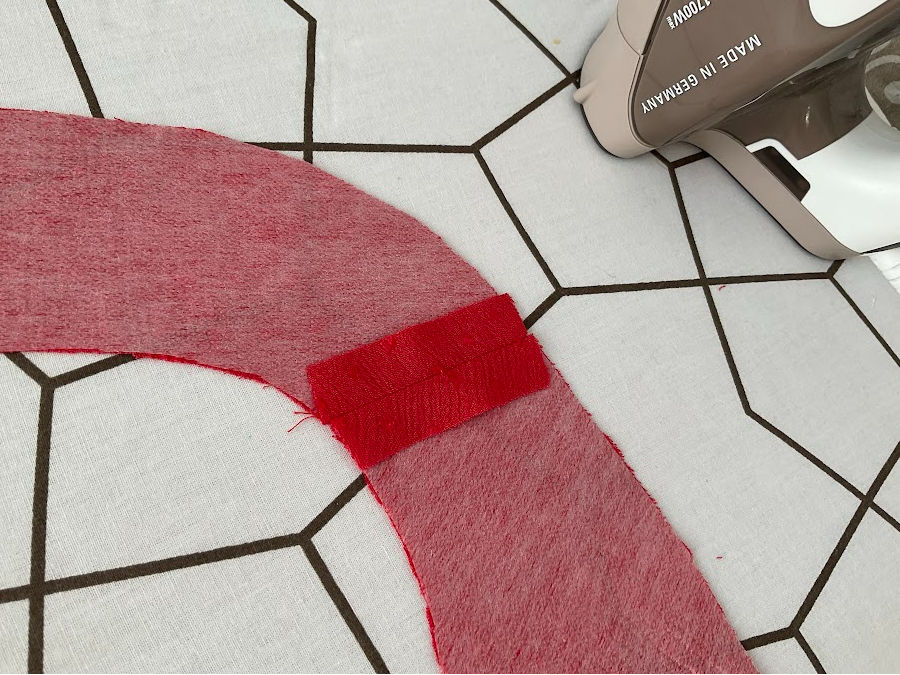
If your pattern says to press the seams open, and you do it without setting the seam first, you might run into trouble. The seam can twist, stretch, or look slightly uneven. Even worse, the stitching line can start to look loose or wobbly over time.
Mistake #5. Not Understanding the Difference Between Ironing and Pressing
In everyday conversation, the words “ironing” and “pressing” often get used like they mean the same thing. But if we want to be exact, they are a little different – and in sewing, that difference matters.
Ironing usually means moving the iron back and forth over the fabric. It works well when you are smoothing out a finished garment or getting rid of wrinkles.
Pressing, on the other hand, is about lifting the iron and setting it down with gentle pressure. You are not sliding the iron across the fabric. You are pressing it into place, holding it for a few seconds, and then lifting it straight up again.
When sewing, pressing is the technique we use more often than ironing. It helps shape the fabric without stretching it out of place. Ironing back and forth over a seam can stretch, distort, or even warp your carefully sewn seams.
Mistake #6. Skipping the Test Press
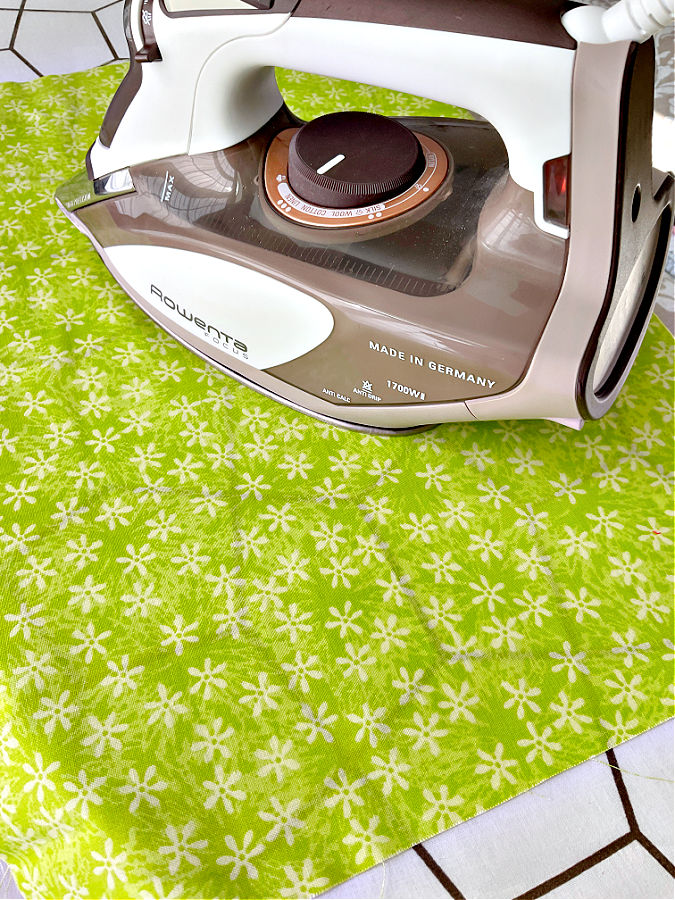
It only takes a few extra seconds, but testing your iron settings on a scrap piece of fabric can save your entire project.
Some fabrics react badly to heat, pressure, or steam. Without a test, you risk creating shiny spots, scorch marks, melted fibers, or even permanent color changes.
Certain fabrics, like wool, linen, velvet, satin, and some synthetic blends, are especially prone to developing shiny patches when pressed directly on the right side.
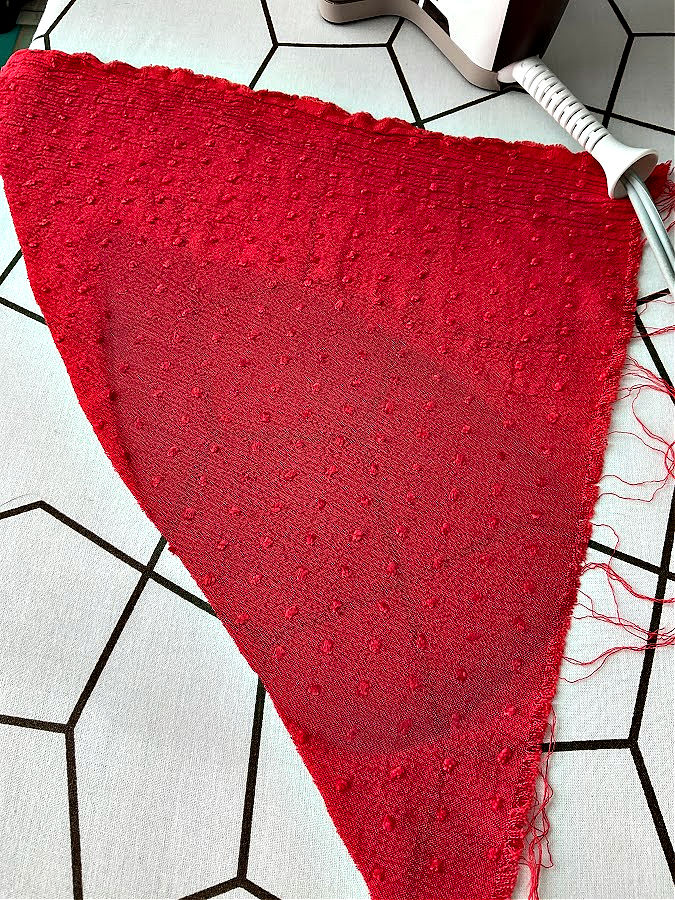
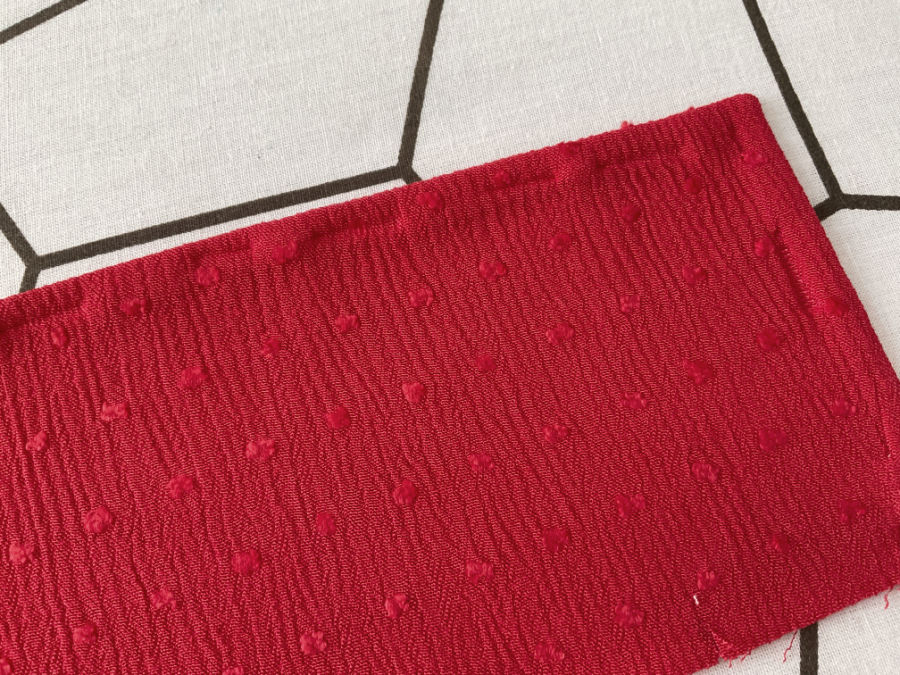
Others, like delicate rayons, can surprise you even more. I recently worked with a red rayon fabric that turned a deep dark red the moment I tried a quick press. Fortunately, in a few minutes, the regular color returned. But what if it would not have?
When testing, make sure to use a scrap from the same fabric you are using for your project. Different fabrics, even ones that look similar, can behave very differently under heat.
It is also important to test your threads. Once, I pressed serger stitches on a piece of quilting cotton (for a serger tutorial). The fabric was perfectly fine, but the polyester thread I had used melted under the iron. Threads can react differently to heat, especially when working with synthetics.
If you are not sure about your materials, always start by pressing gently on a test piece. Try a lower heat setting first, and increase carefully if needed.
It is a small step that protects all the time, effort, and care you put into your sewing.
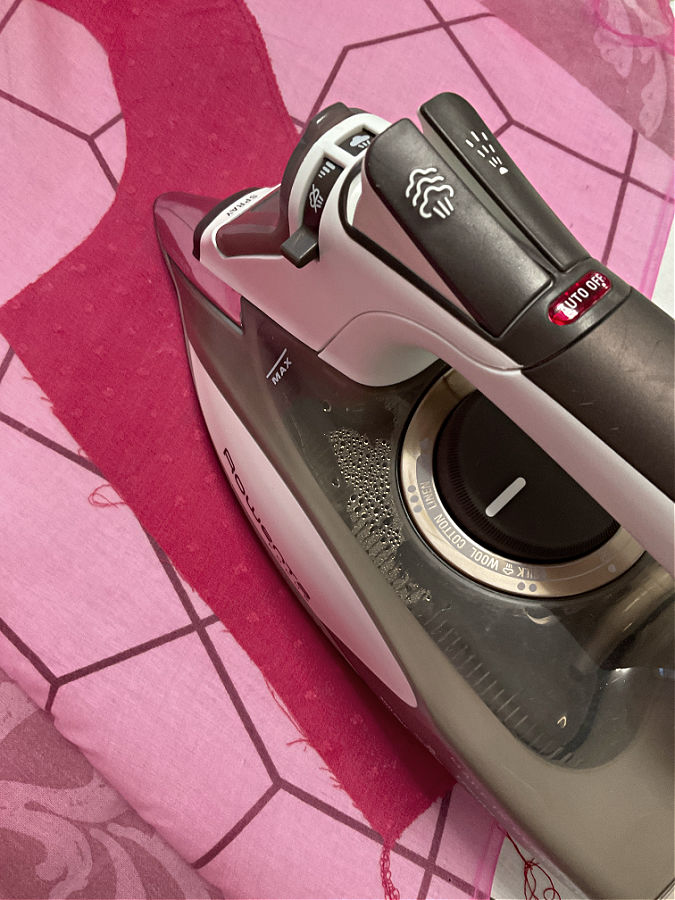
Mistake #7. Not Using a Pressing Cloth
Skipping a pressing cloth is one of those mistakes that can ruin beautiful fabric in seconds. It puts delicate fibers at risk of shine, scorching, or even melting.
I always use a 100% silk organza pressing cloth. It is sheer enough that I can still see the fabric underneath, but it provides a protective barrier against the heat. Silk organza can handle high temperatures without holding moisture, which makes it ideal for both dry pressing and steam pressing. It has saved many projects for me over the years.
If you do not have silk organza on hand, a piece of thin cotton works very well too. Just make sure it is clean and smooth.
Keep a few pressing cloths (is it a word?) near your ironing board so you are never tempted to skip this simple but important step.
Note: Some of the links on this page are affiliate links. This means I will receive a commission if you order a product through one of my links. I only recommend products I believe in and use myself.
If you plan to buy pure silk organza, you can find it on Amazon. Here’s my affiliate link.

Mistake #8. Pressing on the Wrong Surface
Pressing on the wrong surface can cause more problems than you might expect. Not only can it ruin your fabric, but it can also damage your furniture, your cutting mat, or anything else not designed for high heat and steam.
An ironing surface should be firm, heat-resistant, and able to absorb moisture without warping. Soft, unstable, or inappropriate surfaces can leave imprints, stretch your fabric, or cause uneven pressing. Worse yet, steam can warp cutting mats or leave permanent marks on wood surfaces.
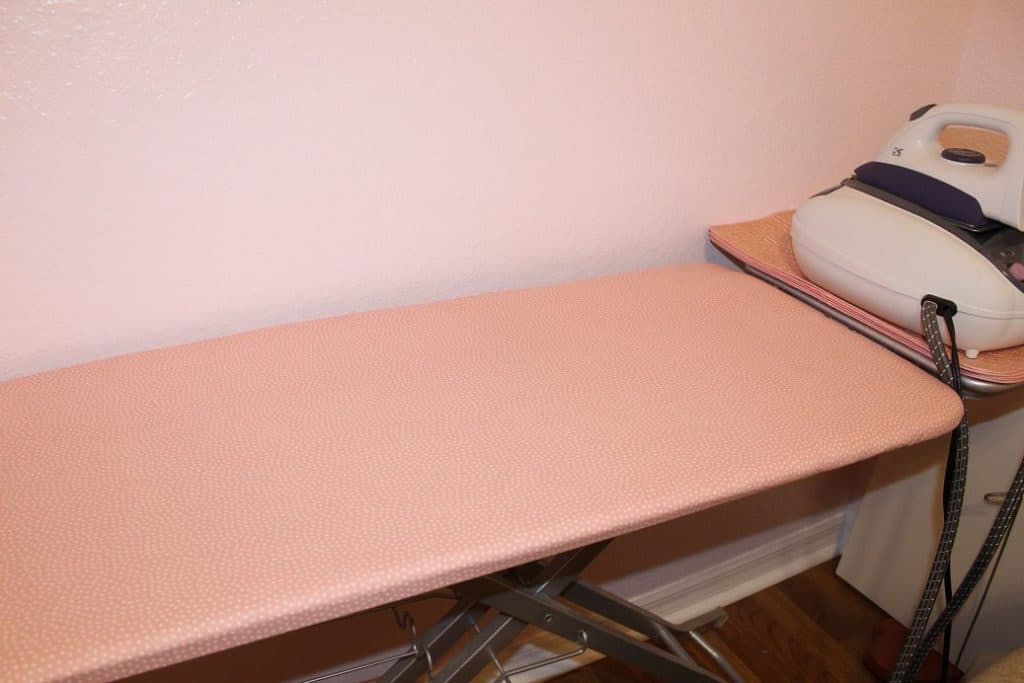
I like to use an extra wide ironing board (18″, regular boards are 13″) for most of my projects. It gives me plenty of space to move larger pieces without wrinkling them again.

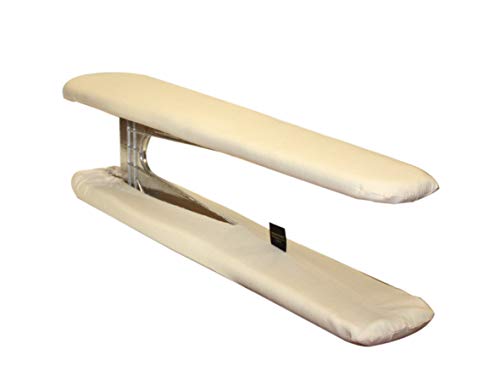
For smaller areas like sleeves and pant legs, I love using small sleeve boards. They make it so much easier to get into tight spots without distorting seams.
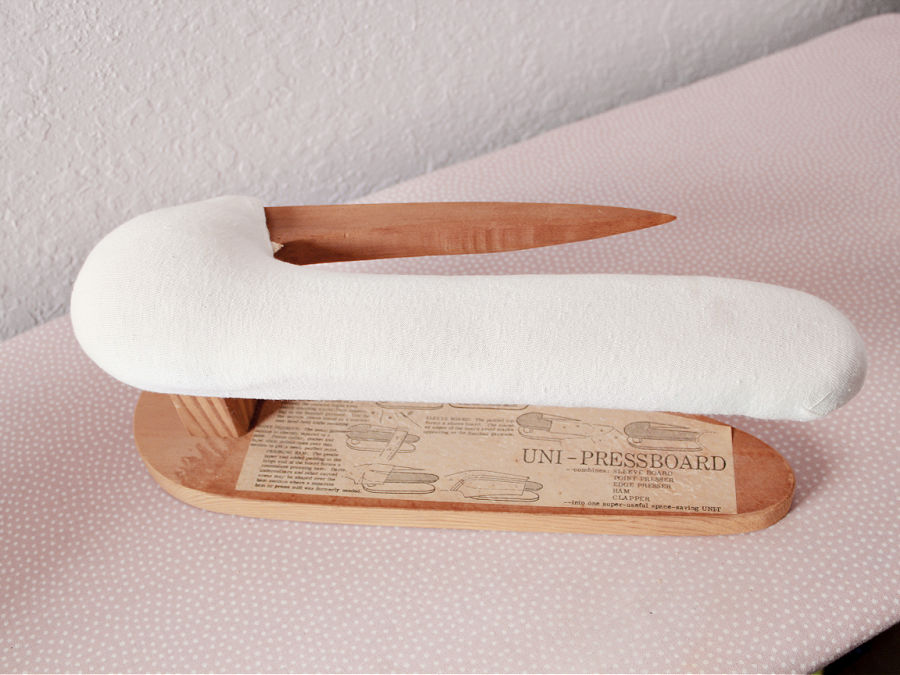
When I need to press curves or darts I reach for my tailor’s ham. I made it myself, and it has been one of my favorite pressing tools ever since. (You can find my tutorial here – How to make a tailor’s ham).

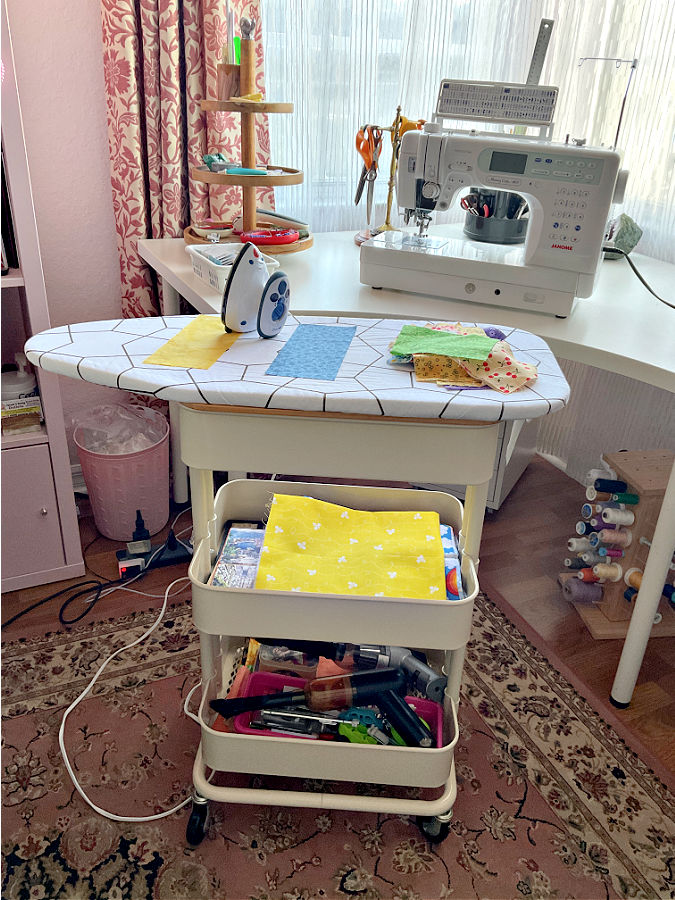
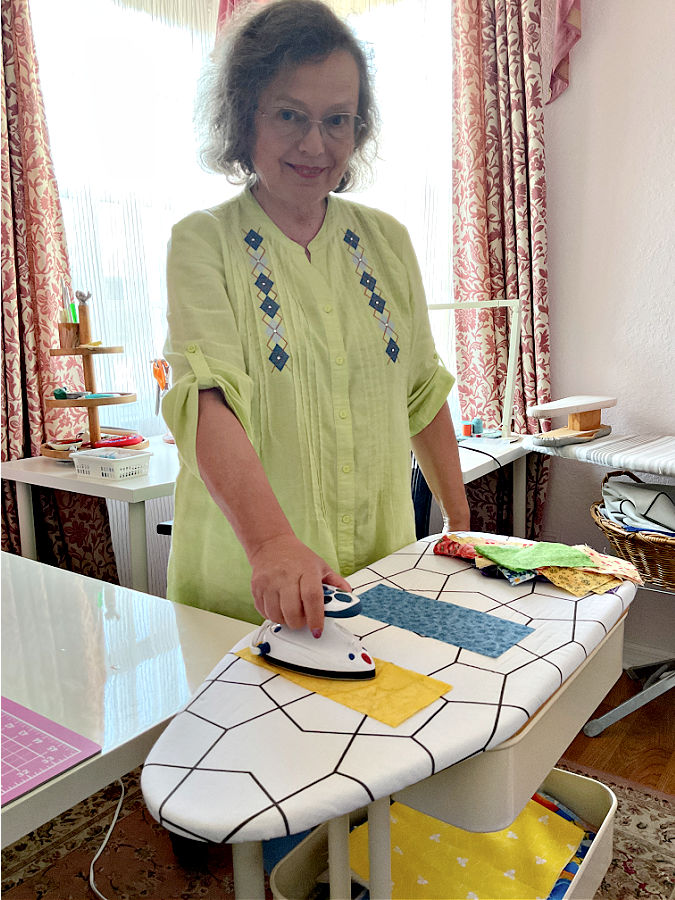
When I need to iron small pieces right next to my sewing machine, especially while piecing for a quilt, I use a smaller ironing board from IKEA (but Amazon and others have it too). It fits perfectly on top of a three-tier cart on wheels, which makes it easy to move wherever I need it.
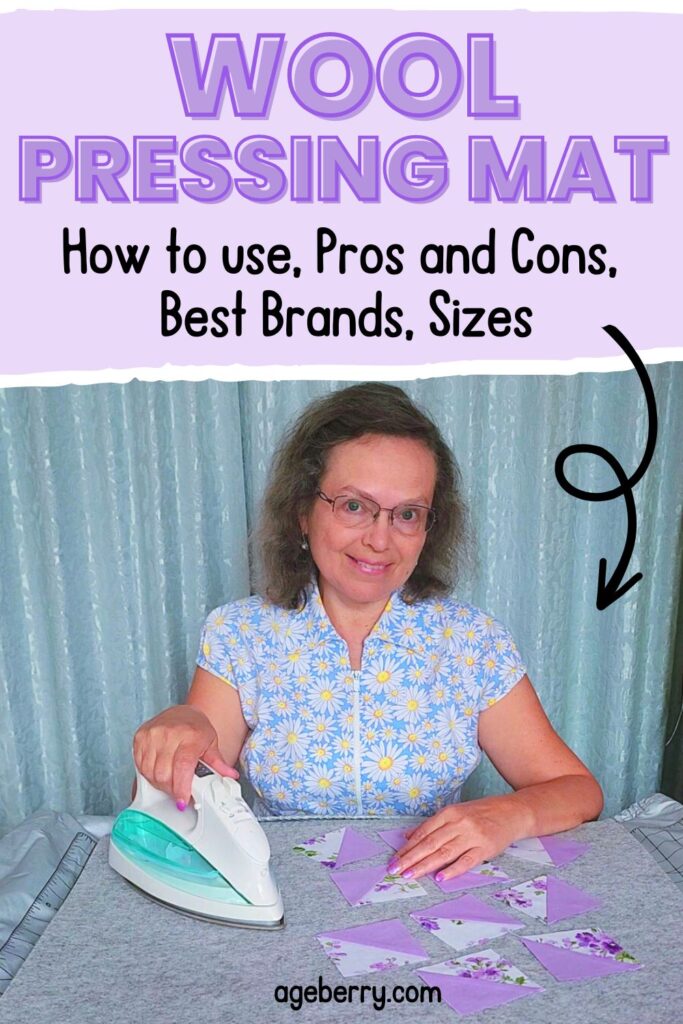
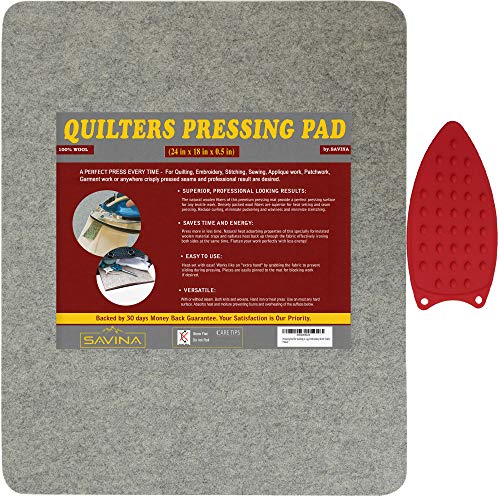
I also like to use a wool pressing mat. It holds heat beautifully, so it presses from both sides at once, but it still needs a good, heat-safe surface underneath it. I wrote a detailed review about this tool – Wool Pressing Mat: How to Use, Pros and Cons, Best Brands, Sizes.
So, a good pressing setup is just as important as your sewing machine. Invest a little time into creating one that fits your space and your projects.
Mistake #9. Using the Wrong Iron
Not all irons are created equal, and using the wrong one can cause all kinds of unexpected problems.
A bad iron can leak water all over your fabric, leaving unwanted water spots or stains and these may become permanent.
Some have cords that are too short, which makes pressing large pieces awkward and frustrating. Others are heavy, bulky, or poorly balanced, which can tire your wrist or cause you to drag the iron instead of pressing properly.
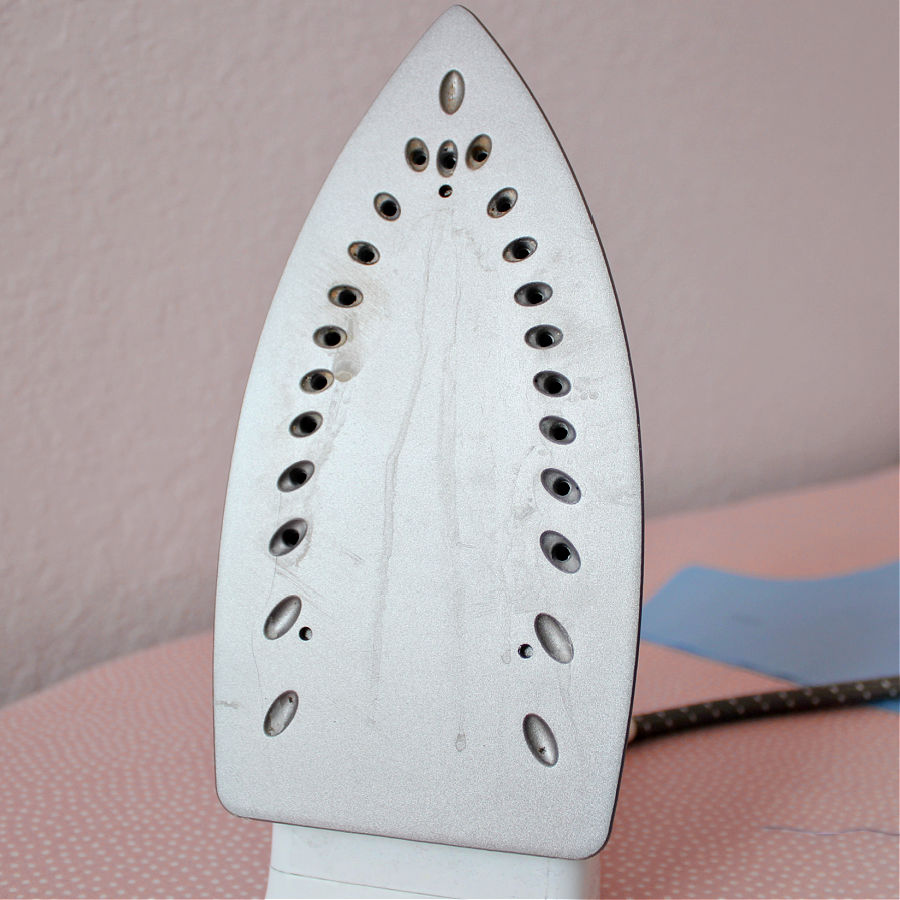
A dirty iron is another hidden enemy. Residue on the soleplate can transfer onto your beautiful fabric, especially when you are using steam. A scratched soleplate can even snag delicate fabrics like silk or chiffon, leaving marks you cannot fix.
Size matters too. A very large iron can make it difficult to press small areas precisely, while a very small iron might not deliver enough steam or heat for bigger jobs.
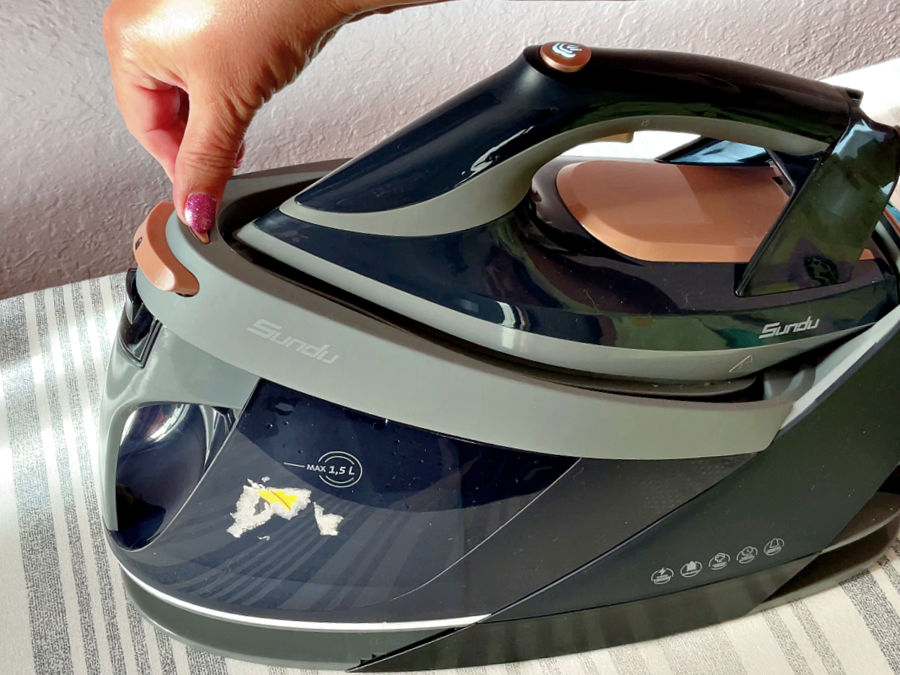
Because of all this, I have learned to choose my irons carefully.I love using ironing stations with a separate water tank. They hold a lot of water, so I can use a steady flow of steam without needing constant refills. They press beautifully and save so much time on bigger projects.
I bought the Sundu steam station and wrote a full review about it — Sundu Pro Steam Station with Ceramic Soleplate Review: Iron-y Good?.
This is actually my second ironing station, my previous Kalorik station lasted for something like 10 years but had to be retired because it had developed leaks.

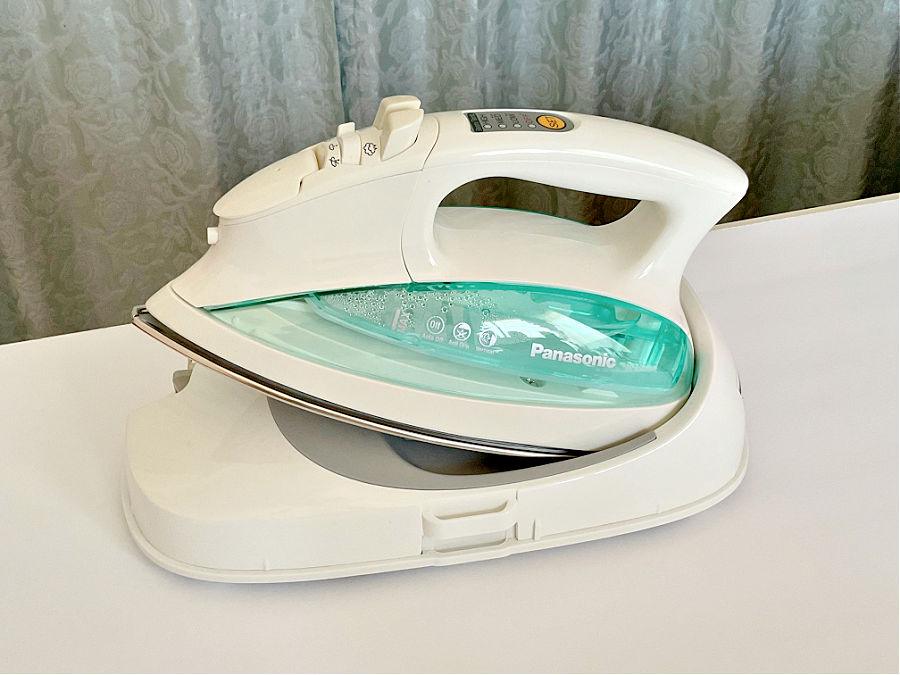
When I need more flexibility, I use my cordless Panasonic iron. It gives me freedom to move without wrestling a cord around delicate pieces, which is especially helpful when working on quilts or tricky garment shapes.
✅ Related tutorial: Panasonic Cordless Irons: Review and Insights from Daily Use
The iron I have is discontinued now, but it has served me well during the (almost) 4 years I owned it.

And I absolutely love my mini iron for small, detailed areas like quilt blocks or appliqué. It heats up quickly, fits perfectly into tight spaces, and gives me the precision I need without overwhelming the fabric.
✅ Related tutorial: Mini Irons For Sewing And Quilting
The right iron makes a huge difference. It feels like having the right tool for the right job — smoother, faster, and so much less stressful.
Mistake #10. Skipping Ironing After Prewashing Before Cutting
Prewashing fabric is an important step, but it is only half the job. If you skip ironing the fabric after prewashing, you are setting yourself up for cutting mistakes that can throw off your entire project.
✅ Related tutorial: Prewashing Fabric: Is It A Good Idea?
After washing, fabric usually comes out wrinkled, twisted, and sometimes even shrunken. If you try to lay it out and cut right away, those wrinkles and distortions can change the shape of your pattern pieces. A small wrinkle can mean your sleeve, bodice, or quilt block ends up a little too short or a little off-grain — and it is almost impossible to fix later.
Ironing after prewashing smooths out the fabric, relaxes any tightening caused by the wash, and brings the fabric back into a true, flat shape. It also helps you find and straighten the grain line more easily, which is crucial for a good fit and drape.
Think of ironing after prewashing as giving your fabric a fresh start.
Mistake #11. Ironing Over Pins
It might feel like a time-saver to press right over pinned fabric pieces. But ironing over pins can cause more trouble than it saves.
Pins can leave permanent impressions in the fabric, especially on lighter or more delicate materials. Plastic-headed pins are even worse — they can melt under the heat of the iron, leaving a sticky mess on both your fabric and your iron’s soleplate.
That said, I have tried some specialty pins called Magic Pins. They are designed to handle the heat of the iron, and I have found that I can press over them without melting. They are very thin, which makes them a nice option when I need to work quickly, especially instead of thread basting.
But even with Magic Pins, there is a small catch. On very lightweight fabrics, I still see tiny impressions after pressing. So I mostly reserve them for thicker fabrics where the weave is tighter and stronger.

Mistake #12. Ignoring Fiber Composition
Not all fabrics behave the same way under the iron. One of the biggest mistakes is treating every fabric the same, without thinking about what it is made out of.
You can’t press cotton the same way you press rayon. Cotton usually loves heat and steam. It responds beautifully to a hot iron and can hold a crisp crease. But if you use that same heat setting on rayon, you can easily scorch it, shrink it, or change its color.
Wool needs careful steam and gentle pressure. Silk likes a cooler, dry press with a pressing cloth. Polyester demands low heat and patience because it can melt before you even realize it.
Ignoring fiber composition often leads to damage that can’t be fixed — shiny marks, burn spots, warped seams, or stretched and distorted shapes.
Before pressing, always pause and think about the fabric you are working with. If you are not sure, test a scrap first, starting at a lower temperature. You can always add more heat if needed, but you can’t undo damage once it happens.
Mistake #13. Pressing Knits and Fabrics with Elastane the Wrong Way
Knits and fabrics with elastane can be tricky when it comes to pressing. They do not behave like woven fabrics. They stretch, they recover, and they are far more sensitive to heat. Treat them like regular cotton or linen – and you could end up with flattened texture, stretched-out seams, or even heat damage.
One of the biggest mistakes is using too much heat or too much pressure. Elastane fibers are especially delicate and can melt or lose their stretch when exposed to high temperatures. Once that happens, the fabric loses its ability to bounce back, and seams can start to look wavy or limp.
Another mistake is stretching the fabric while pressing. Even a slight pull with the iron can permanently distort the shape. Knits should always be pressed gently, using an up-and-down motion, without sliding or pulling.
When working with knits and elastane blends:
- Use a lower heat setting, even if the fabric feels thick.
- Use a pressing cloth to protect the surface.
- Lift and press — never iron back and forth.
- Let the fabric cool completely while lying flat before moving it.
✅ Related tutorial: How To Sew Knit Fabric | 23 Expert Tips For Beginners
Mistake #14. Pressing the Iron Too Hard
When it comes to pressing, many people think that more pressure will give better results. But pressing too hard with the iron is actually a mistake.
Modern irons are designed to do the work for you. They are heavy enough, they deliver steam and heat effectively, and they do not need you pushing down with all your strength. Pressing too hard can flatten the texture of the fabric, stretch seams out of shape, or even leave imprints of the ironing board underneath.
Instead of forcing the iron down, let the weight of the iron itself, the heat, and the steam handle the job. Gentle, even pressure gives the best results — smooth seams, crisp edges, and fabric that keeps its original beauty.
Pushing too hard also tires out your hands and arms much faster. Pressing should feel calm and controlled, not like a workout at the gym.
Mistake #15. Handling Fusible Interfacing the Wrong Way
Fusible interfacing is a wonderful sewing tool. It gives structure, shape, and support to fabrics that need a little extra help. But it also comes with its own set of pressing mistakes that are easy to make if you are not careful.
✅ Related tutorial: How To Use Fusible Interfacing (Video + Tips And Tricks)
One big mistake is using too much heat or steam. Fusible interfacing has a layer of glue that melts to bond with the fabric. If the iron is too hot, the glue can seep through to the right side of the fabric, leaving visible spots or a stiff, shiny surface. If you use too much steam, the adhesive can get watery and weak, leading to poor bonding.
Another common mistake is moving the iron back and forth while trying to fuse. Sliding the iron can shift the layers and cause bubbles, wrinkles, or uneven bonding. Once bubbles form under the fabric, it is very hard to remove them without redoing the entire section.
Also, forgetting to use a pressing cloth when applying fusible interfacing can cause the glue to stick to your iron.
When working with fusible interfacing:
- Use a dry iron (no steam) unless the product instructions specifically allow it.
- Use medium heat unless the interfacing instructions say otherwise.
- Always press, lift, and press again — do not iron back and forth.
- Use a pressing cloth to protect both your fabric and your iron.
Check the manufacturer’s instructions on your fusible interfacing before pressing. Different products may need slightly different techniques to bond perfectly.
Did you find this guide on ironing mistakes useful? If yes, why not save this pin to your Pinterest board? That way, you can easily return to the article whenever you need a refresher on these mistakes. And for an ongoing stream of handy tips, tutorials, and all sorts of creative inspiration, make sure to follow me on Pinterest.
latest posts
- What Do You Call a Person Who Sews? I Asked My Readers and Got 1,408 Opinions
- DIY Round Purse: PDF Sewing Pattern and Detailed Instructions
- Mini Wonder Clips By Clover: Useful Sewing Tool Or Just Another Notion?
- Non-Slip Grips For Quilting Rulers: A Small Notion With A Useful Job
- Fabric Eraser for Sewing: What It Removes and When to Use It
- What Is The Best Thread For Sewing Machine Projects? Let’s Find Out!
- Butterfly Quilt Block Tutorial – Foundation Paper Piecing
- How To Sew Quilt Squares So The Corners Match
- Sewing With Fork Pins: How They Help With Pattern Matching, Slippery Fabric, And Seams