How to Sew a Pointed Fabric Zipper End Tab
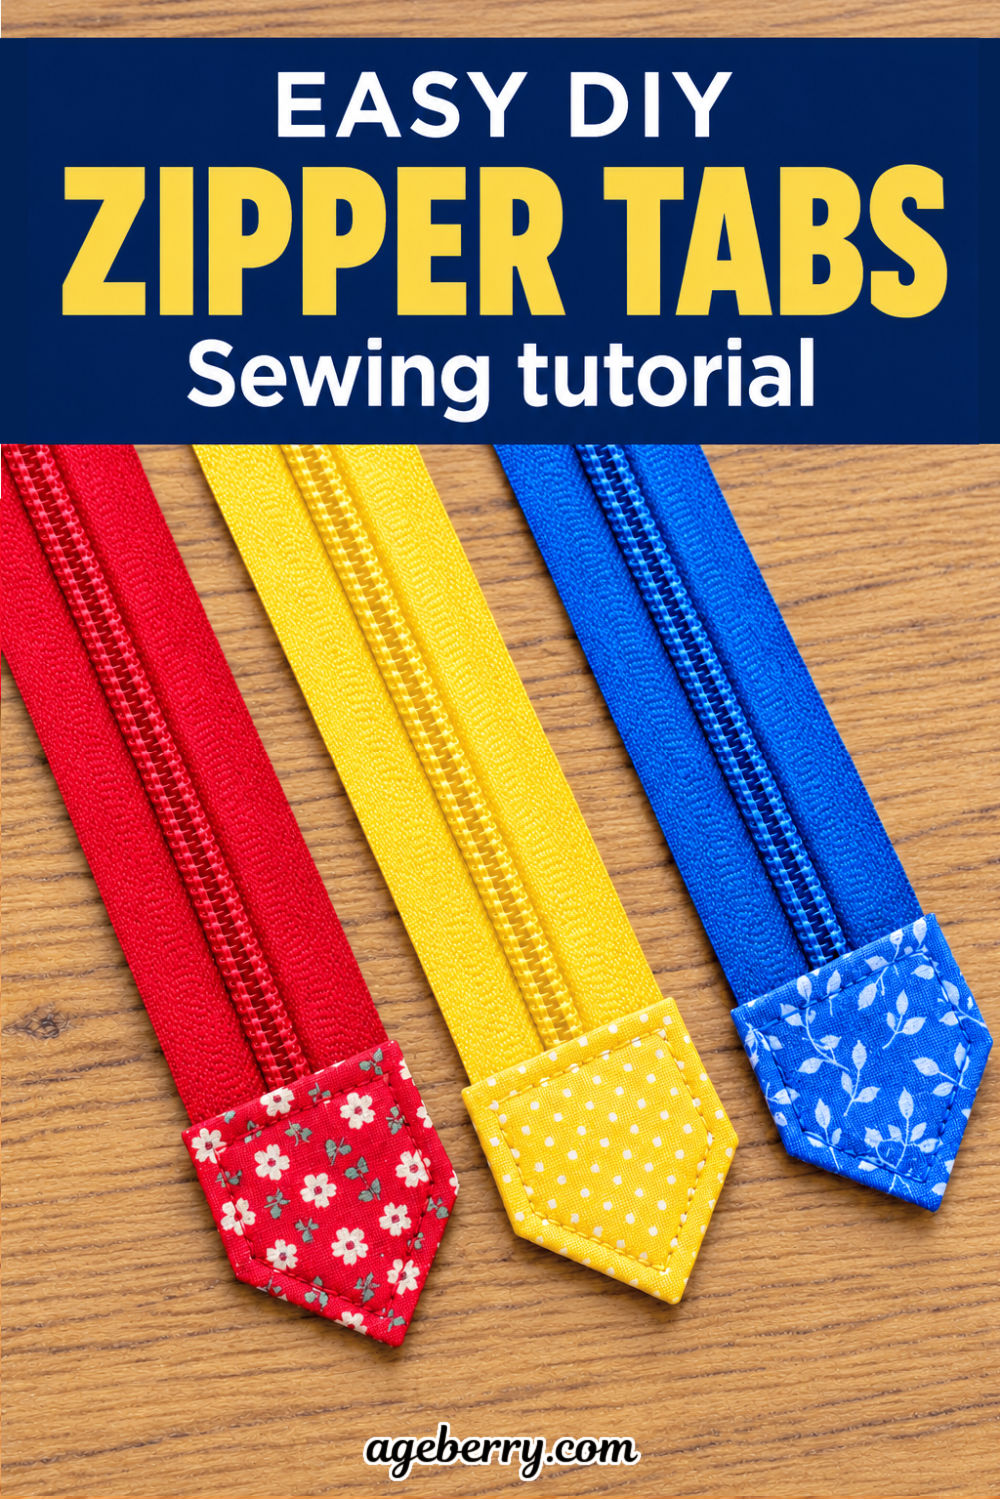
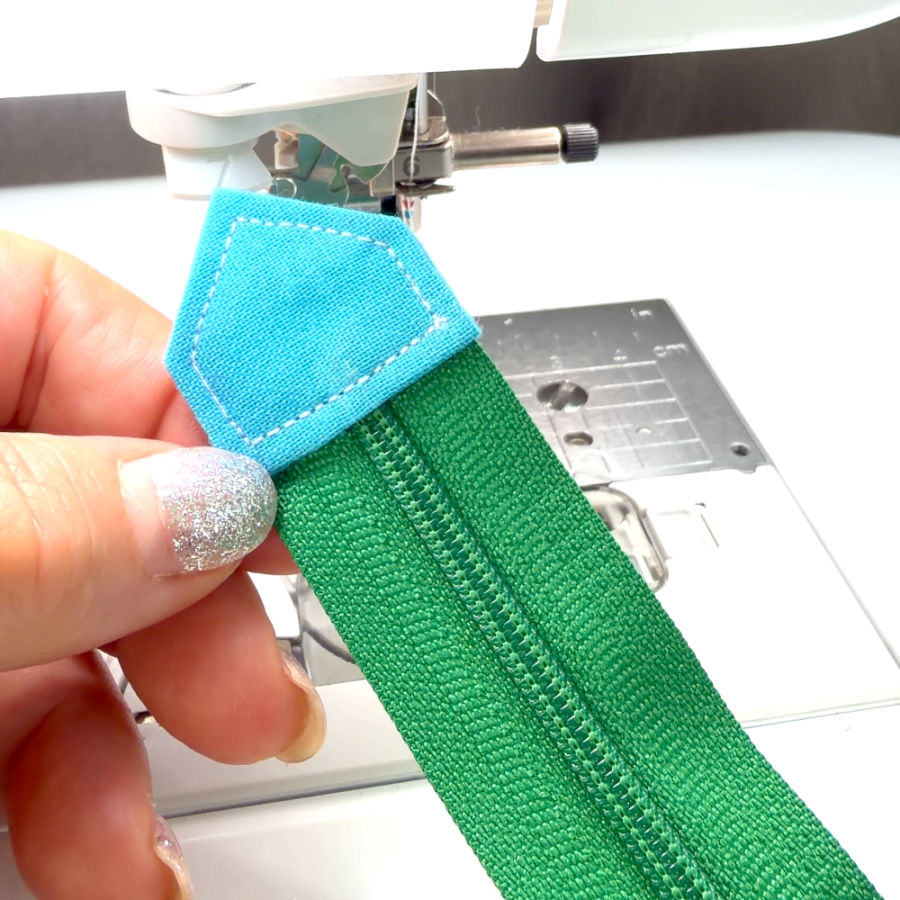
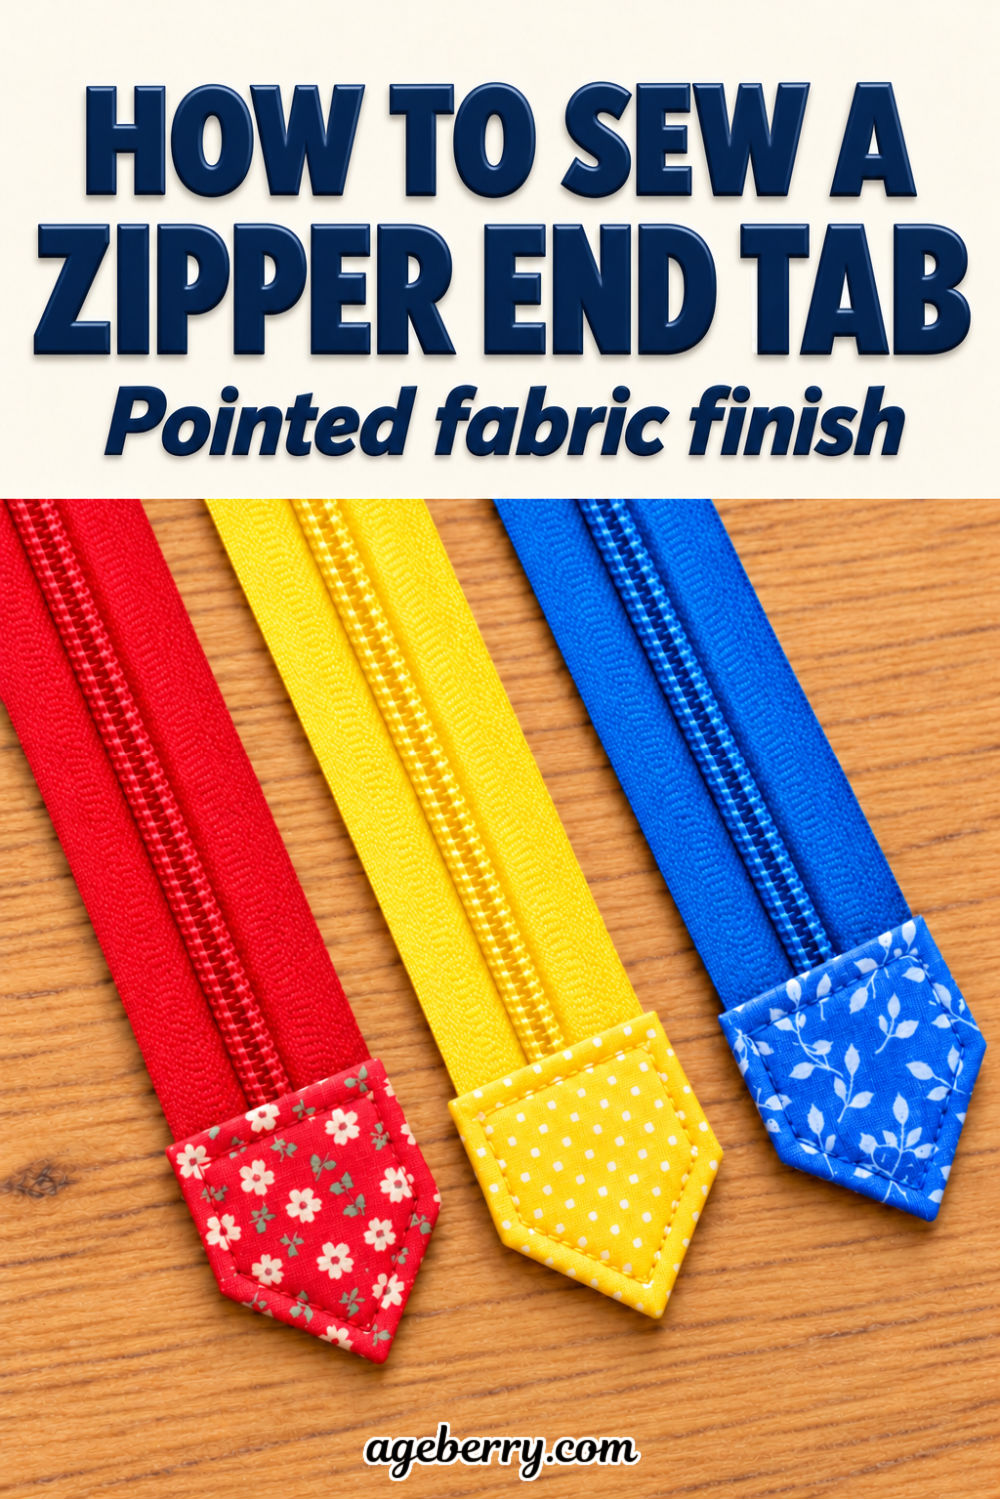
In this sewing tutorial, I’ll show you how to make a pointed fabric zipper end tab using an about 2 × 3-inch fabric rectangle. This small fabric piece covers the cut end of the zipper and adds a neat decorative finish.
Most zipper tabs are rectangular, but this version has an attractive pointed shape. You won’t need a template—the shape is created by folding and turning the fabric.
Prefer to read without ads?
I created a PDF version of this guide for anyone who likes to keep sewing guides saved, printed, or easy to read without ads. It includes the same helpful information in a simple format you can download and use whenever you need it.
The PDF is available in my shop for a small fee. It’s a nice option if you want to support my work and keep this tutorial close to your sewing machine.
This zipper finish works well for handbags, zipper pouches, cases, organizers, and other sewing projects with a visible zipper end.
But zipper tabs are useful even when the zipper ends will not be a main design feature. When you sew a regular zipper pouch, for example, you will often want both ends of the zipper covered with fabric. This reduces bulk at the pouch corners, and means you do not have to sew directly across the zipper coil when closing the side seams.
What You Will Need
- A nylon-coil zipper (mine is a nylon coil zipper with 1 1/16 -inch-wide tape)
- One small fabric rectangle at least 2 x 3 inches
- Regular sewing tools and notions
This method is best for a nylon or polyester coil zipper because you will sew across the zipper teeth. Do not sew across metal teeth.
For the sample in this tutorial, I intentionally used fabric and thread that do not match the zipper. The contrasting colors make the folds, seams, and stitching easier to see in the photos. For a real project, choose fabric and thread that coordinate with the zipper and the rest of the project.
Note: Some of the links on this page are affiliate links. This means I will receive a commission if you order a product through one of my links. I only recommend products I believe in and use myself.
Step 1: Cut the Fabric Rectangle
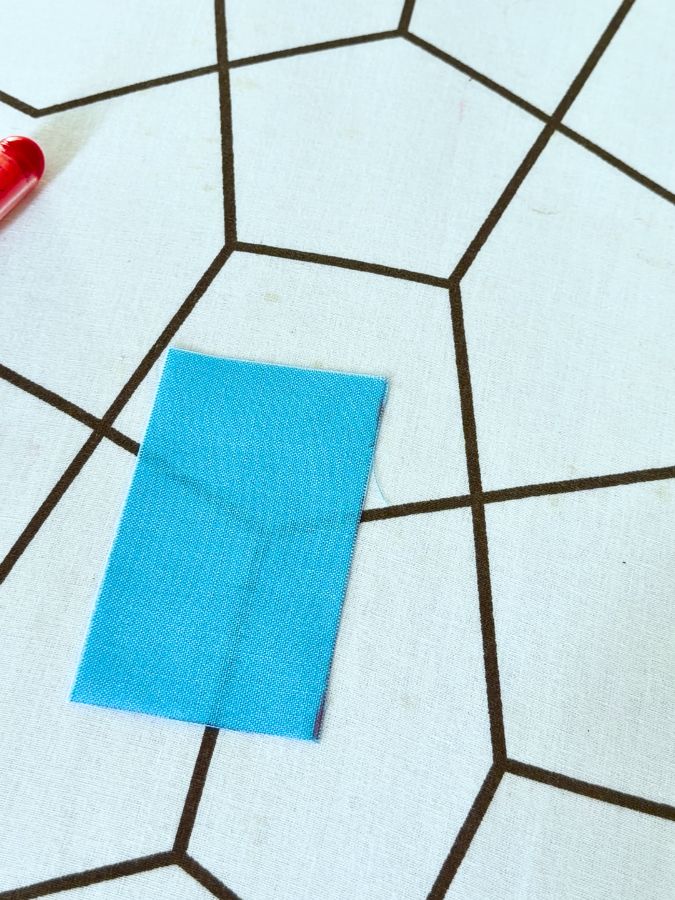
Measure and cut one fabric rectangle. The width of the fabric rectangle depends on the width of your zipper. Measure the zipper from one outside edge of the tape to the other. My zipper measured 1 1/16 inches wide, so I used a fabric rectangle measuring 2 × 3 inches.
If your zipper has a different width, make the fabric rectangle slightly narrower than twice the zipper width. For example, twice the width of my zipper would be 2 1/8 inches, so I reduced that measurement to 2 inches. This allows the folded fabric edges to come close to the zipper coil without covering it.
The 3-inch length determines how large the finished tab will be. You can adjust it if you want a slightly shorter or longer tab.
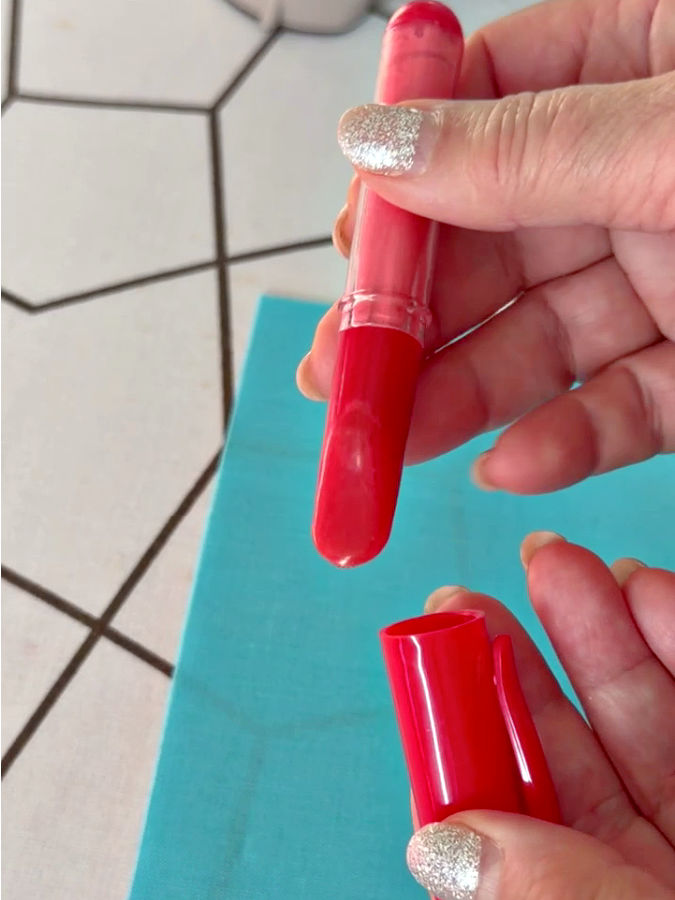
To mark the rectangle, I used a chalk wheel pen, a marking tool I hadn’t tried before. It is shaped like a pen and filled with red powdered chalk. A tiny wheel at the tip releases a fine chalk line as you move it across the fabric. It worked very well for drawing the straight cutting lines.
You can use any other fabric marking tool you like.


You now have a small piece that looks far too plain to become anything interesting. Give it a few minutes.
Step 2: Position the Zipper
Place the fabric rectangle right side up.
Lay the zipper right side up on top of the fabric. Center the zipper across the width of the rectangle and align the cut end of the zipper with one short edge of the fabric.
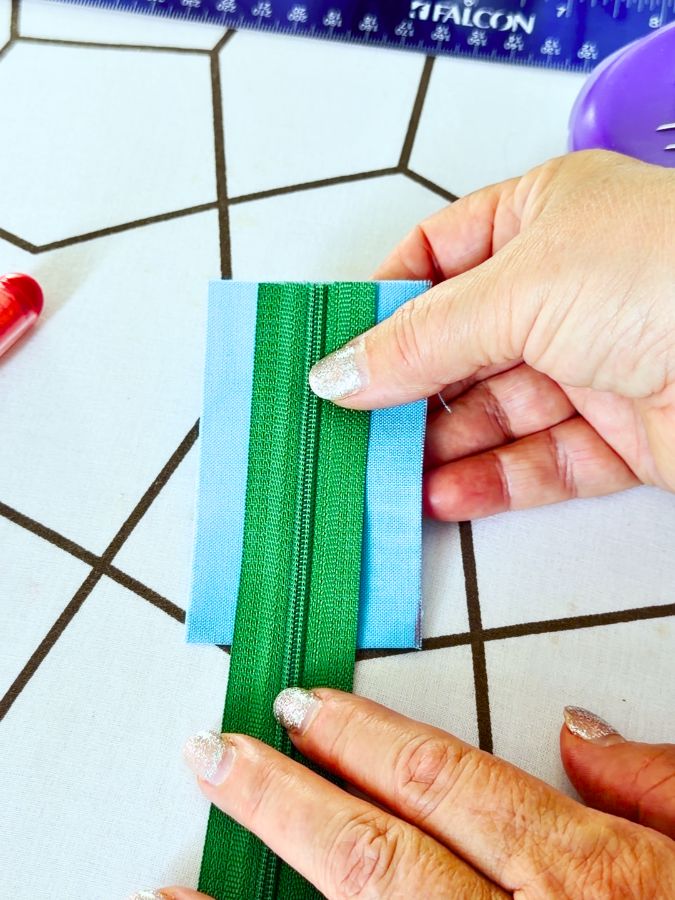
Fold one long side of the fabric over the zipper tape. The folded edge should come close to the zipper coil without covering it.
Fold the other side in the same way. Try to keep the zipper centered between the two folded fabric edges.
Pin the layers in place.
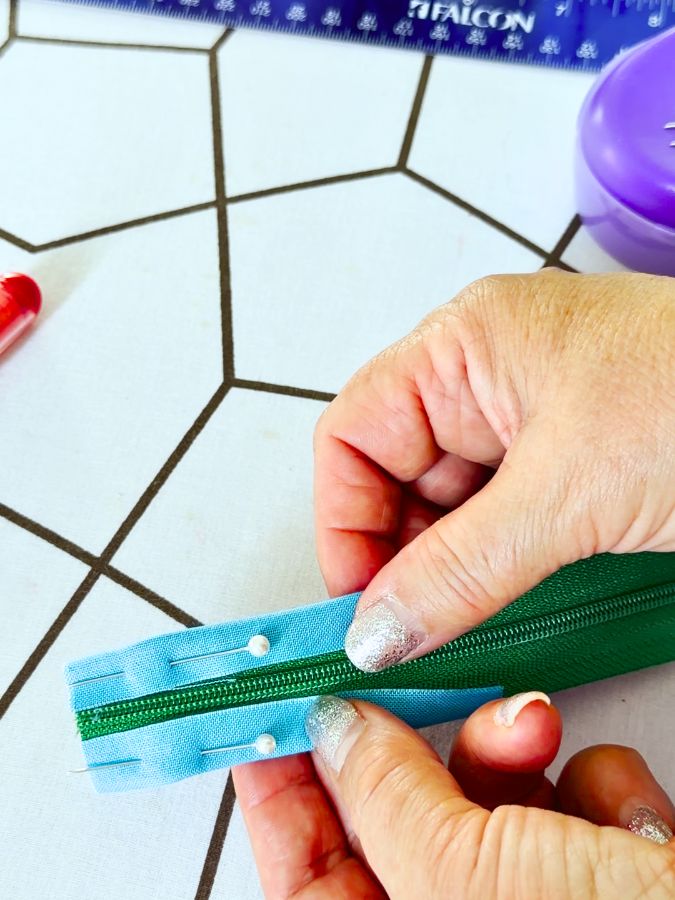
Step 3: Sew Across the Zipper End
Stitch across the fabric and zipper approximately 1/4 inch from the cut end of the zipper.
Backstitch at the beginning and end. Don’t sew over pins.
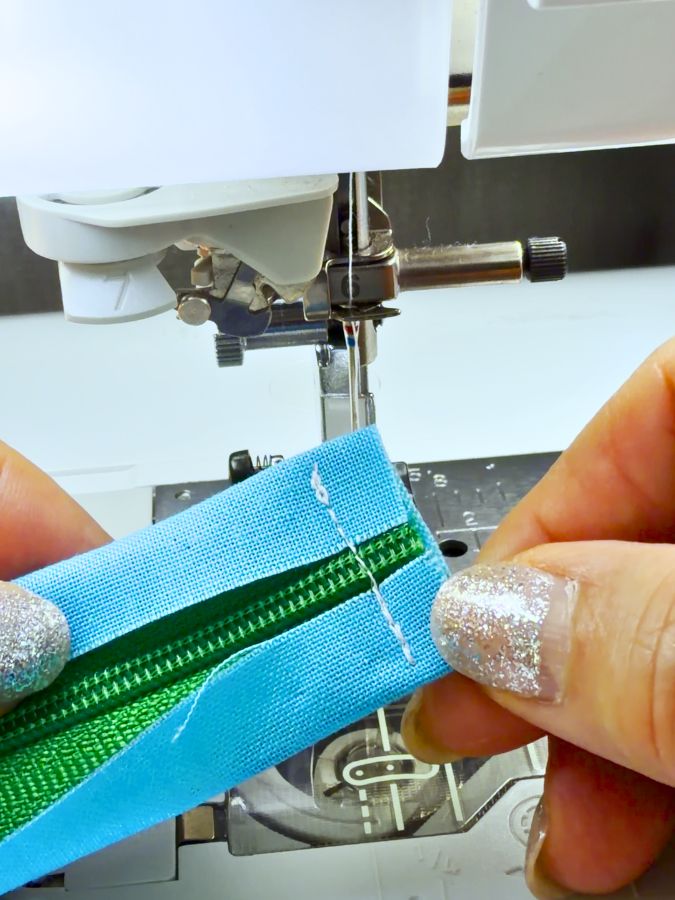
When sewing across nylon zipper teeth, go slowly. If necessary, turn the handwheel as the needle crosses the coil. This reduces the chance of breaking the needle.
Trim the thread tails.
Step 4: Flip The Fabric Over The Zipper End
Open the folded sides of the fabric and pull the fabric away from the zipper. The fabric rectangle will now extend past the end of the zipper. The seam and the zipper end are now hidden inside.
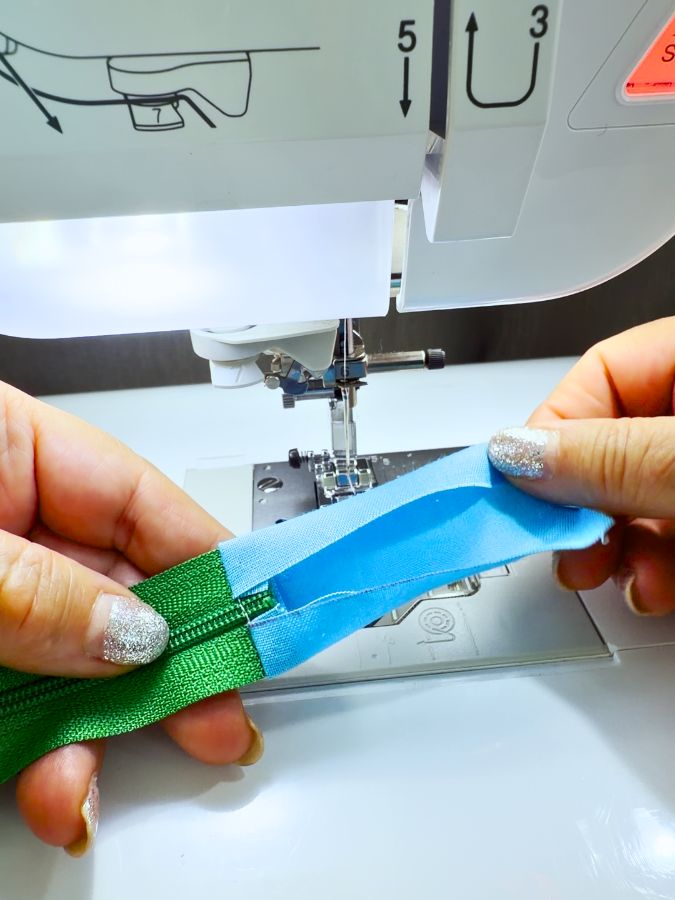
Check the folded edges carefully before moving to the next step. They should be exactly parallel, and each fold should have the same width from one end to the other. The folded fabric should form an even rectangle, with neither side wider than the other and neither folded edge overlapping the opposite one. Uneven folds will make the finished tab uneven.
I pressed the folds with the tip of my iron to help them stay in place. Keep the iron on the fabric and do not allow it to touch the nylon zipper coil because the heat may melt it.
Step 5: Make the Fabric Strip
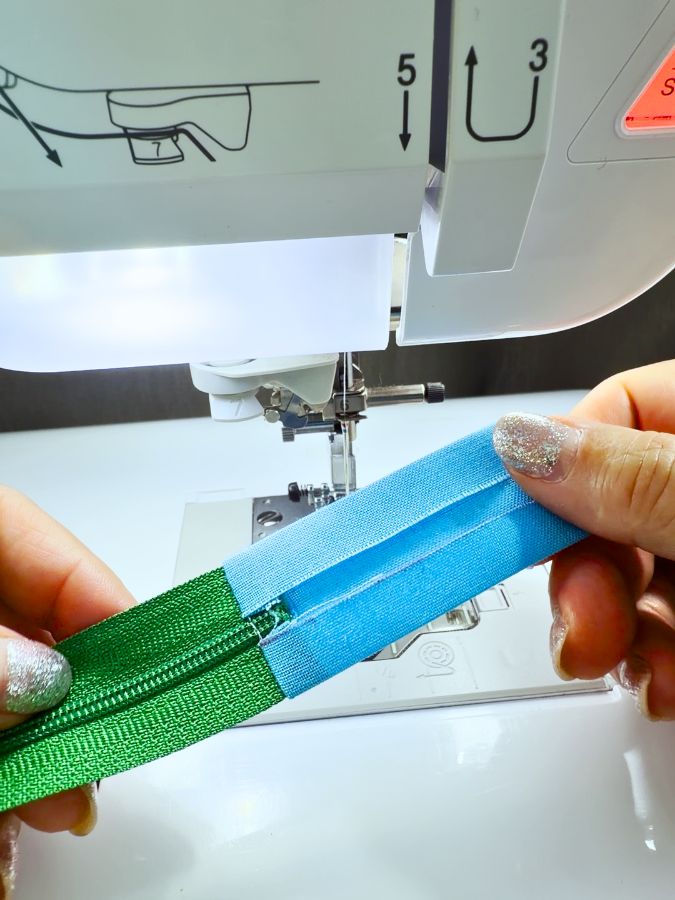
Fold the extended fabric in half lengthwise.
Match the two long edges and keep them together. Keep the zipper tape out of the way.
The strip is now half as wide and four layers thick. Pin it so the layers stay stacked.
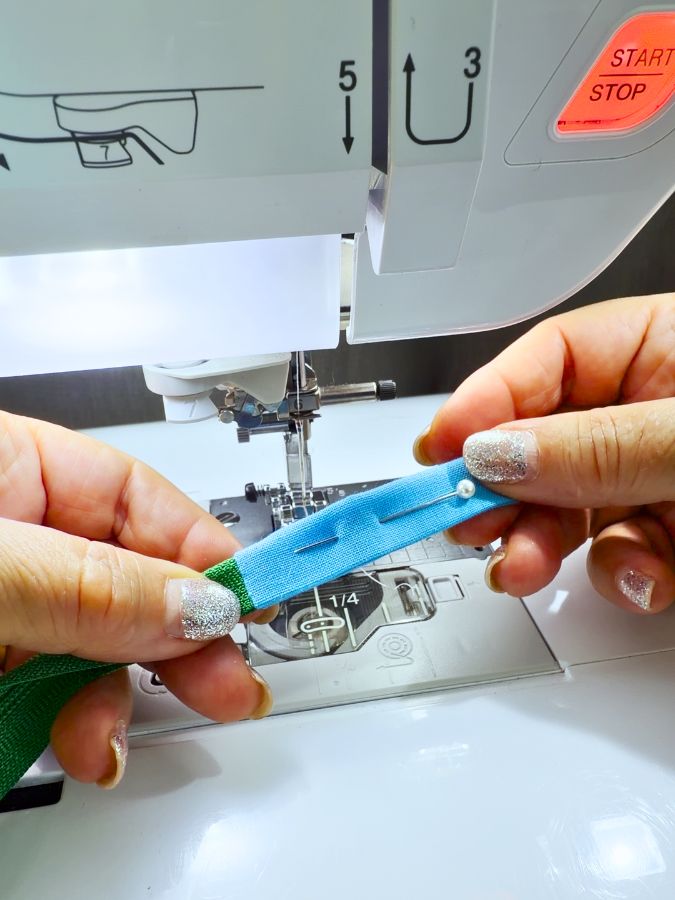
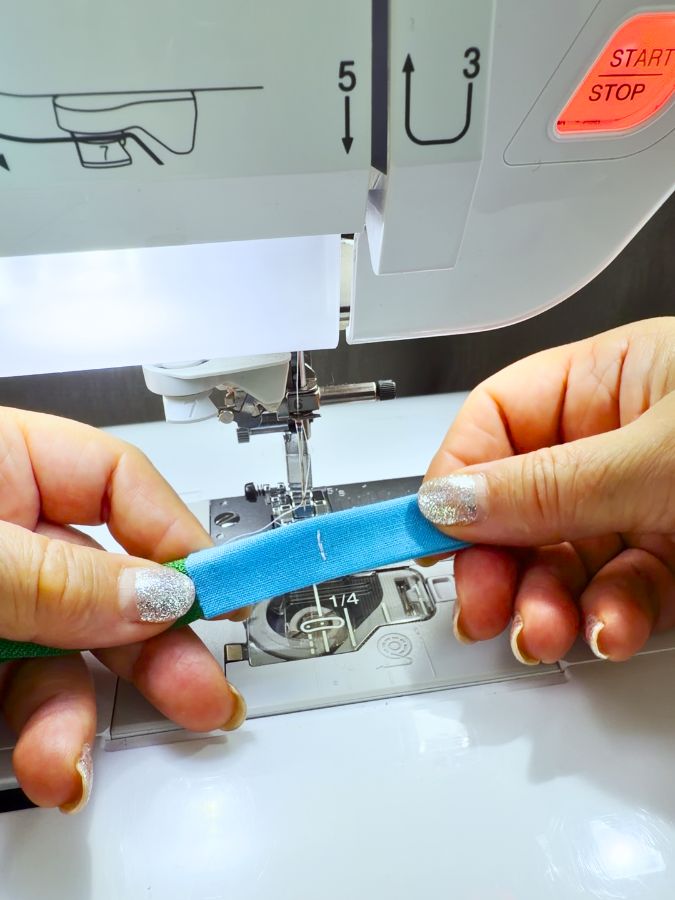
Sew a short line of straight stitching across the width of the folded fabric, about in the middle of the rectangle; perhaps closer to the stitching line. The distance between the stitching line and this line gives the length of the tab. If necessary, the remaining length (to the open end) can be trimmed later.
This small row of stitches holds the layers together while you turn and shape the fabric.
Secure the stitching and trim the thread tails. This little seam is the whole trick. It becomes the point of the tab.
Step 6: Turn the Tube Into a Pointed Tab
This is the step that creates the unusual shape.
Open (unfold) the fabric tube near the zipper. Push the open end of the tube back toward the zipper, turning the tube over itself as if you were turning up a cuff.
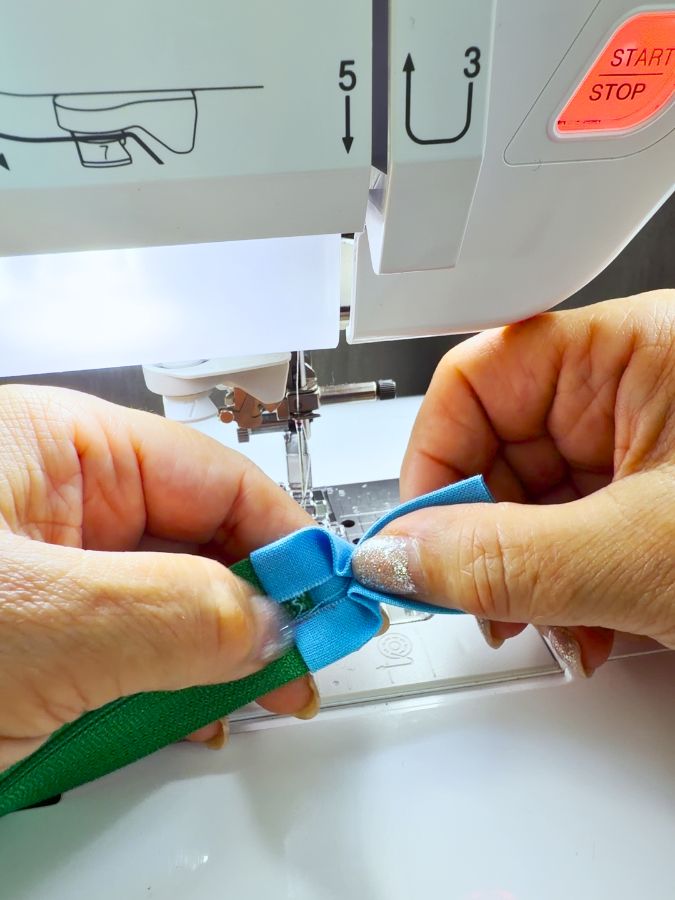
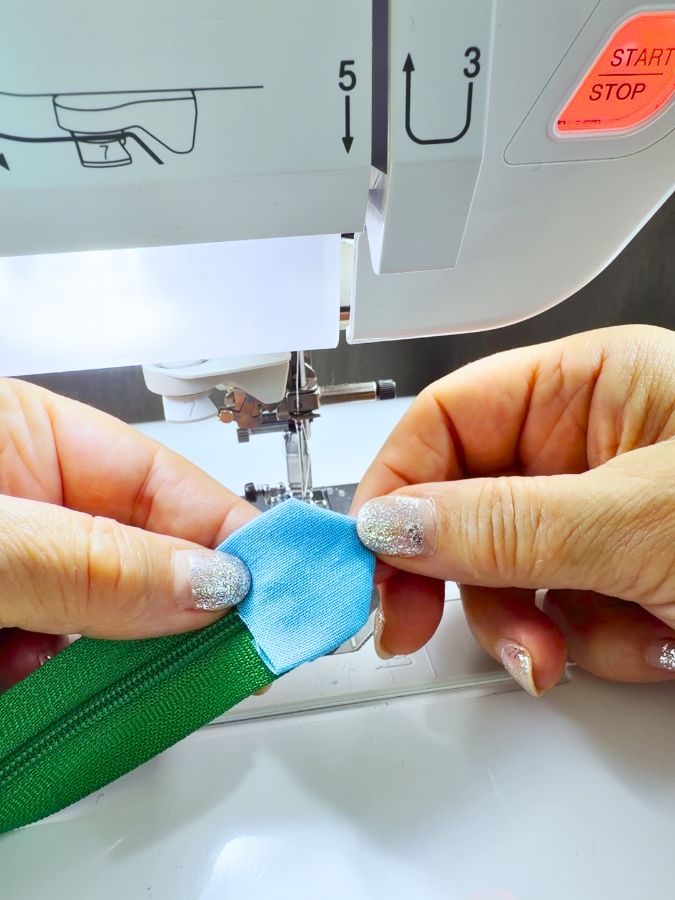
Continue pulling and adjusting the fabric until the right side is facing out and the end forms a pointed shape.
Press carefully. You will obtain the shape like in the image below.
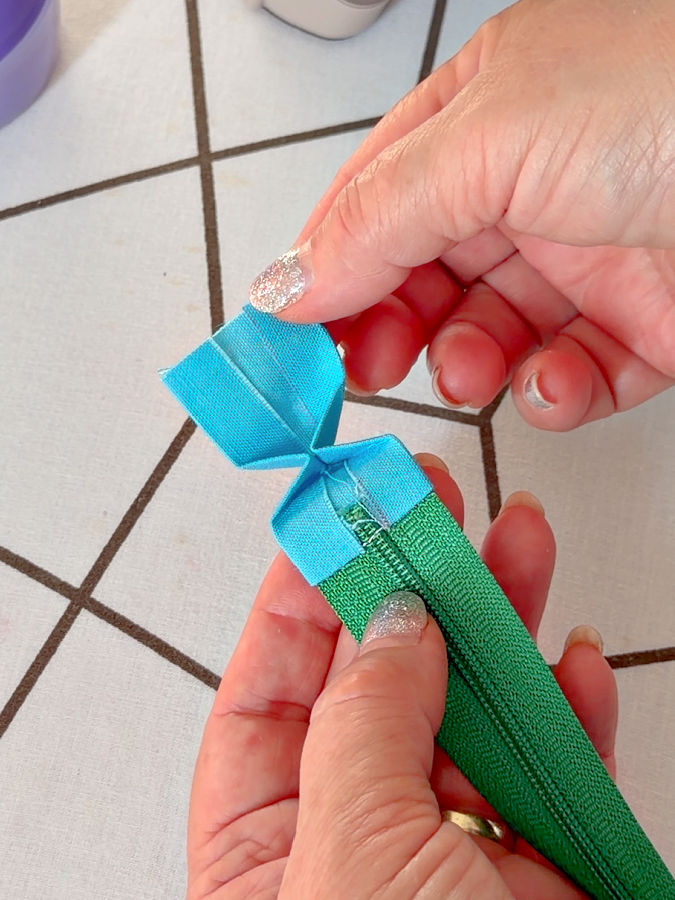
The open end of the tube should finish close to the seam where the fabric was first attached to the zipper. Fold that raw edge under by about 1/4 inch. The folded edge should sit just past the first seam and cover it. Finger press the fold.
This is where you may trim the open end, if it is too long.
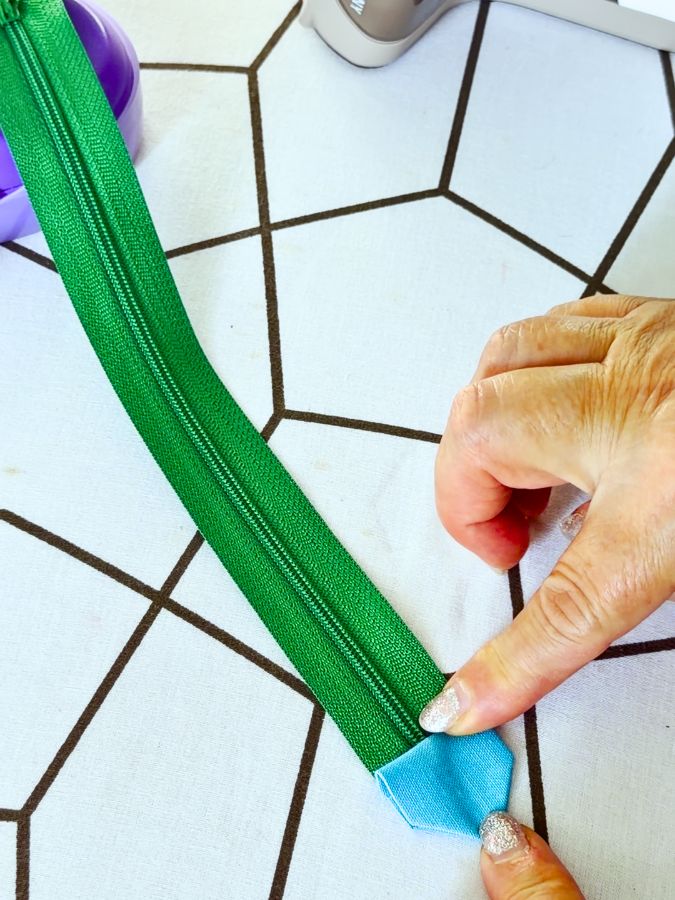
Adjust both sides until the point looks even.
Step 7: Press the Tab
Pin or hold the tab in position and press it carefully.
Use the tip of the iron so you can press the small corners without touching too much of the zipper. Nylon zipper coils can be damaged by high heat, so keep the iron mainly on the fabric.
Press both sides until the tab lies flat and the point keeps its shape.
Step 8: Hold the Layers Together
The turned tab has several small layers that may move while you sew.
Open the tab slightly and apply a small amount of temporary fabric glue between the layers. Close the tab and press it with your fingers.
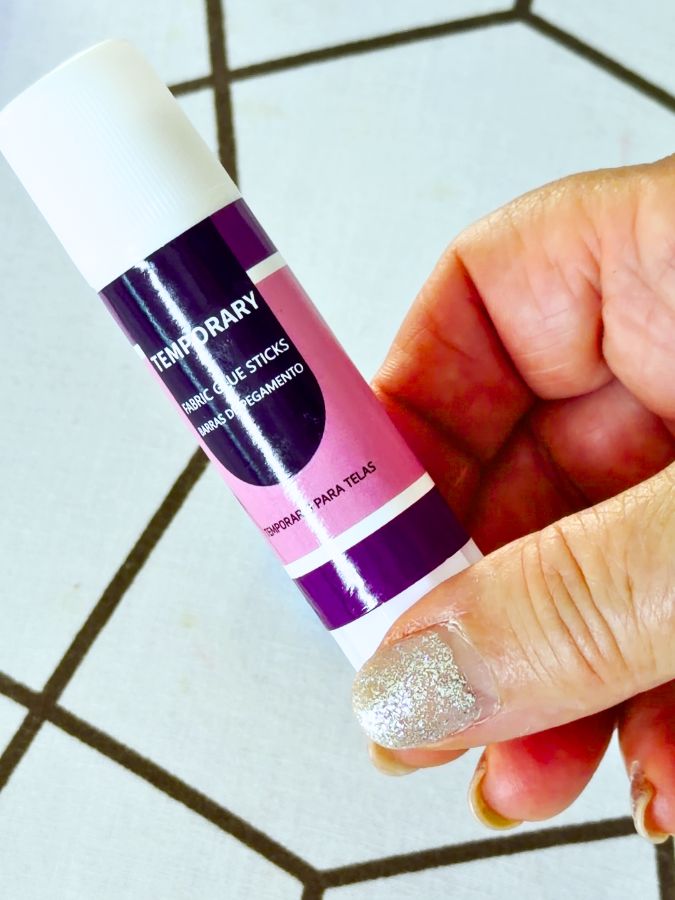
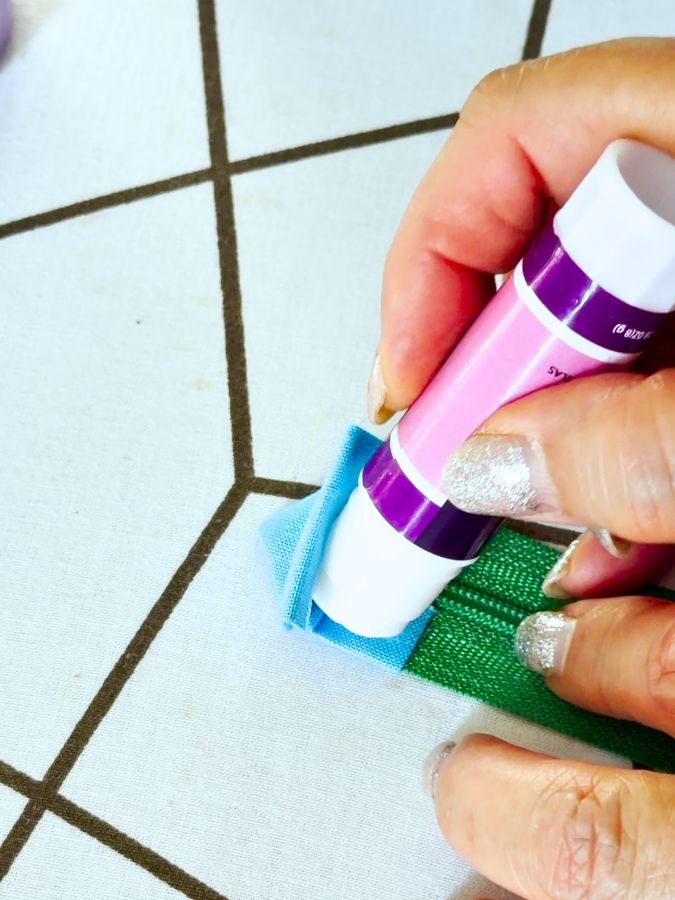

The glue is optional, but it makes the final topstitching much easier. A tab this small has no room for pins. The glue keeps the layers from sliding under the presser foot, and it washes out later.
Make sure the zipper remains centered inside the tab.
Step 9: Mark the Topstitching

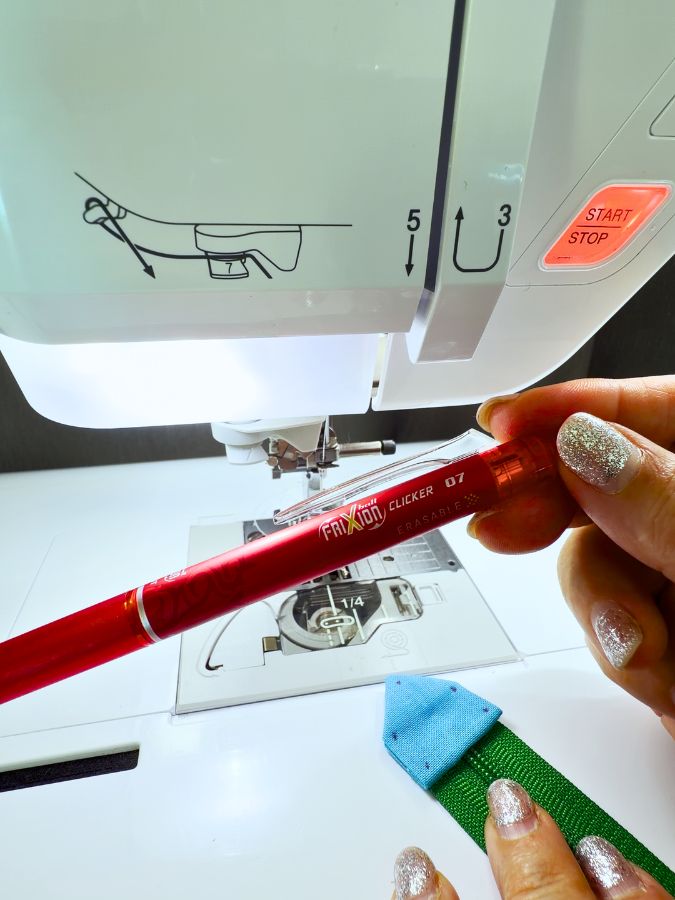
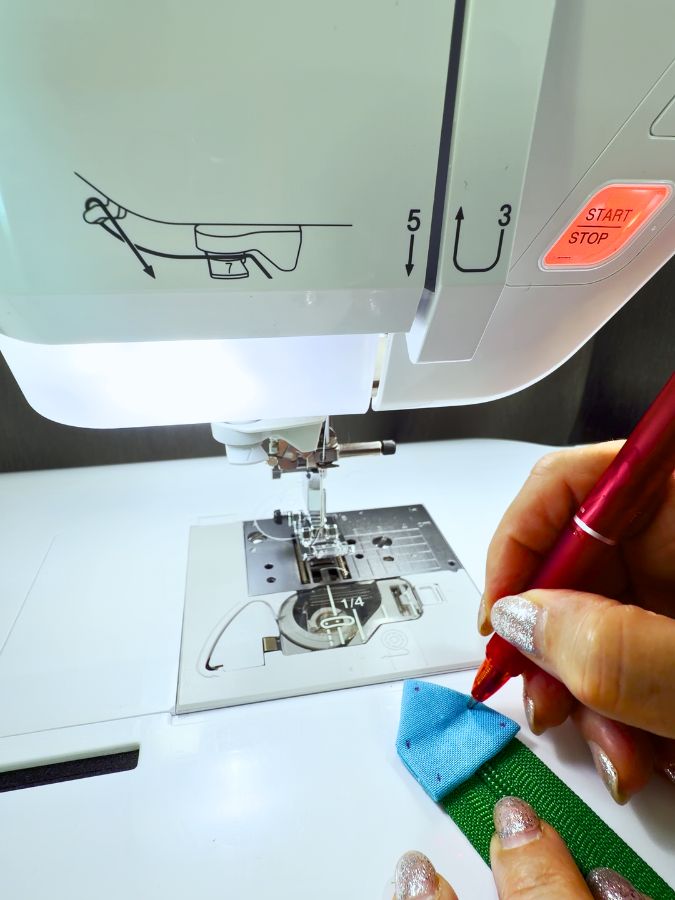
Use a removable fabric pen to mark the pivot points around the pointed edge. I used a heat-erasable pen.
Place the marks approximately 1/8 inch from the outside edge. You do not need to draw the entire stitching line. A few small dots at the corners are enough to show where to stop and pivot.
✅ Related tutorial: How To Topstitch | 17 Topstitching Tips Every Beginner Should Know
Step 10: Topstitch the Pointed Tab
Sew around all five sides of the tab, 1/8 inch from the edge. Start on the straight side that crosses the zipper.
At each dot, stop with the needle down, lift the presser foot, turn the tab, and lower the foot again. Hold the thread tails for the first couple of stitches so the small piece does not get pulled into the needle plate.
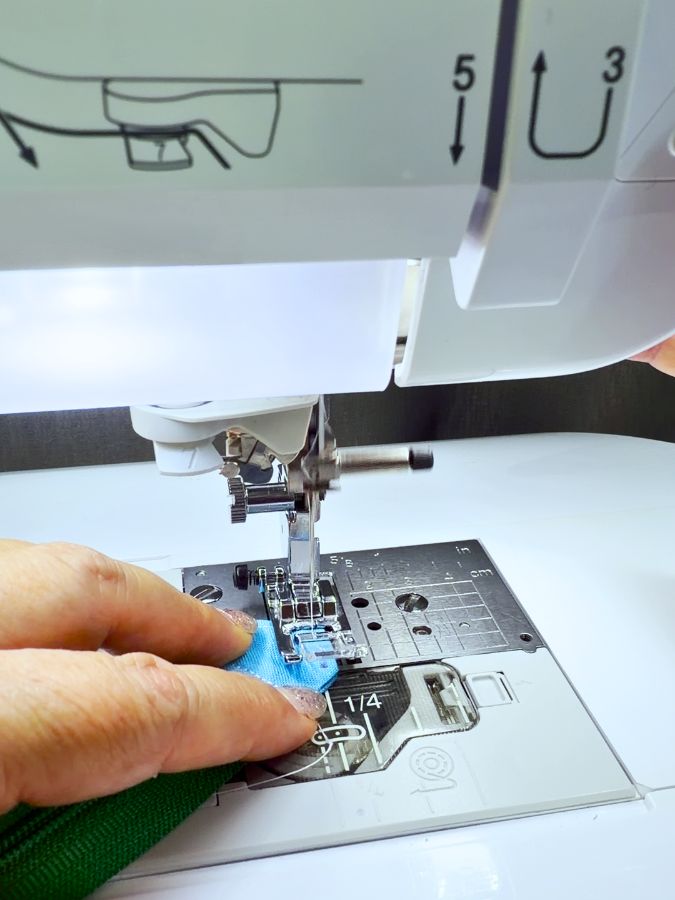
Trim the thread tails. Press the tab once more and the heat makes the pen dots disappear.
✅ Related tutorial: Topstitching Troubles? This Simple Trick Will Turn It Around Instantly!
The Finished Zipper End
The cut end of the zipper is now enclosed inside a pointed fabric tab. There are no loose zipper tape edges showing, and the topstitching keeps all the small fabric layers securely in place.
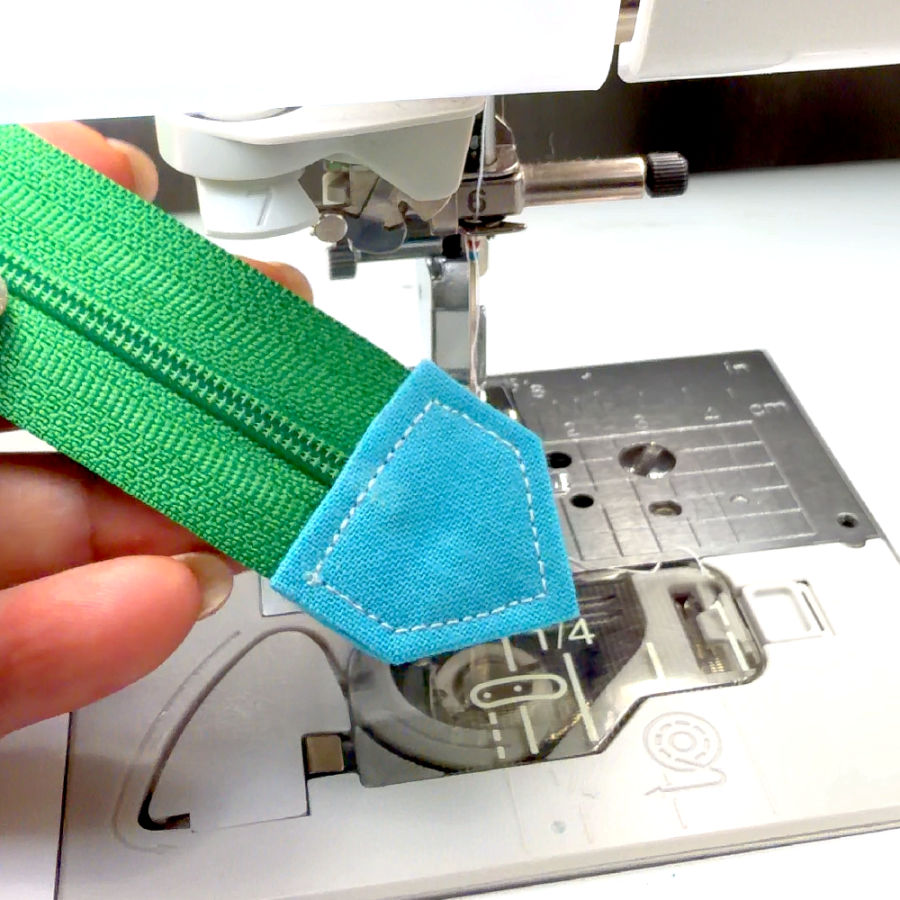
If you want matching tabs on both ends of the zipper, repeat the same process on the other end. Just make sure the zipper slider is installed and positioned safely between the two ends before sewing the second tab.
This is a useful way to finish a zipper that will remain visible on a bag, pouch, case, or organizer. It also gives you another place to use those fabric scraps that are too small for almost everything else—but somehow still too good to throw away.
Save the pin below to your sewing board so you can find this pointed zipper tab tutorial when you need it. You can also follow me on Pinterest for more sewing tips, tutorials, and project ideas.

latest posts
- How to Sew a Pointed Fabric Zipper End Tab
- 15 Sewing Machine Parts You See All the Time — But Probably Ignore
- Adjustable No Buckle Elastic Belt DIY: Sewing Tutorial
- 23 Useful Things to Watch for on Amazon Prime Day
- Sewing Thread Secrets: 8 Tiny Details You Probably Never Noticed — But Should
- Bias Tape Tutorial: How to Make Bias Tape With a Bias Tape Maker
- 10 Easy-to-Miss Features on Sewing Supplies You Should Be Using
- Twin Needle Sewing: My First Try Was a Mess, But Here’s What Worked
- 10 Rules That Made Me a Better Sewist