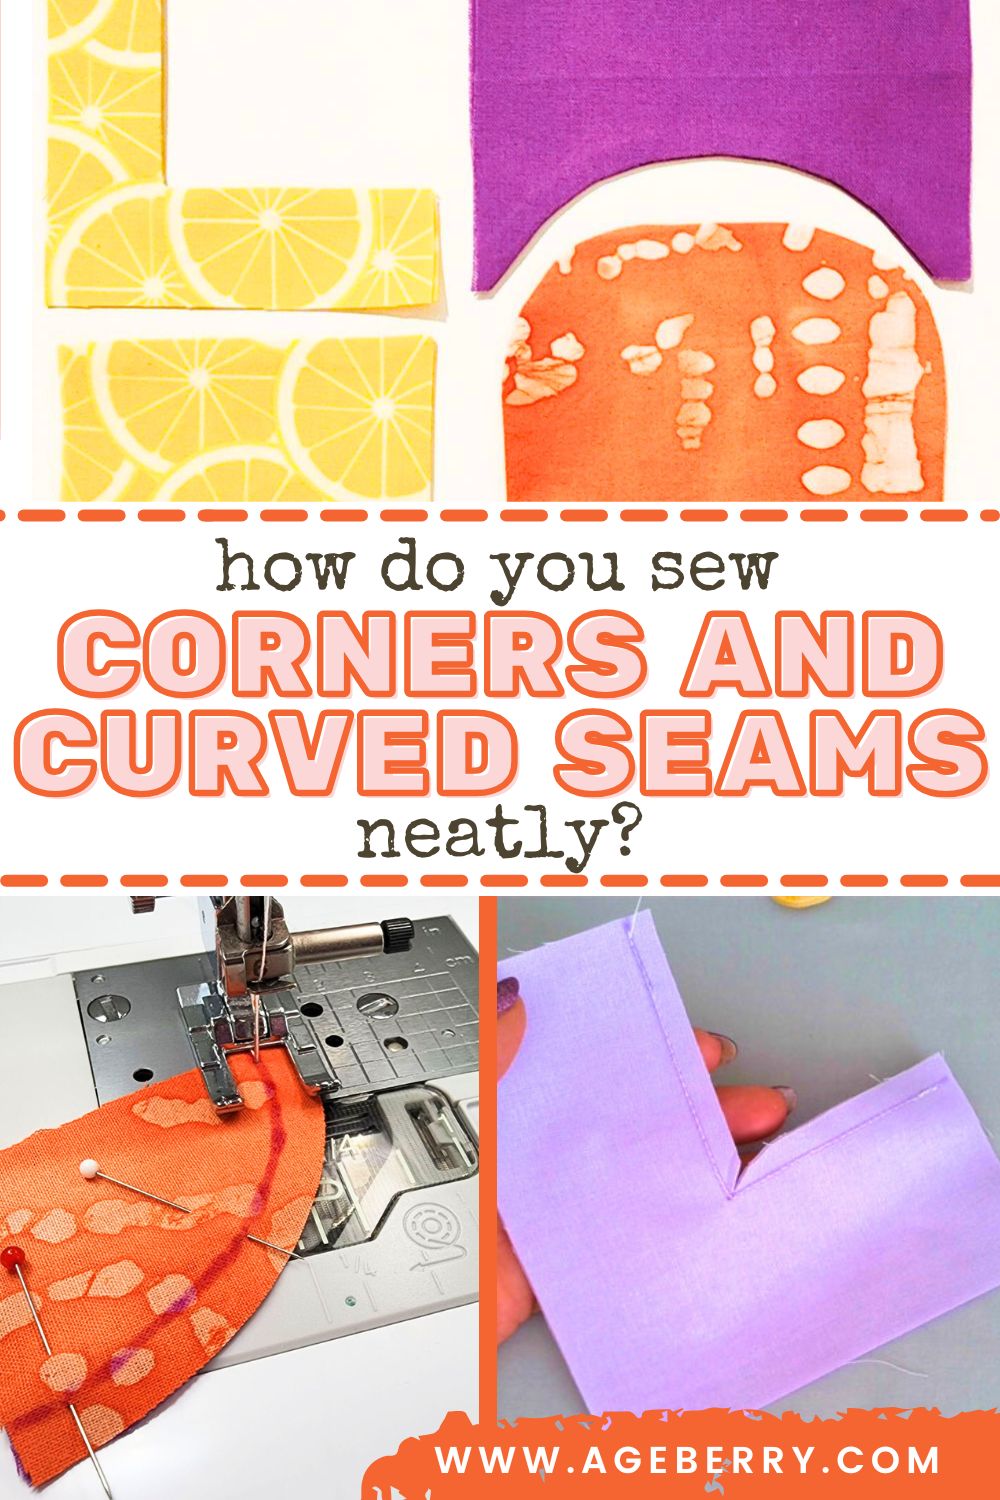
Basic Sewing Techniques: How To Sew Corners and Curved Seams
If you want to take your sewing skills to the next level, it’s important to learn how to sew corners and curved seams. Although sewing straight lines is relatively easy, sewing curves and corners can be more challenging. However, with a little practice, you’ll be able to sew curves and corners that will make your projects look professional.
How To Sew Outward Corners Correctly
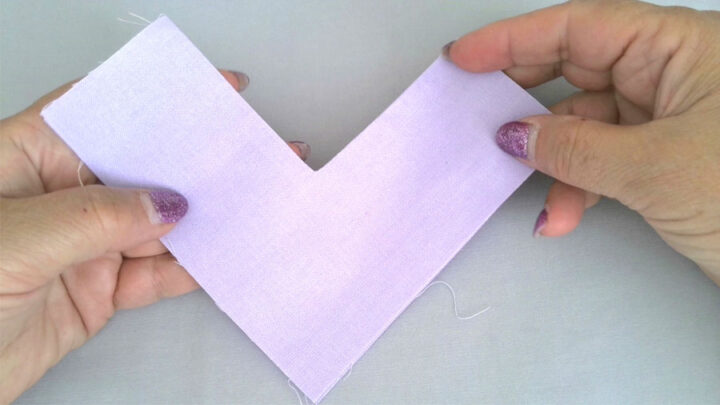
Let’s start with outward corners. It’s a basic sewing technique widely used when sewing something that will be turned inside out – collars, cuffs, waistbands, bags, pouches, etc.
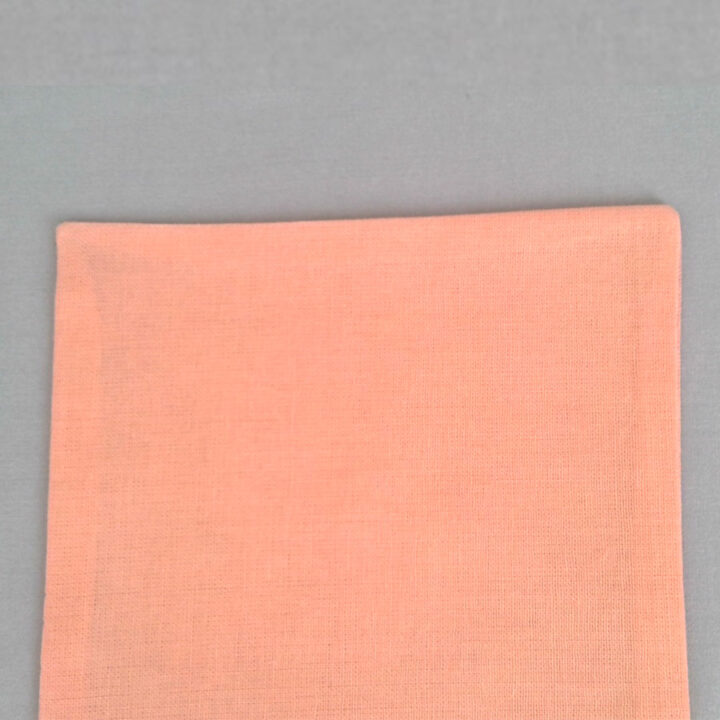
When you’re sewing an outward corner (or an outside corner), you’ll want to trim the tip of the corner at a diagonal close to the seam. That may be enough for the corner to look nice.
But I like to trim seam allowances additionally along each side. This extra step helps to ensure that the outward corners are sharp and don’t look bulky. This is especially important if you sew acute corners.
Note: Some of the links on this page are affiliate links. This means I will receive a commission if you order a product through one of my links. I only recommend products I believe in and use myself.
Once you’ve sewn the corner and trimmed seam allowances turn the piece right side out.
Use a point turner to help push out the corner and give it a nice shape. A point-turner is a handy little tool that can be used to help turn fabric corners when sewing.
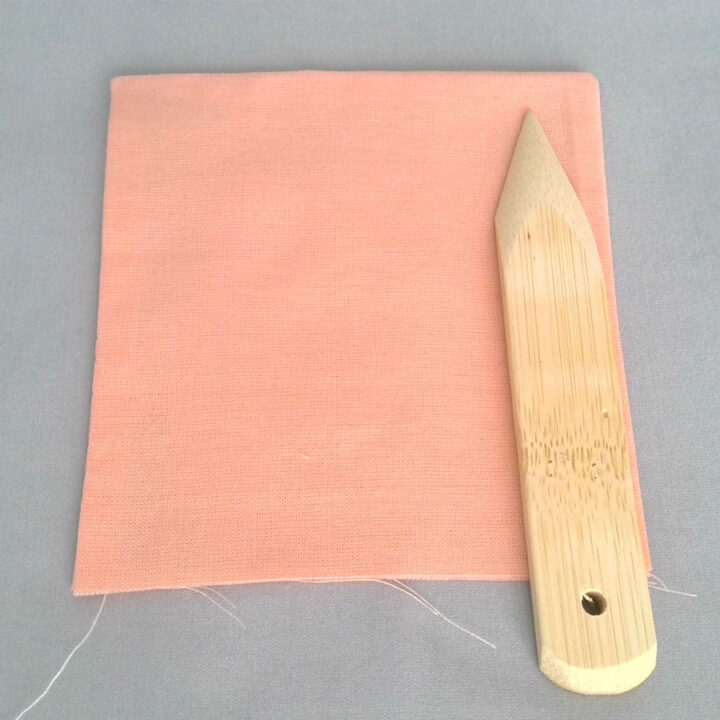
To use a point turner, simply insert the pointy end into the outward corner of the fabric, and then push gently to turn the fabric. Always take care not to poke through the fabric. If you do accidentally poke through, you will need to turn the piece back to the wrong side and sew the corner again close to the first stitching line.
Point turners are particularly useful for working with delicate fabrics, such as silk. But if you’re working with delicate fabric, be careful not to apply too much pressure.
If you don’t have a point-turner, there are a few other tools that can be used to achieve the same effect. A chopstick or dowel can be inserted into the corner to help shape it. Or you can use the eraser end of a pencil. Alternatively, you can use your fingers to gently coax the fabric into shape. I also like to use an old sewing machine needle – it’s still sharp enough but it doesn’t bend as regular pins.
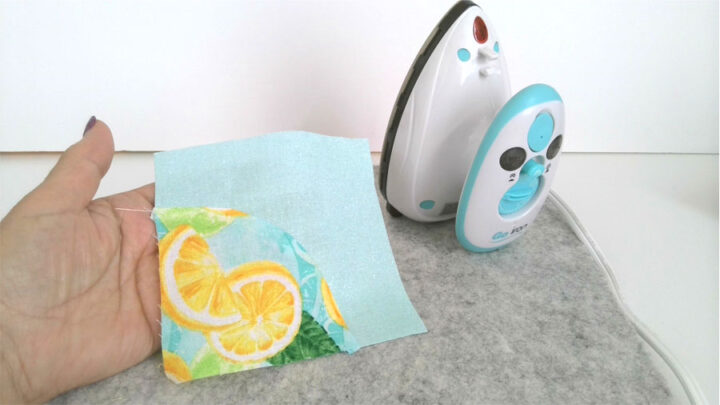
Finally, press the fabric to set the seam.
Acute and obtuse outward corners are sewn the same way as the right corners.
With a little patience, you should be able to achieve professional-looking results.
How To Sew Inward Corners
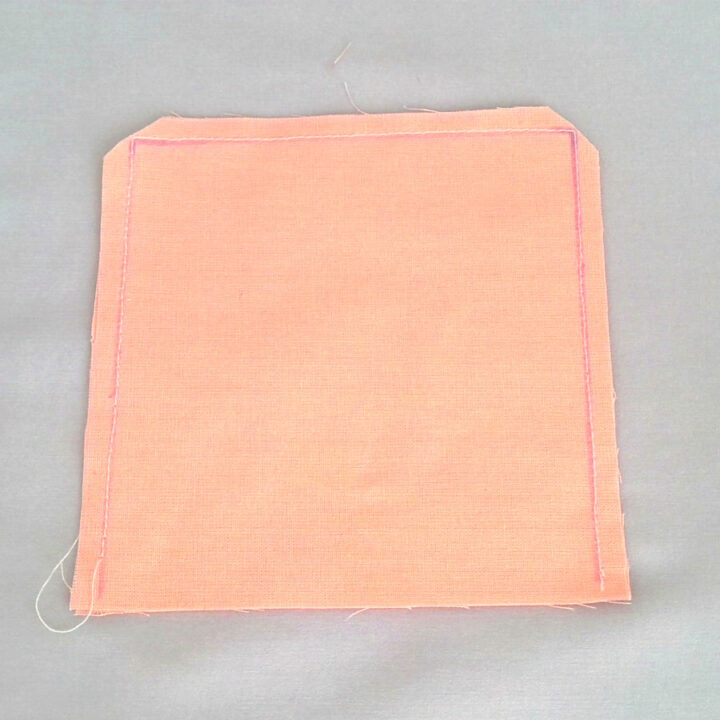
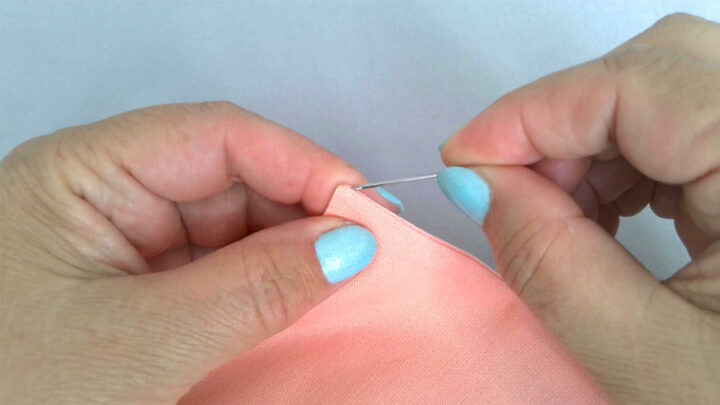
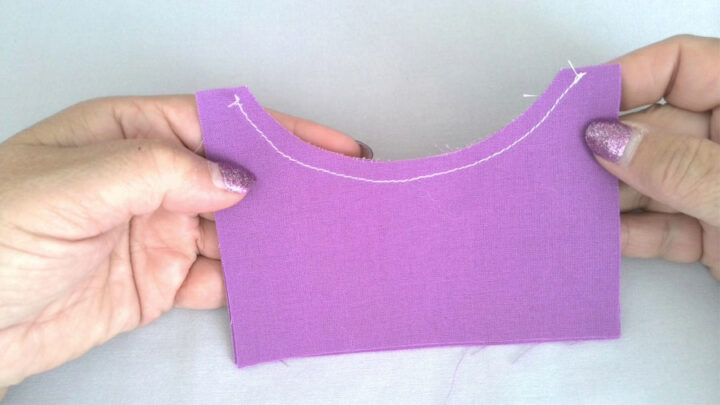
To sew a neat and tidy inward corner, start by sewing a straight seam along the corner.
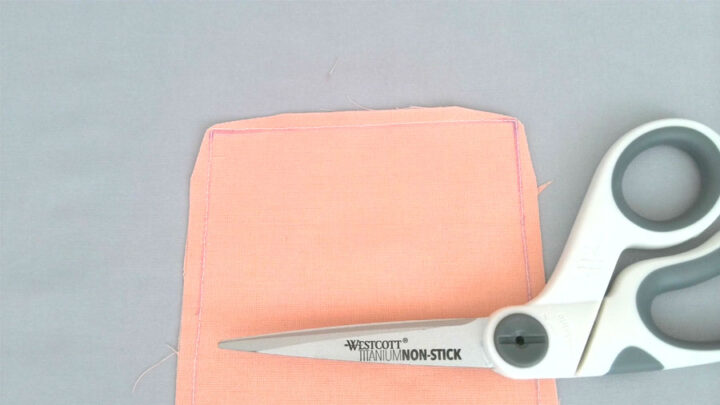
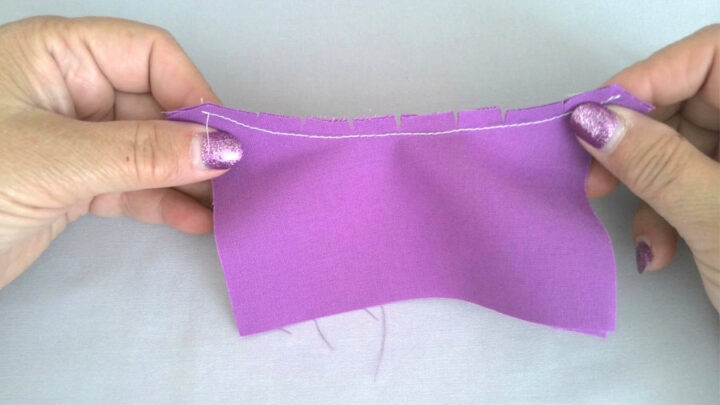
When sewing an inward corner, the key is to clip the seam allowances close to the seam. Seam allowances should be 1/4 “. Be careful not to cut the stitching. This will help to prevent the fabric from bunching up when you turn it right side out.
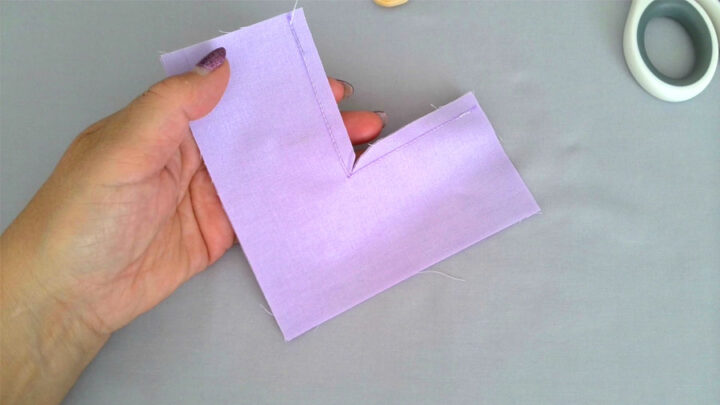
Once you’ve done that, simply turn the fabric right side out, press the corner, and you’re all set. You can also topstitch along the edge of the fabric to secure it in place.
You may notice a slight tension in the corner, but as long as you’ve clipped the seam allowance close to the seam, it should be just fine.
This sewing technique can be used not only for straight corners but also for acute and obtuse inward corners. However, keep in mind that obtuse corners will be easier to sew than acute ones.
How To Sew Curved Seams
Sewing curves is a basic sewing technique that every sewist should know how to do. Sewing curved seams (especially tight curves) can be tricky, but it’s a really useful skill to have.
You may have tried to sew a curve before and ended up with a disaster. The fabric puckers and the stitches are crooked, and it just doesn’t look right.
But it’s not rocket science. Let me show you how to adjust your sewing machine for curved seams, how to pin your fabric correctly, and how to stitch the curves perfectly.
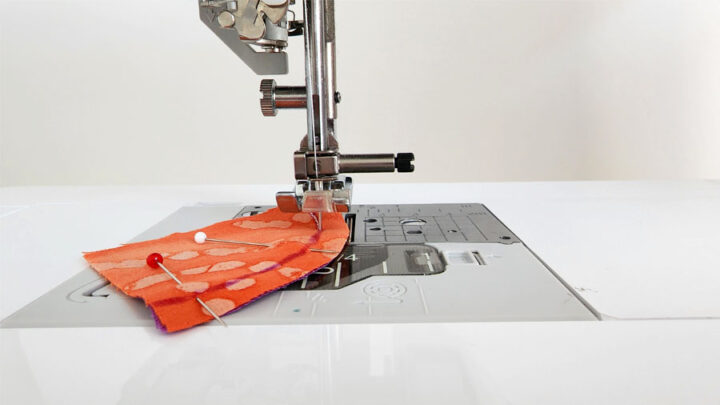
#1. Mark The Curved Seam
When you’re sewing a curved seam, it’s important to mark the seam line so you have a guide to follow to ensure accuracy. If you make a mistake, it will be much easier to correct if you have a visible seam line.
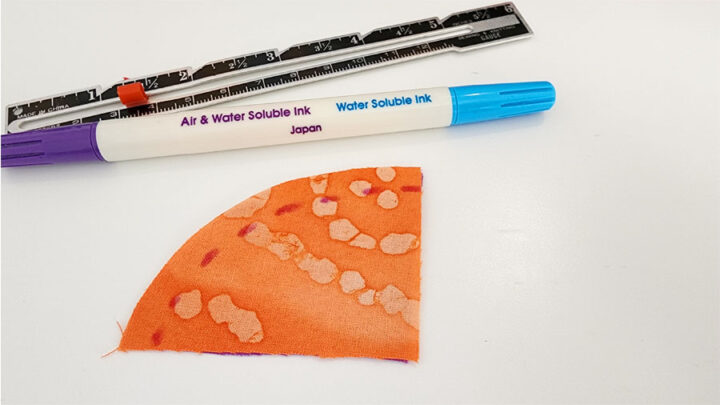
It’s better to use a special fabric marker that can produce a thin line. There are plenty of options on the market.
One popular choice is a disappearing ink pen. These pens are great for marking fabric, and the marks usually disappear over time. However, the downside of disappearing ink pens is that if you use a hot iron over the marks, they may be set on the fabric and not disappear (it happened to me once). So look for a marker that won’t leave a permanent mark. Be sure to choose one that specifically states that it’s safe to use with a hot iron.
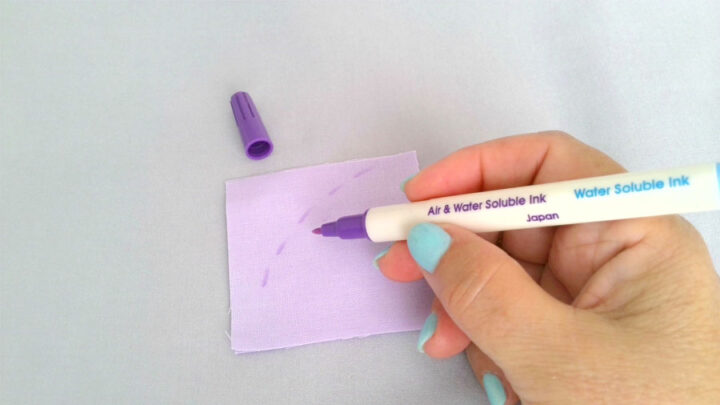
Another option is a heat erasable Frixion pen. I personally prefer to use the latter when sewing curves. With a Frixion pen, you can simply press the curved seam with a hot iron and the marks will disappear. Plus, the pen is available in a variety of colors, so you can find one that best suits your fabric.
The marks will help you visualize the seam line and increase your accuracy when sewing. Use a seam gauge or a small ruler to mark the seam line in little dashes. Just make sure to join them up so you have a continuous curve. Following a marked seam line will help you sew an accurate curved seam.
#2. Stitch The Curved Seam
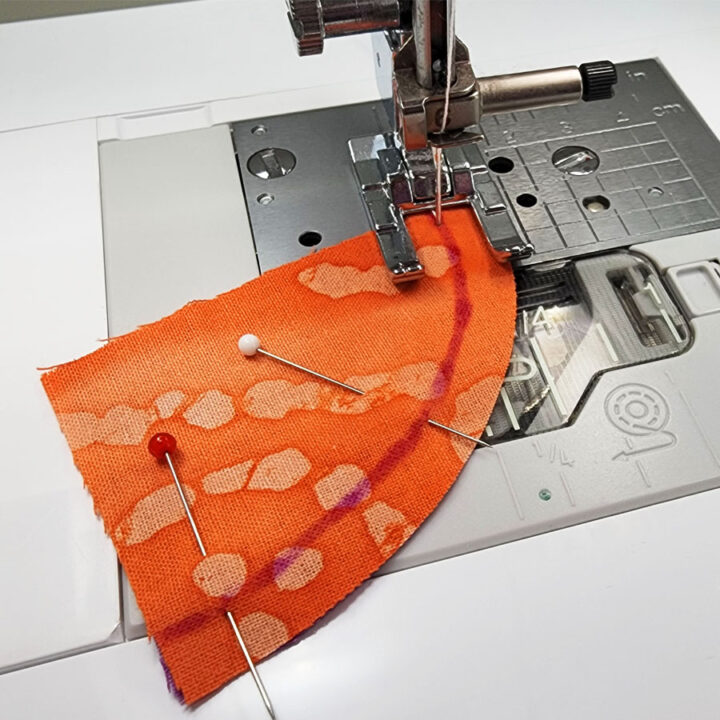
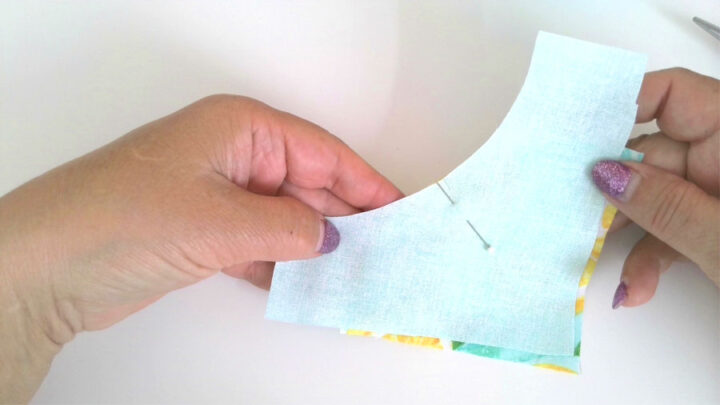
Use a few pins to secure the fabric in place before sewing. This will help prevent the fabric from shifting as you sew and will give you a more accurate finished product.
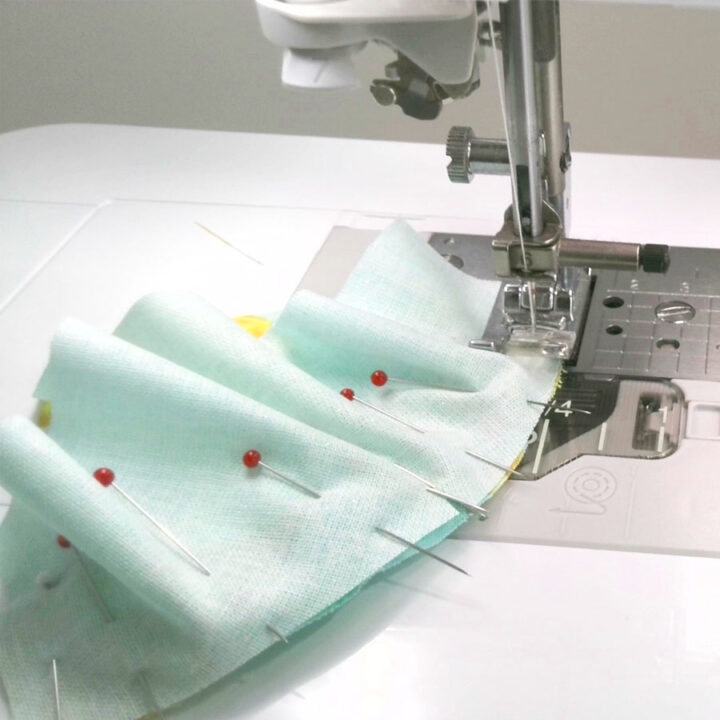
Use a small stitch length for sewing curves. I usually set the stitch length at 2 but if your fabric is thick set it at 2.5.
Take your time and go slowly guiding the fabric with your fingers. You should keep your eyes on the marked line so you can stay on track.
You can try to use an open-toe presser foot. This type of foot allows you to see exactly where the needle is going, which is helpful in avoiding veering off course. But sometimes it’s not easy to use this foot if the seam allowances are small (¼ “).
For wide curves, you might be able to stitch in one continuous motion without stopping.
But if the curve is tight and narrow, it’s better to sew a few stitches and then stop to adjust the fabric than it is to try to sew too quickly and end up with a mess. Stop with the needle down in the fabric, lift the presser foot, pivot the fabric, and start sewing again.
So stop frequently to check that your seam is following the curve of the pattern piece.
Don’t sew over pins! While it might seem like an easy way to save time, sewing over pins can actually be quite dangerous. Take the extra few seconds to remove the pins before you sew the seam.
✅ Related tutorial: Types of sewing pins and their uses: all you need to know about straight pins for sewing
# 3. Press The Seam After You Are Done Stitching It
This will make it easier to work with the fabric and get a clean finish.
When pressing a curved seam, it’s important to use the right pressing motion. The curved seam can stretch because it’s not cut on the straight grain, so pressing the iron in a back-and-forth motion might just make the fabric stretch around the seam. Instead, use an up-and-down pressing motion and work in small sections. That way, you’ll get a nice, crisp seam without stretching out the fabric.
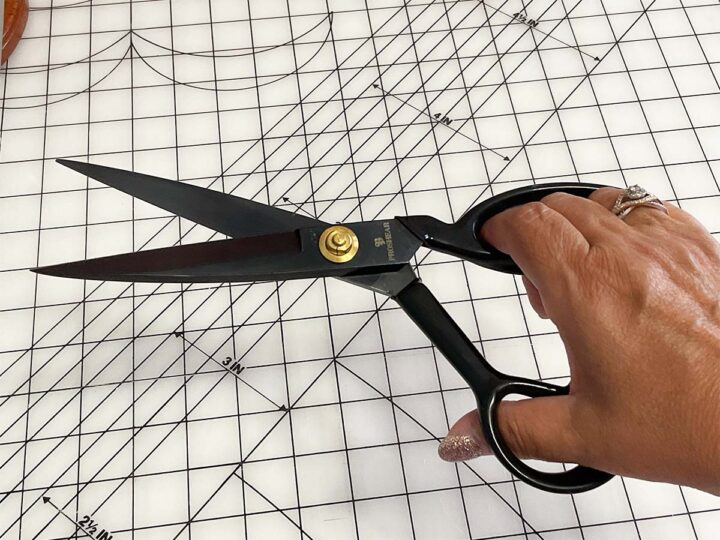
#4. Cut The Seam Allowances
This is a very important step in making curved seams. So read carefully and follow the tips.
To make a nice curved seam, you’ll need to use smaller seam allowances than you would for regular stitches. If your seam allowances are too wide, it will be difficult to get a smooth clean curve so you will need to remove some excess fabric. It will also help to reduce the bulk of your project.
The best way to do this is by cutting the seam allowances close to the stitches. Usually, ¼ inch (5 mm) seam allowances are good to use. And you might need to cut them even smaller (especially around the tight curves) before turning the fabric right side out.
When cutting out the fabric, be sure to use sharp scissors. Do you have a good pair?
I recently purchased a pair of fabric shears and I am very impressed with the quality. These fabric shears are made of high carbon steel, which is a stronger metal than stainless steel. The blades on these fabric shears are very sharp and they make clean cuts through multiple layers of fabric. I would highly recommend these fabric shears to anyone who is looking for high-quality fabric scissors.
And they are not expensive! So go to this link on Amazon and see for yourself – it’s well worth investing in this product with all its benefits! They have more than 6000 5-star reviews!
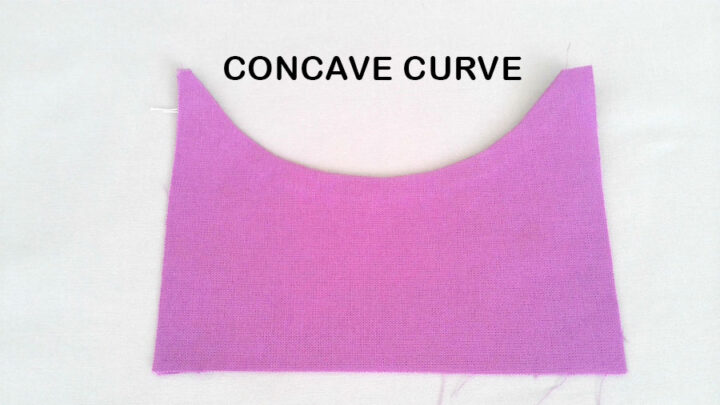
There is a difference between inward and outward curves. Inward curves are concave, while outward curves are convex.
Making Concave Curves
Concave curves are very common – you can find them on necklines and armholes of garments, for example.
If you are dealing with a concave curve clip the seam allowances at regular intervals along the curved seam perpendicular to the stitching line. Be sure not to cut into the seam itself.
The steeper curve you have, the more frequently you need to clip.
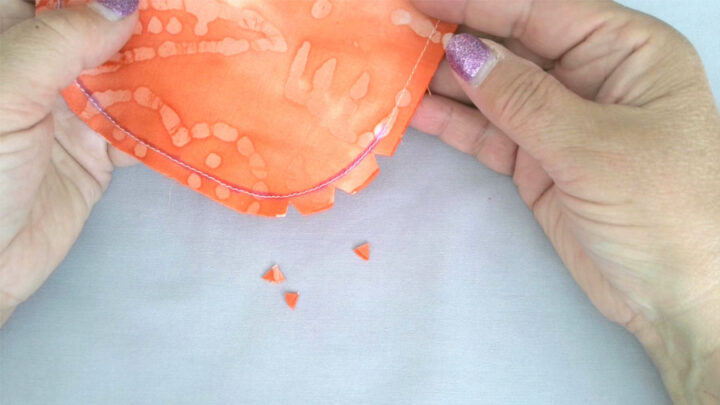
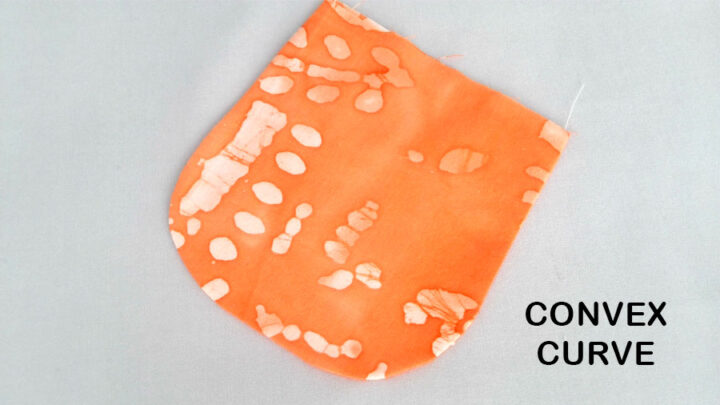
Making Convex Curves
A convex curve is a curve that bulges outward, instead of curving inward like a concave curve.

Convex curves are often used for decorative edges on quilts and pillows.
For a convex curve, notch the seam allowances at regular intervals perpendicularly to the seam. This means cutting away little triangles of fabric along the seam allowances. Notching allows the fabric to lay flat and prevents the convex curve from becoming distorted. The steeper curve you have, the more frequently you need to notch.
But from my experience, notching takes a lot of time and can be quite tedious. It’s often quicker and easier to trim the whole edge (not only the curved seam) with pinking shears. Pinking shears will create a zig-zag cut that looks pretty much like notches.
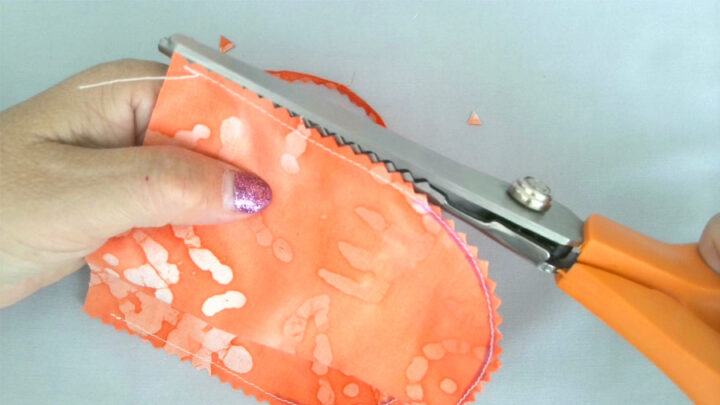
You can use pinking shears on both inward and outward curves. Give it a try next time you’re cutting curved seams and see which method works best for you.

✅ Related tutorial: Cutting Tool For Sewing: Ultimate Guide
# 5. Finishing The Curved Seam
Turn the piece right side out and press. This will help to set the curve and give you a nice, flat edge. You can also topstitch along the seam to secure it in place.
#6. Sewing Together Opposing Curves
One of the challenges of sewing curves is that sometimes we need to sew together opposing curves – a concave curve to a convex curve. It can be difficult to align them correctly but they are actually pretty common – you will use them when attaching sleeves to armholes, you might see them in quilting patterns, in garments with color-blocked segments, etc.
However, there are a few tips that you can use to make the process easier.
First, seam allowances should be small, not ⅝”, not ⅜” but ¼ “. This will make it easier to align the opposing curves together.
Next, mark the center point of each curve. You can use a fabric marker, or just make a small snip with scissors. Then, match up the center points and pin the curves together.
Once the center points are aligned, it will be easier to see where the curves need to be adjusted in order to line up properly.
The next step is to pin the ends of the fabric pieces together.
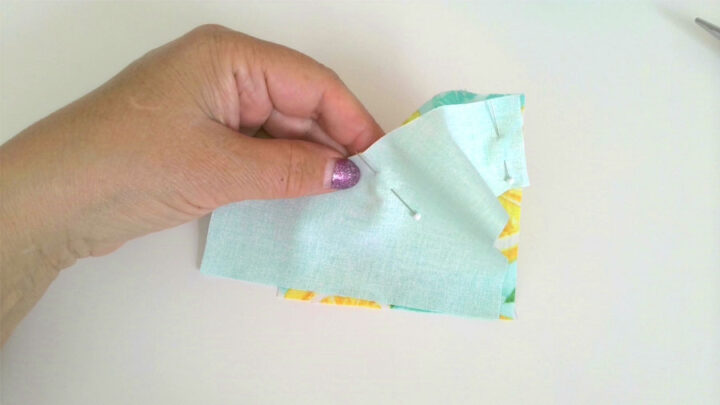
Once you have both ends pinned, you can start pinning the middle section. It’s helpful to pin perpendicular to the seam line.
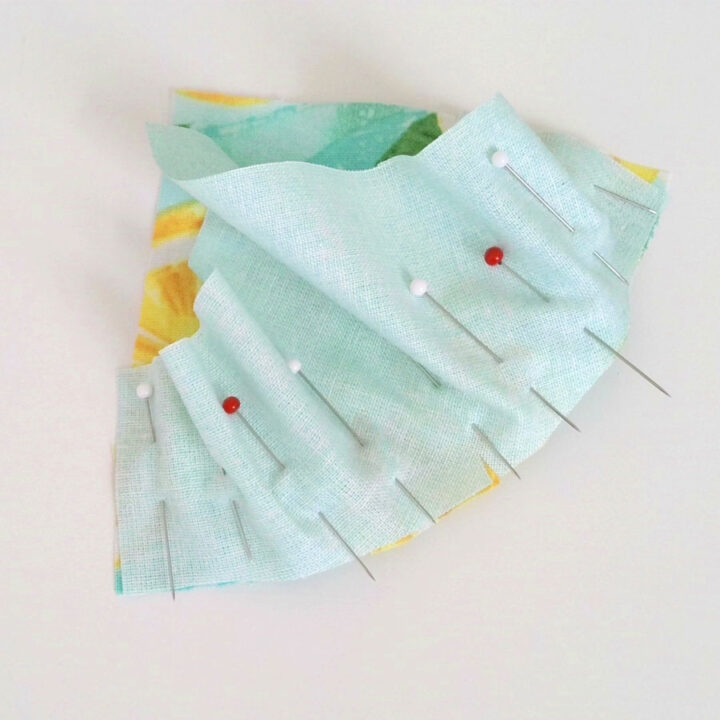
Now the question is – on what curve should you stitch? On concave or cortex? For me, it’s always easier to sew over a concave curve. So the pins should be placed on the side of the concave curve.
If the curve is small and the fabric is stiff you might need to snip seam allowances of a concave curve before pinning.
Once you’ve pinned everything in place, you’re ready to start stitching the seam. It’s best to sew slowly in order to get a good result. Sewing slowly will help you sew more accurately and avoid making mistakes.
After you are done sewing press the seams on one side – on the side of the convex curve.
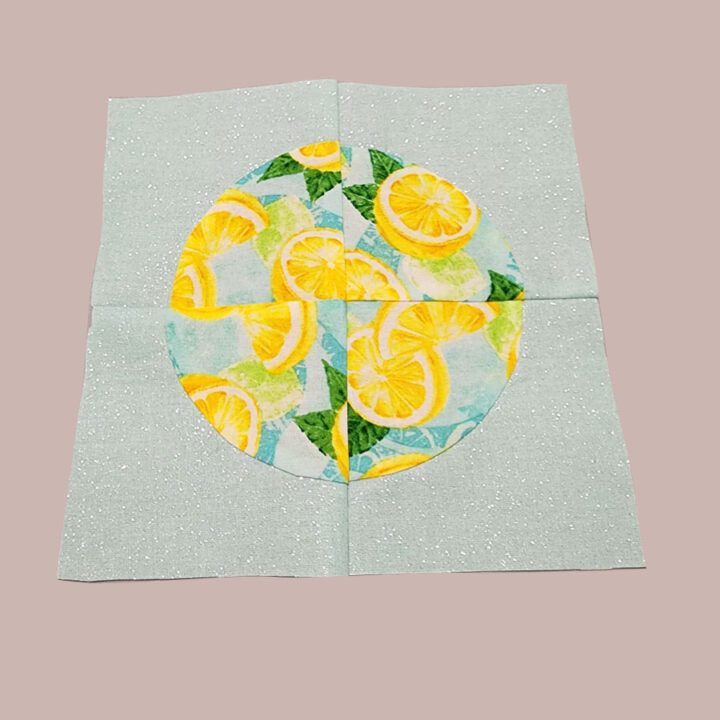
Now that you know how to sew curved seams, you can make all sorts of fun and interesting projects. For example, you could use this technique to make a quilt. Just sew together a bunch of curved pieces in different colors, and you’ll have a unique quilt.
You could also use this technique to make other items like pillows, purses, or even clothes. Just let your imagination run wild and see what you can create!
Did you like this tutorial? If you want to save it for future reference and use it later when you need this information on how to sew corners and curves, pin this image to your sewing board on Pinterest and follow me on Pinterest for more tips, tutorials, and inspiration.
latest posts
- What Do You Call a Person Who Sews? I Asked My Readers and Got 1,408 Opinions
- DIY Round Purse: PDF Sewing Pattern and Detailed Instructions
- Mini Wonder Clips By Clover: Useful Sewing Tool Or Just Another Notion?
- Non-Slip Grips For Quilting Rulers: A Small Notion With A Useful Job
- Fabric Eraser for Sewing: What It Removes and When to Use It
- What Is The Best Thread For Sewing Machine Projects? Let’s Find Out!
- Butterfly Quilt Block Tutorial – Foundation Paper Piecing
- How To Sew Quilt Squares So The Corners Match
- Sewing With Fork Pins: How They Help With Pattern Matching, Slippery Fabric, And Seams