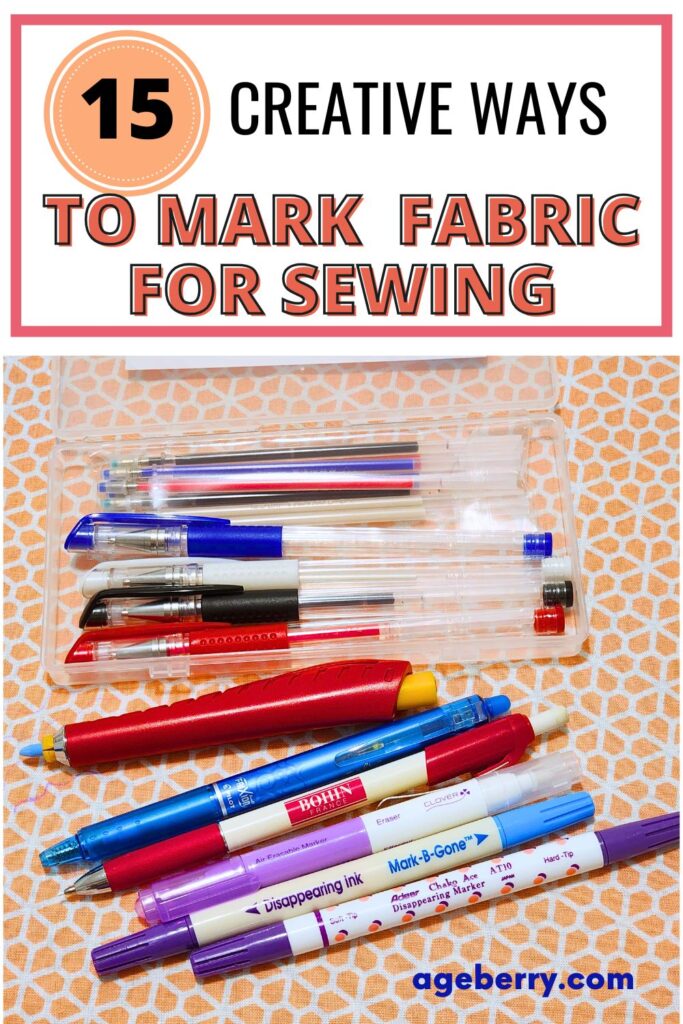
15 Creative Ways to Mark Fabric for Sewing Projects
Marking may not be the most exciting part of sewing, but it quietly plays one of the most important roles. It tells your scissors where to cut, your needle where to stitch, and your seams where to stop or start.
Every dart, pleat, buttonhole, and pocket begins with a mark. And if those marks aren’t placed carefully? That lovely linen blouse or flowing silk skirt might end up lopsided or too tight in all the wrong places.
Even with the most beautiful fabric, a project can go sideways without clear markings.
I learned this the hard way with a piece of silk I used to make a dress. I carefully cut the fabric and made all the necessary markings. Then life pulled me away from the project. When I finally returned to it, the dart lines had vanished. The air-erasable pen I used had done exactly what it promised – it erased itself. Let’s just say that dress taught me to always match my marking method to my project timeline.
In this post, I’ll walk you through different ways to mark fabric that suit your fabric type, your timeline, and your project needs. Because marking matters – and making the right choice can save you hours of frustration.
Overview of Marking Tools and When to Use Them
There’s no one-size-fits-all solution when it comes to marking fabric.
Choosing how to mark fabric is like choosing the right stitch – it depends entirely on what you’re working with. Silks and satins ask for gentle, subtle marks. Denim and canvas can handle something bolder. And if your project won’t be finished in one sitting, you’ll want markings that won’t vanish before you return to them.
Marking tools fall into a few main types.
- Temporary or Permanent: Some lines vanish with water, air, or heat. Others need to be scrubbed or washed out. Temporary tools are useful for everyday garments. Permanent ones come in handy for pattern pieces or long-term projects.
- Bold or Subtle: Dark or textured fabrics call for clear, high-contrast lines. Sheer or delicate materials need softer marks that won’t show through or stain.
- Mechanical or Chemical: Tools like tracing wheels or hera markers press a line into the fabric. Others leave behind ink, chalk, or pigment. Each has its place – it’s all about choosing the one that suits your fabric and won’t come back to haunt you at the ironing board.
The key is to match the tool to the task. Testing first on a scrap piece will tell you how the mark looks, how it behaves under heat or steam, and how easily it disappears.
Note: Some of the links on this page are affiliate links. This means I will receive a commission if you order a product through one of my links. I only recommend products I believe in and use myself.
Chalk-Based Tools
Chalk-based markers are a classic choice for sewists. They come in different forms, textures, and colors, and while they all fall under the “chalk” category, the materials they’re made from can vary quite a bit. Some are soft and powdery. Others feel smooth and waxy. Choosing the right type depends on the fabric you’re working with and how long you need your markings to stay visible.
1. Tailor’s Chalk
Tailor’s chalk isn’t always true chalk. Some versions are made from clay or pressed plaster (which is similar to chalk in feel), while others are wax-based. The pressed powder varieties are easier to brush away, but they can fade if you pause mid-project. Wax-based chalks glide more easily and last longer, but they may leave residue or set under heat, especially on synthetic fabrics.
Tailor’s chalk comes in a variety of colors including white, yellow, blue, and red, which helps when working with light or dark fabrics.
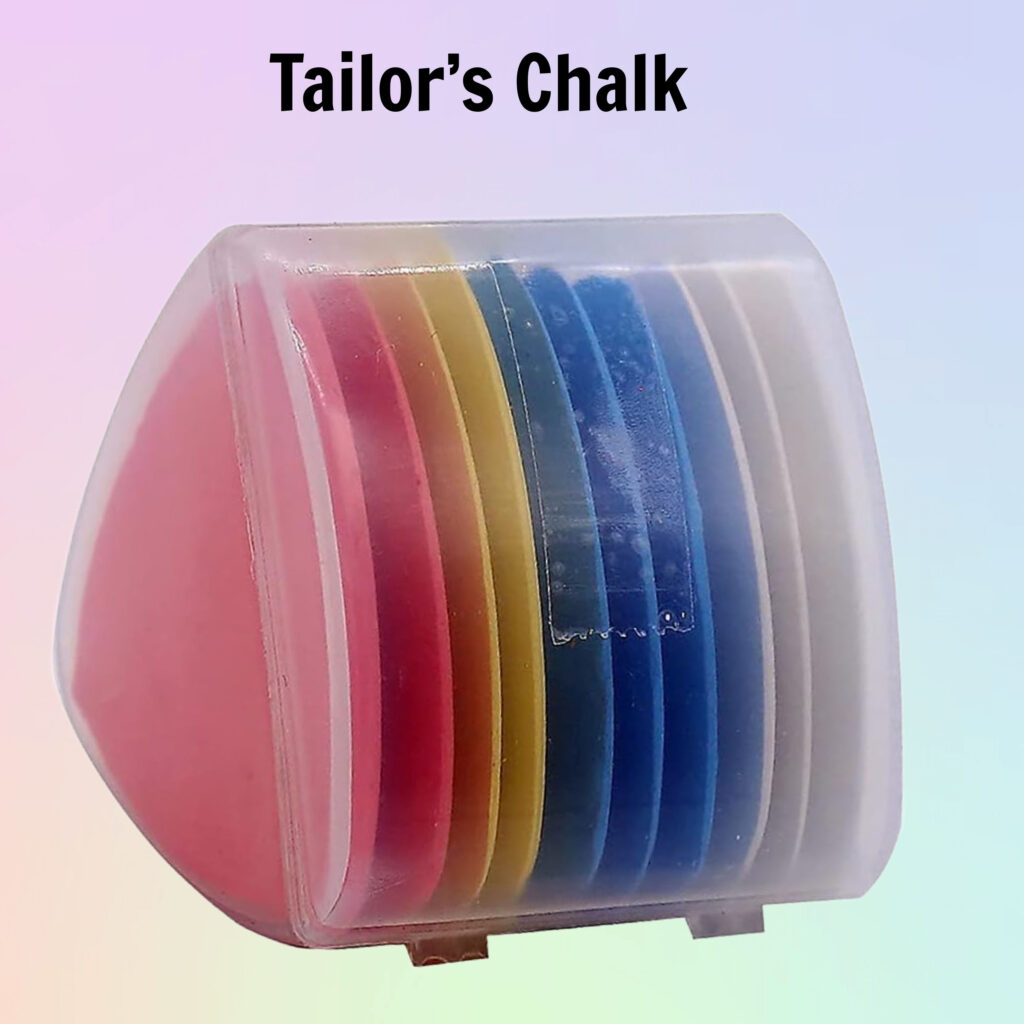


You can also keep the edges sharp with a chalk sharpener like the Prym Chalk Sharpener, which helps maintain clean lines for accurate marking.
Pros:
- Fast and easy to use
- Works on many fabric types (especially woven fabrics – cotton, linen, denim, and canvas)
- Wide color selection
- Easy to sharpen with a dedicated tool
Cons:
- Some wax-based versions may not wash out completely
- Powdery versions may fade too quickly if left sitting
- Can be messy without proper storage
2. Chalk Pencils
Chalk pencils are a go-to for detailed or delicate markings. They offer more control than block chalk and are perfect for tracing curves, stencils, or narrow pattern edges. These pencils can be sharpened to a fine point, which allows for crisp lines that don’t smudge as easily.


Bohin – Fine Chalk Pencil
If you’re looking for a chalk pencil that gives you precision and a soft, easy-to-remove line, the Bohin Extra-Fine Chalk Pencil is a standout. This is a favorite among quilters and garment sewists who want a clean mark that’s visible but not overwhelming. It doesn’t need sharpening.
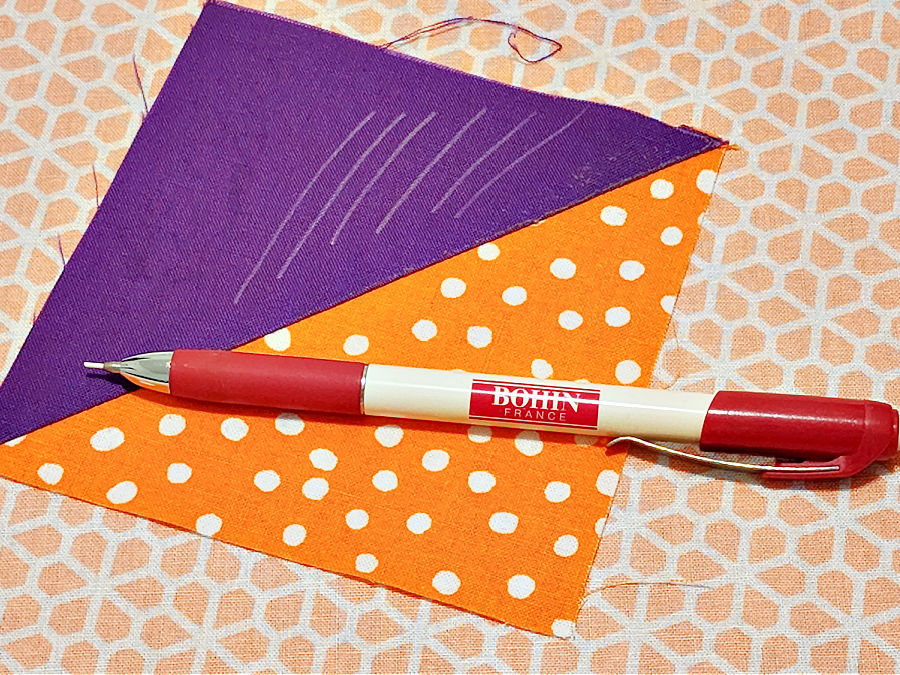
The tip is very fine, so it’s perfect for marking darts, pleats, buttonholes, or stitching lines with accuracy. It glides smoothly, especially on cottons and tightly woven fabrics, and the chalk can be brushed off or removed with a damp cloth. Unlike standard chalk pencils, it doesn’t crumble easily, which helps maintain a steady line even on longer markings.
This pencil also comes with refillable leads in several colors (often white, yellow, pink, or green), so you can adjust based on your fabric: Bohin Chalk Pencil Refill- 3 Color Bundle-Yellow, Green and White. The lead holds a point well but is soft enough not to damage fibers – a helpful balance if you’re working with light to midweight materials.
However this type of pencil is usually more expensive than regular chalk.
3. Chalk Wheels
Chalk wheels are a modern upgrade for clean, continuous lines. They’re perfect for hems, seam allowances, and dart lines. The rolling tip dispenses a fine layer of chalk as you move it across the fabric. Below there are two of the most popular choices.


I own both and if you’re careful, they both work well. These tools can be refilled, such as with the Dritz Refill for Deluxe Hem Marker, White Chalk.
Pros:
- Ideal for straight and curved seam markings
- Refillable and long-lasting
- Cleaner application with less mess
Cons:
- Less effective on soft or highly textured fabrics
- Some chalk colors may fade too quickly
- Requires even pressure for a smooth line
- Best used on flat surfaces
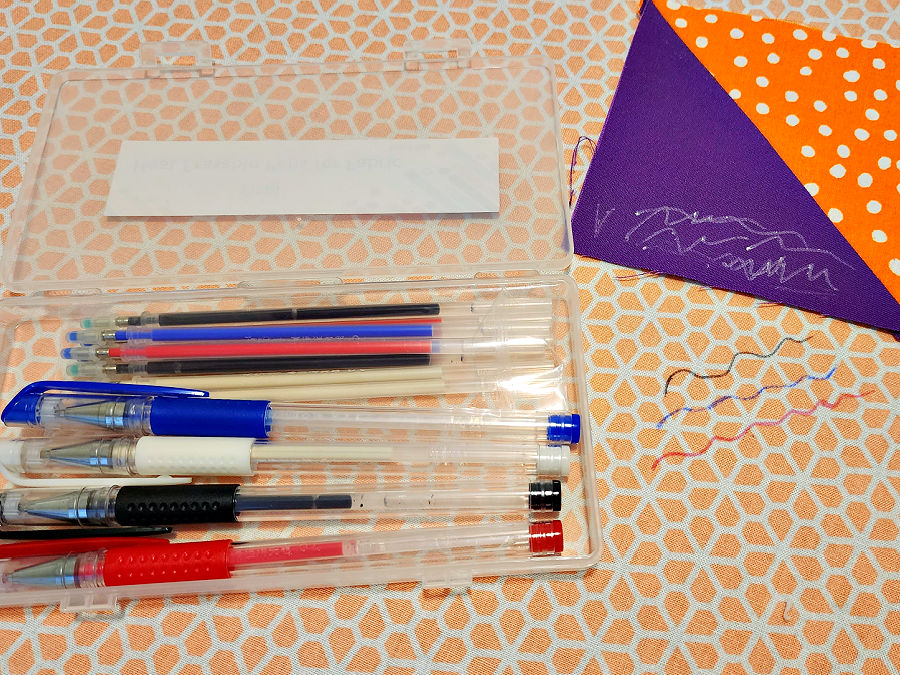
Pens and Markers
Pens and markers are a favorite for many sewists, especially when you need precision. They’re perfect for detailed pattern markings, embroidery placement, or anything that requires a fine, controlled line.
But not all pens behave the same way, and their “disappearing acts” vary – some vanish with water, others with air or heat.
1. Air-Erasable Pens
Air-erasable pens are convenient for fast-paced projects. The ink fades on its own within 24 to 48 hours – sometimes faster depending on humidity. I use air-erasable pens on practically everything – even lightweight silk – and they’ve worked well for me across a wide range of fabrics.
But here’s where it gets tricky: many brands will set if ironed. That can turn a temporary mark into a permanent stain.
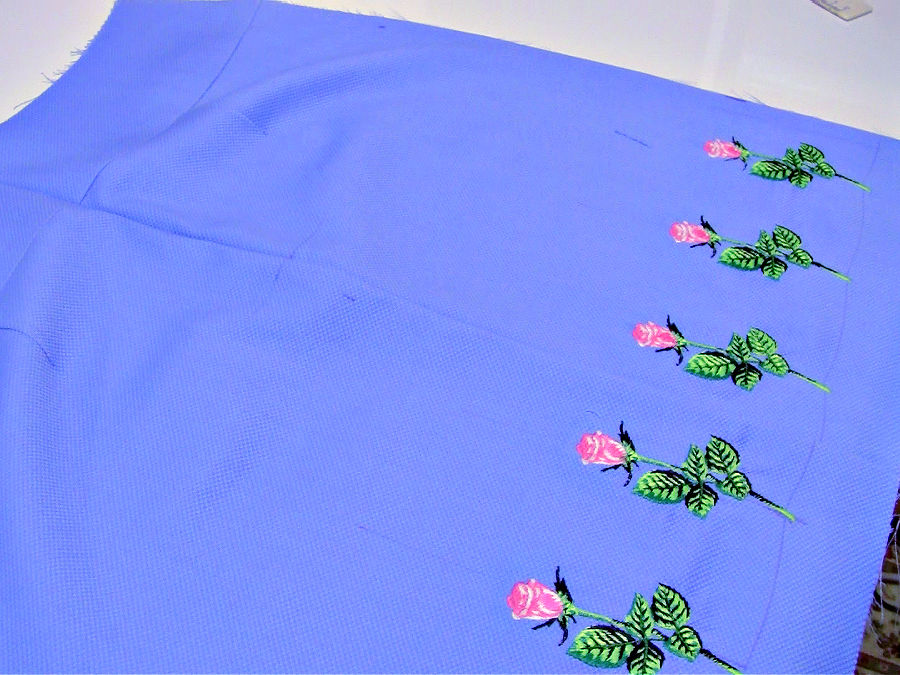
I had this exact problem while making a skirt with dense machine embroidery. I used an air-erasable pen to mark my embroidery placement. It looked great… until I ironed it. The marks set into the fabric permanently. After hours of stitching, I had to stop sewing altogether. The skirt is still unfinished.
✅ Related tutorial: DIY Skirt Inspiration: 10 Sewing Tutorials for Every Skill Level
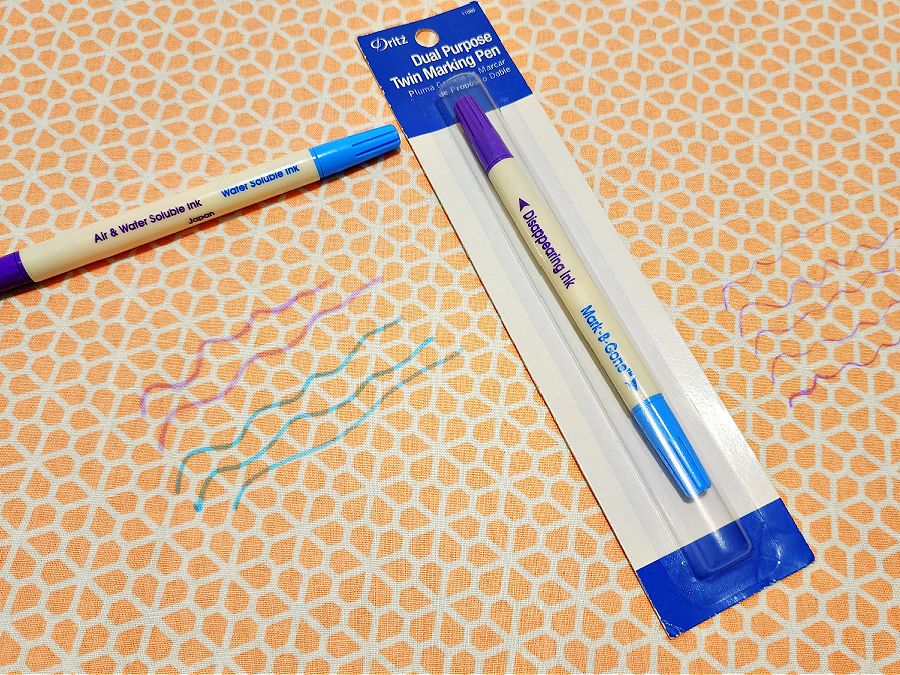
But not all air-erasable pens behave this way. The Dritz Dual Purpose Disappearing Ink & Mark-B-Gone Marking Pen, Blue and Purple has worked beautifully for me. I draw my lines, sew, press – and the marks vanish. No stains, no residue. It’s a gem in the world of fabric markers.
Even better? I recently discovered the Clover 5032 Purple Fine Air Erasable Marker with Eraser. This one is fantastic for daily sewing. It includes a built-in eraser, so if I need to iron before the ink naturally disappears, I can simply erase the mark first.
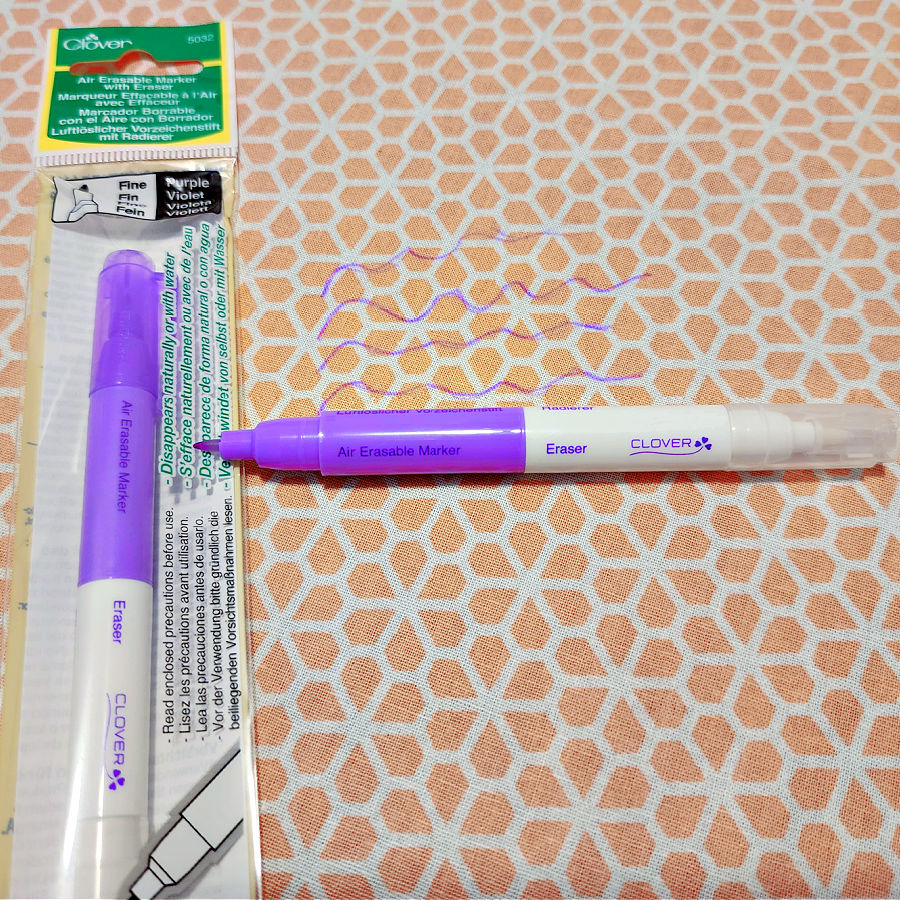
The only downside? The pen doesn’t seem to last long after it’s opened. It works beautifully at first, but if I set it aside for a while, the ink becomes faint and unreliable. I’m not sure if it’s drying out or just fading with time, but it hasn’t held up well through breaks in sewing.
Pros:
- Sharp, clean lines
- Great for light fabrics and daily sewing
- No rinsing required
Cons:
- Can set under heat (depends on the brand)
- Marks fade quickly
- Not ideal for long-term projects
2. Water-Erasable Pens
Water-erasable pens stay put until you remove them with water. I like the LEONIS Water Erasable Fabric Marking Pen because it’s precise and reliable. A damp cloth or gentle mist usually removes the lines completely.

✅ Related tutorial: How to Use Leonis Iron-on No-Sew Hem Tape
These pens work well on most fabrics – as long as the fabric itself can handle moisture. Avoid using them on fabrics that water might damage or stain, such as:
- Water-sensitive silks, especially dupioni or silk taffeta, which can show water rings
- Rayon, which can warp or darken where it gets wet
- Velvet, which may lose its pile or develop marks from pressure and moisture
For these types of fabrics, it’s best to choose another marking method.
✅ Related tutorial: How To Sew Silk: Helpful Tips To Avoid Frustration
Pros:
- Stays in place for days
- Excellent for quilting, embroidery, and fitting
- Doesn’t fade on its own
Cons:
- Cannot be ironed before removal
- Needs water for cleanup
- Not suitable for water-sensitive fabrics
3. Heat-Erasable Pens
These have become popular for their ease and speed – you can draw your lines, sew, then pass over with an iron and watch the marks disappear.
I’ve had great results with Madame Sew Heat Erasable Fabric Marking Pens. The lines are smooth and clear. After sewing, I simply glide my iron over the fabric and the marks are gone. These are especially helpful when I want to check the fit or construction and remove the lines right after.
But there’s a tradeoff: on some fabrics, especially synthetics, they may leave behind faint “ghost lines” or shiny impressions where the ink was.
Despite that, they’re incredibly useful for testing fit or tracing seam allowances, as long as you’re aware of the fabric’s reaction to heat.
I also use Frixion Clicker Erasable pens all the time — they are just so easy and convenient. They have become one of my favorite marking tools for sewing. These pens were originally made for paper, but many sewists quickly discovered how well they work on fabric. I used the 0.7mm version (they are available in multiple sizes).
Just a quick press with an iron, and the marks are gone. The lines are clear, easy to draw, and stay visible while you sew — but disappear instantly when you press.
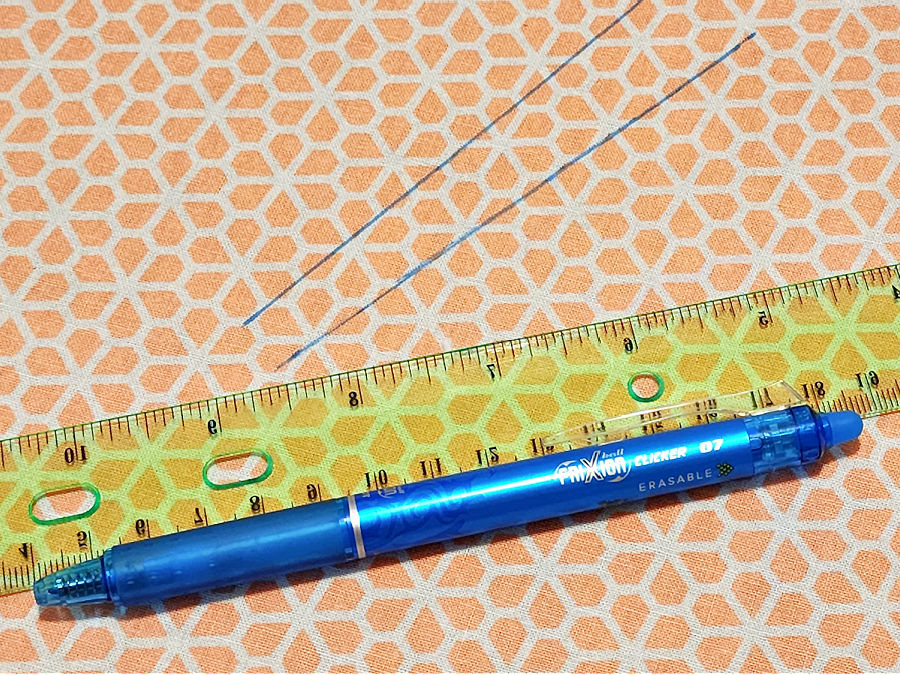
That said, I’ve noticed they don’t always cooperate when I try to draw long, straight lines with a ruler. The first inch or so is nice and crisp, but then the ink can suddenly fade mid-line, as if the pen stops writing. This happens more often when I press against the ruler’s edge – almost like the tip doesn’t get enough pressure or loses contact with the fabric. I often end up drawing shorter segments when I need accuracy.
Pros:
- No water needed
- Disappears instantly with an iron
- Excellent for test garments or muslins
Cons:
- May leave ghost marks on synthetics
- Not recommended for delicate or textured fabrics without testing
- Can fade or skip when marking long lines with a ruler
Pencils for Fabric
Fabric pencils are a simple, familiar tool – and sometimes, that’s exactly what makes them the right choice. They leave crisp, clean lines that are easy to control, especially when you’re working on lighter fabrics or delicate shapes.
They usually come in many colors, which makes it easier to choose something that stands out against your fabric. Light pinks, yellows, and whites are perfect for dark materials, while blue, red, or gray can show clearly on pale cottons or linens.
One reliable option is the Fabric Pencils for Quilting, Sewing, Dressmaking Supplies, Water-Soluble. This set includes pencils in a variety of colors. The water-soluble formula is designed to wash out easily.

This variety is especially helpful when you’re working with layered projects or patterned fabric, where a single color might not always be visible. Having a range on hand saves time and helps avoid straining to see faint marks during sewing.
They’re also easy to sharpen, which is a big plus when you need a precise line for darts, pleats, or fine sewing details.
They work especially well on smooth, tightly woven fabrics like poplin, lawn, or voile. On looser weaves or textured surfaces, the marks might not transfer as clearly. And if you’re working on anything special – like silk, satin, or velvet – always test first on a scrap. Some pencils can leave behind residue or be difficult to remove on delicate fibers.
Pros:
- Clean, fine lines
- Easy to handle and sharpen
- Available in multiple colors
Cons:
- Marks may not show well on textured or dark fabrics
- Some colors can be hard to remove completely
- Not suitable for slippery or delicate fabrics without testing
Tracing Paper and Wheels
Tracing paper (for sewing!) and wheels may seem old-school, but they’re still useful. This method works by using a tracing wheel to press pigment from dressmaker’s carbon (also called tracing paper) onto the fabric. It’s a great way to transfer pattern details like darts, pleats, grainlines, or button placements, especially on structured garments.
It’s especially effective for straight lines and flat seams. For curves or tight shapes, though, it can be harder to control. The wheel might slip or miss the line, so it’s not the best choice for marking rounded collars, armscyes (armholes), or delicate contours.
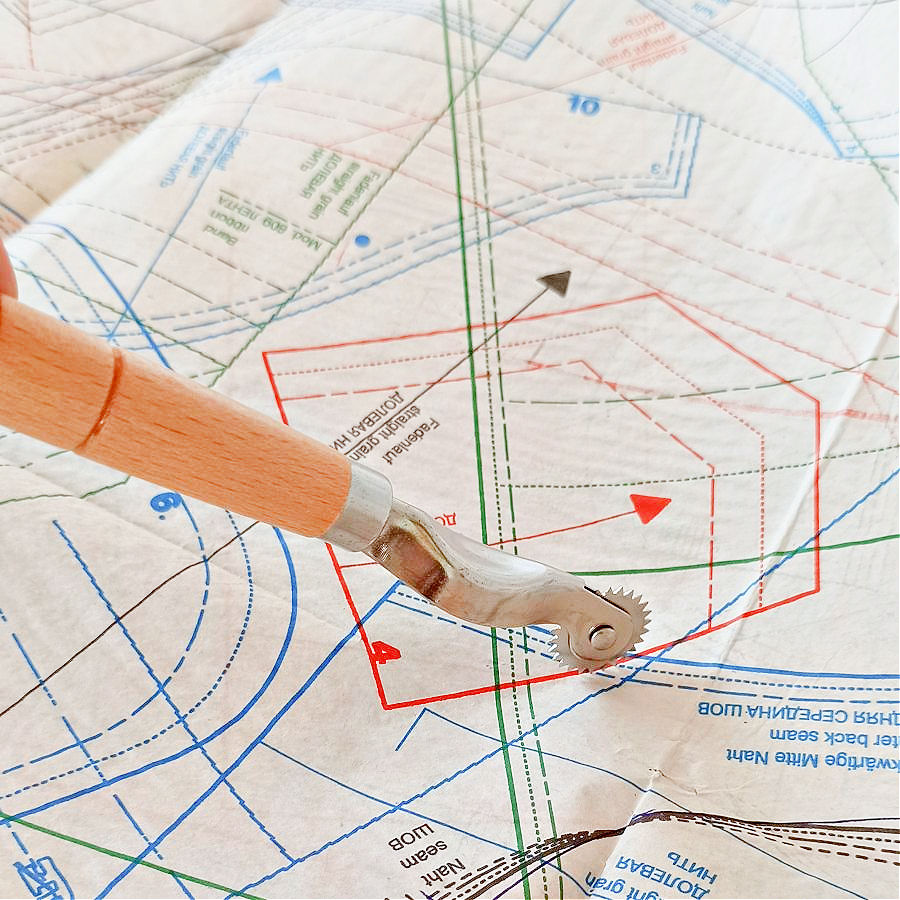
Tracing paper comes in multiple colors, so you can match the pigment to your fabric for better visibility. Just be sure to test first, especially on lighter or delicate fabrics, since some tracing paper can leave behind marks that don’t wash out easily.


I also have a detailed tutorial on how to use a tracing wheel that walks through transferring pattern markings. It’s a helpful guide if you’re new to the tool or want a refresher.
Pros:
- Very precise for straight lines
- Great for transferring detailed patterns
Cons:
- Not ideal for curved or complex shapes
- Some carbon papers may stain (always test first)
- Requires a flat, firm surface for clean marks
Soap Slivers
If you’ve ever trimmed down a bar of soap and thought, this is too small to use, don’t toss it – save it for your sewing room. Soap slivers make excellent fabric marking tools.
They glide smoothly on fabrics, leave a visible line, and wash out completely with water. This is a zero-waste option, which makes it especially appealing for sewists who like to get the most out of every material.
Soap slivers work best on medium to dark woven fabrics, where the contrast is strong enough to see the line clearly. They’re perfect for marking hems, pleats, or cutting lines.
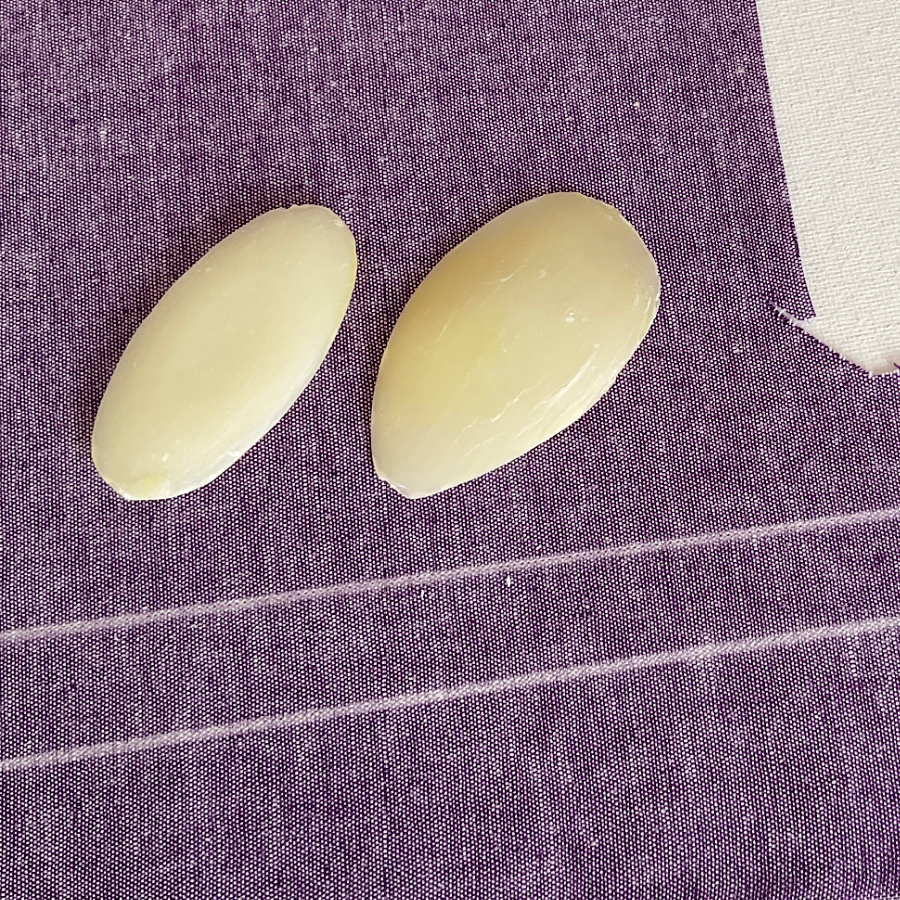
You may be able to iron over soap slivers, and the marks usually fade or disappear completely with heat. However, it’s always best to test first on a scrap. Some soaps contain oils or added color that could react differently with heat or certain fabrics.
Pros:
- Free and zero-waste
- Easy to wash out
- No special tools required
Cons:
- Lines can be hard to see on light-colored or textured fabric
- Shape wears down quickly with use
- Not precise for very fine or detailed markings
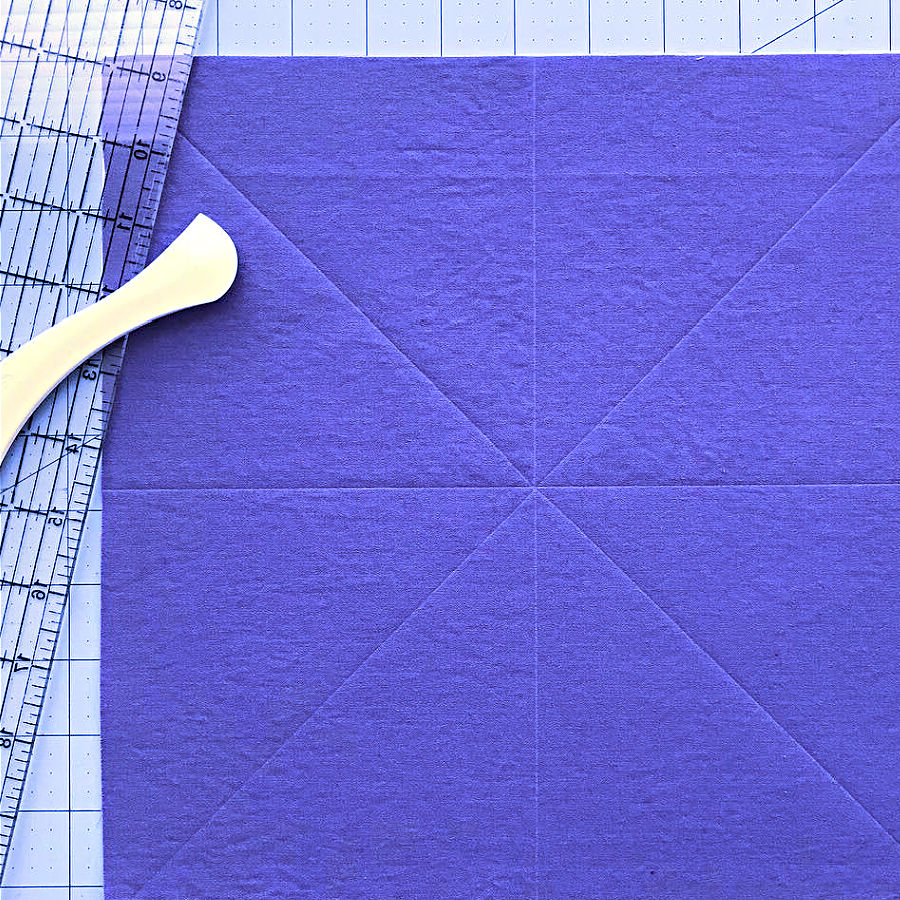
Hera Marker
The Hera marker is one of those tools that doesn’t look like much – until you try it. Instead of leaving behind ink, chalk, or pigment, it creates a crease line on the fabric surface. This makes it especially useful for fabrics where you don’t want to risk staining or when you want a completely residue-free mark.
I actually had this tool – the Clover Hera Marker for Marking and Creasing – in my drawer for a while and kept wondering, What is it even for? It was a surprise to find out just how useful it is.

I used it on a quilt for straight-line quilting, and it worked so well! What a relief to not have to rely on an ink marker for all those lines. I followed the creases with my sewing machine, and everything came together beautifully. I honestly love this invention – it’s one of the most stress-free ways to mark.
✅ Related tutorial: The Basics of Straight Line Quilting
The Hera marker works best on smooth, tightly woven fabrics. It’s perfect for straight lines and can handle gentle curves too. For detailed shapes or tight curves, though, it can be tricky to get consistent results – the tool needs even pressure, which is easier to manage on straight or softly curved paths.
Pros:
- No pigment or residue
- Safe for even the most delicate fabrics
- No need to wash or erase marks
Cons:
- Doesn’t show well on textured or thick fabrics
- Crease lines may disappear with handling
- Not ideal for detailed curves or complex shapes
Thread Marking (Tailor’s Tacks)
Thread marking, or tailor’s tacks, is one of the oldest marking methods in sewing. It involves hand-stitching loose, temporary threads through pattern markings to transfer them from the paper onto the fabric. It’s a slow process – no getting around that – but it’s also one of the safest and most precise methods available.
This technique is best suited for fine fabrics, sheer materials, or couture sewing, where you absolutely don’t want to risk pigment stains or pressure marks. It leaves no residue, can’t rub off, and poses zero risk of becoming permanent.
The downside? It’s time-consuming. And in home sewing, most people simply skip it. I suspect very few still use it outside of couture or tailoring circles – it’s just not practical for everyday projects.
If you ever do want to try it, here’s one key tip: use a contrasting thread color so the tacks are easy to see and remove. Lightweight cotton thread works best, as it pulls through fabric without damaging delicate weaves.
Pros:
- Extremely accurate
- No damage or staining, even on the most delicate fabrics
- Long-lasting for slow-paced or multi-step projects
Cons:
- Very slow to apply
- Threads can get caught or pulled while handling
- Rarely used in everyday home sewing anymore
Tips for Choosing the Right Marking Tool
Choosing the right marking tool is like choosing the right needle – it depends entirely on the fabric and the task. A few thoughtful questions can save you from stubborn marks or disappearing lines halfway through your project.
- What kind of fabric are you using?
Thick fabrics like denim or wool can handle chalk, while smooth or slippery fabrics like silk or satin need something gentler. Textured fabrics might not show creases or soft pencil lines at all, so they’ll need a bolder mark. - How long will the marks need to last?
If you’re working on a project you’ll finish in a single day, air-erasable pens or soap slivers might be just right. But if the project will sit unfinished for a while, those marks could vanish before you return. In that case, look for water-soluble or heat-erasable options. - Is this fabric sensitive to water, heat, or pressure?
Delicate materials like silk or rayon can react badly to moisture or heat. Always check how the marking tool behaves before committing.
And the golden rule: always test first on scrap. The same tool can behave very differently depending on the weave, color, and finish of the fabric. A quick test can help you avoid set-in stains, ghost marks, or disappearing lines.
Making a few smart choices up front helps everything go more smoothly once you’re at the machine.
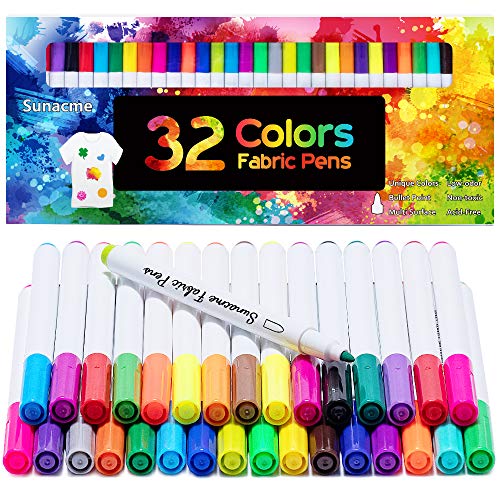
Fabric Markers for Coloring
Fabric markers aren’t for marking darts, pleats, or other pattern lines – they’re for adding color, detail, and personality to your finished projects. These permanent markers are made to bond with fabric, which makes them ideal for creative touches like coloring embroidery, writing quilt labels, or adding artistic designs.
They come in a wide variety of colors and tip styles, from ultra-fine to brush tips, so you can choose the best tool for your design. Most work best on natural fibers like cotton or cotton blends, and once heat-set with an iron, the ink is washable and permanent.
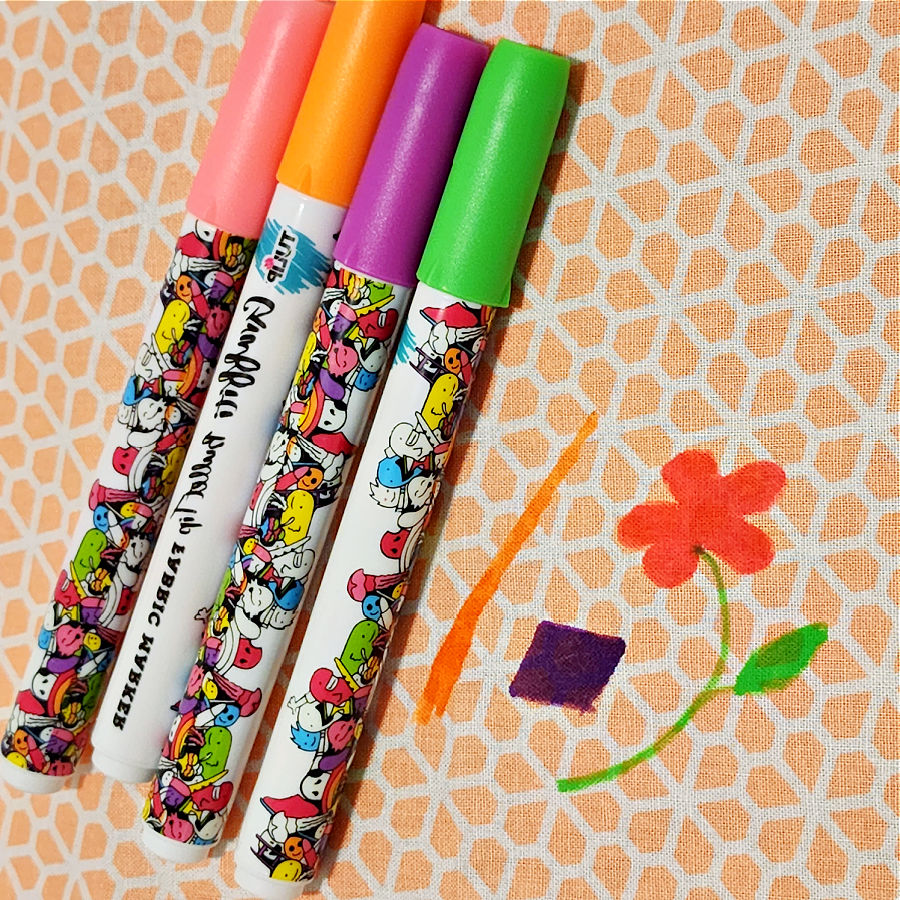
These markers are especially useful when you want to personalize your work – whether that’s a child’s name on a backpack, a date on a quilt label, or a colorful embellishment on a sewing project. As with all tools, remember to test first on a piece of scrap!
Use ideas
- Add color to embroidery or applique details
- Label handmade quilts or garments
- Create one-of-a-kind gifts
- Fill in or outline pre-printed fabric panels
Pros
- Permanent and washable after heat-setting
- No sewing or stitching needed
- Wide range of color and tip options
Cons
- Mistakes can’t be undone
- Ink may bleed on loosely woven fabrics
- Not suitable for marking construction lines
- Some people complain that the pens arrived already dry

Fabric Marking Mistakes to Avoid
Even the best sewing tools can cause trouble if they’re used the wrong way. When it comes to marking fabric, a few small missteps can lead to permanent stains, disappearing lines, or a whole lot of frustration mid-project. Here are some common marking mistakes – and how to steer clear of them.
1. Not Testing on a Scrap First
This is the most important rule. Always test your marking tool on the same fabric before using it on your actual project. Some pens or chalks look harmless until you try to remove them – and find out they’ve left a shadow or stain behind.
✅ Related tutorial: 21 Scrap Fabric Projects to Transform Your Textile Trash into Treasure
2. Using Water-Based Pens on Water-Sensitive Fabrics
Water-erasable pens seem gentle, but they can damage fabrics like silk, rayon, or taffeta. These materials can darken or spot when damp, and some never go back to normal. If you’re working with delicate fabric, avoid anything that needs water for removal.
3. Ironing Over Marks That Should Be Removed First
Many pens – especially air-erasable and water-soluble types – will set permanently if pressed with an iron. It’s easy to forget when you’re in the middle of fitting or piecing. Try to remove marks before pressing, or use a tool that’s safe to iron over.
✅ Related tutorial: Panasonic Cordless Irons: Review and Insights from Daily Use
4. Choosing the Wrong Tool for the Fabric Type
Thick chalk on satin? Not the best match. Fabric pencils on fleece? You won’t see a thing. Match the tool to the surface. Smooth, fine fabrics need soft, fine tools. Heavier or textured fabrics can handle something bolder.
5. Using One Color for Everything
Light blue lines on pale fabric can be impossible to see. Dark marks on black fabric? Same problem. Keep a few colors on hand so you can switch depending on the fabric’s shade and pattern.
6. Letting Marks Sit Too Long
Air-erasable pens might disappear faster than expected, and even chalk can fade or rub off. If your sewing pace is slow or spread out over several days, use something more stable – or go back and refresh your marks as you go.
7. Pressing Too Hard
Whether it’s a pen, pencil, or tracing wheel, pressing too hard can damage delicate fabric or leave permanent indentations. A light touch usually works best.
What’s your favorite way to mark fabric?
There are so many tools out there – from classic tailor’s chalk to high-tech heat-erasable pens – and every sewist has their own go-to. Maybe you love the clean lines of a chalk pencil, or maybe you swear by tailor’s tacks for delicate work. I’d love to hear what works best in your sewing space. Do you have a favorite brand or a trick that’s saved you from a marking disaster? Please share it in the comments! Your insight could help someone else choose the perfect tool for their next project.
Did you like this tutorial? If you did, don’t forget to bookmark this pin (see below) on your sewing Pinterest board! That way, you can easily return to this guide on marking tools in sewing whenever you’re ready to start using it. Plus, make sure to follow me on Pinterest to stay updated with more sewing advice, step-by-step guides, and creative inspiration!
latest posts
- Types Of Sewing Machine Feet And Their Uses
- The Interfacing Cutting Guide: Methods, Folds, and Seam Lines
- Steam or Dry Heat for Fusible Interfacing: Which Actually Works
- Essential Sewing Tips: How to Apply Fusible Interfacing Correctly
- Types of Interfacing Explained: Woven, Non-Woven, Knit, Fusible, and Sew-In
- Fabric Eggs DIY: Quick Easter Craft Decorations From Scraps
- Stuffed Bunny Sewing Pattern And Tutorial (Free Download)
- Sewing Machine Basics: Simple Maintenance Tips Every Sewist Should Know
- Interfacing vs Stabilizer: Is There Really a Difference?