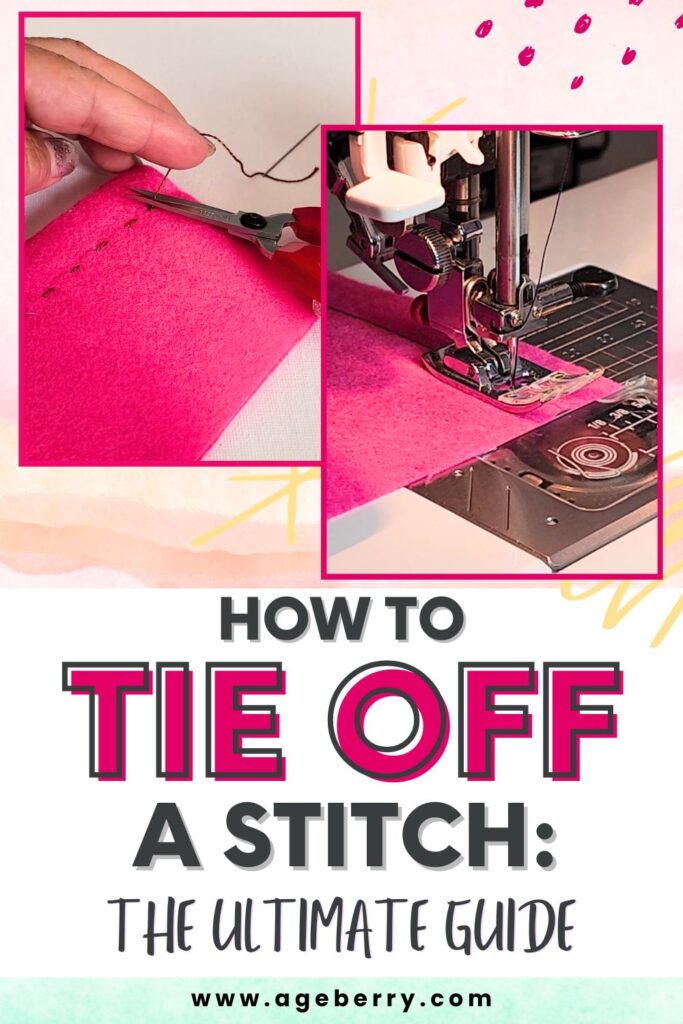
How To Tie Off A Stitch: The Ultimate Guide
You can be sewing along, whether by hand or by machine, and you get to the end of the seam. What happens now? One of the first things that beginner sewists have to learn is how to tie off a stitch. There is more to finishing up the seam than just snipping the thread and continuing on to the next step of your project.
However, this is not a one-size-fits-all solution. How to tie off a stitch depends on what kind of sewing you are doing. If you need to know all the various solutions for how to end a sewing stitch, this article can fill you in. You don’t have to “come apart at the seams” when you know how to finish a stitch.
- Why Tying Off A Stitch Properly Is Essential
- How to End a Stitch In Hand Sewing
- How to End a Blanket Stitch
- How to End a Ladder Stitch and Hide the Knot
- How to Tie Off a Quilting Stitch
- How to Finish Sewing a Button
- What to Do if You Don’t Have Enough Thread to Secure the Stitch
- How to End a Stitch on a Sewing Machine
- How to End a Serger Stitch
- How to End a Stitch in Hand Embroidery
- How to Tie Off a Cross Stitch
- How to End a Stitch in Machine Embroidery
- Common mistakes to avoid when tying off a stitch
- Tips from readers
Why Tying Off A Stitch Properly Is Essential
Properly finishing a stitch is important for several reasons.
First and foremost, it ensures that the seam will not come apart or unravel over time. This is especially crucial for garments or other items that will be worn or used frequently. If a seam is not properly secured, it can come apart and cause the item to fall apart or become damaged. Perhaps the person who coined the phrase “coming apart at the seams” didn’t know how to finish a sewing stitch.
In addition, properly ending a seam also gives it a more professional look. An unfinished seam can make a garment or other item look sloppy or amateurish. By contrast, a well-finished seam shows that the item was made with care and attention to detail.
When you know how to properly tie off a stitch your sewing projects will not be marred by unsightly knots and lumps of thread.
How to End a Stitch In Hand Sewing
Whether you’re hemming a garment or attaching an applique, when you’re hand sewing, you will make a simple knot to finish the seam.
So, here is a general process for ending a stitch in hand sewing.
#1. Take your needle to the back of the fabric and stop stitching. Be sure to leave enough thread at the end so that you can easily make the knot. You should stop stitching when you have 4 to 5 inches of thread left.
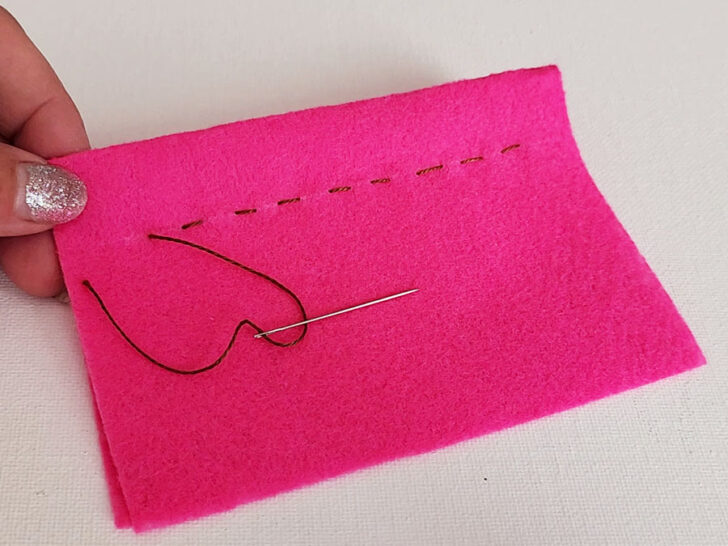
#2. With the needle and thread, create a loop.
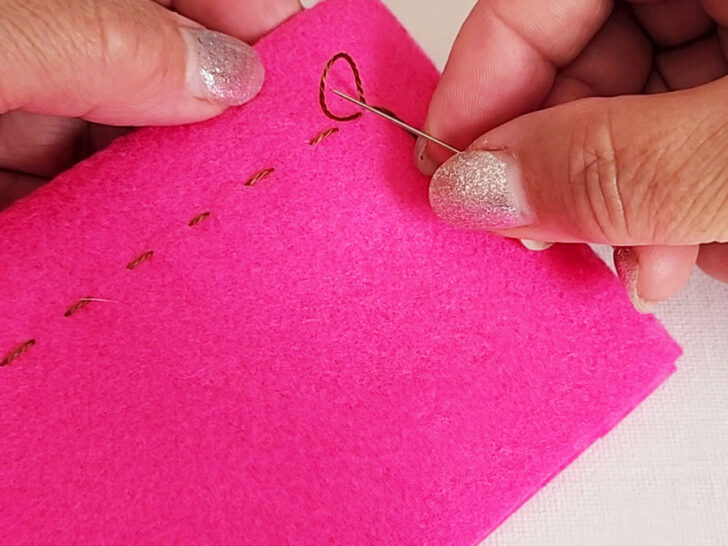
#3. Pass the needle through the loop and then pull it tight against the back of the fabric. You may want to use the fingers of your other hand to keep the knot close to the fabric.
#4. Repeat this process to double knot the seam.
#5. Cut the thread
✅ Related tutorial: Cutting Tools For Sewing: The Ultimate Guide
The trickiest part of creating a knot this way is making sure that the knot is snugly against the fabric, but not too tight to pucker the seam. However, with a little bit of practice, you will manage this perfectly.
This process is generally used for a running stitch, which is a basic stitch used in many types of hand sewing. However, it can be adapted for other types of stitches as well. The key is to make sure that the thread is securely fastened to the fabric and that there are no loose ends that could come undone over time.
While ending a stitch in hand sewing is a relatively straightforward process, there are a few common problems that can arise.
One of the most common issues is that the knot used to secure the thread can come undone over time, causing the seam to unravel. This can happen if the knot is not tied tightly enough, or if the thread is pulled too hard after the knot is tied.
Another common issue that can arise is that the thread can become tangled or knotted while you pass the needle through the loop and you will have a knot on the fabric together with the loop of thread.

Also, the thread can break while you are tying off the stitch. This can happen if the thread is too thin or weak for the fabric being used.
Another problem that you may encounter when ending a stitch in hand sewing is that the thread tail is cut too short. It can make it difficult or impossible to make a loop to secure the thread. To avoid this problem, make sure that the thread tail is long enough to make a loop. As a general rule, the tail should be at least three inches long to allow for a loop.
You can still secure the stitch, but you will have to pull the needle backwards to do so.
How to End a Blanket Stitch
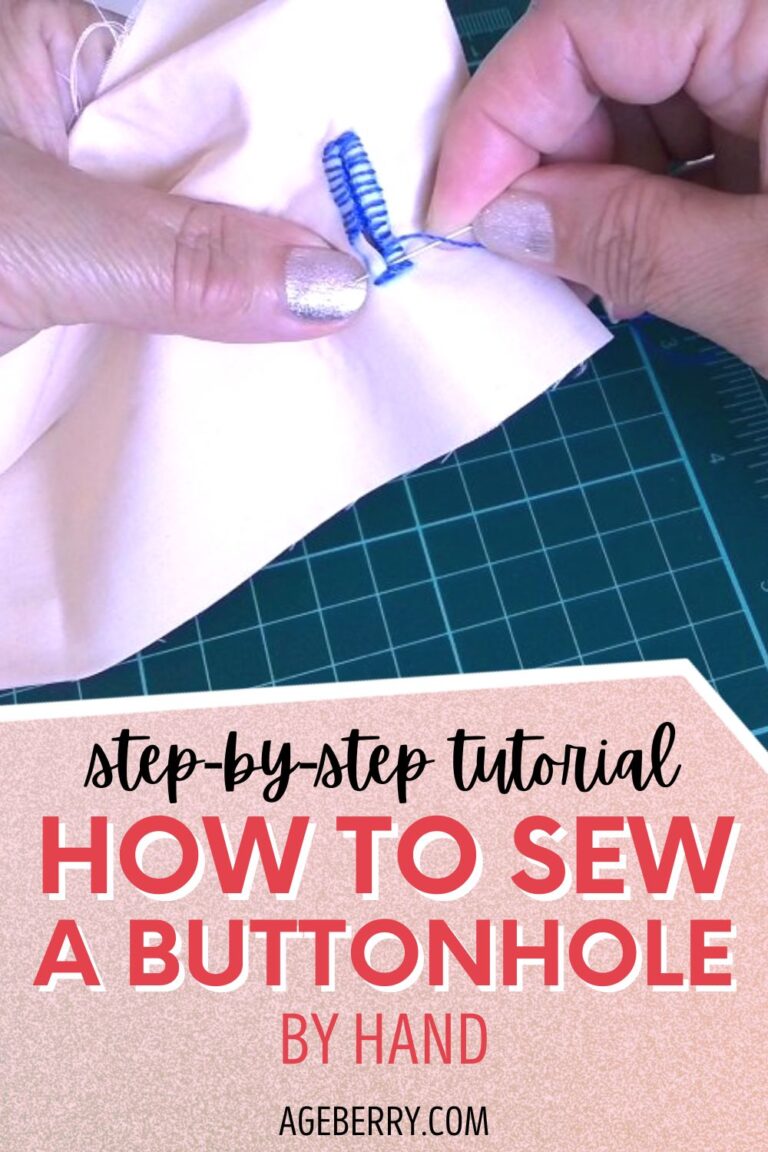
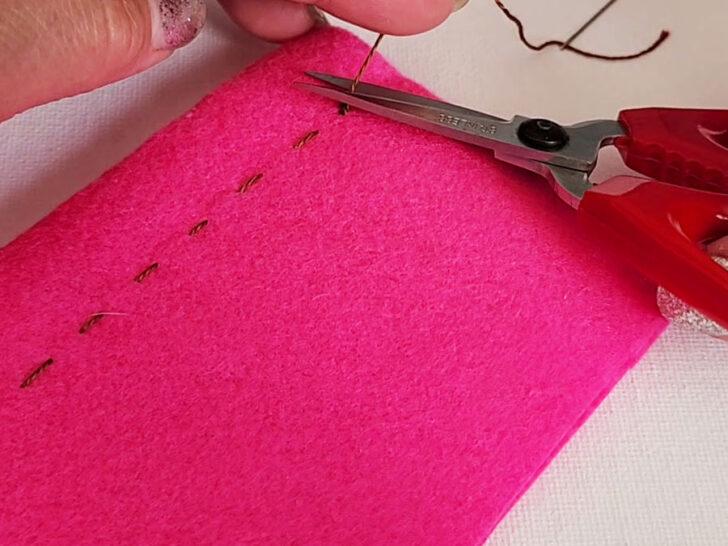
The blanket stitch is a popular choice for finishing edges and creating decorative details. There are actually two main types of blanket stitch (and there are many variations too): the traditional blanket stitch and the buttonhole stitch. Each of these stitches can be finished differently to secure the thread.
The traditional blanket stitch was typically used to finish the edges of blankets, hence its name.
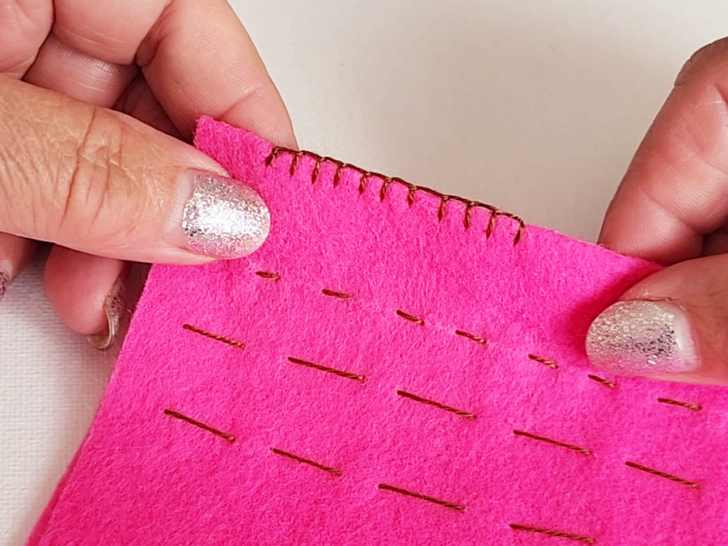
If you are finishing a traditional blanket stitch and need to change the thread, you can start by making the final blanket stitch with the old thread.The problem here is that there is no knot at the end of each blanket stitch. So we need to make a knot to finish the stitch to change the thread.
I do it like this – when I make the final loop I insert the needle twice in the same loop. Then pull gently to tighten the knot. This step will make the knot at the edge of the fabric. You will need to make sure that the knot is at the top of the fabric.
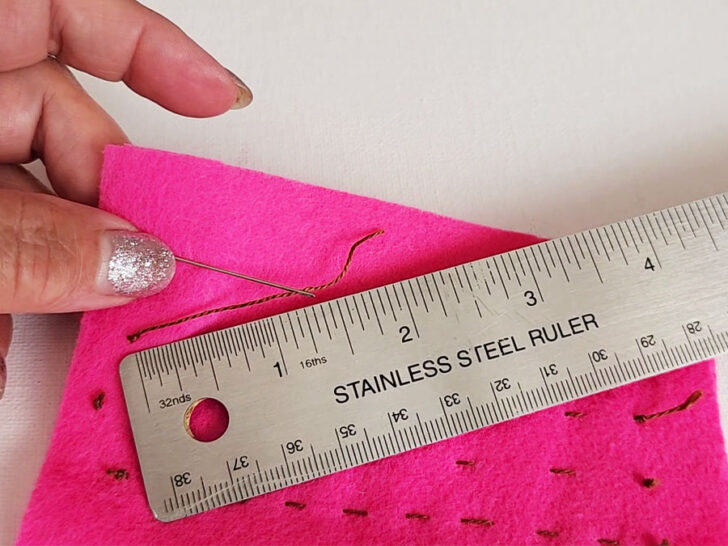
Now the thread is secured. But this is not enough to end the stitch. Don’t cut the thread just yet.
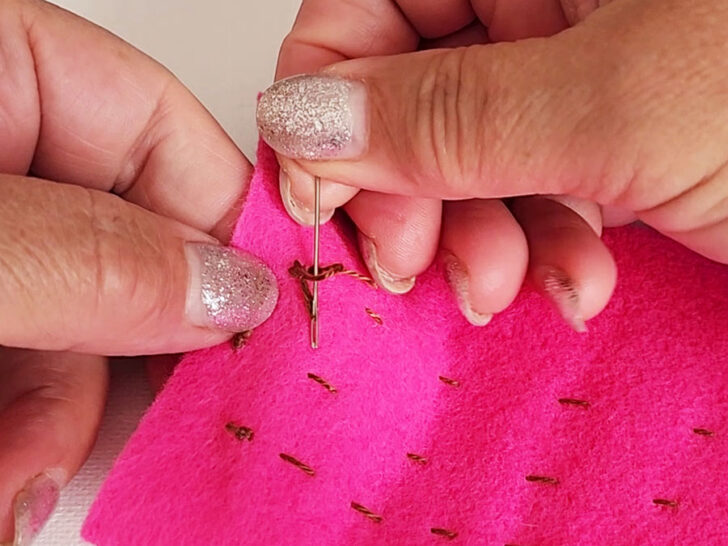
You need to flip the fabric over to the back. Next, take the needle and insert it under the vertical stitch line at the back. You can also insert the thread into the fabric at the back, just a little. Make a loop, bring the needle through the loop and make another knot. Repeat this step once or twice to ensure that the knot is secure. Make sure the knot is tight on the back of the fabric. Cut the thread close to the final knot.
To end a buttonhole stitch when you need to change the thread, the process is slightly different because the buttonhole stitch already has the knot at the edge of the fabric. So you just skip making the first knot. You turn the fabric over to the back and continue to secure the thread as I described above.
✅ Related tutorial: How to sew a buttonhole by hand
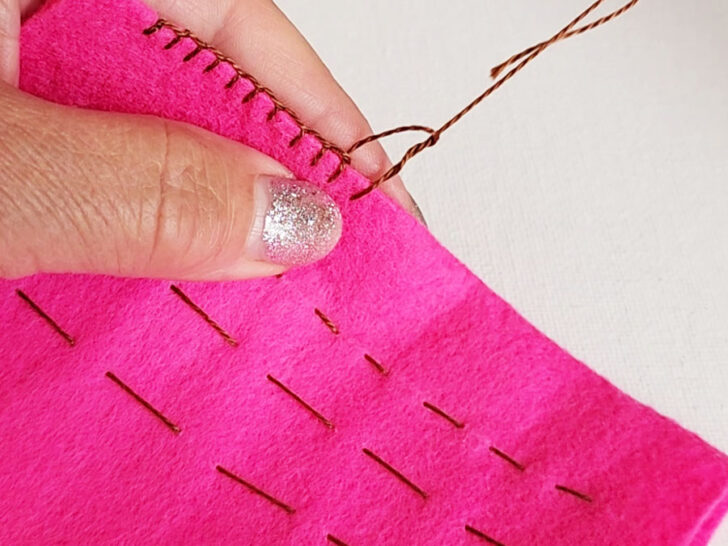
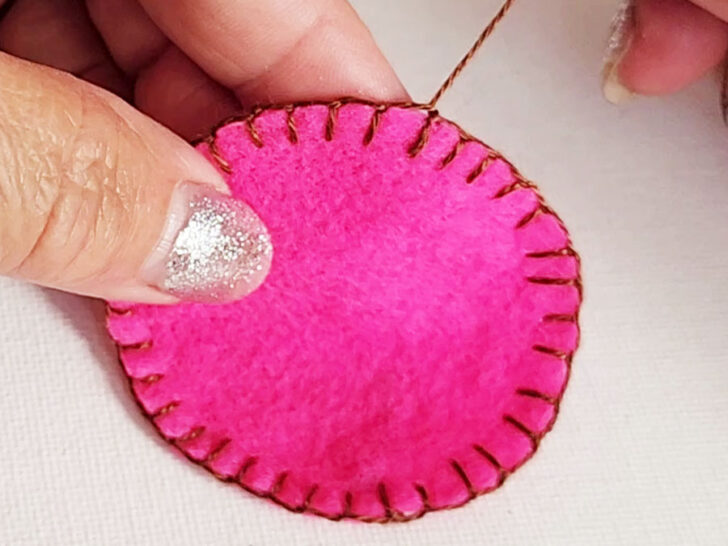
Now there is another situation when you have sewn the blanket stitch all around the project and have come to the end to meet the first stitch you made.
Make the final blanket stitch, double-checking that your stitches are evenly spaced.
Next, use your needle to go up under the vertical stitch on the very first stitch that you made. Pull the thread and go up under the horizontal portion of that same stitch.

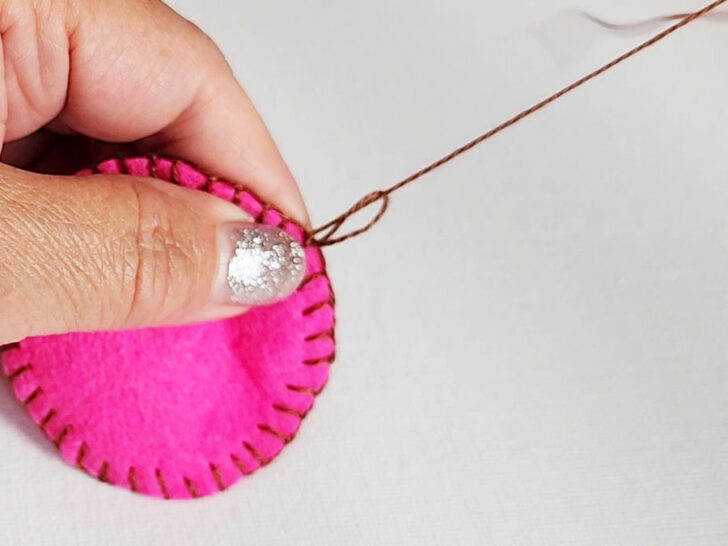
Pull the thread through and then go under the horizontal stitch once again making a loop and pulling the needle through the loop that you made. Gently pull the knot tight.
But wait! Don’t snip that thread. Bring the thread down over the vertical part of the stitch and pull it through the wrong side of the fabric. Make a knot or two and snip the thread.
How to End a Ladder Stitch and Hide the Knot
Also called a blind stitch or invisible stitch, the ladder stitch is used when you want an invisible seam like when you close a pillow. Since this seam is supposed to be virtually undetectable, it’s understandable that ending the ladder seam should also be invisible, so how to tie off a ladder stitch is one skill that you need to tackle.
✅ Related tutorial: Invisible Stitch Tutorial: How To Fix A Tear (+ Sewing “Blind” Hems)
When you finish the seam, pull the thread to close the seam. Make sure you close the seam before tying of the stitch. Insert your needle into the fabric under the last stitch and pull it through to create a loop. Pull your needle through this loop and pull it snug to make a knot. Do the same thing again to make another knot.
To hide the thread tails, push the needle through the seam into the item that you’re making (this is often a pillow or stuffed toy). Pull the needle out of the item in some random place and snip the thread.
The tails will be concealed within your stuffed item.
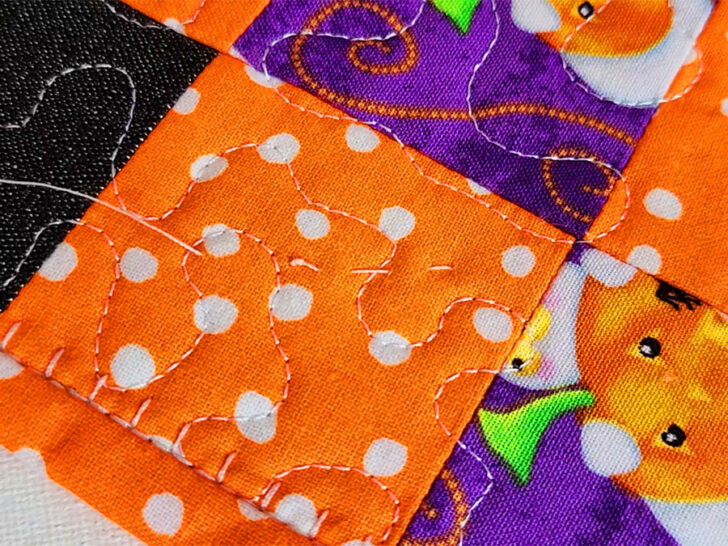
How to Tie Off a Quilting Stitch
Quilting is a wonderful craft that can be both practical and decorative. A cozy quilt can keep you warm on a chilly evening, while a colorful wall hanging can brighten up a room and add personality to your home decor. Since the quilting stitches themselves are a part of the artistic flair of a quilted item, you definitely don’t want ugly knots showing in your finished project.
I don’t usually quilt by hand, but I learned how to tie off a quilting stitch a few years ago. Let me show you. I wouldn’t say it’s very easy to do, and it took me quite a few tries to do it perfectly. However, if you do hand quilting, you must learn this for sure.
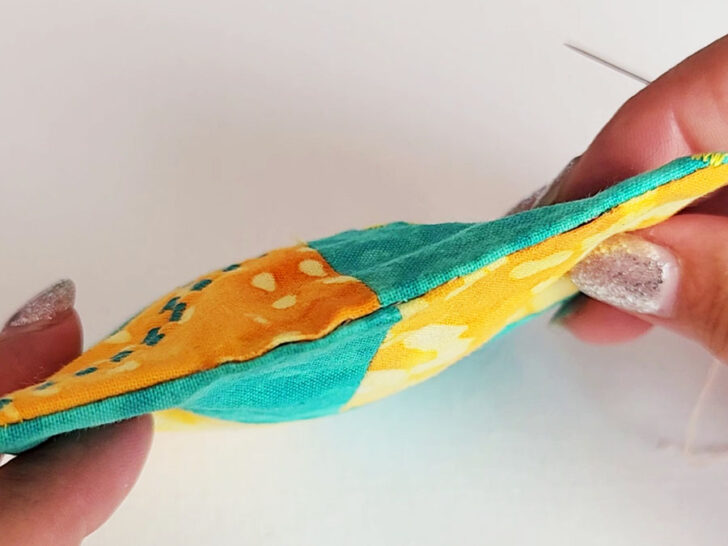
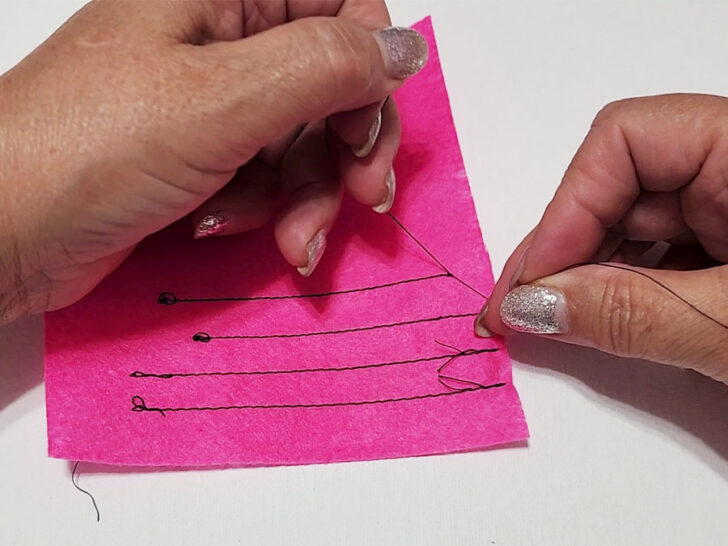
First of all, make a so-called quilter’s knot. When you get to the end of your quilting stitches, leave about 4 inches of thread. I prefer to leave a longer tail. Some professional quilters can leave 2 inches but to me, it’s hard to manage it.
A quilter’s knot is a small knot that is made at the end of a single thread to secure it and prevent it from coming undone over time.
To make a quilter’s knot, hold the end of the thread between your thumb and forefinger, with the rest of the thread hanging down. Hold the needle in your right hand, and keep the thread taut.
Use your left hand to wrap the thread around the tip of your needle two or three times, I usually do three. Keep the wraps tight and close to the tip of the needle.
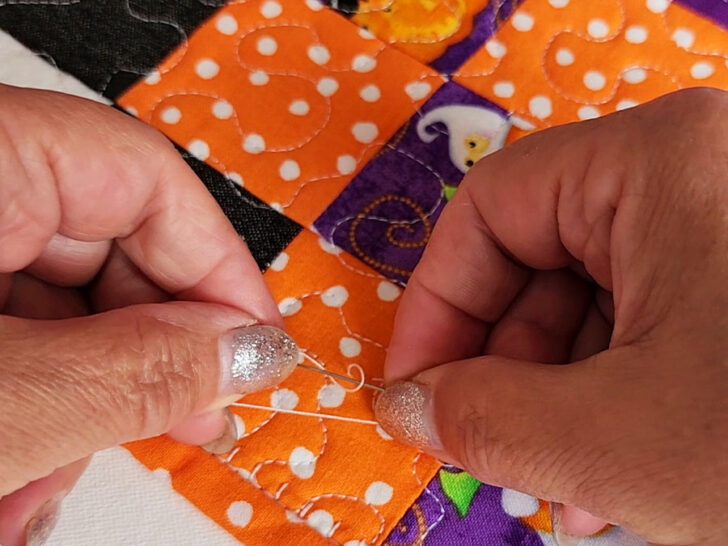
Slide the wraps down the needle towards the fabric being sewn.
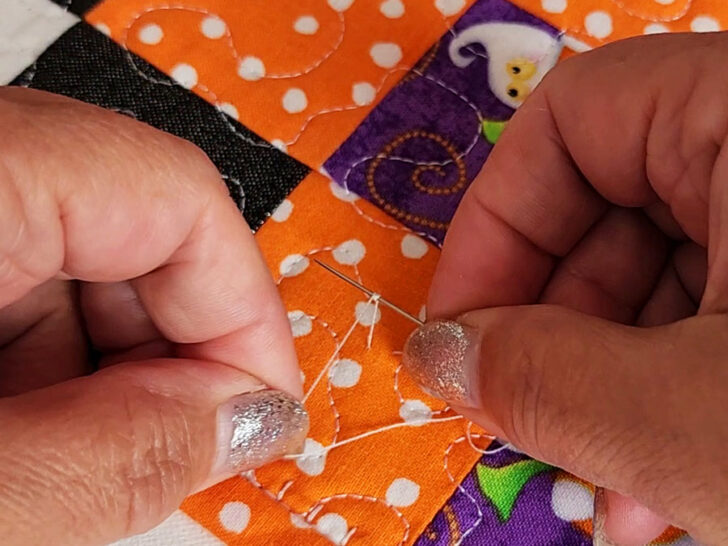
Hold the wraps in place with your forefinger, and push the needle through the top fabric only into the batting and then come out in some random place ahead.
As you do this, the wraps will tighten and form a knot at the end of the thread right next to the fabric.
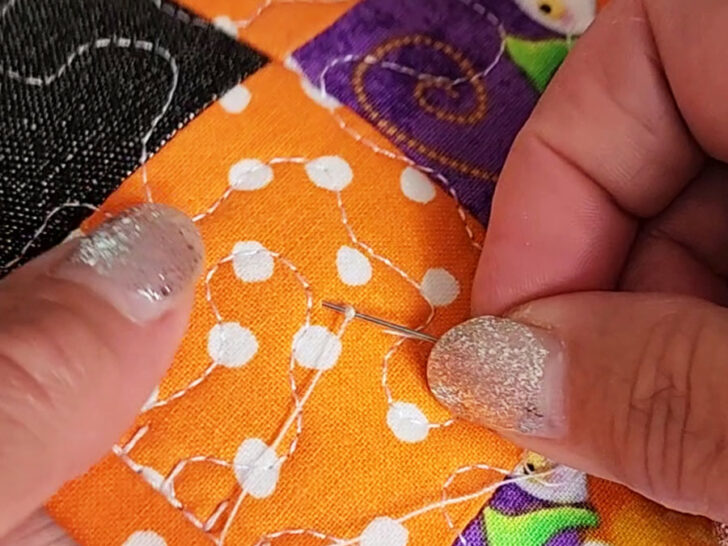
Then, make a last stitch and gently tug on that last stitch until the knot pops through the fabric and is hidden within the quilt. Snip your tail.
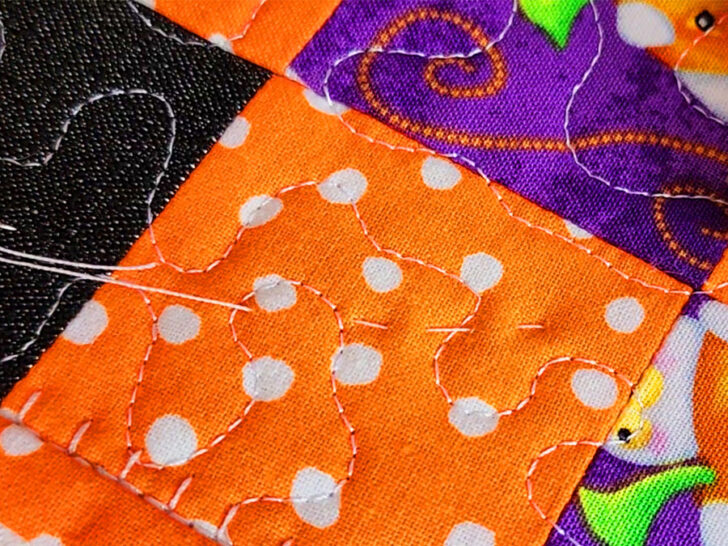
By the way, you can do the exact same thing with machine stitched quilting, knotting the tails and then popping the knot through the fabric to hide it in the batting.
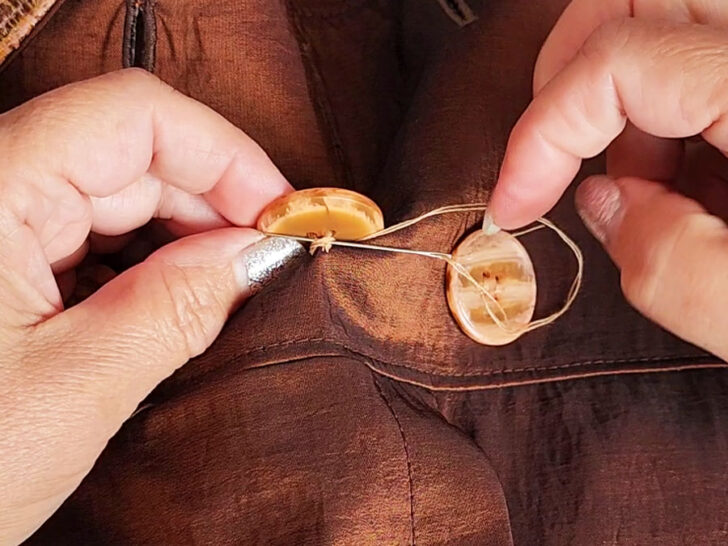
How to Finish Sewing a Button
One of the first things that many people learn to sew is a button. Attaching a button is something that every person who wears clothes should learn to do.
✅ Related tutorial: How to sew on a button
Once you’ve stitched the button into place with multiple snug stitches, what comes next? You probably have a length of thread dangling from your project.
Put the needle back up through the fabric but don’t pull it through the button. Wrap the thread around the stitching that attaches the button to the fabric. Do this three or four times.
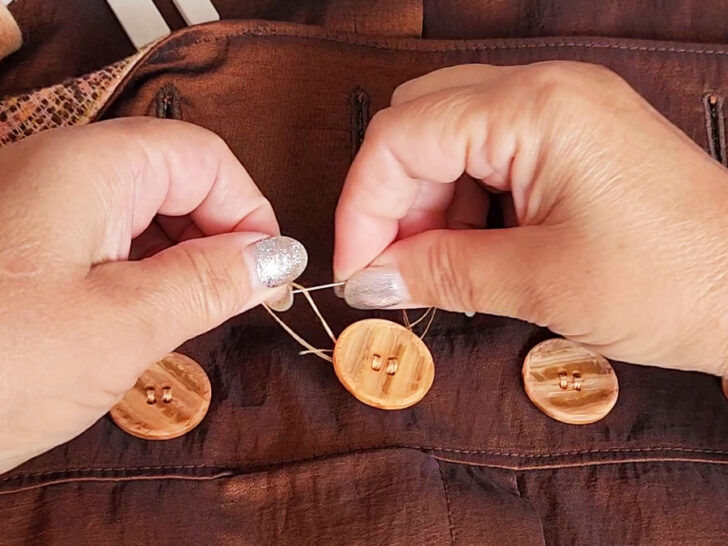
Then, run the needle through the threads holding the button into place and make a knot, ensuring that the knot pulls tight right against the threads that are holding the button secure.
What to Do if You Don’t Have Enough Thread to Secure the Stitch
It happens even to people who have lots of experience sewing…you’re stitching along, and then you realize that you didn’t leave enough thread to tie it off.
All is not lost. You have a couple of options.
First, you can take the thread out of the needle and pull out the last few stitches so that you can knot it.
Second, if you are sewing with a doubled thread, you can snip the thread and then tie the two threads together a time or two to create a knot that way.
Another option is to start a new thread and overlap the new thread over the old one, snugly encasing the loose threads on the tail with a hand stitch.
You can also try to tie off the thread that you do have left. Cut it even closer to the fabric than you normally would and tie a knot by hand like you do when you make a knot at the beginning of your sewing. Make sure to tie the knot tightly and close to the fabric, as this will help to hold the stitch in place.
You can also use a fabric glue to secure the stitch (as a last step). Simply apply a small amount of glue to the back of the fabric where the stitch ends. This will help to hold the stitch in place and prevent it from coming undone.
How to End a Stitch on a Sewing Machine
While sewing machine stitching might seem more secure than hand sewing, it’s still a good idea to secure your stitching when using a sewing machine.
There are a few main options: backstitching or tying off the thread. Backstitching involves sewing a few stitches in reverse at the beginning and end of a seam to lock the stitches in place. Tying off the thread involves manually knotting the thread at the end of the seam to secure it. There is also a locking stitch on modern sewing machines that eliminates the need of backstitching.
There is also another weird way of getting rid of the backstitch (but this time, at the start of the stitch) and you can read about it here Cool sewing trick: how to sew with the bobbin thread in the needle. This technique has a limited use but for making darts on sheer material, for example, it is priceless.
Backstitch or Not?
In general, backstitching is the preferred method for securing a seam on a sewing machine. It is quick and easy, and it creates a secure seam that is less likely to come undone over time. To backstitch on a sewing machine to end a stitch, follow these steps:
Stop sewing at the edge and press the reverse button or lever on your sewing machine.
Sew backward over the stitches you just made, sew backward 2-4 stitches, then stop and cut the thread.

While backstitching is a simple technique, there are a few common mistakes to avoid.
One mistake is not sewing in a straight line when backstitching. Make sure to keep your stitches straight and even, as crooked stitches can weaken the seam and make it more likely to unravel.
Also, be careful not to sew too quickly when backstitching. Sewing too quickly can cause your stitches to become uneven or crooked, which can weaken the seam.
Unbeknownst to many sewists, there actually is a teensy bit of controversy about back stitching to secure a seam. Apparently, those who stitch up couture items say that backstitching just “isn’t done.” They say that backstitching leads to an unsightly lump in the seam from the multiple layers of thread.
I think that the choice of whether to backstitch depends on the fabric and type of garment you are stitching as well as the kind of seam.
If the ends of your seam are to be enclosed by another seam or by a hem, I can’t imagine that it matters all that much. However, if you are stitching something with very fine, delicate fabric and the end of the seam is going to be visible, even after finishing, you may want to try a different way to secure your seam, other than a backstitch. Those backstitches could make a lump or bit of untidiness that you won’t want visible on the finished garment.
Instead of backstitching, some people just start and finish the seam with a couple of stitches that are shorter in length.
Tying Off Thread Tails by Hand
Sometimes when sewing fine fabrics on machine, backstitching fails because the machine can chew up the fabric or make it puckered.
If this is the case you may want to tie off your thread tails by hand at the beginning and ending of a seam.
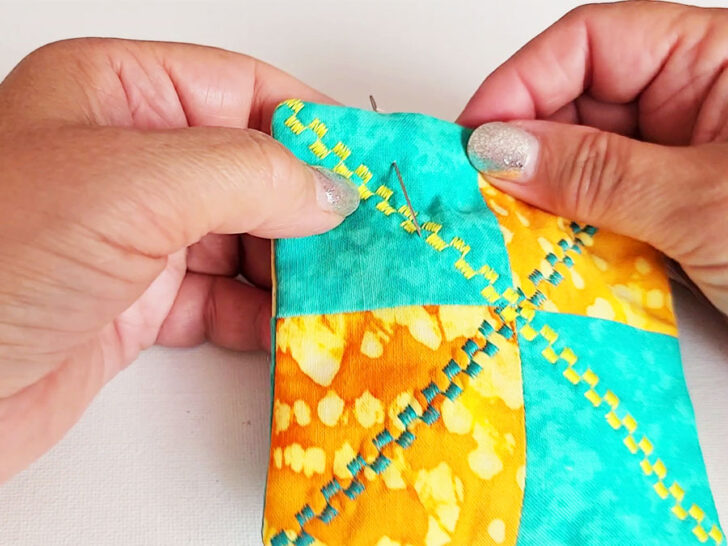
To tie off your thread by hand on a sewing machine seam, first sew to the end of the seam. Next, pull the fabric from beneath the presser foot, snipping the thread with a tail that is 3 or 4 inches long. On the back side of the seam, tug on the thread to pull a loop of thread up to the back side of the seam. Use a pin or a needle to bring that loop up through the fabric. Now you should have two thread tails on the same side of the fabric.
Tie the two threads together twice to make a knot. You can snip it now if desired. If you really need a secure finish on this seam, you can thread the two threads onto a needle. Then, run the needle through two or three stitches and knot the thread around these stitches. Snip the thread tails.
Tying threads off by hand is recommended when the end of your seam is visible or when you are sewing darts.
✅ Related tutorial: How To Sew Darts: Tips And Techniques For Different Types Of Darts
Lock Stitch
There is a special lock stitch that is used in sewing machines. This lock stitch is created by sewing 2-3 stitches in the same place at the beginning and the end of the seam. This is a true lock stitch, and it’s popular among machine quilters because it eliminates the need to backstitch.
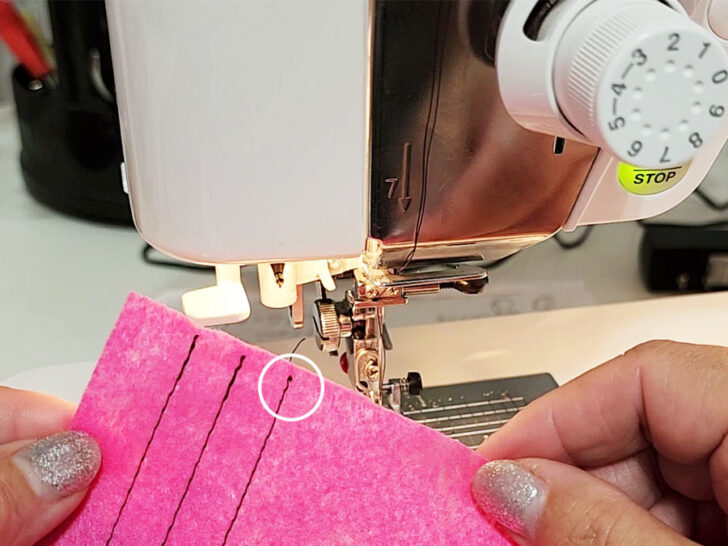
The lock stitch is created by a mechanism in the sewing machine that automatically sews a few extra stitches in the same place at the beginning and end of the seam. This helps to secure the seam and prevent it from coming undone over time.
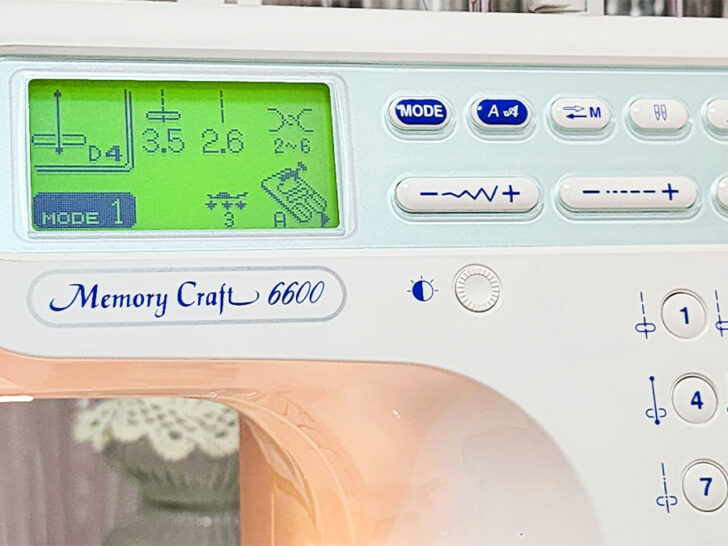
✅ Related tutorial: The best sewing machine for advanced sewers: Janome Memory Craft 6600P
How to End a Serger Stitch
Sergers are an essential tool for sewists, as they allow you to create professional-looking seams quickly and easily. However, unlike regular sewing machines, sergers can’t automatically backstitch over previous stitching to secure it. This means that you need to find other ways to secure the ends of your seams to prevent them from unraveling over time.
✅ Related tutorial: What Is A Serger & What Can I Do With It?
Sometimes seam ends will be crossed with another seam and will not need additional securing.
There are several options you can consider to secure the ends of your serged seams.
#1. One popular option is to use Fray Check, a clear liquid that prevents threads from fraying or unraveling. To use Fray Check, simply apply a small drop to the ends of your serged stitching and use a toothpick to lightly dab the sealant. This will help it to dry faster. Once the Fray Check is dry, you can cut off the excess thread chain. However, it’s important to test Fray Check first for possible staining before using it on a project. Also, consider whether the dried sealant will be worn against the skin, as it can feel scratchy and irritating.
✅ Related tutorial: The Best Fabric Glue Options For All Your Sewing Projects

#2. Another option is to separate the threads in the chain before tying the knot. This method takes at least 3 inches of thread chain. To do this, use a needle to pull the needle threads (which are the shortest) out of the chain. This will make it less likely to tangle when pulled. Then, the other threads will separate easily. Tie a knot close to the fabric, then trim the thread ends. For additional security, dab a bit of Fray Check on the knot and allow it to dry before clipping the threads. However, if this piece will touch the skin, it’s best to avoid using the sealant.

#3. You can also hide the thread chain under the loops of stitches. Thread a tapestry needle with the long chain at the end of the seam. Slide the needle under the looping threads of the seam for about an inch. Remove the needle and snip any excess thread. To ensure that the chain doesn’t work its way out of the seam, you can use a dab of Fray Check on the seam. If you don’t have a tapestry needle, use a crochet hook instead.
✅ Related tutorial: Types of Hand Sewing Needles and Their Uses: A Guide for Modern Sewists

How to End a Stitch in Hand Embroidery
How you secure the stitches in hand embroidery can make the difference between a gorgeous piece of handwork and a lumpy, unsightly mess.
Generally, because you’re working with heavier threads, you don’t want a bunch of big knots on the back of your embroidery. As you come to the end of your thread pull the needle to the back of the piece. Use the needle to slide the thread under some nearby stitches. Bring the needle up to make a loop around one of the stitches. Slip the needle into the loop to make a tiny knot. Slip the needle back underneath some of the nearby stitches and snip the tail.
How to Tie Off a Cross Stitch
When you’re cross stitching, you REALLY don’t want to use knots.
There’s a good reason to “knot” use knots on your cross stitch. As you switch colors and keep cross stitching, all those knots add up. Eventually the back of your piece will look like a shaggy bird’s nest of thread, and then the floss that you’re stitching with will get tangled in that mess.
Sometimes the fibers of all those threads will get pulled through to the right side of your piece, marrying your perfect stitching.
All that to say, learn to secure your cross stitches without knots. It will make your life easier and your project more beautiful.
How to tie off a cross stitch is easy. Pull the needle to the back side of your project. Then, slip the needle behind three to five of the closest stitches. Pull it snug, but not so tight that you warp the front of the project. Snip the thread and you are done!
How to End a Stitch in Machine Embroidery
Generally, machine embroidery stitches are so small that there is little risk of the stitches coming loose.
Most of the time, you can simply clip the threads on the back of your project, and you are done.
However, if you are worried about threads working loose, you can dab a tiny bit of Fray Check onto the ends of the thread to secure them.
Alternatively, you can tie together the bobbin thread and the top thread on the back side of the project in a tiny knot.
Common mistakes to avoid when tying off a stitch
Not Leaving Enough Thread
It is very common for beginner sewists to keep sewing right up until they have a quarter inch of thread left. Then, they don’t have a clue how to tie it off. You have to leave 4 to 6 inches of thread so that tying it off is easy. However, if you mess up and don’t have enough thread, you can use the above-mentioned method.
Pulling the Thread Too Tightly
If you are tying off a seam, you do not want to tie it off too tightly because then your seam will not lie flat. You want the seam to be perfectly flat before you tie it off.
The Knot Isn’t Snug Against the Fabric
When you are tying off a stitch, you want the knot to be snug against the fabric. It should not be too tight because then your fabric will pucker. But it shouldn’t be too loose either, because that defeats the purpose of the knot. You want it to lay right against the fabric, just like Goldilocks said, “Just right!”. You can use the fingers of your other hand as you pull the loop tight to keep the knot close to the fabric.
Tips from readers
From Elaine:
When hand tying off ends it pays to use a reef knot (right over left, left over right). This not only gives a flatter knot, it doesn’t unravel as is likely if ends are all tied in the one direction.
From Jeanne: (in the comments section too)
First, with hand sewing, I make a loop at the end, as you suggest, but I pass the needle through the loop and then pass it through the loop that is made when you do that. Carefully hold the thread straight up and bring the knot down to the fabric. Then I bury the end of the thread in the fabric where it won’t show to help prevent the knot from coming undone. This is perfect for the ladder stitch but works for hems and other applications as well.
Second, I do a lot of cross stitch and one of the best tips that I ever had was to use the “pin stitch” to start and end a thread. This video is the most clear example of how to do it (on linen):

For aida, I just go through the middle of the block of 4 holes and then do the stitch vertically or horizontally, following the thread direction in at the center of the aida block. When I run out of an empty block to end with a pin stitch, i just weave the thread under stitches in the back, but i do a loop around a thread closest to the stitch to help anchor it before running the thread under the adjacent stitches.
I like the pin stitch because you can do it without turning your work over and it is very secure (try taking one out!) and invisible.
If you found this tutorial helpful, be sure to save the pin (see below) on your sewing board so you can easily come back to it later when you need this information on how to tie off a stitch. Saving the pin is a great way to bookmark the article and ensure that you have access to the information whenever you need it.
To save the pin, simply click on the pin and choose the board where you want to save it. You can create a new board specifically for sewing tutorials, or add it to an existing board that you already have.
In addition to saving the pin, you can also follow me on Pinterest for more tips, tutorials, and inspiration.
I hope you found this tutorial on how to end a stitch helpful. If you’re interested in learning more about sewing, I have a variety of tutorials available on my website that can help you improve your skills and learn new techniques. Whether you’re a beginner or looking to build on your existing skills, my tutorials are designed to help you achieve your goals.

latest posts
- What Do You Call a Person Who Sews? I Asked My Readers and Got 1,408 Opinions
- DIY Round Purse: PDF Sewing Pattern and Detailed Instructions
- Mini Wonder Clips By Clover: Useful Sewing Tool Or Just Another Notion?
- Non-Slip Grips For Quilting Rulers: A Small Notion With A Useful Job
- Fabric Eraser for Sewing: What It Removes and When to Use It
- What Is The Best Thread For Sewing Machine Projects? Let’s Find Out!
- Butterfly Quilt Block Tutorial – Foundation Paper Piecing
- How To Sew Quilt Squares So The Corners Match
- Sewing With Fork Pins: How They Help With Pattern Matching, Slippery Fabric, And Seams