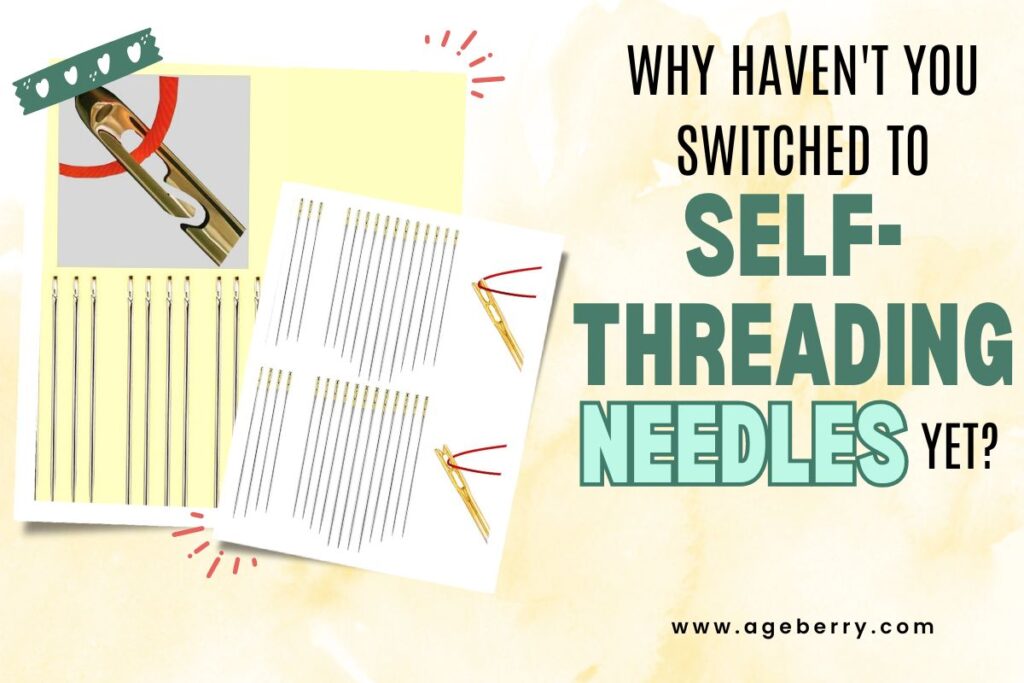
Are Self-Threading Needles Really Useful?
Self-threading hand sewing needles are clever little tools that feature a unique design that allows you to simply slide the thread into the needle eye, eliminating the need for pinpoint accuracy. Their benefits extend far beyond aiding those with less-than-perfect eyesight, or shaky hands.
Many sewers, myself included, choose to use them regularly, even though threading a standard needle poses no issue. The convenience and time-saving aspect of self-threading needles make them a good tool for any project. I find myself reaching for them time and again.
In this article, we’ll explore the surprising versatility and convenience of these needles, examine their various applications, and share some tips that could very well transform your hand sewing experience.
Attention! If you’re someone who likes to see things in action, you might enjoy the video version of this tutorial on my YouTube channel. You’ll find the link at the bottom of this post. Watching the video along with reading this article can help you get a fuller picture, so I definitely recommend checking out both!
What Are Self-Threading Needles
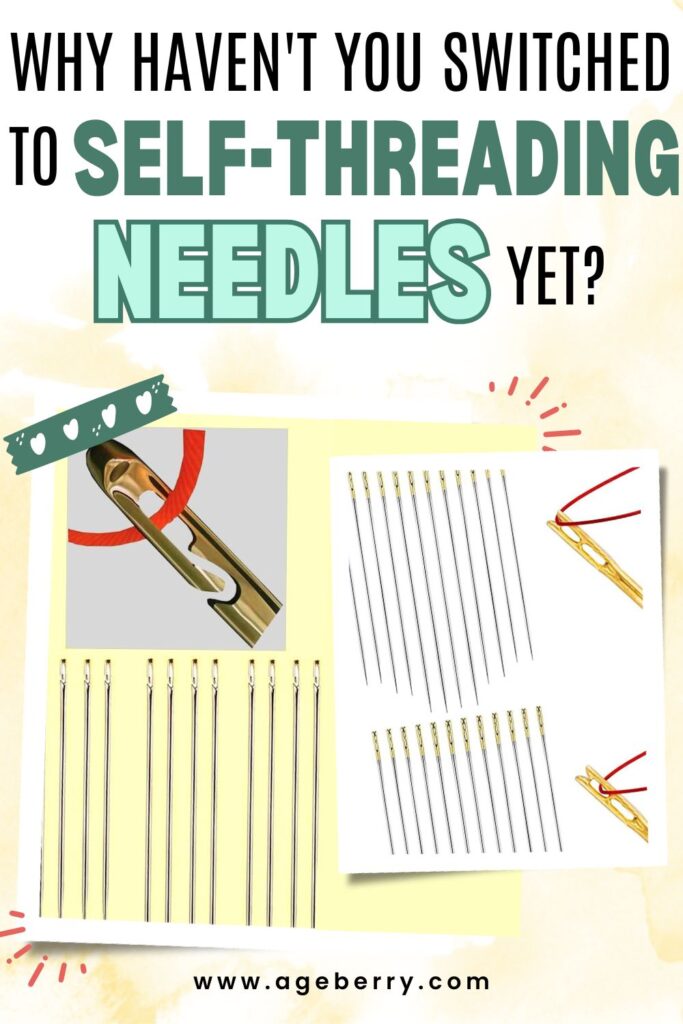
Self-threading needles come in two primary types, distinguished by their threading mechanisms: the top threading type with two “holes” and the side threading type with one “hole”. Let’s take a closer look at each.
Top Threading Self-Threading Needle
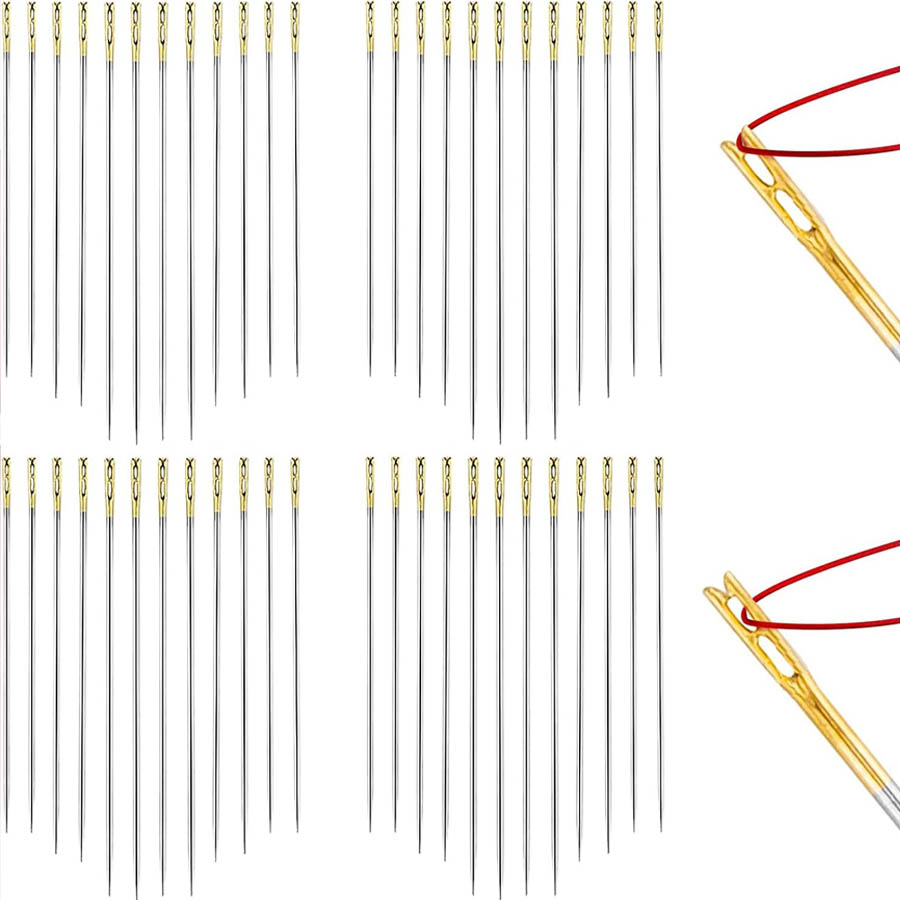
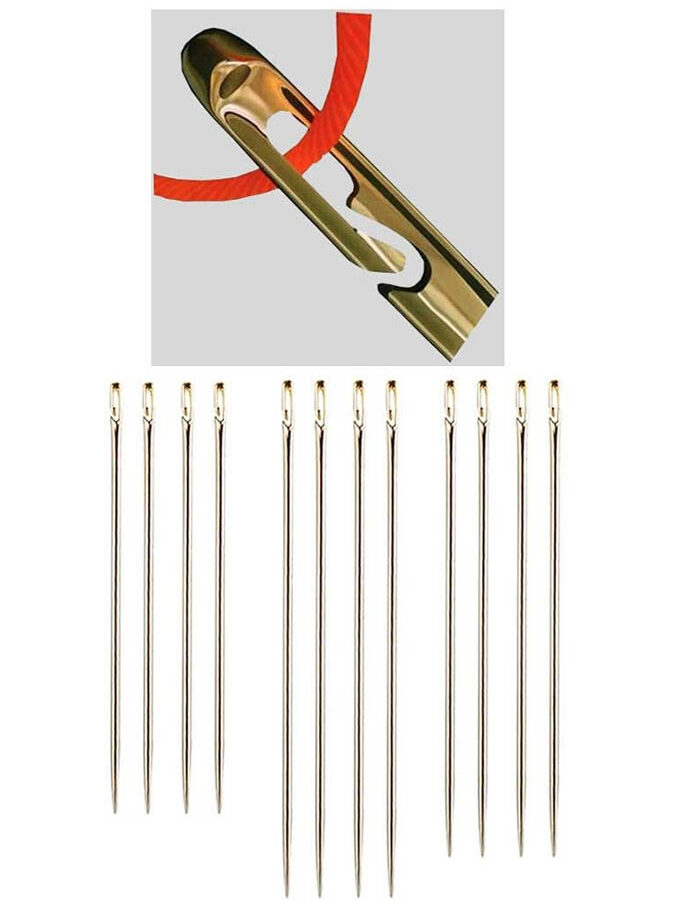
This type of needle features two eyes – one standard eye and one with a slotted opening at the top. To thread, you simply slide the thread down through the top slot, and it catches in the top needle eye.
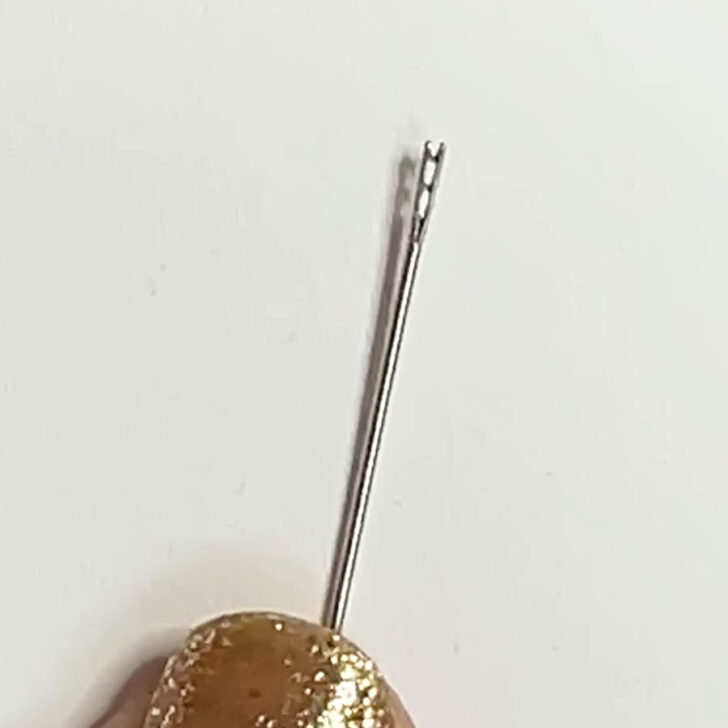
The presence of two needle eyes in a self-threading needle serves a specific purpose. The top eye is the primary feature that makes the needle “self-threading.” It has a slot that allows you to easily slip the thread into the eye without the need to aim through a tiny hole.
The second eye, which is located below the top slotted eye, functions as a traditional eye and can be used if you want or if the self-threading feature is not suitable for your thread or fabric. It offers an alternative for sewists who might want to use the needle in a conventional manner, for instance, when using very fine threads that might not stay securely in the slotted eye during sewing.
✅Related tutorial: How To Thread A Needle For Hand Sewing (9 Easy Tips + Videos)
How To Thread A Self-Threading Needle
Threading a self-threading needle can be done in two different ways, and you might find that one method works better for you than the other. It’s a matter of personal preference, so try both to see which you find more comfortable and effective.
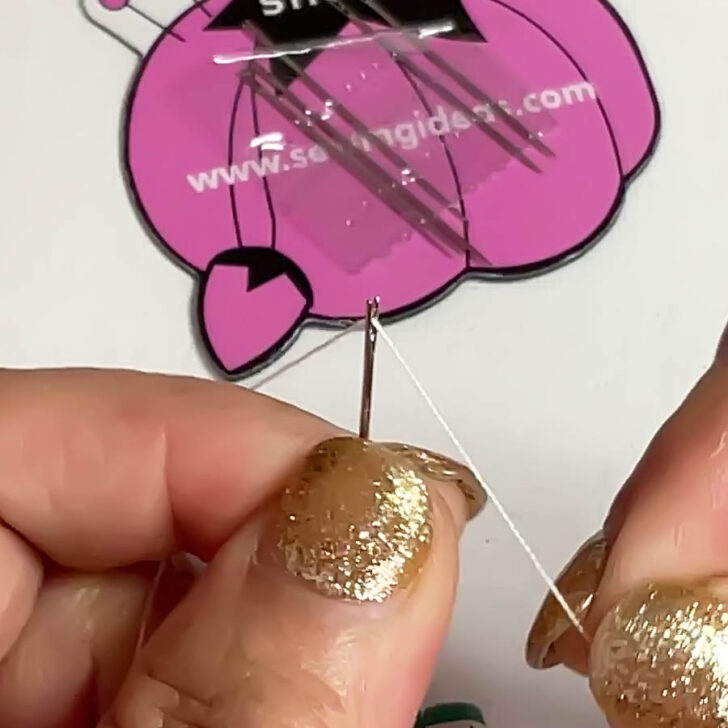
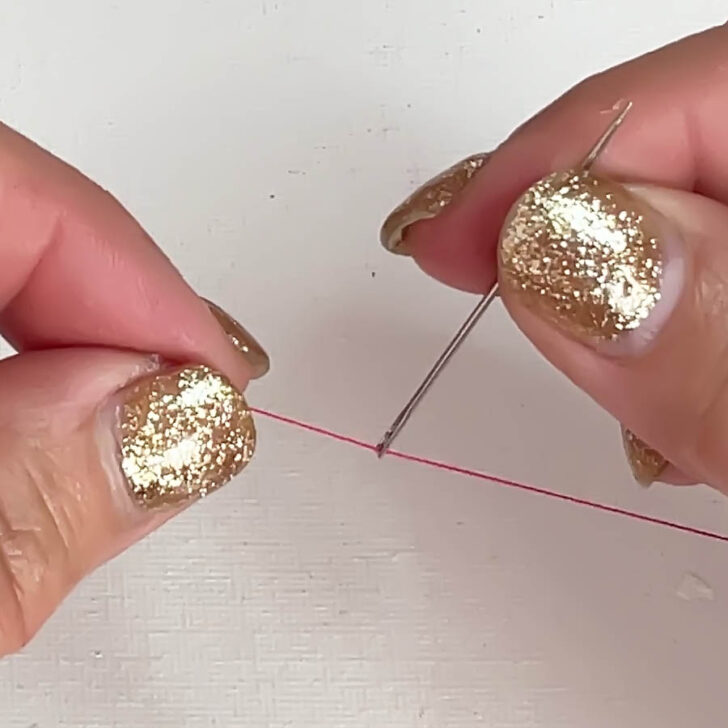
First Method: Needle Down, Thread from Top
This traditional approach involves holding the needle with the slot facing upwards and the pointed end down. You then take your thread and, from above, aim to align it with the slot. With a little bit of a shake or a jiggle, the thread should slip into place. This method is often preferred by those who are used to threading needles in the conventional way and can be especially effective if you’re working with a stiffer thread that can be guided more easily into the slot.
Steps For The First Method
- Hold the needle with the eye facing up.
- Take the thread and approach the needle eye from above.
- Gently press the thread down into the slot.
- Once the thread catches, pull it through and secure.
Second Method: Thread Down, Needle from Up
This alternative method involves flipping the dynamic. You keep the thread steady and bring the needle down to the thread. Hold the thread taut and horizontally, then bring the slot of the self-threading needle down onto the thread. This way, the thread is stationary, and you’re effectively sliding the needle’s eye onto the thread. Some people find this method causes less fraying, as there is less movement and friction on the thread itself.
Steps For The Second Method
- Hold the thread taut and horizontally.
- Position the needle with the eye facing down.
- Bring the needle down to the thread, allowing the thread to slip into the eye.
Experiment with both methods to determine which one you find more effective.
One might assume that because the thread is easily slipped into the eye, it might also slip out just as readily. However, the design of these needles is such that once the thread is in place, it stays secure. It actually requires a deliberate effort to remove the thread.
This reliability means that self-threading needles are suitable for all kinds of hand sewing, from delicate hand embroidery to sturdy repairs and sewing buttons.
So, for the most part, the thread remains intact without slipping out. However, like with any tool, there can be exceptions. Occasionally, the thread may come loose from the needle, but this is not a frequent occurrence and often depends on the type of fabric, the tension of the thread, or the sewing technique being used.
Side Threading Self-Threading Needle
The side threading needle has a traditional single eye, but with a small notch on one side. To thread this needle, you simply push the thread sideways into the notch, and it slips into the eye. This design is often favored for its simplicity and the secure hold it provides for the thread. The thread is less likely to slip out during sewing due to the side insertion.

But on the other hand, threading from the side may still require good lighting and some visual acuity. Also, the notch could catch on some fabrics or threads, potentially leading to snags or fraying.
The choice between these two types of self-threading needles often comes down to personal preference. Both types of self-threading needles offer different advantages, and what is “better” can be subjective. Some sewists might find one type easier to use or more effective for their sewing style, while others might prefer the alternative. It’s often worth trying both to determine which type best meets your needs.
The Gold Plated Eye Of Self-Threading Needles
One feature that is common among self-threading needles is the golden eye. The golden-colored eye is not just for aesthetics; it’s actually a layer of gold plating applied to the needle’s eye. This gold plating has a practical purpose:
- Visibility: The bright color of the golden eye makes the eye more visible, which can be helpful when threading.
- Smoothness: Gold plating can create a smoother surface for the thread to pass through, reducing friction and wear on the thread.
- Corrosion Resistance: Gold is less reactive than other metals, so the plating can help prevent rust and corrosion, extending the life of the needle.

Tips For Securing The Thread
- Gently tug the thread to ensure it’s caught in the notch.
- Use a thread conditioner to minimize fraying and slipping.
- If the thread won’t stay put, try using a thread with a different texture or thickness.
- Make sure you’re using the right thread size for your needle.
- If the eye or notch is damaged, it’s time for a new needle.
Thread conditioner is a product designed to coat and lubricate the thread, making it easier to work with. Using thread conditioner helps to secure the thread in the needle’s notch, preventing it from slipping out as you work. It helps the thread to slip into the needle’s eye more easily.
Note: Some of the links on this page are affiliate links. This means I will receive a commission if you order a product through one of my links. I only recommend products I believe in and use myself.

It also strengthens the thread, making it more durable for the task at hand. It can help prevent tangling and reduce fraying. When applied to thread, it forms a protective layer that can also reduce the amount of friction the thread experiences as it passes through the fabric.
Traditional thread conditioners were primarily beeswax-based, but modern options might also include synthetic compounds that are designed to provide the same benefits without the risk of staining or wax buildup.
✅Related tutorial: Sewing thread types and uses
Troubleshooting Common Issues With Self-Threading Needles
Self-threading needles allow for quick and easy threading, which is a big plus for those who struggle with threading traditional needles. But like any tool, they come with their own set of drawbacks.
- The thread can sometimes slip out of the eye, especially if the needle is pulled through tight or thick fabric.
- Some thicker or specialty threads may not fit as easily into the self-threading notch.
- The thread may catch on the notch as you sew, which can cause fraying or breaking.
To prevent thread from slipping out of a self-threading needle, consider the following recommendations:
- Make sure the thread you are using is appropriate for the needle’s size and design. If the thread is too thin, it may not stay securely within the notch.
- Apply a thread conditioner to your thread before threading the needle. This can help the thread grip the inside of the needle’s eye and reduce the likelihood of slipping.
- Avoid sharp movements, don’t pull the thread too sharply or with too much force reducing the chances of the thread being yanked out of the needle’s eye.
To prevent thread fraying when using self-threading needles, consider these recommendations:
- Invest in high-quality thread that is less prone to fraying. Threads that are smooth and consistently spun will hold up better during sewing.
- When using the self-threading feature, be gentle to avoid damaging the thread. Harshly snapping the thread into place can cause it to weaken or fray.
- Inspect the self-threading needle regularly for any signs of wear or damage, particularly at the notch or eye. A burr or rough spot can contribute to fraying, so replace the needle if you notice any issues.
- Ensure that the needle size is appropriate for the thread you’re using. A needle that is too small can strain and fray the thread.
- Use shorter lengths of thread to reduce the amount of friction as it passes through the fabric and needle, which can help prevent fraying over time.
✅Related tutorial: Types of Hand Sewing Needles and Their Uses: A Guide for Modern Sewists
Brands Of Self-Threading Needles
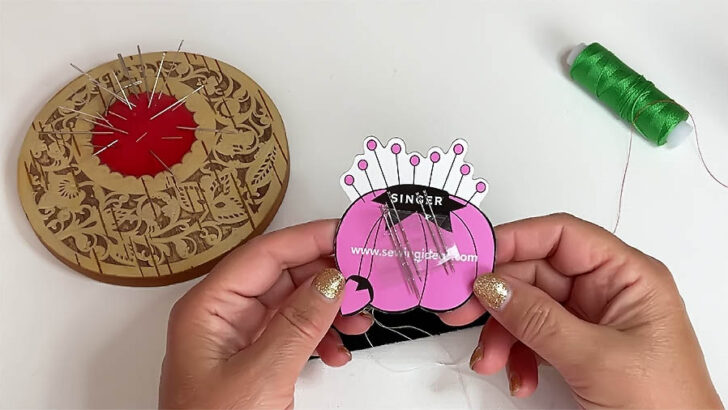
Some notable brands that offer self-threading needles include:
- SINGER: A well-known sewing brand that provides self-threading needles
 Hand Sewing Needles, Assorted Sizes, 10-Count,")
SINGER Self-Threading Hand Needle
- Clover: Offers an assortment of self-threading needles in 5 different sizes, known for their quality and durability.

- Dritz: Another popular sewing brand that produces self-threading needles suitable for a range of projects.
")
Dritz 672 Easy Threading Hand Needles
- Prym: Known for their sewing accessories, Prym offers self-threading needles that are user-friendly and reliable.

Prym Self-Threading Hand Needles
- Bohin: A French brand that provides high-quality self-threading needles among their wide range of sewing tools.

There are of course generic brands of self-threading needles. These brands might not carry the recognition of established names in the sewing industry, but they often offer self-threading needles at a very affordable price. The quality of no-name brands can vary significantly, so it’s important to check reviews. Ensure that the needles are made from durable materials, such as nickel-plated steel, to avoid breakage and wear.
Sizes Of Self-Threading Needles
Self-threading needles, like traditional sewing needles, come in a variety of sizes that differ not only in thickness but also in length.
The thickness of a needle is typically indicated by a number; the larger the number, the finer the needle. For example, a size 9 needle is finer than a size 4. A finer needle is generally used with lightweight fabrics and thinner threads, while a thicker needle is better suited for heavier fabrics and stronger, bulkier threads.
Self-threading needles are typically available in a range of standard sewing needle sizes, such as:
- Fine Sizes (e.g., Size 8 or 9): Suitable for lightweight fabrics and delicate threads.
- Medium Sizes (e.g., Size 4 to 6): Ideal for general sewing tasks with a variety of fabric types.
- Heavy Sizes (e.g., Size 2 or 3): Best for heavier fabrics and thicker threads.
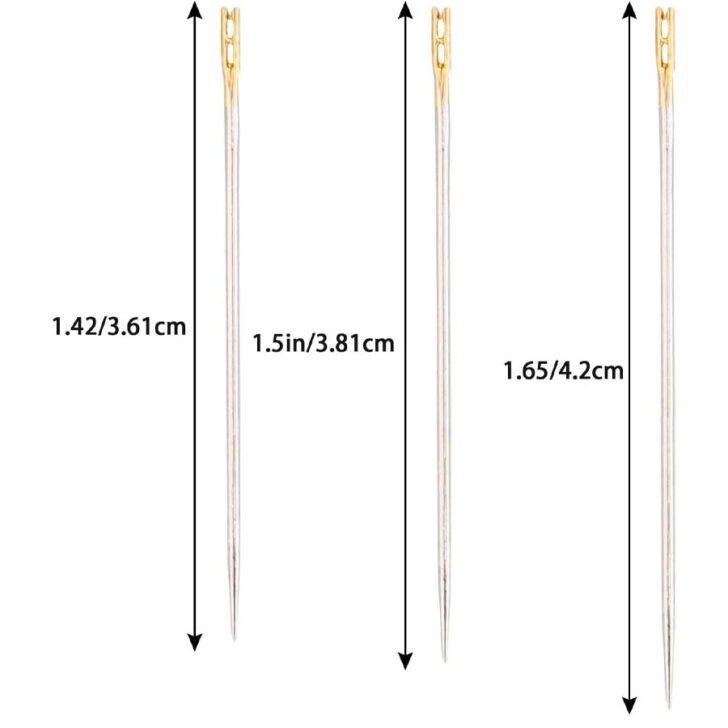
The length of the needle can also vary. Shorter needles are often used for delicate, precise work, such as embroidery or beading, where you need more control. Longer needles can cover more ground with each stitch and might be preferred for basting or quilting, where speed and efficiency are important. For example, I have these the self-threading needles in 3 different sizes, which are 1.42 inch / 3.61cm, 1.5 inch / 3.81cm, 1.65 inch / 4.2cm (according to the manufacturer).
The size you choose will depend on the specific requirements of your sewing project, including the fabric weight and thread thickness.
For self-threading needles, you’re more likely to encounter a variety of lengths rather than a wide range of thicknesses. This is because self-threading needles are designed with a specific mechanism for threading, which can limit the variation in thickness available.
Practical Uses Of Self-Threading Needles
I use self-threading needles all the time, but not for the usual tasks like hand embroidery, basting, or sewing on buttons – though they’re perfectly suitable for those, too. My go-to applications for these handy tools are a bit different.
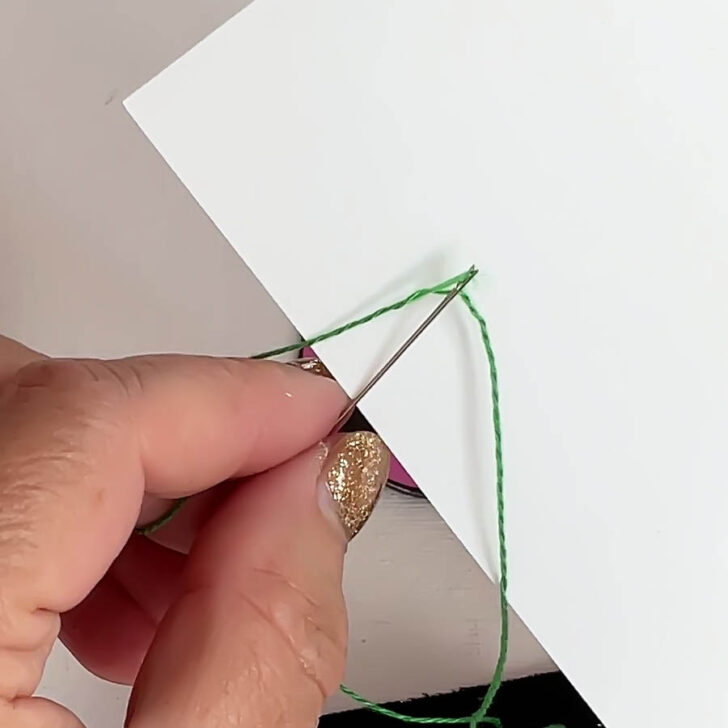
First off, I find them indispensable for burying threads in my quilting projects.

When I’ve finished quilting and have those thread tails, I bring the bobbin thread up to the quilt’s top or the needle thread down to the back. Then I tie a secure double knot by hand to ensure those threads are joined firmly.
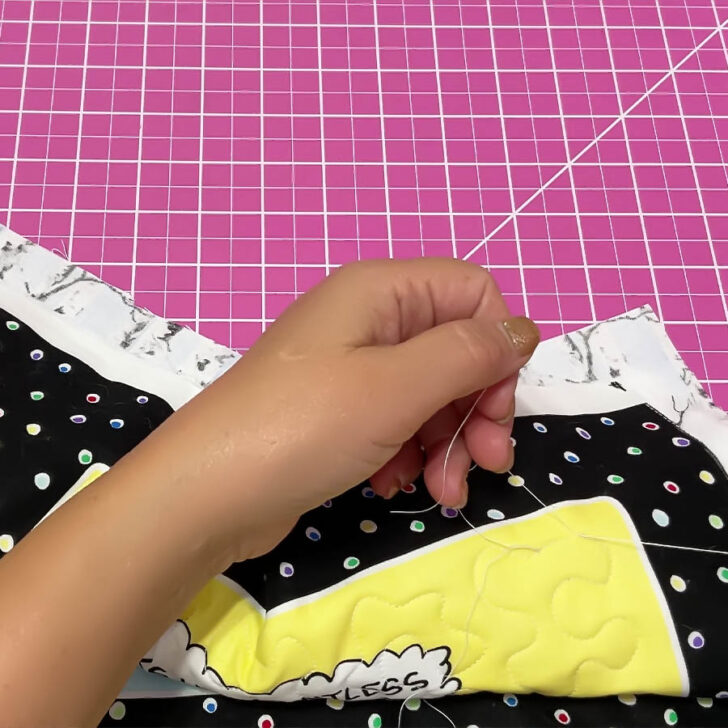
With the knot in place, I take a self-threading needle and thread it really fast with both threads. Then, I insert the needle back into the quilt top near the tie-off point, running it between the layers, emerging a half inch or so away.
I pull the needle and thread through, tug gently to draw the knot and the tail into the quilt layers, and snip the thread close to the fabric. The thread tails disappear, leaving a clean, professional finish.
✅Related tutorials: Quilting projects on ageberry.com
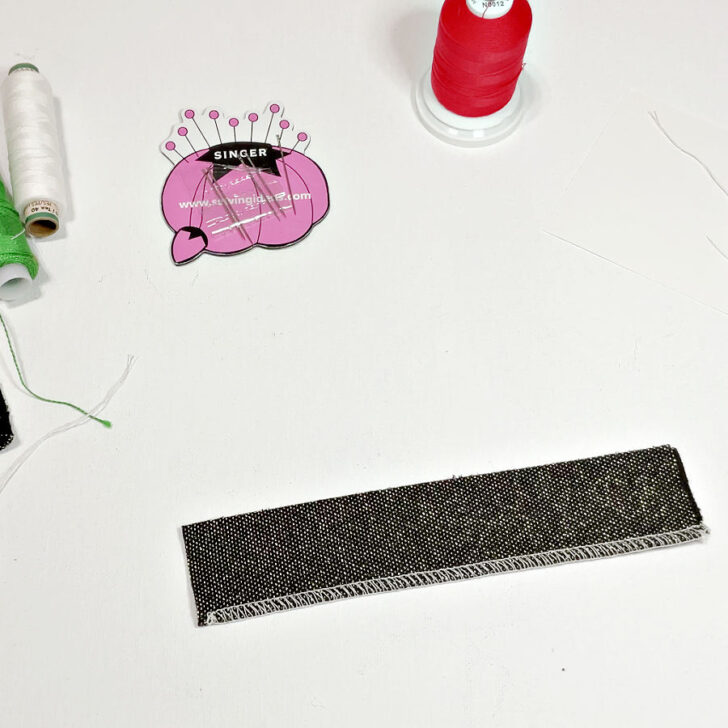
The second task where self-threading needles are very useful for me is when I’m working with my coverstitch machine.
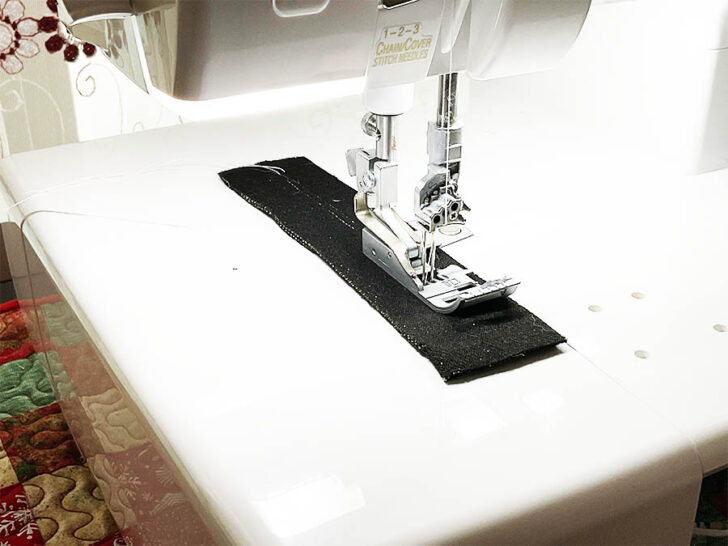
When I’m done coverstitching, I’m left with 2 thread tails on the right side of the fabric and one thread tail on the wrong side. Coverstitching creates a professional-looking hem on knit garments, but those thread tails at the beginning and end can be a real headache because the nature of the stitch makes it prone to unraveling if not secured properly.
✅Related tutorial: Coverstitch vs. Serger
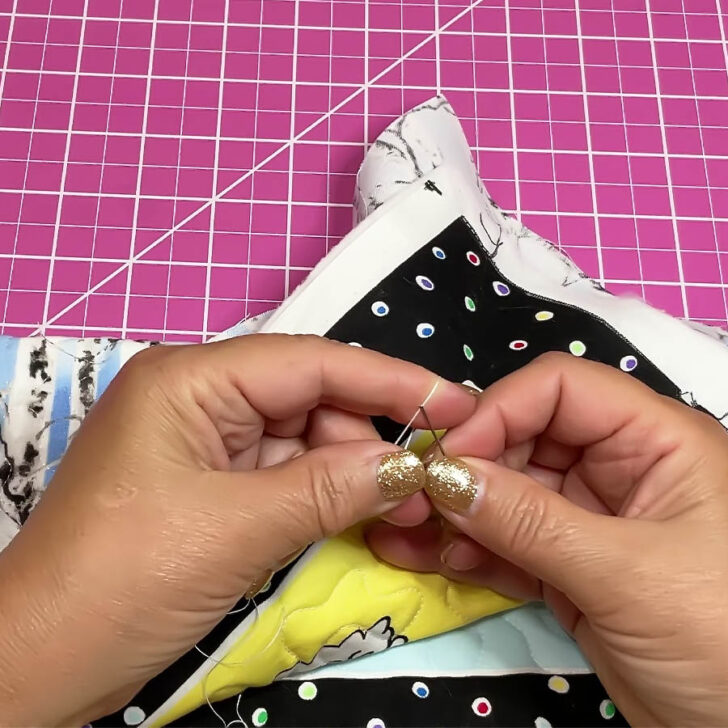
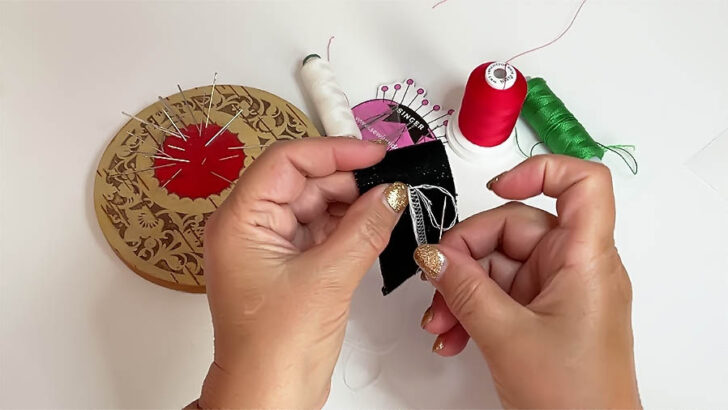
So I take my trusty self-threading needle, slip the 2 tail threads through the convenient opening at the top, and bring them through to the wrong side.
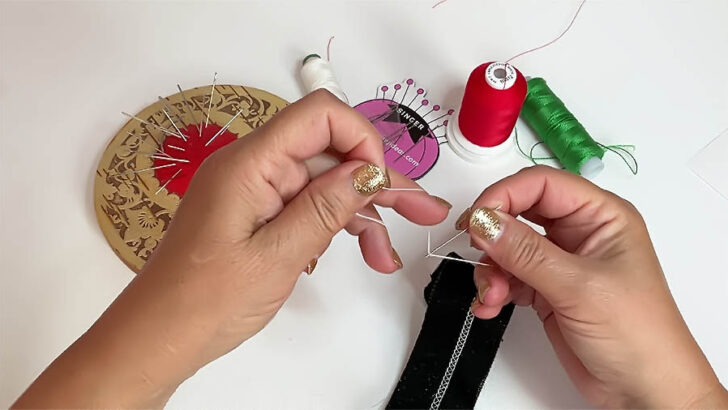
Then I often thread all three thread tails onto a self-threading needle. The needle’s design accommodates this multi-thread approach. Then I secure the threads as usual.
Here are the steps to secure the stitch.
- Make a stitch, leaving a small loop of thread on the surface of the fabric.
- Before the loop closes, insert the needle through it to create a knot.
- Gently pull the threads to tighten the knot against the fabric. Be careful not to tug too hard, as this could pucker the fabric or break the thread.
- For added security, you may want to repeat this step to make a second knot on top of the first.
So when all three thread tails are on the wrong side, you can also tie them together with a regular knot, making sure it’s snug and close to the fabric to prevent any gaps or loose ends. This creates a secure end to the coverstitch that won’t easily come undone.
I also use self-threading needles to secure thread tails when I use my serger. Those serger thread chains at the beginning and end of a seam can be a bit of a nuisance to secure.
After serging,you will have those thread tails that need to be dealt with to prevent unraveling. You need to handle the multiple threads since a serger chain can have 3 or 4 threads in it, depending on the serger settings.
✅Related tutorial: Serger vs. sewing machine
Start by separating the needle threads from the looper threads. Gently pull them apart so that you no longer have a chain, but individual threads instead.
Take your self-threading needle and insert all of the threads through the needle’s eye at once if you have a 3-thread overlock stitch, or two at a time if you’re working with a 4-thread overlock. Now, secure the thread tails as usual and tie a knot close to the fabric’s edge.
If you prefer a visual guide, take a look at my YouTube video. It’s perfect for those who’d rather watch a handy tutorial on the self-threading needles than read about them.

Did you find this guide on self-threading needles useful? If yes, why not save this pin to your Pinterest board? That way, you can easily return to the article whenever you need a refresher on these needles. And for an ongoing stream of handy tips, tutorials, and all sorts of creative inspiration, make sure to follow me on Pinterest.
latest posts
- What Do You Call a Person Who Sews? I Asked My Readers and Got 1,408 Opinions
- DIY Round Purse: PDF Sewing Pattern and Detailed Instructions
- Mini Wonder Clips By Clover: Useful Sewing Tool Or Just Another Notion?
- Non-Slip Grips For Quilting Rulers: A Small Notion With A Useful Job
- Fabric Eraser for Sewing: What It Removes and When to Use It
- What Is The Best Thread For Sewing Machine Projects? Let’s Find Out!
- Butterfly Quilt Block Tutorial – Foundation Paper Piecing
- How To Sew Quilt Squares So The Corners Match
- Sewing With Fork Pins: How They Help With Pattern Matching, Slippery Fabric, And Seams