
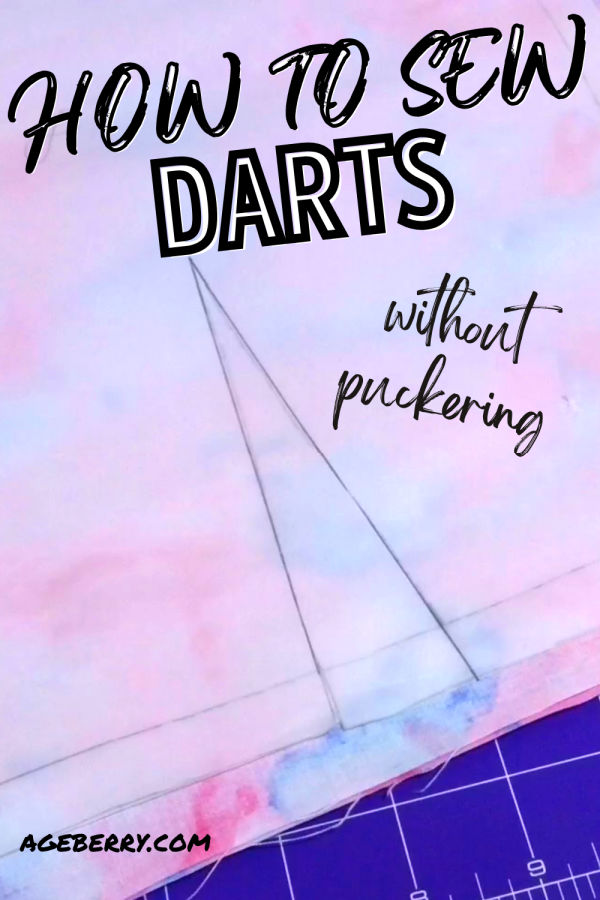
How To Sew Darts: Tips And Techniques For Different Types Of Darts
Sewing garments that have a fitted shape can be tricky or impossible without a useful technique called DART. Sewing a dart is an easy way to make your clothes more flattering. Learn how to sew darts so you can create beautiful, professionally-looking clothing.
Sewing darts are a staple in the world of sewing. They can be used to create an amazing 3-dimensional effect on your clothing and bag sewing projects, or they could even become part of the design itself! If you’re grateful that the days of shapeless clothing are gone, you’ll want to learn how to sew darts to create the gorgeous form-fitting shapes that people love.
Regardless of whether you’re using them as decoration, for shaping purposes, or both, just make sure that each one is sewn well and blends seamlessly into your project. Because if it’s not done correctly, this small detail has the potential to ruin your entire garment.
Are you new to the world of sewing darts? First, learn all about the different types of darts used in sewing to shape garments, so you can see how to use them. Then learn how to sew darts into clothing with today’s tutorial.
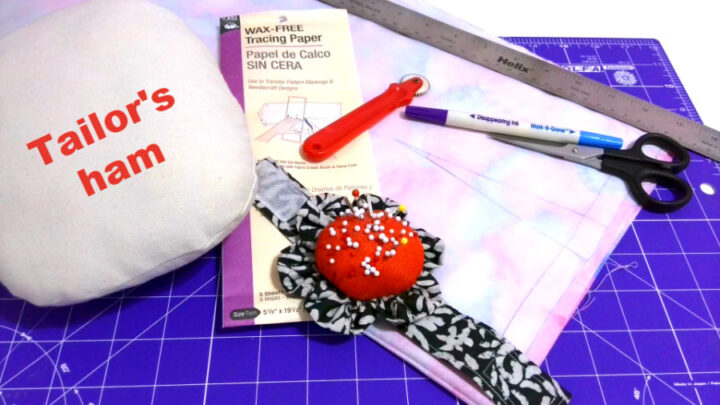
The Tools You Need To Sew A Perfect Dart
In order to sew darts, you’ll need a few basic sewing supplies:
- Your paper pattern
- Fabric garment cut pieces
- Scissors
- Dressmaker’s carbon paper or tailor’s chalk
- Tracing wheel
- Sewing pins
- Thread
- Sewing machine
- Iron
- Tailor’s ham
Note: Some of the links on this page are affiliate links. This means I will receive a commission if you order a product through one of my links. I only recommend products I believe in and use myself.
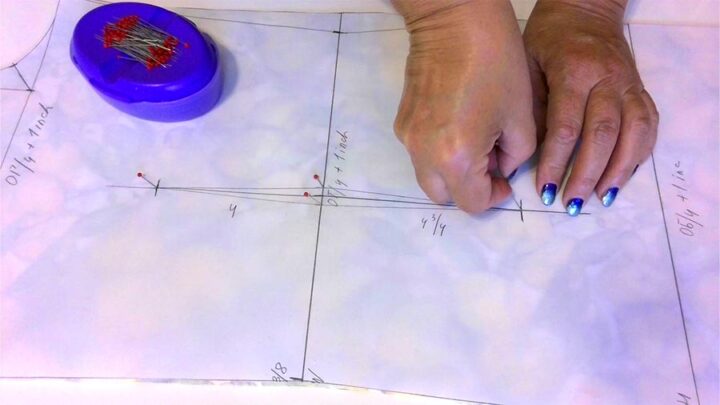
How To Transfer Darts From A Pattern
Transferring darts from a pattern to your fabric isn’t difficult, but it is a crucial first step in the process of how to sew darts. There are a few ways to transfer darts onto fabric.
For example, I needed to transfer double-point waist darts when I was making my summer dress.
I prefer a disappearing ink pen for marking darts.
Remove the majority of the pins from the fabric, but leave the two layers of fabric and the pattern pinned together in some places (so the pattern doesn’t move).
Stick a few pins through all layers in the points of the dart and dart’s legs.
After that, flip the fabric so the pattern is on the bottom and the fabric is on top, and mark the spots where you see the pins.
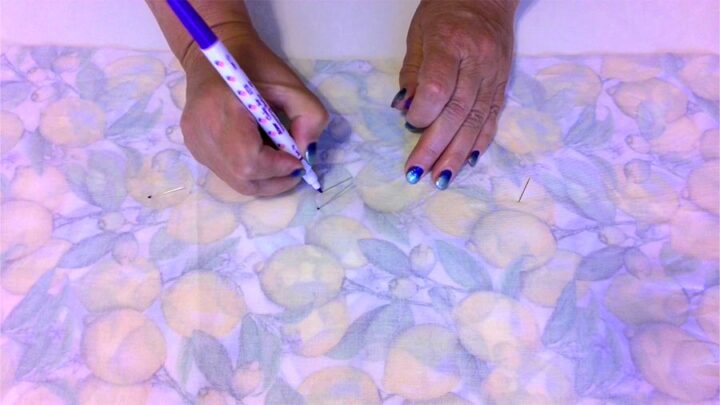
Next, flip the fabric back and then lift up the paper pattern and mark the darts on the fabric under the pattern in the spots where the pins are.
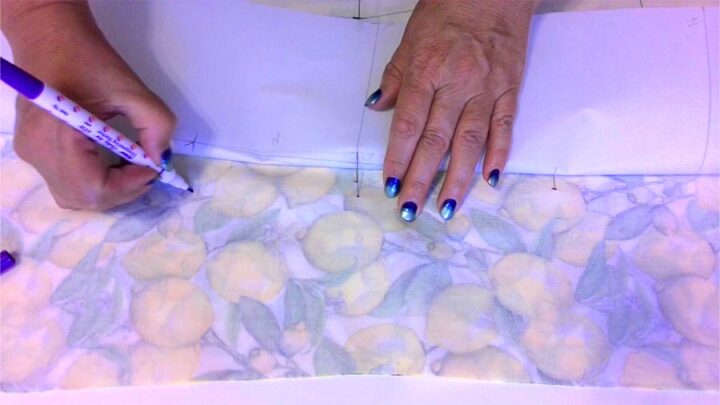
Draw the darts on both pieces of fabric using the markings.
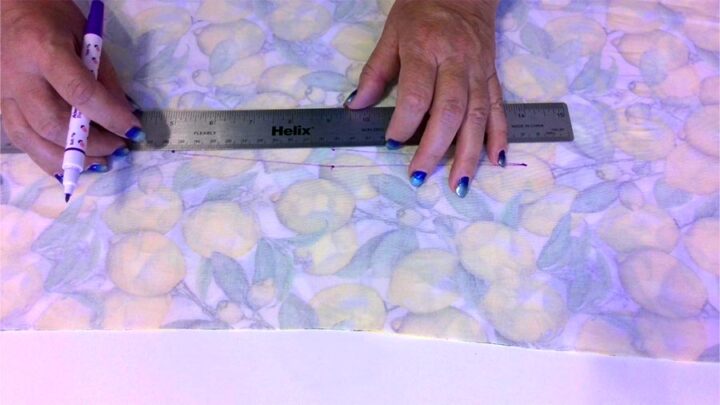
Now let me show you how to transfer the bust darts onto the fabric.
First of all, clip the ends of the dart and then mark the dart’s point with a pin through all layers. Again, mark the dart’s points on both front pieces of the dress.
Remove the pattern and draw the dart legs.
This method is working best with straight darts. If you need to transfer curved darts you better use a different method.
You can transfer darts easily using a tracing wheel. I have a tutorial on how to use a tracing wheel and carbon paper to mark darts on the fabric.
It’s important to mark darts, so you know where to sew them. A good way for beginners is to use the dressmaker’s tracing paper and tracing wheel technique.
Follow this process:
Put a cutting mat or piece of cardboard down to protect your workspace.
Put the carbon paper on the bottom with the marking side facing up. Then place the fabric folded with right sides together on top of the paper with the WRONG side of the fabric facing the carbon paper. Slip another sheet of carbon paper on top of the fabric, with the carbon side against the wrong side of the fabric.

Place your paper pattern on top of the fabric.
With your tracing wheel, mark all the lines of the dart. Make sure to press down hard enough to get clear marks on your fabric.
Helpful Notes About Marking Darts On Fabric
I recommend testing the tracing paper technique on an inconspicuous area of the fabric (or a scrap piece) to make sure that the carbon residue can be removed and the tracing wheel doesn’t damage the fabric.
Carbon paper comes in many different colors. When working with white fabric, use light-colored carbon paper so that other colors don’t leave permanent marks. Or use tailor’s chalk or a disappearing ink pen.
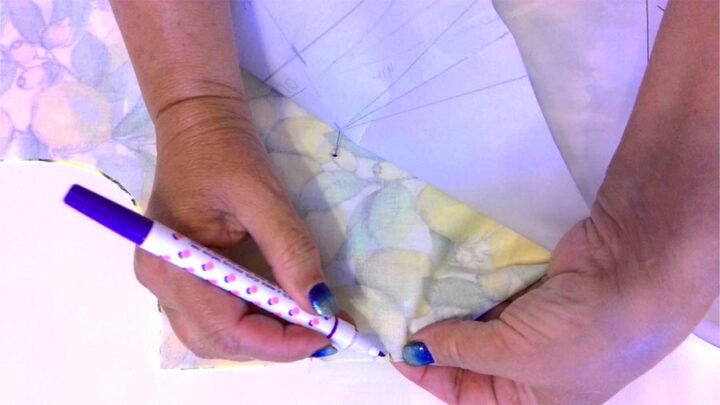
After you have transferred darts onto your fabric snip the fabric at the dart legs (right at the base of the dart).
Pinning Or Basting A Dart
Once you’ve marked your dart, you’ll need to pin the fabric in place. The goal of pinning darts is to match the dart legs together so that the centerline runs through the apex. Follow this process to achieve success:
- Turn the fabric so that the right side is down, leaving the markings you made visible.
- Using your fingers, pinch the legs at the widest part of the dart together so that the wrong side of the fabric is visible. Check to make sure that the legs match up to each other on both sides.
- Place the first pin somewhere below the apex.
- Place pins, one at a time, through the marked line drawn on both pieces of fabric, starting at the widest part of the dart.
- As you place pins in the fabric along the marked line, make sure that the heads of the pins are pointed toward the apex of the dart. That will make the pins easier to remove as you sew from the base of the dart toward the apex.
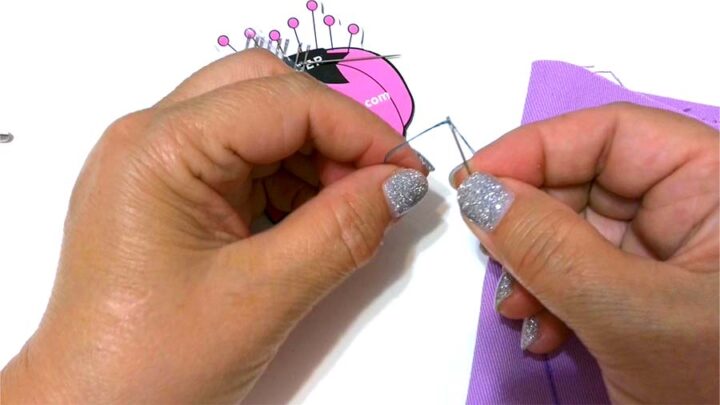
- Or you can baste the dart by hand sewing using thread.
How To Sew Darts Without Puckering
The process for sewing darts varies slightly depending on the type of dart you’re making. I’ll go through the process for each type of dart.
Sewing Straight Darts
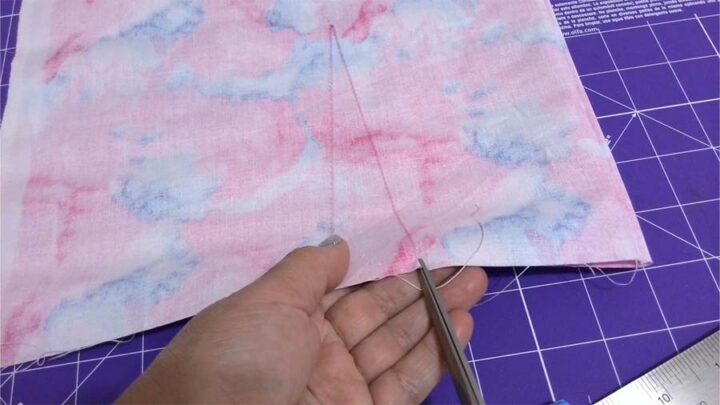
- Orient Your Fabric – You want the bulk of your project on your left. The wide part of the dart should be facing away from you while the dart apex is toward you. The pin heads are toward you, so you can easily pull them out.
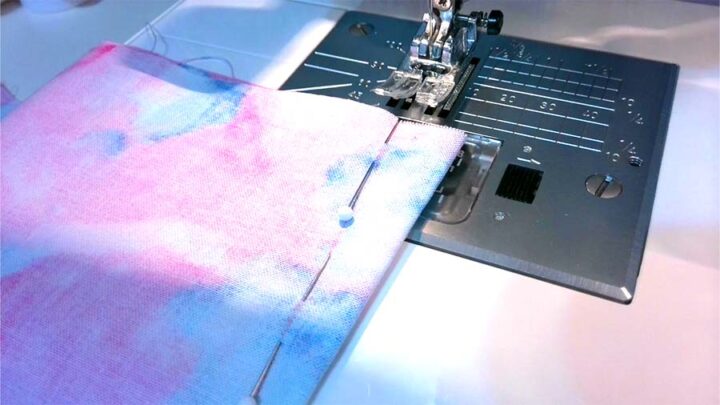
- Backstitch – Do a few backstitches to secure the seam before you begin stitching.
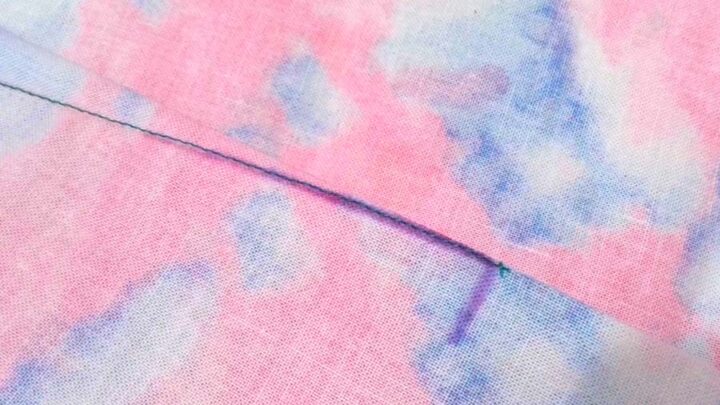
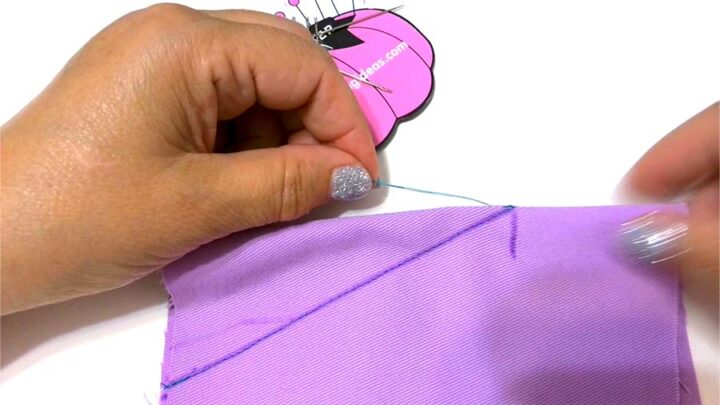
- Stitch – Stitch along the drawn dart leg (keeping the center of your foot on the line), using a straight stitch with a standard length of 2.5mm (for lightweight and medium weight fabrics) or 3mm for heavyweight fabric and removing any pins as you sew.
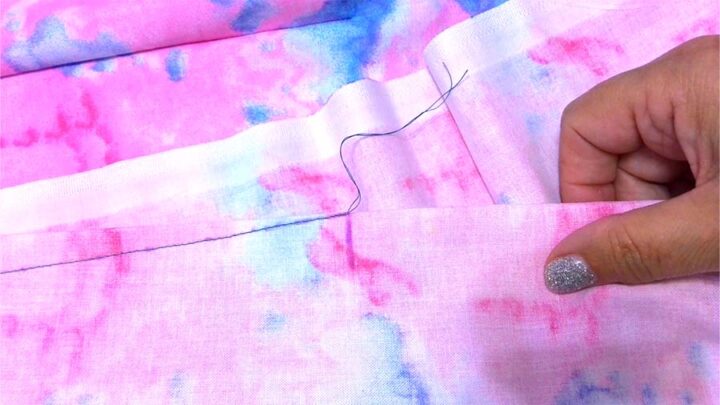
- Continue Stitching Off The Edge: When you get near the point of the dart, change the stitch length to 1.5 – 2 mm (but it’s not mandatory) and sew very close to the folded edge of the fabric. Continue forward, stitching 2 or 3 stitches right into the fold of the fabric, and then sew off the end of the fabric. Do not backstitch because it will create bulk which will cause your dart to pucker. Leave long thread tails so you can tie them off.
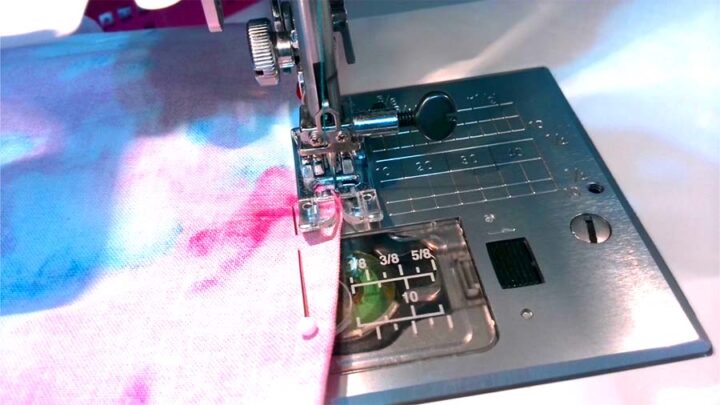
- Tie Off Your Thread: Pull the fabric out of the machine and simply tie the thread twice or 3 times and cut the thread.
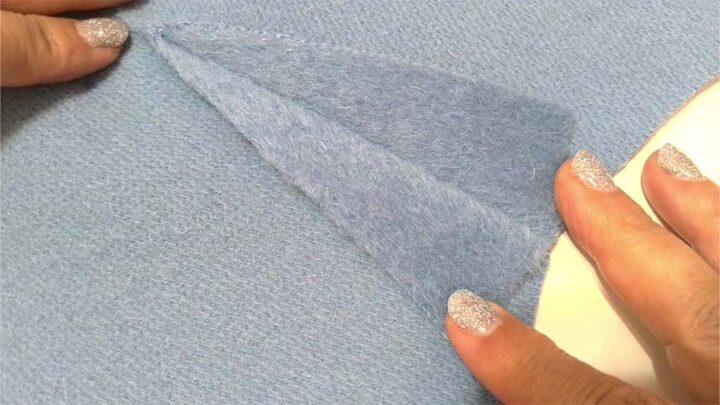
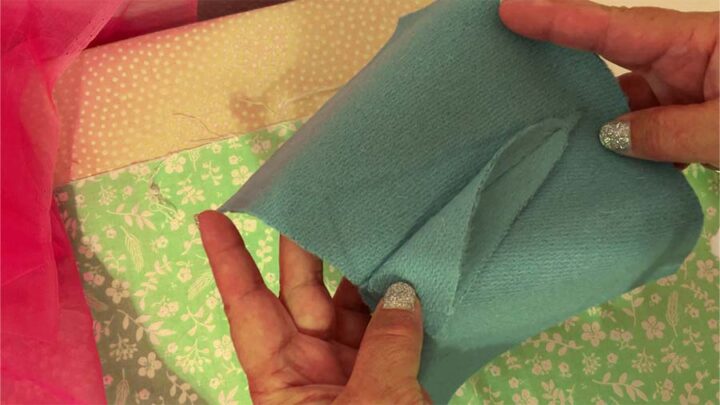
How To Sew A Curved Dart
Curved darts can be convex to pull the fabric in a little more for hollow areas of the body (such as under the bust), or they can be concave to allow a little room for bulge (around the abdomen). The process is very similar to sewing a straight dart.
Sometimes you might need to change a straight dart to a slightly curved one near the apex. It may help to sew darts properly on tightly woven or stiff fabric.
Wherever the dart is located – on the bodice or skirt, it should smoothly end at the apex, without forming an angle (except for cases where it is provided by the style). To achieve this, curve the sides of the dart slightly, so they will be smoother at the apex.
Begin stitching along the drawn dart leg with a standard stitch length of 2.5mm (or 3 mm for heavier fabric) and remove pins as you sew. As you proceed, curve the stitching following your curve line, change the stitch length to 1.5 – 2 mm and continue stitching off the edge.
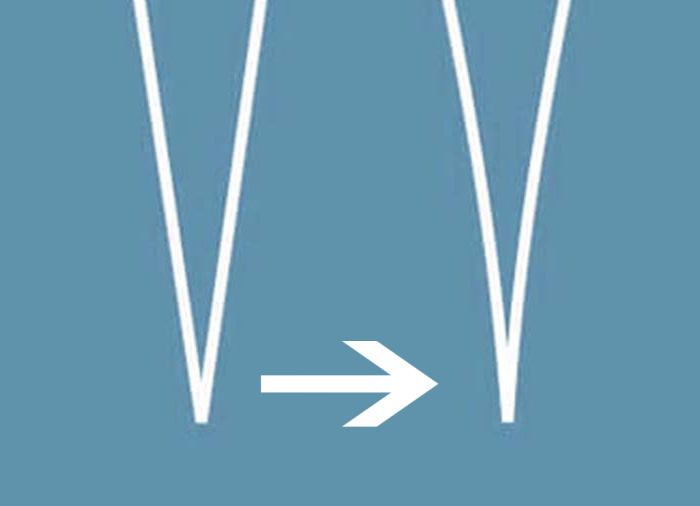
Sewing Double Point Darts
Double point darts are essentially two straight darts that are joined at their widest edges. Sewing these darts is just a little trickier than a standard straight dart. But, if you follow this process, you’ll get the hang of it very quickly.
- Orient Your Fabric: Place the bulk of the fabric to your left with one dart point facing away from you and the other facing towards you.
- Backstitch: Begin in the middle of the double point dart (where the widest point is).
- Stitch: Begin stitching along the drawn dart leg using a straight stitch with a standard stitch length of 2.5mm.
- Continue Stitching Off The Edge: As you near the point of the dart, sew very close to the folded edge of the fabric and continue forward, stitching 2 or 3 stitches right into the fold of the fabric. Then sew off the end of the fabric. Do not backstitch.
- Tie Off Your Thread: Pull the thread out of the machine and simply tie the thread and cut the tails.
- Sew The Other End Of The Dart: Go back to the middle of your dart leg where you stitched before, flip the fabric so the bulk of your project is still to your left and stitch about ½ inch over your previous stitching in the other direction until you sew off the end of the fabric at the second dart apex.
- Tie Off Your Thread: Repeat the same process to tie the thread.
Different Ways To Sew Darts
There are a few special instances where you will need to slightly alter the process as I have outlined it.
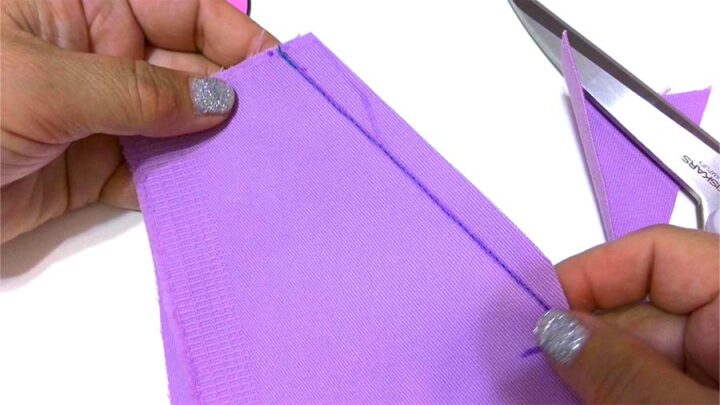
For example, if you sew darts into the thick fabric, cut the dart open with scissors before pressing to reduce the bulk. Leave about half an inch of the fabric not cut.
Next, if you are creating a very wide dart, you might cut out some of the fabric in the middle to make a cutaway dart and reduce the bulk and, therefore, the risk of seeing the excess fabric in your garment. If the fabric is likely to fray, consider overlocking the edge to prevent that.
If the dart is very wide you might want to hide threads after you tie them off. For this, you can use self-threading needles so it would be very easy to thread a needle with 2 short threads.
Just thread both threads through the needle, stick them into the inner area of the dart, and cut the threads after that.
There is a little trick that allows you to get a long double-point dart that smoothly fits the figure, for example, in the back area. Deep darts can pucker the fabric. To avoid this, cut the dart in the middle, not reaching 2-3 mm to the line.
But do this only if your fabric doesn’t fray or if you are sewing a lining for a project.
Finally, sewing darts in knits are a bit unorthodox, given the stretchy nature of the fabric. However, if you’re wondering how to sew darts in knit fabric, consider following the same marking process and then serging the excess fabric with a 3- or 4-overlock stitch all the way to the point.
How To Press A Dart
A tailor’s ham is the best way to get a dart pressed. It will give you incredible results and let your darts be just perfect!
You can buy a tailor’s ham on Amazon, or you can make your own tailor’s ham with my detailed sewing tutorial.
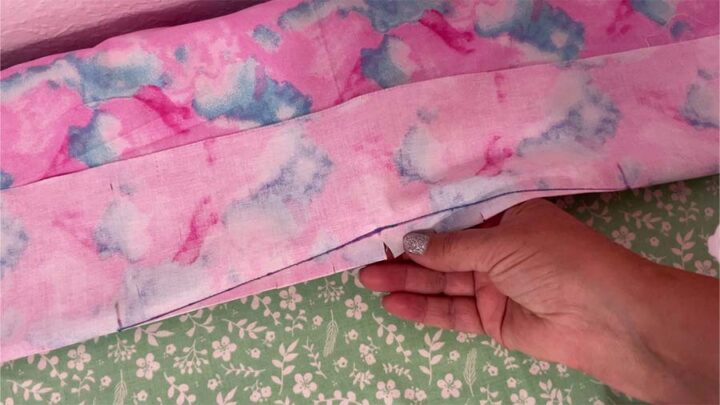
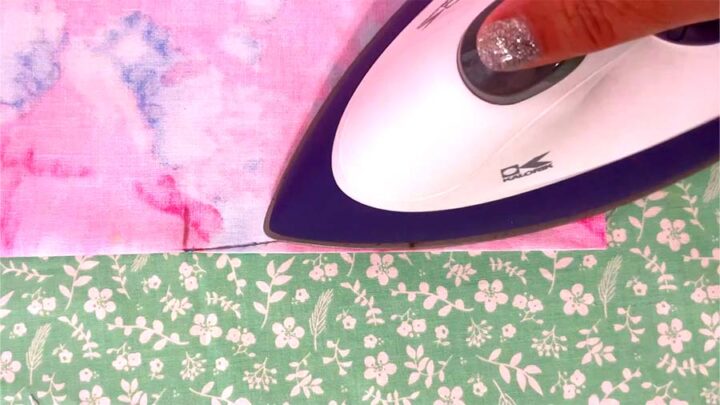
First, press the dart you just sewed so that it’s flat to reduce extra bulk – but avoid pressing the tip of the dart.
Then press the dart with the extra fabric in the direction indicated in your pattern. In general, you will press the dart with the excess fabric toward the center of the body (toward the body’s center for vertical darts and toward the waist for horizontal darts).
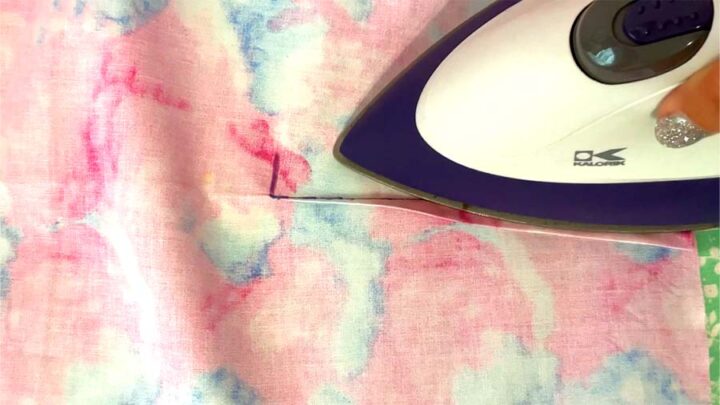
When I press a dart on the wrong side of the fabric, I take a piece of carton and position it under the dart’s folded edge (or under the cut part of the dart).
You won’t have an indentation on the right side of your garment if you do this. When pressing the dart on the right side of your garment, it’s a good idea to perform the same procedure.
Curved darts look best when the excess fabric is clipped and pressed open to create a balanced look and prevent puckering and pulling.
If you have a tailor’s ham, lay your dart over that and use it to press and shape the garment to eliminate any pleats or puckers. A tailor’s ham is curved to help stimulate the body’s natural curves.
Creating a professional-looking dart isn’t a difficult task, but it does take a little knowledge and practice. I hope this tutorial gave you all the information you need to gather your supplies and practice making darts. Once you do that, you’re ready to create fashionable form-fitting clothes!
Did you find this tutorial helpful? If so, save this pin (see below) on your sewing board so you can come to this tutorial later when you are ready to learn how to sew darts and follow me on Pinterest for more tips, tutorials, and inspiration!
latest posts
- What Do You Call a Person Who Sews? I Asked My Readers and Got 1,408 Opinions
- DIY Round Purse: PDF Sewing Pattern and Detailed Instructions
- Mini Wonder Clips By Clover: Useful Sewing Tool Or Just Another Notion?
- Non-Slip Grips For Quilting Rulers: A Small Notion With A Useful Job
- Fabric Eraser for Sewing: What It Removes and When to Use It
- What Is The Best Thread For Sewing Machine Projects? Let’s Find Out!
- Butterfly Quilt Block Tutorial – Foundation Paper Piecing
- How To Sew Quilt Squares So The Corners Match
- Sewing With Fork Pins: How They Help With Pattern Matching, Slippery Fabric, And Seams
Good evening Ma, thank you for your work, they are amazing, please I need the correct measurement for dart in gown, both front and back.
Thank you
Writing from Nigeria
It’s not possible to give advice about dart measurements. The pattern should give the measurements, and if you find out that the fitting is not right (if you make a muslin, for example), adjustments depend of course on the way the garment fits.