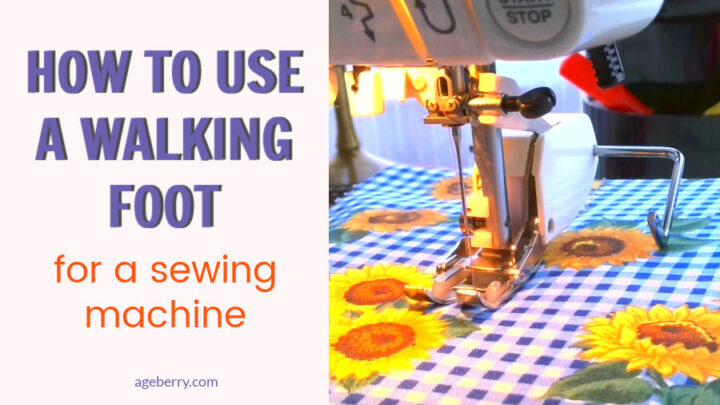
How to use a walking foot
A walking foot is a helpful tool that many sewists find useful and valuable, but it looks complicated and may not seem intuitive at first. I already devoted a post around what a walking foot attachment is. In this post, I’m covering how to use a walking foot on a sewing machine so that you get the best results every time you use it.
Anyone unfamiliar with this presser foot attachment may be a little shocked the first time they see it. It’s much larger and bulkier than other types of presser feet. However, if you like to quilt, match up stripes or seams, or sew slippery fabric of any kind, it’s one attachment that will become your best friend.
Here’s what you need to know about how to use a walking foot successfully.
Attaching a walking foot and removing it – step by step
Thanks to the popularity of this presser foot, any modern sewing machine (not any vintage machine) can use a even feed foot. However, not every sewing machine can use every brand or style of walking feet.
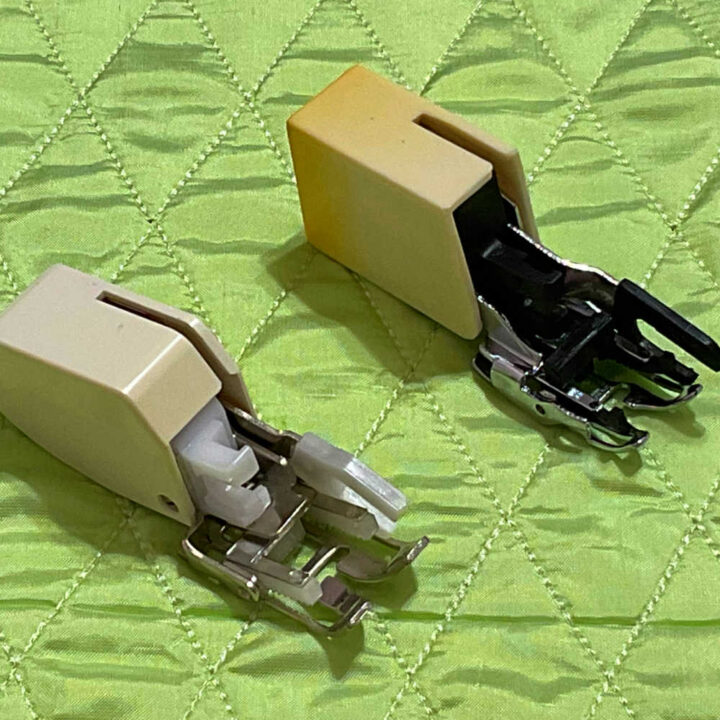
As with many products, you can find a variety of even feed attachments, from brand names for each sewing machine brand to generic options.
In this tutorial, I want to show you how to install the most popular type of walking feet that’s suitable for many brands of home sewing machines. This type:
Attaching a walking foot to your sewing machine is a pretty straightforward process, although it may seem hard at first. After you practice a couple of times, you’ll be able to do it comfortably. Just follow this process for putting a foot on a sewing machine.
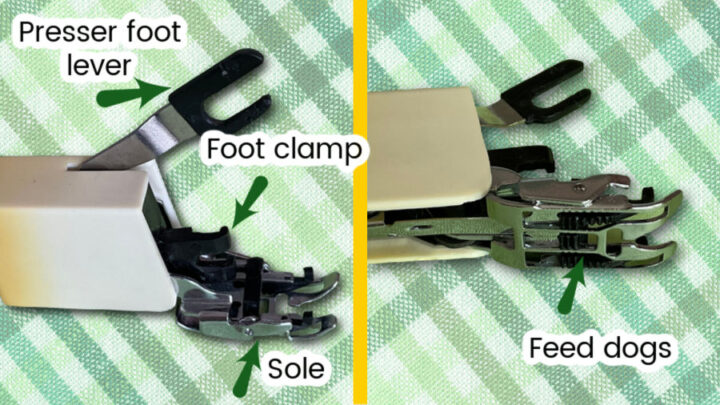
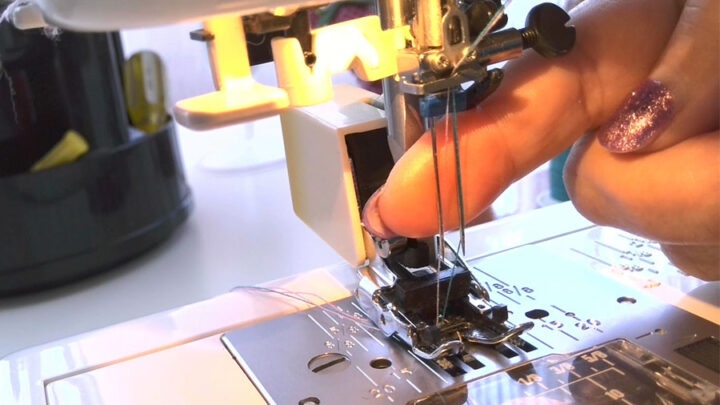
Use this image to see the parts of the walking foot I am talking about.
Attention! If you like the video format, at the bottom of this post, look for a YouTube video version where there is a quick tutorial on walking foot attachment for a sewing machine. For a more complete picture, I recommend exploring both versions.
Step 1
To start, turn off your machine (or lock all keys and buttons on high end sewing machines) because you might accidentally press the “start” button on your machine (or even another button) or press the pedal and the machine will start. It may be dangerous and cause injury.
Step 2
Manually raise the needle into the highest position (if it’s not in this position already) by turning the handwheel toward you.
Raise the presser foot lever.
Press the button on the presser foot holder and remove the snap-on presser foot that was on the machine before.
Remove also the presser foot holder (sometimes also called adaptor) from your sewing machine. You will need to use a screwdriver to loosen the presser foot holder screw.
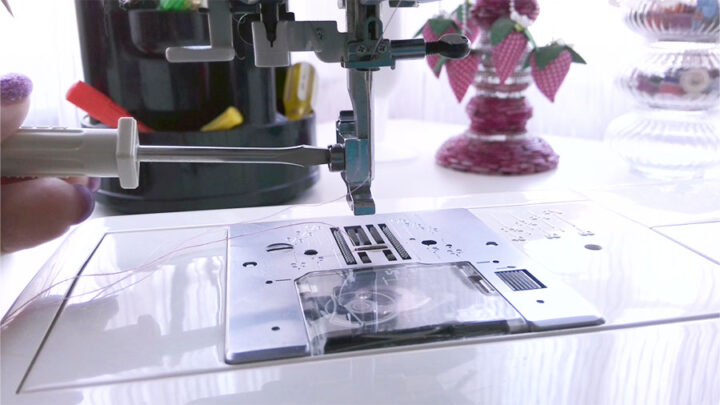
Don’t lose the presser foot holder, put it in a safe place, you will need it for all other presser feet.
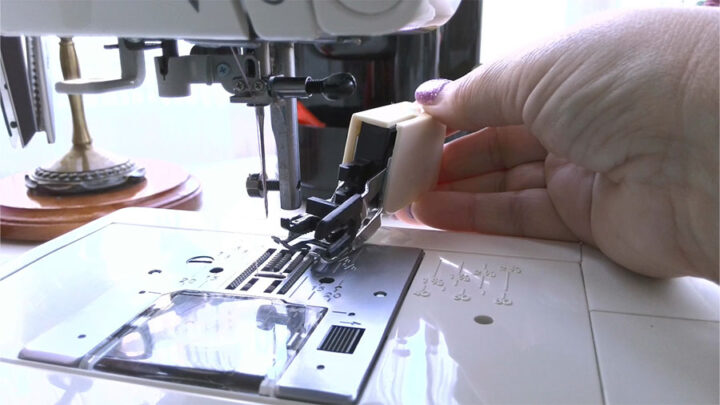
Step 3
Bring your walking foot around the back of your shank, paying close attention to the presser foot lever with an open claw/fork (or “U”). Place the lever so that the claw part fits around the needle bar (or sit on the bar, for some machines).
Make sure the needle is not bent and is right above the foot opening.
The correct placement of the presser foot lever is essential for the feed dogs in the walking foot and the machine to work in unison.
Step 4
Slide the walking foot onto the shank and tighten the screw in place with a screwdriver.
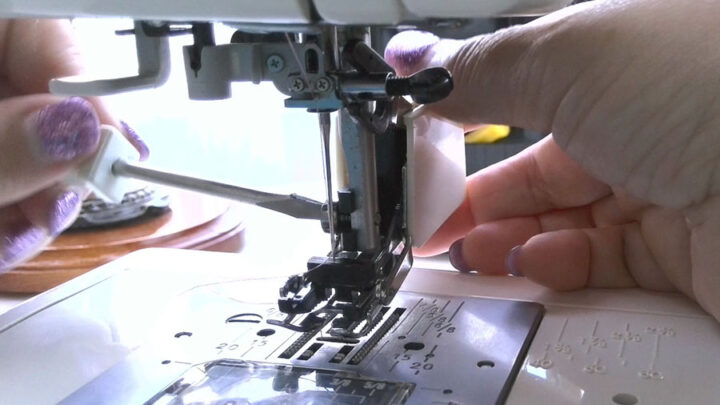
Step 5
Use the handwheel to move your needle up and down as you test to make sure the needle doesn’t touch the sole of the foot. Also, check that the upper feed dogs move in unison with the lower feed dogs.
Removing a walking foot
To remove a walking foot, turn off your machine and just loosen the shank screw (use a screwdriver if needed) and pull the foot off toward the back of the machine. Replace it with the presser foot you need for your next project. Don’t forget to attach back the presser foot holder.
If you would like to know how a walking foot works and why you might want to use it check out my tutorial Walking Foot Attachment For A Sewing Machine: What It Is And Why To Use It
Sewing with a walking foot
Note: Some of the links on this page are affiliate links. This means I will receive a commission if you order a product through one of my links. I only recommend products I believe in and use myself.
Here are some helpful tips about the different components you’ll need as you work with your walking foot.
What stitch length to use with a walking foot
The stitch length to use with an even feed foot has to match the thickness of your fabric.
If you are using a straight stitch with your foot, most often you should set your machine’s stitch length to 2.5-3 mm because the walking foot is mostly used for bulky fabrics, quilt sandwiches, heavyweight fabrics. However, there will always be exceptions because one particular project might require 3.5 mm and another 2 mm.
Take into consideration what kind of fabric you use and how much bulkiness you have under your even feed foot.
For example, if your batting is very thick, a longer stitch length will accommodate the increased bulk.
But if you want to sew a slight curve when quilting with your walking foot, use a smaller stitch length so the curve will be smooth without corners.
✅ Related tutorial: Stitch length tutorial
What stitches can you use with a walking foot
The walking foot likes to stick with the straight stitch and is made for forward-moving stitches. It works well with zigzag stitches too because zigzag is also a forward-moving stitch.
That said, this presser foot usually does not work with reverse stitching and some decorative stitches that require the fabric to move from side to side.
If you press a reverse button while sewing with a walking foot the feed dogs will move backwards but they don’t work as well backward as they do forward so the fabric layers may shift.
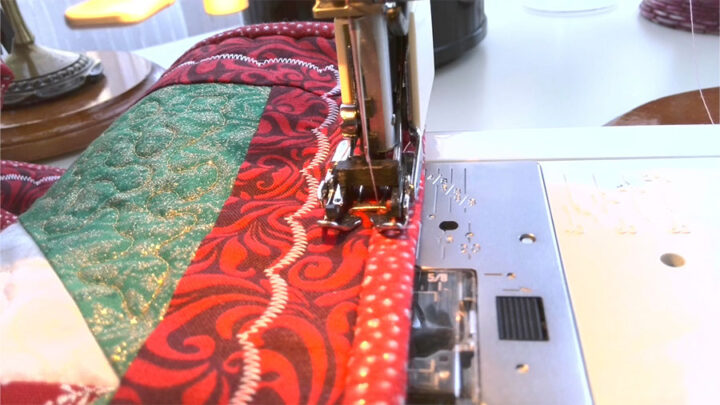
Decorative stitches with walking foot
You can use many of the decorative stitches on your sewing machine with your walking foot.
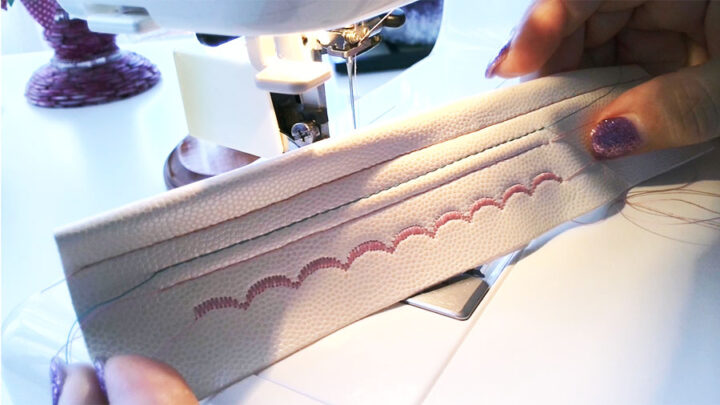
But don’t use multi directional stitches that require backwards and sideways motions and those that are too wide for the foot.
If you want to experiment with creative stitching using an even feed foot, don’t be afraid to try some decorative stitches you like but test them on scrap first: manually move the wheel while the stitching sequence for the test decorative stitch is going on so you can make sure that it’s working for your fabric.
Needles you can use with a walking foot
You won’t need special needles for sewing with a walking foot. Instead, match your needles to your fabric. For example, use Universal needles size 90/14 for your quilt, or leather needles to sew leather with a walking foot.
You can even use a twin needle with this presser foot.
✅ Related tutorial: How to use a twin needle
Thread you can use with a walking foot
Similar to the needles you choose for your project, match your thread to the fabric you’re using. Since you will likely be sewing bulky items, I recommend using a strong thread.
✅ Related tutorial: Sewing thread types and uses
How to use a walking foot for different sewing projects
What do you use a walking foot for? Here are some helpful tips to apply when using your even feed foot for different projects.
How to use a walking foot for quilting
Quilting is one of the most common uses for a walking foot because the foot works wonders to keep all the layers of the fabric moving through the machine without bunching up. Quilters use many different techniques for quilting with this presser foot. Some of them are these:
- Stitch in the ditch – if you want your seams to be nearly hidden, use your walking foot to sew precisely on the line. Stitch in the ditch means that you sew exactly along the seam lines. Proceed slowly to ensure your needle stays where you want it to be. The foot will help you to avoid puckering.
- Straight line quilting – when you want to quilt straight lines across your quilt, your walking foot is the attachment you’ll want since it keeps the layers of the quilt together and prevents the top layer from moving ahead of the batting and backing layers. Also, use a walking foot to avoid puckering and tiny pleats.
- Matchstick quilting – this is a variation of straight line quilting that places lines very close together (about a “matchstick” apart). Modern quilts often use this technique, and a walking foot helps to keep the material from shifting and puckering while you sew.
- You can sew curves with a walking foot too. If it’s a slight curve you just go ahead like with straight line quilting but with regular curves you have to stop, raise your presser foot and turn the fabric slightly under the foot to accommodate the curve.
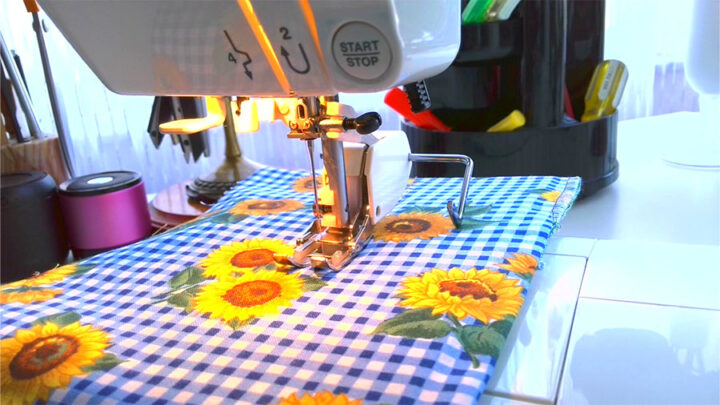
Walking foot with guide
You can use a walking foot with a seam guide. It’s a metal piece that you can attach to most walking feet. This quilting guide/bar looks like a hooked bar that comes out and slides on the fabric as you sew, and it’s there to help you keep your lines straight and evenly spaced as you quilt.
In my sewing machine manual this seam guide is called Quilting bar but I guess there are other names for this tool. I was surprised to find this small metal bar among my sewing machine accessories and had to read the manual to see how to use this thing. But it was a long time ago and since then I have been using it quite often.
For this quilting bar to work you will need to find some stitching lines that are already on the fabric. Or you can use the edge of the fabric as the first line.
Sew while tracing the previous seam with the quilting bar.
✅ Related tutorial: Seam guide tutorial
How to attach guide bar to walking foot
It’s really easy to attach.
Find a small hole on the back of your walking foot. Insert the quilting bar into the hole and slide the bar back and forth to set the width of the seam you want. Not all walking feet will have the hole. Older models might be without one.
My seam guide attachment from the sewing machine accessories extends to a maximum width of around 2″. But there are longer seam guides available.
A walking foot is a versatile tool and useful for a variety of sewing projects, not only for quilting. Topstitching a jacket through multiple layers? Matching plaids in your skirt? A walking foot can help.
How to use a walking foot with some types of knit fabrics
When you sew medium or heavyweight knits on a regular sewing machine, a walking foot helps to keep the fabric moving through the machine without stretching. Simply stitch your material using the same technique that you would use when sewing woven fabric with your standard presser foot. Use a special stretch stitch like this.
✅ Related tutorial: Types Of Stretch Stitches On A Sewing Machine And When To Use Them
I am often using my wallking foot (together with a twin needle) to hem stretchy leggins for example.
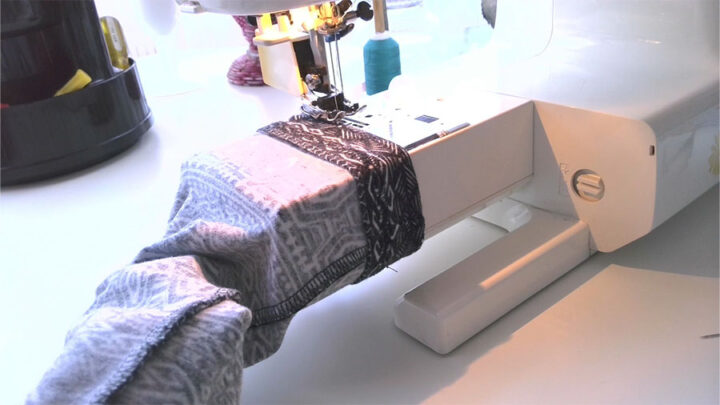
When using the walking foot, I recommend sewing your stitches slowly so that you can keep an eye on your project as you proceed. This also allows the feed dogs to move appropriately.
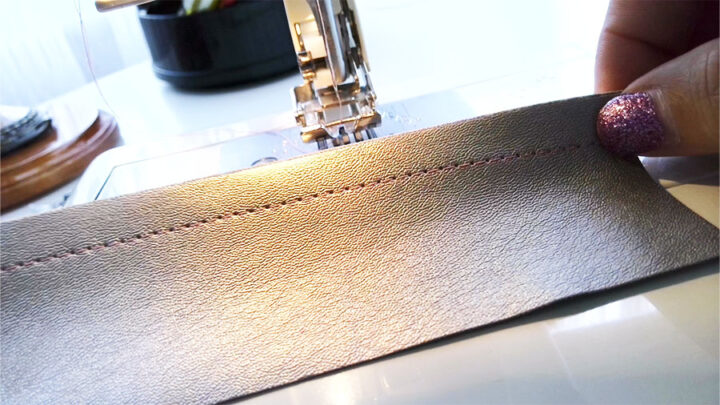
How to use a walking foot with heavyweight fabrics, leather, & vinyl
Sew as you normally would when working with these fabrics, just at a slightly slower pace. The walking foot does a great job of feeding these materials through evenly.
If you would like to buy a walking foot for your sewing machine check out my tutorial Brands of walking foot attachments: buying guide
And if you do not have a walking foot for your sewing machine or you can’t find one, I am reviewing an interesting type of foot here: Presser foot guide: what is a Rotary Even Foot and how to use it. It does what a walking foot does (almost) and it really works!
Common mistakes people make while using a walking foot
I love to use my walking foot, but it has its limitations. Here are a couple of mistakes I often see people make with their walking foot attachments.
Can I use a walking foot for regular sewing?
Yes…and no. Your walking foot isn’t designed to be used as a multi-purpose presser foot. Remember, I mentioned earlier that a walking foot is designed for forward-moving stitching that also doesn’t require the fabric to move from side to side.
Although it’s not a multi-purpose foot, there are several other ways you can use it in your regular everyday stitching. Here are a few examples:
- Aligning seams
- Sewing bulky seams
- Topstitching multi layered projects
- Matching plaids and stripes
- Sewing heavyweight and bulky fabrics such as leather, faux fur, upholstery, camping gears, etc.
- Working with slippery materials such as lycra, minky fabrics, vinyl, etc.
When should you not use a walking foot?
Even though you can use a walking foot for many everyday sewing projects, it’s not a good fit for a few types of projects. Don’t use your walking foot for
- Free-motion quilting – a walking foot works very well when the fabric moves forward, but it doesn’t turn from side to side.
- Wide decorative stitches – since these require side-to-side movement, a walking foot can’t handle them.
- Sewing in reverse – a walking foot’s feed dogs can only move the fabric forward, which will still happen even if you try to sew in reverse.
- Sewing lightweight silk – a bulky walking foot with moving feed dogs can damage delicate fabric.
Walking Foot Troubleshooting
Is your walking foot not working correctly? Here are a few things to check.
1. Foot Attachment – Visually scan to see if the foot is attached correctly.
2. Feed Dogs – Inspect your feed dogs. Are they engaged? Are they worn out? Are they clean of lint? They are not going to move fabric properly if they are full of lint.
3. Needle Tension – You may need to adjust the tension for heavyweight fabrics and multi-layer sewing.
4. Foot Pressure – Observe the foot pressure, and adjust it if necessary. The foot pressure should be different for sewing lightweight and heavyweight fabrics. What does it do? It raises or lowers the presser foot when the foot is in the down position. You can’t see it with your eye but the difference is there and you will feel it when sewing. Make sure you set the correct height of the presser foot for the thickness of the fabric.
5. Inspect The Needle – Examine the needle to see if it’s bent, dull, etc. Replace it if necessary.
6. Check The Thread – It must be strong enough for sewing heavyweight fabric.
Uneven stitches with walking foot
There are several reasons why you may experience uneven stitches with a walking foot. One of them – if you sew with different speeds when sewing a seam (or a quilting line) – faster / slower/ faster/ slower. I noticed that my stitches look better if I keep an even, slow speed while sewing with a walking foot. It gives you more control over your project and more time to get those stitches perfect.
Another reason for uneven stitches – you have different thickness of material under the presser foot. It happens when you hem jeans for example. Walking foot is very good in this situation, with a regular presser foot your machine will not even sew the hem. But nevertheless, stitches might come uneven. Again, to avoid this, sew slowly, “walk” your walking foot.
Stitches might be uneven if you sew over pins that you used for basting and didn’t take out. Always remove pins when using your machine.
FAQs
Here are a few common questions I see people ask about how to use a walking foot.
Can you backstitch with a walking foot?
No. I have seen some people indicate that you can do a couple of reverse stitches when you start sewing. However, the feed dogs are designed to pull fabric from the front of the machine to the back, and they don’t work in reverse. If you try to backstitch, your material will likely bunch or shift out of place.
Can you zigzag with a walking foot?
Yes! The zig-zag stitch is a forward-moving stitch that doesn’t require the fabric to turn. A walking foot makes an excellent zig-zag stitch.
Do you use a walking foot for binding?
Yes, this is precisely what it’s designed to do. When you sew binding, you sew through several layers of materials, all of which can shift as the fabric moves through the machine. A walking foot helps to pull all the layers through the machine at the same rate so that your project stays perfectly lined up.
So here is my YouTube video. Check this out if you like to see a helpful video on this even feed/walking foot attachment.

I hope this post provides all the information you need about how to use a walking foot. If you find yourself asking questions that I didn’t answer, please leave them down below in the comments section so I can answer them for you.
Did you find this tutorial helpful? If so, save this pin (see below) on your sewing board so you can come to this tutorial later when you need this information on how to use a walking foot, and follow me on Pinterest for more tips, tutorials, and inspiration!
latest posts
- Corset Pressing Board for Sewing: What It Does and How I Use It
- 7 Essential Tools and Settings for Sewing Denim on a Regular Sewing Machine
- That Purple Thang: 10 Smart Ways to Use This Weird Little Tool
- 20+ Reasons Your Sewing Machine Thread Keeps Breaking (+ Solutions)
- Dresden Plate Quilt Block: 4th of July Fireworks
- How To Sew Curves the Easy Way Using a Curve Master Presser Foot
- 30 Sewing Hacks That Turn Ordinary Items into Useful Sewing Tools
- Seam Allowances in Sewing Patterns: What They Are and How to Use Them
- What Do You Call a Person Who Sews? I Asked My Readers and Got 1,408 Opinions