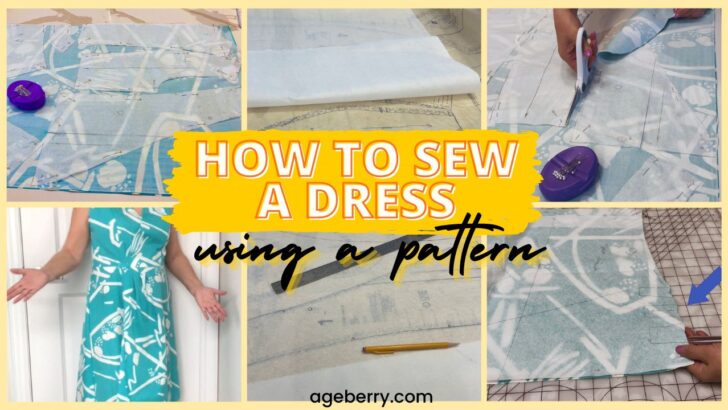
How to Sew a Dress Using a Pattern: A Step-by-Step Guide
Sewing a dress from a pattern requires attention to details and an understanding of sewing fundamentals, but it’s a manageable task even for beginners. Having the right pattern, fabric, and tools ready can set a solid foundation for your sewing journey.
I’ve picked out the Butterick B6629 pattern for my project. It’s actually meant for making a fitted top with different options for the neck, sleeves, and a peplum at the bottom. But here’s the twist – I’m going to turn it into a wrap dress. I plan to modify the peplum part into a skirt. In this tutorial, I’ll guide you through each step of how I do it.
If you’re interested in purchasing the pattern, you have a variety of options. You can find it at Joann Fabric stores if you want to buy it in person. It’s available online on platforms like Amazon and Etsy. Here is the link to Amazon.

This pattern is all about simplicity and comfort. The pattern envelope comes complete with everything you need to get started: clear instructions, fabric recommendations, images, and all the pattern pieces. Plus, it includes a sizing guide to help you create the perfect fit. My pattern is for sizes 6, 8, 10, 12, and 14.
These tops are super easy to sew, which makes them ideal for both beginners looking to practice their skills and more experienced sewers wanting a quick and satisfying project.
Before starting the sewing process, read the pattern instructions and ensure you’ve selected the correct size for your measurements.
This pattern includes various size options and customization tips to make a garment that fits well. Reading the pattern thoroughly will help you understand the necessary fabric layout, cutting guides, and the sequence of construction steps.
Ensure you gather your materials and prepare your work area, so you have everything within reach.
Learning how to sew a dress really isn’t as hard as it might seem, as long as you approach it one step at a time. Breaking down the process into manageable parts makes it easier to focus on each task without getting overwhelmed.
Just like any new skill, it takes patience and practice, but with each step you complete, you’ll be building your confidence and improving your sewing skills.
Fabric Selection and Preparation
Selecting the appropriate fabric for a sewing pattern is the foundation of a successful sewing project.
Selecting Suitable Fabrics
Since the Butterick B6629 pattern is for woven fabric, you’ll want to choose a material that aligns with the pattern’s recommendations: broadcloth, cotton blends, chambray, poplin, gingham.
Woven fabrics are generally not stretchy compared to knits and are easier to work with for beginners.
Consider the drape and weight of the fabric – qualities that affect how the dress will hang on your body. Natural fibers like cotton or lightweight linen (even if it’s not among recommended fabrics for the pattern) can be a good starting point.
When choosing fabric, there are a few important attributes to keep in mind.
Drape. This is about how the fabric hangs or falls. For garments like skirts and dresses, you’ll want a fabric that flows well and has a good drape to it, so it moves nicely as you wear it.
Weight. The weight of the fabric can determine the structure and shape of your garment. Heavier fabrics tend to hold their shape and provide more structure, while lighter fabrics are softer and can give a more relaxed feel.
Texture. This refers to the surface feel and appearance of the fabric. Texture can add depth and interest to your clothing, and it can range from smooth and silky to rough and rustic, depending on the effect you’re going for.
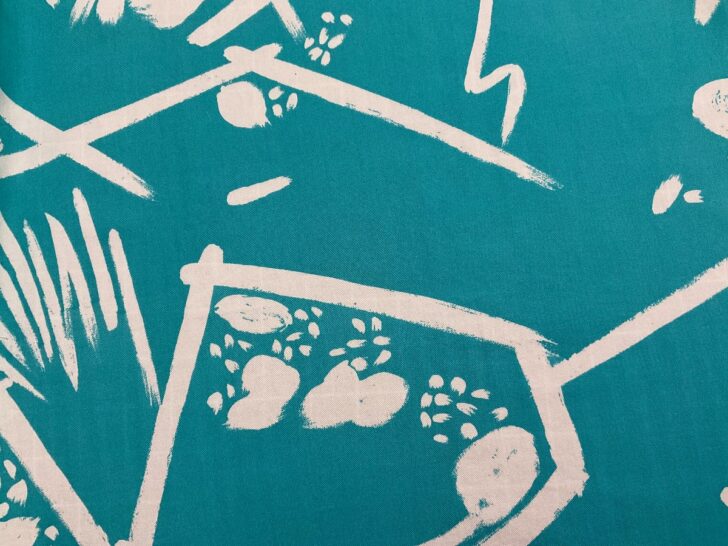
I’ve decided to go with a 100% cotton fabric for the dress. It’s a type of apparel cotton that’s light and flows nicely, yet it’s thick enough that it isn’t see-through. The fabric has a simple weave which makes it really smooth to the touch. The color is what really caught my eye – it’s a beautiful shade of turquoise, and it’s got these abstract white motifs that give it a unique look.
Preparing the Fabric
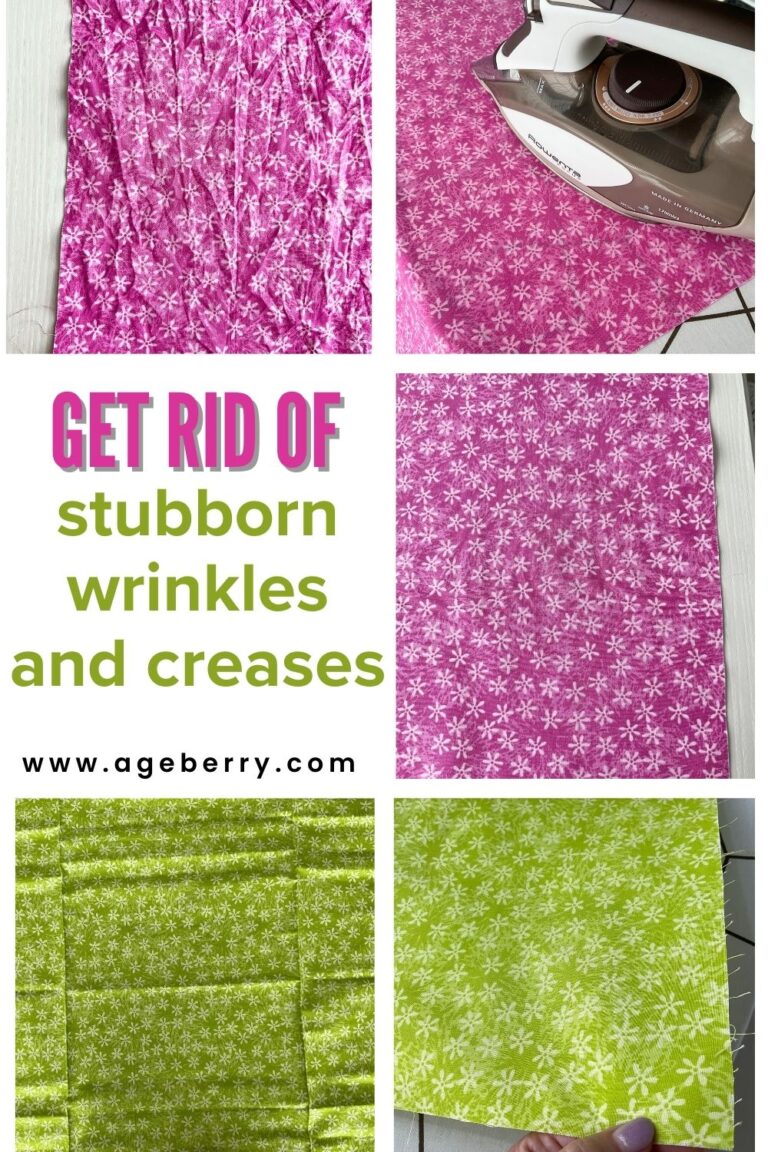
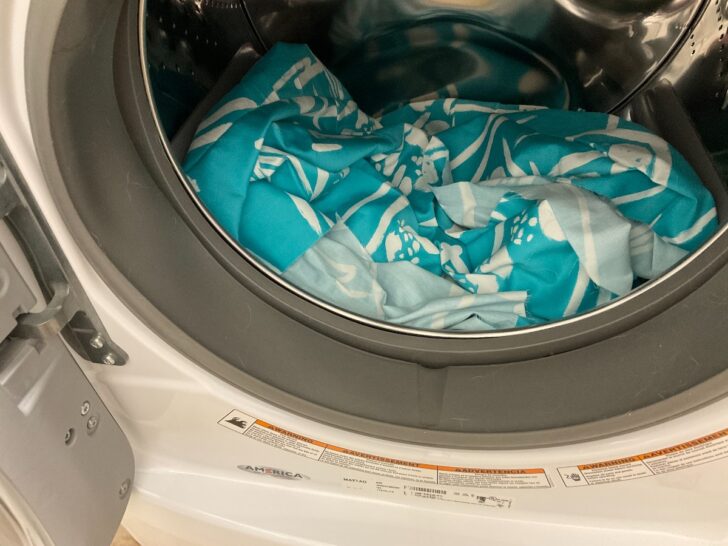
Before I start cutting my pattern pieces, I always pre-wash my fabric. This step is important because it helps to prevent any shrinkage after you’ve made your garment. I highly recommend you do the same—pre-wash your fabric before you begin sewing with it. I’ve put together a detailed tutorial that explains how and why to pre-wash fabric. Check out my guide Prewashing Fabric: Is It A Good Idea? to get all the insights and tips you need.
When the fabric is dry, press it with an iron to remove any wrinkles, ensuring a smooth surface for accurate cutting.
Taking Accurate Measurements and Choosing the Size
Before cutting your fabric and starting to sew, ensure that your measurements are precise.
Taking Body Measurements
To measure your bust, wrap the tape measure around the fullest part of your chest, keeping it parallel to the floor. For the waist, find the narrowest part of your torso, typically an inch above your belly button. Finally, measure your hips by locating the widest point around your buttocks. Always maintain a relaxed posture and breathe normally during the process to ensure a true fit.
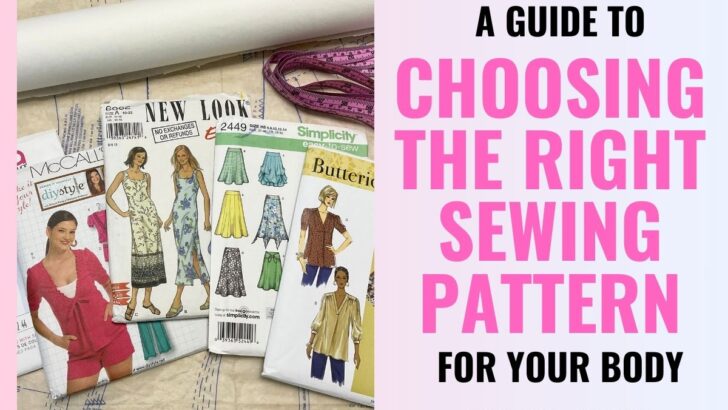
I’ve put together a comprehensive tutorial that breaks down how to select the correct size for a sewing pattern. It’s really important to get this right, so your finished garment fits you well. Make sure to check it out, it’s called A Guide to Choosing the Right Sewing Pattern for Your Body.
As for me, I typically use size 12 for the top part of my patterns and size 14 for the bottom. This ensures that the clothes I make fit my body shape properly.
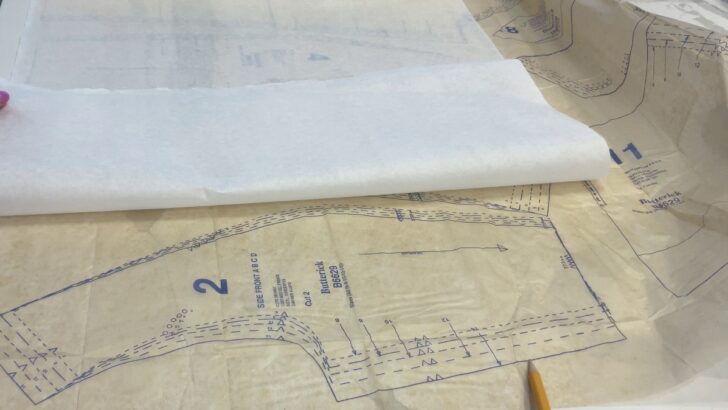
Transferring Pattern Pieces to Tracing Paper
I usually transfer my pattern pieces to transparent tracing paper. It preserves the original pattern and provides clarity for cutting my fabric. This is a precise process that requires attention to detail.
Transferring Pattern Lines and Marks
Note: Some of the links on this page are affiliate links. This means I will receive a commission if you order a product through one of my links. I only recommend products I believe in and use myself.
To successfully transfer pattern pieces to tracing paper, you’ll need to follow a set of methodical steps. Begin by laying the original pattern flat on a work surface. Place the transparent paper over the top, ensuring it is smooth and wrinkle-free.
I usually buy tracing paper for my patterns on Amazon. It’s a convenient option that offers a wide selection of tracing papers suitable for various sewing projects, allowing me to compare brands, prices, and reviews all in one place.

Step-by-Step Guide:
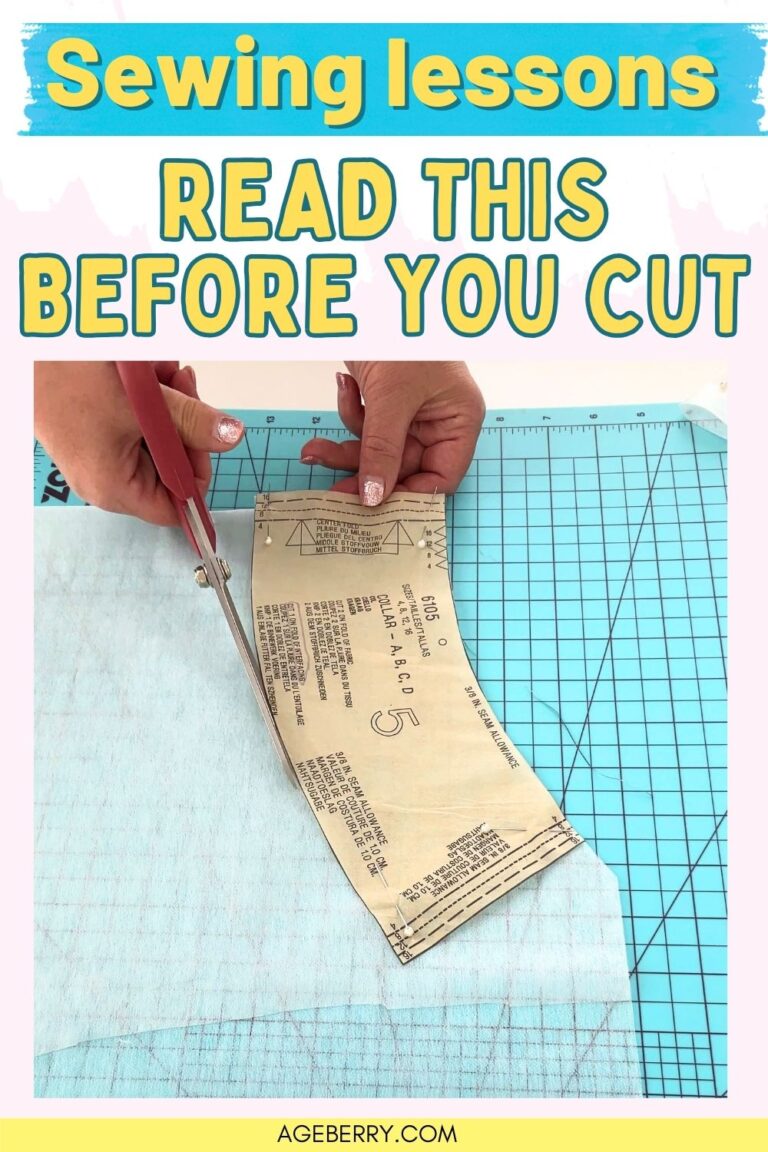
#1. Secure the Original Pattern. Use weights or even low-adhesive tape to hold the original pattern in place to prevent slipping.
#2. Trace the Cutting Lines. Carefully draw along every edge of the pattern pieces. Use a well-sharpened pencil to ensure precision. For this pattern, ⅝” seam allowances are included.
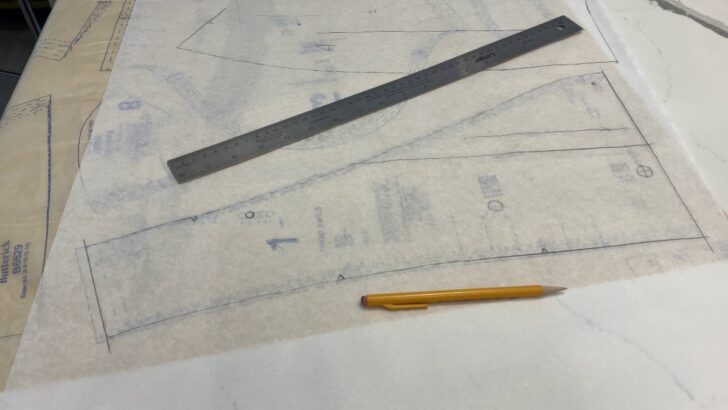
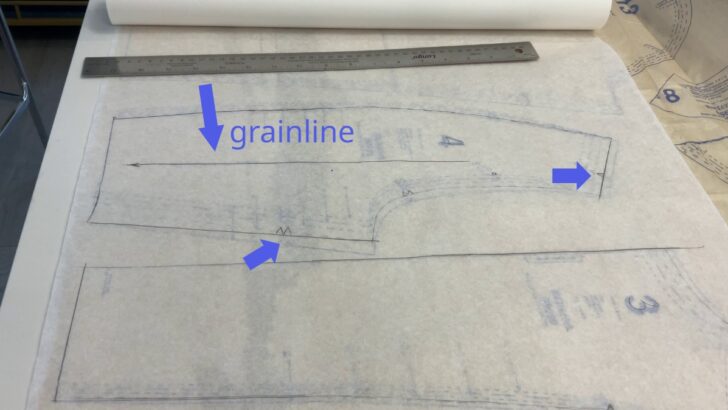
#3. Transfer all markings and lines of construction. Markings and notches are critical for aligning the pieces correctly. Don’t forget to transfer grainlines. Write the pattern piece number on each piece.
#4. Transfer Pleats. This pattern has pleats. Accurately replicate the pleats points and lines onto the transparent paper.
Accuracy at this stage is crucial for the fit and finish of your final garment.
Grading the pattern
It’s not uncommon to require a different size for top and bottom. If I’m a size 12 for the bust but size 14 for the waist and hips, I’ll need to grade the pattern. This entails adjusting the seams from a size 12 at the bust and shoulders to size 14 at the waist line.
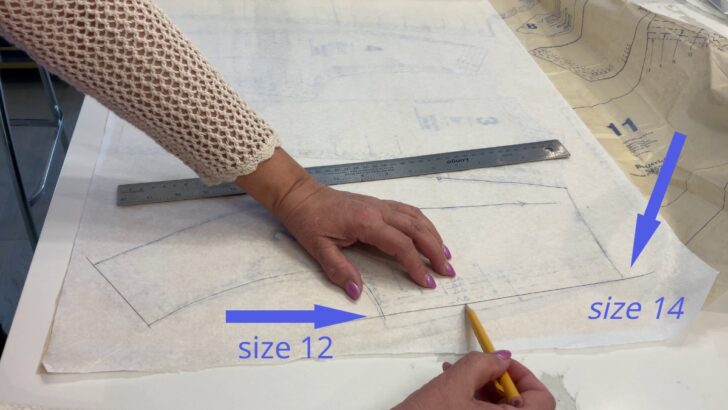
Be sure to keep all lines smooth and gradual for an invisible transition between sizes.
Adjusting the Pattern from Blouse to Dress
When transforming a peplum blouse into a wrap dress, I’ll convert the peplum flare into the skirt part of the dress.
For this, I measure the length from my waist to where I’d like the dress to end. I’ll need to add the new length to each part of the peplum. So, I modify the pattern accordingly, adding 13 inches to the peplum hem and ensuring the skirt’s waist matches my size.

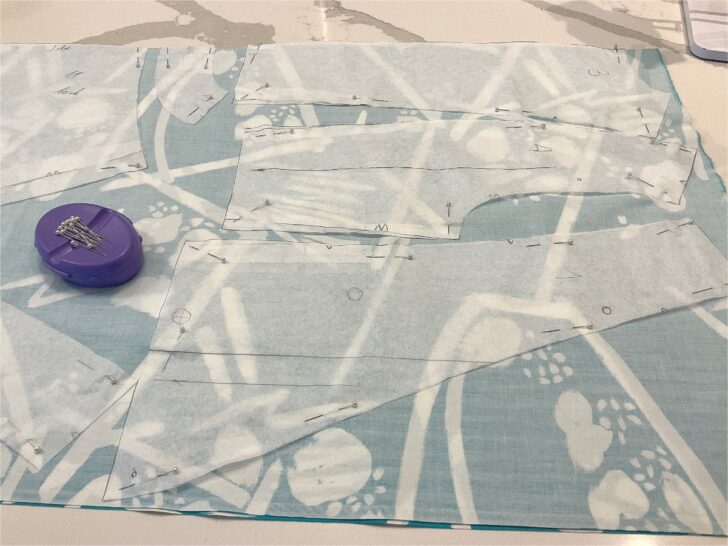
Cutting Fabric Pieces
Identify the grainline which runs parallel to the selvage, as it’s essential for the correct alignment of the pattern pieces on the fabric.
Fold fabric right sides together lengthwise, selvage to selvage.. Sometimes, the selvages might shrink differently from the rest of the fabric after pre-washing. If that happens, it’s a good idea to trim off the selvages so they don’t affect how your fabric lays flat.
However, if the selvages lay flat and haven’t shrunk, like with the fabric I’m using right now, you can just leave them be. The only thing to remember is not to place any of your pattern pieces on the selvage edges. You want to keep those edges clear because they can have a different texture or density than the rest of your fabric, which could affect your final garment.
Lay out the fabric flat and place the pattern pieces on the fabric, paying attention to the grainline marked on the pattern. This step is key to maintaining the integrity of the dress’s shape once you’re sewing it.
Accurate cutting is just as important as the sewing itself.
✅ Related article: How to cut fabric straight | 8 Easy Ways Explained
You’ll find that the pattern instructions come with a suggested layout for placing your pattern pieces on the fabric. While this can be a helpful starting point, you don’t have to stick to it exactly. It’s okay to think independently about how to arrange your pattern pieces on the fabric. Feel free to experiment with different layouts to see what works best for you and the specific design you’re working on.
For instance, in my current project, I’m making modifications to the pattern. Instead of creating a peplum for a blouse as the pattern originally suggests, I’m sewing a skirt part for a wrap dress.
This means my layout needs to change too. I’ll be cutting two front skirt pieces separately on a single layer of fabric, not on the fold, because the left and right skirt pieces are not symmetrical. So, my approach to laying out the pattern pieces will be different to accommodate these changes.
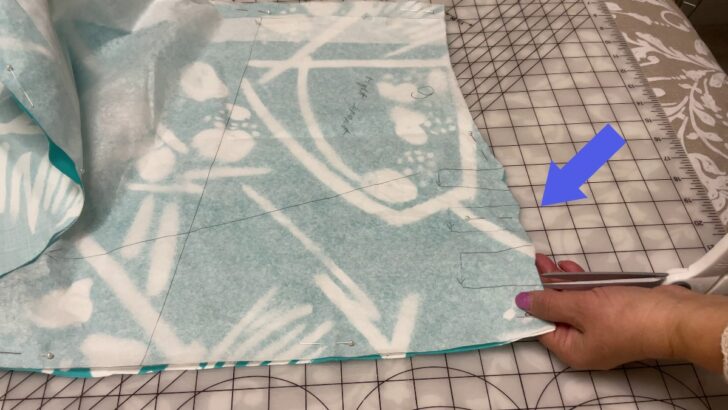
I like using my rotary cutter for cutting out garment pieces because it can be really efficient. However, for this particular project, I’ve decided to go with fabric shears.
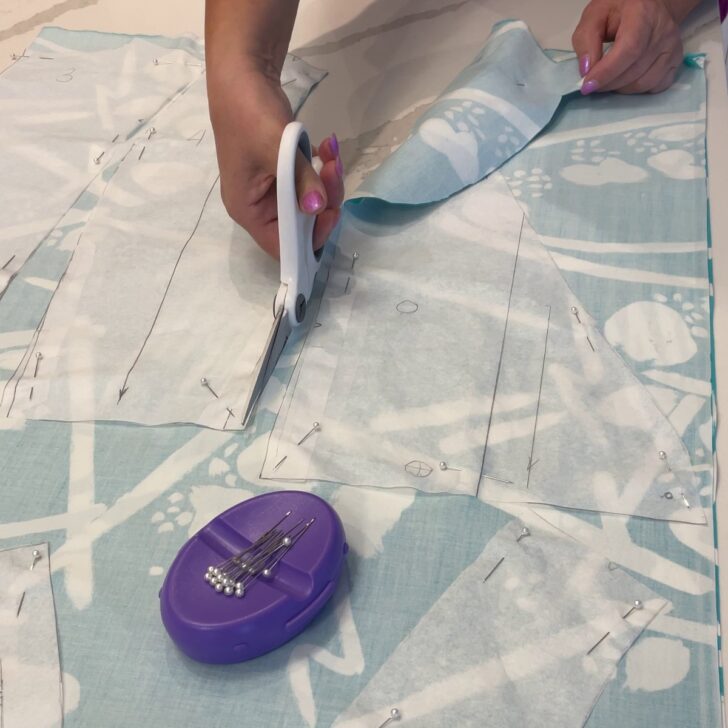
You can use whichever tool you prefer – both a rotary cutter and fabric shears have their advantages, so it really comes down to what you’re comfortable with and what works best for the fabric and pattern you’re using.
✅ Related article: Cutting Tools For Sewing: The Ultimate Guide
Use pins to affix the pattern to your fabric, paying close attention to the grain lines. Space pins 3-4 inches apart for security. Double-check that pins don’t distort the fabric or pattern.
Begin cutting at one end and follow the pattern’s outline steadily. Keep the lower blade of your shears on the table to facilitate a clean cut and avoid lifting the fabric excessively.
Do not rush; take your time to follow the pattern’s edges accurately.
Cut in long, smooth strokes to preserve the integrity of the fabric edge.
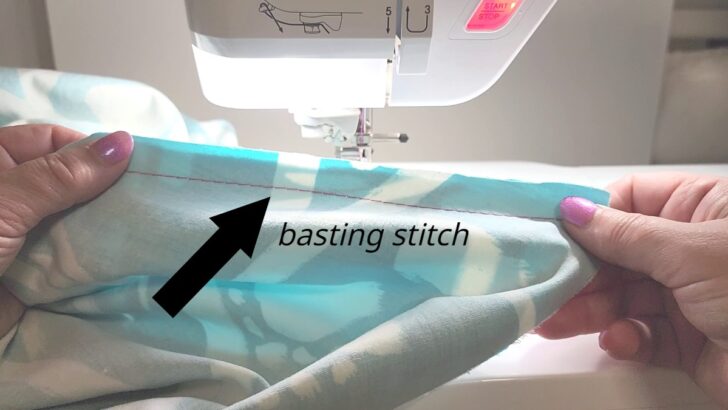
Assembling the Dress using a basting stitch
When you sew a dress, using a basting stitch to temporarily join pieces allows you to make necessary adjustments during the initial fitting. It’s a nice step to ensure the dress fits perfectly before final sewing.
First Fitting and Alterations
Once you’ve cut your pattern and are ready to assemble, start by loosely sewing the seams with a basting stitch on your sewing machine. It’s just a regular straight stitch with stitch length 5 and tension close to 0.
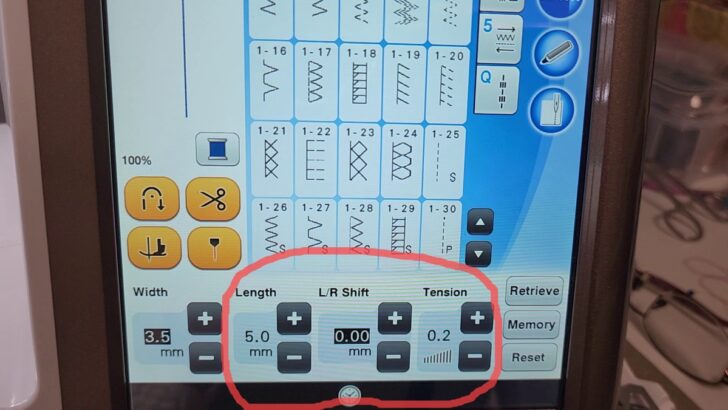
This large, temporary stitch holds the fabric together and allows for easy removal for adjustments. Your focus is not on the final construction but on how the dress drapes on your body.
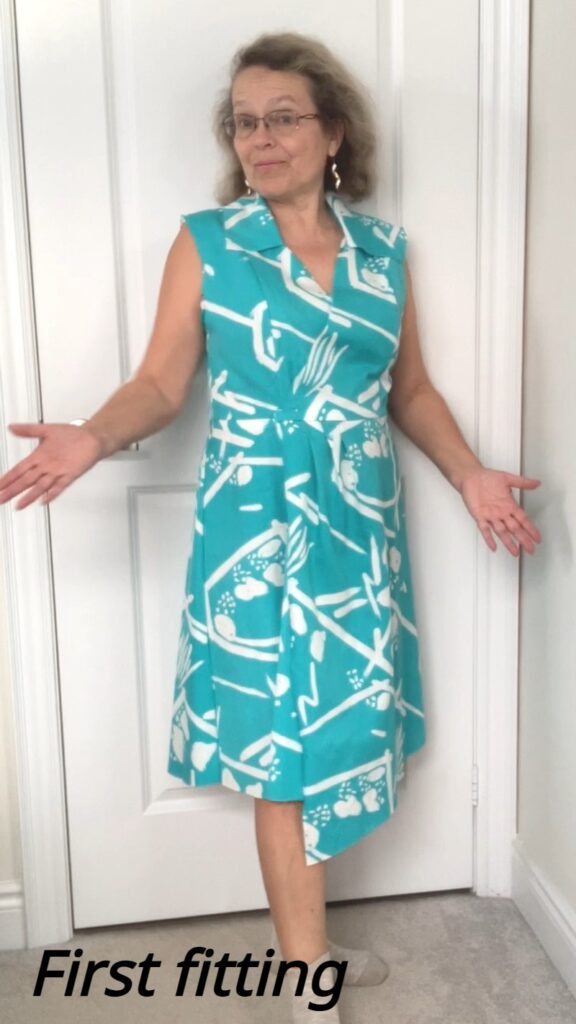
So, after sewing all the seams, try on the dress. This allows you to assess the fit and pinpoint areas that may need to be taken in, let out, or altered. Pay close attention to how the fabric behaves around potential additions like collars and pleats, ensuring they do not affect the dress fit negatively.
If alterations are needed, carefully remove the basting stitch in the required area, make your adjustments, and baste again. Repeat this process until the dress fits as desired. Only after confirming that everything fits well should you proceed to permanently sew seams and add detailed features like sleeves and buttons.
I’ve tried on the dress, and it seems to fit really well. I’m happy with how it’s coming together, so now I’m ready to move on to the sewing stage. It’s always a good feeling when the fit is right and you can proceed with confidence, knowing that your finished piece is going to look great. Time to get sewing.
Did you find this tutorial helpful? If so, save this pin (see below) on your sewing board so you can come to the article later when you need this information on how to sew a dress using a pattern , and follow me on Pinterest for more tips, tutorials, and inspiration!
Frequently Asked Questions
In this section, you’ll find straightforward answers on how to effectively use a sewing pattern to create a dress, ensuring precision and repeatability without spoiling the pattern for future use.
What are the steps to cut and sew a beginner’s dress from a pattern?
To start off, you need to select a suitable pattern for a beginner and the fabric you wish to use. Next, lay out your pattern on the fabric, pin it down, and carefully cut around the pattern pieces. After cutting, you’ll sew the pieces together, following the instructions provided with your pattern, taking care to align notches and seam lines.
Is it possible to use a sewing pattern multiple times without damaging it?
Yes, you can use a sewing pattern multiple times. To preserve the original, consider tracing the pattern onto lightweight tracing paper or interfacing. This way, the original pattern remains intact, allowing multiple uses and size adjustments as needed.
What is the process for transferring a sewing pattern onto fabric accurately?
Accurately transferring a sewing pattern onto fabric involves laying the pattern onto the fabric without stretching. Use pattern weights or pins to secure the pattern in place. If your pattern includes markings for darts, notches, or other alignments, use tailor’s chalk or a disappearing ink pen to transfer these important details onto your fabric.
What is the average time required to sew a dress using a commercial pattern?
The time it takes to sew a dress using a commercial pattern can vary widely depending on the complexity of the pattern and your sewing skills. Generally, a simple dress pattern can take a few hours, while more complex designs might require several days’ work spread over time. The key is patience and careful workmanship for the best results.
latest posts
- Corset Pressing Board for Sewing: What It Does and How I Use It
- 7 Essential Tools and Settings for Sewing Denim on a Regular Sewing Machine
- That Purple Thang: 10 Smart Ways to Use This Weird Little Tool
- 20+ Reasons Your Sewing Machine Thread Keeps Breaking (+ Solutions)
- Dresden Plate Quilt Block: 4th of July Fireworks
- How To Sew Curves the Easy Way Using a Curve Master Presser Foot
- 30 Sewing Hacks That Turn Ordinary Items into Useful Sewing Tools
- Seam Allowances in Sewing Patterns: What They Are and How to Use Them
- What Do You Call a Person Who Sews? I Asked My Readers and Got 1,408 Opinions