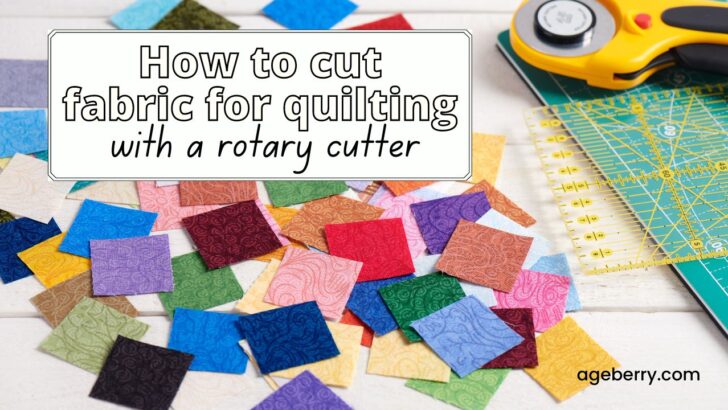
How To Accurately Cut Fabric For Quilting With A Rotary Cutter
Whether you’re a seasoned quilter or new to the art, learning how to cut quilt fabric accurately is a must. Cutting quilt squares, triangles, and other shapes are entirely different from cutting yardage for apparel. While apparel is necessary and functional, quilts lean more toward art.
Quilts have a long and useful history, but many of today’s quilters use fabric as a medium to form shapes, lines, textures, and colors into exquisite masterpieces. Modern quilts hang in art shows, museums, and in displays at the county fair. They’re gifted to children and grandchildren and passed down the line to the next generation. Quilts remind us how very much we’re loved. And they all begin and end with scraps of fabric that have been painstakingly cut to the right dimensions.
Learning how to cut quilt pieces accurately is the first step in making a quilt that’s easy to sew together. If you’re new to quilting, you can’t get enough information regarding how to cut fabric for quilting.
Preparing Quilt Fabric For Cutting
Before you can begin cutting quilt squares, strips, or other shapes, you must prepare your fabric.
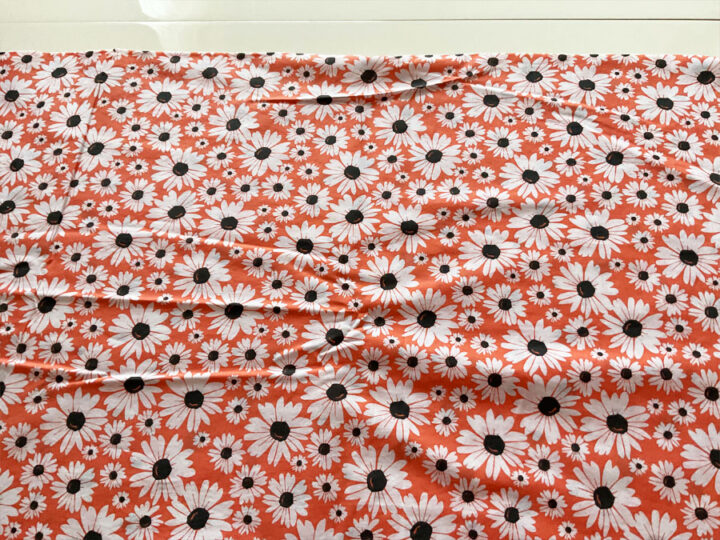
While there are no set rules for which types of fabric work and which ones don’t, the majority of quilters turn to fabric that’s 100 percent quilting cotton.
If you’re feeling rebellious, you can always break the rules, however, and stitch up a quilt crafted from damask, polyester, tee shirts, baby clothes, Crown Royal bags, or even real fur. All are beautiful in their own ways, and all will keep you warm on a chilly evening. More importantly, many may be tied to favorite memories. And memories play important roles in the art of quilting.
Different sewists prepare their fabrics in different ways. Choose the method that works best for you and go with it. I do recommend at least trying each method before deciding which one you like best, as each helps you achieve different goals.
Just remember that there’s no right or wrong way to treat your fabric before you commence cutting it. There are no quilt police here, and even if you end up making a mistake, it’s all just a part of the learning process. And note to self — fabric that’s made of 100 percent cotton is the best for quilting.
To Prewash or Not to Prewash, that Is the Question
Many quilters swear by prewashing fabric before cutting it. Others deny that it’s necessary at all. What we do know is that prewashing your fabric before cutting quilt squares may keep your colors from running the first time the quilt is washed.
Note: Some of the links on this page are affiliate links. This means I will receive a commission if you order a product through one of my links. I only recommend products I believe in and use myself.
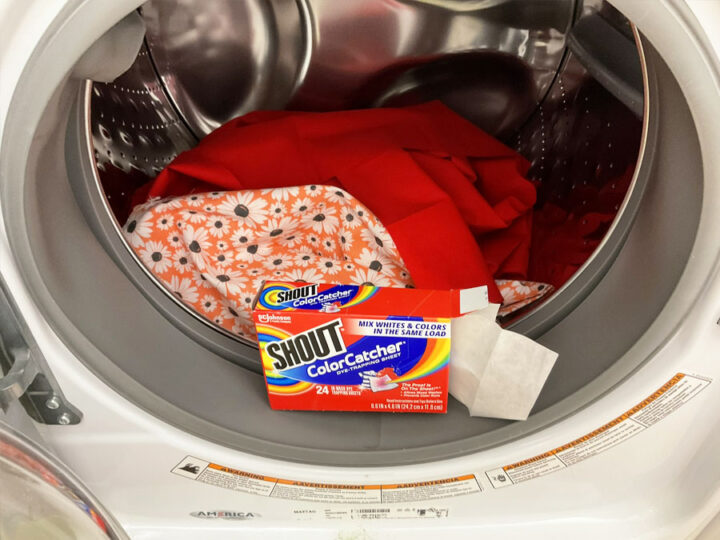
This is especially true for vibrant colors such as red and black. If you do prewash, toss color catchers in the washer with your fabric. These little sheets absorb and trap loose dyes, protecting your fabrics against damage from color bleeds. As an added bonus, they also help preserve those vibrant original colors.
Prewashing also gives the fabric the opportunity to shrink before you piece it together. Though many quilters love the crinkled look and feel of a freshly washed and dried quilt that was never pre-shrunk.
Those who avidly choose not to prewash usually say it’s because it makes the fabric feel used, and they don’t want to put the used fabric in a quilt.
It’s also good to note that attempting to prewash pre-cut fabric strips or squares may result in a tangled mess that Rapunzel herself could not resolve.
Prewash or don’t, the choice is yours, and it’s important to note that neither method is right or wrong.
Iron Your Quilt Fabric Before Cutting
You should, however, always iron fabric before attempting to cut it. Iron on the wrong side and use steam if you have it. This helps the fabric lay completely flat and removes all wrinkles that could be hiding in the folds.
✅ Related tutorial: Iron buying guide
Nothing is worse than cutting all the pieces of your pattern and finding one or two with weird creases that throw off the dimensions.
You should also trim off any frayed ends before you begin cutting. And use the fabric selvage to help you align the pieces on your cutting board.
Using the Right Tools When Cutting Fabric for Quilting
Quilters use a variety of tools when cutting fabric. The more you use these tools, the sooner you’ll learn how to cut quilt pieces accurately. The cutting tools you’ll use the most include the following:
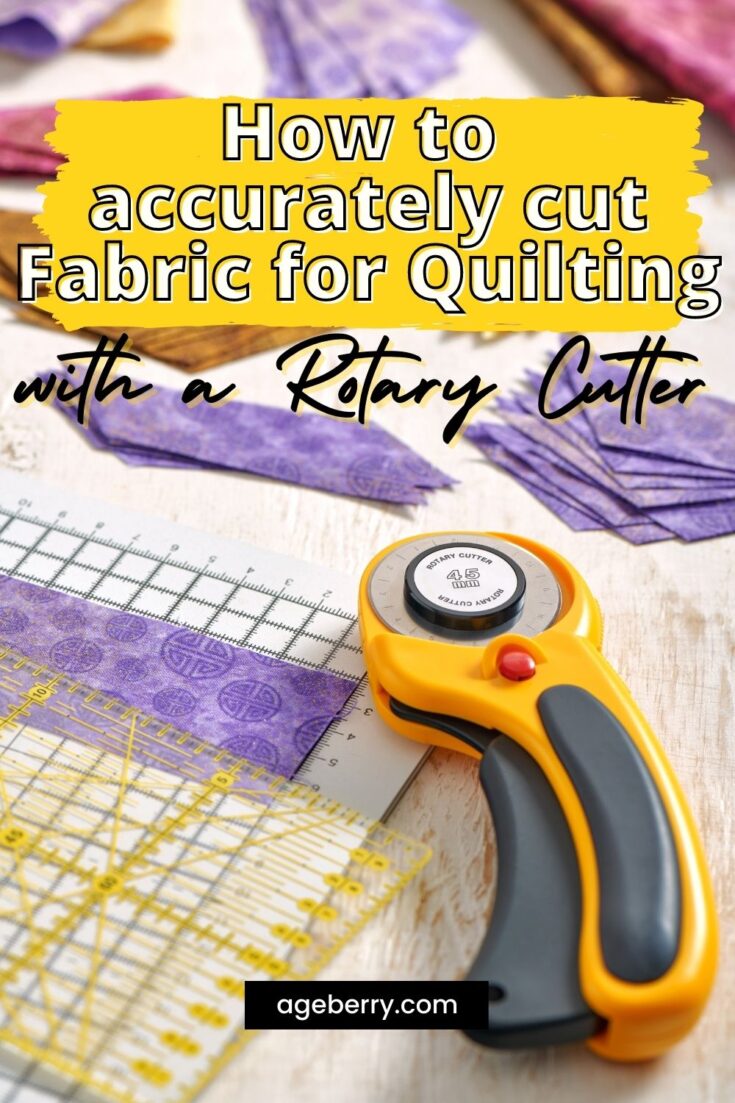
Rotary Cutter
A rotary cutter is a type of hand-held cutting instrument that uses a rotating blade to swish through multiple layers of fabric at once. Blades are disposable after so many uses, and replacement blades are used in their place. Rotary cutting blades are sold singly or in multi-packs, which makes it easy to always have a sharp blade on hand when you need one.
✅ Related tutorial: Cutting Tool For Sewing: Ultimate Guide
I like to use Martelli rotary cutter. It’s one of the most popular rotary cutters among quilters for a good reason: its handle is designed to reduce tension in your hand and wrist, allowing for fatigue-free cutting.
Martelli makes two versions of their rotary cutter: one for right-handed users and one for left-handed. I’ve found that it can easily handle several layers of fabric at once without any difficulty and allows for precise, even cuts while sitting down – something that’s essential for anyone who spends a lot of time quilting.
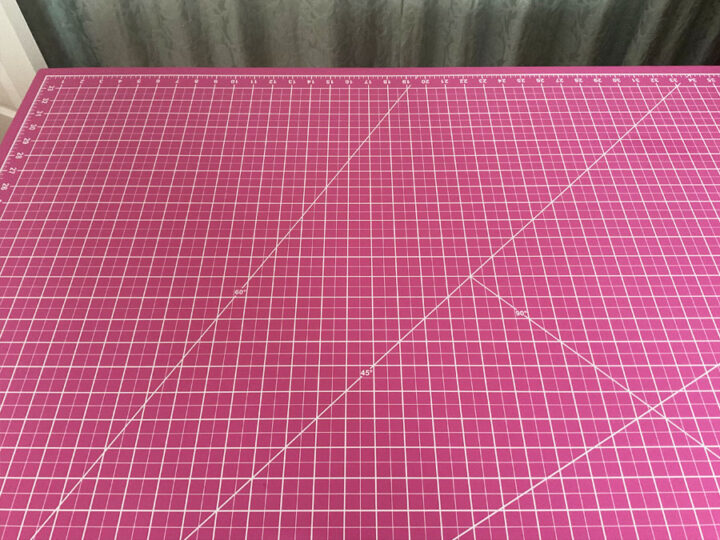
Self-Healing Cutting Mat
A cutting mat is an essential tool for any sewist or quilter. It provides a safe cutting surface for your rotary cutter and helps to keep your fabric in place. Cutting mats come in a variety of sizes, but most quilters prefer to use a mat that is at least 24″ x 36″.
They feature lines and measurements, which can be used in conjunction with a see-through, acrylic quilting ruler to help you make accurate cuts. Most cutting mats also have a different cutting surface on each side, so you can use them for both light and dark fabrics.
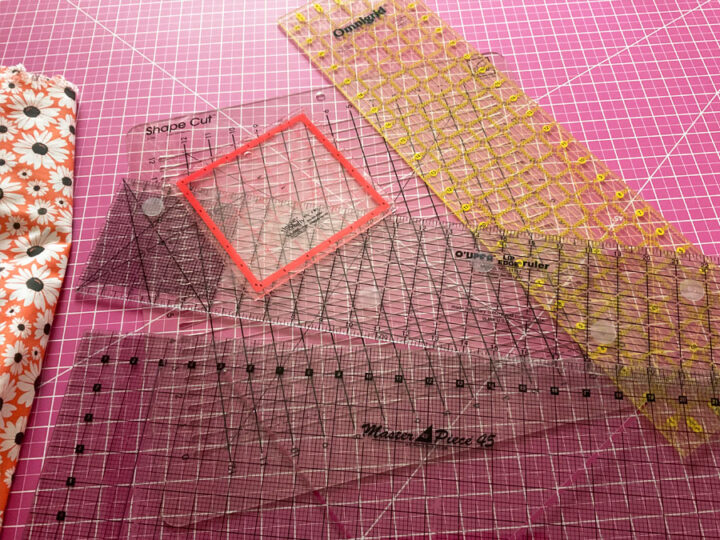
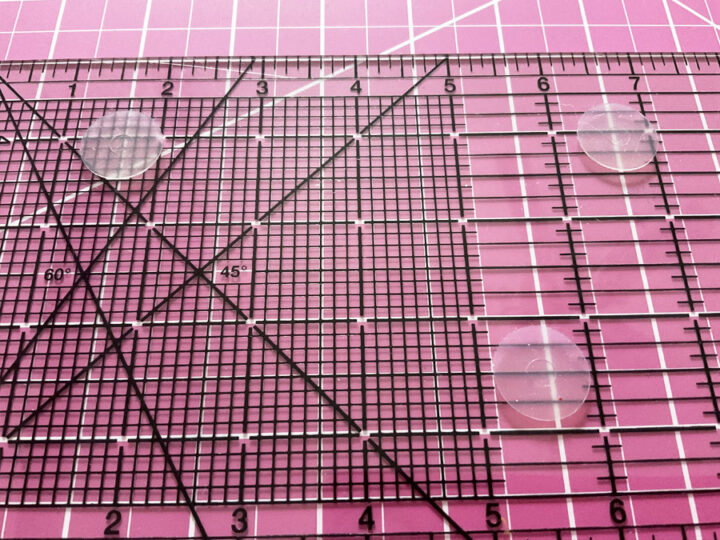
Acrylic Ruler
Quilting rulers are a universe all their own, and you can purchase them in all shapes and sizes. They help you cut squares, rectangles, triangles, hexagons, etc. easily and accurately. Each is marked with measurements in a grid-like pattern to make measuring a snap.
Some rulers come with evenly-spaced slots built in. You can insert your rotary cutter directly into the slot and move left or right through the remaining slots to cuts evenly spaced strips without ever moving either ruler or fabric.
There are also rulers that feature curved and arced markings to help you construct fun shapes and circles.
As you grow and experiment as a quilter, you may acquire a collection of rulers that perform different functions.
Sewing Scissors
A good, sharp pair of scissors is another necessary item that every quilter needs. You may not use them to cut much fabric, but for trimming “dog ears” and clipping corner seams, they’re vital. You’ll need a second small pair for trimming threads.
Once you purchase a good pair of sewing scissors, be sure not to use them on anything but fabric or they’ll become dull before their time.
There are many different ways to cut fabric for quilting. Let me show you the traditional way first.
While the traditional way of cutting fabric for quilting is the most used by quilters and is pretty straightforward, it is not always the most accurate or efficient method. There are other ways to cut fabric that can save you time and provide more precise results. For example, many quilters use a die-cutting machine like AccuQuilt to create perfect shapes every time.
Ultimately, the best way to cut fabric for quilting is the method that works best for you and your needs. If you are just starting out, traditional methods may be more suitable. But as you become more experienced, you may find that other methods are better suited for your quilting projects.
Positioning Your Quilt Fabric for Cutting
Learning how to fold and position your fabric on your cutting mat is vital.
Unless your pattern says otherwise, you’ll want to cut your fabric on the straight grain. This minimizes any stretching and makes your quilt squares or quilt strips much easier to work with. To understand grain, it’s good to have an idea of how fabric is made.
- Warp threads run lengthwise through your fabric.
- Weft threads are interwoven through the warp threads at a perpendicular angle.
You may cut along the warp or the weft of the fabric and still be on the straight grain. However, if you cut diagonally, or at even a slight angle, your quilt pieces will be off-grain. This could cause them to stretch during sewing. As a result, your quilt blocks and your finished quilt may not be square.
✅ Related tutorial: How to square up fabric
This is why it’s so important to understand how to place your fabric on the cutting mat for cutting.
Proper Way to Fold Quilt Fabric for Cutting
To cut larger pieces of fabric, such as one yard or bigger, you’ll need to fold them to fit your cutting mat. The right way to do this is to bring both selvages together.
One of the most important things to keep in mind when cutting fabric is the grainline. The grainline runs parallel to the selvage edges of the fabric, and it determines how the fabric will behave once it’s been cut.
If you cut along the grainline, the fabric will remain stable and won’t stretch. However, if you cut against the grainline, the fabric may shrink or become distorted. For this reason, it’s important to take care when aligning the fabric before you start cutting.
If you’re unfamiliar with the selvage edge, it’s simply a fancy word for the tightly woven edge of your fabric. The selvage edge often looks different from the rest of the fabric. It may lack dye or include lettering that details the name of the pattern, the manufacturer, and the designer.
There’s a selvage edge down each side of the fabric that’s been newly cut from the bolt. Fold the fabric in half lengthwise bringing the two selvages together. You’ll end up with a fold that’s on-grain (well, most of the time, there are exceptions).
You must make sure that the folded edge is exactly parallel to selvages and lies flat without any “waves” or pleats.
Slightly press the fold so it stays completely flat on the cutting mat. Place the fold closest to your body on the cutting mat. This means the selvage edges will be at the top of the fabric.
If your cutting mat is not very big you might need to make another fold again and smooth it out so you will have to cut 4 layers of fabric at once. So fold the fabric in half lengthwise again. But this time you have to bring the first folded edge to the selvages so that the second fold is exactly parallel to the selvages and the first fold.
Take your time to line up the fabric correctly before making any cuts.
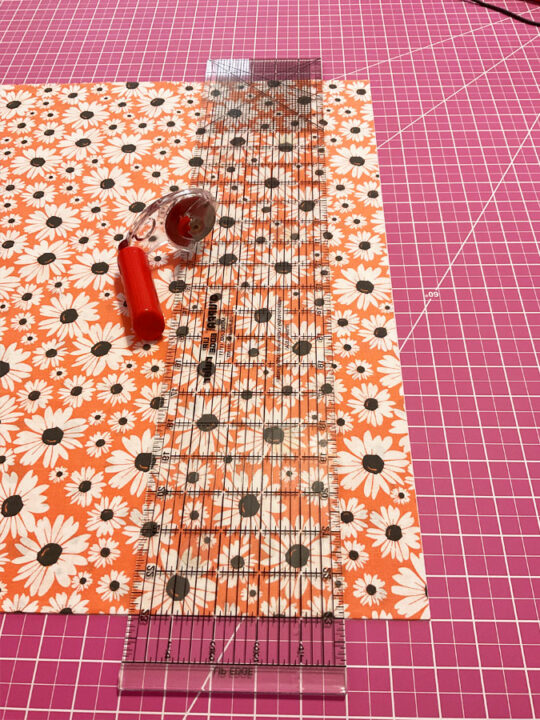
Take a ruler and place it onto the bottom fold (closest to you) and line it up with the line on the bottom of the ruler since we have to cut a perfect 90-degree angle.
Once your fabric is neatly pressed, folded, and positioned on your mat, use your cutting mat’s markings and acrylic ruler to measure and cut your strips. Even if your pattern calls for squares or rectangles, you’ll often cut strips of fabric first, then cut the strips into the smaller pieces needed.
How to Keep Your Acrylic Ruler in Position to Accurately Cut Fabric for Quilting
Your ruler may want to slip and slide once you have it in position, but it’s important to keep it firmly in place. There are several solutions on the market to help with this. They include:
- Fabric Grippers — These are small, adhesive dots that stick to the underside of your acrylic ruler to keep it from sliding. They’re similar to the gripper dots on the bottoms of your bedroom slippers. You can remove or reposition them easily, and they won’t harm your fabric or leave sticky residue on your ruler.
- Ruler Handles, Grippers, or Knobs — They’re called by different names, but they all perform the same function. These easy handles adhere to the top of your acrylic ruler to give you a convenient grip while cutting.
- Weights — While there are such things as pattern weights that you can buy to place on top of your ruler when cutting, you can just as easily recycle a 4- or 5-pound weight from your home gym. Place it at the far end of your ruler to keep the ruler from sliding left or right while cutting.
How to Cut Fabric Straight with a Rotary Cutter
Once your fabric is folded and positioned correctly, use the lines on your cutting mat as a guide and make the actual cuts with a rotary cutter. Hold your cutter perpendicular to your fabric and place it along the edge of the ruler. Carefully begin your cut at the fold closest to you and cut away from your body, toward the selvage.
It may take some practice to get the cutting pressure just right, but if you’re using a new blade, it should take only one pass-through to completely separate your strip from the rest of the fabric. This leaves a clean, straight edge that’s easy to piece and sew.
If you notice problems with frayed edges or wonky cuts, I’ve put together a few tips that may help:
- Place your cutting mat on a flat, sturdy, uncluttered surface that’s large enough to accommodate it. Place it at counter-height so cutting is easier on your back.
- Make sure your rotary blade is sharp and that only one blade is installed. Blades often stick together in the package, making it easy to accidentally install two blades. This will chop the edges of your fabric into ruins.
- Safely discard blades that become damaged or dull. Tape them inside the original packaging or inside two pieces of cardboard to prevent accidental injury.
- Don’t try to cut too many layers at once. A general rule-of-thumb to remember is that 28mm cutters can handle two layers, 45 mm blades can handle 4-6 layers, and 60 mm blades can handle eight layers at once.
- Use even pressure when cutting.
- Stick to the same brand of ruler throughout a project. Often, grid lines vary slightly from brand to brand.
- Always count twice before cutting once.
The more you use your rotary cutter, acrylic ruler, and cutting mat, the more precise your work will become. These tips will help you fine-tune your process.
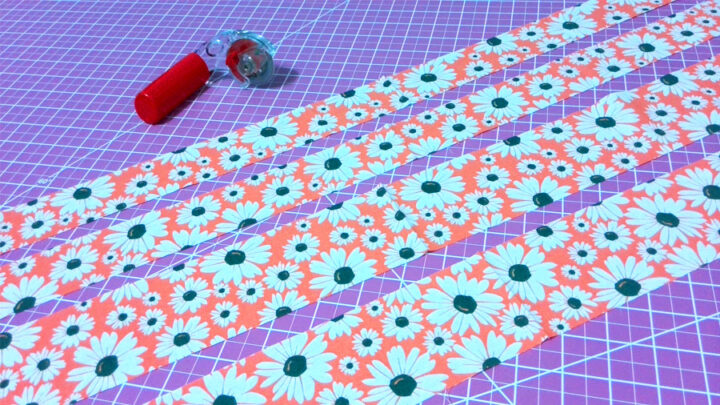
How to Cut Perfect Strips
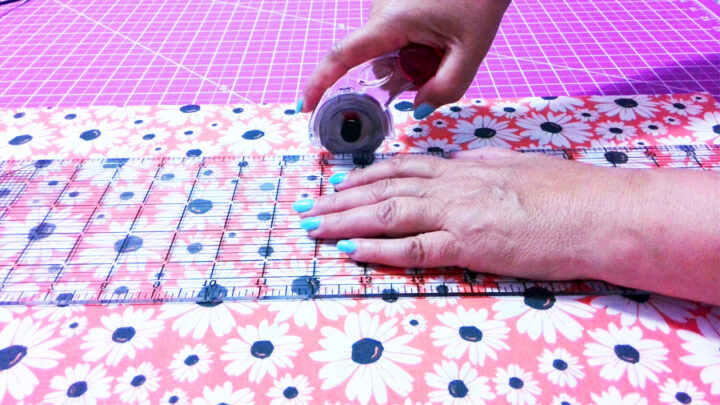
When cutting fabric strips, it is important to line up everything in order to get a straight, clean cut. To do this, first, line up the fabric with the markings on the cutting mat. Then, place the ruler on top of the fabric, making sure that the ruler is lined up with the vertical and horizontal lines on the cutting mat.
The markings on the ruler will help you to measure the width of your cut. Once you have measured the width of your cut, carefully slide the blade of the rotary cutter along the edge of the ruler to make your cut.
Cutting perfect quilt strips should come easy if you’ve squared your fabric, folded it accurately, and positioned it with the fold close to you on the cutting mat. Perfect strips require a cut that is at an exact 90-degree angle to the fold. By keeping this portion of the fabric next to you, you can make sure your angle is crisp and your cut is clean.
However, if you lean a little to the left or right, your strips will not be straight in the middle.
The blades on a rotary cutter are incredibly sharp, so you’ll want to take precautions to avoid injuries. One of the most important safety tips is to always push the rotary cutter away from your body as you cut. In addition, be sure to keep your fingers well clear of the blade. You’ll want to hold the cutter in your dominant hand. Then, use your other hand to hold the ruler as you cut. It’s important to apply even pressure as you cut.
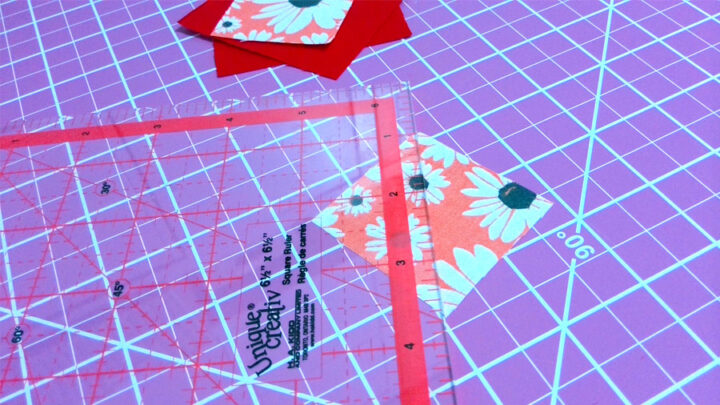
Cutting Quilts Squares Accurately
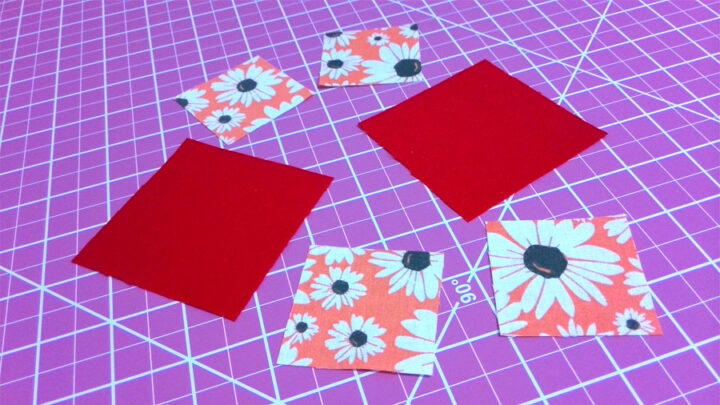
Perfect squares often begin with perfect strips. Place the strip on your cutting mat so the long side is to your right, and then use a ruler to mark off increments to the desired square size. For example, if you are cutting 2″ squares, you would move the ruler over 2″ each time you make a cut.
If you find that you’re having difficulty aligning the ruler correctly, try using more than one point of reference on your cutting mat. This will help you keep the lines straight and ensure that you’re cutting accurate squares. Just remember to move the ruler slowly and carefully to avoid making any mistakes.
If you’re cutting a lot of fabric squares, a specialty ruler can help make the process faster and more accurate. Look for a ruler that’s specifically designed for cutting squares. These rulers have measurements printed directly on them, making it easy to see exactly where to cut.
How to Cut Triangles for Quilting
Triangles with 90 degrees angles are very easy to cut from squares. You can cut half-square triangles or quarter-square triangles. Start with a square piece of fabric and cut it along the diagonal. This will give you two identical triangles. After that, you can cut these triangles in half again making 4 quarter-square triangles. Just be sure that all of your starting squares are the same size.
But 60º equilateral triangles for quilting are tricky to cut because you either need to use a special ruler that’s in the shape of a triangle, or you can use your regular acrylic ruler if it has the right markings.
Equilateral triangles can be used to create a wide variety of designs, from traditional pieced patterns to modern improvisational quilts. I recommend checking out a tutorial by Alanda Craft. In it, they break down three different methods for cutting triangles and provide clear step-by-step instructions and photos to help you get the perfect shape every time.
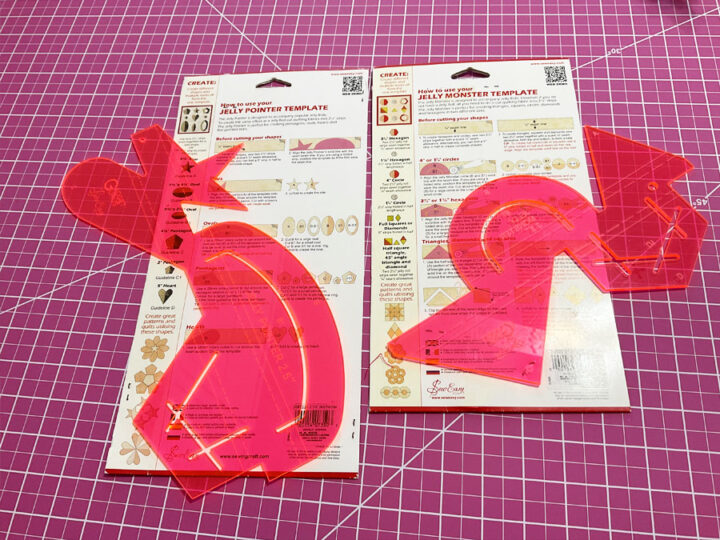
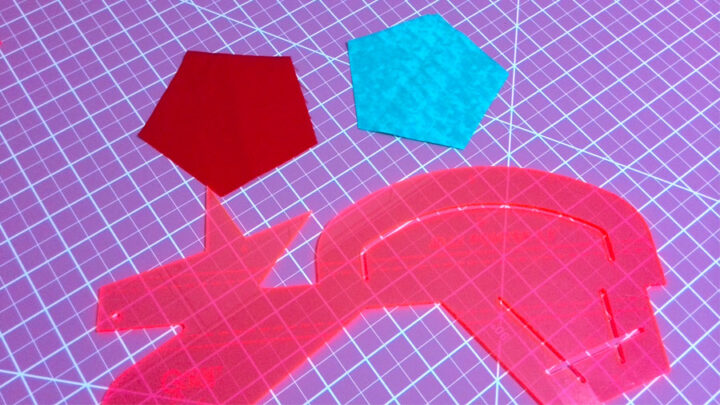
Cutting Diamonds, Pentagons, and Hexagons
To cut diamonds, pentagons, and hexagons, you’ll need a template. You can make the template yourself, for example, you can find clear instructions on how to make a hexagon template in this tutorial by Geta’s quilting studio. But I prefer to use a special ruler or a cutting machine.
You can buy specialty rulers to make different shapes from companies such as SewEasy.
SewEasy is a company that designs and sells the creme-de-la-creme of sewing supplies, including acrylic rulers that let you cut out everything but the kitchen sink with startling accuracy. SewEasy is Australia-based and has been manufacturing superior sewing supplies since the 1980s. You may want to check out their fascinating product line, whether you’re new to quilting or an experienced pro.
I have a few of these rulers and they are so easy to use.
In conclusion: Learning how to cut quilt fabric accurately may take a little time and practice, but it’s a skill you’ll use over and over again throughout every project. And the more you practice, the easier it will become to make swift, accurate, and efficient cuts that generate beautifully sewn blocks. We hope this tutorial on cutting quilt pieces gets you started.
Did you find this tutorial helpful? If so, save this pin (see below) on your sewing board so you can come to this tutorial later when you need this information on how to cut fabric for quilting, and follow me on Pinterest for more tips, tutorials, and inspiration!
latest posts
- What Do You Call a Person Who Sews? I Asked My Readers and Got 1,408 Opinions
- DIY Round Purse: PDF Sewing Pattern and Detailed Instructions
- Mini Wonder Clips By Clover: Useful Sewing Tool Or Just Another Notion?
- Non-Slip Grips For Quilting Rulers: A Small Notion With A Useful Job
- Fabric Eraser for Sewing: What It Removes and When to Use It
- What Is The Best Thread For Sewing Machine Projects? Let’s Find Out!
- Butterfly Quilt Block Tutorial – Foundation Paper Piecing
- How To Sew Quilt Squares So The Corners Match
- Sewing With Fork Pins: How They Help With Pattern Matching, Slippery Fabric, And Seams