What Sewing Lessons Don’t Tell You About Fabric — But Should
Fabric can be frustrating in ways no pattern ever warns you about. It frays when you least expect it. It shrinks after you thought you handled that step. It stretches, twists, fades, or suddenly refuses to behave — even when you follow the instructions carefully.
This guide is not about the usual advice you see everywhere. You won’t find reminders to “wash before sewing” or “press your seams.” You already know that. These are the quieter fabric lessons — the ones sewing tutorials often skip — but the ones that can save real time, real fabric, and a lot of frustration.

If you’re new to sewing, these tips help you avoid common mistakes before they happen. If you’ve been sewing for years, you’ll probably recognize a few “oh, that’s why” moments. Either way, this is about understanding how fabric really behaves — so your projects turn out the way you expect, not the way fabric decides on its own.
Tip 1: The Secret Life of Fabric Grain — Before You Cut, Check It
Here’s the tip: Always check and correct your fabric’s grain before cutting. Skipping this step is one of the most common reasons handmade garments hang oddly, twist after washing, or don’t fit the way they should.
Most tutorials tell you to “cut along the grainline,” then move on. But they rarely explain what happens when the grain is even slightly off — or how easily that can happen.
Even a small distortion can throw off your whole project.
Here’s what can go wrong when you skip checking grain:
- Garments twist at the side seams or hems dip unevenly
- Seams creep forward on the body
- Curtains refuse to hang straight no matter how carefully you pressed them
- Bias-cut pieces stretch out of shape before you’ve sewn a single seam
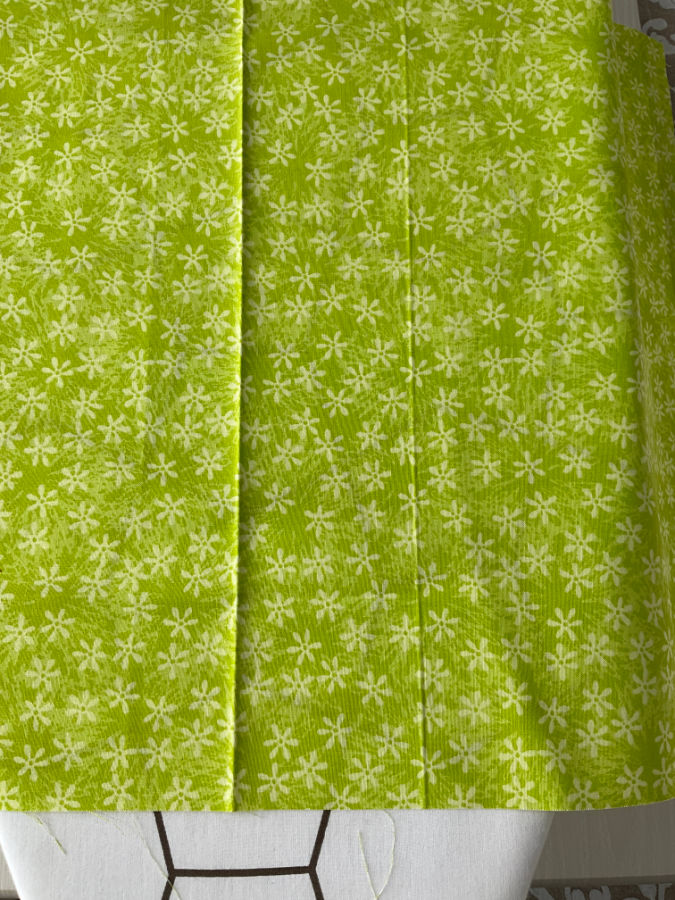
Find the selvage. Position the pattern’s grainline so it runs parallel to the selvage. For this – measure from the pattern grainline to the selvage at the top and bottom. Those distances must match. If they don’t, the pattern is off‑grain.
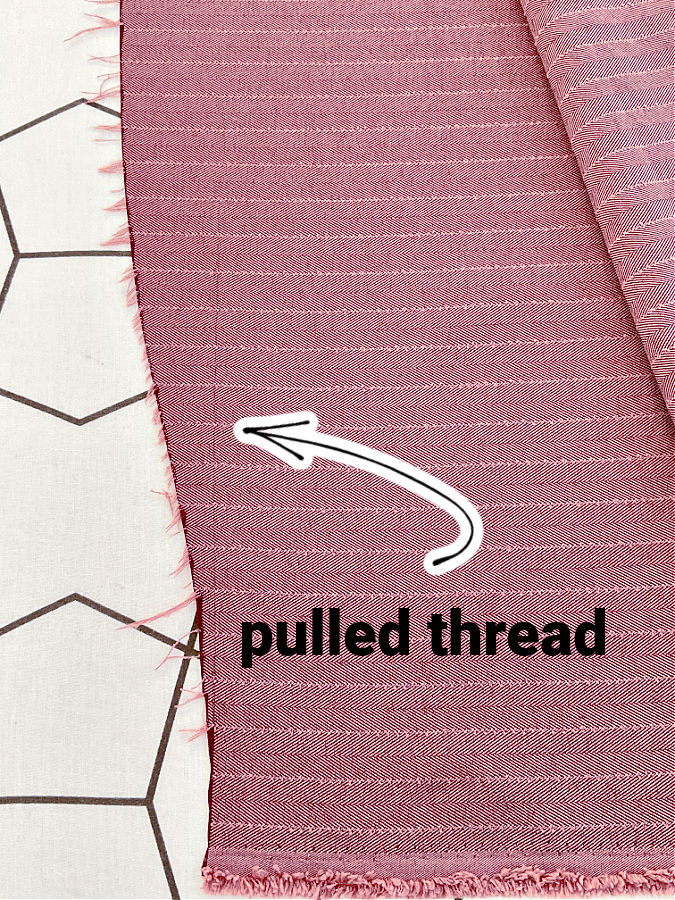
Often you need to reset the fabric’s alignment. Pull a thread across the width of the fabric at one horizontal edge. You’ll see a pucker where the thread moved. Cut along that line for a true cross-grain edge. What it gives you is orientation. Think of the pulled thread as setting the compass. It takes two minutes and prevents hours of frustration.
If you’re folding the fabric to cut, make sure the fold runs on the lengthwise grain (parallel to the selvage), and the torn or thread-pulled edge runs across the fold at a right angle.
✅ Related tutorial: How to square up fabric
Bias cutting needs even more attention. Bias is cut at a 45° angle to the straight grain. That means both your cross-grain and lengthwise grain must be accurate first. If either one is off, the 45° line will not be true — and your lovely bias-cut neckline might stretch into a wobble after pressing.
To cut on the true bias:
- Use a quilting ruler or clear square to mark a 45° angle from your freshly corrected edge.
- Then lay your pattern piece along that line, following the bias marking exactly.
✅ Related tutorial: How to cut fabric on the bias
One more thing: grainline is flexible in quilting — sometimes
In small patchwork pieces, grain isn’t critical. The quilting stitches will stabilize them. So don’t stress about perfect alignment for tiny squares or triangles.
But grain does matter for:
- Bindings — Bias binding must be cut accurately or it’ll warp, especially after washing.
- Backing fabric — Straight grain helps you avoid puckers and waves.
- Wide borders — Off-grain borders can look wavy or buckle at the edges.
So remember the tip: check grain before cutting. Especially for garments, home decor, and anything bias-cut.
✅ Related tutorial: How To Cut Fabric Straight | 8 Easy Ways Explained
Tip 2: Pre-shrinking Isn’t Always Washing
Here’s the tip: Pre-shrinking fabric doesn’t always mean tossing it in the wash. Some fabrics — especially delicate ones like fine wool or silk — shrink with steam alone. If you skip this step, the fabric will shrink while you sew. Right there at your ironing board, in the middle of construction.
Let me give you a real example. I had a gorgeous thin wool blend — silvery grey, soft, with a little elastane. Perfect for tailored pants.
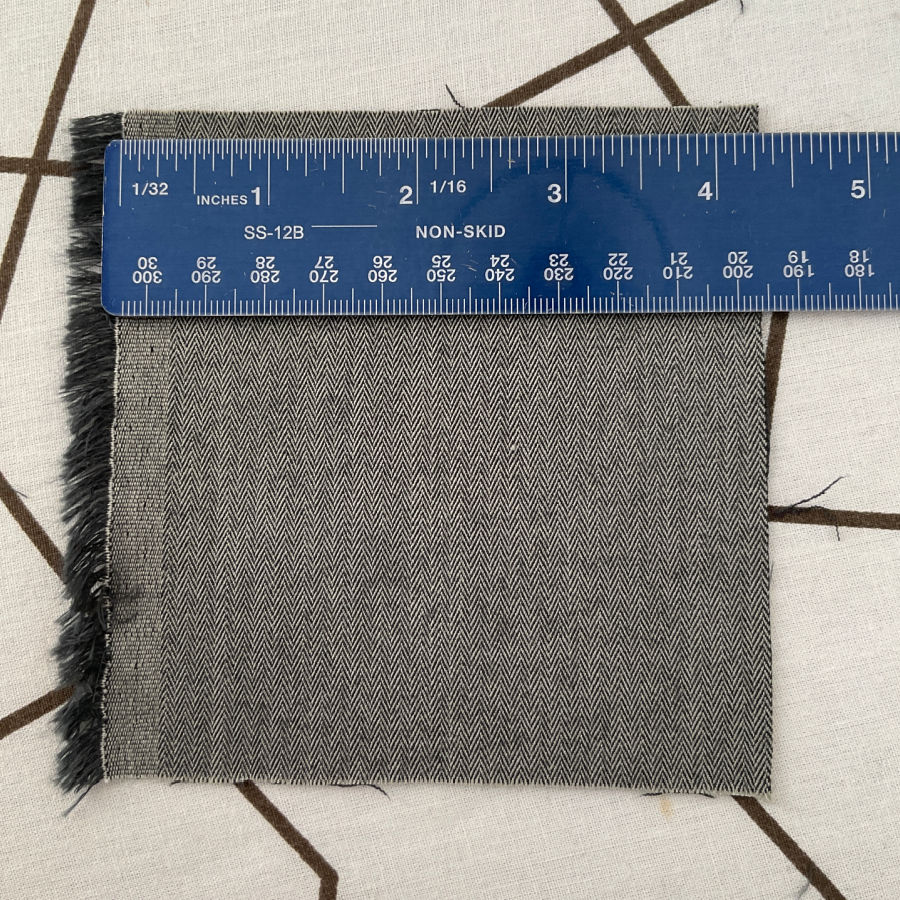
Wool can’t be pre-washed, so I steamed the fabric instead. Before pressing the full yardage, I cut a 4.5″ test square.
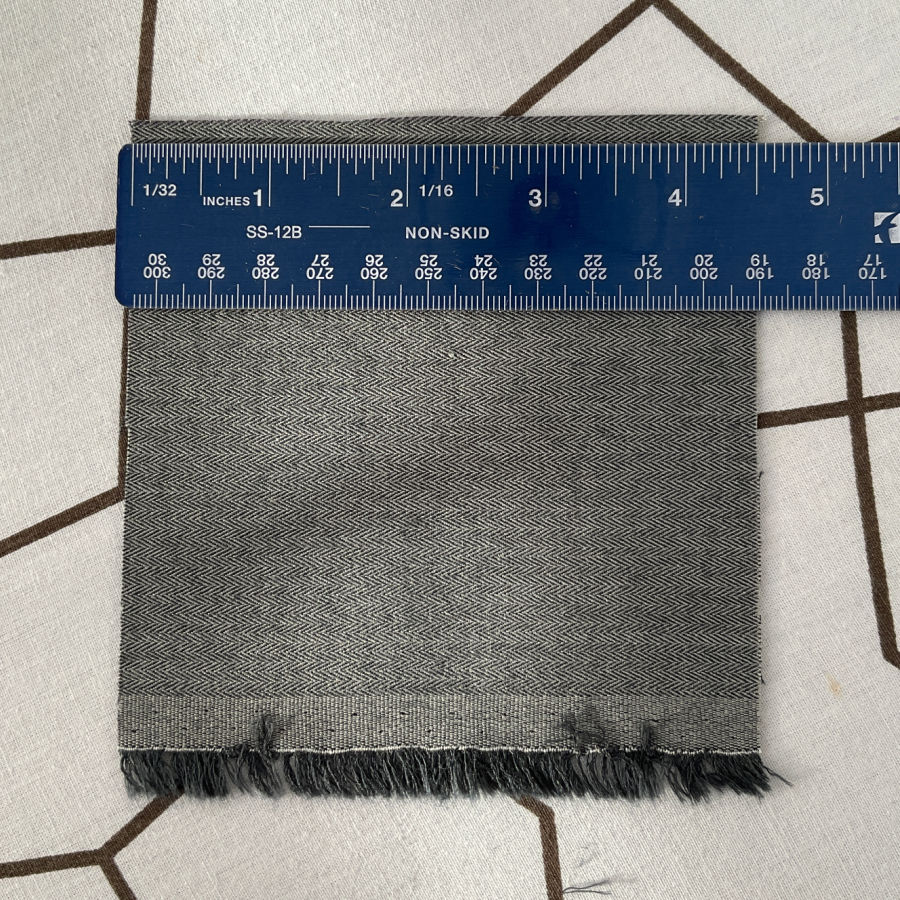
After steam pressing, one edge stayed 4.5 inches (the one parallel to the selvage). The other side? It shrank to almost 4.25″. That ¼” loss on a test square. Multiply it across pant legs.
Now picture this: I cut all my pant pieces from unshrunk fabric, thinking I was being careful. Then I start sewing, pressing every seam as I go — like I always do. But with every press, the pieces would shrink.
The result? The pants would keep getting smaller as I worked. Seam by seam, press by press, the fit would shift. By the time I finished, they’d be too tight — or not wearable at all. All that time, effort, and careful sewing… wasted.
That’s exactly why I steam wool fabric now before I cut, especially for anything tailored or shaped. Once you’ve seen your hours of sewing turn into a garment you can’t wear, you don’t forget.
That’s the kind of mistake you only make once.
✅ Related tutorial: Prewashing Fabric: Is It A Good Idea?
How to pre-shrink fabric without pre-washing
Some fabrics can’t be washed. But they still need to be pre-shrunk.
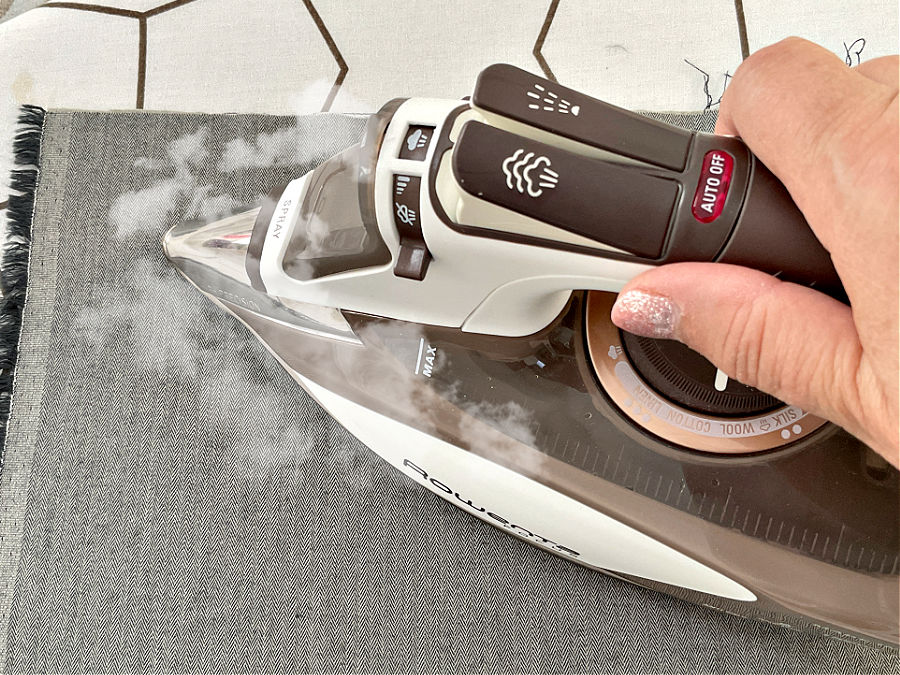
- Steam press with your iron. Set your iron to full steam. Press across the fabric in small sections.
- Don’t use a pressing cloth. For pre-shrinking, I’ve found pressing cloths get in the way. They hold back steam and leave some areas less shrunk than others.
- Always press on the wrong side. Some wools can get shiny or develop pale streaks if you iron directly on the face side. But pressing from the wrong side usually prevents this. Test a scrap first, of course.
- Spritz and rest: Lightly mist the fabric with water and let it relax flat for several hours. This works well for fabrics that shift or crinkle under heat.
Note: Some of the links on this page are affiliate links. This means I will receive a commission if you order a product through one of my links. I only recommend products I believe in and use myself.


When not to pre-wash
Avoid the washing machine for fabrics like:
- Wool or wool blends
- Natural silk
- Anything with a sheen, metallic threads, or special surface finishes
- Thick, heavily woven, or treated with sizing and finishes home decor and curtain fabric
Washing can distort the fabric, felt the fibers, or dull the finish. Steam pressing keeps the structure but removes the risk.
One quick check can save a whole project. Cut a 4″ or 5″ square, press it with steam, and measure again. If the size changes, you must pre-shrink the full piece before cutting. Otherwise, the fabric will shift while you sew — and your finished item won’t match the fit you planned.
If the test square doesn’t shrink? That means the fabric is stable under steam. You can go ahead and cut your pattern pieces without pre-shrinking the whole yardage. It’s still a good idea to give the fabric a gentle overall press, but you won’t need to worry about shrinking during construction.
Tip 3: Fabric Has a Memory
Here’s the tip: Fabric remembers everything you do to it — folds, creases, even where you poked it with pins. And some fabrics hold a grudge. If you press a sharp crease in the wrong spot or leave pins in too long, that mark can come back to haunt your finished project.
You might not notice during construction. Everything seems smooth under your hand. But then you press that final seam, admire your work — and there it is. A deep crease across the front, baked in like a scar. Or a row of tiny pinholes across silk that suddenly looks like it’s been pierced with a fork.
Folds that won’t let go
Some fold marks seem determined to stick around, especially if the fabric has been folded for months. These usually show up right across the center of your project — the exact spot you don’t want attention.
Here’s how to deal with them:
- Steam and press — don’t iron hard. Use lots of steam and a light touch to relax the crease.
- Spritz with a vinegar-water mix. Try 1 part white vinegar to 3 parts water in a spray bottle. Mist lightly, then press with a dry iron.
- Use fabric-safe wrinkle releasers or seam relaxers. Some fabrics respond well to commercial sprays.
- Press from the wrong side. If the crease still shows after pressing the back, place a damp cloth between the iron and fabric and hold for a few seconds.
You’re not “ironing out” the crease. You’re re-training the fibers. Think gentle and persistent.
✅ Related tutorial: How to Get Rid of Stubborn Wrinkles and Creases
Pin holes that won’t close
This is especially common with silk, taffeta, satin, and faux leather. Once pierced, the hole doesn’t always bounce back.
How to avoid permanent pin marks:
- Never pin through the visible part of the fabric — especially not across darts, necklines, or front panels.
- Pin in seam allowances only.
- For very delicate or tight-weave fabrics, use fine silk pins.
- Use clips for leather and vinyl.
- If you must pin in a visible area, keep the pin time short — no long waiting sessions pinned up overnight.
You can try steaming a pinhole to relax it, but results vary. If the weave was tight or the fabric synthetic, that little hole may stay.
One more memory trick…
If you fold or bunch fabric pieces while sewing, they can develop set-in wrinkles or soft pleats before you’re even finished. Try to store in flat layers during construction — especially for garments, linings, and anything with interfacing.
Tip 4: One Side Is Usually “Right” — Even for Solids
Here’s the tip: Most fabrics have a “right side,” even if they look the same on both sides at first glance. That side might reflect light slightly differently, show a softer texture, or reveal a directional weave. If you don’t choose one side before you cut, your project might end up looking like a patchwork of almost-matching pieces.
This sneaks up on sewists when using solid fabrics — cotton twill, linen, wool suiting, or knits. It looks uniform until you’ve sewn the whole thing, stepped into sunlight, and suddenly your pieces don’t quite match.
How to find the “real” right side
- Hold it up in bright natural light. Angle it gently and look for shifts in texture or sheen.
- Feel both sides. One might be slightly smoother or more finished.
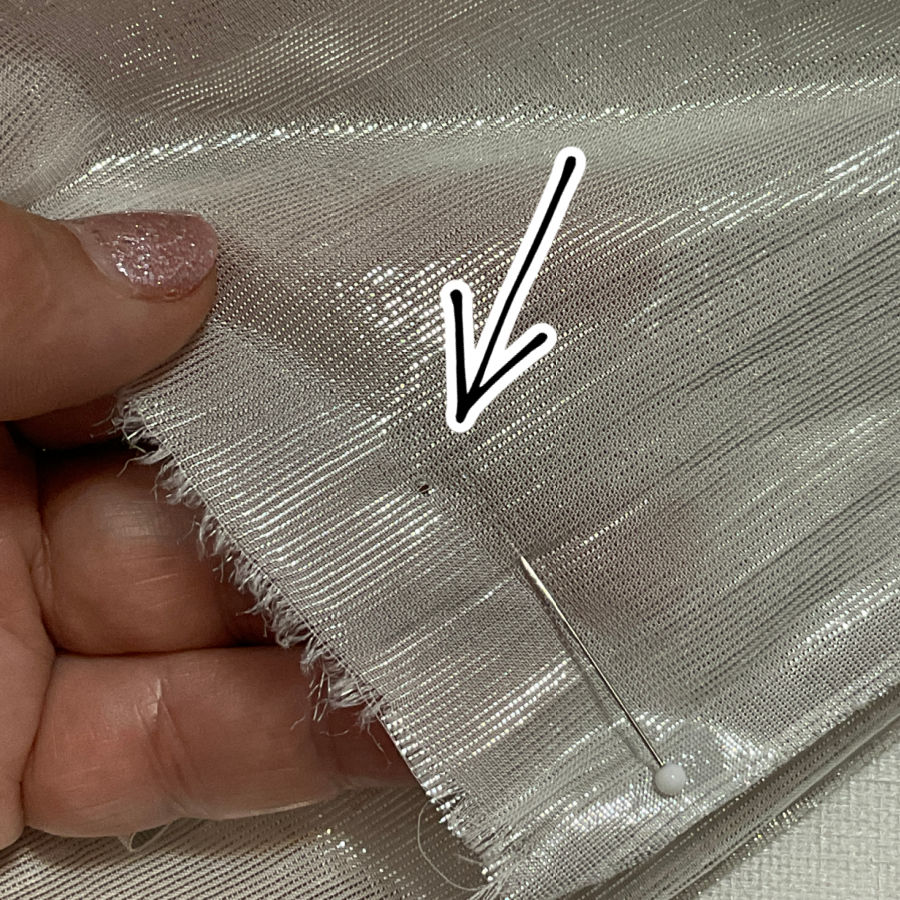
- Look at the selvage holes. The side where the holes are slightly raised is usually the right side. Feel it with your finger.
What if both sides really do look the same?
That happens too — just not as often as you’d think. Some fabrics are deliberately reversible — like double-faced wool, yarn-dyed chambray, or certain textured knits. In that case, pick the side you prefer. But pick just one. The human eye is excellent at spotting mismatches once the pieces are sewn together.
How to keep track as you cut

Use painter’s tape or masking tape to mark the right side of each cut piece. Stick it on the wrong side. It peels off cleanly and keeps your pieces organized as you sew.
Especially helpful when:
- You’re working with a subtle solid
- You’ll be cutting many mirrored pieces like sleeves, pant legs, or bodice panels
Takeaway: Fabric doesn’t need a bold print to have a right side. Light, weave, and texture all play a role. Choose your favorite side before cutting — and stay consistent — so your final project looks intentional and cohesive, not mismatched by accident.


Tip 5: Don’t Trust Store Cutting
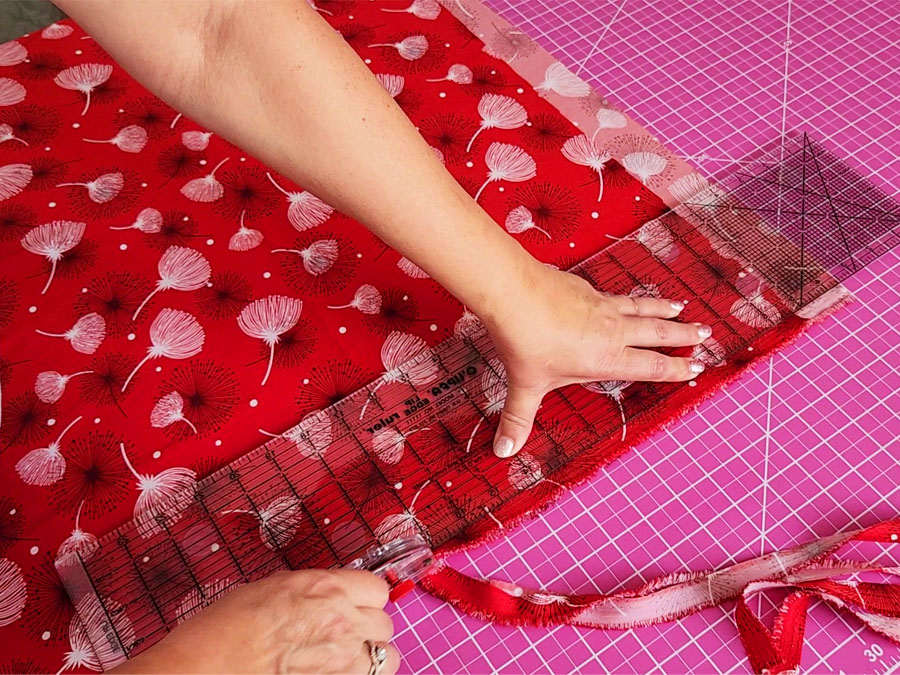
Here’s the tip: Always check and square up your fabric before starting your project — especially if it just came off the bolt. Store cuts are rarely straight, and they almost never follow the grain. If you start cutting from a crooked edge, you’re already behind.
Most fabrics are folded, rolled, pulled, and refolded so many times before you buy them that the cut edge is usually off. Sometimes by half an inch. Sometimes by more. The store clerk is doing their best (hopefully) — but the scissor snip at the cutting table is made for speed, not grain accuracy.
Here’s the edge of a fabric I bought recently. You can see how uneven the cut is — not even close to following the threads of the weave. It might look fine at first, but if I started cutting pattern pieces from that edge, nothing would sit straight.

How to “square up” your fabric before sewing
This takes less than five minutes and prevents hours of future headaches:
- Open up your fabric fully and let it relax flat on your work surface.
- Pull a thread near the raw edge. Tug gently and follow the pucker line it creates.
- Cut along that line — this gives you a true cross-grain edge to use as a reference.
This is your new baseline. It doesn’t mean you’ll line up pattern pieces to that edge — but it helps you fold, align, and measure properly from here on out.
✅ Related tutorial: How to square up fabric


Tip 6: Color Bleeds Don’t Always Show at First
Here’s the tip: Fabric colors can bleed — and sometimes they wait until after you’ve spent hours cutting, sewing, and pressing. That beautiful project may look perfect… until its first trip through the wash. Then suddenly the white lining turns pink, or the floral print leaks into the background fabric.
What makes it tricky is that color bleeding doesn’t always happen right away. Some dyes are slow to release. And some don’t bleed in cold water, but react later when heat or steam is involved.
This is especially common with:
- Dark or saturated reds, navies, blacks, purples
- Hand-dyed or artisanal fabrics
- Rayon, cotton batiks, and some quilting cottons
Test before you sew — it’s fast and free
Use the damp white cloth test before you trust that fabric:
- Wet a clean white cloth or cotton swab.
- Rub it firmly on the fabric, especially dark or saturated areas.
- If the cloth picks up any color, the dye is unstable — and likely to bleed later.
This takes less than a minute and tells you whether you need to take action before cutting.
If the dye bleeds, don’t panic
You can stabilize many fabrics with a simple soak:
- Fill a basin with cool water and add either:
- ¼ cup white vinegar (for most cottons and rayons)
- 1 tablespoon salt (for intense dyes or traditional printed fabrics)
- Soak for 15–30 minutes, then rinse well and dry
This won’t fix all fabrics — but it often sets unstable dye enough to prevent bleeding later.
When you finally wash your finished project…
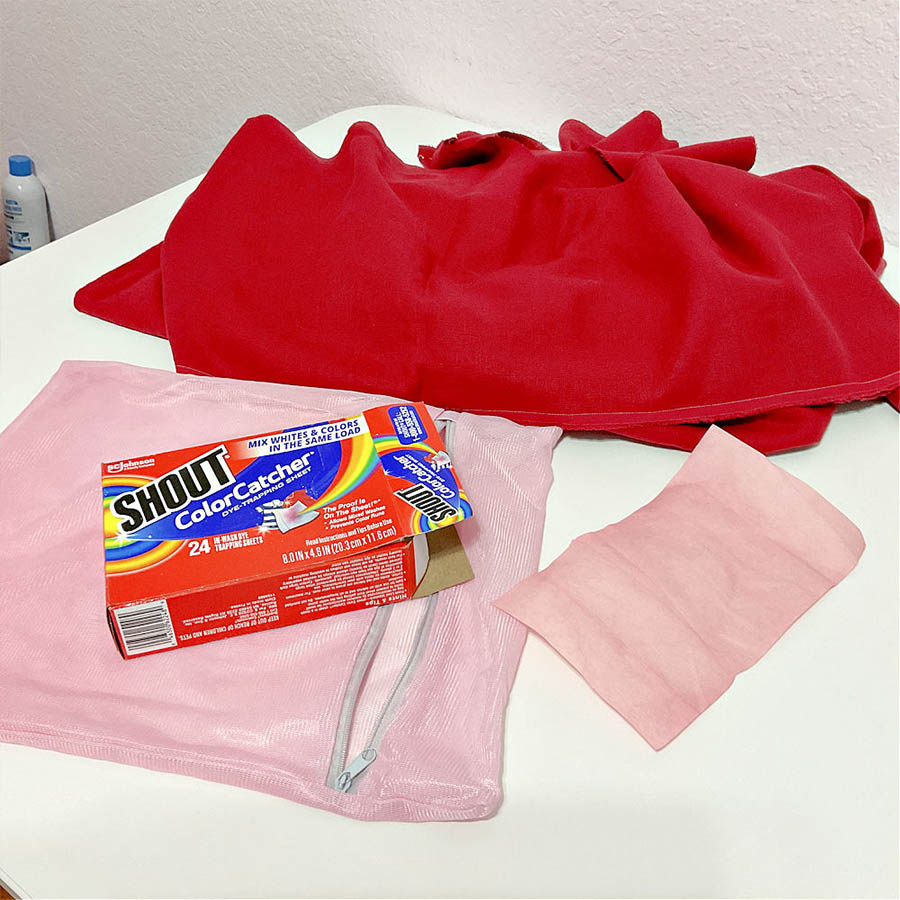
Use color catcher sheets in the wash. These little sheets grab loose dye before it can transfer to other fabrics. They’re not magic, but they’ve saved more than a few linings, collars, and quilt blocks from heartbreak.


Tip 7: Fabrics Can “Grow” While You Sew
Here’s the tip: Some fabrics quietly stretch during sewing — not dramatically, just enough to throw things off. You pin carefully, stitch gently, and still end up with necklines that gape or hems that ripple. That’s not you making a mistake. That’s the fabric slowly growing under pressure.
This happens most often with:
- Knit fabrics
- Bias-cut pieces
- Lightweight or drapey wovens (rayon, crepe, challis)
And it doesn’t always show up right away. Things look fine from the beginning — then suddenly the armhole feels baggy, or the side seams don’t quite match.
Some fabrics can shift even under the weight of your hand or the iron.
The result? One side grows while the other stays put. Or both edges stretch — but unevenly.
Some stitches stretch the fabric as you sew. Certain stitches are designed to move and stretch with the fabric — but they can also pull the fabric as they go, especially if you’re not careful.
For example, triple stretch stitch (also called straight stretch stitch). This stitch goes forward‑back‑forward on each step to build in strength and stretch. But all that back-and-forth motion means extra needle action in the same spot — and that can drag soft or stretchy fabric, especially over long seams.
If you use these stitches on knit hems, necklines, or side seams, you might notice the edge growing longer as you sew — even if you didn’t stretch the fabric yourself.
Easy ways to prevent fabric “creep”
You don’t need fancy equipment. These simple steps stop most growth in its tracks.
- Staystitch edges right after cutting
Use a short stitch (2.0–2.5 mm) about ⅛” inside the seam allowance. Do this especially for necklines, armholes, and curved pieces. - Sew with tissue paper or tear-away stabilizer under seams
This gives slippery or stretchy fabric something to grip. Tear it away gently after sewing. - Use spray starch for lightweight fabrics
A light mist adds crispness that keeps the fabric from relaxing under the presser foot.
✅ Related tutorial: How Fabrics Are Made – And Why It Matters


Tip 8: Be Careful with Selvage
Here’s the tip: Don’t trust the selvage to behave like the rest of the fabric. It might look tidy and stable — but it can shrink, pucker, or pull in a way that distorts your seams. And that neat-looking edge can quietly throw off everything from hems to quilt blocks.
The selvage is woven tighter than the rest of the fabric to keep it from fraying. That tight weave often reacts differently to pressing, steaming, and washing. Some selvages shrink more. Others don’t shrink at all. Some ripple when you press them. Others make the fabric pull toward them, so seams nearby pucker or curve.
✅ Related tutorial: Understanding Selvage Edge of Fabric and Its Role in Your Projects
So should you always cut it off?
For most projects — yes. Here’s when to definitely remove it:
- Garments: Always cut it off before using fabric near the edge. You don’t want any part of a seam or hem sitting next to a stiff, unpredictable selvage.
- Home decor: Curtains, cushions, and table linens look smoother and hang better when selvages are trimmed away first.
- Bias binding or facings: You don’t want tight selvage threads showing or distorting your edges.
Sometimes selvage can be useful. Some selvages have pretty printed edges or color dots. These can be saved for fun scrap projects, zipper pouches, or unique labels.
Tip 9: Fabric Is Affected by Humidity
Here’s the tip: Fabric reacts to the air around it — even when it’s just sitting quietly on a shelf. If your home is very humid or very dry, that environment can change the fabric’s texture, flexibility, and how it behaves when you finally take it out to sew.
This matters more than people think. I live in Florida, and in the winter, my air conditioner isn’t running — which means indoor humidity goes way up. That moisture doesn’t just hang in the air. It moves into the fabric, especially natural fibers like cotton, linen, wool, and rayon.
What high humidity does to fabric
- Fabrics feel slightly limp or sticky when you unfold them
- Edges ripple or stretch, especially on lighter cottons and rayons
- Mold and mildew can develop
Best fix? Use a dehumidifier. It can lower the moisture in the air and keep fabric from absorbing more than it should. If your sewing room is especially humid, this makes a noticeable difference.


You can also:
- Add silica gel packs to storage bins (they will need changing after a while)
- Avoid storing fabric near windows or exterior walls where condensation builds up
What low humidity does — hello, Canada in winter
When I am in Canada during the winter, the opposite happens. The air indoors is very dry — thanks to heating systems and cold outdoor temperatures. And the inside humidifier is never enough especially when temperatures are very low.
- Static electricity builds up fast. Fabric clings, jumps, and sometimes zaps.
- Folding is harder. Rayon, silk, and synthetics resist folding cleanly and shift constantly.
- Some fabric can feel brittle. They’ve lost moisture and structure.
In my daughter’s house, I keep a humidifier running. It doesn’t need to be high — just enough to bring the air back to normal. It helps fabric handle well and keeps the static from driving me crazy.
Tip 10: Fabric Is Affected by Light
Here’s the tip: Fabric doesn’t just fade from the wash — it can fade, weaken, or discolor just from sitting in the sun. If you store your fabric in a bright room, or by a window, or in a clear bin where light hits it regularly, the fabric can start to change — even if you haven’t touched it in months.
It happens slowly. But once it shows, it can’t be undone.
What light does to stored fabric
- Fading: The exposed side of a fold or bolt lightens, while the part underneath stays true — leaving you with uneven color
- Discoloration: Natural fibers like cotton or linen may yellow slightly under constant light
- Fiber damage: UV rays can weaken delicate fibers over time, especially silk and wool
You might pull out a gorgeous fabric you’ve saved for something special… only to realize the top layer looks bleached, and the rest doesn’t match.
How to store fabric safely
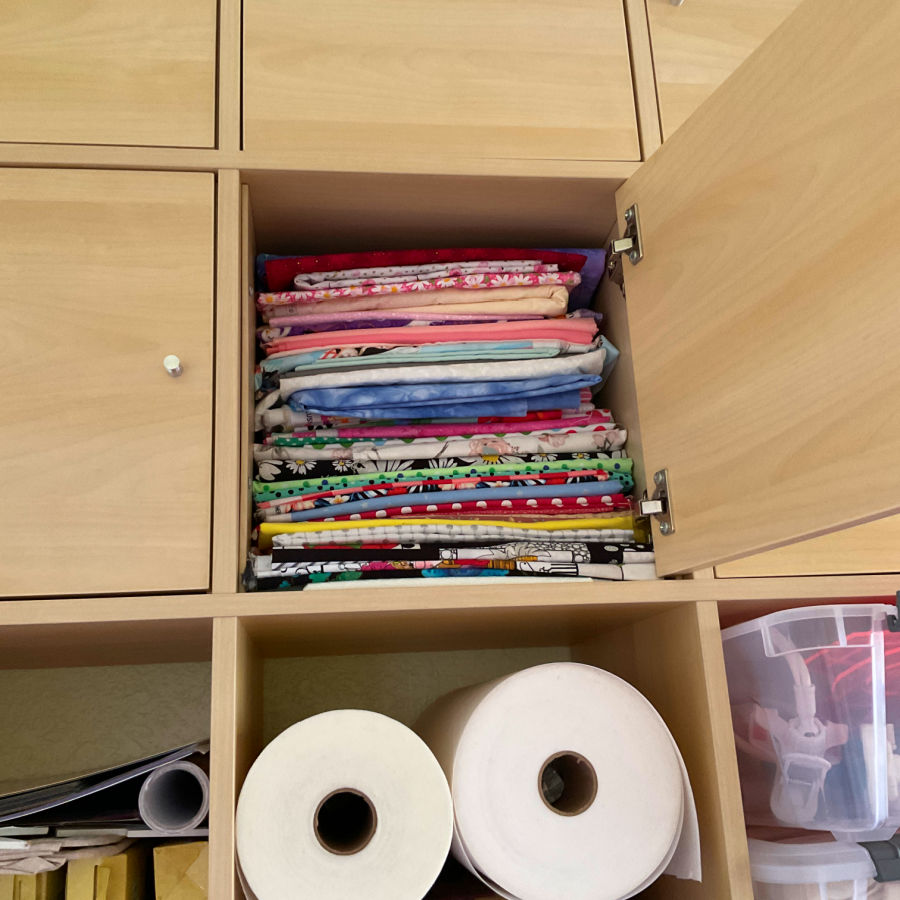
- Keep fabric out of direct sunlight. If your sewing space has bright windows, don’t store fabric right next to them — even if it’s folded neatly in a bin.
- Avoid clear bins for long-term storage. They let in light, which can cause fading even when the lid is closed.
- Cover open shelving. You can throw a cloth over your fabric stacks, use pillowcases, or store fabric in drawer units.
- Roll or rotate bolts occasionally. If you do keep fabric visible, flipping or rotating the stack now and then helps distribute the light exposure more evenly.
✅ Related tutorial: How To Store Fabric: Fabric Storage Ideas For A Sewing Room
Fabric likes a little darkness. The less UV exposure it gets, the more vibrant and strong it stays when you’re ready to cut and sew.
If this article gave you a few new ideas about fabric, you may want to save it for later. Pin the image below to your sewing board so you can come back to this tutorial when you’re ready to use it and follow me on Pinterest for more tips, tutorials, and inspiration!

latest posts
- 20 Sewing Tips You Didn’t Know 5 Minutes Ago
- Corset Pressing Board for Sewing: What It Does and How I Use It
- 7 Essential Tools and Settings for Sewing Denim on a Regular Sewing Machine
- That Purple Thang: 10 Smart Ways to Use This Weird Little Tool
- 20+ Reasons Your Sewing Machine Thread Keeps Breaking (+ Solutions)
- Dresden Plate Quilt Block: 4th of July Fireworks
- How To Sew Curves the Easy Way Using a Curve Master Presser Foot
- 30 Sewing Hacks That Turn Ordinary Items into Useful Sewing Tools
- Seam Allowances in Sewing Patterns: What They Are and How to Use Them