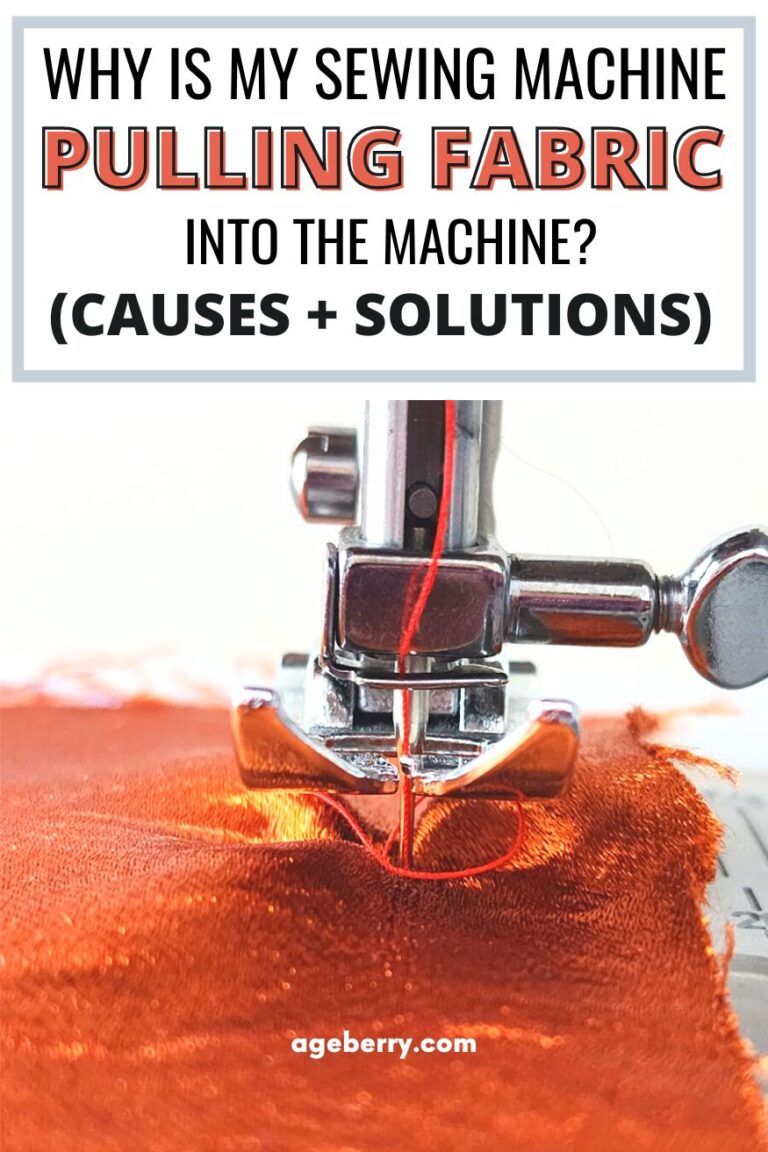
How To Hem Curtains: Your Total Guide
In this sewing tutorial, I will guide you through the process of hemming curtains with all the necessary considerations, available hem styles, and tips on how to hem curtains with or without a sewing machine. Also, I will discuss the most common curtain hemming mistakes to avoid.
You may think that hemming a curtain is a simple task, and it can be. But like most things, there is more than meets the eye, as experienced sewists will tell you!
However, the effort is more than worth it. One of the most satisfying feelings is admiring your own handmade curtains hanging in your home. It adds a personal touch and speaks to your unique style in a way no store-bought curtain ever could.

- How To Prepare Curtains For Hemming
- How To Measure Curtains For Hemming
- Marking The Hemline
- How To Cut Curtains To The Desired Length
- Folding And Pinning The Hem
- Different Hemming Techniques
- How To Hem Curtains Without Sewing
- How To Hem Curtains By Hand
- How To Hem Curtains With A Sewing Machine
- Common Curtain Hemming Mistakes
How To Prepare Curtains For Hemming
Before we start hemming, there’s prep work to be done. By properly preparing your curtains, you’ll ensure an accurate hem without running into common issues down the line.
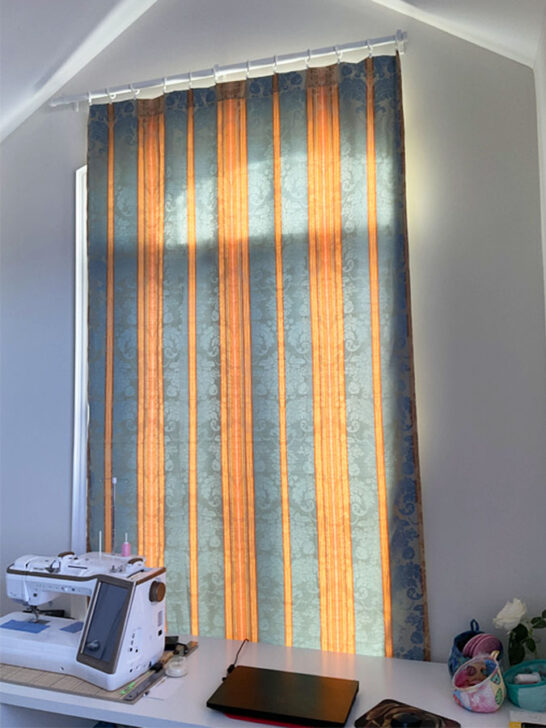
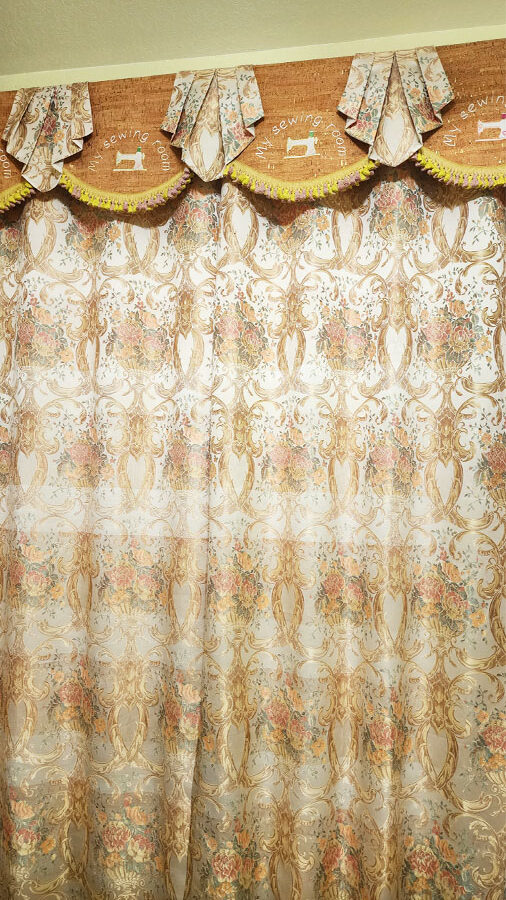
By the way, if you are looking for inspiration, I have an entire post with DIY curtain ideas for your living room and bedroom where I show the curtains I made for my own home.
Curtains Length
First, decide on your curtain length. Common curtain lengths (for store-bought curtains) tend to be 84”, 96”, or 108” (210, 240 and 275 cm respectively) depending on the window, but you can also find curtains 45”, 63” or shorter. Your DIY curtains, however, can be a custom length to best fit your space and I bet they will look better than the ready-made ones. I am not talking about designer curtains obviously.
Note: Some of the links on this page are affiliate links. This means I will receive a commission if you order a product through one of my links. I only recommend products I believe in and use myself.
You’ll also want to provide extra room for your hem, depending on which type of hem you choose. A typical hem will be between 2-4 inches but it can be bigger of course.
How Long Should The Curtains Be?
The length of curtains that you choose for your windows depends on several factors such as the height of your ceiling, the size of your window, and the desired effect you want to create. There is no one-size-fits-all answer to this question, as the length of curtains that you choose will depend on your personal preferences and the style of your home.
If you have high ceilings, long curtains can help to create a sense of grandeur and elegance in your room. On the other hand, if you have low ceilings, shorter curtains may help to make your room feel more spacious and open.
Curtains that just hit the floor, or are a half inch above the ground, are ideal for a chic, polished look. In my opinion, longer curtains are going to look better than shorter curtains, but that is a personal preference. Curtains that are two inches above the ground may look awkward and out of place. It is not difficult to determine which is better, all you have to do is hang the curtain and fold it (or pin it) until you get the look you want.
The size of your window is another factor to consider when choosing the length of your curtains. If you have a large window, you may want to choose longer curtains that will help to frame the window and create the desired effect. If you have a small window, shorter curtains may be more appropriate, as they will help to make the window appear larger and more prominent.
The desired effect you want to create is also an important consideration when choosing the length of your curtains. You can make a big statement by creating pooled or puddled curtains. To achieve this look, you’ll want an extra 6-12 inches of fabric past the ground. On the other hand, if you want to create a more casual look, shorter curtains that just cover the window can be a good option.
Choosing A Hem Style
Before you make your first snip, decide on your desired hem style. This will affect both how much you trim and which hemming method you use. For example, a double hem will require more length than a single fold or narrow hem.
The hem style that works best for your project will depend on your chosen fabric and desired effect.
Possible hem styles include:
Single Fold Hem
The most straightforward hem, a single-fold hem, is simply one edge of fabric folded over and sewn into place.
Double Fold Hem
The name gives the idea here: this is a single-fold hem that is folded one more time, hence the “double fold”. This style of hem is slightly more secure and has a more polished look since it hides the raw edge.
Narrow Hem
For sheer fabrics like organza, satin, and chiffon, a narrow hem can be useful. It has a small, neat edge that looks delicate – not bulky.
You can read more about the narrow hem in this article: Narrow hem tutorial: how to make a narrow hem using a Ban Roll tape.
Blind Hem
Nearly invisible, the blind hem is challenging yet effective, giving professional results to your work. You can achieve this by using a blind hem stitch, creating very small stitches on the opposite side of your curtain.
I have an entire post and video to show you how to sew a blind hem in this article: Blind hem foot: How to sew an invisible hem with a sewing machine. A blind hem foot is very useful and if you do not already have one (oftentimes it comes with the sewing machine), they are not expensive at all. Here are current offers at Amazon.
Serged Hem
A serged hem uses a serger to finish the raw edge of your fabric. While using the serger, the blade and threads trim and finish your edge for a seamless look. This is also called an overlock hem. You can use it if you don’t have enough fabric for your desired curtain length.
Embroidered Hem
An embroidered hem adds a decorative embroidery design to the edge of your hem. You can use an embroidery machine to create artful embellishments on your curtains.
If you’d like even more information on hemming along with best practices, I have a great resource for you: Hemming 101: A Guide To Different Types Of Hems.
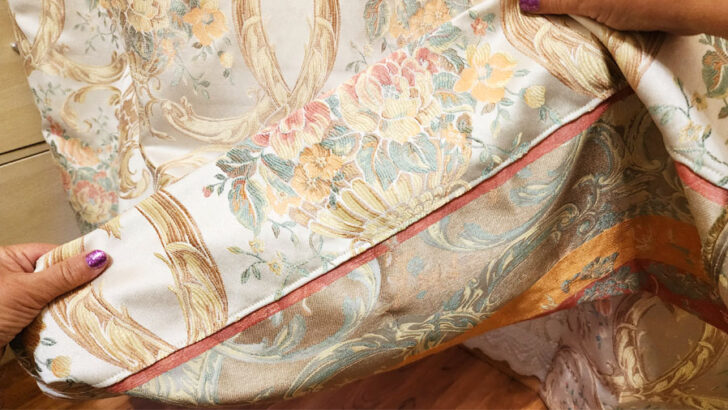
Consider The Fabric Of Your Curtains
One of the most important steps in how to hem curtains is considering your fabric. Sewing with different fabrics will affect both the hem you choose and the way you sew that hem.
Different drapery fabrics require different techniques and tools for hemming and sewing, and choosing the wrong ones can result in a poorly finished product.
For example, if you choose a lightweight sheer fabric for your curtains, you may need to sew a narrow hem that is perfect for lightweight fabrics. On the other hand, if you choose a fancier drapery fabric such as velvet or brocade, you may need to use a blind hem that is invisible from the front. Of course, you might end up having both, if you like (as I do) both lace curtains and heavy drapes.
For some medium-weight fabrics, you can choose a no-sew method using hemming tape. One of my curtains is actually hemmed this way and I described the process in my article How to Use Leonis Iron-on No-Sew Hem Tape.

But most curtain fabrics should be hemmed with a single or double-fold hem, which is a basic hemming technique that involves folding the fabric under itself and stitching it in place. This technique is suitable for a wide range of drapery fabrics, including cotton, linen, and polyester.
The type of fabric you choose can also impact the type of sewing tools you will need to use. For example, if you are working with sheer fabric, you may need to use a small size needle and a thinner thread.
If you are working with a fabric that is prone to fraying, you may need to use a serger/overlocker to finish the raw edges of the fabric before hemming.
Related tutorial – How To Stop Fabric From Fraying: 21 Proven Ways That Work In 2023
Needed Supplies For Different Hemming Methods
Before you start sewing, you’ll need to gather your supplies along with your curtains and corresponding thread. The exact supply list will vary slightly based on which sewing method you choose.
Supplies for a Hand Sewn Hem
- Measuring tape (Amazon current offers)
- Ruler or seam gauge (Amazon current offers)
- Fabric scissors (Amazon current offers, but I like this one)
- Pins
- Needle and thread
- Iron and ironing board
- Fabric marker
Supplies for a Machine Sewn Hem
- Measuring tape
- Ruler or seam gauge
- Fabric scissors
- Pins
- Sewing machine
- Bobbins
- Sewing machine needles
- Fabric marker
Supplies for No Sew Hem
- Measuring tape
- Ruler or seam gauge
- Fabric scissors
- Pins
- Iron and ironing board
- Fusible hemming tape
- Fabric marker
Should You Wash And/Or Iron Curtains Before Hemming?
There is no straightforward answer as to whether or not you should wash and/or iron them before hemming. It largely depends on the type of fabric the curtains are made from.
Curtains are usually made from drapery fabric which is more heavyweight and durable than other types of fabric. It’s typically treated to improve its durability and resistance to fading, staining, and mildew. Some drapery fabrics are also treated to improve their fire resistance.
It’s generally not recommended to prewash curtains, as doing so can wash out the chemicals that make the fabric durable. Also, heavyweight drapery fabric can be difficult to pre-wash, so prewashing may not be practical.
However, if you are working with lightweight curtains and are concerned about potential shrinkage, it may be a good idea to prewash the fabric to prevent having to redo the hem later.
Shrinking can be a concern with natural fiber drapery fabrics, such as cotton or linen, especially if they are not pre-shrunk before being made into curtains or drapes. Pre-wash them before hemming so any shrinkage is taken care of before you start hemming.
So, whether or not to pre-wash curtains before hemming largely depends on the specific fabric and your individual concerns. If you do decide to prewash lightweight curtains, be sure to follow the manufacturer’s instructions and use a gentle cycle to avoid damaging the fabric. You can read more about prewashing in this article: Prewashing Fabric: Is It A Good Idea?.
Most drapery fabrics can be ironed or steamed to remove wrinkles, but it is important to follow the manufacturer’s care instructions. Leaving any wrinkles could cause an uneven hem.
Should I Hang My Curtains Before Hemming Them?
You should definitely hang your curtains on their rod before hemming. This will ensure you get an accurate measurement and can trim and hem your curtains correctly.
By hanging the curtains, you can also check if they are parallel to both the ceiling and the floor. Even if the room is not perfectly straight or the rod is not exactly horizontal, small deviations of 1-2cm can be fixed before hemming by adjusting the curtains on the rod.
With hemming, accuracy is key. And the length of the curtain can look deceiving until you actually hang them in your space.
Hanging your curtains will also help you decide which curtain effect and hem choice you’d like to use.
How To Measure Curtains For Hemming
Measuring your curtains for hemming is quite time-consuming and, at times, tedious. But you’ll be happy you took the proper steps for a professional-looking hem.
Try to enlist the help of a friend or family member to make the process as smooth and accurate as possible because it can be difficult to hold the tape measure and read the measurements at the same time, especially if your window is large and you are measuring multiple windows.
Tools And Supplies Needed
To measure your curtains, first, gather these simple supplies:
- Measuring tape
- Ruler or seam gauge
- Pins
- Fabric scissors
- Marking pens
Now, get ready to measure, mark and cut your fabric.
Hang The Curtains And Then Mark The Hems
First, hang your curtains in your desired window. Decide where you want the end of your curtain to hit. Pull the curtains a bit towards the floor and fold the fabric at the desired length (usually where the fabric meets the floor). Insert a pin or two to fix the length.
Then insert pins at 4-6 inch intervals across the entire curtain panel.
Measure this hemline with a measuring tape or ruler, and mark your work using a fabric marker. Remember to account for any extra length needed, depending on your chosen hem.
For example, if you’re making a 2-inch, single-fold hem, your marked measurement should account for these extra two inches. When in doubt, a little longer is better than a little bit too short.
Be sure to measure each panel individually, as the length may vary slightly from panel to panel.
Once you measure, measure again! Make sure you have an accurate number.
Measuring Without Hanging
If you don’t want to hang the curtains, you can still measure them for hemming of course. To do this, measure the distance from the top of the curtain rod to the bottom of where you want the curtains to hang. This will be the approximate finished length of your curtains.
Why did I say approximate? Because this depends on the hanging mechanism. If your curtain has grommets, the top of the curtain goes above the rod. If you use rings and clips, the curtain starts well under the rod.
Note: Remember to measure from where you will hang your curtains, not from the top of the window. Most rods sit several inches above the actual window frame, so measure accordingly.
Lay the curtains flat on a table or the floor. Measure the distance from the top of the curtain to the desired finished length and mark the hem with pins.
Make sure your marked line measures correctly, all the way across your curtains. This is a necessary step for accuracy.
But I don’t advise you to measure your curtains without hanging them.
I had such a great feeling when I finally finished sewing a beautiful set of curtains for my second sewing room.
However, I made a mistake during the hemming process. In this case, the mistake was not hanging the curtains on the rod before measuring for hemming. Unfortunately, the curtains are now 1/2 inch too long, which means they touch the floor when closed and don’t look quite as nice as I had hoped.
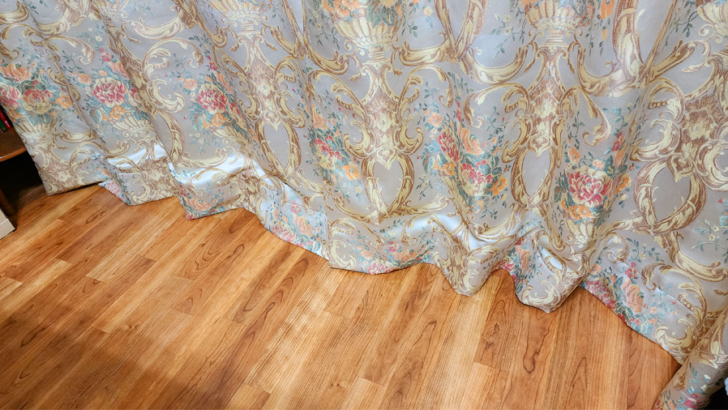
So if you are planning to hem curtains, always hang the curtains on the rod before measuring for hemming. This way you get a more accurate measurement and your curtains will fit perfectly once they are hung.
Tips For Getting Accurate Measurements
Here are a few tips to avoid common mistakes and get the most accurate measurement possible:
- Ensure fabric is lying flat without any twists (it’s better to do this on the floor), and use a measuring tape.
- Make sure that the hem is straight and even.
- Pin or baste your hem for an accurate measurement across the curtains.
- Measure multiple times with curtains hanging and laying flat.
- Iron your curtains before measuring to remove any wrinkles.
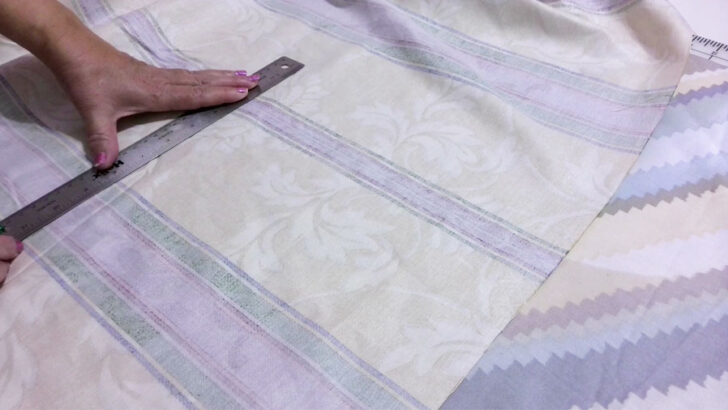
Marking The Hemline
The most common curtain hems range from 2 to 4 inches wide. Shorter curtains suit shorter hems and will most likely look more natural with a two-inch hem.
Long, heavy curtains may suit a longer hem, around 4 inches. This also depends on preference, design, and your choice of hem.
Some of the best tools for marking fabric are tailor’s chalk, a water-soluble pen, and a disappearing ink pen. These tools were tested on different drapery fabrics in various colors, and usually they don’t bleed, disappear mid-sewing, or stain the fabric when exposed to heat or steam from the iron.
I like to use this Frixion pen – a type of erasable pen that uses a thermo-sensitive ink that can be erased by the heat of an iron. The ink becomes invisible when exposed to heat without leaving any residue or marks. It really works!
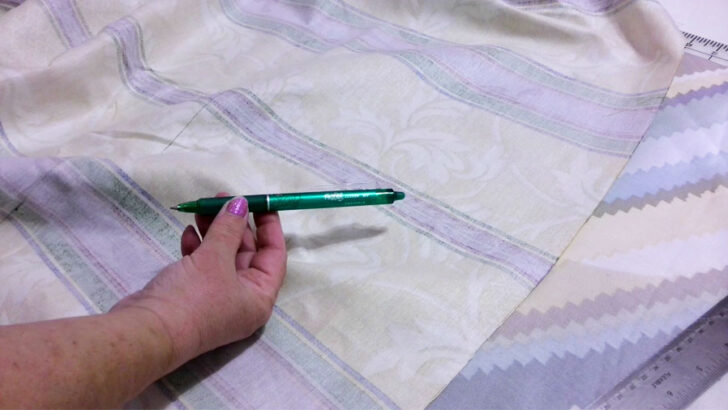
After you’ve marked the hem, you can take a ruler and connect the marks into straight lines. Make sure that the lines are straight and even, and that they match up with the other curtain panel if you’re hemming both panels. The lines should be clear and easy to see, and it will be easier for you to sew the hem in a straight line.
How To Cut Curtains To The Desired Length
To cut curtains to the desired length, you will need fabric scissors, a rotary cutter, or pinking shears if you are worried about your fabric fraying. It is important to use sharp cutting tools with a comfortable grip to ensure a clean cut. If you are working with heavyweight drapery fabric, you can even use electric scissors for cutting.
Lay your fabric out on a flat surface. With your marked line as a guide, make a straight cut with the cutting tool of your choice. Hold the fabric steady with one hand and use the other hand to cut along the marked line. It’s important to use long, smooth cuts and to avoid jagged edges. If your scissors are not cutting through the fabric easily or are leaving behind a ragged edge, they may be too dull and need to be replaced.
✅ Related tutorial: Cutting Tools For Sewing: The Ultimate Guide

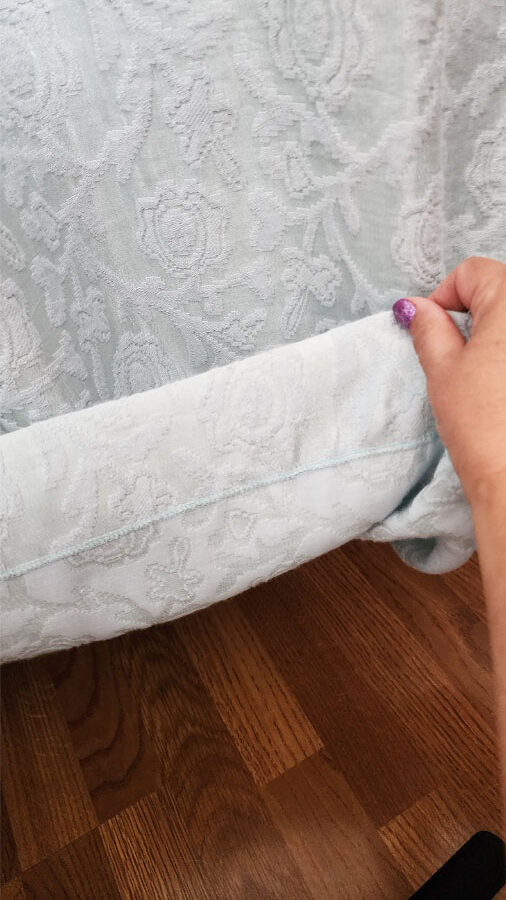
Folding And Pinning The Hem
Next, carefully fold your hem to its desired length. Use pins to mark the hem and keep it in place. Insert pins at 4-6 inch intervals across the entire curtain panel. Double-check your measurement throughout – the hem should be even all over. I also advise you to baste the hem in place, and take the pins out. Iron the hem before sewing.
Don’t rush this step, as it is important for accuracy and a polished, professional look. Do not skip pinning or basting.
It can be tempting to skip pinning or basting the hem and just press it with a hot iron. This may seem like a time-saving shortcut, but it can actually lead to some unwanted results when it comes time to sew the hem.
One common issue that can arise from not pinning the hem is puckering. Because of the length of the hem, a very small shift of the fabric in the beginning may have a large effect in the end. If the fabric shifts slightly when you stitch, this can result in puckering and ruin the look of your curtains.
Another issue that can arise from not pinning the hem is that you may end up with a hem that is not straight or even. This can also make your curtains look less than perfect and can be difficult to fix once the hem has been sewn.
If you want to get a neat fold that stays in place without pins, you can try using spray starch before pressing. However, this may not always be the best option and can still lead to issues when it comes time to sew the hem.
I also like to baste the hem to prevent the fabric from shifting during sewing. Basting gives me more control over the fabric alignment.
Different Hemming Techniques
There are three different techniques on how to hem curtains that I’m going to share today. You can sew by hand, sew by machine, or use an easy, no-sew method.
How To Hem Curtains Without Sewing
No-sew hemming can be extremely convenient; it’s much quicker than sewing, user-friendly for beginners, and a great solution if you don’t own a sewing machine.
For the no-sew method, you’ll need some kind of fusible hem tape like iron-on hem tape or Leonis tape. You can also use fabric glue.
I’ll discuss the pros and cons of this method.
Pros Of Hemming Curtains Without Sewing
- Convenient
- Time-saving
- No sewing skills required
- No sewing machine needed
Cons Of Hemming Curtains Without Sewing
- Temporary solution
- Not as durable as sewn hems
- May not work for all types of fabric
- Finicky installation sometimes
Using hemming tape or fabric glue to hem your curtains may seem like an easy option, but it may not last as long as you’d like.
After a couple of washes or with daily use, the tape or glue can weaken and no longer stick, leaving your hems looking undone, saggy, and unattractive. No-sew methods may not be the best option if you want your curtains to last.
Methods For Hemming Curtains Without Sewing
Here are two methods that I have tried for hemming curtains using the no-sew technique:
Iron-On Hem Tape
One of the easiest no-sew hemming methods uses iron-on hem tape, commonly known as fusible webbing tape or Stitch Witchery. It is not expensive and it even comes in black if necessary. Check out the current offers at Amazon. This tape is also readily available at fabric and crafting stores and is quick and easy to use.
For detailed step-by-step instruction on how to hem curtains with hemming tape, read Hem Tape: How To Use, FAQs, And Tips
Leonis Tape
A good alternative for hem tape, Leonis tape appears less stiff in the hems I guess because it involves a soaking step that iron-on hem tape does not. It’s also very easy to apply and a quite durable no-sew option.
For a full breakdown of Leonis tape, read How to Use Leonis Iron-on No-Sew Hem Tape.
Tips For Getting The Best Results
If you’re having trouble with hemming tape, or are looking to ensure a perfect outcome, read these tips for the best results:
- Don’t use hemming tape on textured or waterproof drapery fabric – the tape will not adhere. Leather, nylon, and silk are also no-gos.
- Use this no-sew method for single-fold hems only; it will not hold a double-fold.
- Always use a pressing cloth to protect your fabric, especially when working with delicate fabrics or trying to decide on the proper heat setting for your iron.
- To get the placement just right, try practicing on a scrap piece of fabric before you move to the real thing.
- For large curtains, work in sections to keep your hemming tape straight and smooth.
- If your adhesion isn’t strong, try turning up the temperature on your iron or holding the iron to your fabric for an extra two seconds.
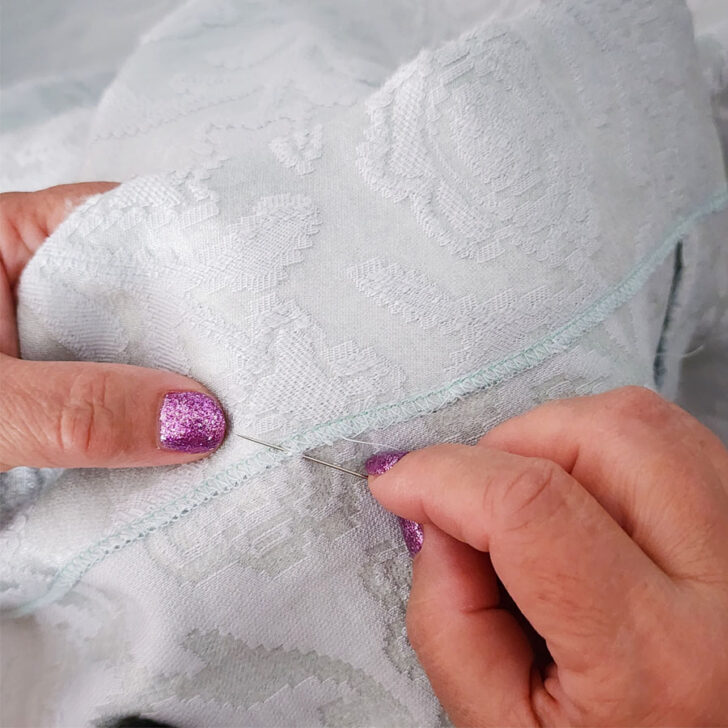
How To Hem Curtains By Hand
Hand-sewing is a tried and true method preferred by many sewists, and this applies to hemming curtains as well. Hemming curtains by hand is particularly useful for delicate, gauzy curtains made from chiffon or silk.
For this method, you’ll need an iron, scissors, needle and thread.
Interested in more sewing basics, like how to sew by hand? Read my tutorial on Sewing Basics # 2: Learn How To Sew By Hand.
Step-By-Step Instructions For Hemming Curtains By Hand
While hemming curtains by hand can be rather time-consuming, it may be a necessary labor of love for some fabrics, or if you don’t own a sewing machine.
Follow these steps for hand-hemming your curtains:
1. Prepare your needle and thread
Thread your needle with a corresponding color to your fabric, tying a knot at the end of your thread.
✅ Related tutorial: How To Thread A Needle For Hand Sewing (9 Easy Tips + Videos)
2. Hand stitch your hem
What is the best stitch to use? I like to use a ladder stitch, also known as invisible stitch. You can see the details in my tutorial Invisible Stitch Tutorial: How To Fix A Tear (+ Sewing “Blind” Hems)
Begin stitching at one edge of your curtain along your pinned or basted hemline. Remember to secure the thread at the beginning.
Continue your stitches across the curtain, taking your time to ensure even stitches that are almost invisible on the right side.
3. Tie off the thread
Finish your hem by tieing off the thread and trimming any excess thread.
4. Press your hem
Press your hem again for a few seconds with your iron to make it flat.
Tips For Getting The Best Results
For best results can hand-hemming your curtains, follow these tips:
- Ensure you’re using the correct needle for your fabric, depending on the weight of the material so you don’t leave unsightly holes in the fabric.
- Match both color and weight of the thread for your curtains.
- Take your time making even stitches for a clean, professional-looking hem.
- Sew in a brightly-lit room so you can best see your progress.
- Practice on a scrap piece of fabric, preferably one of the same material your curtains are made of. This way, you can troubleshoot any issues before beginning your hem.
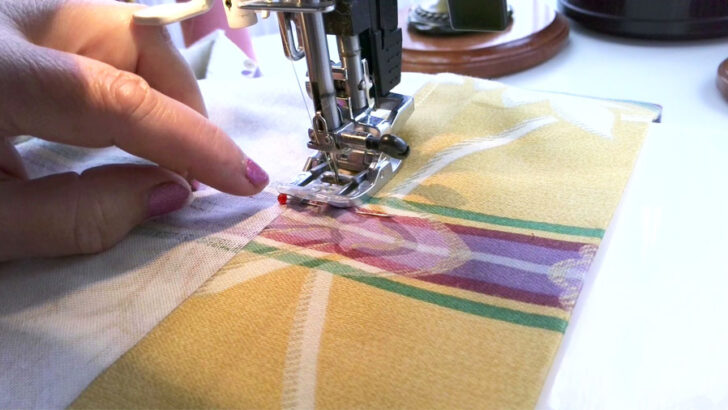
How To Hem Curtains With A Sewing Machine
Using a sewing machine is perhaps the most traditional way of hemming curtains. For this option, you’ll need a sewing machine and sometimes special presser feet to ensure nice topstitching.
Pros Of Hemming Curtains With A Sewing Machine
- Quick and easy sewing process
- Durable
- Professional-looking results
- Several options for different hemming techniques and finishes
- Permanent, long-lasting hem
Cons Of Hemming Curtains With A Sewing Machine
- Not beginner-friendly
- Machines are expensive if you don’t already own one
- More room for error
In my opinion, hemming curtains with a sewing machine is the best way to hem curtains. It may take a little more time than using hemming tape, but it’s a more durable option and you won’t have to worry about re-hemming your curtains again in a couple of years. And anyway, it’s just as easy as the no-sew method, and you’ll have the added satisfaction of knowing that you did it yourself and did it well.
Step-By-Step Instructions For Hemming Curtains With A Sewing Machine
Follow these steps for hemming your curtains with a sewing machine:
1. Prepare your sewing machine
Start preparing for sewing by threading your machine with a thread that matches your curtain fabric. Choose a straight stitch and adjust the stitch length. 3 mm should work for your hem, if you use regular drapery fabric, but adjust for your needs.
✅ Related tutorial: Free Arm Sewing Machine: Do I Need One?
2. Sew your hem
Next, begin your hem by sewing from one edge of the curtain along your pinned hemline. Remove your pins as you sew, keeping the fabric taut, but not stretched.
The main problem will be sewing the hem straight. If you want to know how to easily sew straight check out my tutorial How to sew straight.
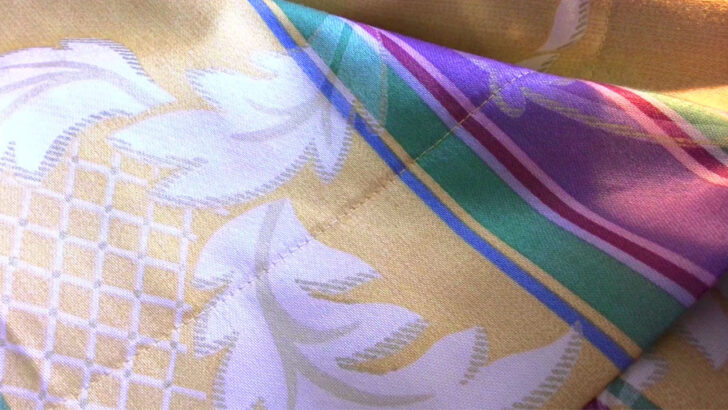
3. Finish and press your hem
At the end of your hem, backstitch a few stitches to secure. Then, trim any excess thread. Press your hem with an iron for a few seconds for a beautiful result.
Tips For Getting The Best Results
- Choose the correct weight for both thread and needle. Heavier fabrics will likely need heavier thread and a thicker needle. Lighter fabrics will need both a thinner thread and needle.
- Adjust your stitch length to the length of your choice. 3 mm is standard for this kind of project.
- For even stitches, keep your fabric taught in one hand while you sew. Don’t stretch your fabric; this may create an uneven stitch.
- Remember to remove your pins as you sew.
- Backstitch at the beginning and end of your hem to help keep your thread secure.
- Press your hem with your iron as a final step for a flat finish.
Common Curtain Hemming Mistakes
Hemming curtains, although seemingly straightforward, can be a challenging process when it comes down to it.
Curtains often involve a lot of fabric and can be heavyweight or involve tricky materials. Hemming curtains also relies on a lot of patience, accuracy, and tedious steps for a favorable outcome.
In other words, there are a lot of things that could go wrong.
Here are a few common curtain hemming mistakes, along with practical advice on how to avoid them and achieve a professional finish.
Uneven Hem (Not Straight)
One of the most common mistakes when hemming curtains is an uneven hem. This happens more easily than you may think. Wrinkled fabric, inaccurate measuring, and forgetting to pull your fabric taut can all lead to uneven hemlines.
Here are a few tips for avoiding an uneven hem:
- Ensure you take the time to measure your hem before trimming, then again to pin your hem. Use a seam gauge to ensure consistent measurement throughout the hemline.
- Use sharp fabric scissors or a rotary cutter for a steady, accurate cut.
- Use straight pins at regular intervals and baste the hem to keep your hem in place before sewing. Double-check your pin measurements once complete.
- As you sew, periodically check your hemline to ensure the measurement is accurate.
- Measure your initial hem with the curtains both hanging and laying flat.
- Iron your curtains for a perfectly flat surface. This will make an even hem possible.
Fraying Fabric
If you’re working with a tricky fabric, fraying is always a possibility. Luckily, there are a few simple ways to help prevent your curtains from fraying.
- Use pinking shears to cut your hem; these shears cut your fabric in a zigzag pattern which can prevent the garment from fraying.
- If sewing on a machine, consider using a serger. The serger can sew and finish your edges for a polished look. This will prevent your raw edge from fraying.
- If your fabric is prone to fraying, apply a fray check sealant on the raw edge of your garment before completing your hem.
- Use a zigzag stitch on your raw edge to protect your fabric from fraying. Then, continue with the next hemming steps.
Wrong Length
Nothing is more frustrating than thinking you are done with a project and then – boom. The curtains are the wrong length.
Whether your curtains end up too short or too long, this is almost always a measuring error. Here are a few tips for measuring correctly:
- Never “eyeball” your measurement. Always use either a measuring tape or ruler, measuring carefully across the entire length of your curtains. Re-measure when necessary.
- Use good marking tools to clearly mark your hemline. Double-check your measurements once complete.
- Ensure you iron your curtains before hemming. Wrinkly fabric will not only result in an uneven hem, but your curtains will also be too long once hung.
- Measure your curtains as they are hanging to properly visualize them in the space. This will help you determine if your chosen length is awkward or seamless.
Fabric Puckering
Another common sewing problem is fabric puckering. This is particularly common when working with a lot of fabric, like when hemming curtains.
Preventing fabric puckering is quite intuitive when you know how to do it. Simply follow this checklist:
- Take your time and sew slowly. Feed your fabric evenly through the machine, being aware of potential puckering.
- Tension can often be the culprit of puckering fabric. Adjust your machine tension, loosening it. A tension that is too tight tends to cause puckering. Try practicing on a scrap piece of fabric to adjust the tension as needed before you begin hemming.
- Needle choice is also an important factor. Using incompatible needles with your fabric can cause puckering. Remember to adjust your needles based on whether your fabric is heavier or lighter.
- Install a walking foot in your machine; this will feed your fabric evenly through your machine.
- Try a stabilizer to reinforce the fabric. You can also try wash-away or tear-away stabilizers. These will all prevent puckering.
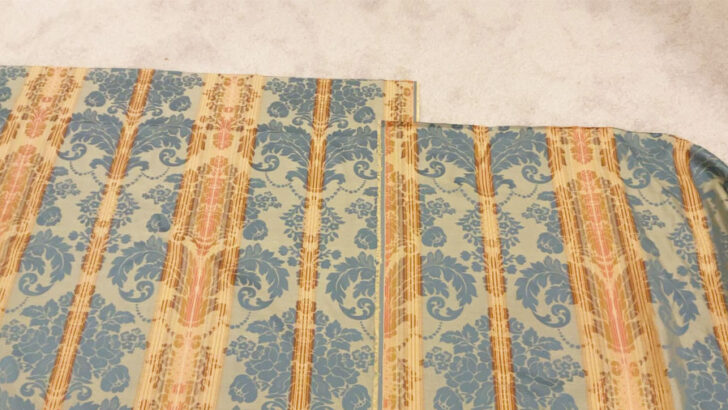
Mismatched Patterns/Prints
Sewing patterns and prints can be frustrating because it’s difficult to get everything lined up. When hemming with prints, you often run into the same problem. But this applies only if you make curtains yourself because ready-made curtain panels should match.
You need to make sure that the pattern repeats are laid out symmetrically and match on both curtain panels.
Here’s how to safeguard your curtains from mismatched patterns:
- Before you make your first cut, ensure that your patterns are matched up correctly where your hem is pinned. This is the first step to an even fabric after hemming.
- Use straight pins to ensure your patterns are aligned on each panel. Cover the entire length of your hem with straight pins for accurate measurements.
- Take your time while sewing, checking regularly to ensure that your panels are still aligned.
Did you find this tutorial helpful? If so, save this pin (see below) on your sewing board so you can come to the article later when you need this information on how to hem curtains, and follow me on Pinterest for more tips, tutorials, and inspiration!
In conclusion: I use these methods to hem curtains in my own home for a variety of desired effects. I hope that this guide on how to hem curtains is helpful to you in your future sewing projects. If you have any further questions about hemming curtains, please leave them in the comments down below. I’d love to help.
If you’re interested in learning more about hemming, check out my other detailed tutorials by following this link – How To Sew A Hem.
latest posts
- What Do You Call a Person Who Sews? I Asked My Readers and Got 1,408 Opinions
- DIY Round Purse: PDF Sewing Pattern and Detailed Instructions
- Mini Wonder Clips By Clover: Useful Sewing Tool Or Just Another Notion?
- Non-Slip Grips For Quilting Rulers: A Small Notion With A Useful Job
- Fabric Eraser for Sewing: What It Removes and When to Use It
- What Is The Best Thread For Sewing Machine Projects? Let’s Find Out!
- Butterfly Quilt Block Tutorial – Foundation Paper Piecing
- How To Sew Quilt Squares So The Corners Match
- Sewing With Fork Pins: How They Help With Pattern Matching, Slippery Fabric, And Seams