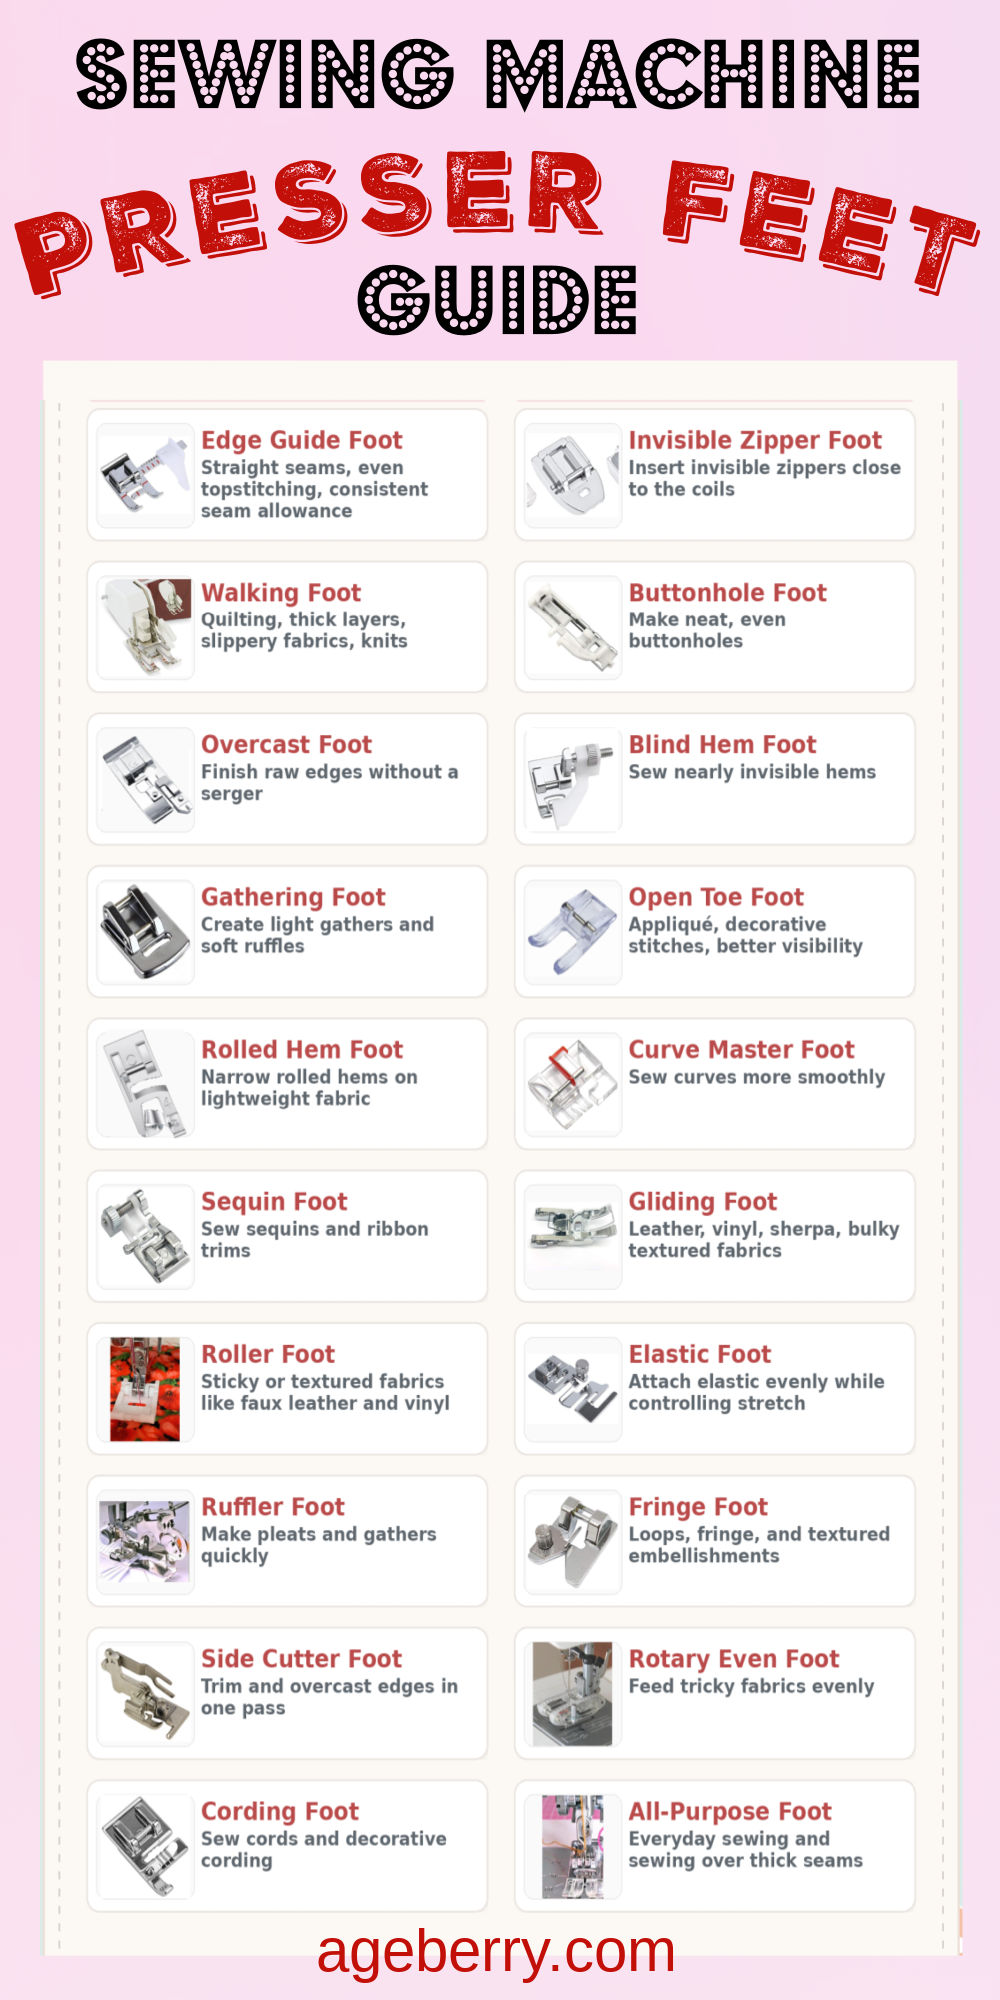
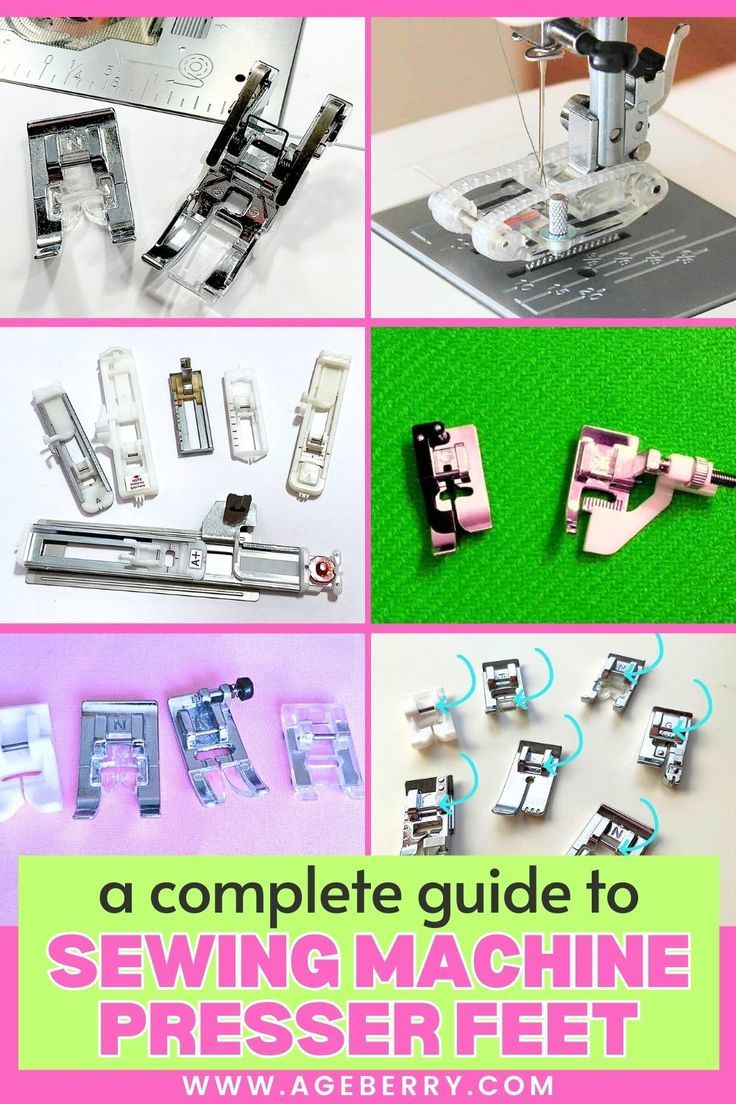
Types Of Sewing Machine Feet And Their Uses
If you love sewing it helps to understand the types of sewing machine feet and their uses before buying or switching attachments. A little knowledge goes a long way when it comes to choosing sewing presser feet, especially if several of them look similar at first glance. This guide also works as a sewing machine presser feet comparison, so you can see what each foot is meant to do and which ones are worth using for your sewing projects.
You know you’ve crossed into real sewing territory when a small metal presser foot starts to look exciting instead of confusing. One minute it’s just another attachment. The next, you’re comparing feet, checking what they do, and wondering whether you need one more for your next project.
I spent $87 on specialty feet last month. For context, that’s more than I’ve spent on my actual feet in shoes this year. My priorities are clearly in the right place. And somehow, I still convince myself I NEED the next one…
Note: Some of the links on this page are affiliate links. This means I will receive a commission if you order a product through one of my links. I only recommend products I believe in and use myself.


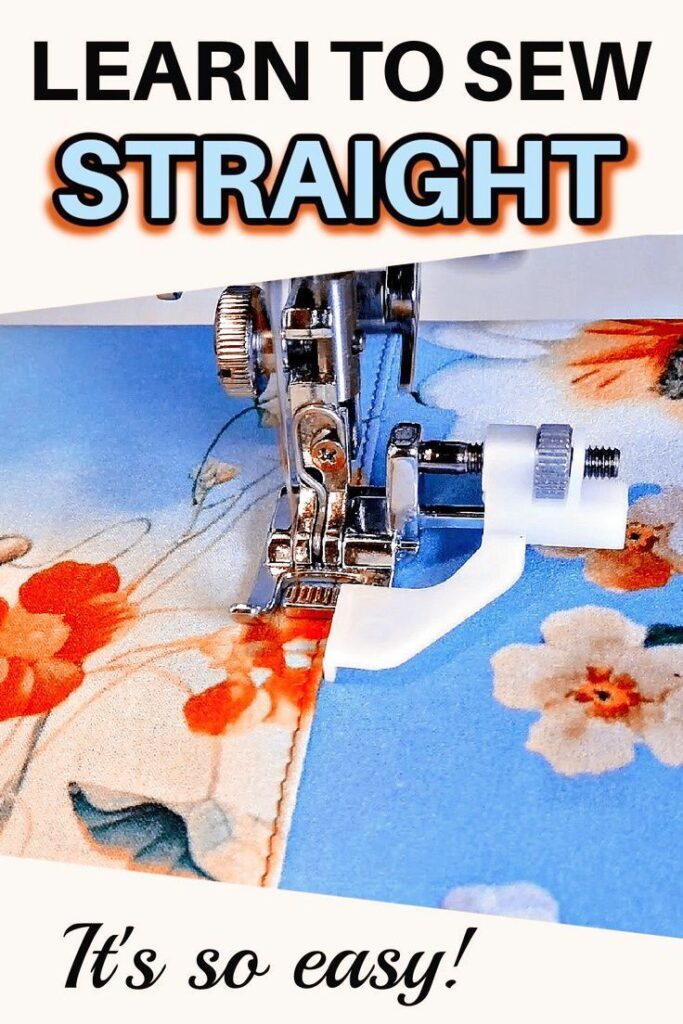
Sew Perfectly Straight with an Edge Guide Presser Foot
Sewing straight is easy, right? Well, this is where we see the difference between theory and practice. In theory, it is easy. But it turns out sewing straight lines is a challenge for most people, including advanced sewists. If you are looking to learn how to sew straight, this article is the perfect place to start.
This article will teach you everything about sewing in a straight line using special sewing machine presser feet like Edge Guide Foot. These feet are often overlooked, but there are situations where their use adds tremendous value to your projects.


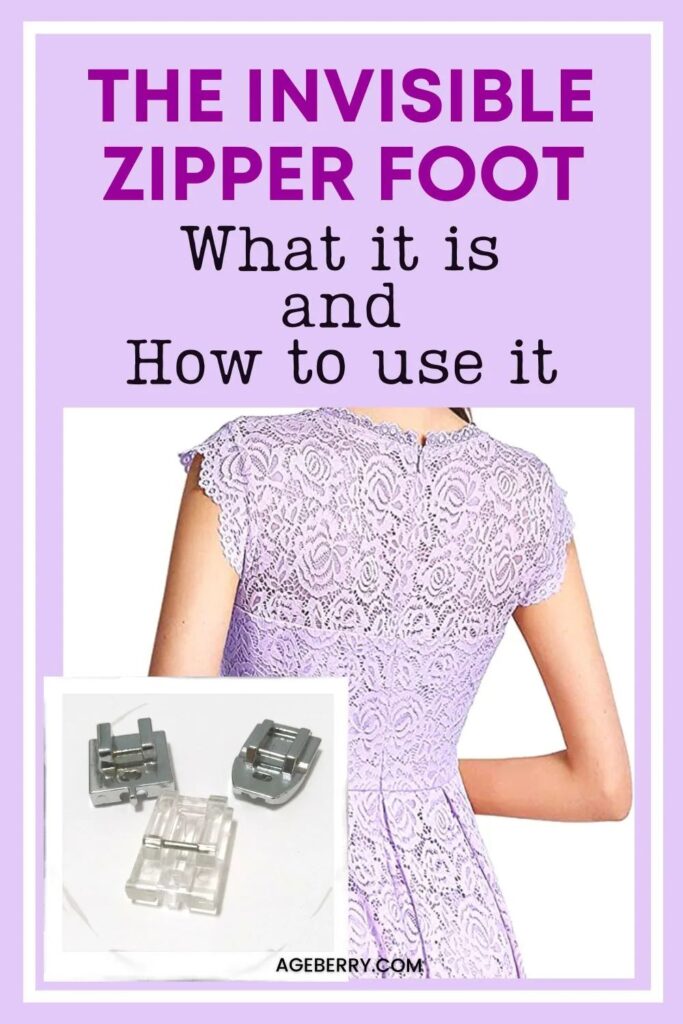
The Ultimate Guide to Using an Invisible Zipper Foot
Very few dresses or blouses can be made without some kind of closure, and the most common of these is of course the zipper. The invisible zipper, that is. It is in fact improperly called “invisible” because there is nothing magic about it; it is merely hidden behind a layer of fabric! But the result is the same – the zipper cannot be seen if sewn properly.
How to sew it properly, and easily? This sewing tutorial will show you how to use an invisible zipper foot and what types of feet are available for inserting invisible zippers. Many beginner sewists dread sewing invisible zippers, but the right tool for the job can make all the difference. Use this invisible zipper foot guide to make sewing invisible zippers easy.
✅ Related article: Think You Know Zippers? This Installation Guide Might Surprise You


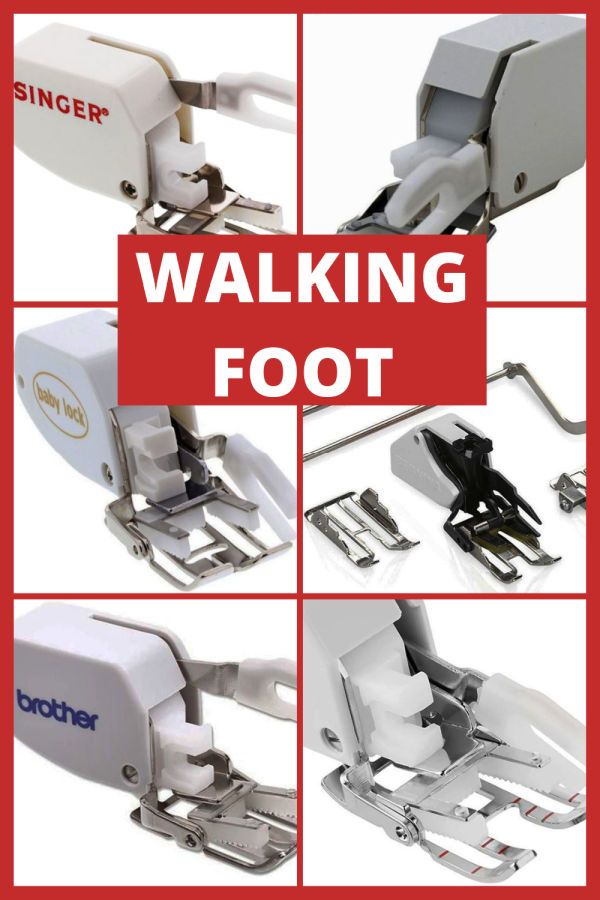
How to use a walking foot
A walking foot attachment is one of the essential presser feet that sewists use on their sewing machines. It is sometimes absolutely necessary, when sewing slippery materials, or thick layers of material. It’s great for quilting, heavyweight materials, leather and vinyl, knit fabrics, and when you need to sew many layers together.
Many machines have some kind of walking foot built in, and my Janome 6600 is one example. But what to do if your machine lacks one? If you want to get more done with your machine, there is an alternative: the walking foot. If you are serious about sewing, this is definitely something worth investing in. You’ll never have to worry about your material shifting out of place again when using this walking foot attachment on your machine. This tutorial will talk about the walking foot features, why, how and when to use it.
✅ Related tutorial: How to use a walking foot


The Easy Way To Create Buttonholes With A Buttonhole Foot
The button is by far the most common closure we have. And the oldest. And what does every button need to work properly? You guessed it: a buttonhole. Buttonholes are an essential part of sewing.
A buttonhole is relatively simple: a hole in the garment with reinforced sides. Unfortunately, the fact that it is simple does not make it simple to make.
Luckily, with the right tools and knowledge, making beautiful buttonholes is easy and here is where the buttonhole foot helps: it turns your sewing machine into a “buttonhole factory”. This guide will teach you everything you need to know about using your machine’s buttonhole presser foot so that you can create perfect buttonholes every time.
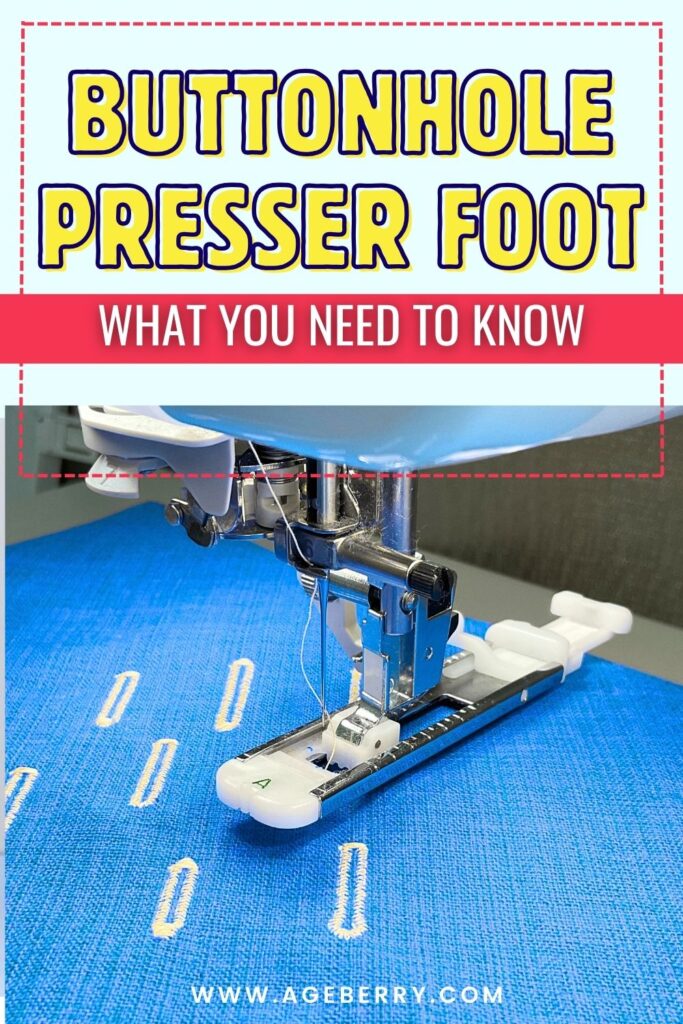
Probably the buttonhole foot came bundled with your machine; if it did not, there are feet available for sale separately. Just make sure you buy the one that is compatible with your machine.


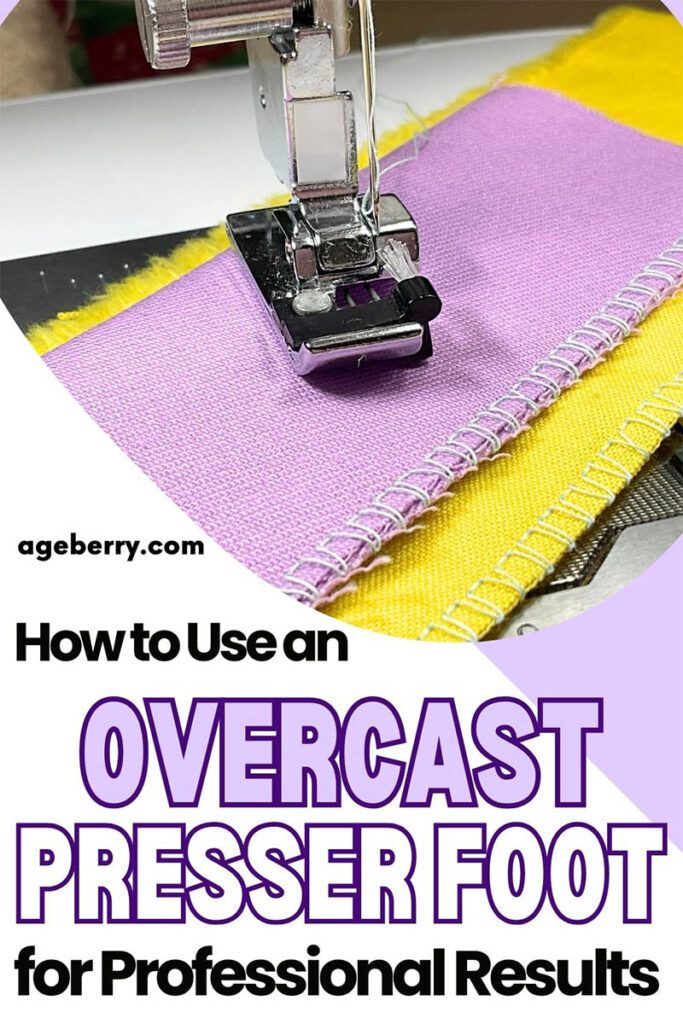
How To Use An Overcast Presser Foot For Professional Results
If you do not (yet!) own a serger, overcast presser feet may be a solution. In this presser foot guide, you will find answers to these questions: does my sewing machine have an overlock stitch, how do you stop seams from fraying with an overcast stitch, and how do you finish a seam with zig-zag, how do you overcast, is overcasting the same as overlocking?
I believe anyone will benefit from having a serger; just that if you are not sewing a lot, the expense might not be justified. And even if you can justify the expense, the storage space might not be there. So, use the overcast presser foot to finish raw fabric edges.


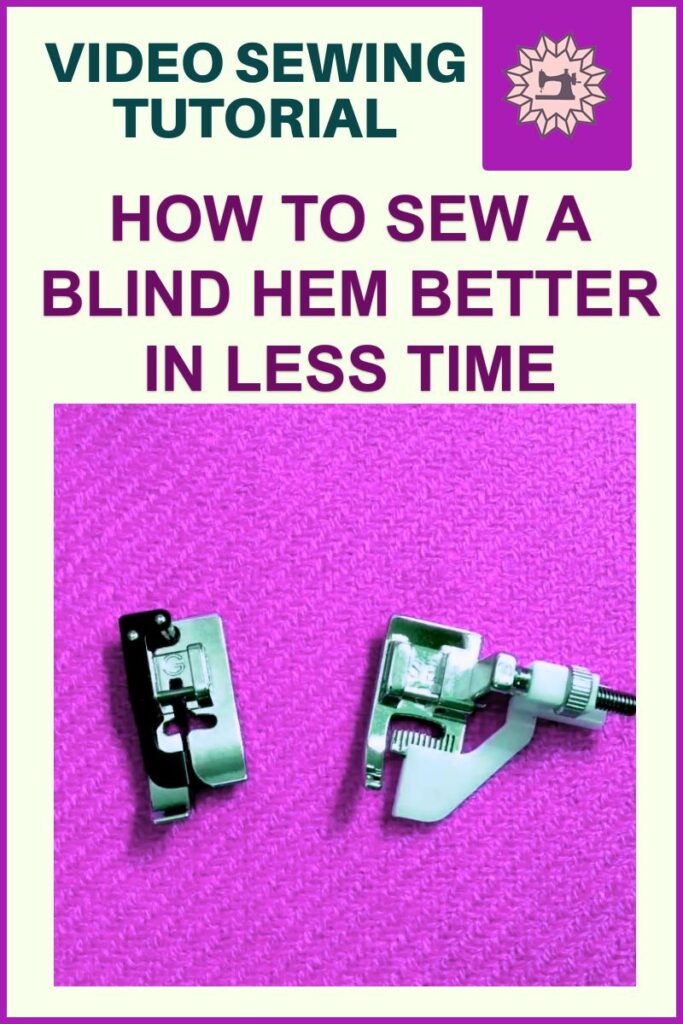
How To Sew Invisible Hems with a Blind Hem Foot
Making a pretty hem is very important; if you can hide zippers, darts or even belts, you can almost never hide a hem. But there is a way to hide the stitches on the hem by using a procedure called “blind hem”, or “invisible hem”. Well, the hem is neither blind, nor invisible.
Such a hem is professionally looking with nearly invisible stitches on the front of the garment. This sewing tutorial will talk about making such a blind hem using the appropriate presser feet. They help create barely noticeable, tiny stitches on the front of the item that cover only a few threads from the fabric structure giving your garment a polished and professional look.


How to Use a Gathering Foot: What Works, What Doesn’t, and How to Get the Best Results
The gathering foot is one of those presser feet that can save you a lot of time — if you know how to work with it. Instead of sewing two long basting rows and pulling threads by hand, this foot creates gathers as you stitch, turning a flat strip into ruffles in one pass.
In this guide, I share how it performed on eight very different fabrics, which settings gave me the neatest results, and which fabrics gave me trouble. You’ll find tips for getting more gathers, how to handle tricky knits, and when it’s worth switching to a ruffler foot.


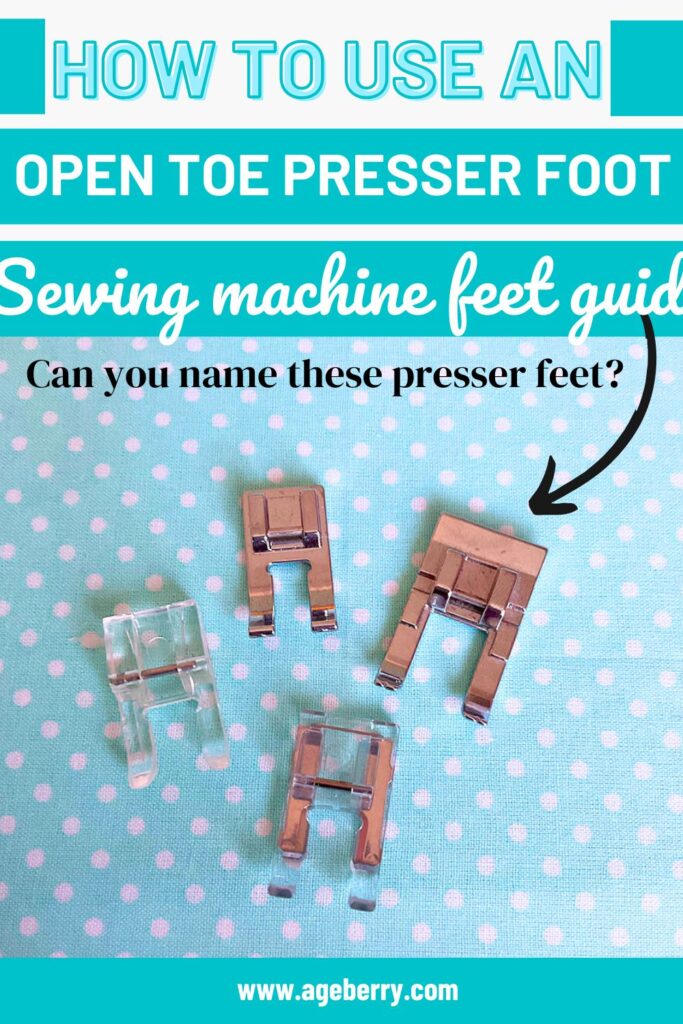
Presser Foot Guide: How To Use An Open Toe Presser Foot
If you’ve ever felt like your presser foot was blocking your view like an overenthusiastic spectator at a parade, it’s time to meet the open toe foot.
This foot clears the way, literally. With nothing in front of the needle, you can actually see what you’re doing — whether you’re following a drawn line, stitching around appliqué, or placing decorative stitches exactly where you want them. It’s like switching from tunnel vision to panoramic.
In this post, I’ll show you when to use it, how to position your stitches with more accuracy, and why your standard foot might start collecting dust.
No cramped toes here, just an open-air design that lets you see exactly where you’re going wrong in real time.


Rolled Hem Foot Tutorial: A Comedy of Errors
Join me in my misadventures with the rolled hem foot, a device seemingly designed to test a sewist’s patience. This tutorial chronicles the comedy of errors that ensues when attempting to use a rolled hem presser foot. From wrestling with chiffon to battling uncooperative cotton, discover why sewing rolled hems might be easier with different techniques. Laughter guaranteed, perfect rolled hems not included.
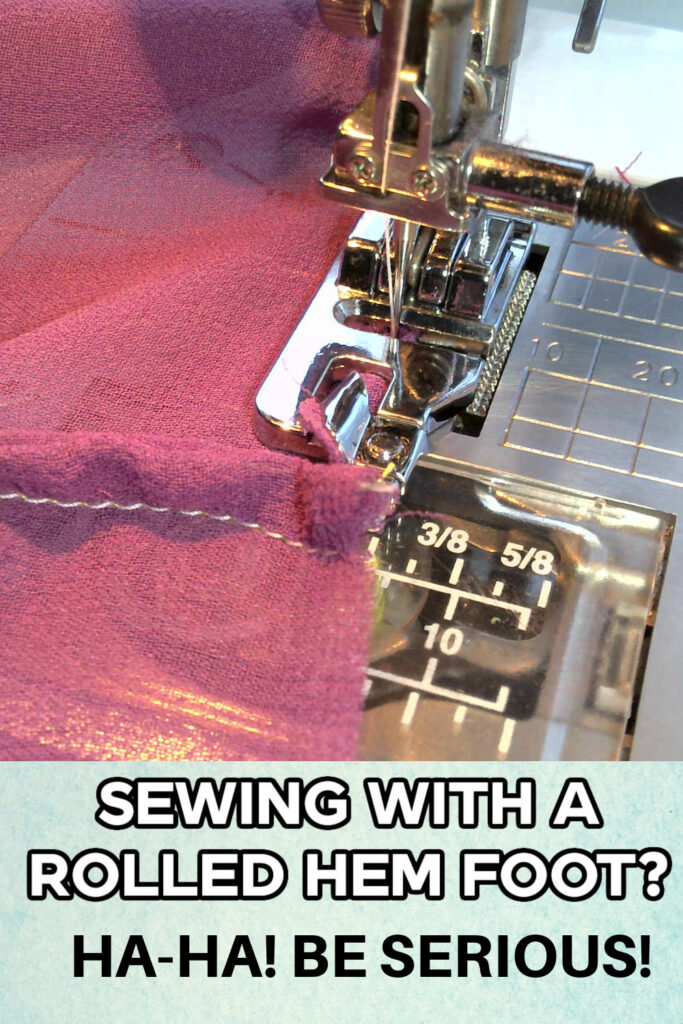
✅ Related tutorial: Narrow hem tutorial: how to make a narrow hem using a Ban Roll tape
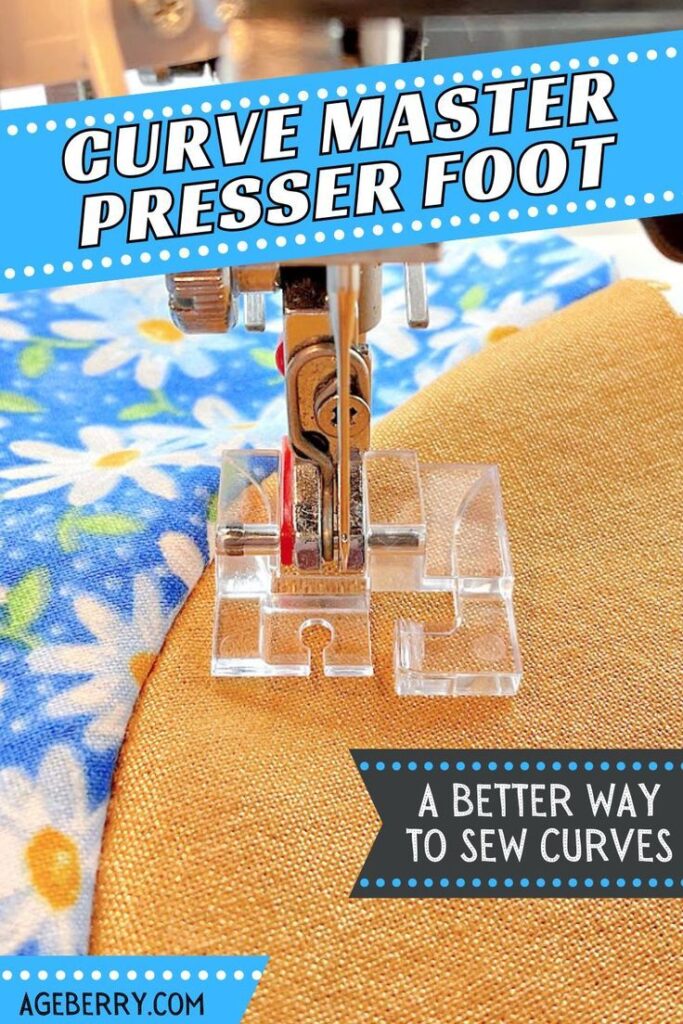
How To Sew Curves the Easy Way Using a Curve Master Presser Foot
If you’ve ever wanted to conquer concave and convex curves – but the thought of clipping, pinning, and possibly crying held you back – I hear you. I used to feel the same way. But after some practice, I can say this with confidence: you can sew curves. Truly. Like most things in sewing, it just takes some patience and the right tools.


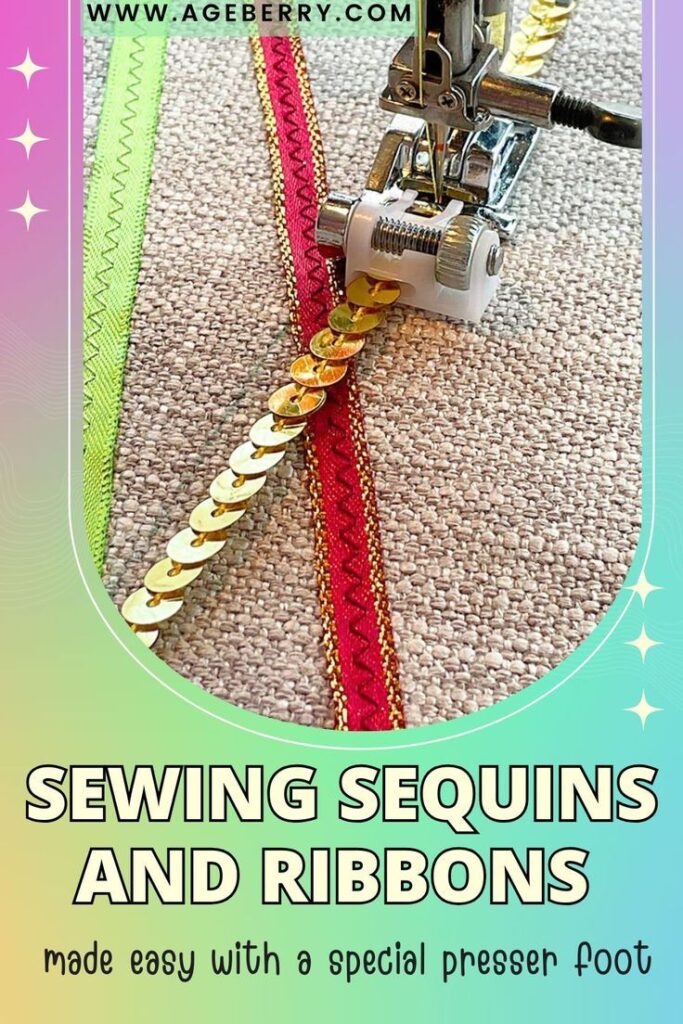
How to Sew Sequins and Ribbons onto Fabric Using a Special Sequin Presser Foot
Want to add sparkle and texture to your sewing projects? In this tutorial, you’ll learn how to sew sequins and ribbons onto fabric using a special sequin presser foot. I’ll show you how to guide the trims, align your stitches, and make your embellishments stand out with ease. You’ll also see how decorative stitches and colorful threads can turn simple ribbons into eye-catching details. It’s a fun way to personalize placemats, table runners, or any project that could use a bit of shine.


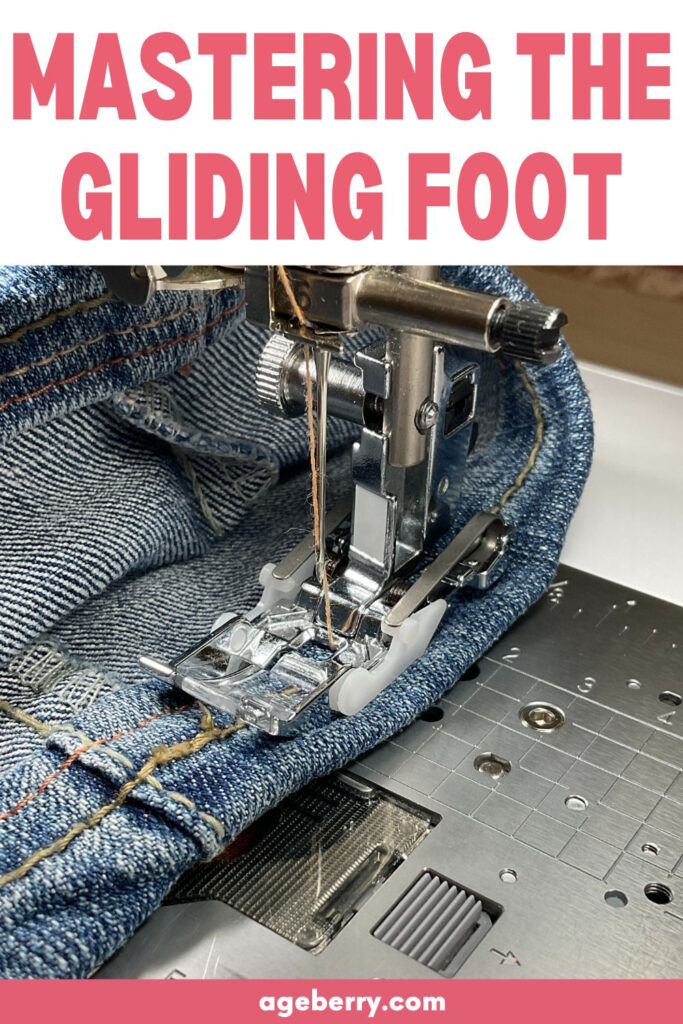
Mastering the Gliding Presser Foot
Some fabrics are drama queens. Leather sticks. Vinyl bunches. Sherpa turns into a snowstorm the moment your needle gets near it. And your regular presser foot? It just slides around pretending everything’s fine.
The gliding presser foot is made for moments like this. It moves smoothly over thick seams and sticky surfaces, keeping your stitches steady and your fabric moving. In this guide, I’ll show you how it works, when to use it, and how it saves time when sewing bulky or textured materials.

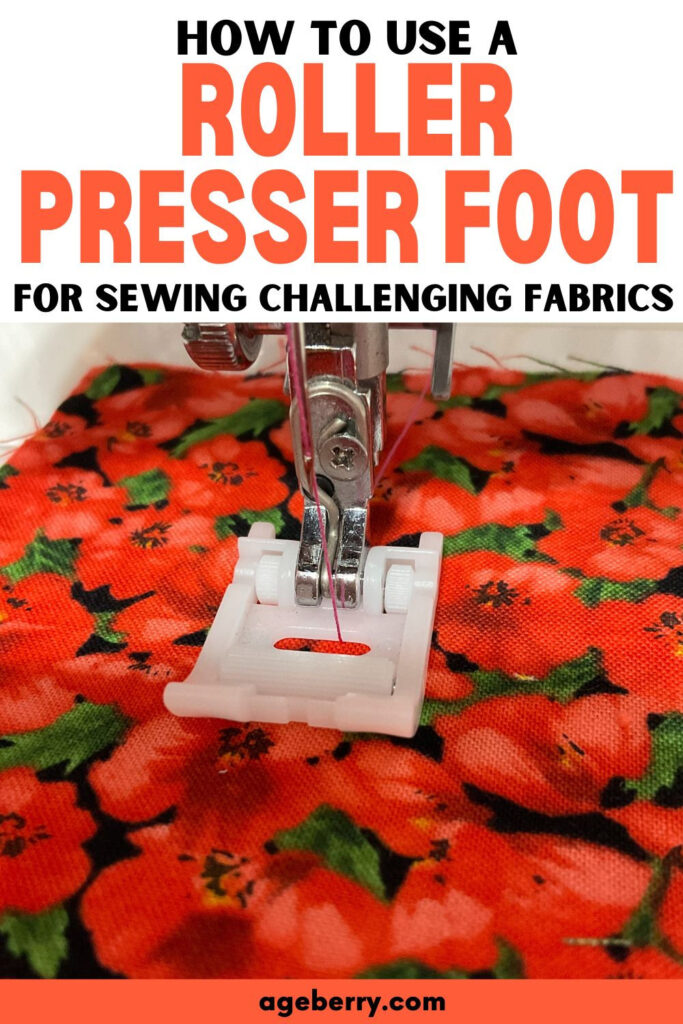
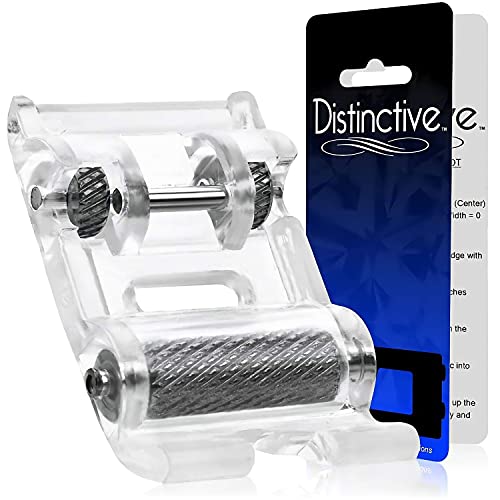
Must-Have Presser Foot for Sewing Challenging Fabrics: The Roller Foot
If your fabric keeps getting stuck like it’s stepping in gum, the roller foot might be the upgrade it’s been waiting for.
Think of it as the sewing machine equivalent of wheels on a suitcase — simple, effective, and surprisingly satisfying. Instead of dragging sticky fabric like vinyl or textured materials like faux leather and fur, this foot uses tiny rollers to keep everything moving smoothly under the needle. No hopping, no sticking, no pleading with your feed dogs.
In this post, I’ll show you how the roller foot works, how it’s different from the walking foot, and when it earns its place on your machine.

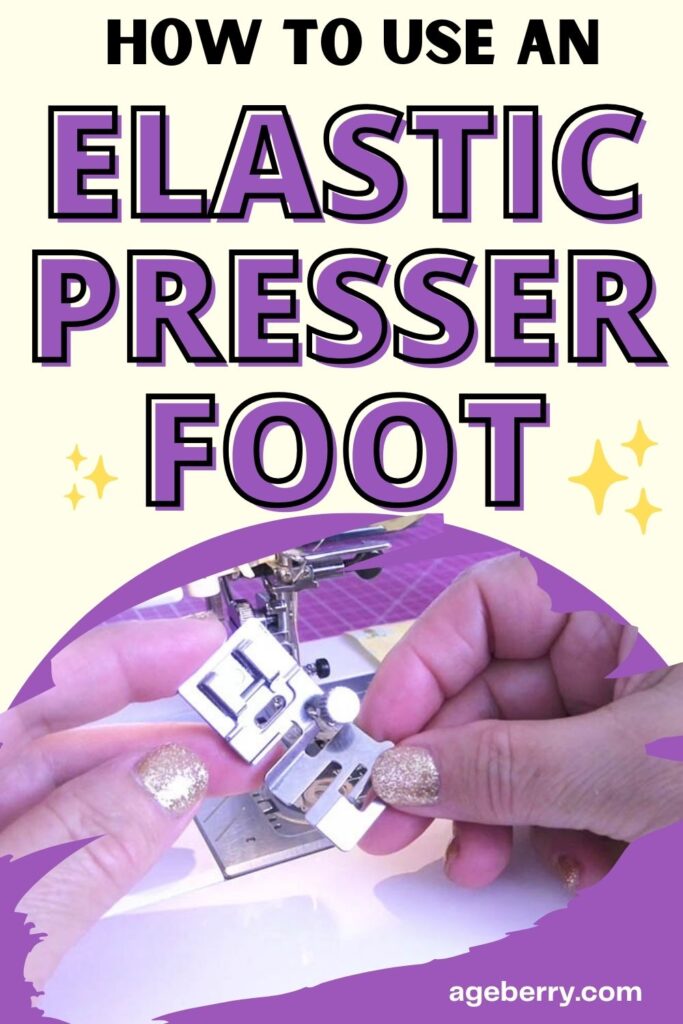
The Presser Foot Nobody Knows How To Use: The Elastic Foot
This one comes with a screw. A tiny, mysterious screw. The kind that makes you stare at it and wonder if your machine just became a DIY project.
But once you figure out what it does, the elastic foot becomes surprisingly clever. That little screw adjusts the angle of the elastic guide, which controls how much your fabric gathers as you sew. Smaller angle? Subtle gathers. Steeper angle? Full-on puff sleeves, if that’s your thing.

It snaps onto most modern machines, works great for waistbands, cuffs, and doll skirts, and saves you from the old “stretch and hope for the best” technique.
How to Use A Ruffler Presser Foot
Gathering fabric by hand builds character. And possibly carpal tunnel.
The ruffler foot steps in like a tiny mechanical assistant that doesn’t complain or lose count. It grabs, tucks, and stitches pleats or gathers with machine-like precision — because it is a machine part, after all.
In this tutorial, I’ll show you how to set it up, adjust the pleat settings, and avoid the chaos of uneven gathers. Whether you’re ruffling a hem or constructing a skirt with more tiers than a wedding cake, this foot keeps things consistent and less frustrating.


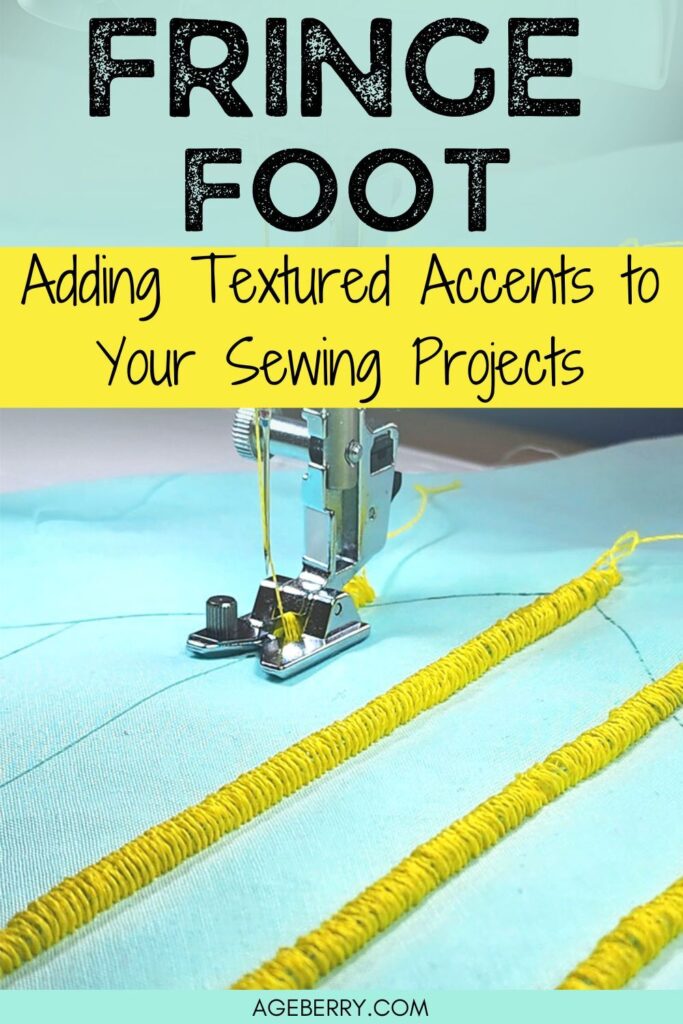
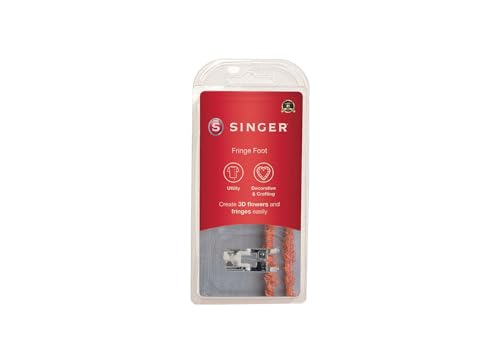
Master Decorative Sewing with the Fringe Foot Tutorial
Oh, this foot is so interesting! The fringe foot is a fantastic little gadget that can add a whole new dimension to your sewing and quilting projects. It allows you to create loops, fringes, and 3D effects that bring texture and visual interest to your work.
In this sewing tutorial, I walk you through the steps of using this versatile and easy-to-use tool. You’ll learn how to create custom fringe and eye-catching embellishments. So, if you’re ready to add some flair to your fabric, visit my tutorial on this fun and functional presser foot!

Master the Side Cutter Presser Foot with Our Easy Tutorial
You do not have a serger (overlocker)? No problem! There are alternatives. You could use the overlock stitches on your sewing machine (in a pinch, you could use a simple zig-zag!), but there is a better way of finishing edges without a serger: the side cutter presser foot.
A side cutter presser foot is an accessory that attaches to your sewing machine and allows your sewing machine to cut fabric as it sews, creating a stitch that mimics the look of a serger overlocking stitch. In this tutorial, I will explain what a side cutter presser foot is, how it works, and if you should consider using one.
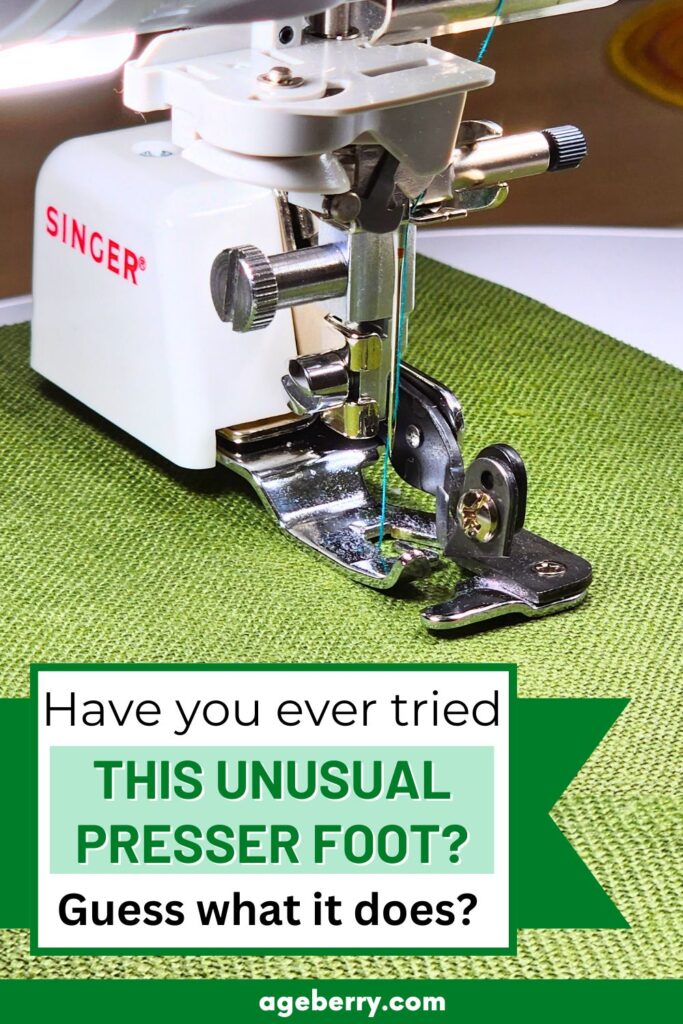


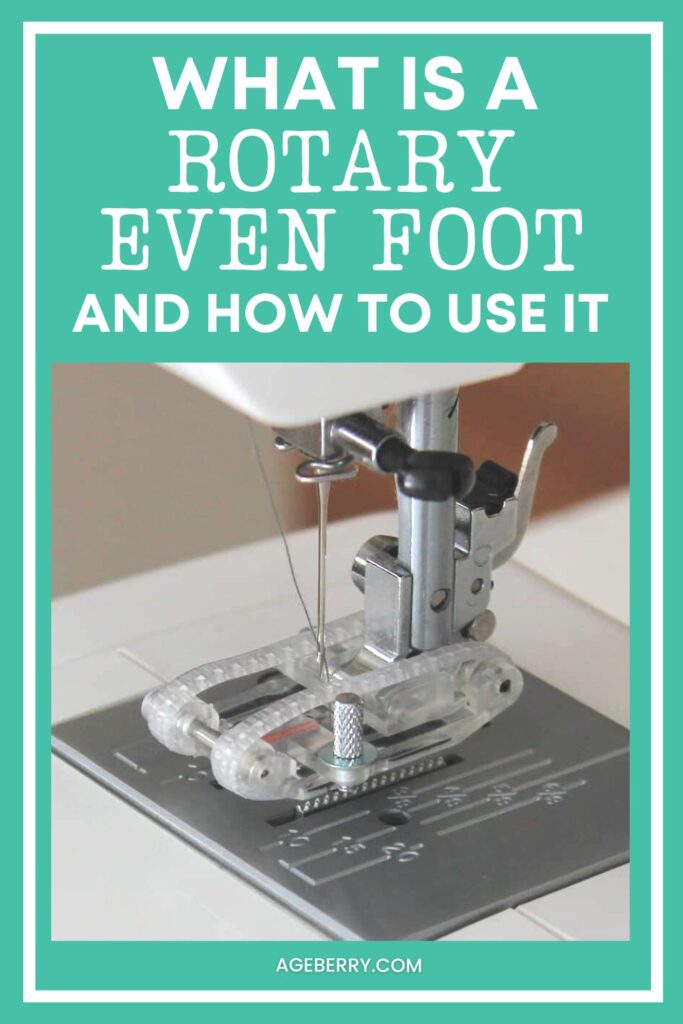
Did You Hear About A Rotary Even Foot?
In this tutorial, I’m excited to talk about a presser foot that might not be in every sewist’s kit yet – the Rotary Even Foot. JANOME came up with a very interesting foot which can be used on any low shank machine (or any machine that has a low shank adapter) and performs the same function as a walking foot. It looks like a tank but it works on the flimsiest of materials: the rotary even foot.
The rotary even foot is in fact a collection of attachments that perform multiple functions: a blind hem attachment, a bias tape attachment, and rolled hem attachments in 3 different sizes.
It’s true that not many know about this tool, and it can be on the pricier side, but from my experience, it’s well worth the investment. I particularly love using the Rotary Even Foot for sewing challenging fabrics like fur, leather, vinyl, and velvet. It helps feed the fabric evenly, preventing the layers from shifting and puckering, which is a common headache when working with these luxurious materials. Join me as I talk about the benefits and techniques of using this presser foot, and discover how it can elevate the quality of your sewing projects.


How To Use A Cording Foot for Decorative Detailing
Have you ever found yourself wishing to attach an elastic cord to a garment, create delicate ruffles, or even add a 3D embellishment to your sewing project? All these can be achieved with a tiny yet mighty piece of equipment: the cording foot.
It’s a small, unassuming tool that won’t break the bank and doesn’t look overly complicated. Yet, it’s really effective for certain sewing tasks and adding unique touches to your work.
This sewing tutorial is your ultimate guide to the cording foot. You’ll learn how to use it to sew elastic cords, add embellishments and understand why this tool is good for enhancing your sewing projects. Join me to unlock the potential of the cording foot and take your sewing to a whole new level of creativity.


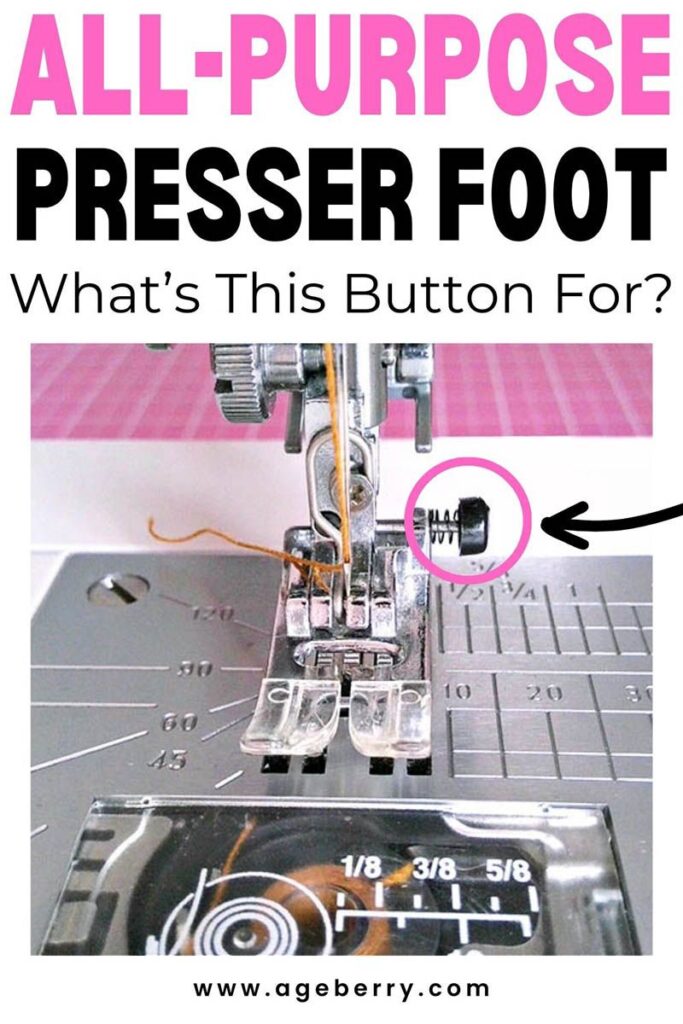
All-purpose Presser Foot: What’s This Button For?
I guess, we all have been using all-purpose presser feet for ages, but did you know there’s a little secret not many are aware of? It’s the small black button on the side. This unassuming feature is actually a game changer! It’s designed to help you sew over thick seams or multiple layers of fabric.
When you come across a bulky seam, you can use this button to level the presser foot, which helps prevent skipped stitches and ensures a smooth stitch line. I’m excited to show you how to use this clever addition to your sewing arsenal in this guide. So, check it out to find out how to make the most of this clever tool!
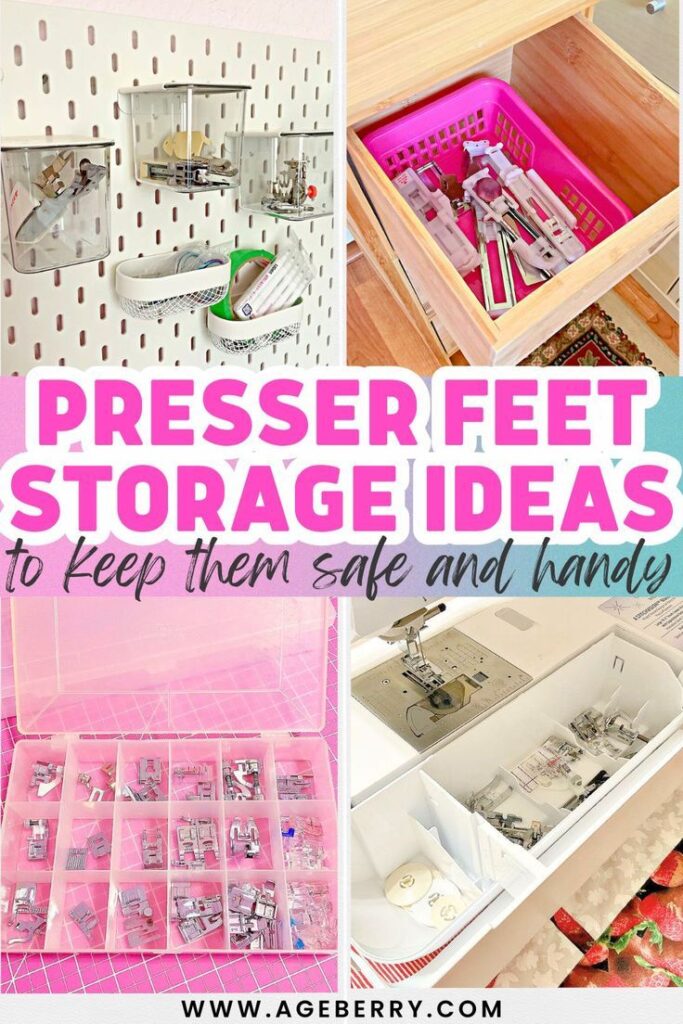
Presser Feet Storage: Practical Ideas to Keep Them Safe and Organized
Presser feet don’t take up much space, but somehow they still manage to create chaos. If you’ve ever opened a drawer and found your walking foot tangled in thread or realized you bought a second gathering foot because you couldn’t find the first — this guide is for you.
I’m sharing practical storage solutions that actually work. You’ll see how to organize small snap-on feet, what to do with bulkier ones like rufflers, and how to keep everything visible without turning your sewing table into a hardware store. From simple plastic boxes to DIY fabric rolls, and even those built-in compartments some machines hide in plain sight — these ideas will help you store smarter, not just prettier.
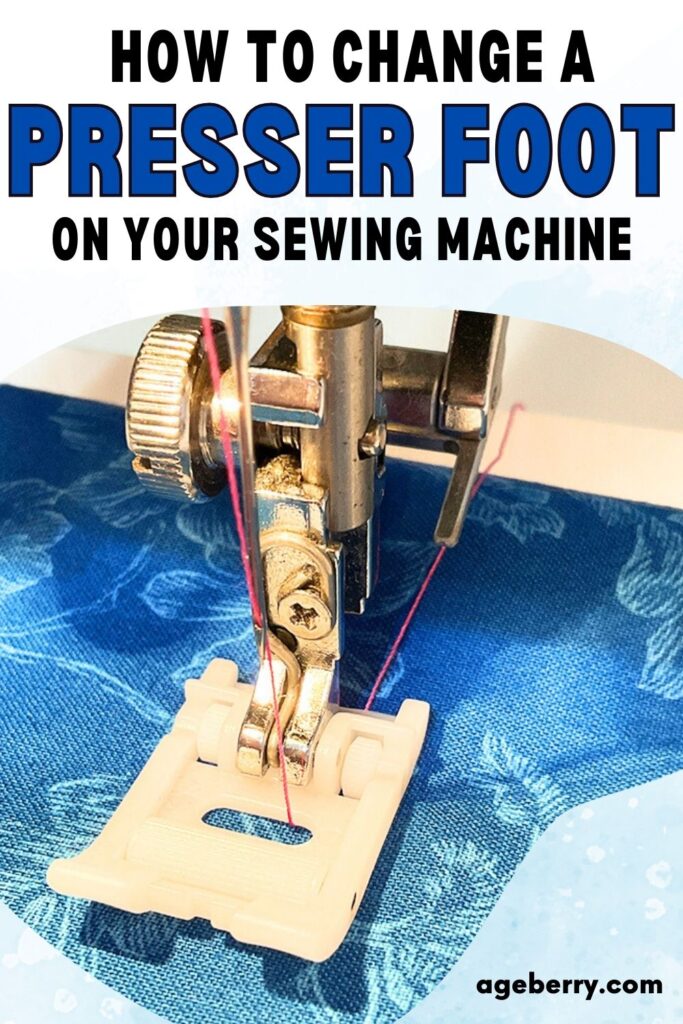
How to Change a Presser Foot on Your Sewing Machine
Changing a presser foot shouldn’t feel like you’re fixing a watch with oven mitts on. But for many beginners, it’s one of those oddly intimidating things — right up there with threading the needle when someone’s watching.
In this guide, I’ll show you exactly how to remove and attach presser feet on most machines, without wrestling the shank or guessing which lever to press. Whether your machine uses a snap-on system or a screw-on foot, you’ll be switching feet like a pro in under a minute.
Not ready to use all those presser feet just yet? No problem. Save this pin to your sewing board so it’s right there when you’re feeling brave (or just curious). And don’t forget to follow me on Pinterest — I share tutorials, tips, and a healthy amount of sewing humor.
latest posts
- What Do You Call a Person Who Sews? I Asked My Readers and Got 1,408 Opinions
- DIY Round Purse: PDF Sewing Pattern and Detailed Instructions
- Mini Wonder Clips By Clover: Useful Sewing Tool Or Just Another Notion?
- Non-Slip Grips For Quilting Rulers: A Small Notion With A Useful Job
- Fabric Eraser for Sewing: What It Removes and When to Use It
- What Is The Best Thread For Sewing Machine Projects? Let’s Find Out!
- Butterfly Quilt Block Tutorial – Foundation Paper Piecing
- How To Sew Quilt Squares So The Corners Match
- Sewing With Fork Pins: How They Help With Pattern Matching, Slippery Fabric, And Seams