
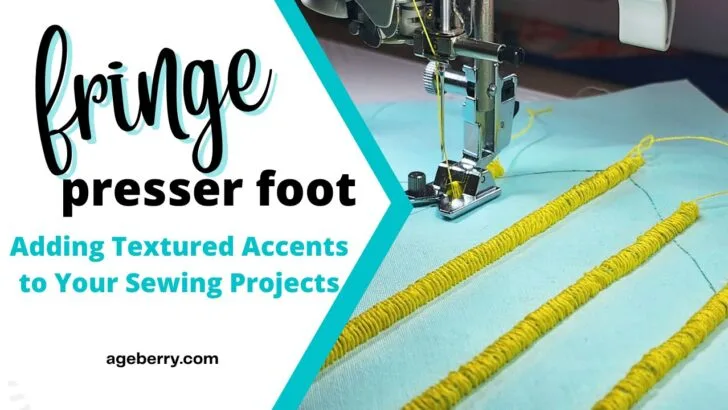
I’m always excited to try new presser feet on my machines. So I bought this foot – the fringe/looping foot. It helps create cool effects on sewing projects. Want to add loops or fringes to your sewing or quilting projects and make them unique? The fringe foot can do it, and in this article, I will show you how to make the most of it. Learn how to use this foot effectively by leveraging my experience, rather than by making your own errors.
The fringe/looping foot can create many different effects. You can make 3D loops or add interesting fringes to fabric edges. This foot definitely makes sewing more fun.

What Is A Fringe/Looping Foot?
A fringe or looping foot is an interesting attachment for a sewing machine that allows to add texture and unique 3D effects to sewing projects. It works by using a simple zigzag stitch and manipulating the threads to create loops and fringes.

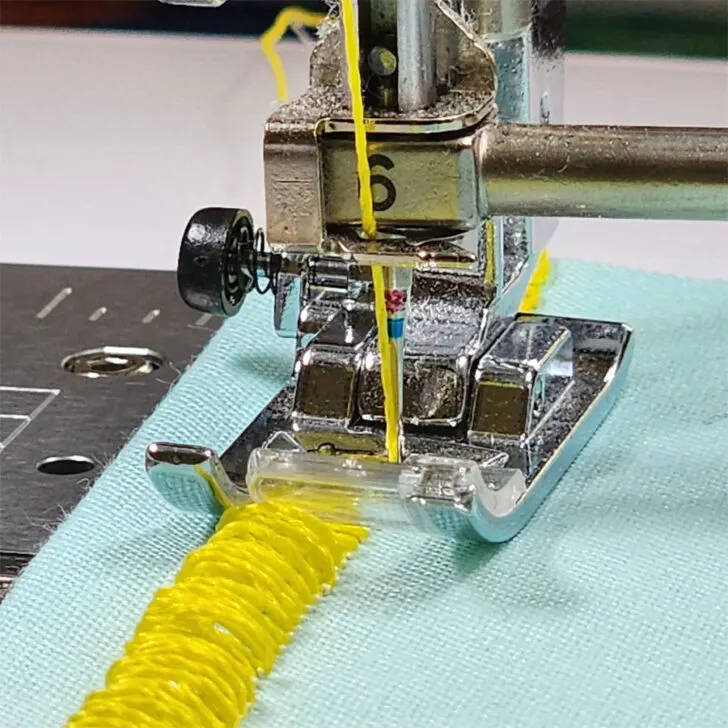
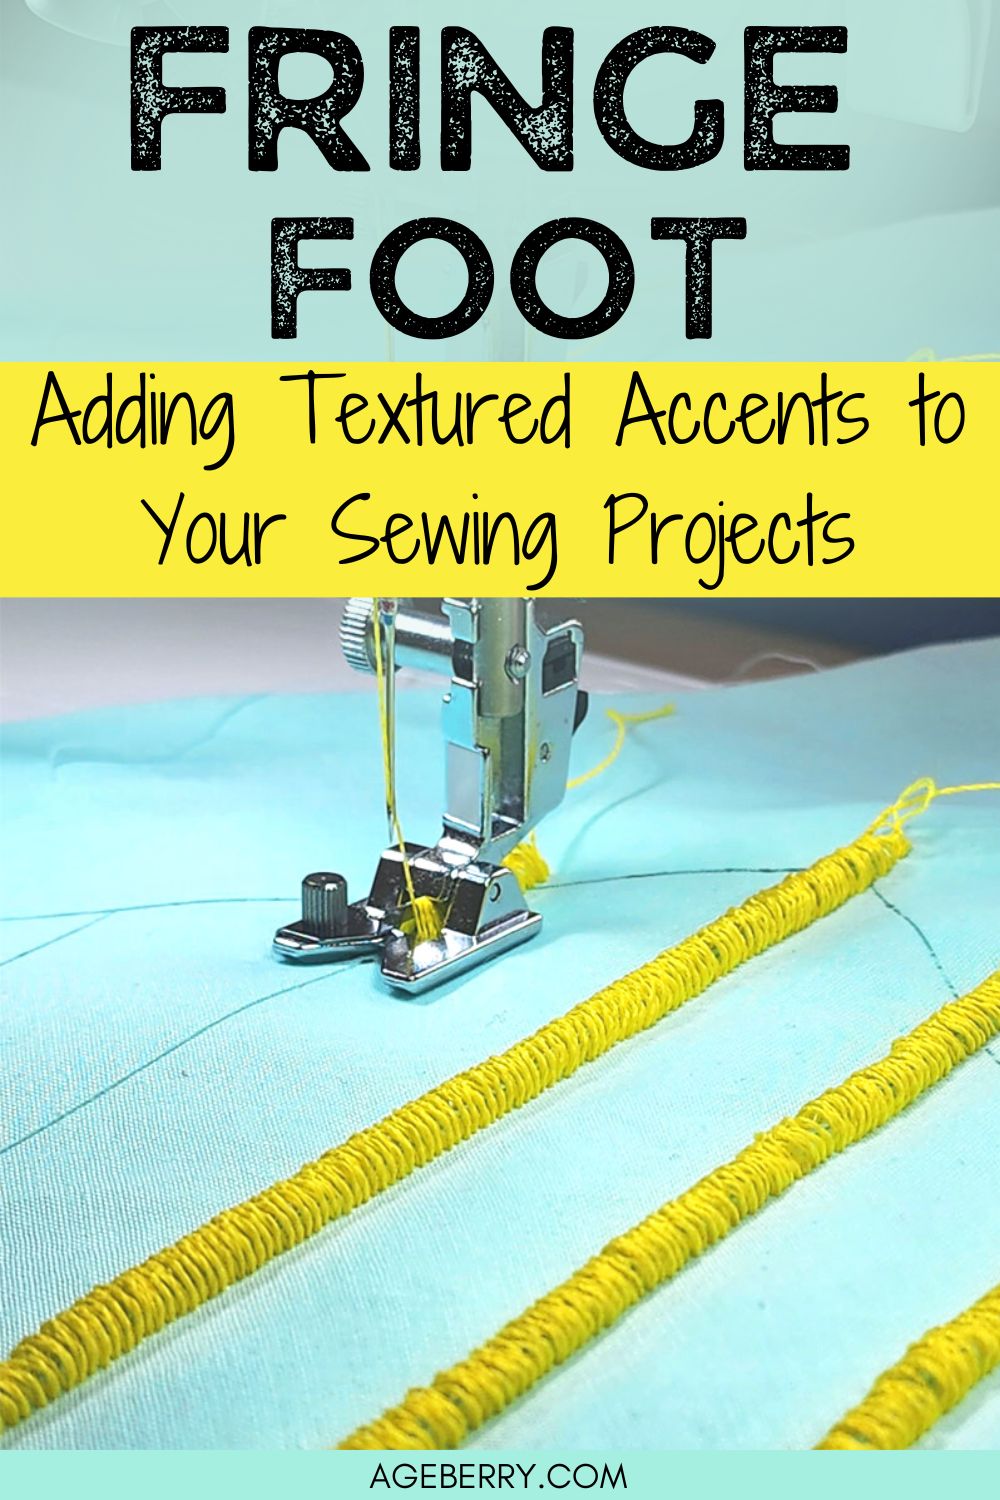
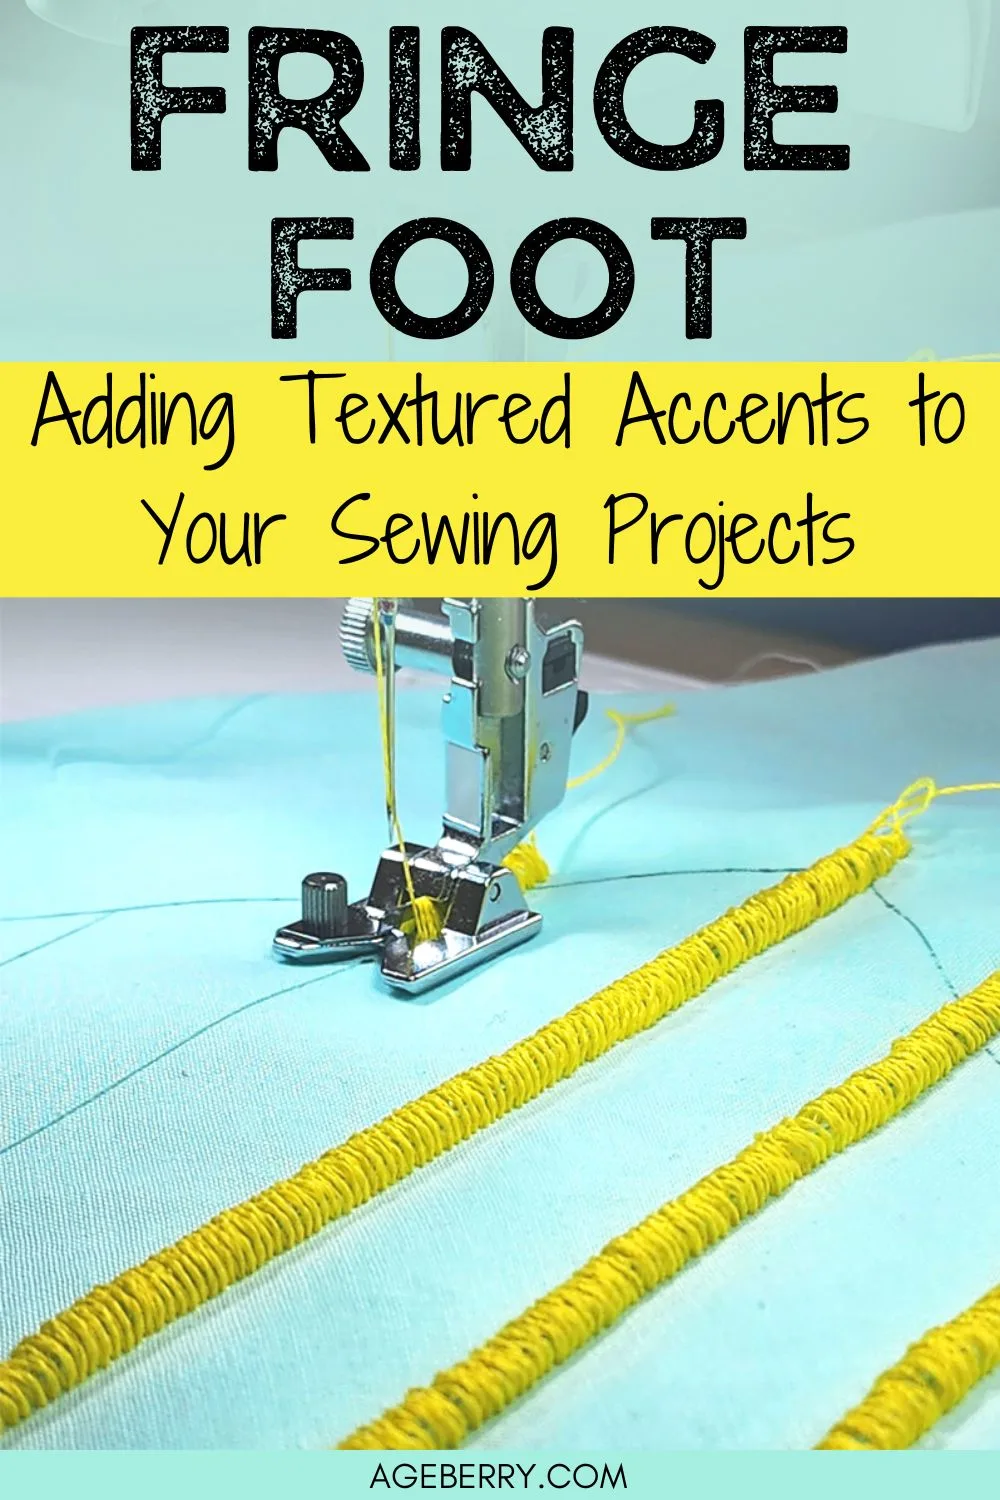
Now, let’s take a closer look at this foot – it appears to be very simple compare to other sewing machine preser feet. The main feature is a raised bar in the middle. This bar helps guide the thread when you use a zigzag stitch because it allows more thread to go into each stitch. That extra thread makes wider loops.
At the front of the foot, you can see a V shape. You should use the tip of the V to guide the fabric and position the loops perfectly.

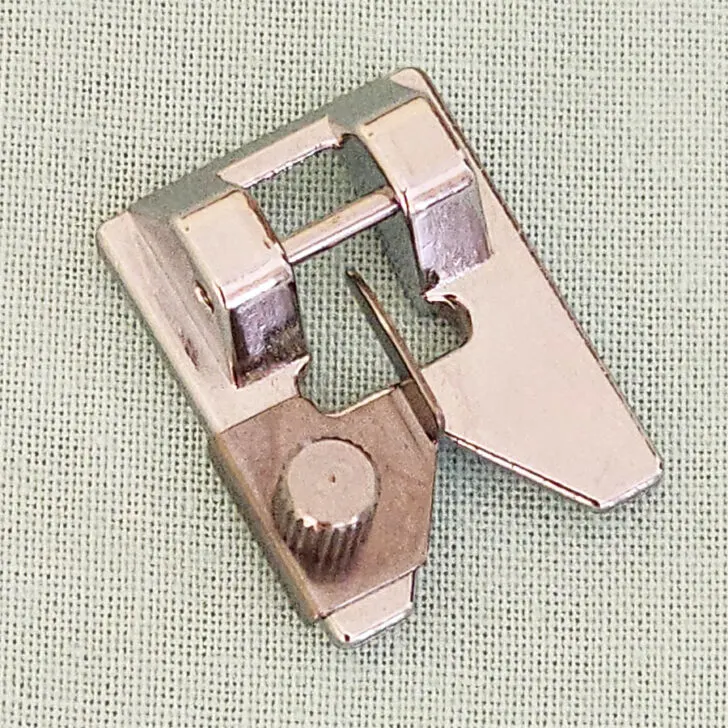
I can also see a screw as a part of the foot. This screw actually holds that raised bar – the main part of the foot.
Note: Some of the links on this page are affiliate links. This means I will receive a commission if you order a product through one of my links. I only recommend products I believe in and use myself.
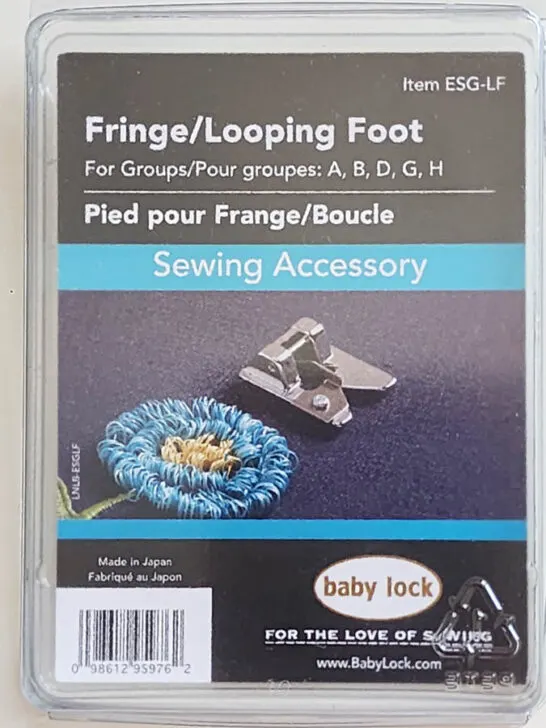
This foot is compatible with all low shank sewing machines. I have a Baby Lock foot as you can see from the image above, but it works perfectly with my Brother and Janome machines. If you don’t already own one you can find one at Amazon and the foot is also a part of a feet set sold by Madam Sew.

Types of Fabric and Thread That Work Best with a Fringe/Looping Foot
I’ve found that some fabrics work better than others with this foot. Consider the fabric’s weight, texture, print and thickness when working with it. Some fabrics that typically provide the best results are medium weight to heavyweight woven fabrics, like quilting cotton (sometimes together with batting), linen, and polyester blends.
You certainly can use this foot with lightweight fabrics but you will need to stabilize them with fusible interfacing or embroidery stabilizer.
✅ Related article: How To Use Fusible Interfacing
Textured fabrics, printed fabric with many colors, and stretchy knits are not suitable for this type of presser feet. The texture or model already present will in my opinion not be suitable for the extra decorative effects the foot creates. Also, the stitches created with this foot will not be stretchy.
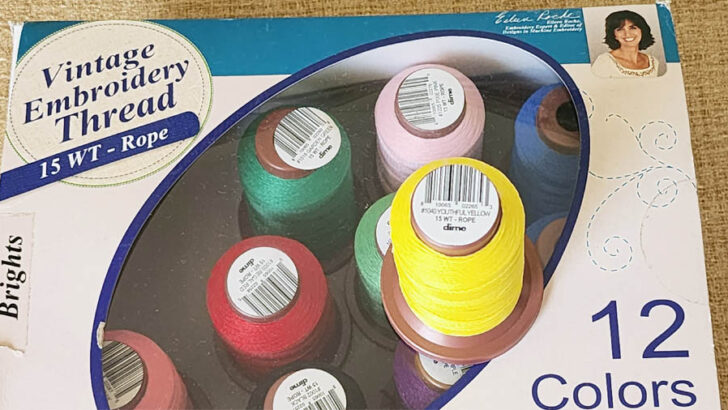
As for the thread, for some effects, it’s best to use a thicker thread as it will create more defined and visible loops or fringes. So I usually use weight 15 thread. If you are interested to buy this thread here is my link to the store (it’s an excellent thread but you can’t find it even on Amazon)
✅ Related tutorial: Sewing thread sizes and how to choose

But for some effects, I used 100% cotton thread with a weight of 40 and it worked well with this foot and created well-defined and sturdy loops on my fabric.

So I advise you to test different thread types and weights on a scrap piece of fabric before starting your project to see what works best for your specific application.
For the bobbin thread, you can use a different color thread (I used white for all these projects) and a regular weight 40 cotton thread. But the foot will practically “eat” the thread from the bobbin very fast (as the zigzag stitches are wide and very close to each other), so wind lots of bobbins for the project.
✅ Related tutorial: How to thread a bobbin
How to Attach the Foot to the Sewing Machine
Attaching a fringe presser foot (similar to the one I show in the images) to a low shank sewing machine is a simple process because it’s a snap-on foot. But there are fringe feet for high shank machines too – use your manual to see how to attach the foot.
If you have a low shank machine then you can follow these steps.
- Turn off your sewing machine (so you don’t start it accidentally) or press the LOCK button (if your machine has one).
- Remove the current presser foot by pressing a lever behind the foot.
- Position the fringe presser foot so that the metal bar is aligned with the slot on the sewing machine’s presser foot holder.
- Lower the presser foot lever on your sewing machine so that it is in the down position.
- Once the foot is in place, raise the presser foot.
- Turn on your sewing machine, choose a zigzag stitch and check if the needle is in the correct position so it doesn’t hit the foot.
- Test the fringe presser foot by sewing a few stitches on a scrap piece of fabric.
What Settings To Use With The Fringe Foot
To use a fringe presser foot on your sewing machine, you need to use the appropriate machine settings to achieve the desired results. First, select a regular zigzag stitch and set the stitch width to a range of 2 to 7 mm, with 5 usually being the best width. I use 5 for most of my projects. You can use 6 and 7mm too but I am afraid that the needle might hit the presser foot and break.
Next, set the length of the zigzag stitch to any value between 0.4 and 1. I like a length of 0.6 – it’s very suitable for my fabrics and threads. But it’s important to test your settings on a scrap piece of fabric to find the ideal length for your project.
Read your sewing machine manual for the zigzag length, some machines only allow adjustments in large increments. The Singer 4411 which has excellent reviews on Amazon only allows 0.5mm as a minimum but the next step is already 1mm.
It’s recommended to set the tension very low, between 0.4 to 1, with 0.6 being a suitable tension for my fabrics and threads. A low tension setting helps to create the looping effect.
The recommended settings may vary of course depending on the fabric and thread used. Experiment with the settings on a scrap piece of fabric before starting your project.
How To Use The Fringe/Looping Foot
There are various ways to use the fringe/looping presser foot to achieve different effects on fabric. Depending on if you are cutting the threads after sewing, and how you position the fabric under the foot, you can create at least six different effects. However, my preference is to use the foot to create a 3D looping effect on my projects and chenille type texture on my fabrics. I find the results to be quite impressive. It adds an interesting dimension to my sewing projects.
While the fringe presser foot can also be used to create fringes on the fabric, I don’t use these effects often. For this, I also need to use a different foot and stitch to secure the threads properly. In addition, I need to cut threads which is time-consuming if you have a project and not just a test stitch (see below). But I will show you how to do it in case you decide to use the technique.
Of course, the choice of effect to achieve with the fringe foot depends on personal preference, so I advise you to experiment with different techniques to find the perfect effect for your project.
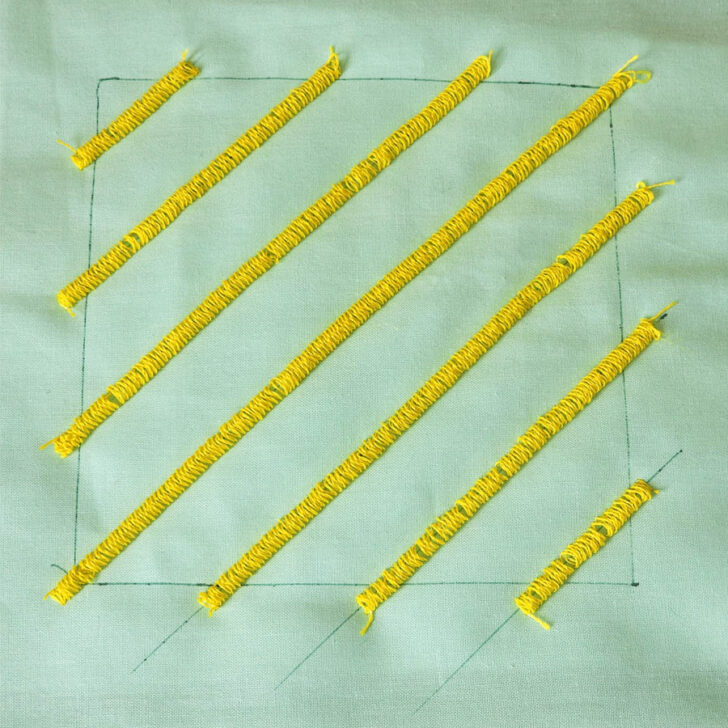
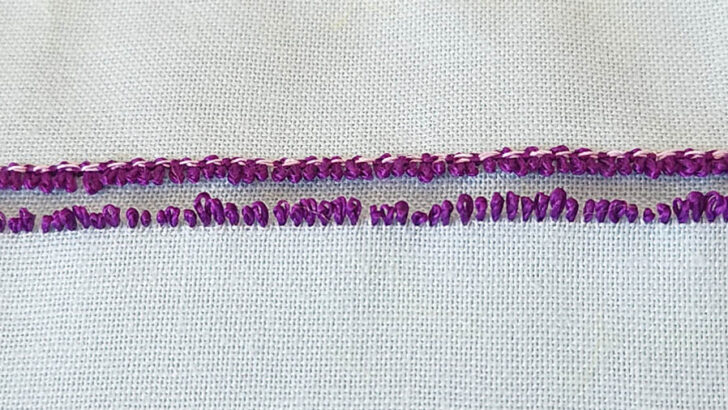
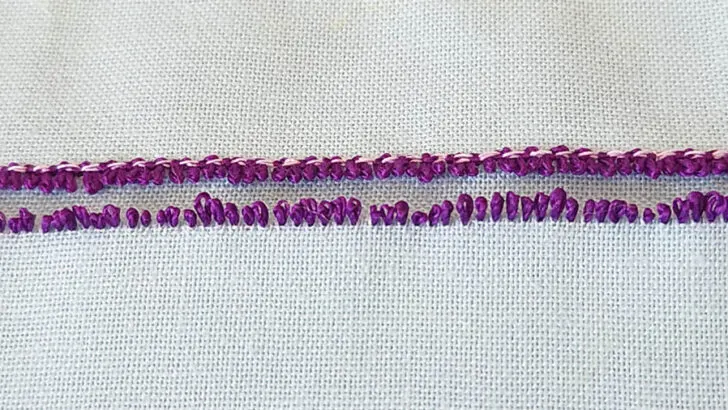
Effect #1. Making 3d Loops
Settings for this effect for my quilting cotton fabric:
- Zigzag stitch
- Width from 5 to 7mm
- Length – 0.6
- Tension – 0.4 for thinner thread or 0.6 for thicker thread
Make sure you fill lots of bobbins ahead.
Choose a needle suitable for your fabric and thread. I used Universal Shcmetz needle size 80/12 for 40 weight cotton thread and size 90/14 for thicker thread in my quilting projects.
✅ Related article: Everything You Ever Wanted to Know About Schmetz Needles
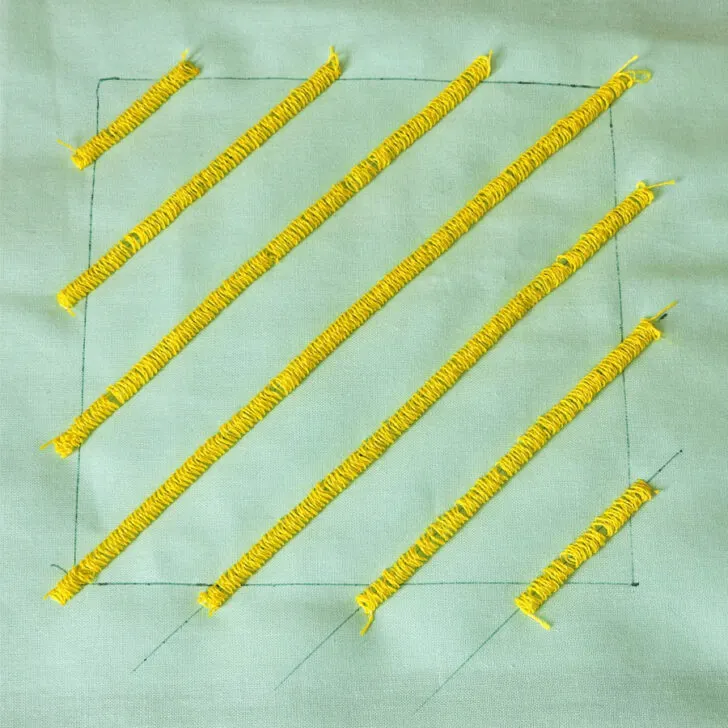
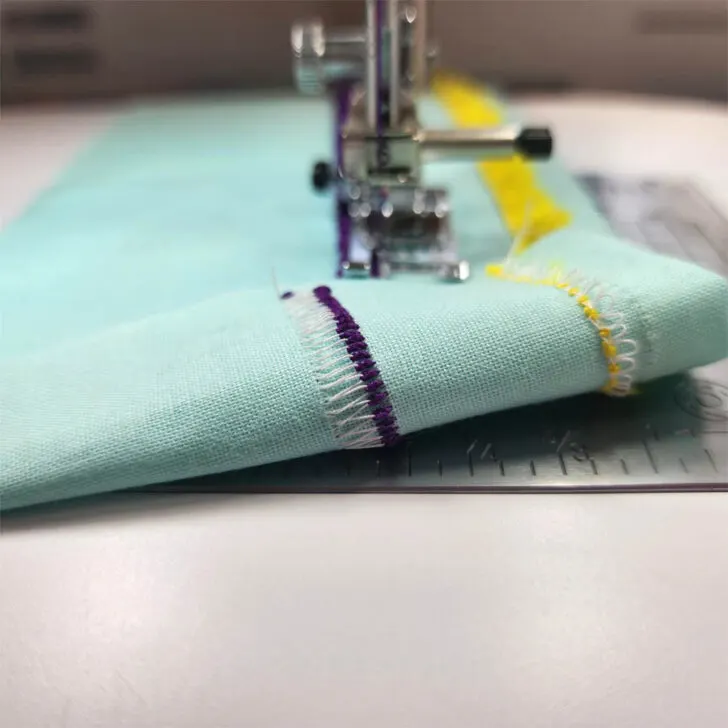
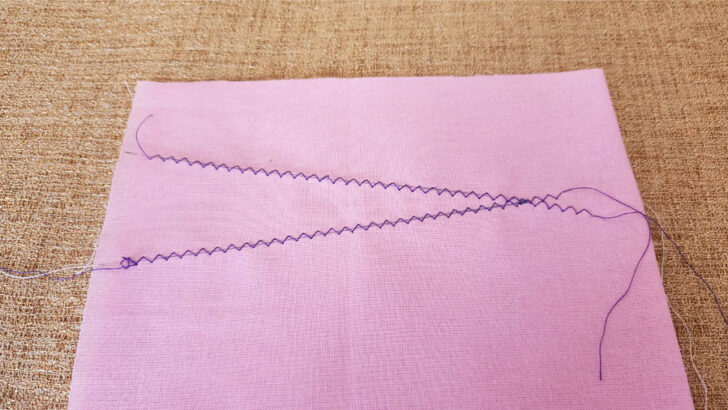
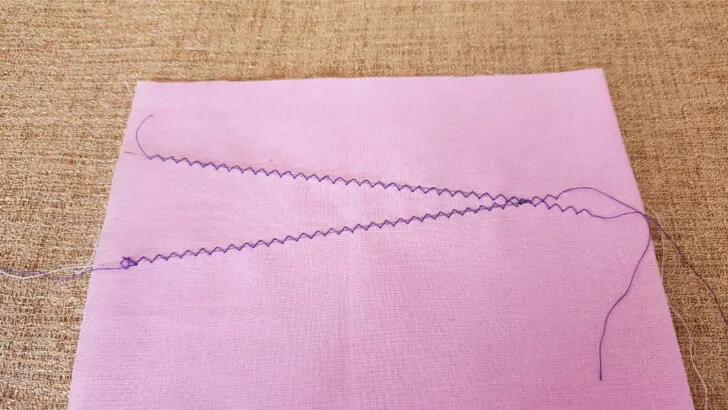
Once you’ve set up your machine, you can begin sewing. Very important – I usually draw lines (most of the time straight lines, but the point is to mark the design) on my fabric for correctly positioning the foot. For this, you will need a marking tool with disappearing ink, as it’s impossible to clear the marks under the loops of threads. I use my Frixion pen – I need just some steam from the iron for marks to disappear after the project is done. Check out current offers at Amazon.
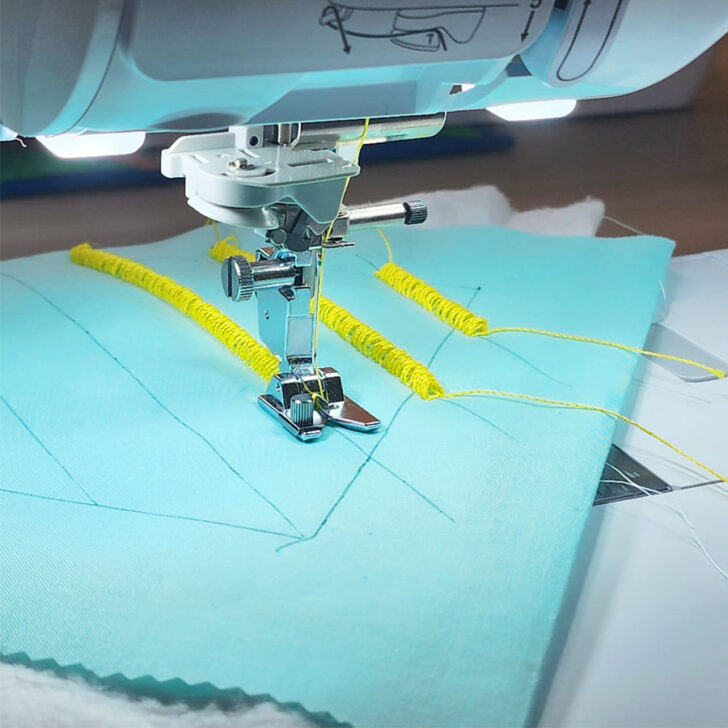
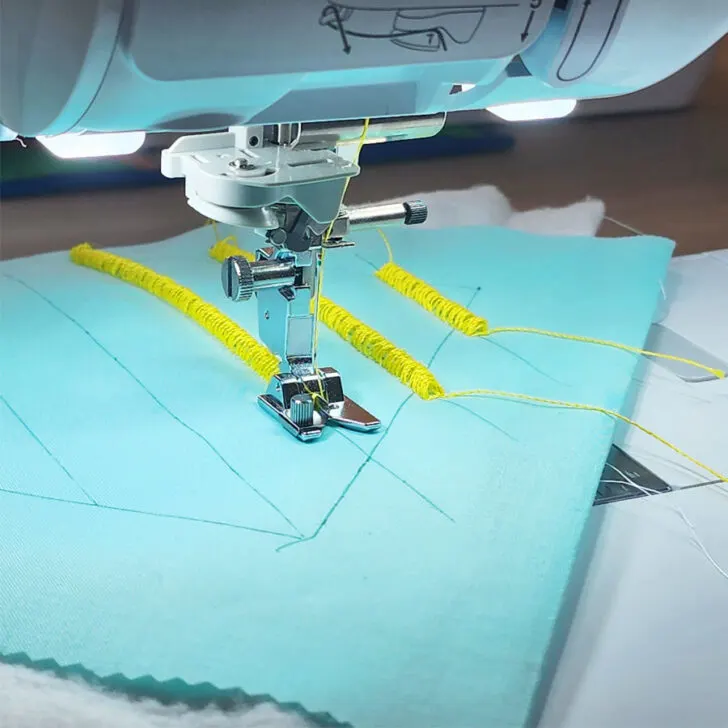
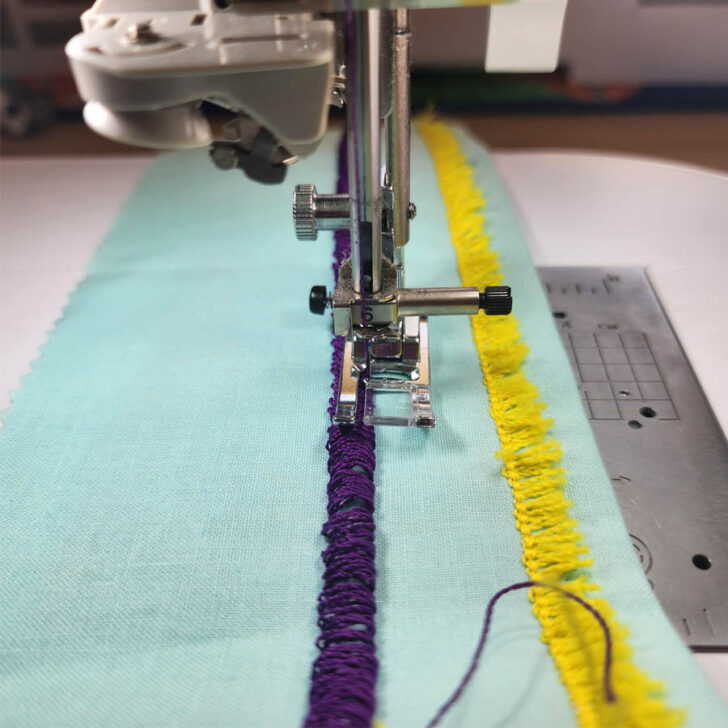
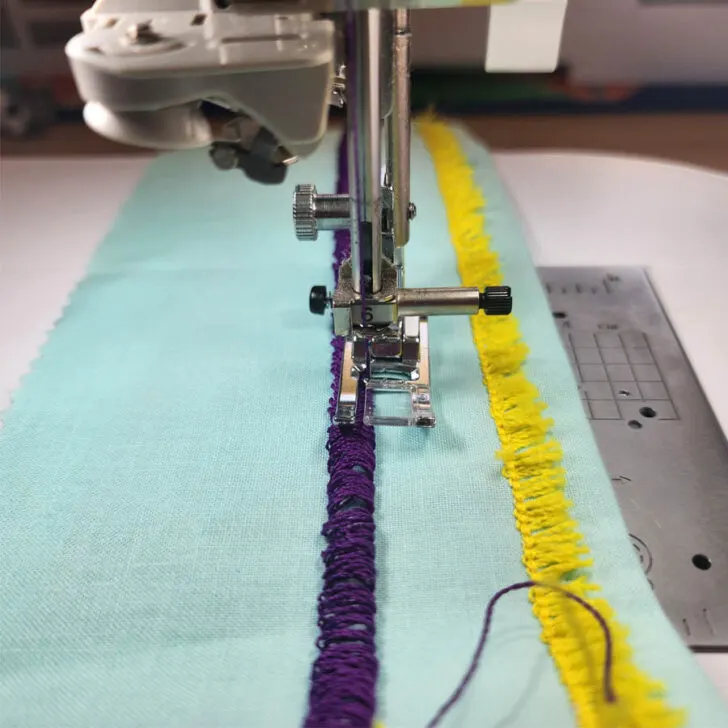
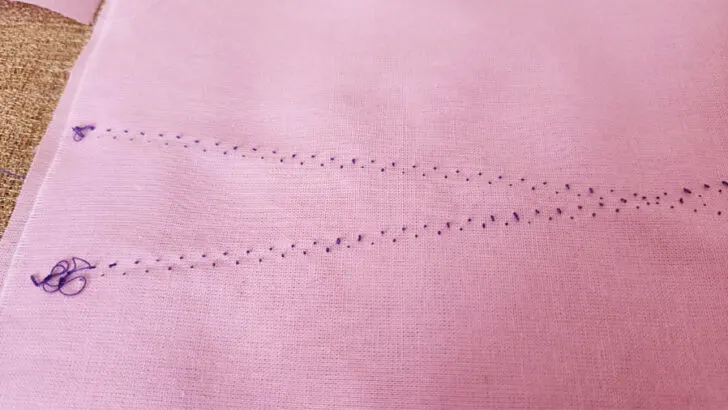
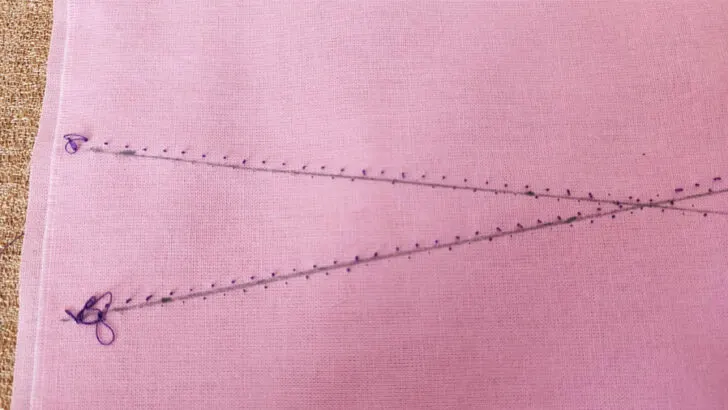
Make sure to sew a reverse stitch at the beginning of your fabric to secure the threads in place. Position the fabric under the foot and use the tip of the V shape on the front of the foot to guide the fabric along the drawn lines so that the loops are at an equal distance from the fabric edge and from the other loops.
Sew slowly from the beginning and carefully so that the loops are uniform and evenly spaced. But if everything works fine, you can increase the speed.
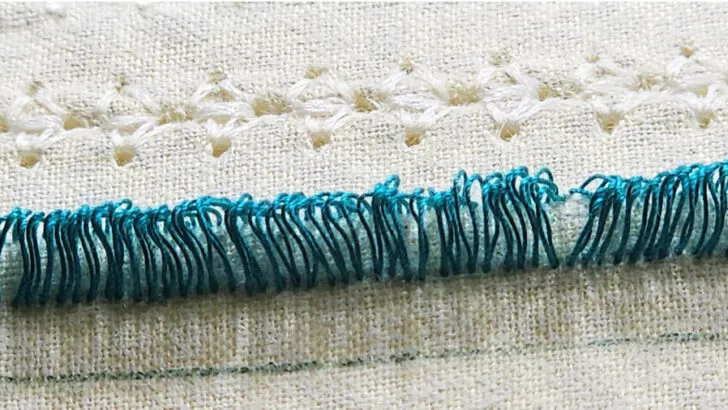
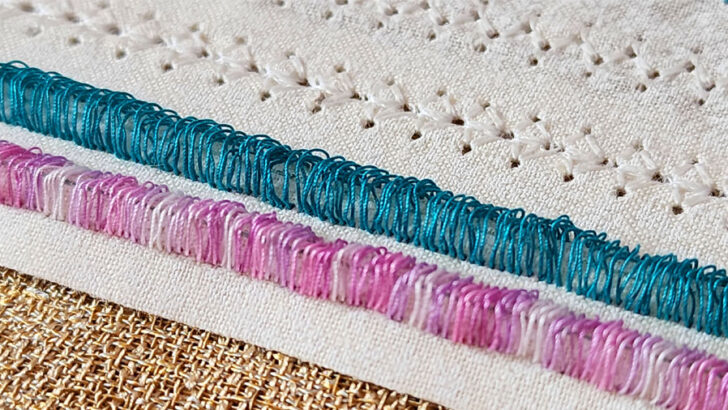
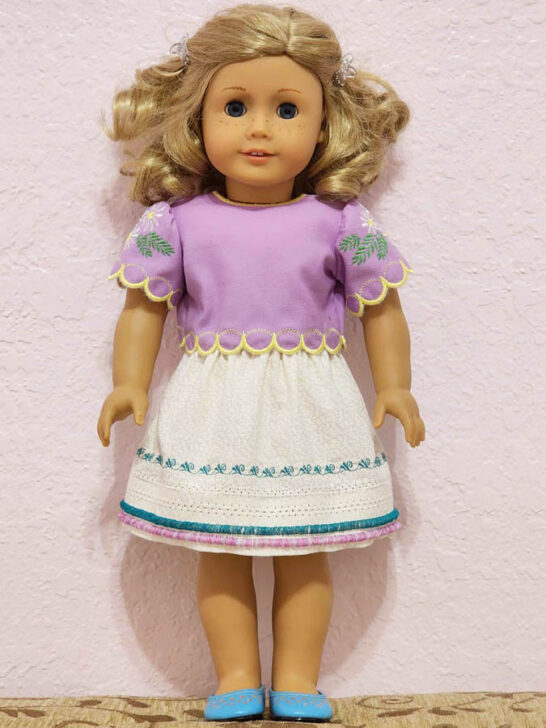
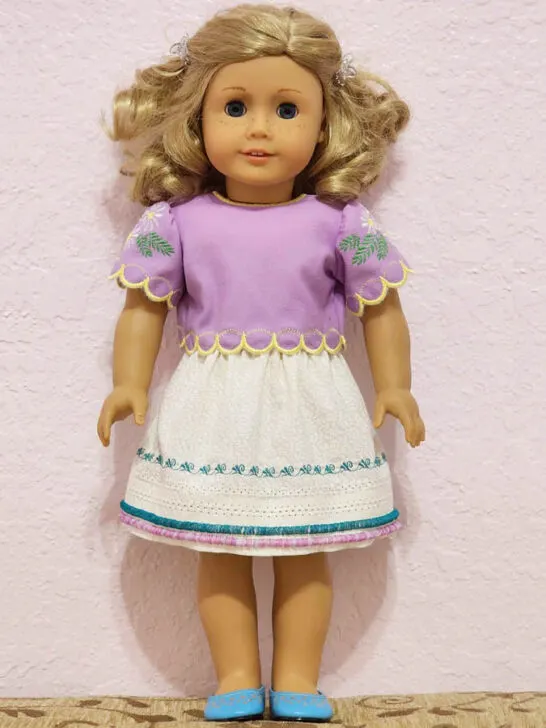
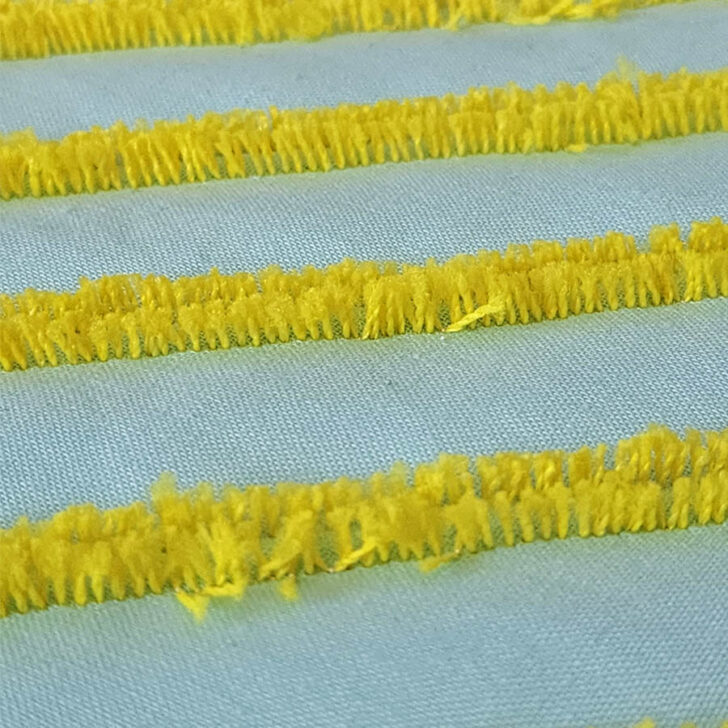
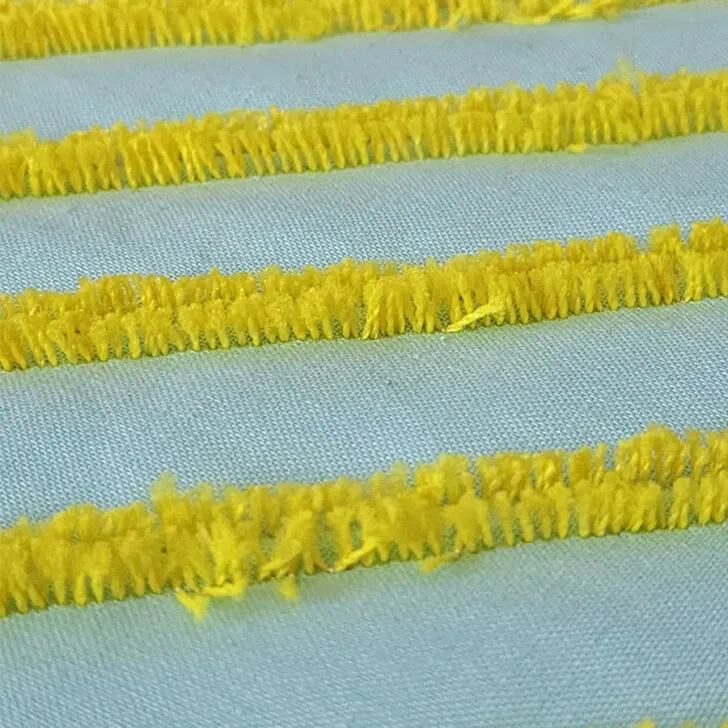
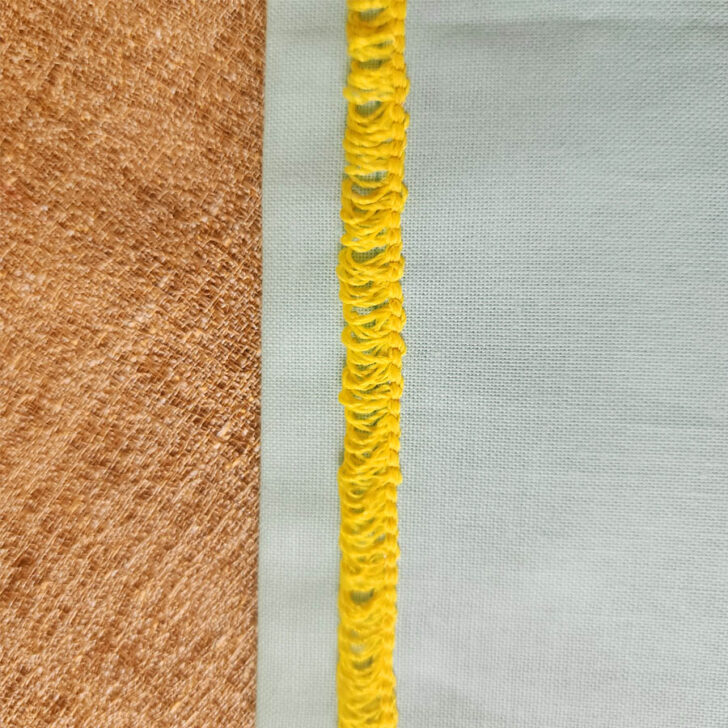
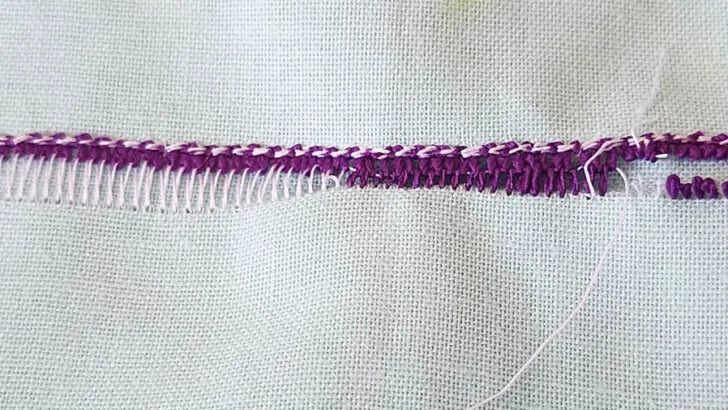
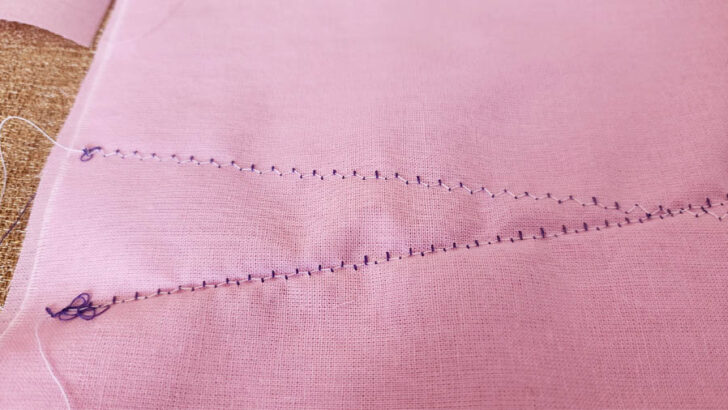
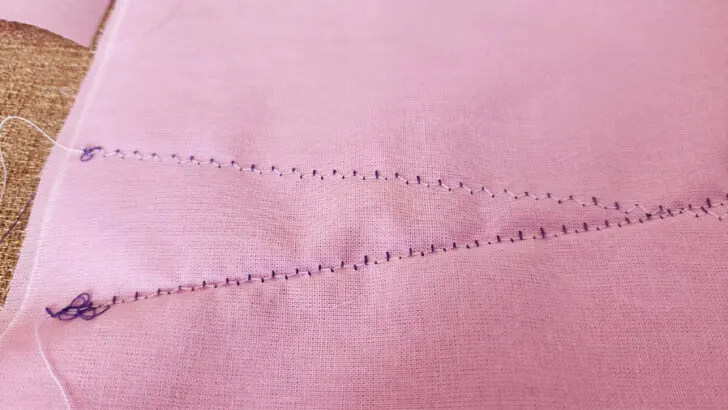
Once you reach the end of the fabric, sew another reverse stitch to secure the threads. As you can see in the image below I created 2 parallel lines of loops using different color threads. This is a skirt for a doll. I used thinner 100% cotton thread for this for a more delicate outcome. By the way, the upper stitch is made with a wing needle described in my article How to Use a Wing Needle for Hemstitching.

Here’s an image of how the skirt looks on a doll, so you can get a better idea of how the embellishment might look when on a garment.
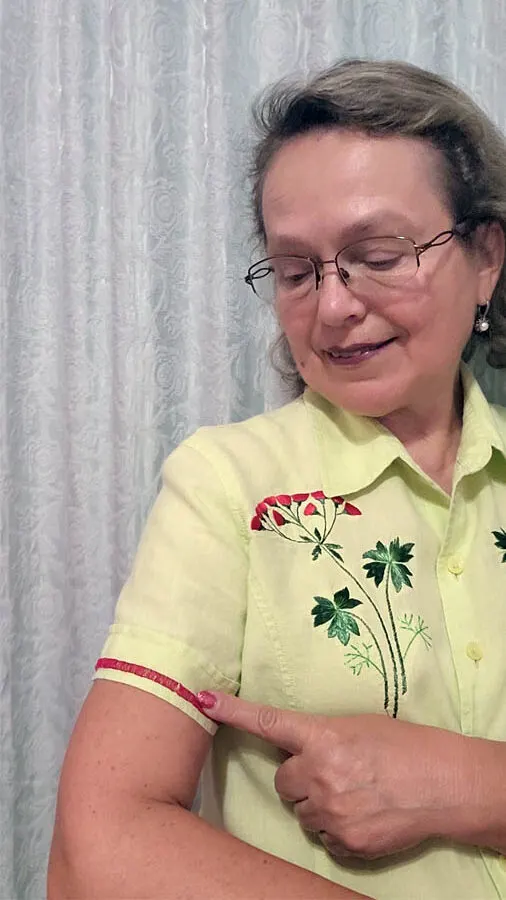
And I made a single row of loops on the sleeves of my linen blouse. Also used 100% cotton thread.
The outcome is really nice and makes the items unique. You won’t be able to find anything like this in a store.

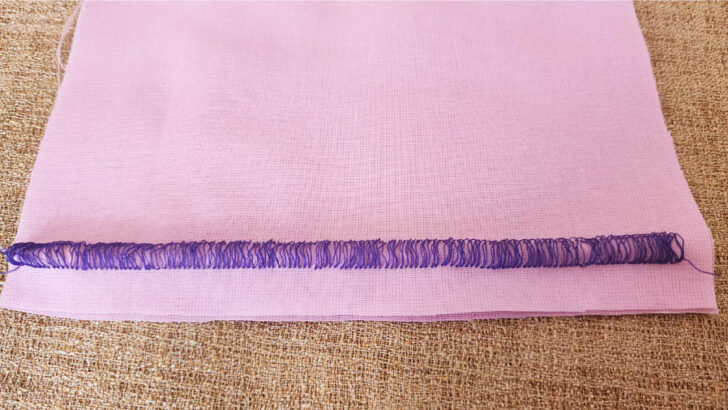
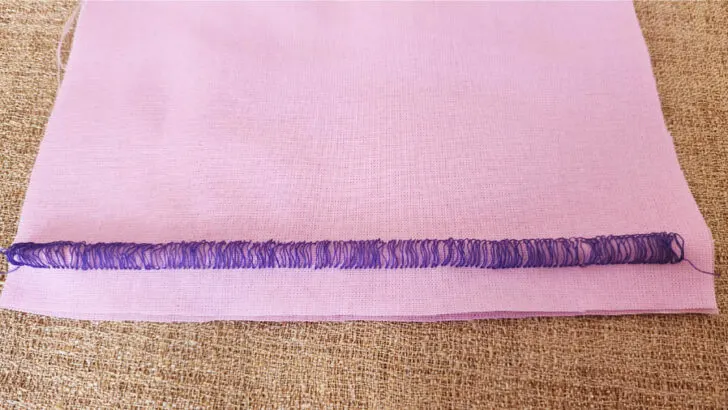
I also like to use this foot for quilting projects. Straight line quilting can be easily done with the fringe foot. Here is the image of one quilt block I made. For quilting projects, I use thicker 15 weight thread.
✅ Related tutorial: The Basics of Straight Line Quilting
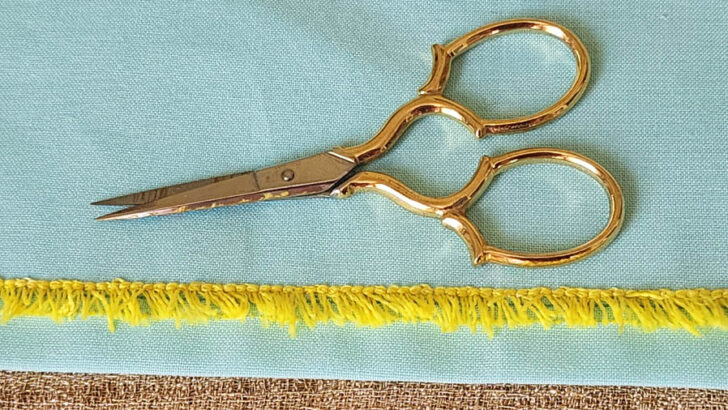
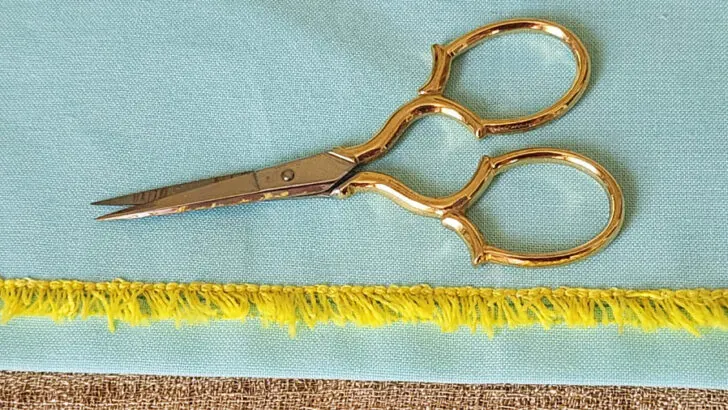
Effect #2. Making Chenille Type Texture By Cutting The Loops In The Middle
The first step is still the same as above – make loops first as described in Effect #1. So the settings are the same for this effect.
Use a thicker 15-weight thread for this effect and size 90/14 needle.
To achieve the chenille type effect you will need to cut the loops in the middle.
For this, you will need small sharp scissors. I used Gingher brand scissors – they are very sharp and cut thick threads without any problems. Check out current offers at Amazon.

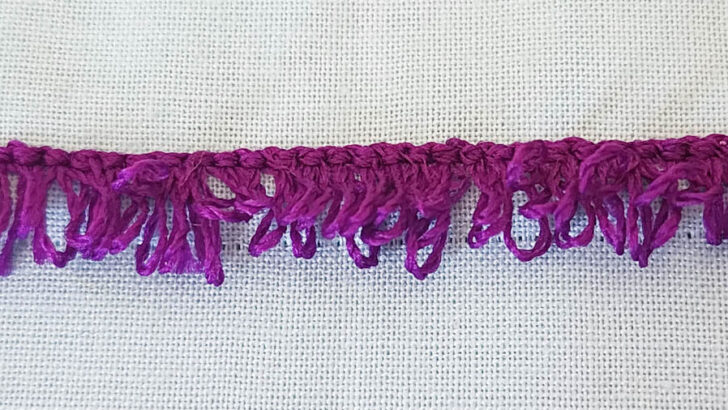
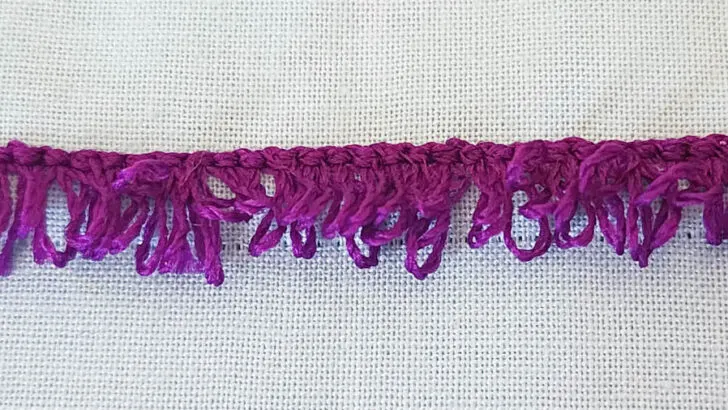
Effect #3. Making An Eyelash Fringe By Cutting The Loops At Any Edge
I guess this is the main purpose of the fringe foot – sewing a fringe.
However, you can’t cut them right away after making loops because the stitches will unravel.
To prevent this, you need to stitch down one side of the loops using a straight stitch. If you have a triple straight stitch, that’s better, but if not, a regular straight stitch with a small length (like 1mm) will do.
✅ Related tutorial: Types of Sewing Machine Stitches: Unraveling the Mysteries of the Straight Stitch
So you will need to change the presser foot for the straight stitch – use just a regular presser foot.

Stitch down on one side of the loops with the straight stitch. Try to sew exactly at the edge of the loops. But don’t go out of the loops – we need to secure the thread.

Then, use small scissors to cut the loops on the other side. Pull out the snipped threads from the right side of the fabric.
As you can see, the fringe looks quite nice and unusual.
Effect #4. Making The Fringe By Cutting The Loops At The Specific Edge
The process of making a fringe with a fringe presser foot can be done in a way that keeps the loops intact and prevents a frayed look.
The settings are the same as in previous examples. You can increase or decrease the stitch length depending on the look you want and how close you want your fringe threads to be. To achieve this, take the following steps.
Sew the regular 3D loops as I described above using a thick thread (weight 15).
Next, look at the wrong side of the fabric and find the bobbin thread stitches.
You will need to sew a row of straight stitches opposite to the side where the bobbin thread is located.
See the image below – I have white bobbin thread.

So, change the presser foot again – install the regular presser foot instead of the fringe foot. And change the zigzag stitch to the triple straight stitch. If you don’t have the triple straight stitch, use the straight stitch with a length of 1.5mm.
Sew the straight stitch along to the edge of the loops to secure the thread, again – opposite to the side where you see the bobbin thread.
Next, remove the bobbin thread (white in my project for contrast) to keep the fringe intact. Just pull it out, and it will be removed easily.

Once you remove the bobbin thread, bring all those other threads (that are not secured by a straight stitch) over to the front.
The fringe will not appear frayed as you see in the image below, and it will have a nice neat look.
Effect #5. Making Tailor’s Tacks With The Fringe Foot
In addition to creating beautiful 3D loops and fringes, the fringe presser foot has a practical application for making tailor tacks. If you’re not familiar with tailor tacks, they’re a traditional method of marking pattern lines on fabric for accurate cutting and sewing.
I actually prefer to use other methods (not the tailor tacks) for transferring pattern lines onto my fabric, and you can see me using them in my tutorials. For example, in the article Tracing Wheel In Sewing – what it is and how to use it. But the fringe foot can make creating tailor tacks very easy if you want to use them.
Let me show you how to make them with the fringe foot. The settings are a bit different for this type of application.
First of all, decrease the zigzag stitch width – I put it to 2.5 mm. You could also use 2 mm but not lower than that because you don’t want the needle to hit the raised bar in the middle of the fringe foot.
Increase the stitch length – I went all the way to 2.5.
Keep the tension at a low number – I had it at 1 this time.
So, you have something marked on your fabric. For example, a dart. And you need to transfer those marks to the other side of the pattern. Fold the fabric and sew the stitches using the fringe foot.
Next, remove the bobbin thread (from the wrong side of the fabric). Just pull it and it will easily go out of the stitches.
On the right side of the fabric, you will see the marks made by threads. Draw the lines of the dart in between the stitches. Remove the threads after that.


You can use this method to mark pleats, pocket placements, etc.
✅ Related tutorial: How To Sew Darts: Tips And Techniques For Different Types Of Darts
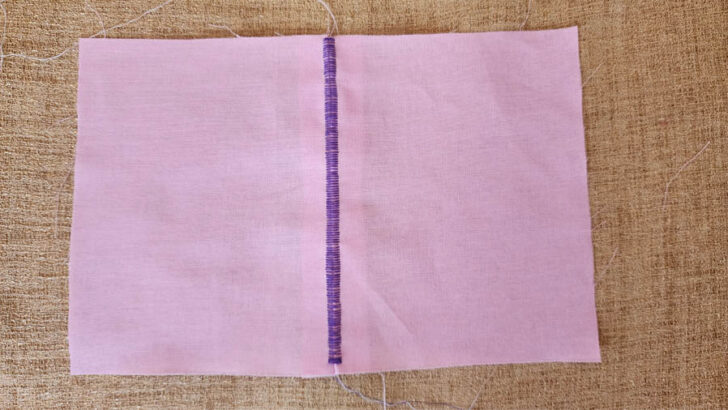
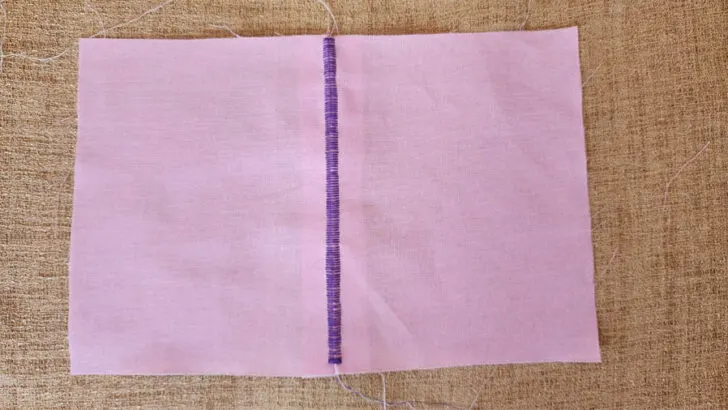
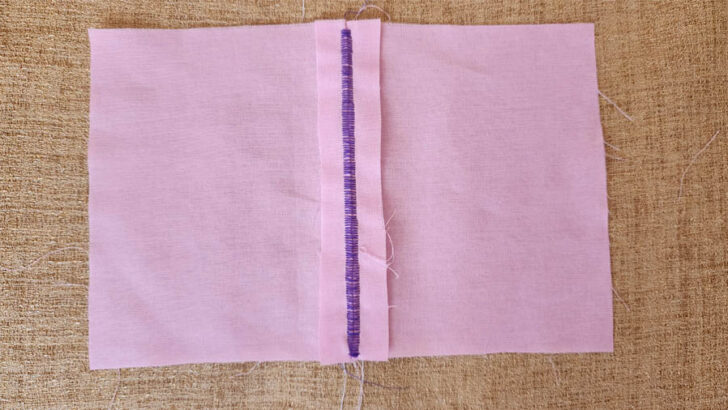
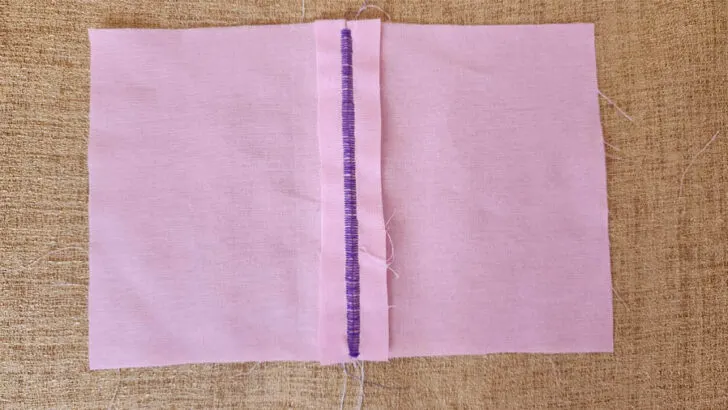
Effect #6. Creating Fagoting Stitches With The Fringe Foot
For this effect, use the same settings as for the 3D loops, but use a thinner thread, like 100% cotton weight 40 thread.
Place the pattern pieces (only ones with straight lines, like rectangles) right sides together and sew a straight seam (usually with ⅝” seam allowance). Secure the seam by sewing backstitches at the beginning and the end of the seam.
After you sew the seam, open the seam allowance by pulling the fabric slightly and press the seam allowances back on each side. Turn the fabric right side out. You will have so-called fagoting stitches on both sides of the fabric and they hide the seam under them.
In conclusion: by following the tips and techniques outlined in this article, you can use the fringe foot to create a variety of textures and embellishments. Your sewing projects are sure to benefit from the added texture and visual interest that the fringe foot can provide.
Did you find this tutorial helpful? If so, save this pin (see below) on your sewing board so you can come to the article later when you need this information on how to use a fringe foot , and follow me on Pinterest for more tips, tutorials, and inspiration!
latest posts
- Ever Tried This on Your Serger? This Differential Feed Feature Will Amaze You
- Ditch My Sewing Machine? Not in This Lifetime!
- Adorable DIY Needle Book | Easy Tutorial for Beginners
- Master the Seam Ripper: Your Ultimate Guide to Precision Stitch Removal
- Think You Know Zippers? This Installation Guide Might Surprise You
- Why Does Your Seam Ripper Have a Red Ball? Discover Its Purpose!
- Topstitching Troubles? This Simple Trick Will Turn It Around Instantly!
- How to Sew Shirring: A Step-by-Step Guide to Elastic Thread Gathering
- Are Self-Threading Needles Really Useful?
