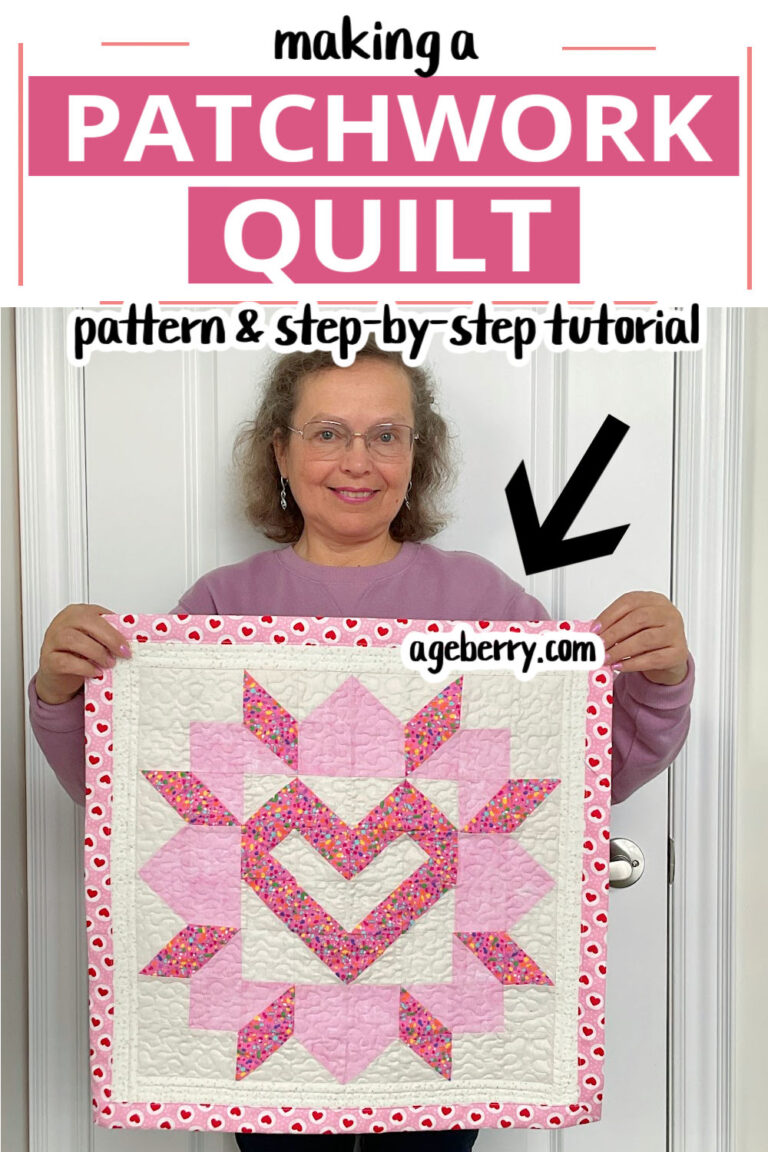
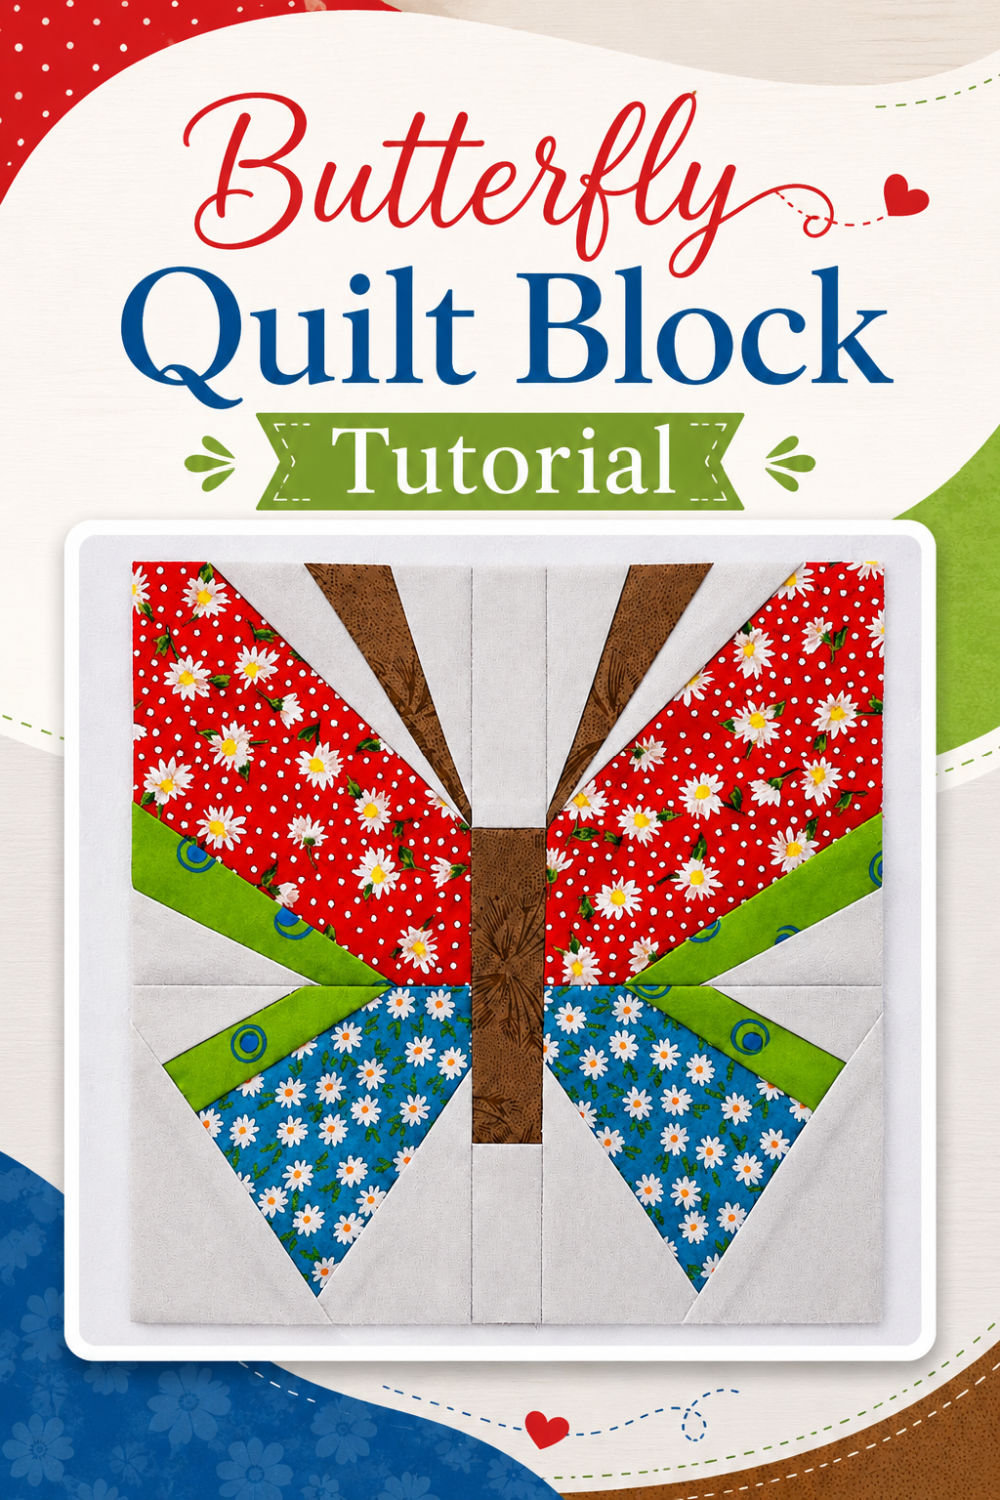
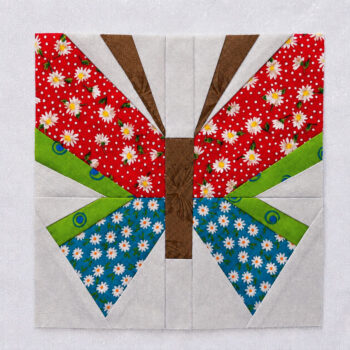
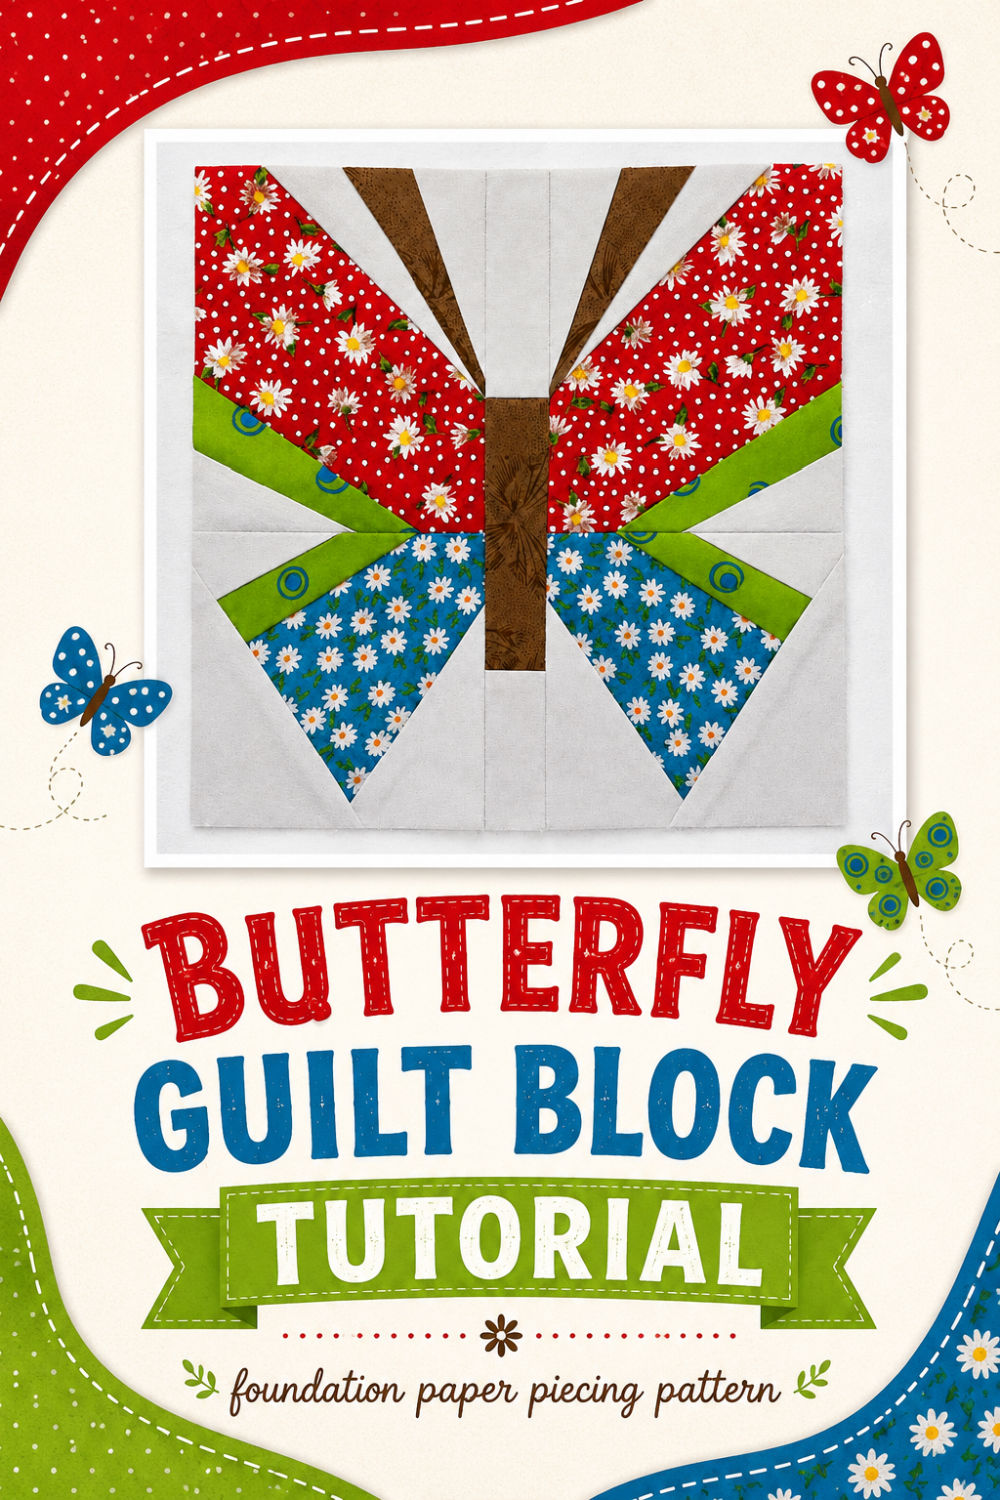
Butterfly Quilt Block Tutorial – Foundation Paper Piecing
This tutorial shows how to create a butterfly quilt block with foundation paper piecing. For this block, I wanted to try a method where I don’t sew directly through the paper. Mostly, I was curious whether I could avoid the part nobody loves very much: tearing out all those little bits of paper after the block is finished.
The method worked well for this butterfly.
That said, you can absolutely make this butterfly with traditional foundation paper piecing too. If you already have experience sewing directly on the paper, that method will work very well.
The block is simple enough for a confident beginner, but I wouldn’t call it the very first sewing project. It can, however, be a very nice first foundation paper piecing project if you take your time and follow the instructions.
You can find the butterfly PDF pattern and templates in my shop. I also included SVG templates for cutting machines and a full step-by-step sewing tutorial PDF, so you can download everything, save it to your device, and use it without ads while you sew.
What You’ll Need
- Butterfly foundation paper piecing pattern
- Printed fabric templates
- Vellum paper or another semi-transparent paper
- Quilting cotton fabric in your chosen colors (5 different colors)
- Fabric glue stick or repositionable spray adhesive
- Hera marker, point turner, or another creasing tool for folding the paper on the sewing lines
- Regular sewing notions (like pins, rotary cutter, ruler, etc)
Optional but helpful:
- Open toe presser foot
- Finger presser, seam roller, or mini iron
- Medium cardstock for making templates
- Removable fabric marker, such as a Frixion pen
- Cricut machine, if you want to cut the templates from SVG files
How To Choose Fabric For This Paper Piecing Block
Choosing fabric for foundation paper piecing is a little different from choosing fabric for a regular quilt block. The pieces are smaller, the seams are sharper, and every fabric has to earn its place.
For this butterfly block, I recommend using quilting cotton. It presses well, holds its shape, and is easy to handle when you are folding the paper and sewing beside the lines. Very soft, stretchy, slippery, or loosely woven fabrics can make the process harder than it needs to be.
The butterfly has several sections, so choose fabrics with enough contrast. If the colors are too close to each other, the shape of the butterfly can disappear. I used different fabrics for the upper wings, lower wings, body, antennae, and background so each part is easy to see.
For the wings, small prints work very well. Florals, dots, tiny geometric prints, and small novelty prints can all look nice. Try to avoid very large prints unless you don’t mind that only a small part of the design will show. In small paper piecing sections, a large flower or big motif may get cut off and look more like a mystery blob than a flower.
For the butterfly body and antennae, choose a fabric that stands out from the wings. Brown, black, dark gray, or another darker fabric works well because it gives the butterfly a clear center. I used brown fabric for both the body and antennae so they look connected.
For the background, choose something that lets the butterfly show. A solid, tone-on-tone, or subtle shimmer fabric works better than a busy print. My background fabric is white with silver specks, and the plain fabric in the block is a bright shimmering silver. These fabrics add interest, but they don’t compete with the butterfly wings.
It also helps to think in pairs. This butterfly is symmetrical, so most pieces have a matching partner on the other side. This keeps the two wings balanced.
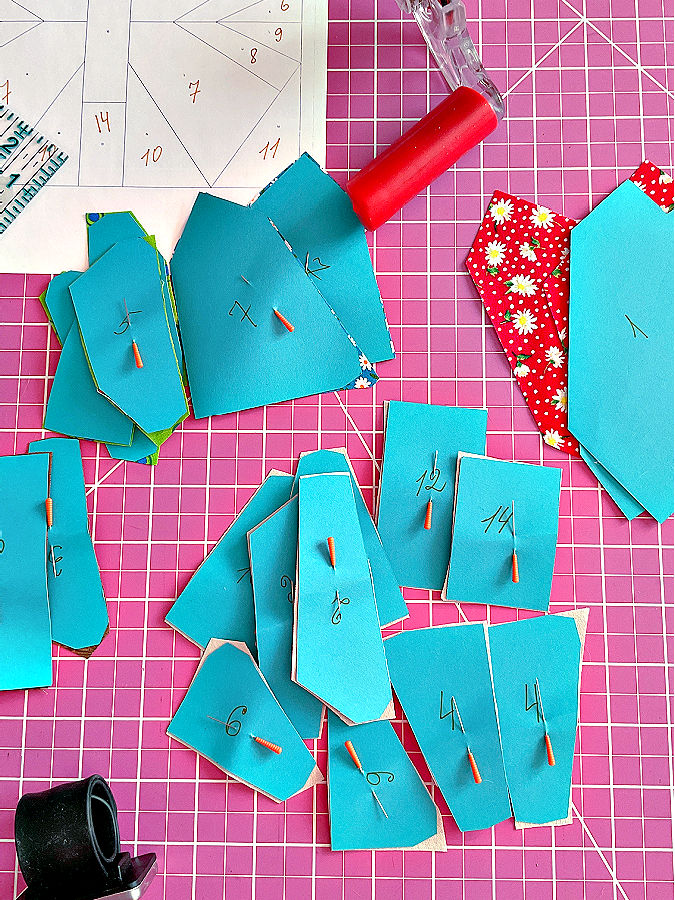
Step 1: Print The Pattern And Check The Numbers
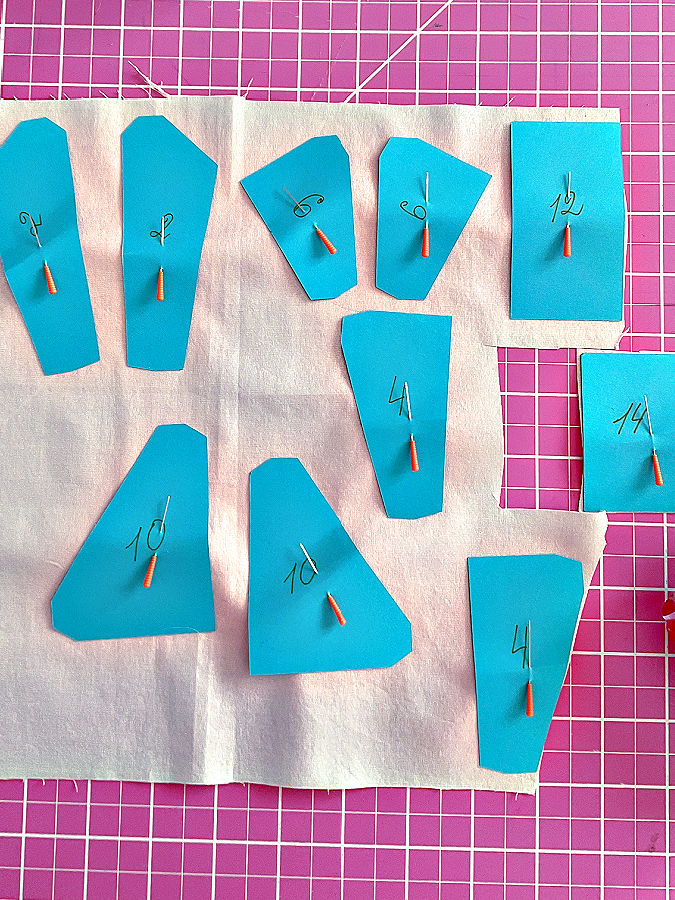
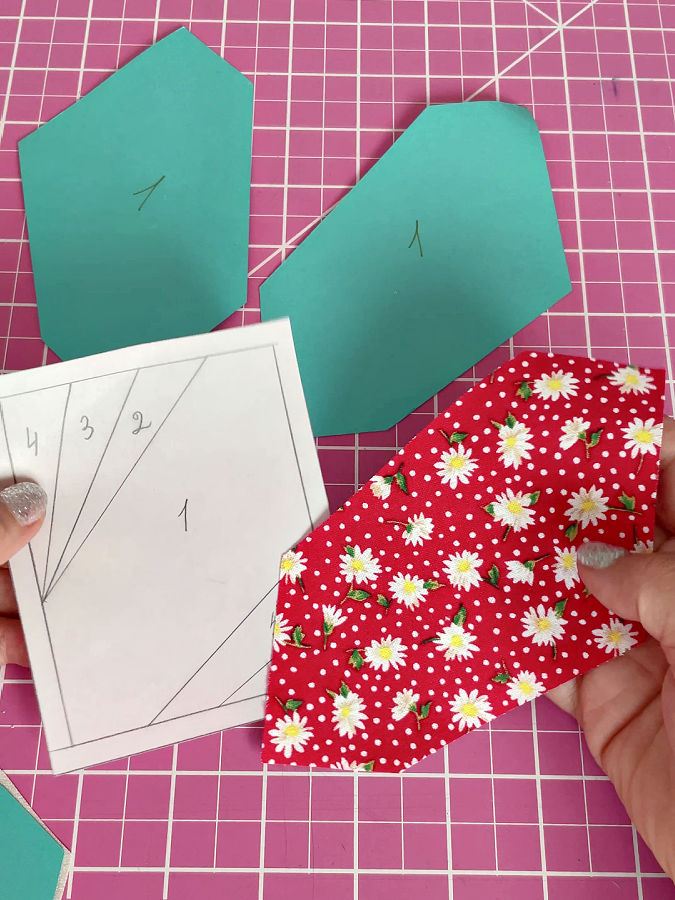
Print the butterfly pattern and the templates. Before you cut any fabric, look closely at the numbers on the pattern. These numbers show the order in which the fabric pieces will be added.
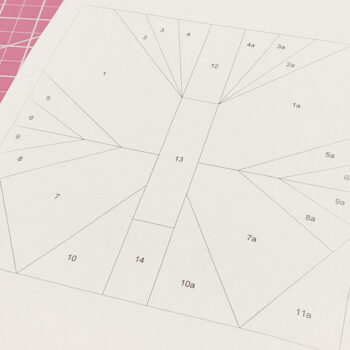
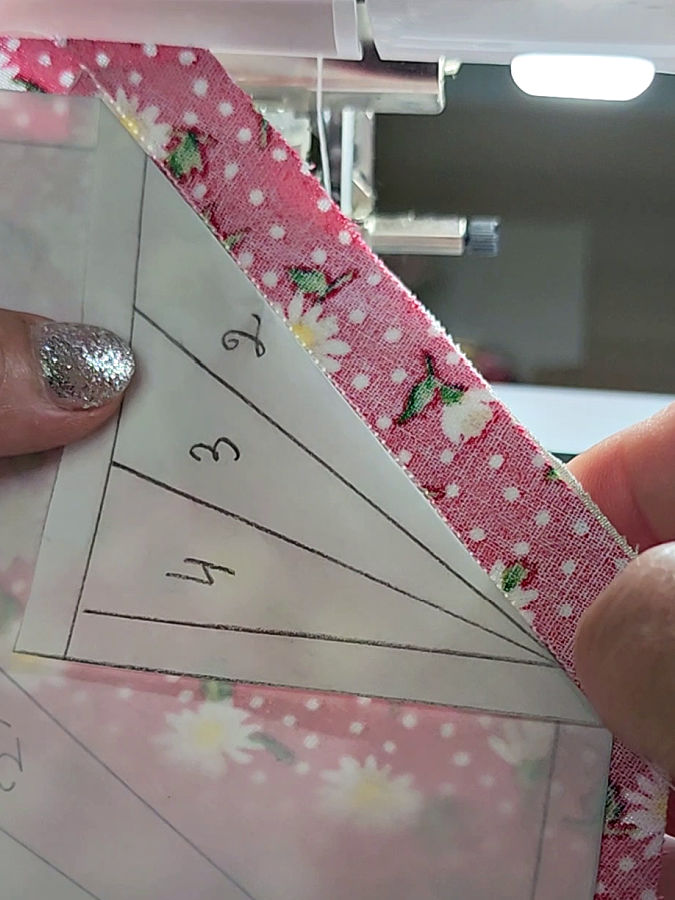
For this butterfly, I numbered the pieces starting from the main wing pieces and moving through the smaller sections. The left wing has pieces numbered 1, 2, 3, 4, 5, 6, and so on. The right wing has matching pieces with an “a” after the number, such as 1a, 2a, 3a, 4a, 5a, 6a, etc.
The “a” pieces are the mirror-image pieces for the other side of the butterfly. So 1 and 1a are a pair, 2 and 2a are a pair, 3 and 3a are a pair, and so on. They are usually cut from the same fabric so both wings match.
I used this numbering system because the butterfly is symmetrical, but the pieces are not interchangeable. A piece from the right side will not automatically fit the left side unless it is mirrored. The “a” keeps each matching piece easy to recognize while still showing that it belongs with the same fabric as the plain-numbered piece.
You will also see separate numbers for the body pieces in the center. These are sewn in their own order, just like the wing sections.
Don’t skip the numbering step. In foundation paper piecing, the numbers are your map. They tell you which piece comes next, which pieces match, and how the butterfly shape will build from one section to the next. The pattern is simple enough for a confident beginner, but following the numbers is what keeps it from turning into a confusing pile of almost-matching shapes.
Note: Some of the links on this page are affiliate links. This means I will receive a commission if you order a product through one of my links. I only recommend products I believe in and use myself.
Step 2: Prepare The Foundation Paper
For this foundation paper piecing project, you can use different types of paper. But regular printer paper is not the best choice for this method because the paper needs to be at least somewhat transparent. You need to see the pattern lines from both sides, so use paper that lets the lines show through clearly.


There are also newer materials people use instead of paper, for example, lightweight embroidery stabilizers. Some of them can even stay in the project, so you don’t have to tear anything away after sewing.
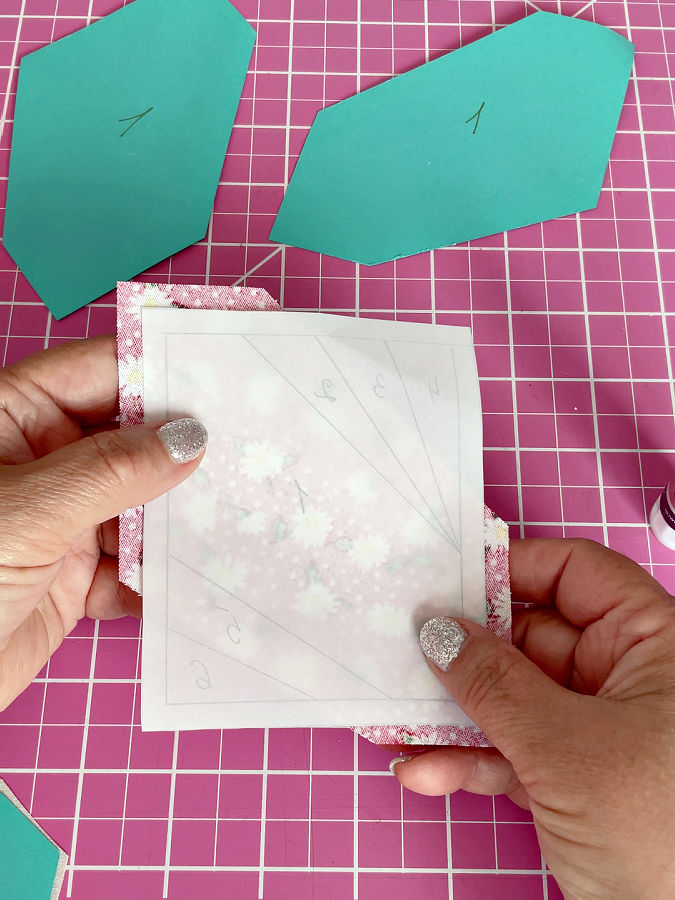
For my butterfly, I decided to use vellum paper. Vellum is thin and transparent, which makes it very helpful for this method. I need to see the pattern lines clearly from both sides. Vellum makes that much easier. So I will make a copy of the pattern on vellum.
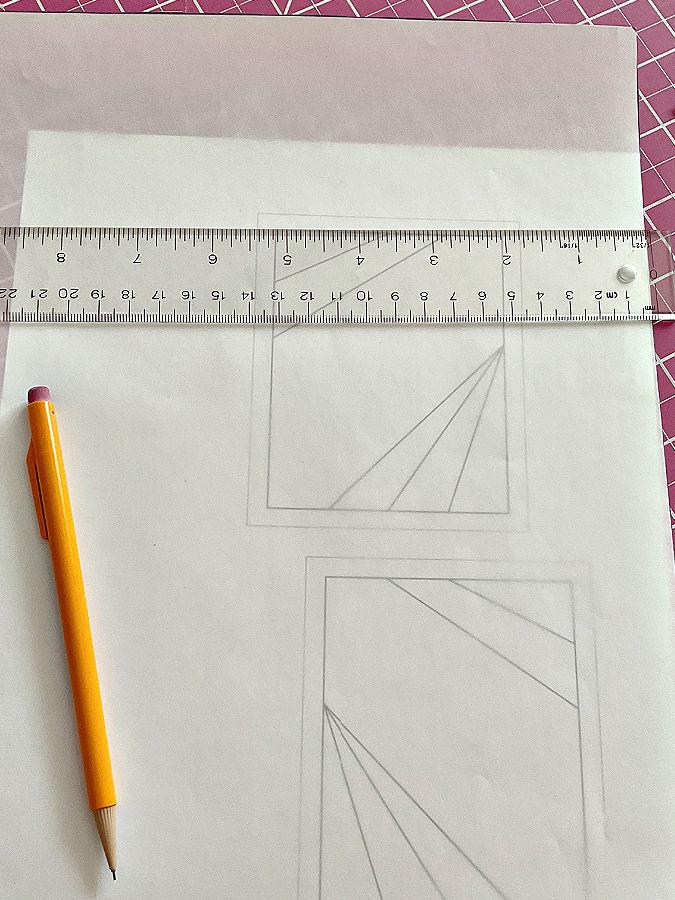
To sew the butterfly, you will need to prepare 5 separate foundation blocks. These blocks will be pieced separately first, and then sewn together to make the full butterfly design.
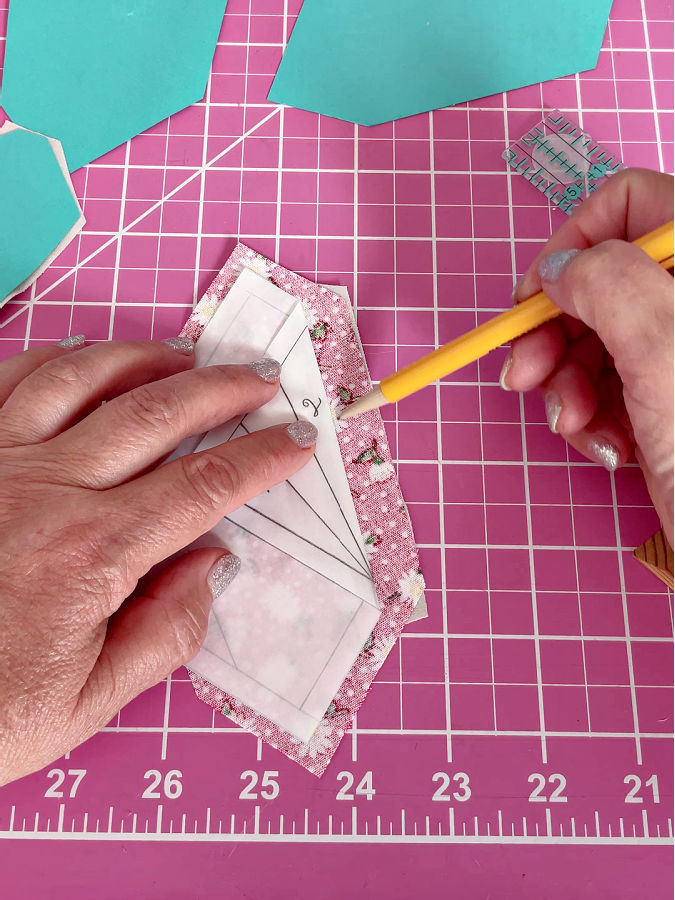
Copy each of the 5 block sections onto vellum paper. Use a ruler and a sharp pencil so the lines are clear and accurate. Don’t trace freehand if you can avoid it — straight lines need to stay straight, especially in foundation paper piecing. Even a small shift can make the pieces harder to match later.
Make sure you copy all the important details:
- the outside edges of each block
- all the sewing lines inside the block
- the numbers that show the sewing order
These vellum copies will be your guides while placing, folding, trimming, and sewing the fabric pieces.
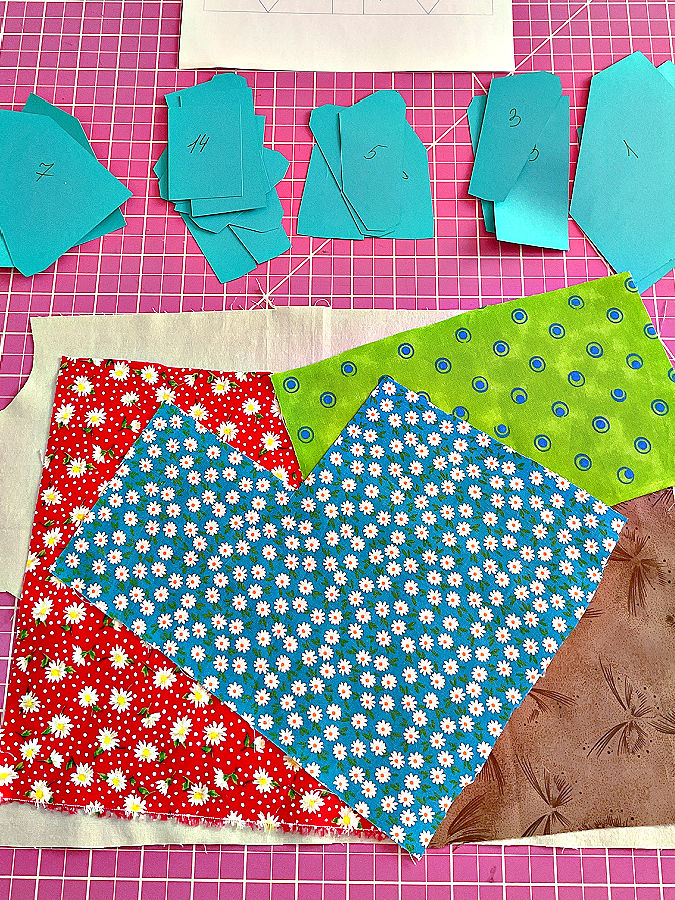
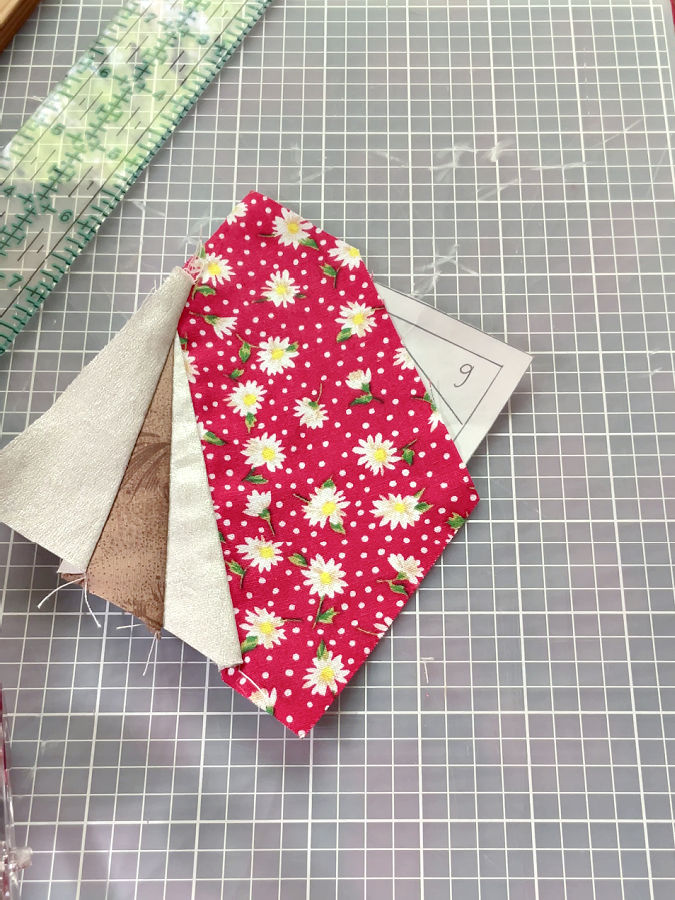
Step 3: Cut The Fabric
Now it’s time to cut the fabric pieces for the butterfly.
In many foundation paper piecing projects, you can use odd scraps of fabric and cut them roughly by eye. The fabric pieces just need to be larger than the section they will cover. That method works, and it can be useful if you are using small scraps.
But for this butterfly, I found it much easier to pre-cut the fabric pieces using templates. It saves fabric, keeps the pieces more organized, and makes the sewing process smoother. Instead of guessing whether a scrap is large enough, each piece is already close to the right size before you start sewing.
I provide printable templates in the PDF. These templates already include seam allowance. For this project, I used a 1/2 inch seam allowance, not the usual 1/4 inch. The extra allowance gives you a little more room to work with, which is helpful in foundation paper piecing, especially if this is your first time using this method.
I also include SVG files for the templates, so you can cut them with a Cricut if you like. I cut my templates from medium cardstock. Cardstock makes the templates easier to trace around and sturdier to use more than once.
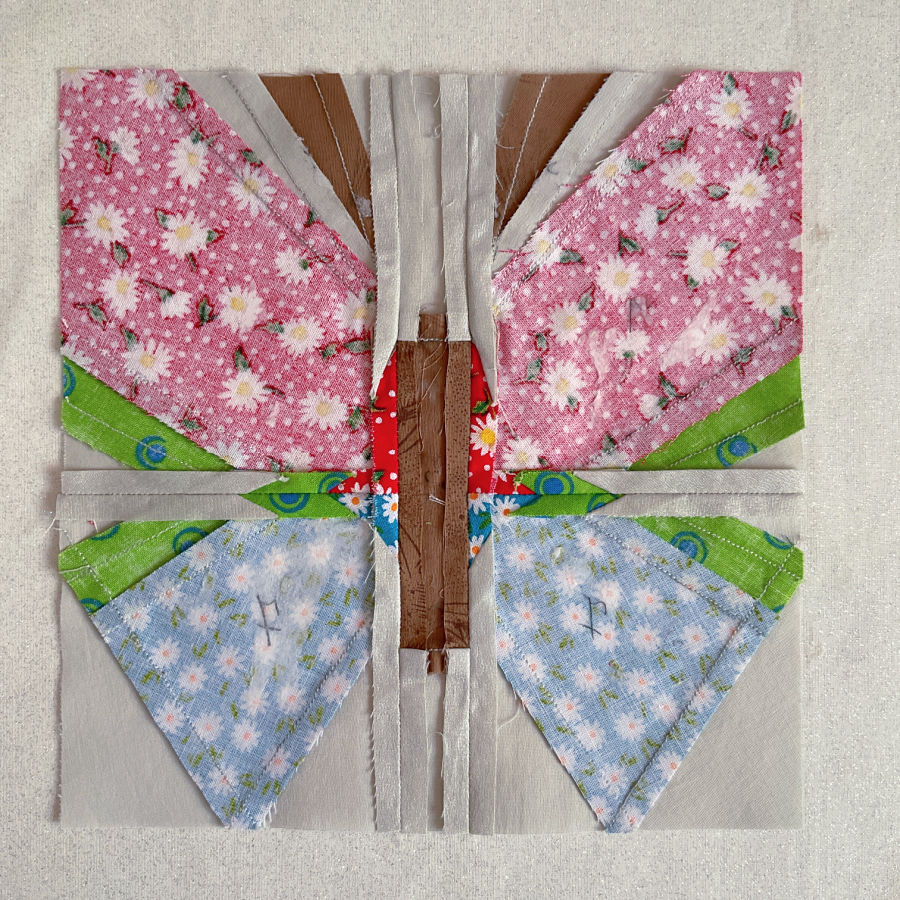
You will notice that in the images here I omitted the “a” for mirrored pieces because I wrote the numbers by hand, before the PDF template was ready. The PDF template will include the “a” suffix.
If you don’t have a Cricut, you can still use the templates. Print them directly onto cardstock paper and cut them out with scissors.
Then cut the required number of shapes from your fabric. A rotary cutter makes this step fast and easy, especially for the straight edges.
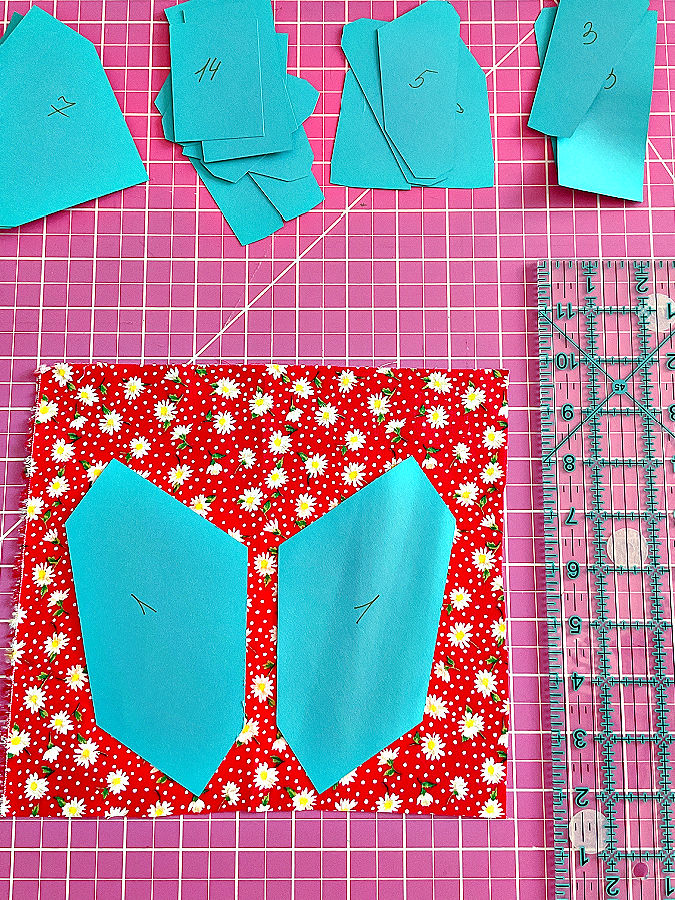
For the mirrored pieces, you can even stack 2 pieces of fabric wrong sides together or right sides together and cut both at the same time. This gives you a left and right version of the same shape, which is exactly what you need for the butterfly wings. It is also faster than cutting each piece separately.
You don’t have to cut every tiny angle perfectly, especially where the template has small notches or little detail lines. Follow the main outside shape of the template. If you leave a few extra millimeters around the fabric piece, that’s fine. In fact, a little extra fabric is better than cutting too close and discovering later that the piece doesn’t cover the section completely.
As you cut, keep the paper template with the fabric piece and pin them together. This keeps the numbers with the right fabric pieces and saves you from guessing which piece belongs where later.
Step 4: Sew The First Pieces
Now you can start the sewing process.
Set your stitch length very small. I used about 1.5 mm. A short stitch helps keep the seam secure and makes the paper easier to remove later if any stitches catch the paper.
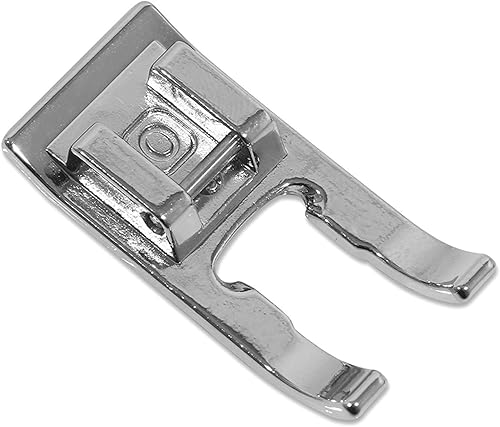

I also changed my regular presser foot to an open toe presser foot. This makes it much easier to see exactly where you are stitching. When you are sewing close to a folded paper edge, that extra visibility is very helpful.Place fabric piece number 1 on the paper template, right side up. Make sure the fabric extends beyond the lines of section 1 on the paper. That extra fabric becomes your seam allowance.
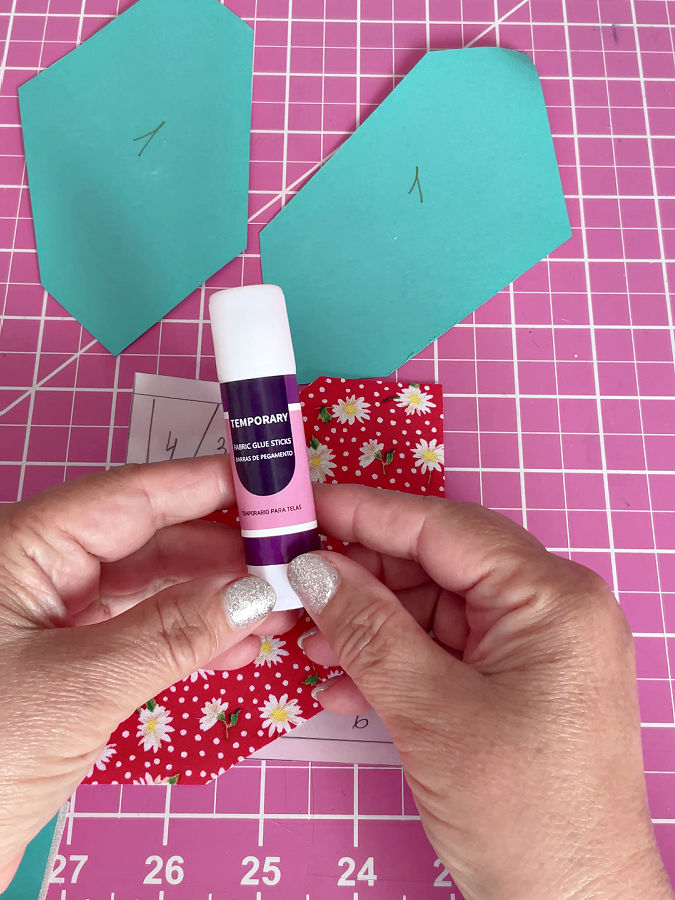
Use a tiny bit of fabric glue stick to hold the first piece in place. Don’t use too much — just enough to keep the fabric from shifting while you sew, which is very important because there will be no stitches going through the paper to hold everything steady.

You can also use a repositionable spray adhesive on the paper template instead of a fabric glue stick. But these 5 butterfly blocks are pretty small, so a fabric glue stick will hold the fabric pieces in place pretty well. For larger pieces, spray adhesive can make the process easier because it holds a wider area of fabric in place while still letting you lift and adjust the pieces if needed.
The placement of the first piece is important. Turn the paper over and check that you can see the pattern lines and numbers through the vellum. Adjust the fabric if needed so it fully covers section 1, with extra fabric around all the edges. This is exactly why transparent paper is so useful for this method.
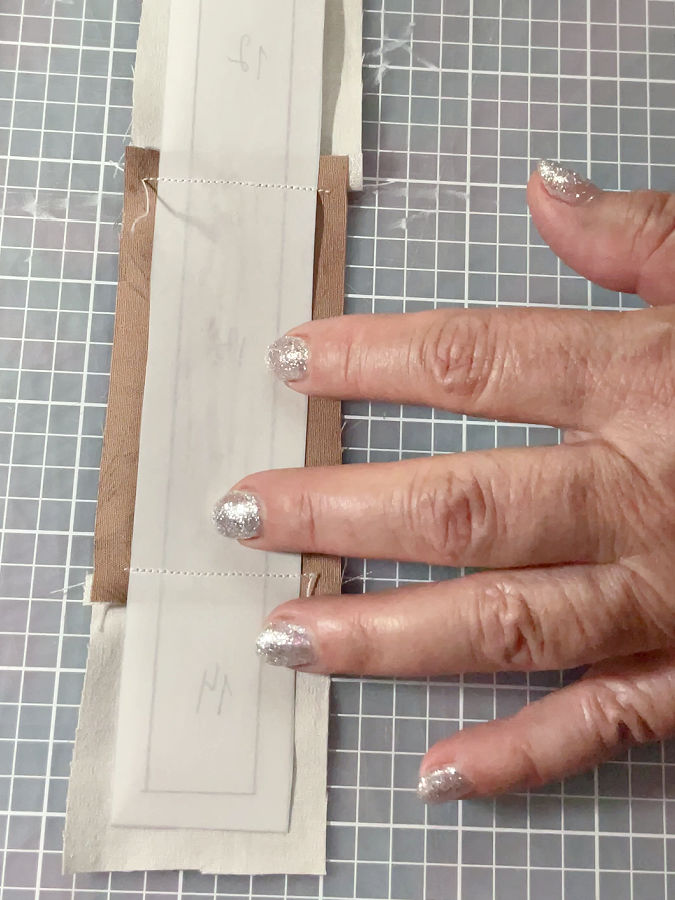
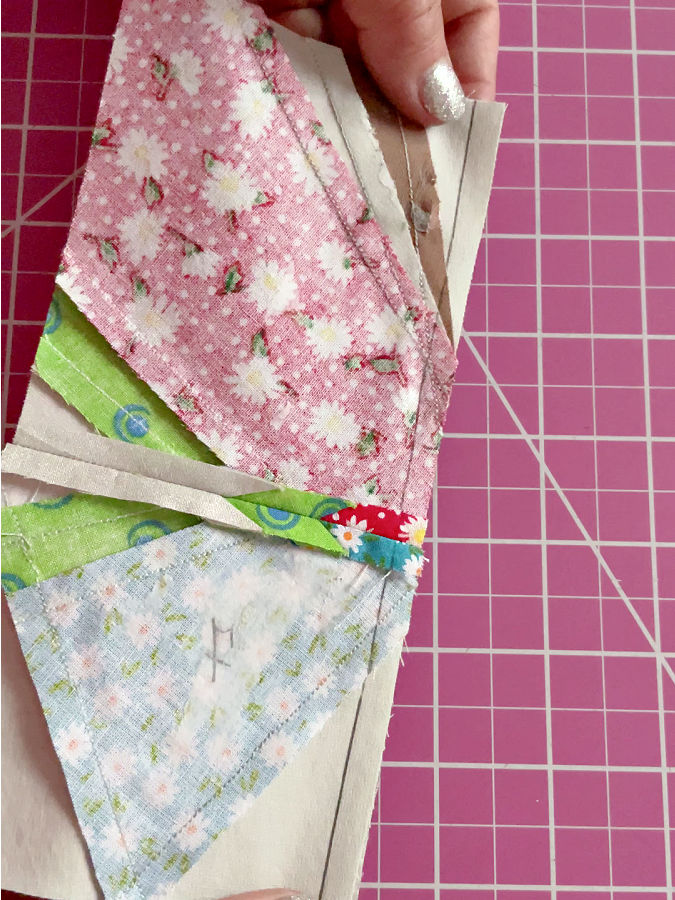
Next, place fabric piece number 2 on top of piece 1, right sides together. Align it along the edge where pieces 1 and 2 will be joined.
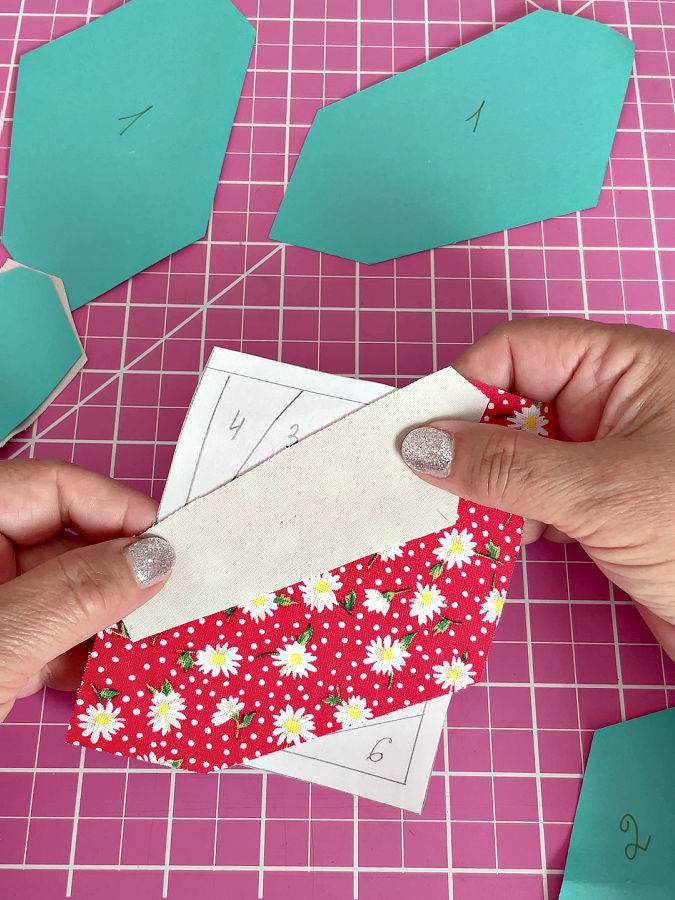
In traditional foundation paper piecing, you would sew directly on the printed line. And you can do it if you prefer this method. But for this butterfly, I wanted to try the method where you do not sew through the paper.
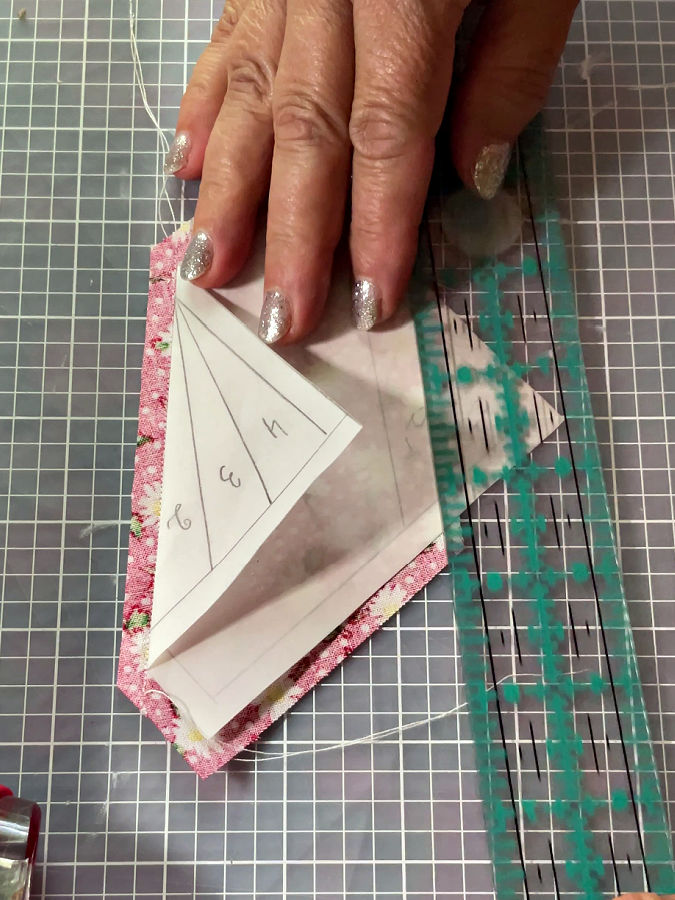
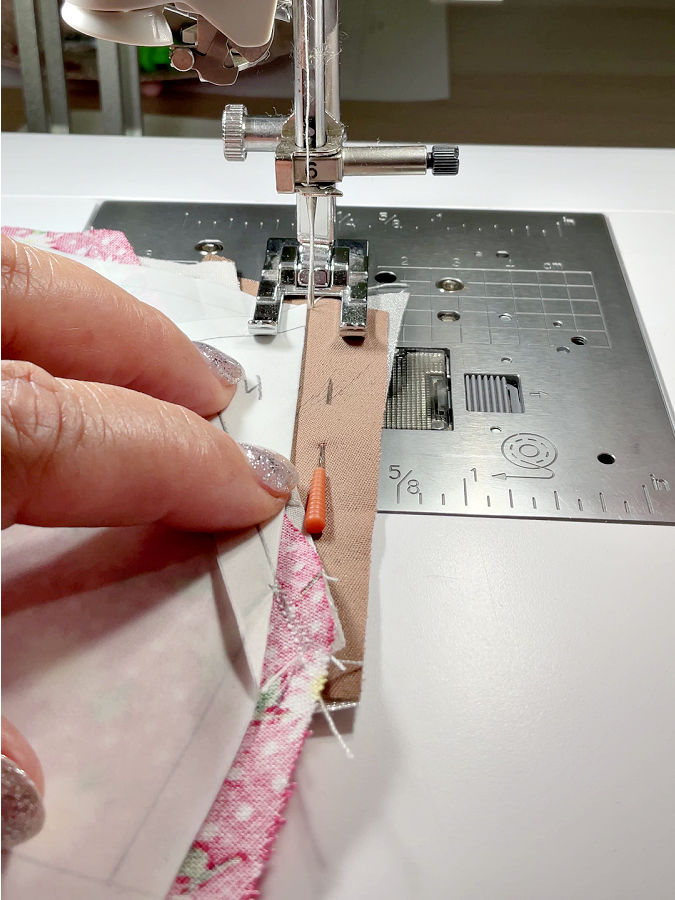
To do that, fold the vellum paper back along the sewing line between pieces 1 and 2.
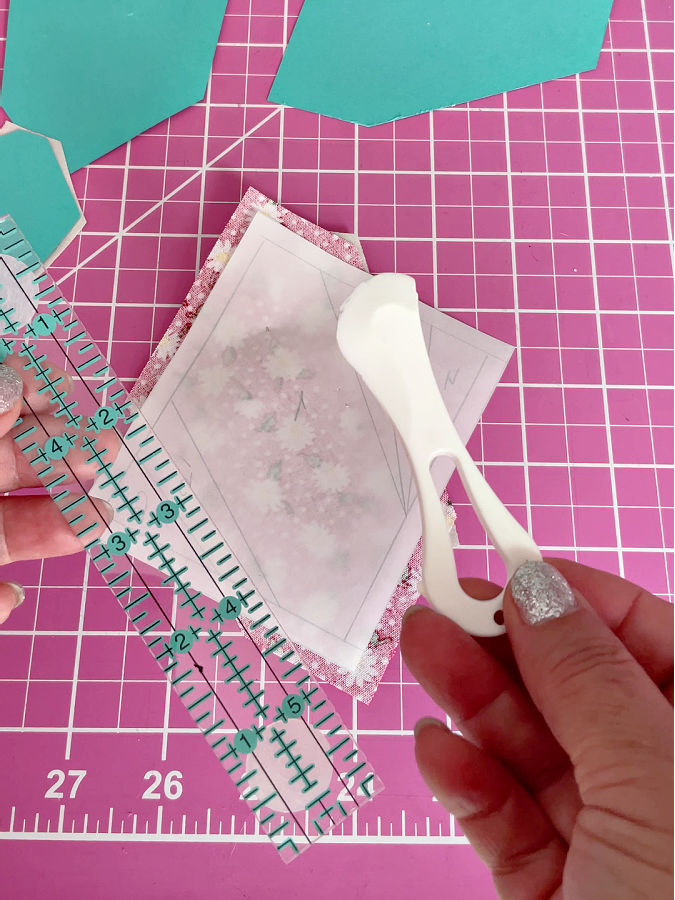
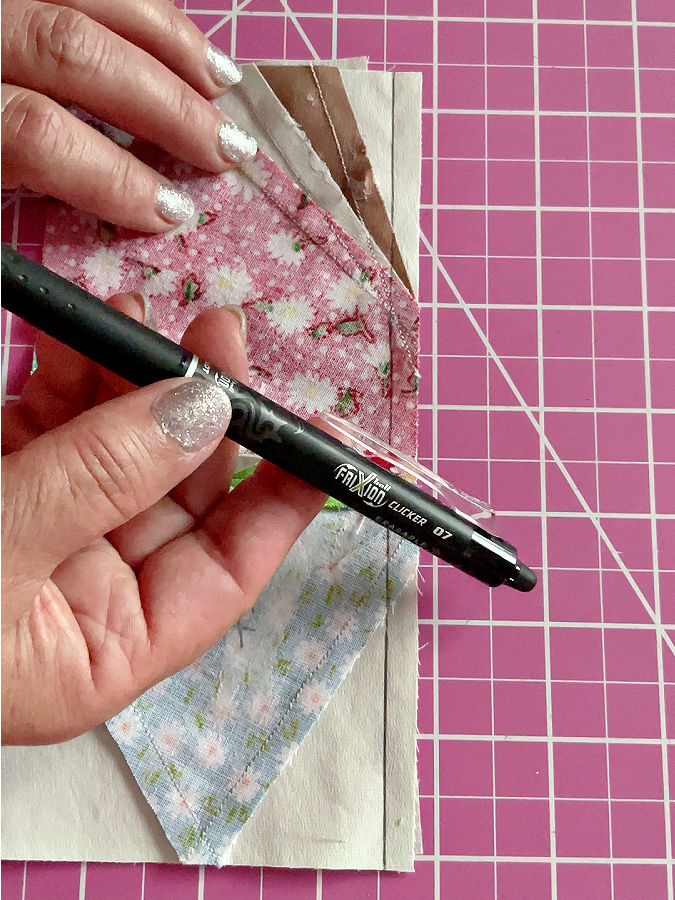
To make a clean fold, place a ruler on the line and use a point turner, hera marker, or another pressing tool to crease the paper. I used my hera marker. Once the paper is creased, it should fold easily and accurately on that line.


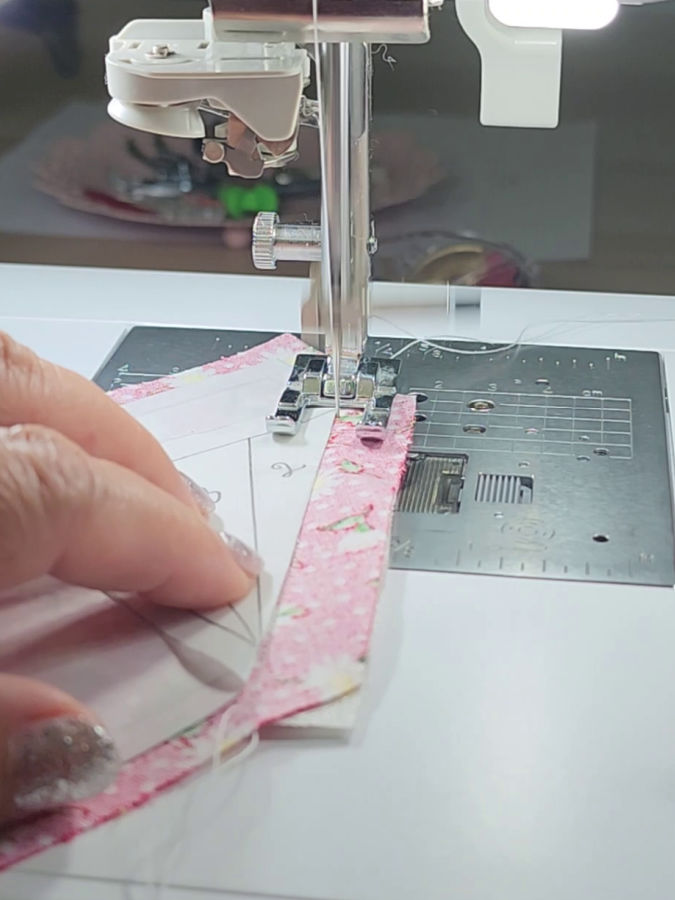
Take the block to the sewing machine and stitch right next to the folded paper edge. Try not to sew through the folded paper itself. If a few stitches catch the edge of the paper, don’t worry. You can gently pull the paper out afterward.
Don’t start and stop exactly at the printed line ends. Stitch a little past each end of the line, about 1/4 inch, so the seam is secure and the pieces are fully joined.
After stitching, trim the seam allowance to 1/4 inch. This helps keep the block neat and accurate, especially as more pieces are added.
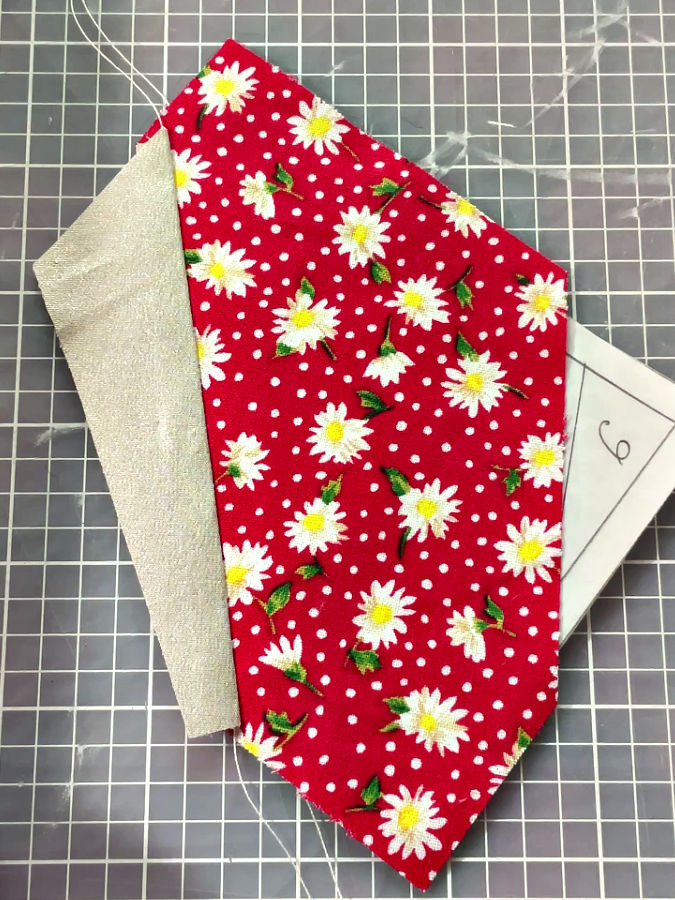
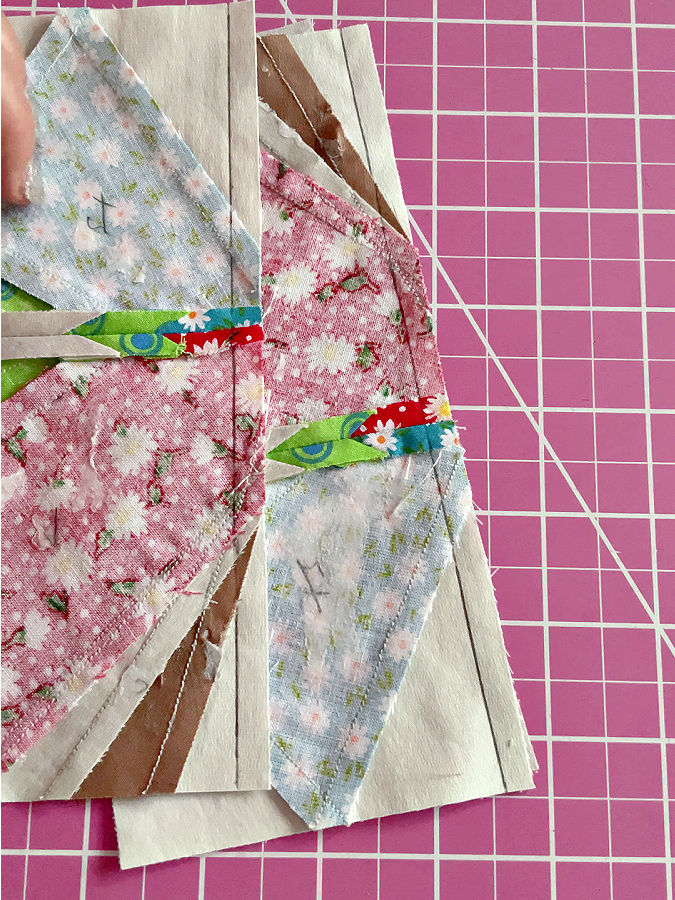
Then open fabric piece 2 and press the seam. You can use a finger presser, seam roller, or mini iron. I used a finger presser because it is quick, easy, and doesn’t move the small fabric pieces around as much.
Step 5: Add Piece 3
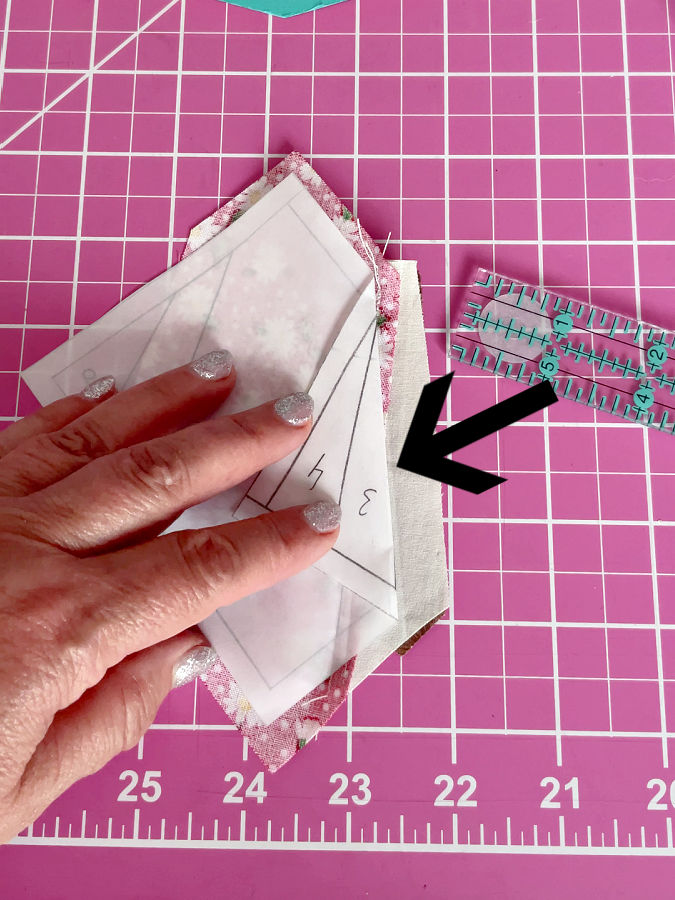
Now you have pieces 1 and 2 sewn in place, so it’s time to add piece 3.

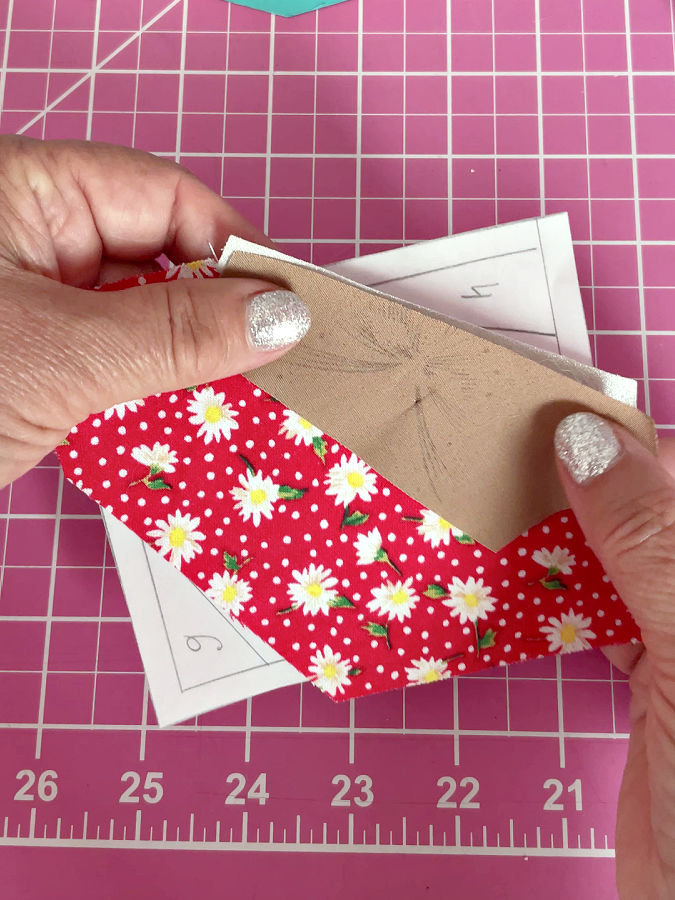
Before sewing, always check the fit of the next fabric piece. This is one of the most useful habits in foundation paper piecing, especially with angled shapes. Place fabric piece 3 where it will be sewn, then fold it over as if the seam has already been stitched. Make sure it will cover the whole section marked 3 on the paper, with extra fabric extending past the pattern lines.
Don’t just check one corner. Look at the full section. Piece 3 should cover the section after it is flipped open, and it should still leave enough extra fabric around the edges for trimming later. It is much easier to adjust now than to unpick a tiny stitch line later.
Since we cut the fabric pieces using templates, the fit should not be a problem. The pieces already have extra seam allowance added, so they should be large enough to cover their sections. But I still like to check before sewing each piece, because angled pieces can shift slightly when you turn and fold them.
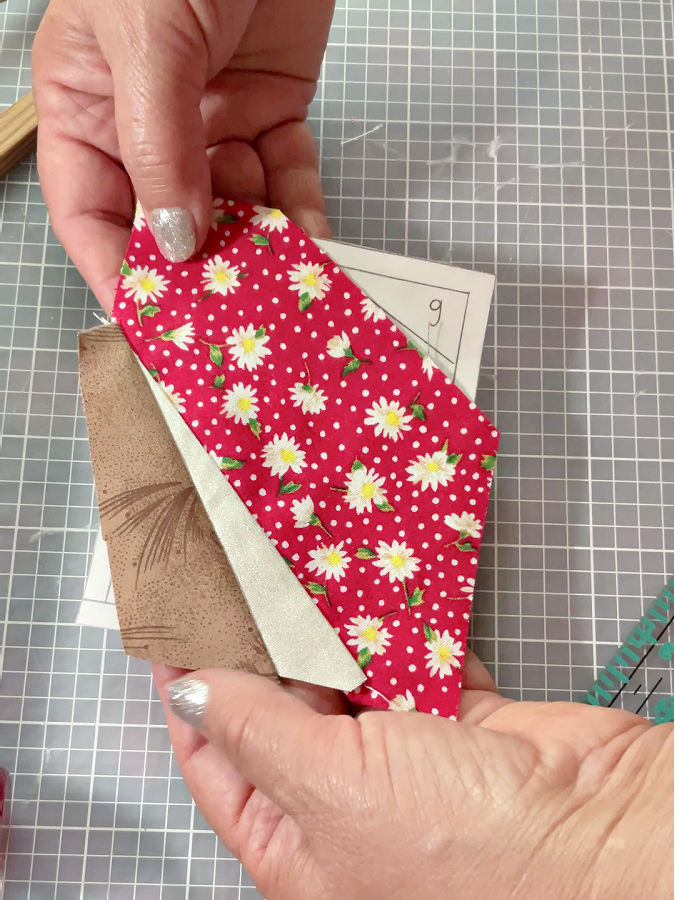
Once you are sure piece 3 will cover its section, place it right sides together with the already sewn fabric pieces. Align the edge of piece 3 with the edge where it will be joined.
Now fold the paper back along the sewing line between pieces 2 and 3. Use a ruler and a creasing tool to make a sharp fold. The fold is your guide for stitching.
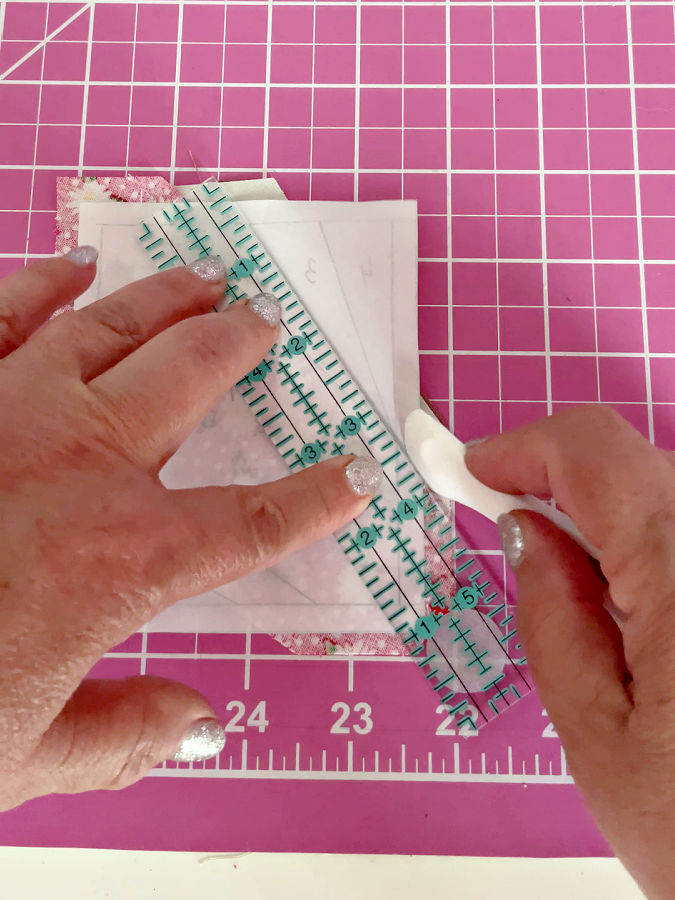
Take the block to the sewing machine and stitch right next to the folded paper edge, just as you did before. Try not to sew through the paper. Stitch a little beyond the beginning and end of the line so the seam is secure.
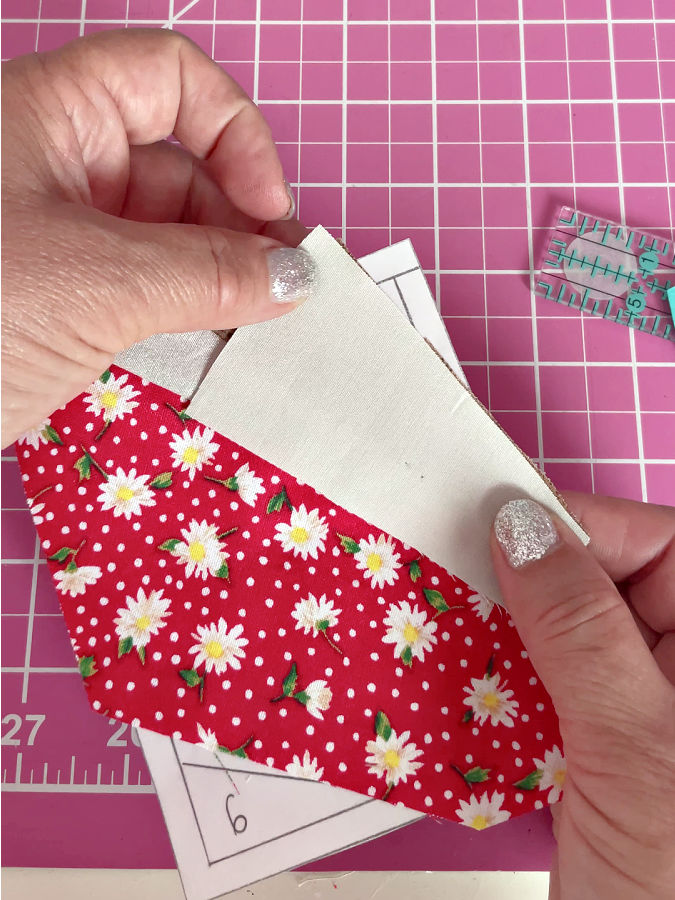
After stitching, open piece 3 and check the right side. Make sure the fabric covers the whole section 3 area. Then trim the seam allowance to 1/4 inch and press the piece open with a finger presser, seam roller, or mini iron.
At this point, you should have pieces 1, 2, and 3 in place, and the paper should still be mostly free from stitching. That is the whole point of this method: the paper guides the seam, but it doesn’t have to become part of the seam.
Step 6: Add Piece 4
Now add fabric piece 4 in the same general way, but don’t skip the placement check.
Since these pieces were cut from templates, piece 4 should already be large enough to cover its section. Still, before you sew, place it where it will go and do a quick “flip test.” Lay piece 4 right sides together with the sewn pieces, along the edge where it will be attached. Then fold it with your fingers to make sure it will cover the whole section marked 4 on the paper.
Check that the fabric extends past the printed lines of section 4 on all sides. This is especially important with narrow angled pieces, because they can look correct at first but shift just enough to miss a corner after they are flipped open.
Once the placement looks right, fold the paper back on the sewing line between pieces 3 and 4. Use the ruler and pressing tool to make a clean crease.

Take the block to the sewing machine and stitch close to the folded paper edge, just as before. The needle should sew beside the paper fold, not through the paper. Stitch a little past the beginning and end of the line to secure the seam.

Open piece 4 and check the right side. Make sure it covers the entire section 4 area. Then trim the seam allowance to 1/4 inch and press the piece open with a finger presser, seam roller, or mini iron.
Now pieces 1, 2, 3, and 4 are in place, and the wing section is starting to take shape.
Step 7: Continue Adding The Remaining Pieces In Number Order
After piece 4 is sewn and pressed, continue adding the rest of the pieces in numerical order.
The process is the same each time:
- Place the next fabric piece right sides together with the already sewn pieces.
- Check that it will cover the correct section after it is flipped open.
- Fold the paper back on the sewing line for that section.
- Stitch close to the folded paper edge, without sewing through the paper.
- Trim the seam allowance to 1/4 inch.
- Open the fabric piece and press it flat.
Even though the fabric pieces were cut from templates and should fit well, it is still a good idea to check each piece before sewing.
Follow the numbers printed on the paper foundation. Add piece 5 after piece 4, then piece 6, and continue until that block is complete. For the mirrored side of the butterfly, follow the same order. The lower part of the butterfly (pieces 7 to 11, 7a to 11a) are assembled in a similar manner.
The important thing is not to rush the order. In foundation paper piecing, the numbers are there for a reason. Each new piece needs an edge to attach to, and the next piece usually depends on the one before it.
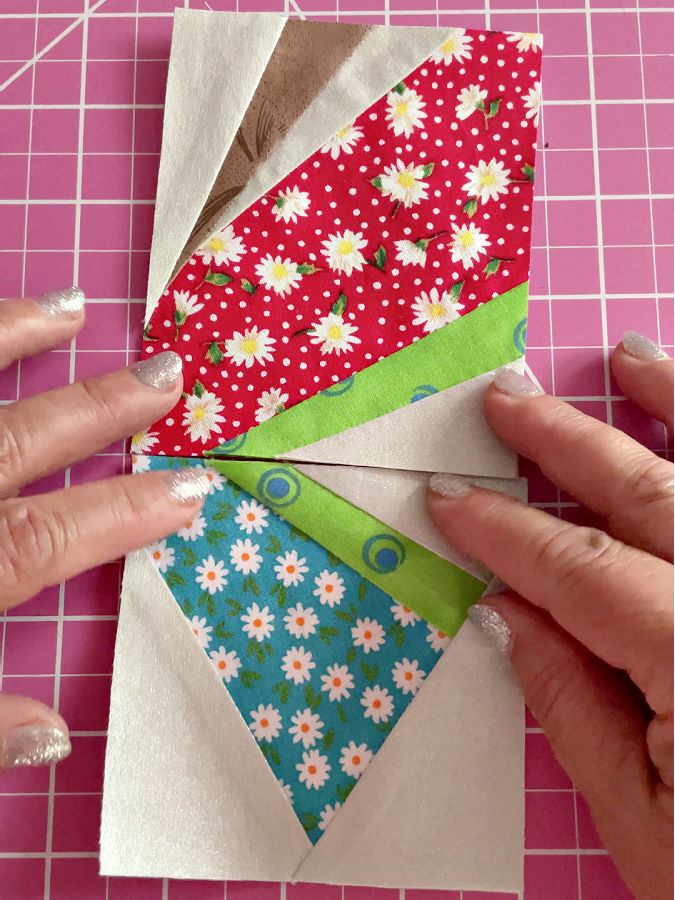
You will make 4 butterfly wing blocks this way. Each block is sewn separately first, and later they will be joined together with the body section to make the full butterfly.
Make sure you keep the paper attached as you work. It is your guide for the sewing lines and the outside shape of each block.
Step 8: Sew The Butterfly Body Pieces
For the butterfly body, I used the regular foundation paper piecing method. The body section is made from simple straight pieces — 12, 13, and 14 — so I didn’t use the folded-paper method here. I stitched directly on the paper and removed the paper afterward.
I started with piece 12. Place fabric piece 12 on the paper foundation, right side up, making sure it covers the section marked 12 with extra fabric around the edges.
Then place piece 13 right sides together with piece 12, aligning it along the seam line between sections 12 and 13. Turn the paper side up and stitch directly on the printed line. Use a short stitch length, about 1.5 mm, so the paper will be easy to remove later.
Open piece 13 and press it flat. Then add piece 14 in the same way. Place it right sides together with the already sewn body section, stitch on the printed line, open, and press.

Step 9: Trim The Finished Blocks
After all the butterfly blocks are sewn and pressed, trim each block using the outer lines on the paper foundation.
Keep the paper attached while you trim. The paper gives you the exact shape of the block and makes it much easier to cut accurately. Use a ruler and rotary cutter if you can, and line up the ruler with the outer block lines. Cut around the outside edge, keeping the seam allowance included in the pattern.
Trim all 4 wing blocks this way. Don’t trim them smaller than the printed outside lines, because those edges are what you will use when you sew the butterfly sections together.
Trim the body section the same way. Since the body was sewn with regular foundation paper piecing, leave the paper on while trimming. Cut along the outside template lines, so the body piece has the correct finished shape and seam allowance.
After all the blocks are trimmed, check that the edges are clean and the shapes match the pattern sections. Now the 4 wing blocks and the body section are ready to be joined together.
Step 10: Sew The Blocks Together
After trimming all the finished blocks, remove the paper from each section. Since the wing blocks were sewn mostly with the folded-paper method, the paper should come off easily because it was not stitched into every seam.
Press all the blocks well after the paper is removed.
Now start joining the butterfly sections. First, sew the upper wing section to the lower wing section on each side of the butterfly. Place the sections right sides together, match the edges carefully, and pin or clip them in place.
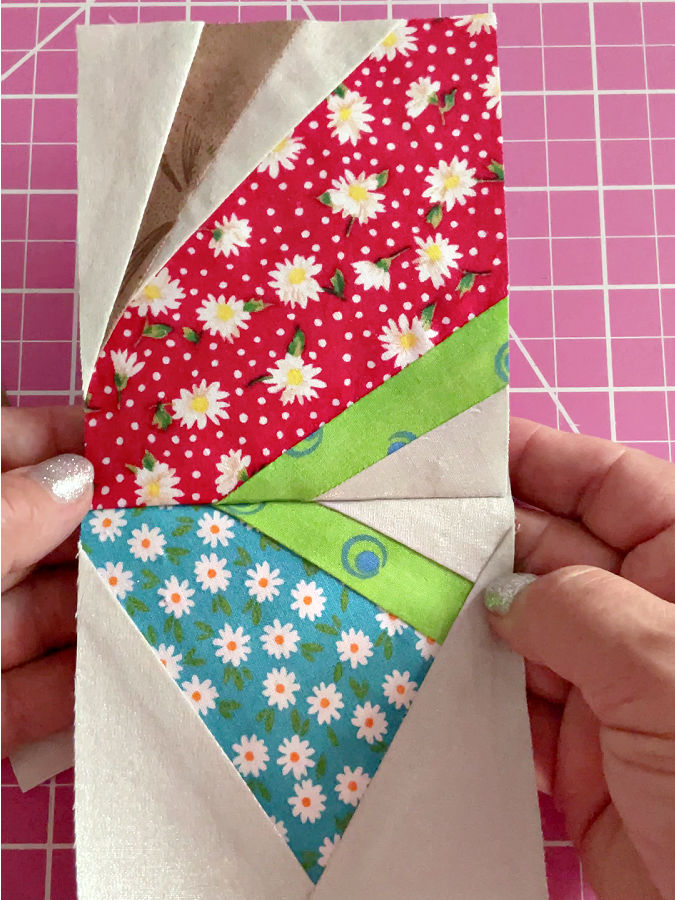
Before stitching, draw the stitching line only on the upper wing pieces (not shown in the images). Use a removable fabric marker. I used a Frixion pen, which makes temporary marks that disappear with heat. Measure 1/4 inch from the edge and draw the line on the wrong side of the upper wing section. This line will help you sew accurately now that the paper has been removed.
Stitch on the marked line. After sewing, press the seam allowances open. I pressed these seams open because it helps reduce bulk where the butterfly sections meet.
Repeat this for the other side of the butterfly, joining the upper and lower wing sections together.
Next, attach the butterfly body piece between the wing sections. Before sewing, draw the 1/4 inch stitching lines on the wing sections where they will be joined to the body. Place the body and wing section right sides together, match the edges, pin or clip, and stitch on the marked line.
After stitching, press the seam open again. Then attach the other wing section to the opposite side of the body in the same way.
Take your time with this step. The butterfly is made from separate sections, so careful matching and pressing will help the final shape look clean and balanced.
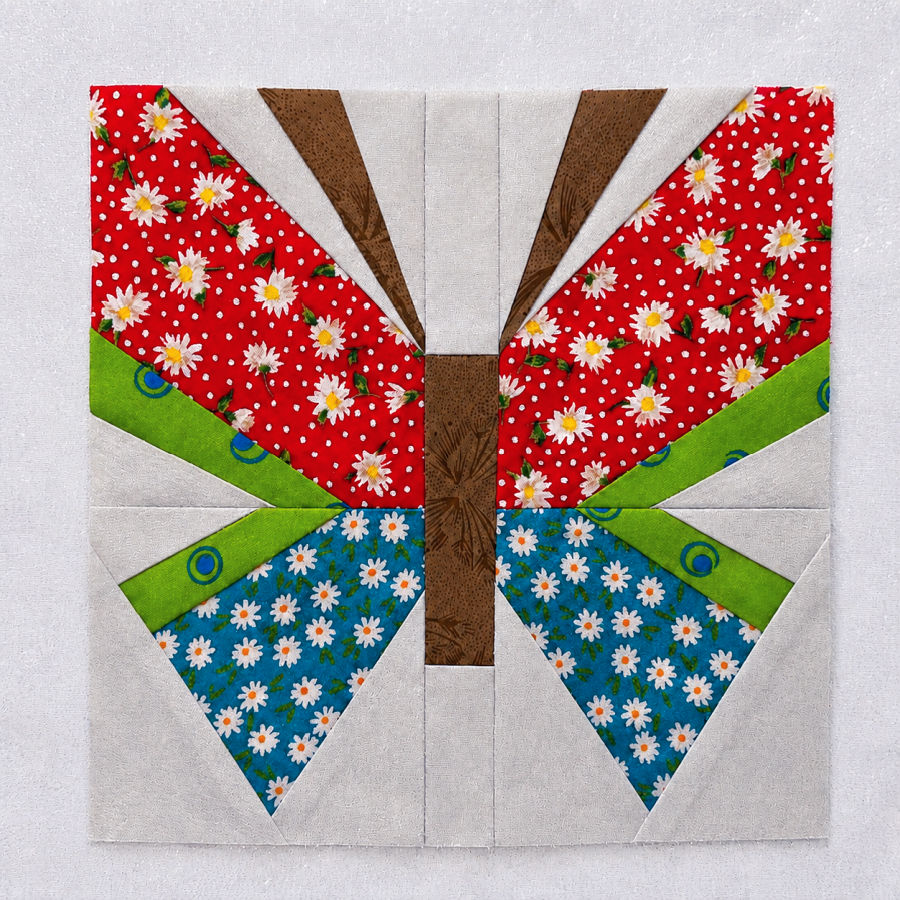
This is what the butterfly block can become.
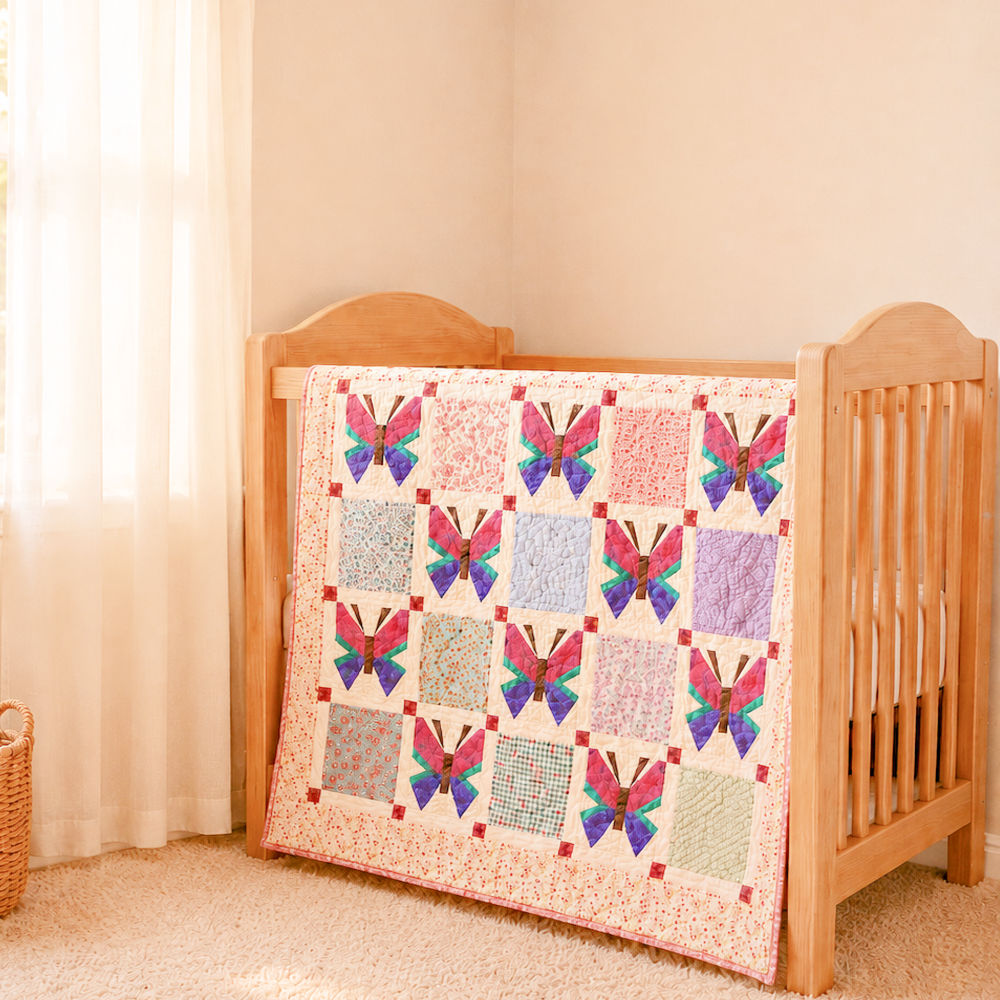
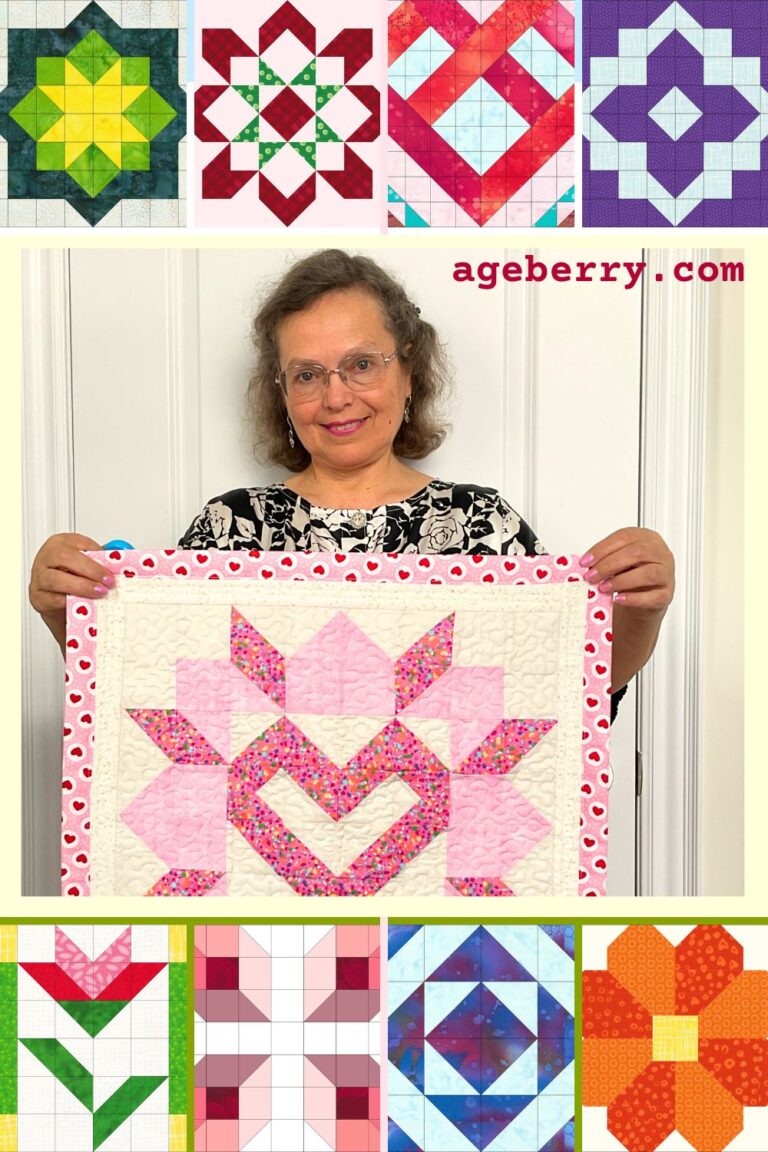
I used the same paper pieced butterfly design in a baby quilt, alternating the butterfly blocks with pretty fabric squares (from scrap) and adding sashing and a border. It’s a sweet way to use the block in a larger project without making every square complicated.
You can find the butterfly PDF pattern and templates in my shop. I also included SVG templates for cutting machines and a full step-by-step sewing tutorial PDF, so you can download everything, save it to your device, and use it without ads while you sew.
Do you like how this butterfly block came together? Have you tried a paper piecing method where you don’t sew through the paper? It made the finishing part a bit easier because there was no tiny paper to tear out of all those seams. Save the pin below to your Pinterest board so you can find the tutorial when you’re ready to make your own butterfly block. Follow me on Pinterest for more sewing tips, quilt ideas, and step-by-step tutorials.
latest posts
- What Do You Call a Person Who Sews? I Asked My Readers and Got 1,408 Opinions
- DIY Round Purse: PDF Sewing Pattern and Detailed Instructions
- Mini Wonder Clips By Clover: Useful Sewing Tool Or Just Another Notion?
- Non-Slip Grips For Quilting Rulers: A Small Notion With A Useful Job
- Fabric Eraser for Sewing: What It Removes and When to Use It
- What Is The Best Thread For Sewing Machine Projects? Let’s Find Out!
- Butterfly Quilt Block Tutorial – Foundation Paper Piecing
- How To Sew Quilt Squares So The Corners Match
- Sewing With Fork Pins: How They Help With Pattern Matching, Slippery Fabric, And Seams