Think You Know Zippers? This Installation Guide Might Surprise You
Ever wrestled with a zipper and felt like you were attempting to thread a needle in the dark? Well, it’s time to turn the lights on. I’m here to illuminate the path to zipper success, one simple step at a time. I used to think zippers were my nemesis. But not anymore! In this article, I will show you how to install zippers with such ease and precision, you’ll wonder why you ever feared them. Because a well-installed zipper is the difference between a dress that’s ‘just okay’ and one that screams designer chic.

Attention! If you’re someone who likes to see things in action, you might enjoy the video version of this tutorial on my YouTube channel. You’ll find the link at the bottom of this post. Watching the video along with reading this article can help you get a fuller picture, so I definitely recommend checking out both!
What You’ll Need For Zipper Installation
- Wonder tape
- Special zipper
- Zipper presser foot
- Regular sewing notions
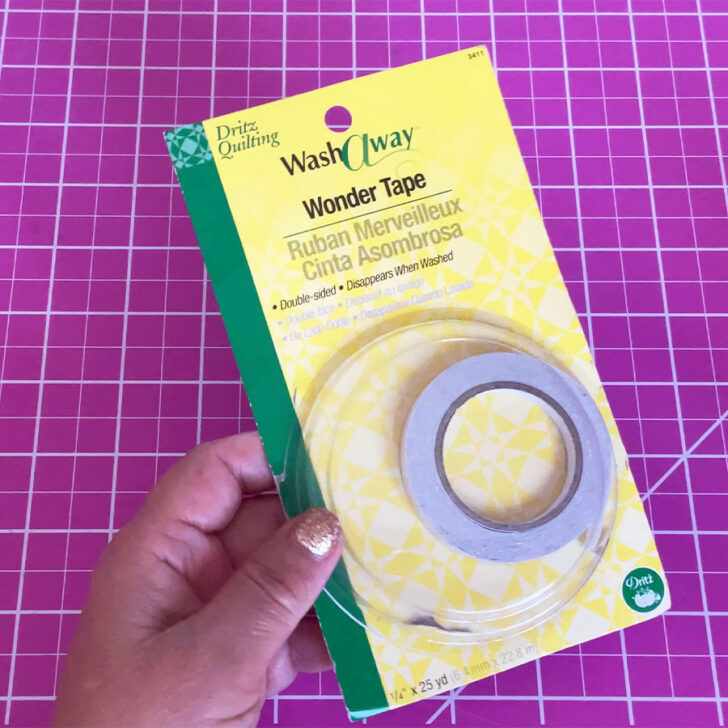
What Is Wonder Tape And Why It’s Useful
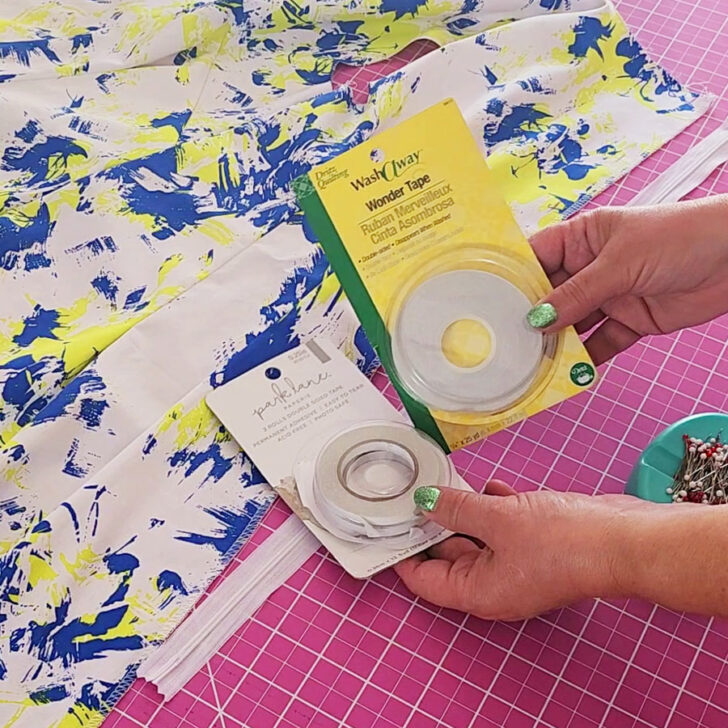
I always use Wonder tape for installing any type of zipper, whether it be a regular zipper, an invisible zipper, or even a separating zipper. Wonder tape helps to hold the zipper tape in place, so it doesn’t shift as I sew.
For invisible zippers, Wonder tape is even more invaluable. Invisible zippers can be tricky to install because they need to be rolled and unrolled in a specific way to maintain their “invisible” appearance. Wonder tape secures the zipper in the correct position, so I can focus on sewing close to the teeth without the zipper slipping or the fabric puckering.
No matter the zipper type, Wonder tape provides a no-pin solution that simplifies the installation process.
So, are you familiar with Wonder tape? It’s double-sided, semi-transparent tape that designed to temporarily hold fabrics together without leaving residue or causing puckering.
This temporary bond allows you to position zippers exactly where they need to be, so they are perfectly aligned and lie flat against the fabric. The tape is particularly useful for tricky or slippery materials that are difficult to pin. Moreover, Wonder tape washes away with water and leaves no trace once the garment is finished and laundered.
There are other double-sided tapes that have adhesive on both sides. Don’t use them. Regular adhesive tapes can permanently mar fabrics with sticky residue. They can also gum up needles. In contrast, Wonder tape is formulated to be sewing-friendly; it does not leave residue, it can be sewn through without damaging needles, and it dissolves in water.
✅ Related tutorial: Are These ‘Magic’ and ‘Wonder’ Tools the Secret to Sewing Perfection?
Not All Zippers Are Created Equal
Ok, now let’s talk about zippers.
If you like to sew dresses and skirts, you’ll quickly realize that the seams where we install zippers are rarely straight. Instead, they often feature a curve that is designed to follow the natural contours of the body. This is especially true for garments that are fitted or tailored to accentuate the waist, hips, and other curves.
A straight zipper on a curved seam can lead to bunching, puckering, or pulling, which disrupts the clean lines of the garment and can be even uncomfortable to wear.
Incorporating a zipper into a curved seam requires careful handling and the right materials. This is where the choice of zipper becomes very important. A zipper that is too rigid can force the fabric to lay unnaturally flat, failing to conform to the body’s curves.
Note: Some of the links on this page are affiliate links. This means I will receive a commission if you order a product through one of my links. I only recommend products I believe in and use myself.
So I always use a specific kind of zipper known as “Silk Invisible Zipper with Lace tape,” which I purchase from Amazon.
")
You can’t find these zippers at Joann, Hobby Lobby, or Walmart, which is why I do online shopping for these zippers.
The Silk Invisible Zipper has a very thin, almost transparent tape that is very soft and flexible. This help prevent any stiffness or distortion along the curved seams.
These zippers are not made of actual silk, but they are designed to mimic the qualities of silk and have a fine texture that resembles the smooth and lightweight feel of silk.
Unlike standard zippers, which are bulkier, these silk invisible zippers can conform to the dress’s contours without interrupting the line of the garment.
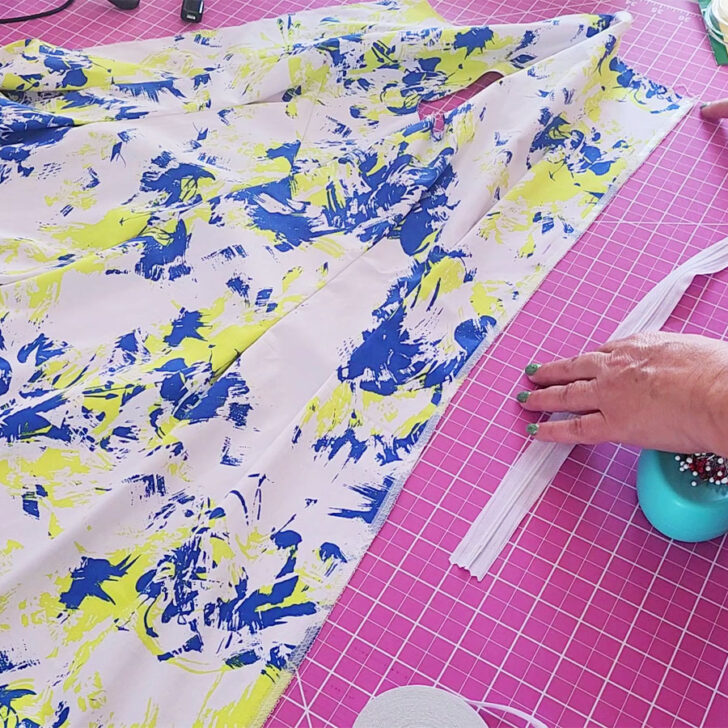
Step 1. Applying Wonder tape Along One Seam Edge
Finish the raw edges of pattern pieces before installing the zipper.
You may come across different methods for using Wonder tape when installing zippers. Some sewists prefer to apply Wonder tape directly onto the zipper tape before positioning it onto the fabric. I prefer to place the Wonder tape onto the fabric first.
Unroll the Wonder tape and cut a piece long enough for the zipper. Carefully apply Wonder tape along one side of the seam allowance. Start at the top of the seam and press it down firmly onto the fabric as you go.
Position it directly on the very edge of the seam where the zipper will sit.
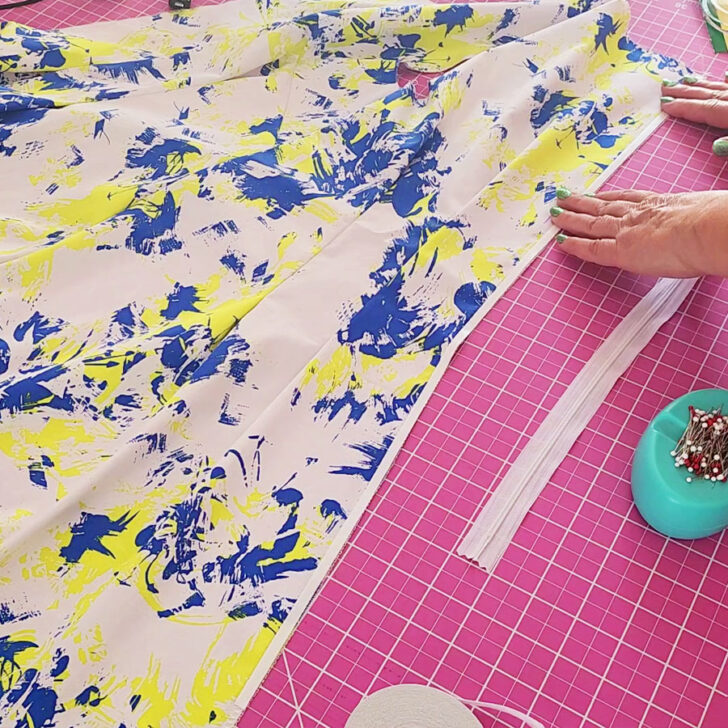
The tape should lie flat against the fabric without any wrinkles or folds. Any unevenness in the fabric can lead to puckering once the zipper is installed, which can distort the appearance of the dress and affect the fit. So make sure that the fabric lay flat on the table.
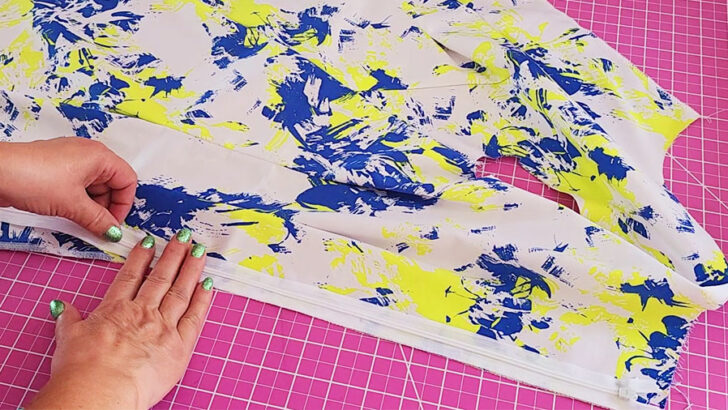
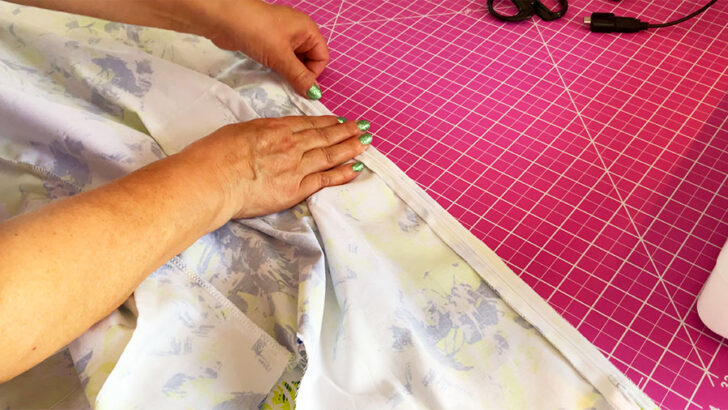
Step 2. Attaching The Zipper To The Wonder Tape
Peel the paper backing off the Wonder tape to expose the adhesive. Make sure that the tape remains smooth and intact on the fabric as you remove the backing.
Don’t open the zipper. Identify which side of the zipper tape should be attached to the Wonder tape. When the garment is worn, the zipper teeth will be facing towards the body.
Carefully align the edge of the zipper tape with the seam allowance where the Wonder tape has been applied. The top of the zipper should be in line with the top edge of the garment.
Gently press the zipper tape onto the Wonder tape, starting from the top and working your way down to the bottom. The adhesive should hold the zipper in place firmly, eliminating the need for pins.
Make sure that the zipper teeth do not get stuck to the tape. The zipper should lie flat against the fabric without any puckering or rippling. If the position of the zipper needs to be adjusted, you can carefully lift the zipper tape and reposition it. The Wonder tape allows for repositioning.
Once the zipper is correctly positioned, press it down along the entire length with your fingers to secure its attachment to the Wonder tape and the fabric.
This will make sewing the zipper much easier.
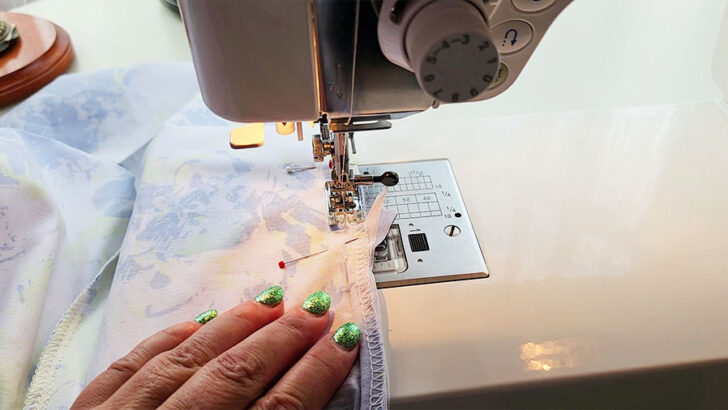
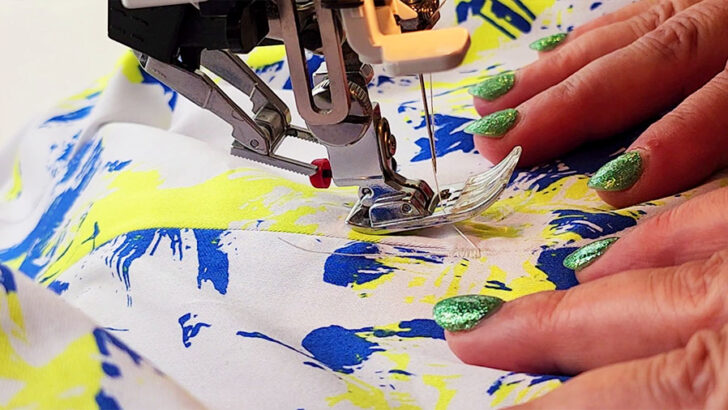
Step 3. Sewing The First Part Of The Zipper
Now it’s time to sew the first part of the zipper into place.
For this step, you will need an invisible zipper foot for your sewing machine. If you do not have an invisible zipper foot, a regular zipper foot can also be used, although it may require more careful handling to get close to the zipper teeth.
The invisible zipper foot is designed to allow your sewing machine to stitch close to the zipper teeth, rolling them out of the way as you sew. This helps to create the ‘invisible’ appearance once the zipper is closed.
✅Related tutorial: The Invisible Zipper Foot: What It Is And How To Use It
Open the zipper and place the fabric under the sewing machine’s foot, aligning the zipper teeth with the groove on the underside of the invisible zipper foot. If using a regular zipper foot, you will need to adjust the needle position so that it stitches as close to the zipper teeth as possible without actually sewing over them.
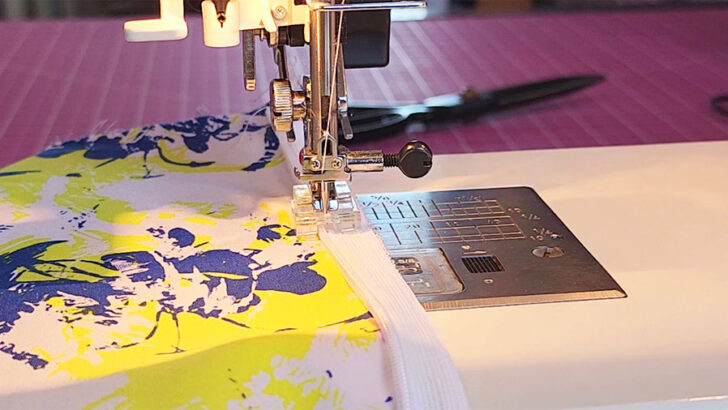
Begin sewing from the top of the zipper. Sew down the length of the zipper. The Wonder tape will keep the zipper in place as you sew, but be cautious and sew slowly.
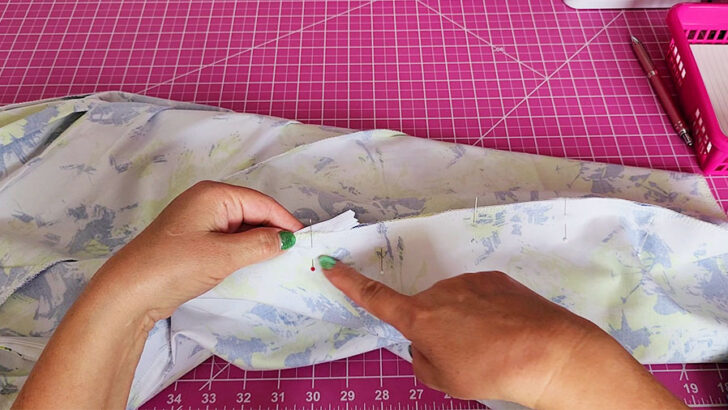
Step 4. Aligning The Second Part Of The Zipper
The next step is to align and attach the second part of the zipper to the other side of the dress.
Begin by closing the zipper. This will bring the unattached side of the zipper into the correct position relative to the side that has already been sewn in.
Now, apply Wonder tape to the opposite seam edge where the second part of the zipper will be attached. As before, ensure the tape is placed smoothly along the entire length of the seam allowance to prevent any puckering or misalignment.
Carefully peel off the paper backing from the Wonder tape to reveal the adhesive side. With the zipper closed, position the unsewn zipper tape onto the exposed Wonder tape, starting at the top of the garment. For dresses, this usually means starting at the neckline. The top of the zipper should line up with the top edge of the fabric to maintain consistency and symmetry.
As you position the zipper, pay close attention to the alignment of the zipper teeth and the seam edge. The zipper should be placed so that when sewn and zipped, it appears as a seamless continuation of the seam.
Press the zipper tape onto the Wonder tape, moving from the top down, and make sure that it adheres well without any twists or wrinkles.
This will hold the zipper steady for the next step. Proper alignment in this step is key to achieving correct zipper installation.
Step 5. Sewing The Second Part Of The Zipper
First, carefully reopen the zipper. Make sure to handle the fabric gently to avoid detaching the zipper from the Wonder tape.
Position the fabric under the presser foot of your sewing machine. As with the first part of the zipper, you’ll want to position the foot so that the needle will sew close to the zipper teeth without catching them.
Start sewing from the top of the zipper, just as you did with the first part. Sew along the length of the zipper tape. The Wonder tape will keep the zipper in place, but be mindful to sew slowly.

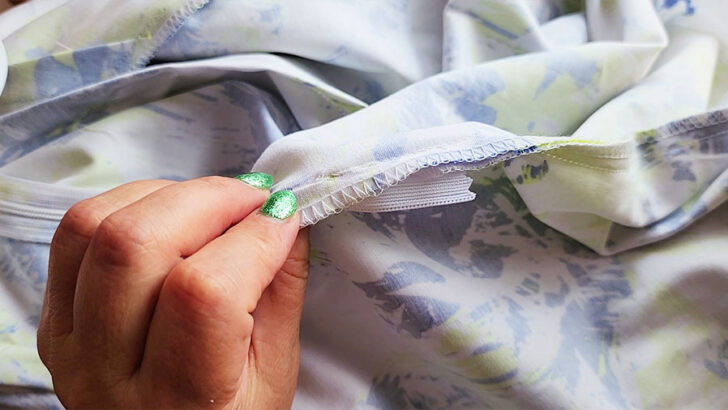
This step completes the main zipper installation process. The zipper should now be securely in place, with both sides matching up evenly at the top and bottom.
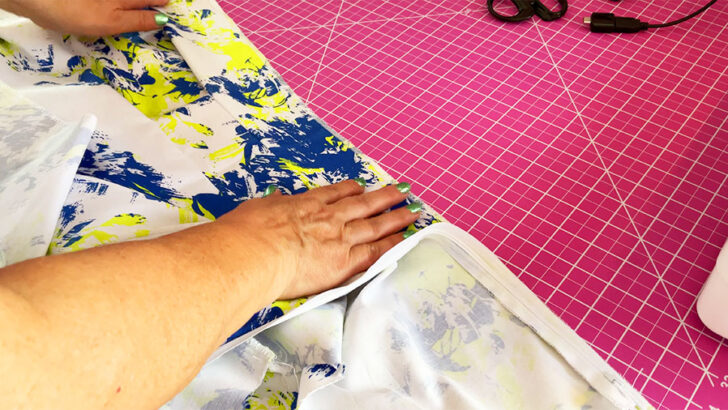
Step 6. Removing The Wonder Tape
To remove the Wonder tape, gently lift the edge of the fabric where the tape was applied. The tape should peel away easily from the fabric without leaving any residue.
Peel the tape away slowly, ensuring that you do not stretch or distort the fabric or the newly sewn zipper.
Step 7. Finishing The Zipper Installation
Completing the zipper installation often includes sewing the seam below the zipper. This can be done either before or after inserting the zipper. I usually sew this seam beforehand, but this time I followed a method recommended by my Burda Style magazine, which involves sewing the seam after the zipper has been inserted.
This approach seemed to me slightly more challenging, as it required careful sewing to connect the seam to the point where the zipper seams end without leaving any gaps. If you encounter difficulty sewing close to the zipper and find a small hole near the zipper’s end, this can be neatly resolved with a few hand stitches.
So, do it like this:
- Close the zipper.
- Pin the seam below the zipper, ensuring it aligns with the finished zipper sewing.
- Using a zipper presser foot, sew from the bottom to the zipper
- Maintain the original seam allowance.
For any small holes or gaps at the ends of the zipper:
- Use a needle and matching thread to hand sew the area with secure stitches.
- This will close the hole and help blend the end of the zipper sewing into the seam of the dress.
Now it’s usually recommended to reinforce the area where the zipper sewing ends and the seam begins. This technique adds strength and stability to the end of the zipper.
So, press the seam open and set your sewing machine to a very close zigzag stitch. You’ll be sewing this directly on the right side of the garment, just above the seam, at the bottom end of the zipper. This stitching should be about 3/8 inch in length.
Keep the zigzag stitch narrow and dense, which will create a strong bar tack that resembles the bar tacks seen on commercially installed zippers.
Step 8. Final Touches
Give your garment the final touches by pressing the seams.
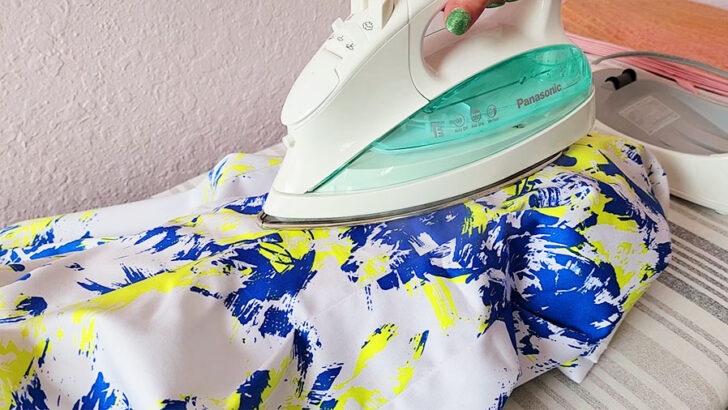
Press the seams open on both sides of the zipper, starting from the top and moving towards the bottom. Take care not to press directly on the teeth, as this could affect the zipper’s functionality.
✅ Related tutorial: Panasonic Cordless Irons: Review and Insights from Daily Use
Use a pressing cloth if necessary, especially for delicate or heat-sensitive fabrics.
Make sure the fabric around the zipper lies flat and that there are no wrinkles or puckers.
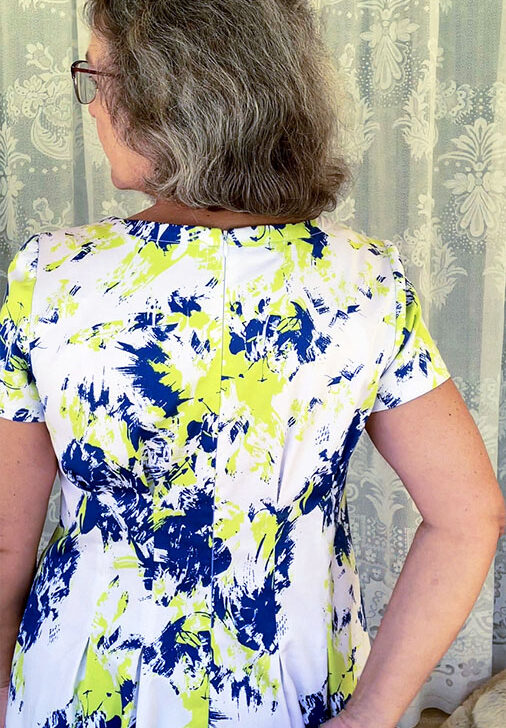
Here I am, wearing the finished dress. I think it fits beautifully, hugging my curves in all the right places.

The invisible zipper blends seamlessly with the fabric, the zipper has been installed in such a way that it becomes one with the fabric, and it’s virtually undetectable to the eye. The zipper pull is the only clue to its existence.
I hope that by sharing this process with you, I’ve inspired you to take on your own sewing challenges, to create something that you too will like to wear.
Thank you for following along on this sewing adventure.
But there’s so much more to dressmaking that I’d love to share with you!
What other aspects of making this dress would you like to explore further? Are you interested in learning about how to sew sleeves to ensure a comfortable fit and ease of movement? Maybe you’re curious about finishing edges to give your garments a professional and durable finish?
Or perhaps you’re looking to master how to hem your dresses for that perfect length. And of course, there’s the art of sewing facing to provide structure and a clean finish to necklines and armholes.
Please let me know in the comments what you’re most interested in, or if there are any other dressmaking techniques you’re eager to learn about. Your questions and interests guide the content, and I’m here to help you expand your sewing skills.
If you prefer a visual guide, take a look at my YouTube video. It’s perfect for those who’d rather watch a handy tutorial on zipper installation than read about it.

Did you find this tutorial helpful? If so, save this pin (see below) on your sewing board so you can come to this tutorial later when you are ready to sew a zipper, and follow me on Pinterest for more tips, tutorials, and inspiration!

latest posts
- Dresden Plate Quilt Block: 4th of July Fireworks
- How To Sew Curves the Easy Way Using a Curve Master Presser Foot
- 30 Sewing Hacks That Turn Ordinary Items into Useful Sewing Tools
- Seam Allowances in Sewing Patterns: What They Are and How to Use Them
- What Do You Call a Person Who Sews? I Asked My Readers and Got 1,408 Opinions
- DIY Round Purse: PDF Sewing Pattern and Detailed Instructions
- Mini Wonder Clips By Clover: Useful Sewing Tool Or Just Another Notion?
- Non-Slip Grips For Quilting Rulers: A Small Notion With A Useful Job
- Fabric Eraser for Sewing: What It Removes and When to Use It