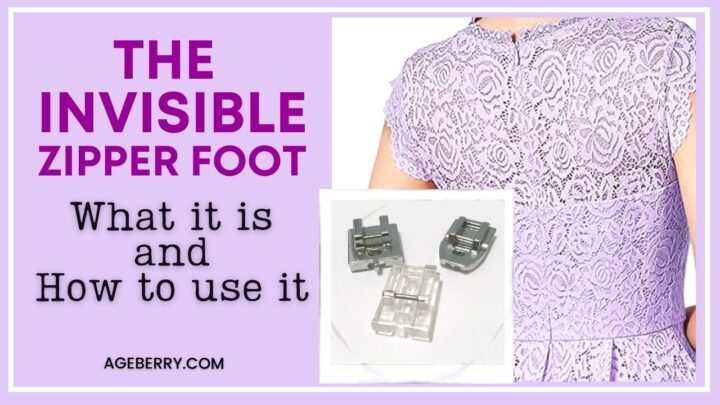
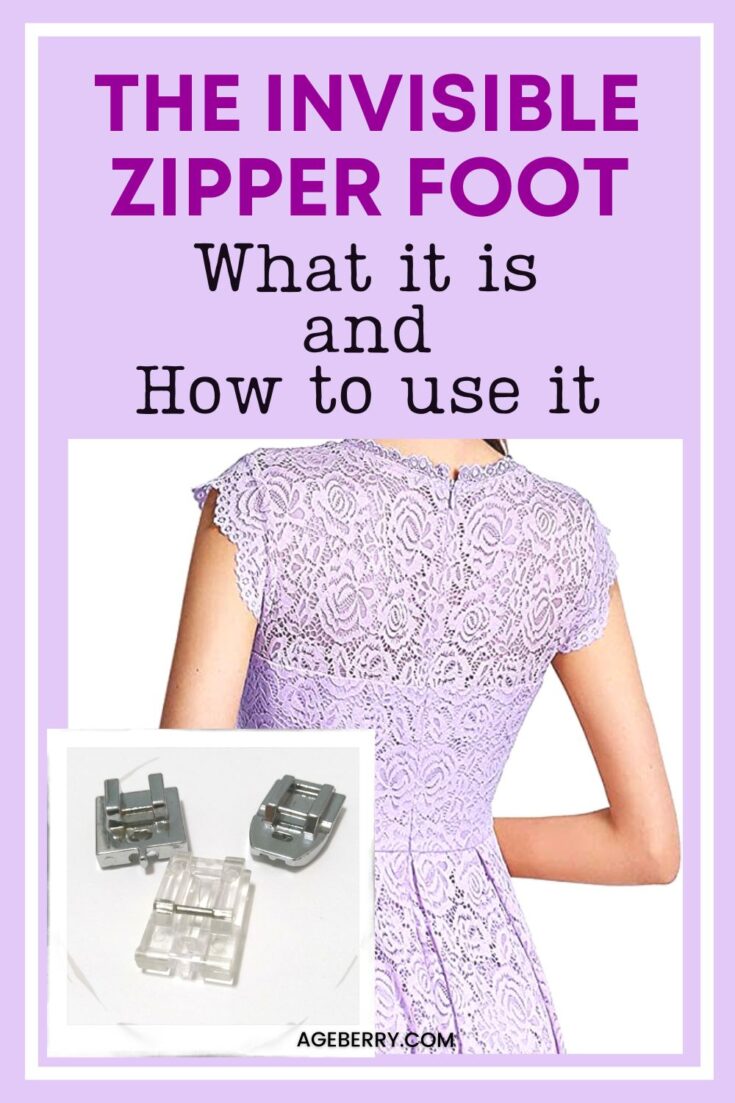
The Invisible Zipper Foot: What It Is And How To Use It
Inserting invisible zippers is one of those sewing tasks that tend to intimidate beginner sewists. But the truth is that they’re easier to sew than you may expect especially if you are using an invisible zipper foot. Plus, the bonus of sewing them is that no one will be able to see if your stitches are just a little bit “off” since they’ll stay hidden.
Using the right zipper foot will take the task of sewing an invisible zipper from intimidating to quite manageable. In this tutorial, I cover everything you need to know about using an invisible zipper foot.
What is an invisible zipper foot, and why is it better for sewing an invisible zipper?
Before we can cover what an invisible zipper foot is, we need to go over the concept of these types of zippers quickly. As you may interpret from the name, an invisible zipper is a zipper that’s hidden in a seam so that it’s (nearly) invisible.
For this reason, it’s a popular option for home decor items (like pillows and cushions) and they are commonly used in the side or back seams of garments (such as dresses, pants, skirts, tops, etc., and more elegant clothing such as gowns). Think about the back of your dress: a regular zipper on its back would not look good, would it?
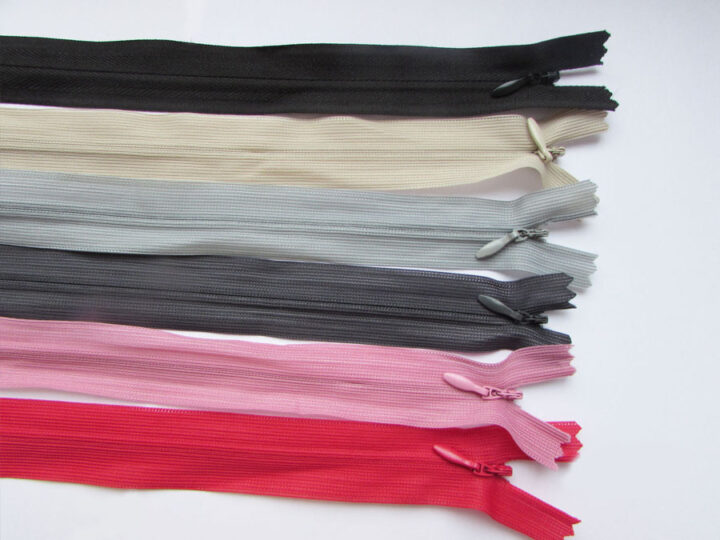
If you like to sew, the chances are good that you’ll come across a pattern that calls for an invisible zipper at some point. Invisible zippers are typically made of plastic and nylon and can be found in a variety of colors to match the fabric of the item and in various lengths. But in any case, the invisible zipper should be longer than the slit by at least 1.5 inches (or longer).
Note: Some of the links on this page are affiliate links. This means I will receive a commission if you order a product through one of my links. I only recommend products I believe in and use myself.
The teeth of the invisible zipper and its slider are very thin, and the tape is made of lightweight polyester. It gives the impression that there is no zipper where it is located.
When sewing an invisible zipper into a garment, it is important to use a special invisible zipper foot.
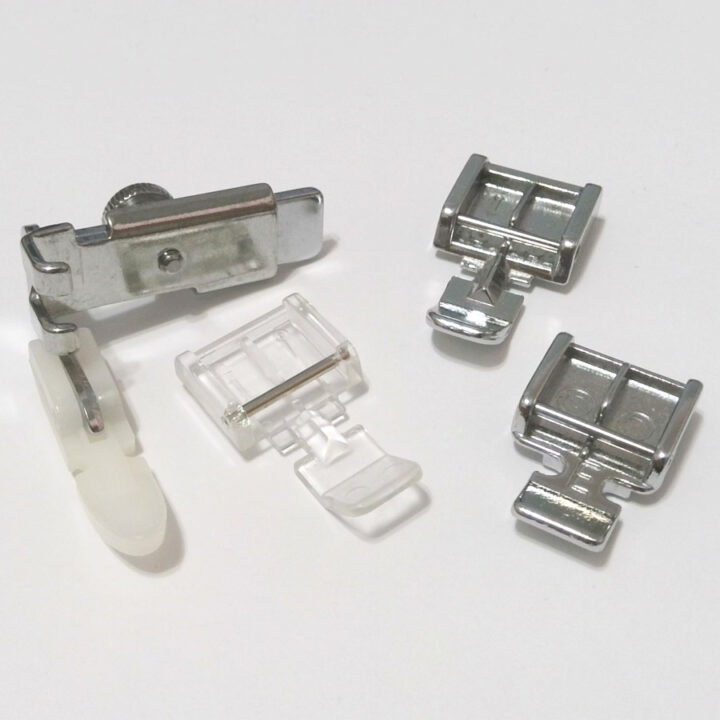
If you’re looking for an invisible zipper foot, you’ll notice that they come in a few different styles. Most of them are made of metal, but some are made of plastic. The clear plastic feet are great because they allow you to see the zipper underneath. There are also feet made of Teflon which can be used with vinyl or leather.
Some of them are snap-on feet good to use with a low shank machine, but some of them are made for high shank machines. And there also is a universal invisible zipper foot which is good for all sewing machines, old and modern, and made of small parts that you need to put together before using.
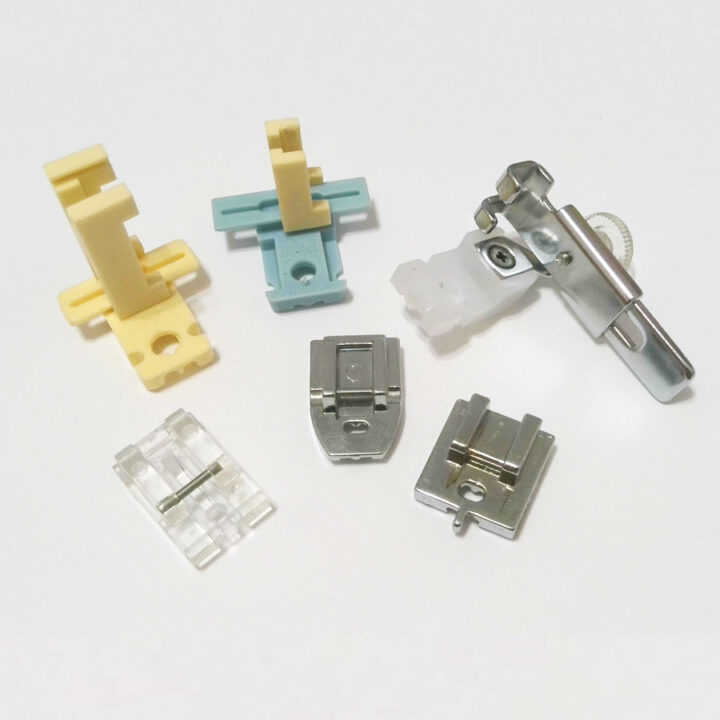
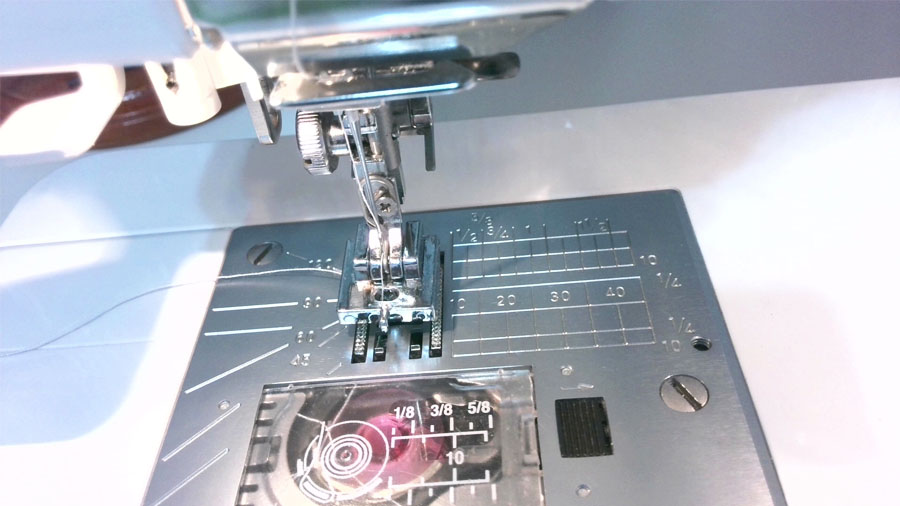
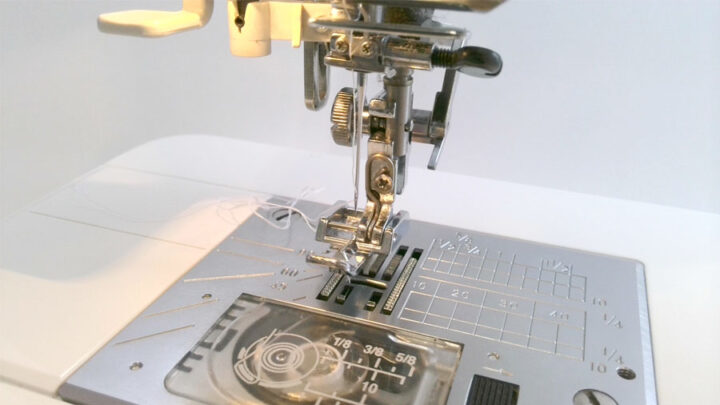
But you can see that they all have a small hole in the center (for the needle) and two grooves as you look at the underside of the foot. These grooves help to keep the invisible zipper teeth in place while you sew. This way, the needle is able to get close to the coils and create invisible stitches.
Additionally, having an invisible zipper foot makes it easier to sew in a straight line and get even stitches on both sides of the zipper. This results in a strong and invisible seam.
No matter what type of invisible zipper foot you choose, make sure it’s compatible with your sewing machine before you start sewing.
A regular zipper foot glides along with the zipper teeth, but you need to remain very alert as you sew to guide the stitching placement yourself. The invisible zipper foot is easier to use than a regular one because those grooves on the underside keep your zipper coils perfectly in place as you sew.
Although you can use a standard zipper foot and achieve a similar outcome, the invisible zipper foot will yield better results and a professional-looking finish.
Invisible Zipper Foot vs. Regular Zipper Foot
These two types of zipper feet differ in both style and technique for using them. Although all zipper feet allow you to get your stitches close to the zipper teeth, the only thing they have in common is that sewists use them both to sew zippers.
Let’s compare the two more in-depth to better understand how to use each one to sew invisible zippers.
Regular Zipper Foot
A regular zipper foot is more versatile because it can sew both standard and invisible zippers. Moreover, you need to use both feet when inserting an invisible zipper. Why? Because you will need to finish the seam under the invisible zipper – and that’s where a regular zipper foot is very useful.
This foot has a flat underside and notches on both sides to allow the needle to sew on either side of the presser foot. It is often included as an accessory when you purchase a new sewing machine.
While a regular presser foot works for sewing invisible zippers, it’s not ideal because the pressure will always be a little off-center due to the need to move your needle to the left or right when you sew and as a result, the foot doesn’t always sit nice and flat against the zipper and fabric.
In addition, because the presser foot pressure isn’t centered, the fabric sometimes doesn’t feed through well. As a result, you have to keep a close eye on it and guide it through the machine as you sew.
Moreover, the invisible zipper teeth are often rolling inwards and it’s not easy to keep them flat and sew with a regular zipper foot – you might accidentally step on the zipper coils.
Invisible Zipper Foot
First things first – the invisible zipper foot is not an accessory that comes with new sewing machines. Instead, you have to purchase it separately, and it can range in price based on the brand you need.
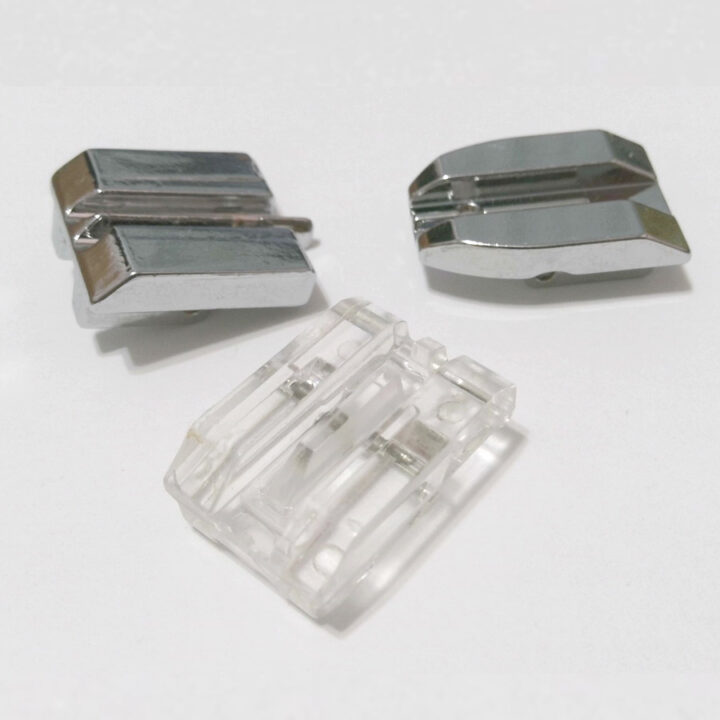
It’s designed quite differently from the regular zipper foot. Instead of notches on the sides where the needle goes, this foot has a hole in the center for the needle. The stitching hole can go in the center because two grooves on the bottom glide over the zipper teeth as you sew to guide them and keep them in place as you stitch.
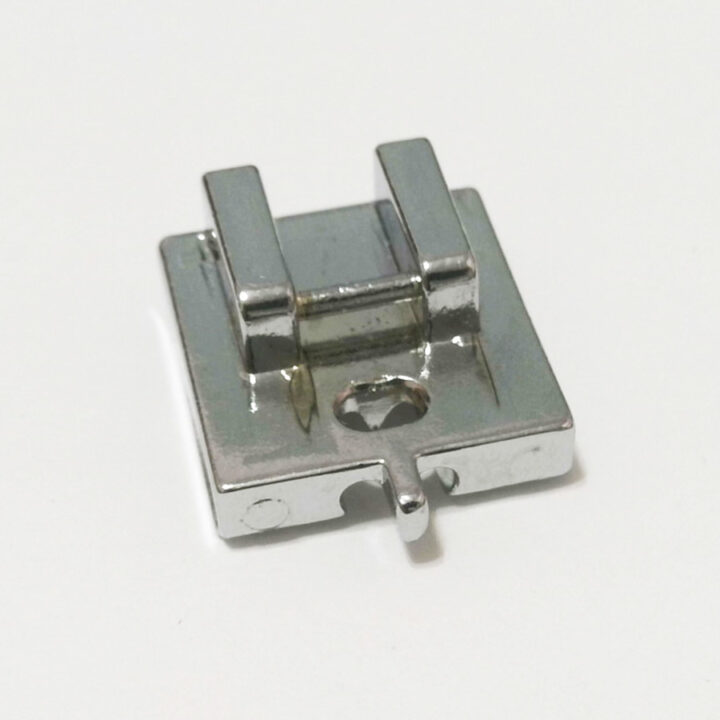
When stitching, you’ll place the zipper teeth under the groove. This design also helps keep the pressure from the presser foot centered so that the fabric consistently feeds through smoothly. This foot gives you more control to stitch very close to the zipper teeth.
This foot is generally less versatile than a regular zipper foot because you can only use it to sew invisible zippers. However, if you sew invisible zippers frequently, it will make the job faster and easier. In fact, by using the right tool for the job, you may find that you enjoy sewing invisible zippers more than you like sewing regular zippers!
How To Install An Invisible Zipper Foot
I want to walk you through how to install an invisible zipper foot on your machine so you can use it. The process is simple but different presser feet can be installed differently obviously.
So, these are the steps for installing snap-on presser feet:
Step 1
Turn off your sewing machine (if you have a high-end device, just lock all keys and buttons) to prevent accidentally “starting” your machine by pressing the pedal or a button.
Step 2
Turn the handwheel toward you to raise the needle into the highest position (if it’s not there already). Lift the presser foot lever.
Next, press the presser foot holder release button to remove the snap-on presser foot on the machine.
If you have a snap-on invisible zipper presser foot, you’ll simply place that foot under your clamp and lower the presser foot lever to clamp the foot into place. And you are done.
Step 3
Make sure the needle is in the center position (not move to the left or to the right) as the hole in the presser foot is pretty small.
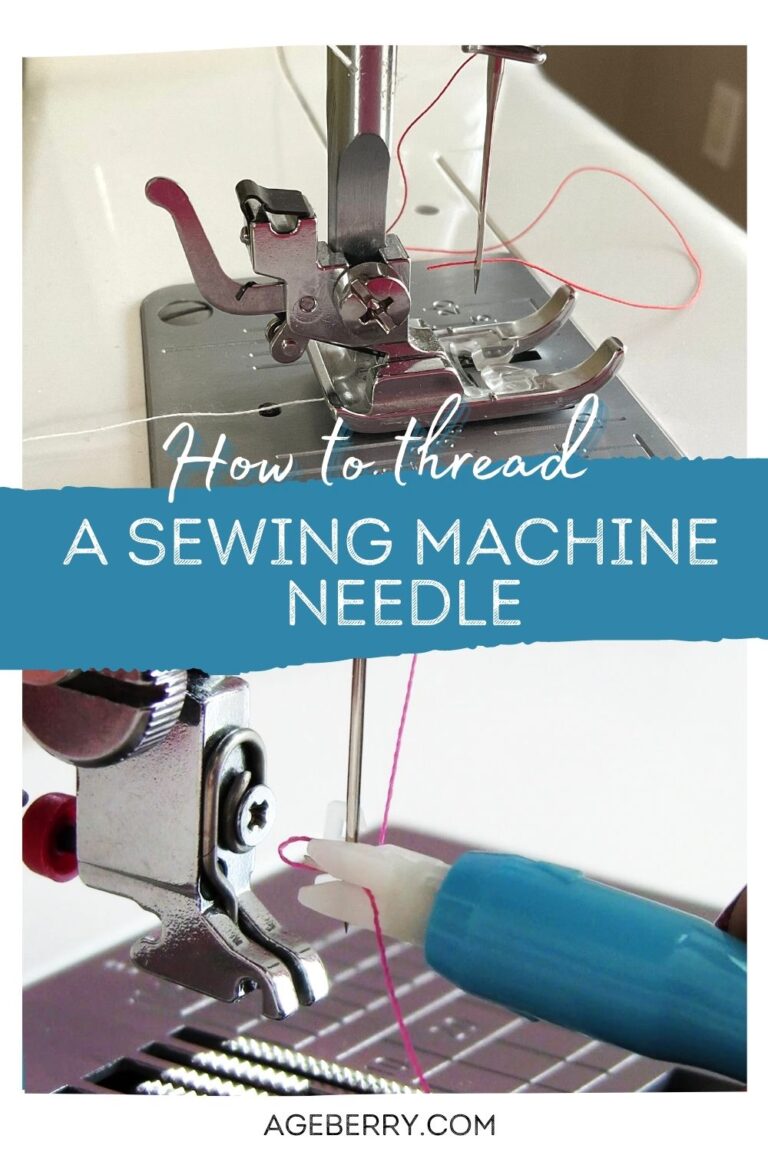
Now you will need to insert the upper thread tail into the small hole of the foot, you can’t leave the thread above the foot.
Just turn the handwheel, bring the needle down and up again, and pull both thread tails behind the presser foot.
If your foot is not snap-on foot use these steps:
Step 1
Turn off your sewing machine (if you have a high-end device, just lock all keys and buttons) to prevent accidentally “starting” your machine by pressing the pedal or a button.
Step 2
Turn the handwheel toward you to raise the needle into the highest position (if it’s not there already). Lift the presser foot lever.
Grab your screwdriver and remove the presser foot holder (and screw) from your sewing machine.

Pro Tip: Put your presser foot holder in a safe place and keep track of it because you will need it for all other presser feet.
Step 3
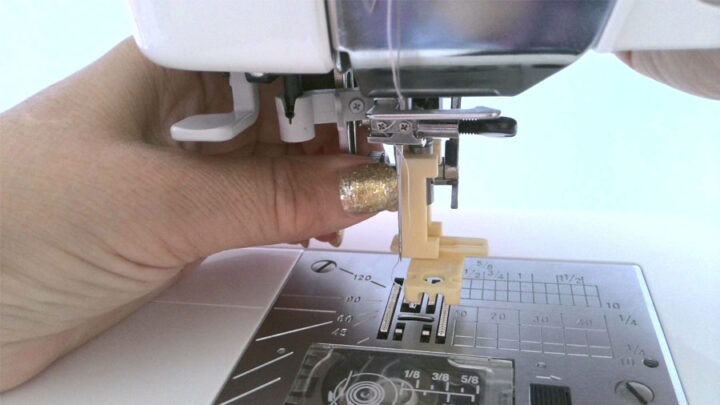
Slide the invisible zipper foot onto the shank and tighten the screw in place with a screwdriver.
I have this old-style plastic invisible zipper foot that I have to assemble from pieces before using. Your presser foot will look different but if it’s not snap-on, the steps are about the same as I am showing for my type.
Step 4
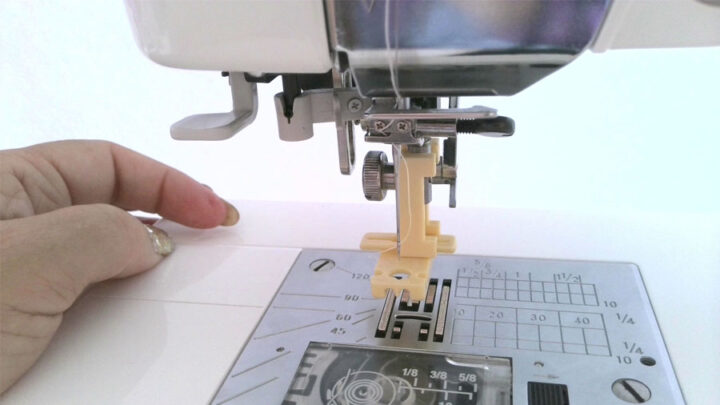
Manually move your needle up and down with the handwheel as you test to ensure the needle is in the right place and doesn’t touch the presser foot. Adjust if necessary.
How To Use An Invisible Zipper Foot
Now that your new invisible zipper foot is installed onto your machine, it’s time to use it! There are different methods of using the invisible zipper presser foot. I wrote about one of them (not a traditional one) in my tutorial – How to put in an invisible zipper using Wonder tape for sewing. But in this article, let me show you the more common way of installing an invisible zipper with this unique presser foot.
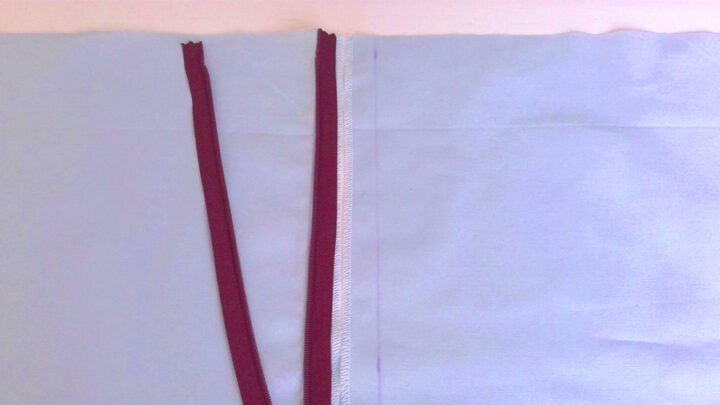
1. Get The Seam Edges Ready
Finish the fabric edges. I will use a serger for this, but you can also use the overlock stitches of your sewing machine ( zigzag, if none other is available ).
Place the seam edges (where your zipper will go) side by side, with the right side of the fabric facing up. This is the best way to figure out how the zipper goes and how it will look when you are finished sewing the zipper.
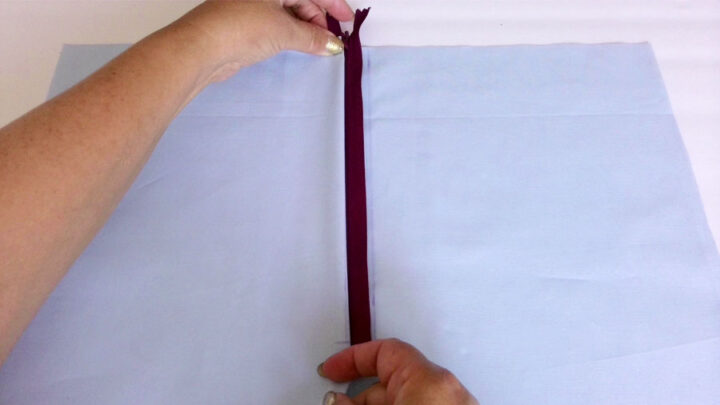
Do not sew the rest of the seam that will be under the zipper. The zipper is usually inserted before the rest of the seam is sewn.
Sometimes you may need to fuse lightweight interfacing to stabilize the fabric making it easier to sew a zipper.
Applying fusible interfacing to the wrong side of the fabric before inserting a zipper might be helpful if you use stretchy or very fluid fabric.
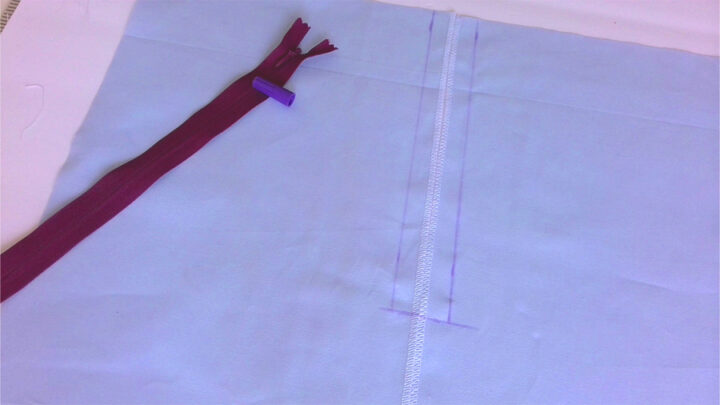
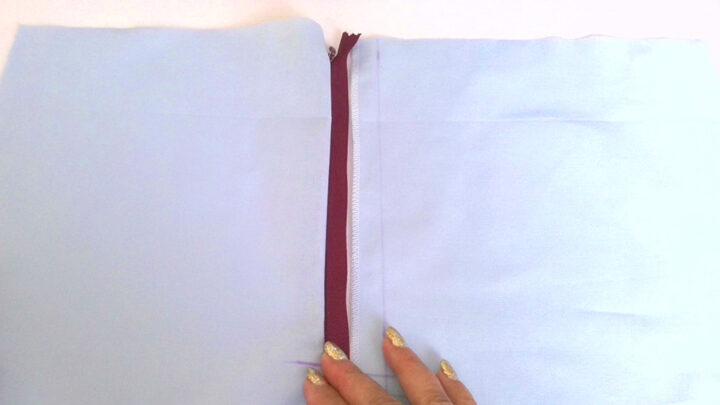
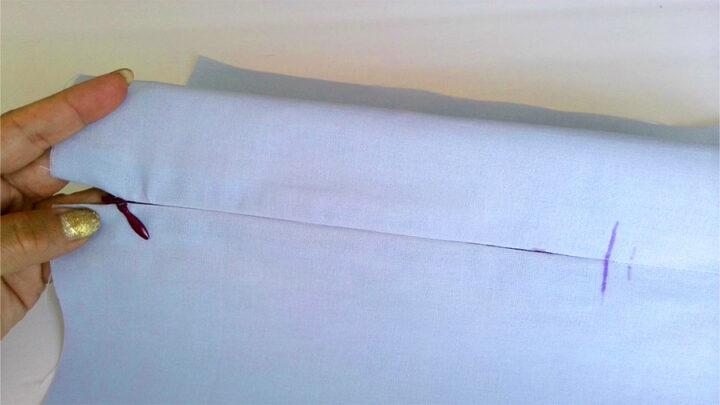
2. Mark Your Seam Allowance
With a marking pen, mark ⅝ “ seam allowances on both pattern pieces.
Mark also where you want the zipper to end on both fabric pieces.
3. Prepare Your Invisible Zipper
You need to prepare your zipper: make sure the color of the zipper pull matches the color of your fabric, and the length of the zipper is long enough for your garment.
Unzip the zipper.
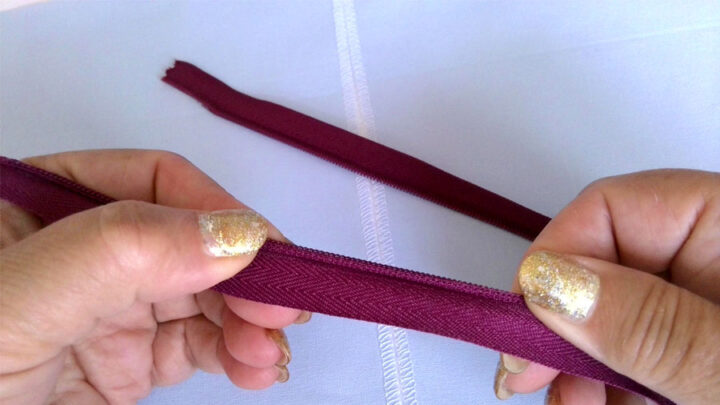
If you open the zipper up and inspect it, you’ll notice that the zipper teeth curls over the zipper lace. However, you want them to be not that curled while you sew to get a very close stitch (they’ll curl over your stitching to hide it later).
So, it’s often recommended to take your iron, turn it on to the lowest setting (synthetics) and carefully press the zipper coils flat and away from the zipper tape. Using high heat will melt your zipper teeth and ruin your zipper (and possibly your fabric) so use only barely warm iron. You will not be able to make the teeth completely flat, they still will be curled but a bit less.
But this step is optional, I often skip it if I have a lightweight zipper that doesn’t curl too much.
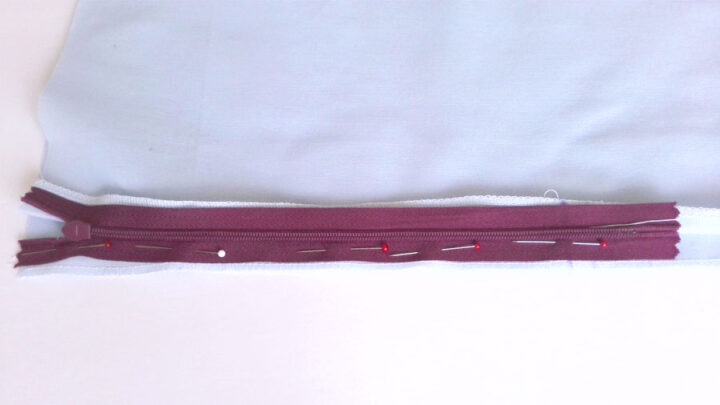
4. Hold Your Zipper In Place
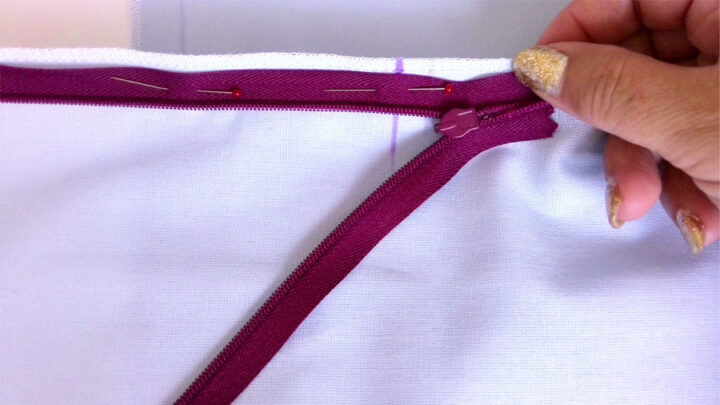
Once your zipper is ready for sewing, place one side of the zipper tape (with the zipper open) right side down on the right side of the fabric. The wrong side of the zipper should be facing you.

Make sure that the zipper teeth align with the seam allowances marks and that the top edge of the zipper tape lines up with the top edge of the fabric.
Hold the zipper tape in place by pinning or basting.
For example, pinning in place will be enough for non-slippery cotton fabrics. I recommend hand-basting the zipper tape in place if you work with knits or stretchy and slippery fabrics.
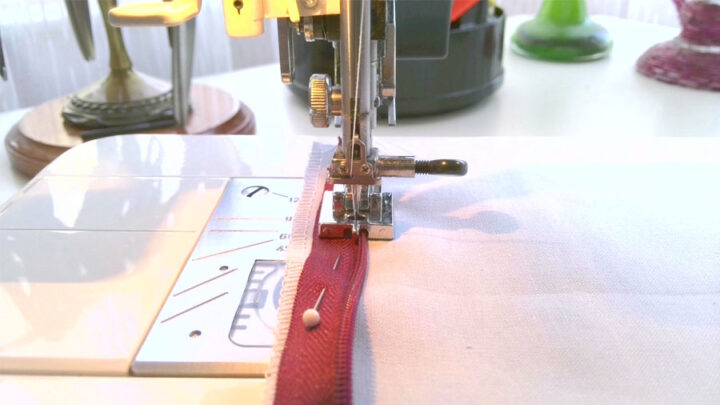
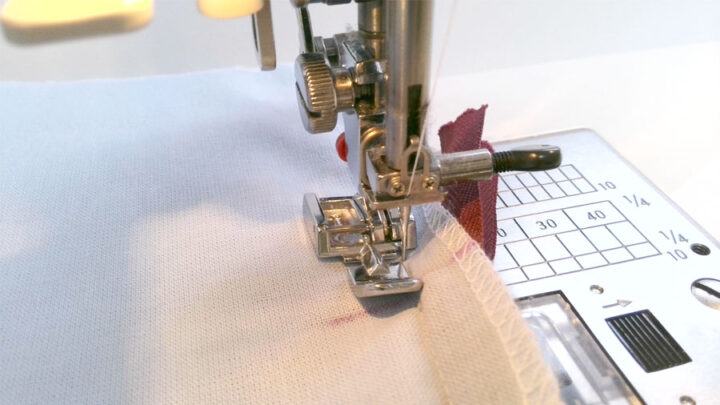
5. Stitch The First Side Of Your Zipper
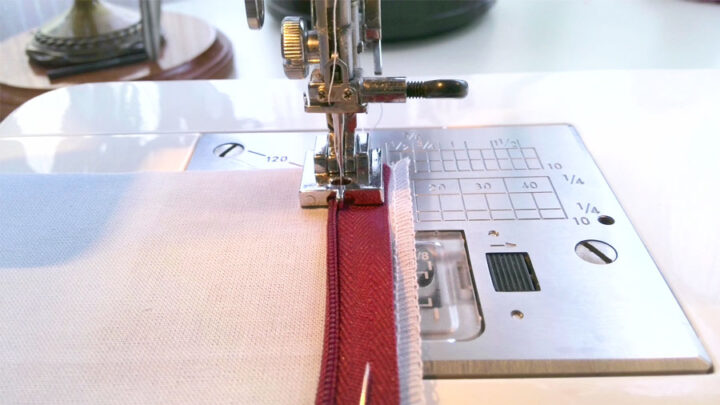
Once you double-check that everything is ready for sewing, it’s time to begin sewing! Position the zipper teeth under the correct groove of the invisible zipper presser foot. Start at the top edge.
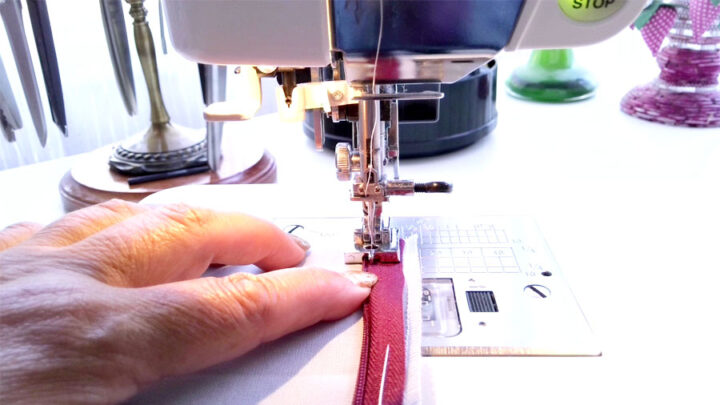
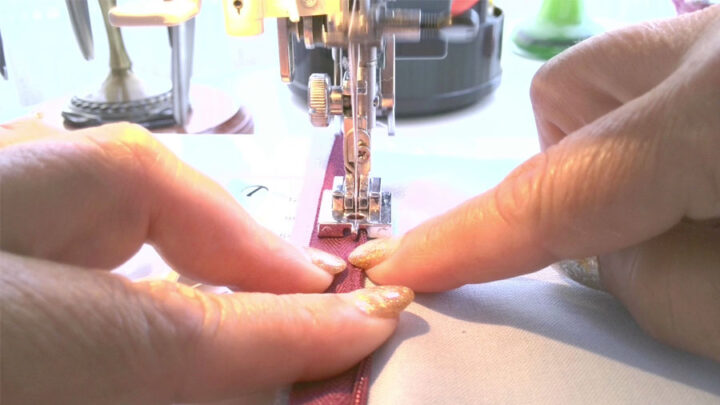
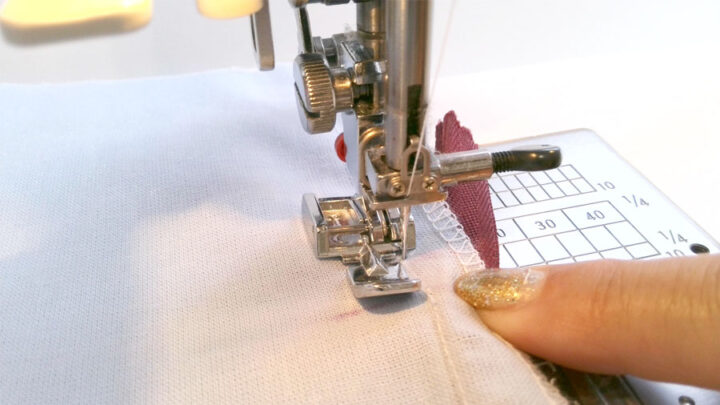
Backstitch at the top edge and then sew along the teeth (removing pins as you sew) until you reach the mark where you want the zipper to end. Try to sew as close to the zipper coils as possible. Use your fingers to uncurl the coils as you sew. Don’t backstitch at the end point as you may stitch over the teeth (because you were sewing really close to the zipper teeth) and that will ruin your project.
Secure the thread tails by making a knot by hand.
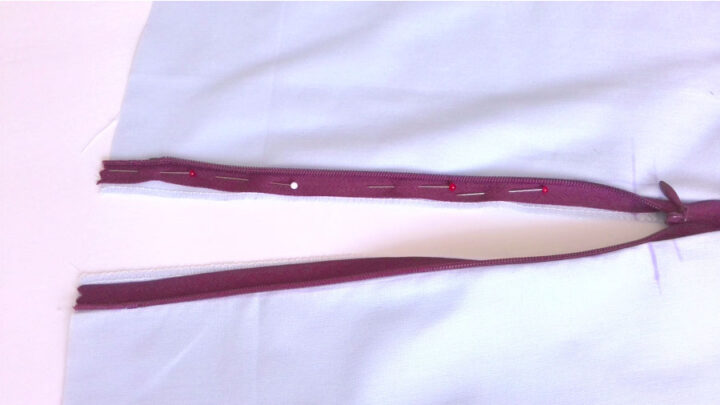
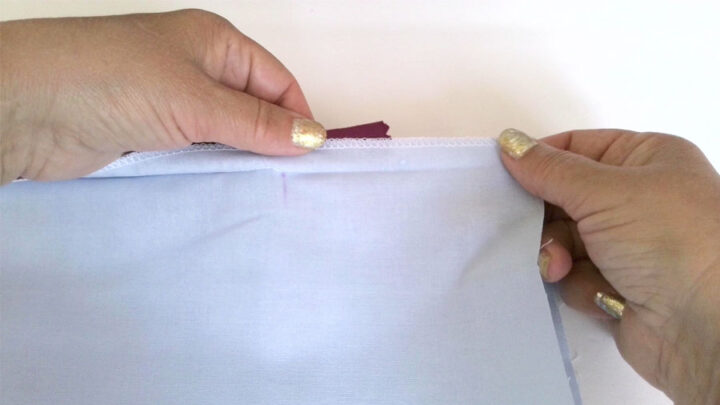
6. Prepare The Other Side Of Your Zipper
Close the zipper in preparation for the second stitch. I found from experience that it’s absolutely necessary to have the zipper closed when establishing its position.
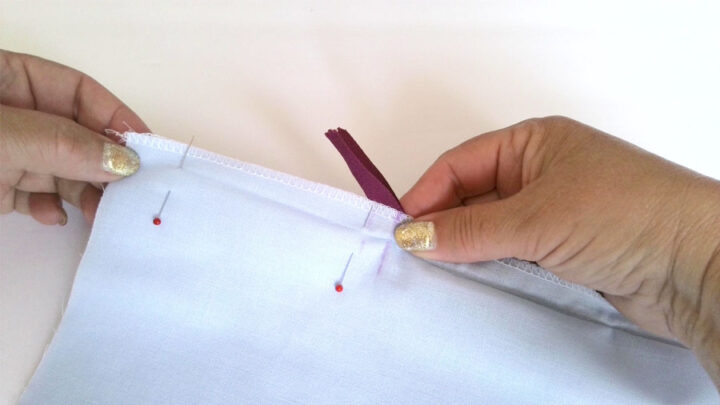
Align the other side of your zipper with the seam allowances in the same way that you did on the first side. Pin (or hand baste) it in place. Open the zipper again.
7. Sew The Second Side Of Your Zipper
Placing the zipper teeth under the proper groove of the invisible zipper foot, begin again at the top edge, backstitch, and sew your zipper tape in place (taking pins out as you sew, if needed) until you reach the mark. Don’t backstitch and secure the thread tails by tying a knot.
8. Complete The Seam Below The Zipper
Close your zipper and place the right sides of the fabric together. Push the zipper tail out of your way and pin the seam.
Change the invisible zipper foot to a regular zipper foot.
Next, put your garment down on the machine and make a stitch that goes as close to the zipper stitches as possible. Start sewing from the bottom toward the zipper. Don’t backstitch at the end, just tie the thread tails by hand.
Then use your iron to press the seam open and sew the bottom of the zipper tape to the seam allowances.
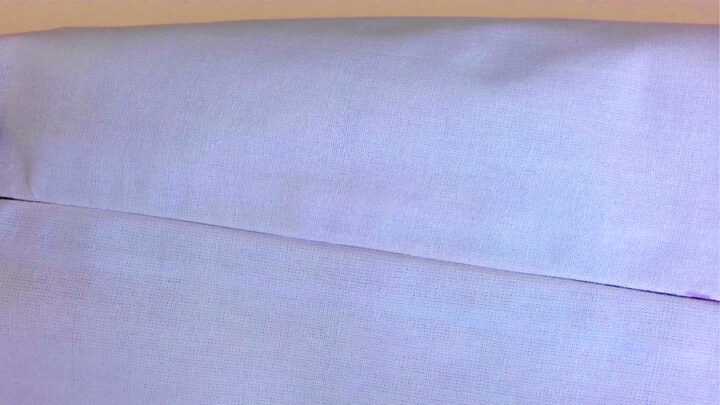
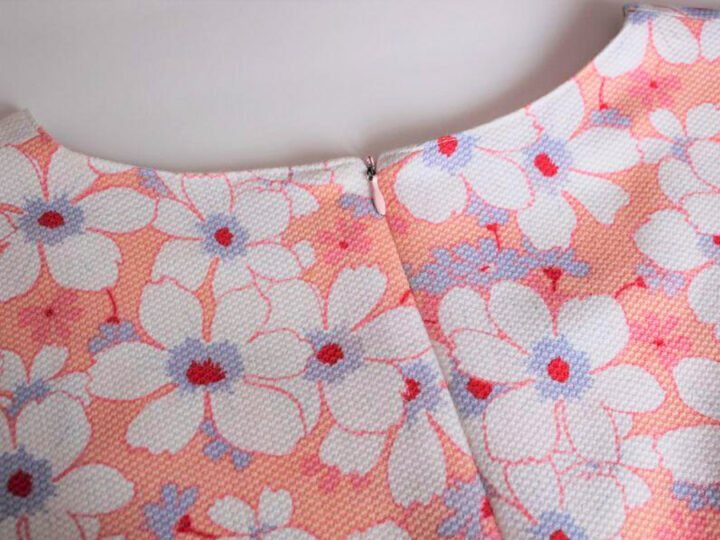
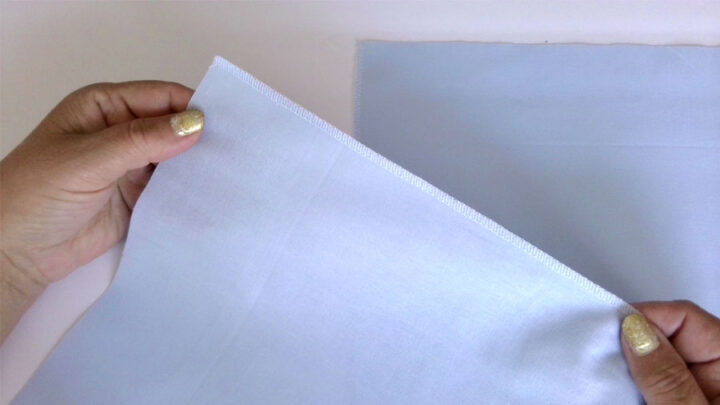
We can see that the zipper is really invisible, only the zipper pull can be seen.
I hope this invisible zipper foot guide was helpful to you in your journey of sewing zippers. Although you can use a regular zipper foot to sew invisible zippers, this simple tool will make a difference in the final look of your product and your enjoyment of making it.
You may also be interested in another unusual foot…
Did you like this tutorial? If you want to save it for future reference and use it later when you are ready to use an invisible zipper foot, pin this image to your sewing board on Pinterest and follow me on Pinterest for more tips, tutorials, and inspiration.
latest posts
- What Do You Call a Person Who Sews? I Asked My Readers and Got 1,408 Opinions
- DIY Round Purse: PDF Sewing Pattern and Detailed Instructions
- Mini Wonder Clips By Clover: Useful Sewing Tool Or Just Another Notion?
- Non-Slip Grips For Quilting Rulers: A Small Notion With A Useful Job
- Fabric Eraser for Sewing: What It Removes and When to Use It
- What Is The Best Thread For Sewing Machine Projects? Let’s Find Out!
- Butterfly Quilt Block Tutorial – Foundation Paper Piecing
- How To Sew Quilt Squares So The Corners Match
- Sewing With Fork Pins: How They Help With Pattern Matching, Slippery Fabric, And Seams