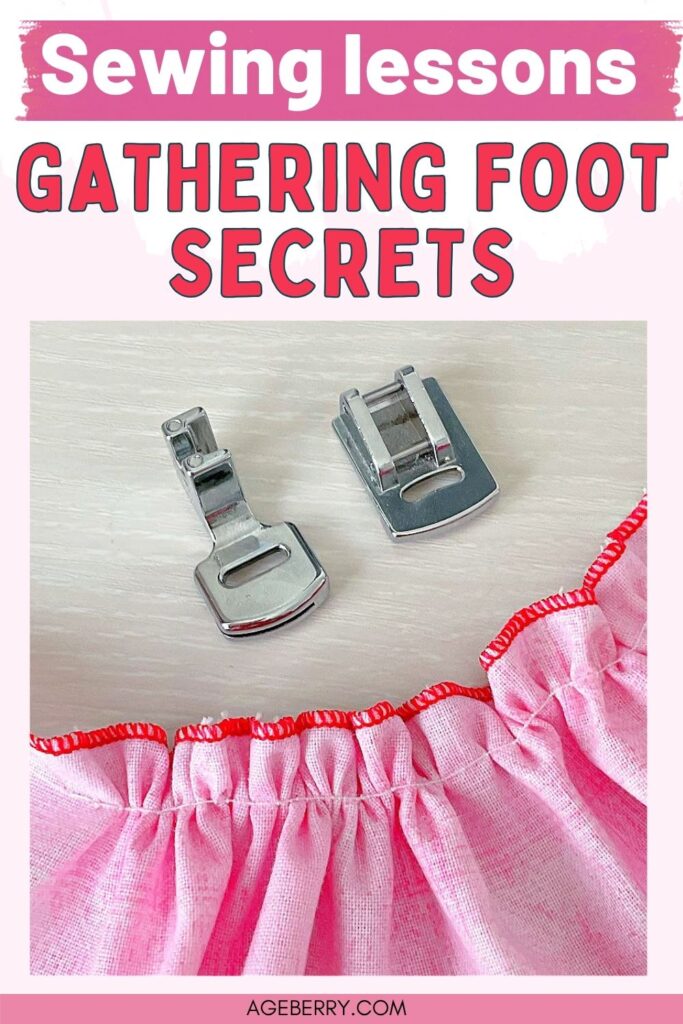
How to Use a Gathering Foot: What Works, What Doesn’t, and How to Get the Best Results
I have two feet. No, not the ones I walk on (though I still have two of those, thankfully). I mean two gathering feet. Or should I say… foots? The grammar police might not approve, but in the sewing world, this is where language gets tricky. After all, these aren’t exactly human feet.
They’re more like specialized footwear for my sewing machine — and my machine has quite the shoe closet. I’ve collected all sorts of presser feet over the years, from the everyday “sensible flats” (zigzag foot) to the glamorous “special occasion heels” (ruffler foot). And among them are my gathering feet — quirky, opinionated, but very useful.
One is a Janome snap-on version that works beautifully on my Janome machine. The other is a screw-in foot meant for low-shank machines. And let’s just say… neither of them has had an easy relationship with my Brother Luminaire.
Note: Some of the links on this page are affiliate links. This means I will receive a commission if you order a product through one of my links. I only recommend products I believe in and use myself.
The Janome foot is loyal to Janome. It refuses to even pretend to work with my Brother.
The screw-in low-shank foot isn’t any better — my Brother is high-shank, so even with a low-shank adapter it made odd noises that made me nervous. I decided my expensive machine deserved better than to be tortured for my gathering experiments.
So, when I visited my daughter, I used her Singer low-shank machine. That’s where the real testing began. The low‑shank gathering foot I tested will fit most low‑shank sewing machines.
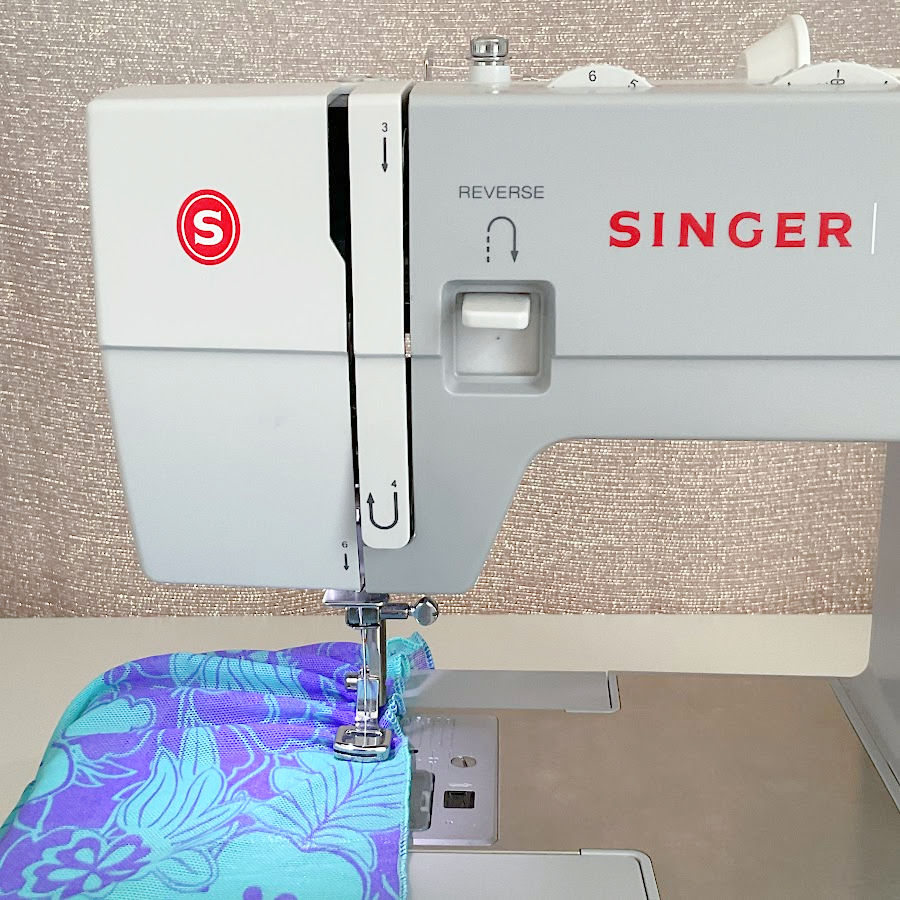
This Singer is actually one of the cheapest mechanical machines on the market, and I would not expect a high-end product for it’s price. But my daughter has it for a good number of years and while she is not really using it much, every time I visit I make up for the lack of use. And until now I have not been disappointed!


I need to mention here that a Janome gathering foot works exactly the same way as the other gathering foot I tested except for the slit in the other foot – which I don’t like anyway (I will talk about it later). So if you have a Janome machine, read further – the article applies to it also.
The reason I’m not using it here as example is simple — not many of my readers sew on a Janome machine, and this foot only fits certain Janome models (not even all of them). That said, it works really well. So if you do have a compatible Janome and this foot in your collection, you can still follow along with this guide — every tip, trick, and setting I share applies just the same.


What Is a Gathering Presser Foot?
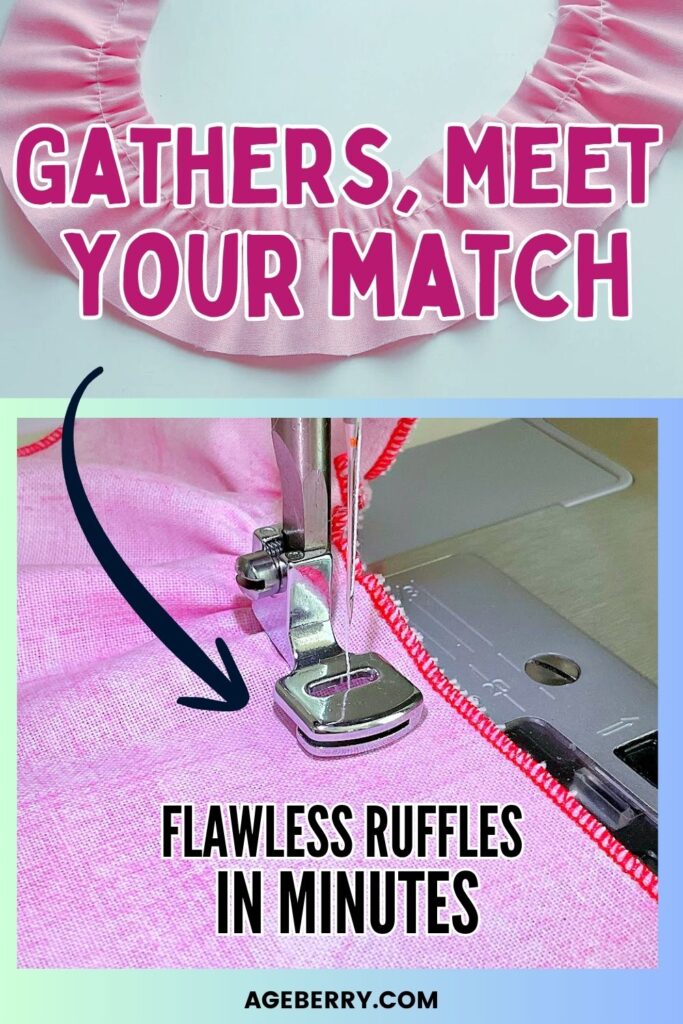
A gathering foot is a specialty sewing machine foot that automatically creates gathers as you sew. It works best on lightweight to medium fabrics. Unlike the old-fashioned “two rows of basting stitches and pull the threads” method, this foot “scrunches” the fabric for you while you sew.


The selection of gathering feet is quite large, I gave a couple of examples above.
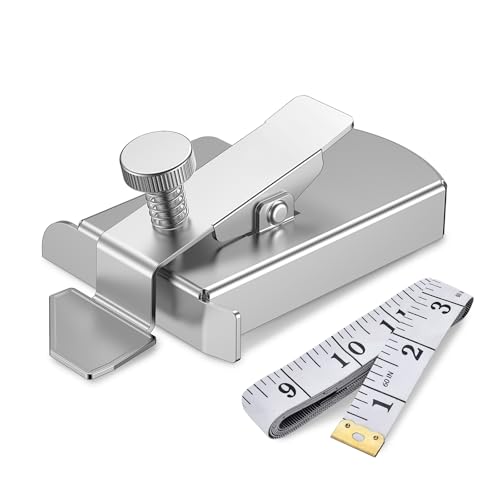
How to Install a Gathering Foot
The installation depends on your foot type:
- Snap-on type (Janome)
Align the foot with the presser foot holder and snap it into place. - Screw-in type (low shank)
Remove your regular presser foot holder. Slide the gathering foot into place and secure it with the side screw.
Make sure the presser foot is firmly attached before sewing.
Once it’s on, manually turn your handwheel to lower the needle and check that it clears the opening in the foot. This is important whether your needle is in the center or moved to the left. If the needle hits the foot, stop immediately and adjust your needle position before you start sewing. That little check will save both your needle and your foot from damage.
If you have a high-shank machine, you’ll need an adapter — but be cautious. Some feet may not align well, and your machine might not appreciate it.
My Fabric and Setting Tests
I couldn’t resist playing with all kinds of fabrics. Here’s what happened. If you want the short version, here it is.
Quilting Cotton
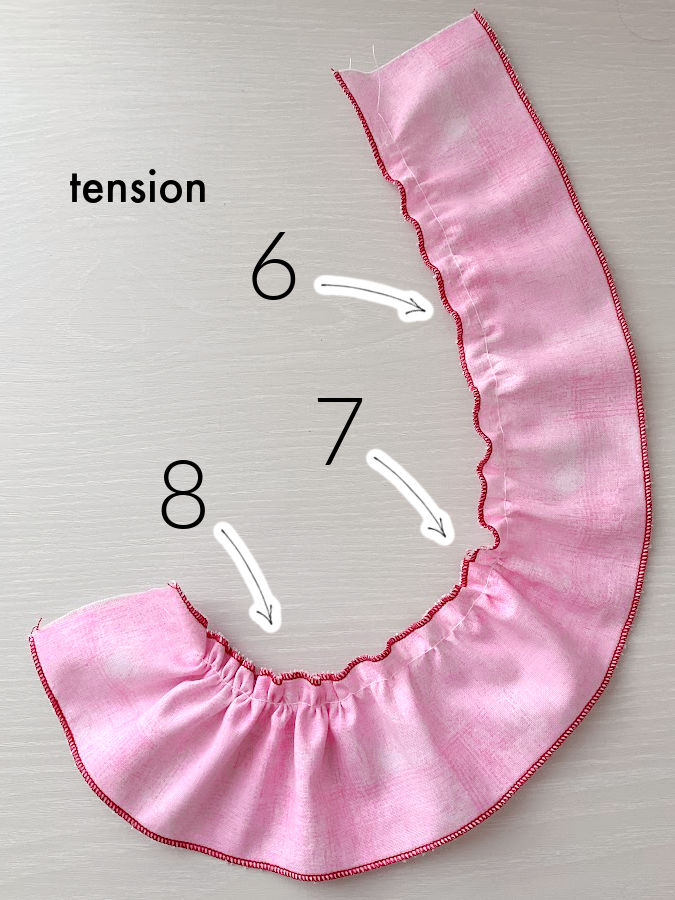
- Settings: Tension 8, then 6, then 7; stitch length 4.
- Result: The higher the tension, the more gathers. Nice, even texture.
Lightweight Polyester Crepe
- Settings: Lower tension and shorter stitch length. I got the best gathers with tension 4 and stitch length 3
- Result: Gorgeous soft gathers.
Organza Ribbon
- Settings: Centered stitch, tension 7.
- Result: Gathered beautifully down the middle.
Thin Rayon Knit
- Settings: Tried everything.
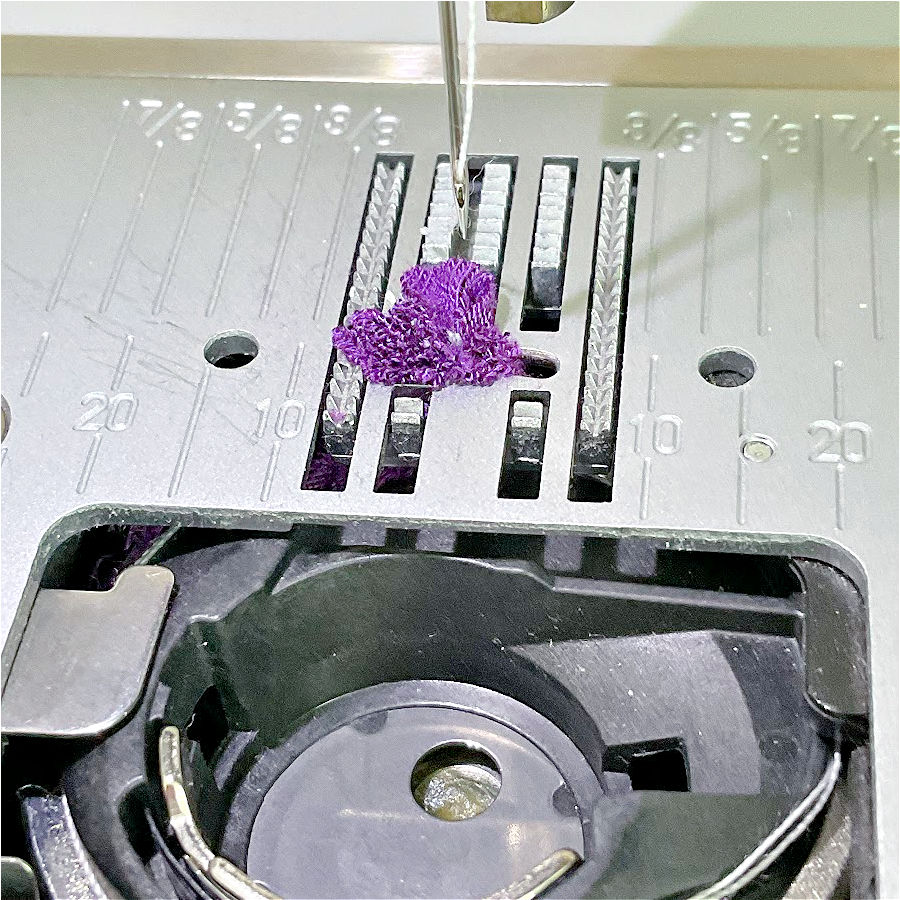
- Result: Disaster. The machine “ate” the fabric and I had to perform surgery under the needle plate.
Thicker Knit
- Result: Worked well — stable fabric is the key.
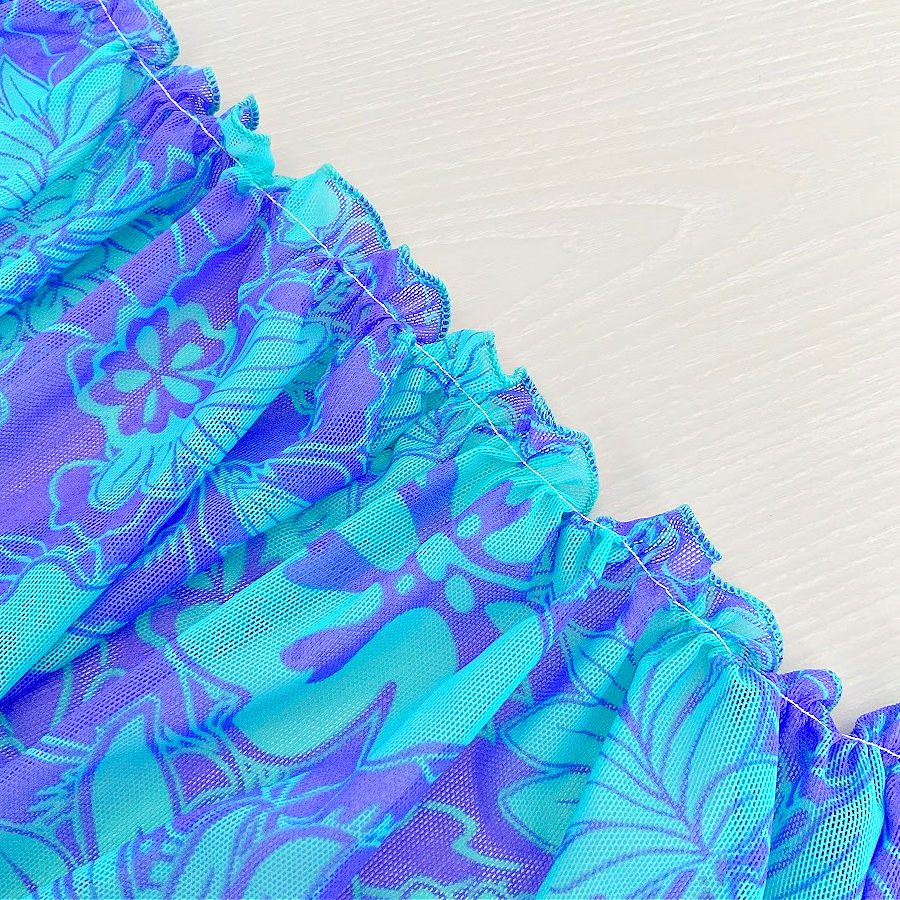
Stretchy Mesh Fabric
- Result: Gathered perfectly.
And now, for those who enjoy the long, chatty version — here are all my tests in glorious detail, complete with my little sewing-room adventures (and misadventures).
Quilting Cotton
For my first test, I reached for a strip of good old quilting cotton. I threaded my machine with a strong but thin thread — the kind that can handle a little bossy tension without snapping. My needle choice was a universal 80/12, which is my go-to for most woven cotton projects.
I started with the tension dial cranked all the way up to 8, then experimented with 7, then 6, all while keeping my stitch length at 4. The rule here is simple: high tension plus long stitches equals happy, cooperative gathers.
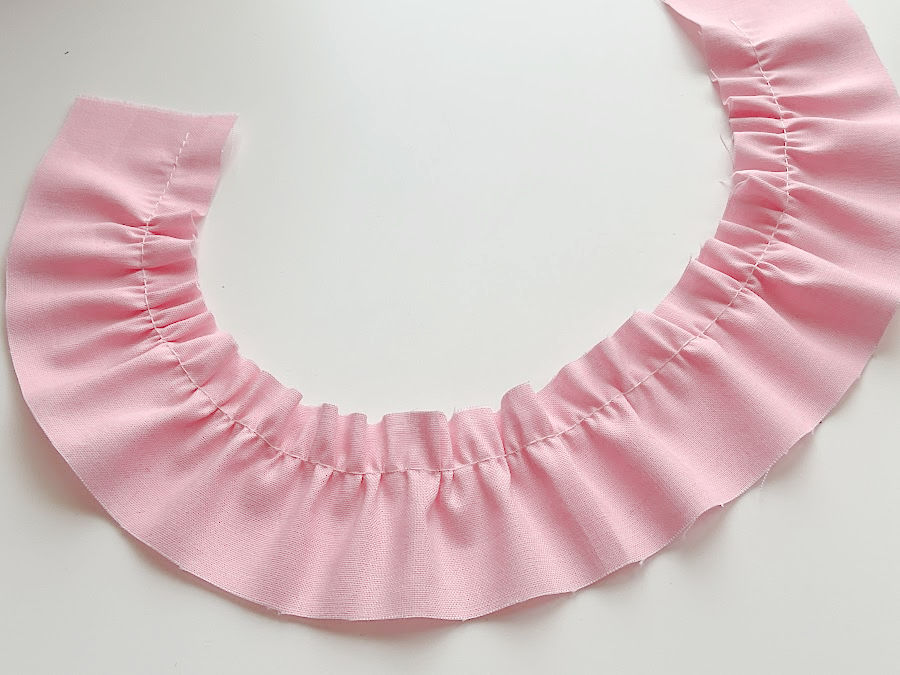
Quilting cotton is one of those fabrics that finds itself in gathering situations quite often. Think apron ruffles, tiered skirts, puff sleeves, gathered yokes, or the sweet little frills on children’s dresses. If you’ve ever made a pillow with a ruffled edge, chances are it was quilting cotton.
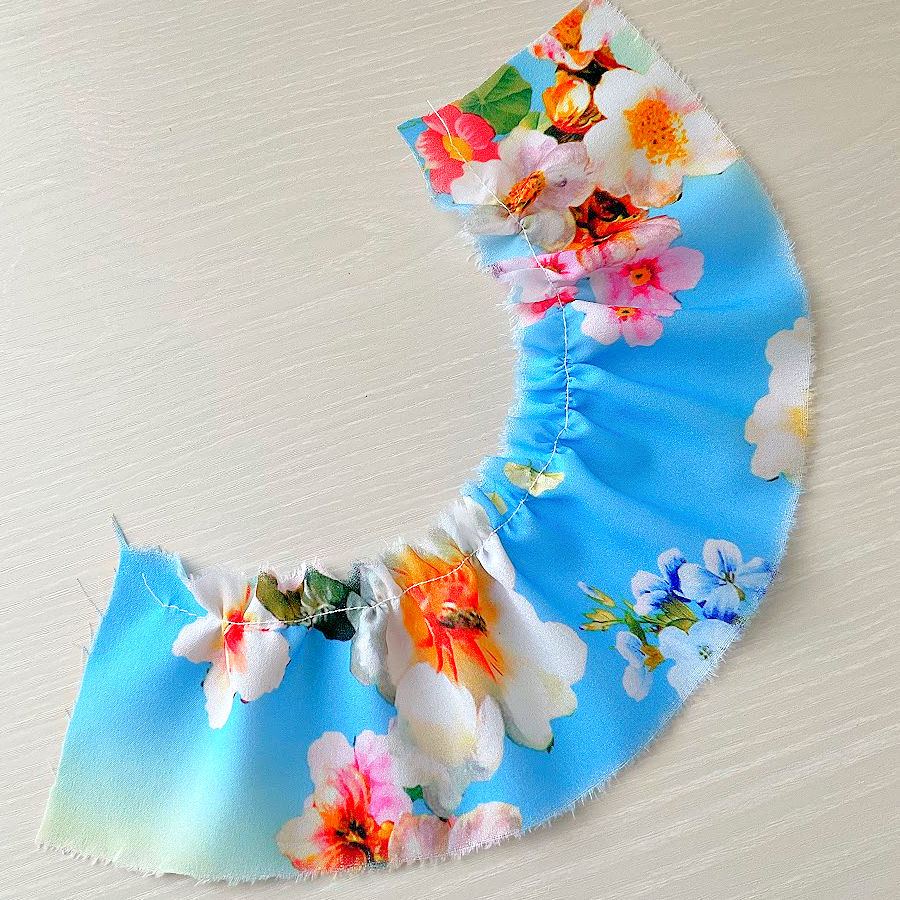
This particular test turned out so nice that I decided it deserved more than just being tossed into the “sample” pile. So, I repurposed it as a skirt for my memory bear (gathered with tension at 7) — and it looked adorable.
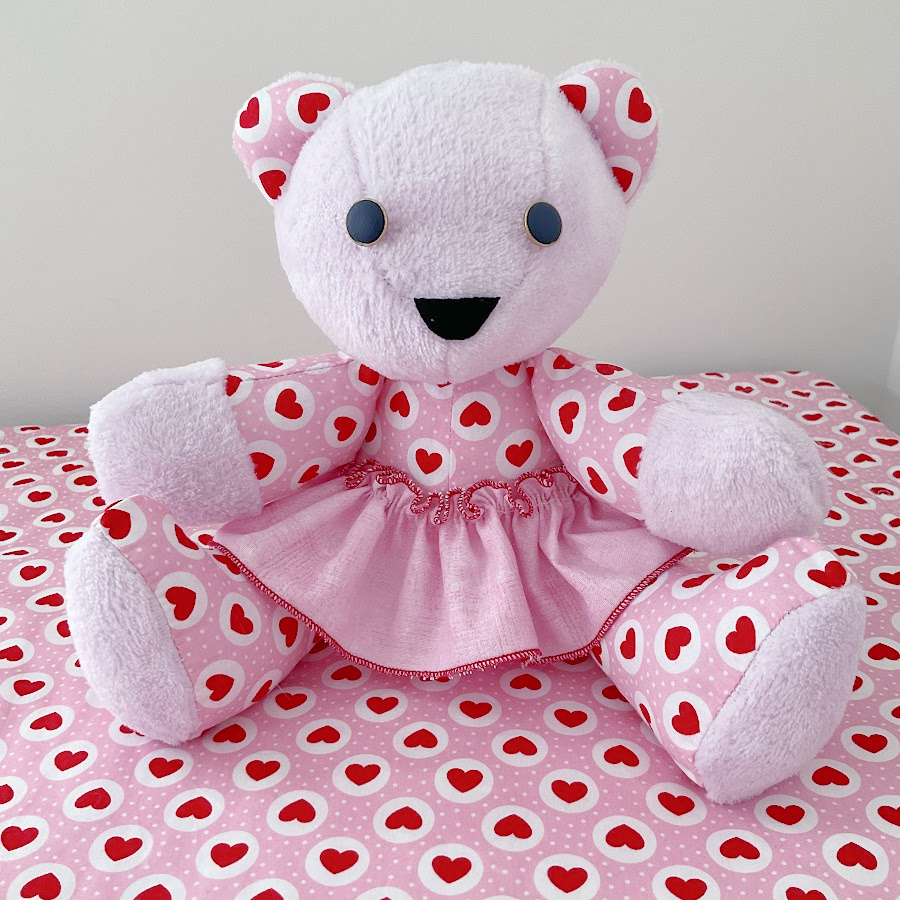
Here’s the link to my memory bear tutorial if you’re curious – My Adventure with a Memory Bear Template: The Good, the Bad, and the Adorable. The gathers were neat, full, and evenly spaced.
One thing I learned while testing is that quilting cotton responds best when you give it a little speed. If you creep along too slowly, the gathers can lose their rhythm and start looking not so nice. But at a good steady pace, they fall into line beautifully.
And yes, there is something a little magical about watching a flat strip of fabric suddenly scrunch itself into a frilly little wave right before your eyes. It’s almost enough to make you forget about those times your bobbin ran out halfway through. Almost.
Lightweight Polyester Crepe
Next up was a strip of lightweight polyester crepe. I started with the same settings I’d used for quilting cotton: tension at 8 and a stitch length of 4. The result? Gathers were very dense and full. Beautiful in their own way, but not what I was after.
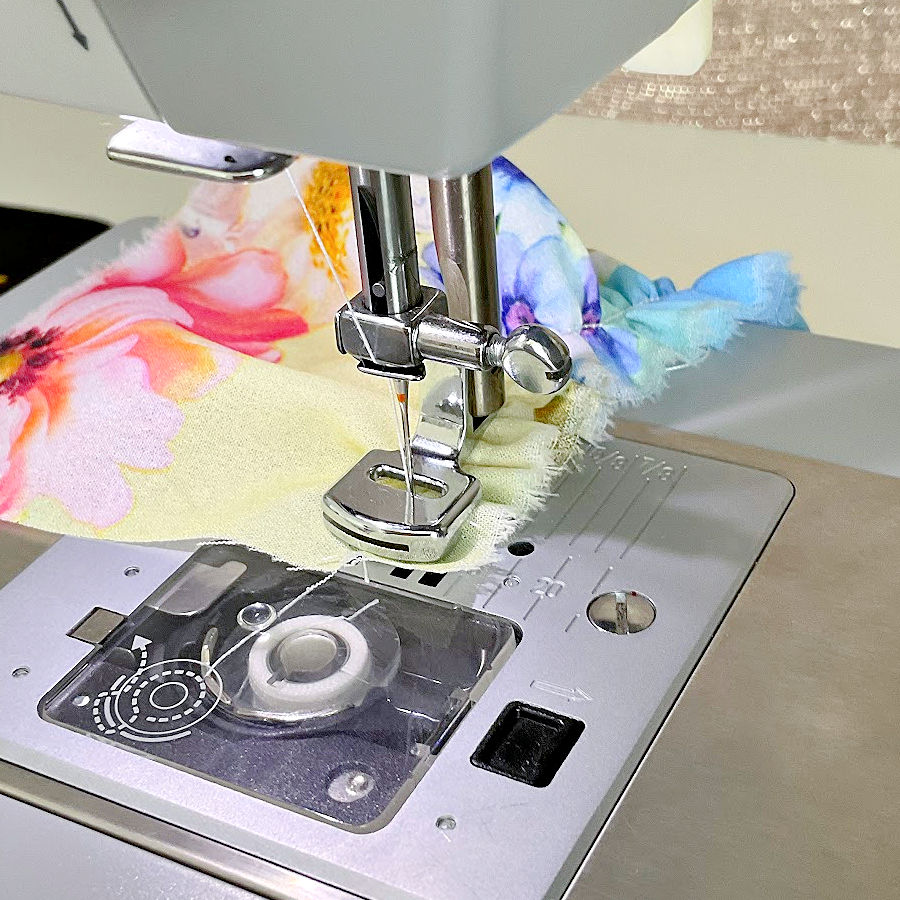
I dialed the tension down to 7, then 6. Still too much — the gathers were still piling up.
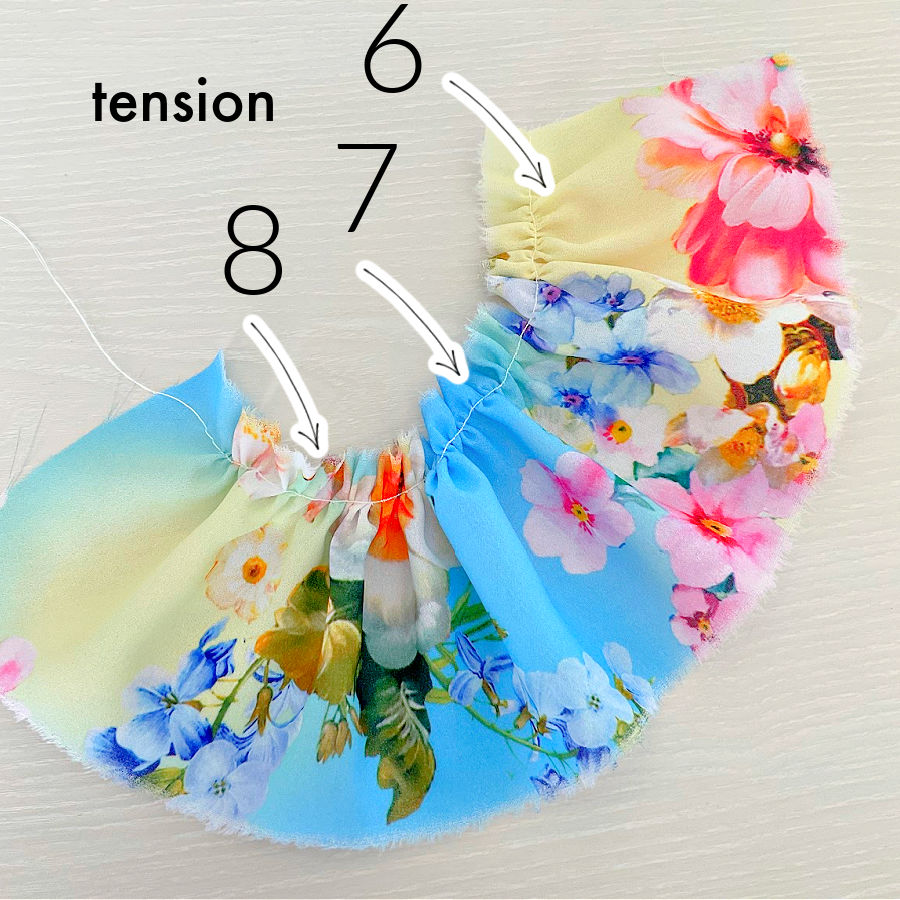
I also tried tension 5 and in the end, I settled on tension 4 and a stitch length 3, and that’s what I liked.
Instead of tight bunches, I got soft, airy gathers that draped with an easy elegance. I still used my trusty universal 80/12 needle and the same strong, thin thread, which let the machine stitch smoothly through the crepe without snagging or skipping.
The finished look was good — gentle ripples rather than structured folds. Perfect for a floaty blouse hem, the tiers of a summer maxi skirt, or the sleeves on a breezy peasant top. Lightweight crepe is a gatherer’s dream when you want softness instead of bulk.
And watching that flat strip of fabric glide under the gathering foot, transforming into romantic waves without a single pulled basting thread? That’s one of those sewing-room moments that makes you feel just a little smug — in the best way.
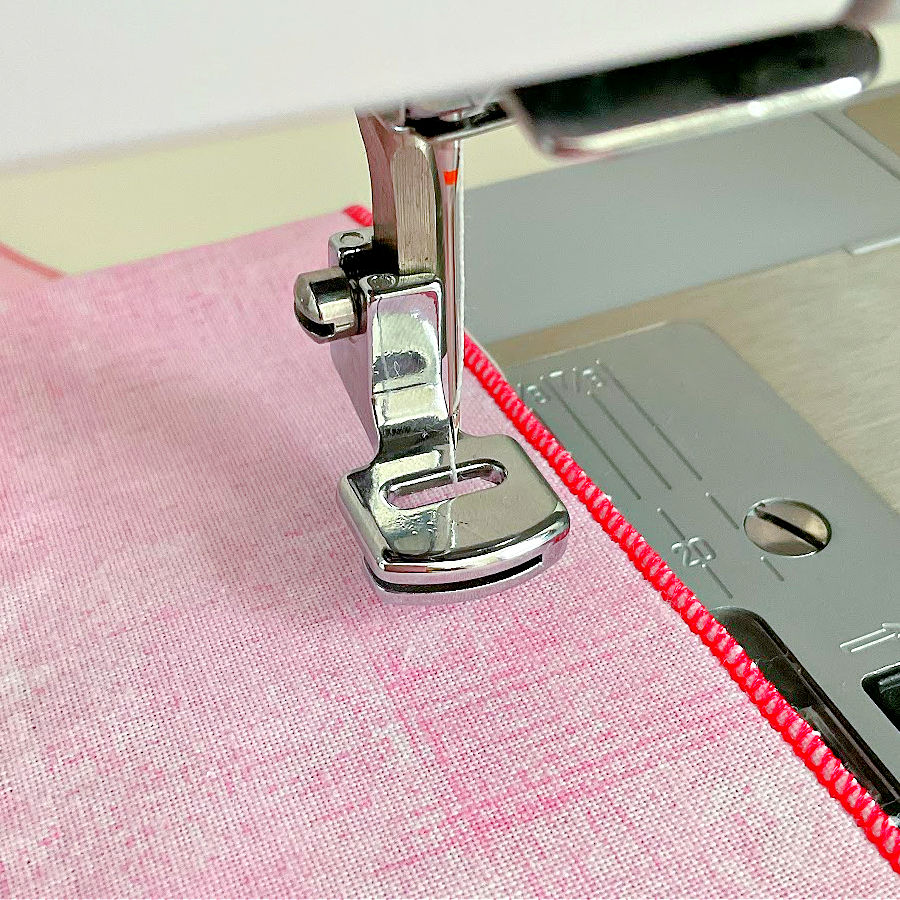
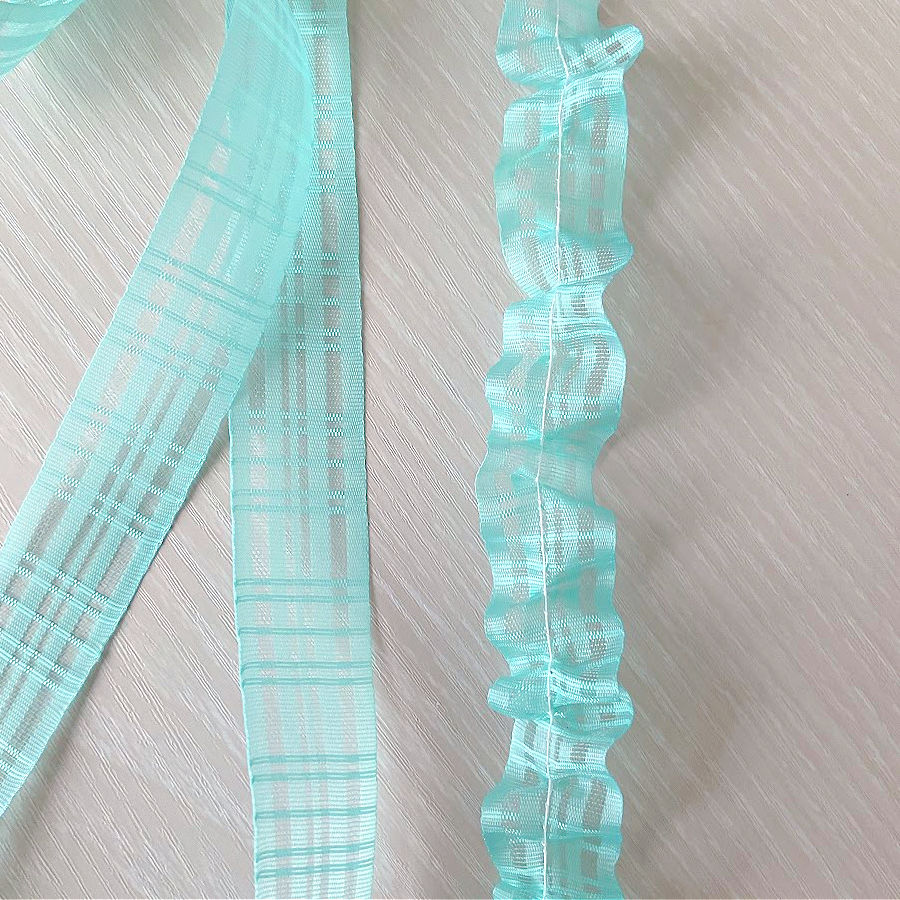
Organza Ribbon
Then I moved on to a strip of sheer organza ribbon — the kind that looks delicate enough to flutter away if you sneeze near it. I threaded my machine with the same strong, thin thread and set the tension to 7 with the stitch centered. Organza ribbon doesn’t have much weight, so it responds quickly to gathering. Too much tension and it would have curled itself into a little knot; too little and it would have stayed stubbornly flat.
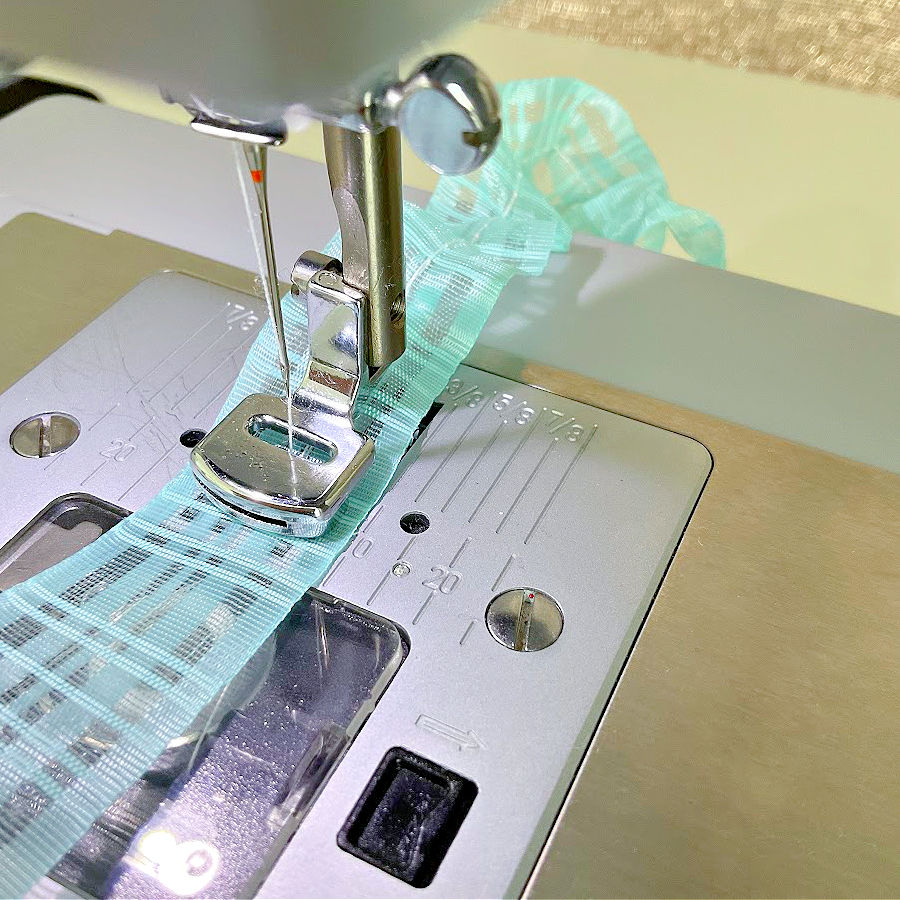
Sewing right down the middle gave me a beautiful, even ruffle along the entire length. The transformation was instant: plain, flat ribbon on one side of the sewing table; elegant, fluttery trim on the other.
This is a trick worth remembering for gift wrapping, hair accessories, dress embellishments, or adding a dainty edge to home décor projects like lampshades and cushions. You could even sew several rows on a skirt or sleeve for a whimsical layered look.
And the best part? The gathering foot kept the center line perfectly straight for me. No hand-basting, no fiddly pinning — just a gentle “press the pedal and go” moment. It’s the sewing equivalent of having your cake and eating it too… except in this case, you get ruffles.
✅ Related tutorial: How To Sew A Ruffle Using Traditional Two-Row Gathering Technique
Thin Rayon Knit Fabric
After my success with these cooperative fabrics, I thought — why not try a lightweight rayon knit? Well, now I know why: because my machine was about to have it for lunch.
I started optimistically, tension set to 6, stitch length to 3.5. I slid the fabric under the gathering foot, pressed the pedal… and my machine gobbled it straight into the needle plate opening.
And suddenly it made sense why it’s called a throat plate — sometimes it swallows. I stopped immediately and, thankfully, was able to rescue the fabric from its metallic jaws before it disappeared entirely.
Not willing to admit defeat, I thought a change in settings might help. I dialed the tension up to 7, lengthened the stitch to 4, and gave it another go. This time, the fabric didn’t just get caught — it dove so deep into the “throat” that I had to unscrew the plate and perform full-on sewing machine surgery to extract it.
The verdict? This particular knit and the gathering foot are not destined to be friends. Not a big deal though — I usually gather lightweight knits on my serger using the differential feed, which works beautifully (here’s my tutorial if you’re curious – Ever Tried This on Your Serger? This Differential Feed Feature Will Amaze You). Sometimes, it’s just about knowing when to switch tools and let the gathering foot rest.
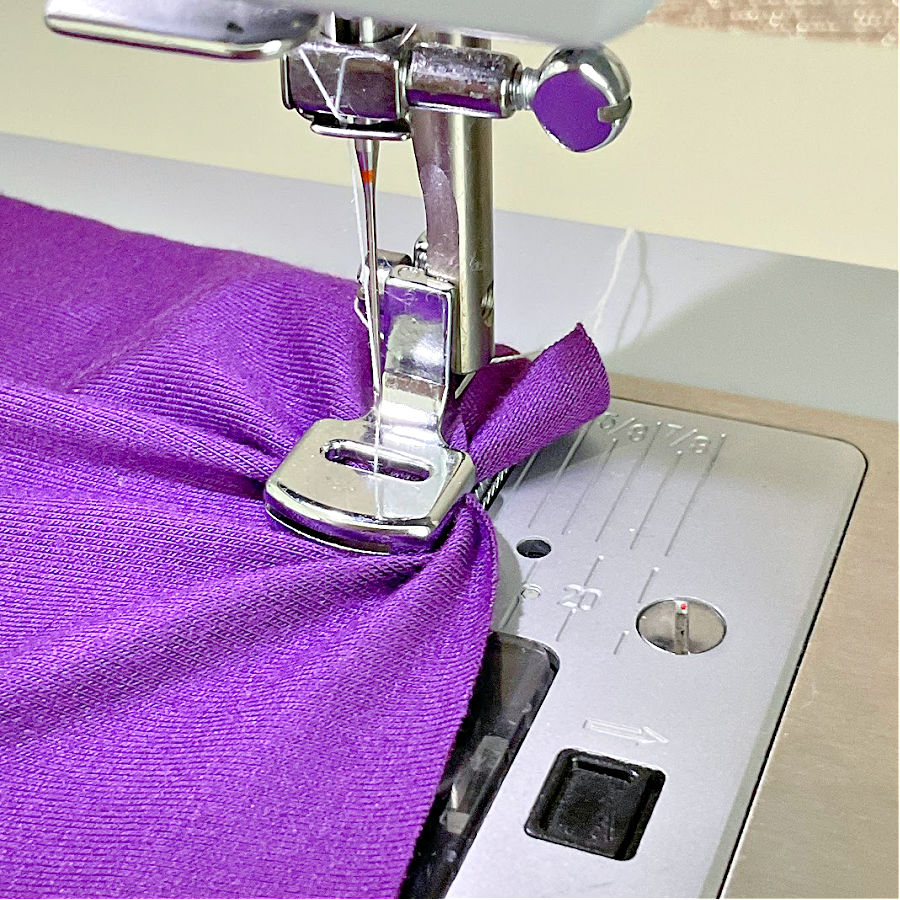
Thicker Knit Fabric
After my thin rayon knit debacle, I decided to see if a thicker, more stable knit might behave better. I figured if the fabric vanished into the machine’s throat again, I was ready to swoop in like a seasoned sewing paramedic.
Happily, there was no need for any rescue operations this time. The gathering foot handled the thicker knit well, sliding the fabric through without any chewing or choking. The stability of the knit made all the difference — it stayed flat against the feed dogs and gathered evenly.
I used it to gather the waist of a knit skirt, and it came out exactly as I’d hoped: soft gathers that added a bit of volume without bulk.
This made me realize that with knits, stability is key. Flimsy, drapey knits are unpredictable and ready to dart into the needle plate at any moment. But stable knits? They don’t put up a fight; they gather just the way you want them to.
So, if you want to use a gathering foot on knits, choose one that has some structure to it. And you won’t have to reach for a screwdriver mid-project.
Stretch Mesh Fabric
Next on my list was a piece of stretch mesh fabric — the kind you often see in swim cover‑ups, sporty mesh tops, and those fashion‑forward layered dresses that are everywhere right now. It’s lightweight, breathable, and has just enough stretch to move with you. Designers love it because it can be sheer and airy yet still have structure, which makes it a big trend in ready‑to‑wear clothing at the moment.
I wasn’t sure how it would behave with the gathering foot, but it turned out to be one of the easiest fabrics in the whole test.
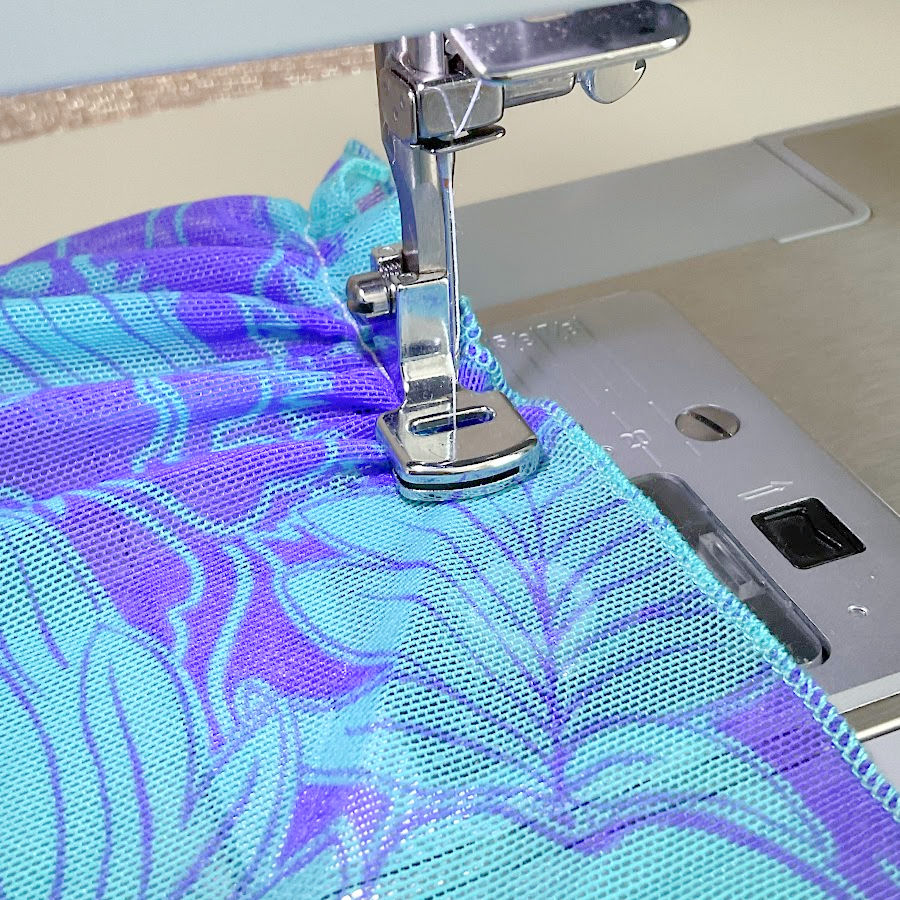
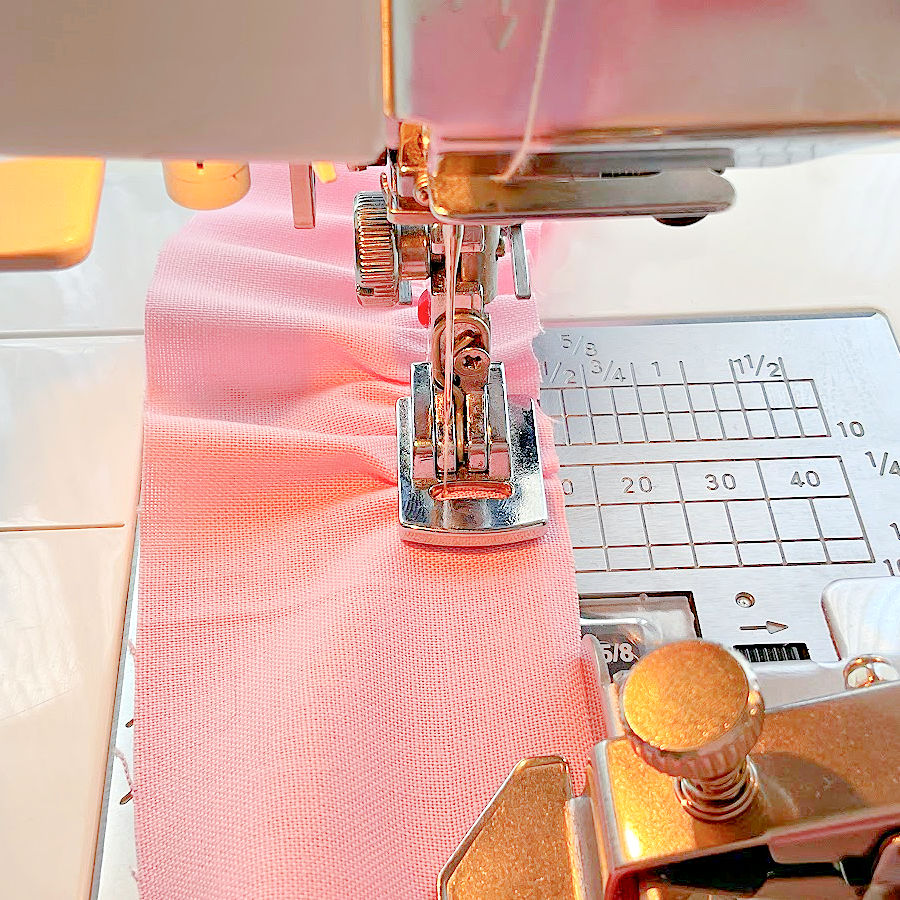
I set the tension to 6 and the stitch length to 3.5. The foot glided over the mesh as if it were made for this fabric, and the results were perfectly even, soft gathers that didn’t twist.
It’s easy to imagine using this for a gathered skirt overlay, flouncy sleeve cuffs, or even as a decorative ruffle on activewear. I especially liked how the gathering added depth and interest without weighing the fabric down.
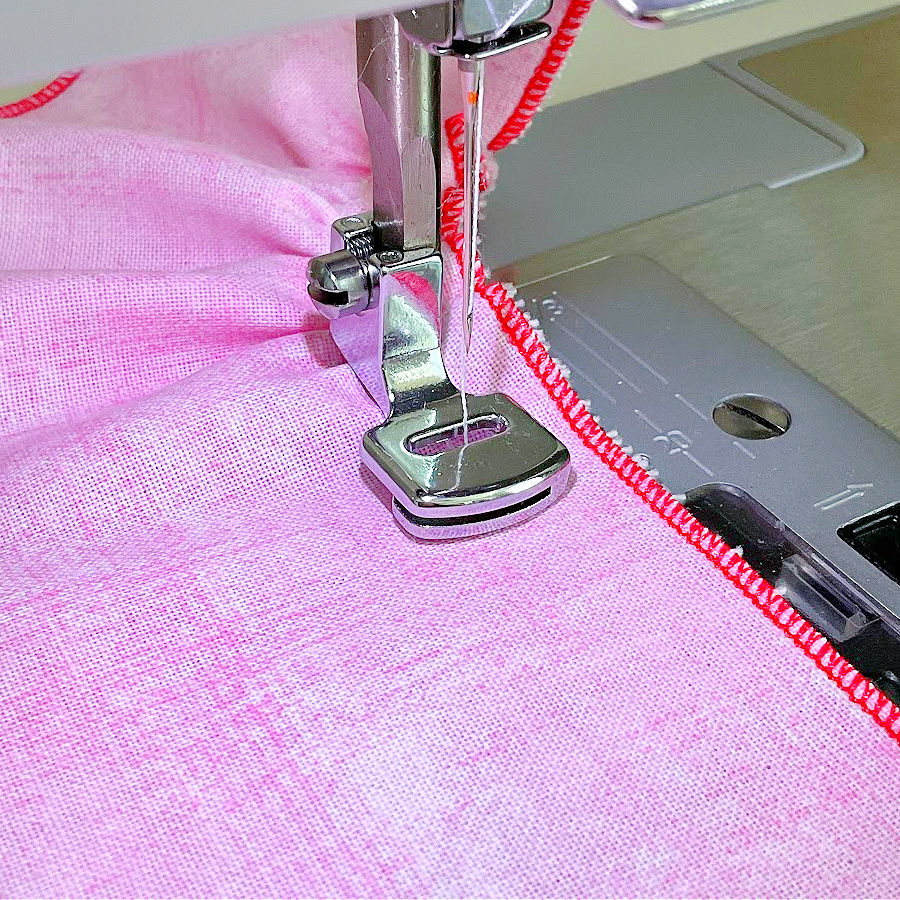
Using the Foot to Attach Gathers to Another Piece
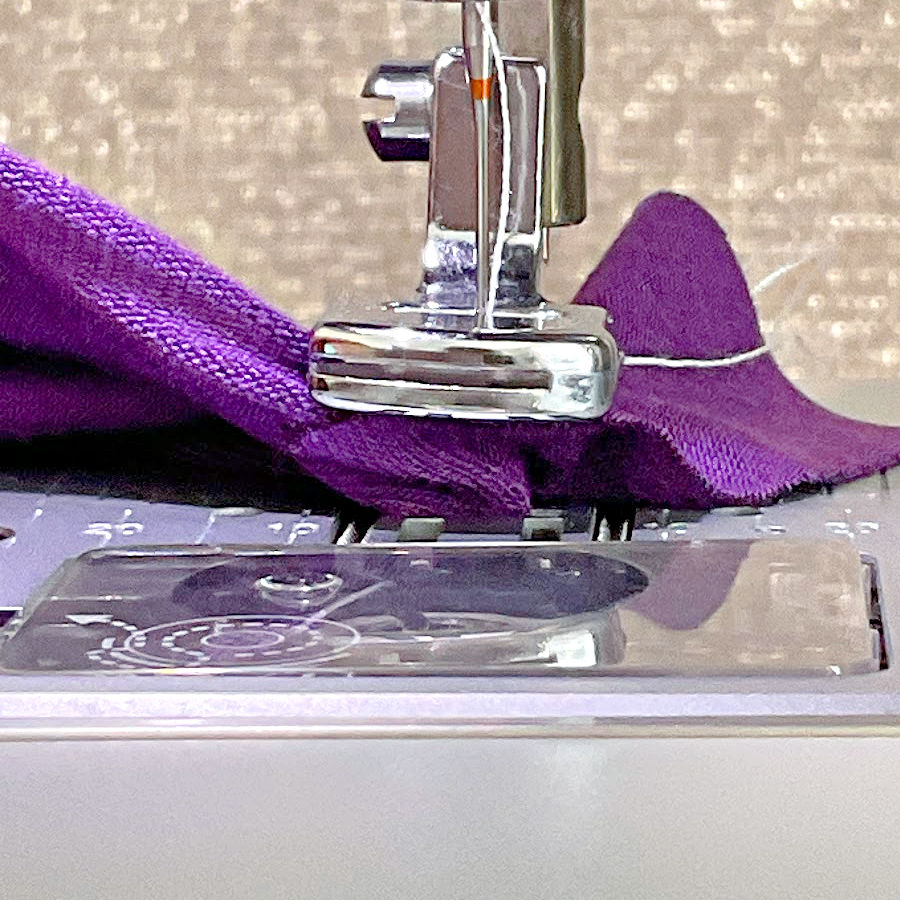
One of the intriguing features of this gathering foot is the narrow slot along the top. It’s designed so you can feed a flat piece of fabric through that slot while the gathering foot works its magic on the fabric underneath — in theory, creating and attaching gathers in one go.
This is the feature the Janome foot does not have.
It sounds brilliant, and I was hopeful. I tried several times, feeding my flat fabric through the slot and my gathering strip underneath. The foot’s opening is wide enough to move the needle between the center and far‑left positions, which I tested. Just make sure your needle clears the opening completely and doesn’t smack into the plate — that would be a very short‑lived experiment.
Unfortunately, despite my best efforts, the real‑life results weren’t so picture‑perfect. The flat piece on top wandered away from the seam allowance, while the gathered piece underneath refused to stay on track. It slowly crept away from the stitching line, and it was impossible to keep both layers aligned evenly.
I tried adjusting my hand position, feeding both fabrics more slowly, even switching needle positions mid‑test. The gathers still seemed determined to ignore the straight edge of the top fabric.

After a few rounds of this fabric wrestling match, I decided my time was better spent doing it the old‑fashioned way: gather first, then attach. It may take two passes under the machine, but at least I can control where each fabric layer ends up — and avoid those awkward moments where the needle is sewing air because the top layer had made a quiet escape from under the presser foot.
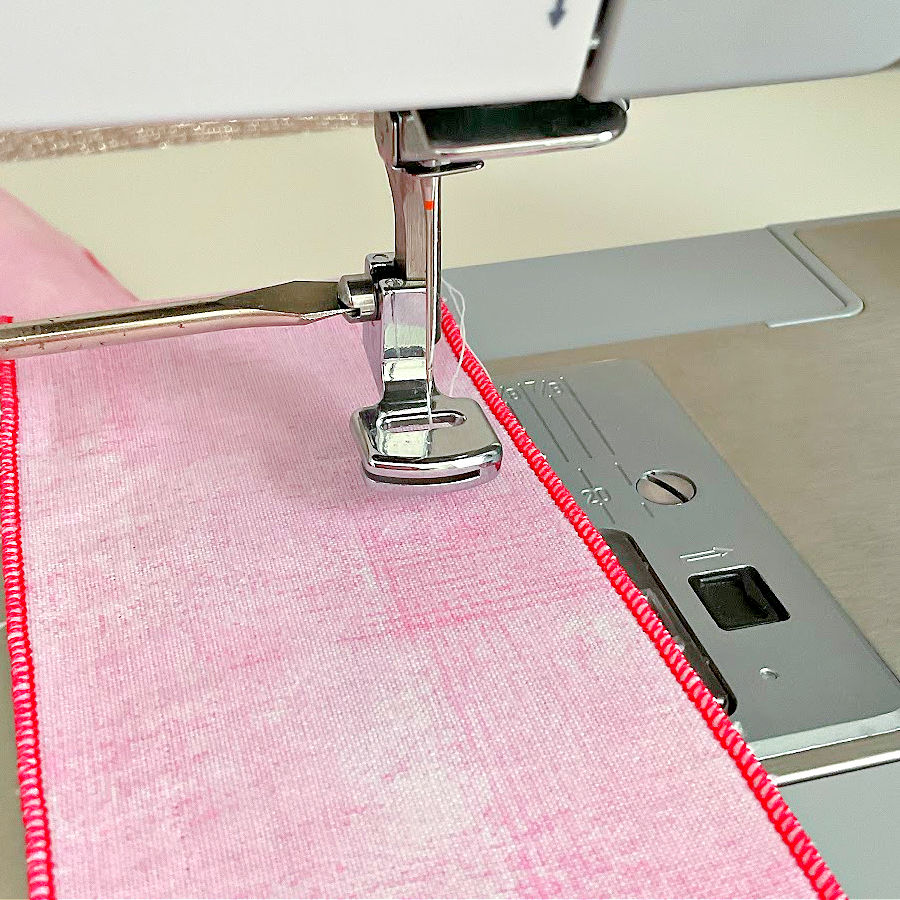
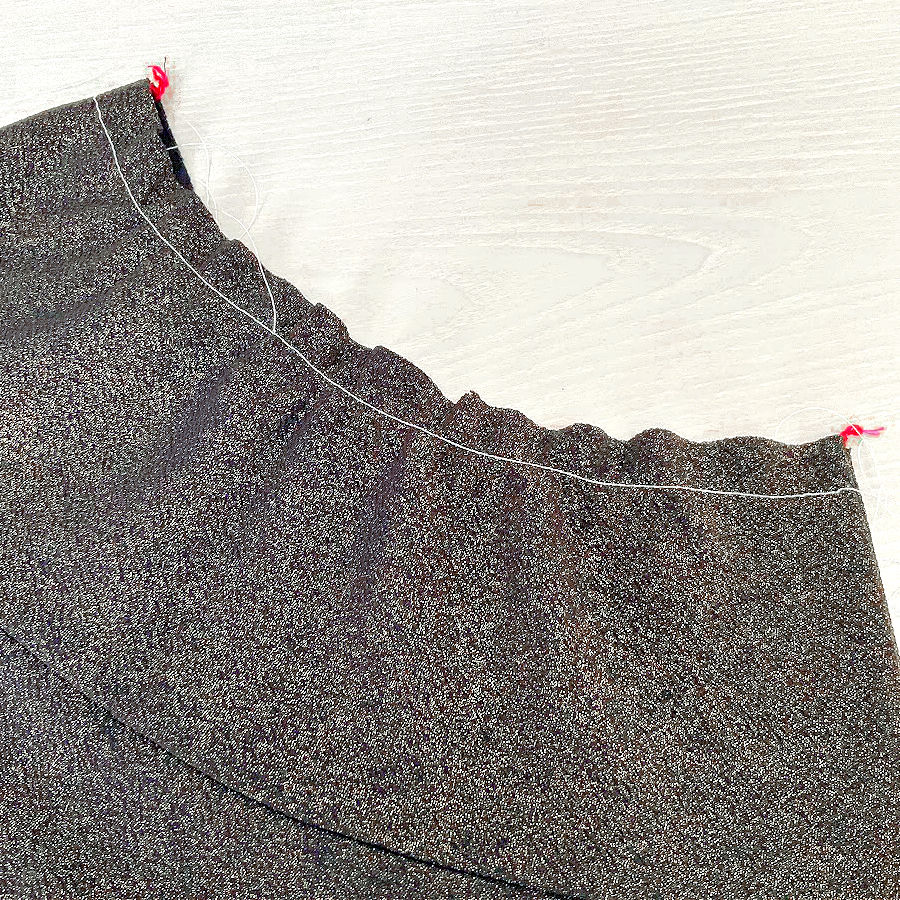
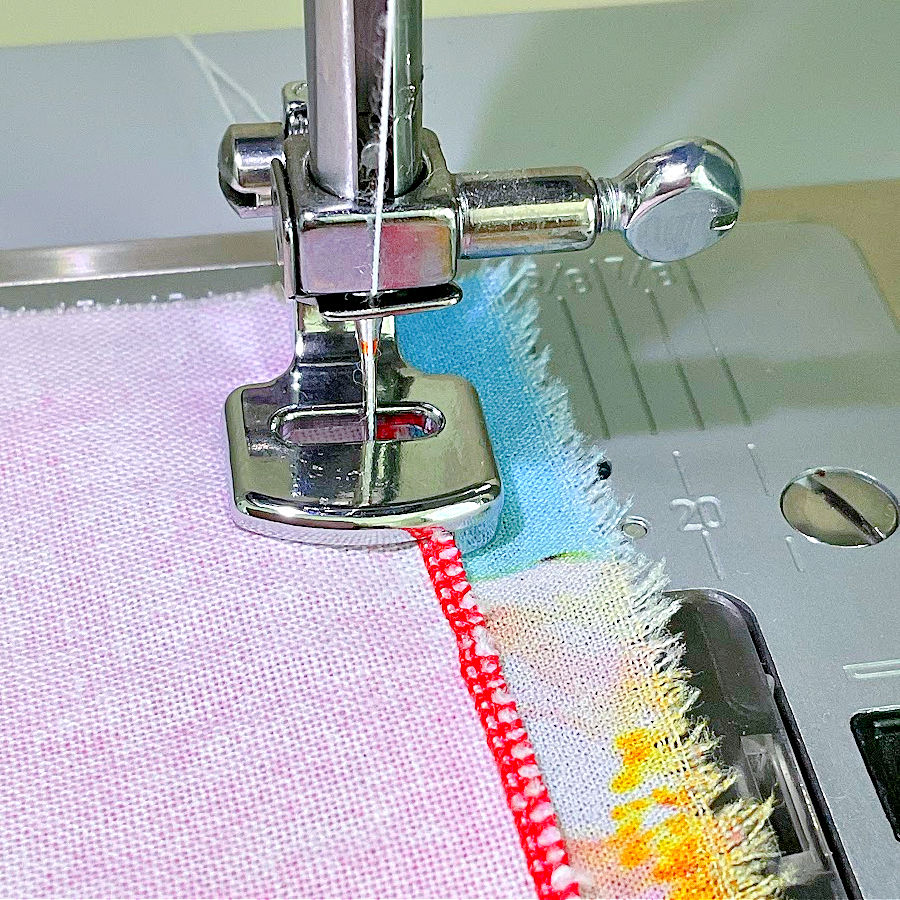
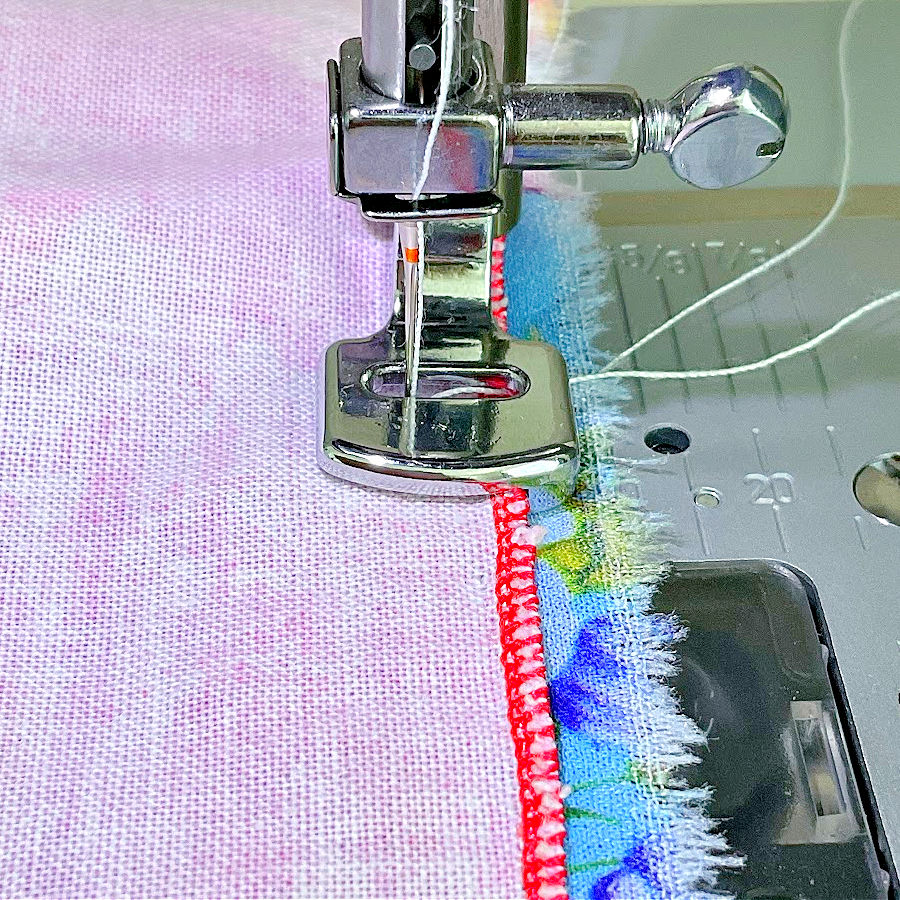
Gathering with Elastic Thread in the Bobbin
For this experiment, I swapped out my regular thread for Gutermann red elastic thread — but only in the bobbin. Elastic thread is too thick and stretchy to wind on a bobbin the usual way, so I wound it by hand, trying to keep a gentle, even tension so it wouldn’t stretch before it even hit the machine.
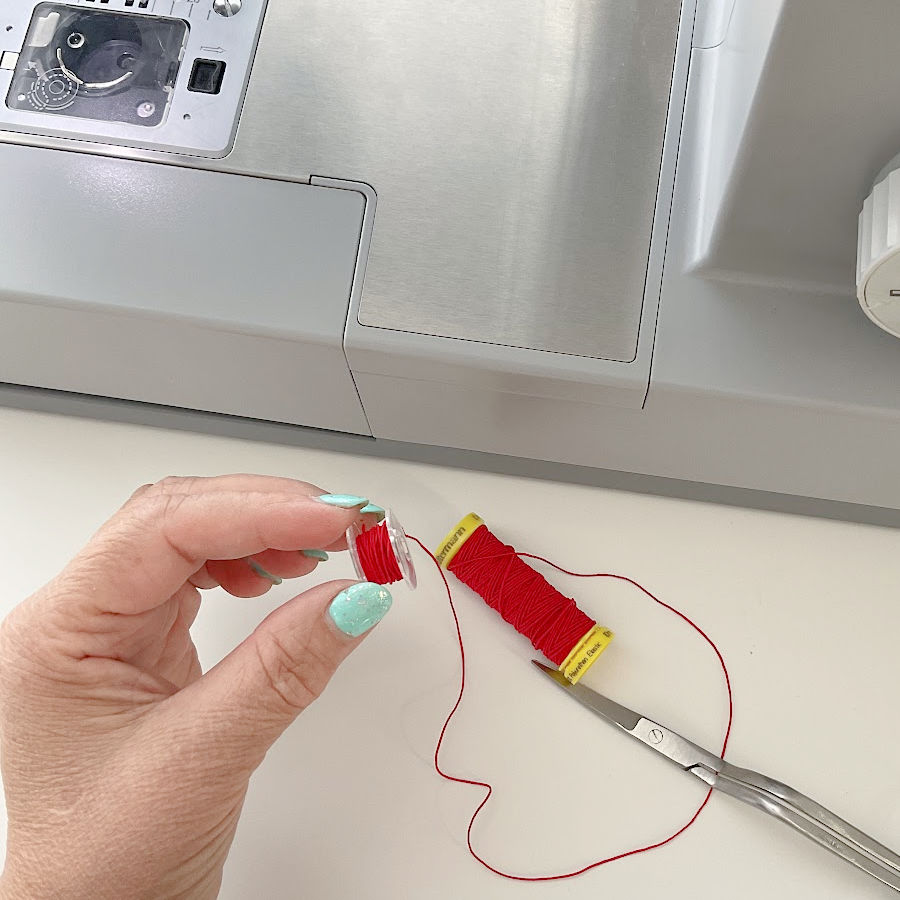
Buy the way, if you want to try gathering with elastic thread, I recently bought this 19‑piece set of elastic threads on Amazon, and I’ve been really happy with it. It comes in lots of colors so you can match or contrast with your fabric. They’re perfect for experimenting with elastic‑bobbin gathering, shirring, or adding stretch to your projects.

For the top thread, I used regular sewing thread. My test fabric was lightweight polyester crepe, and I set my tension to 5 with a stitch length of 3.
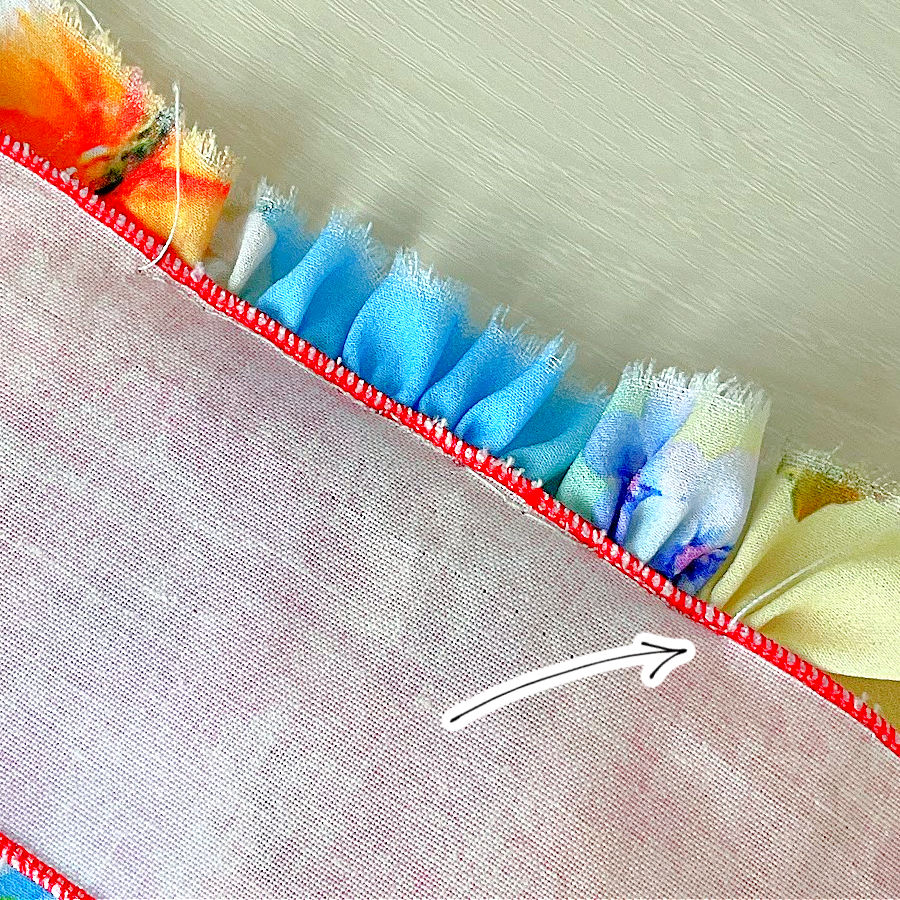
Sewing with this setup felt pretty much the same as with regular thread. The gathers were soft and evenly spaced, but with one big difference: they could stretch. I could gently pull the fabric and completely smooth the gathers away, and then let go and watch them bounce right back into place.
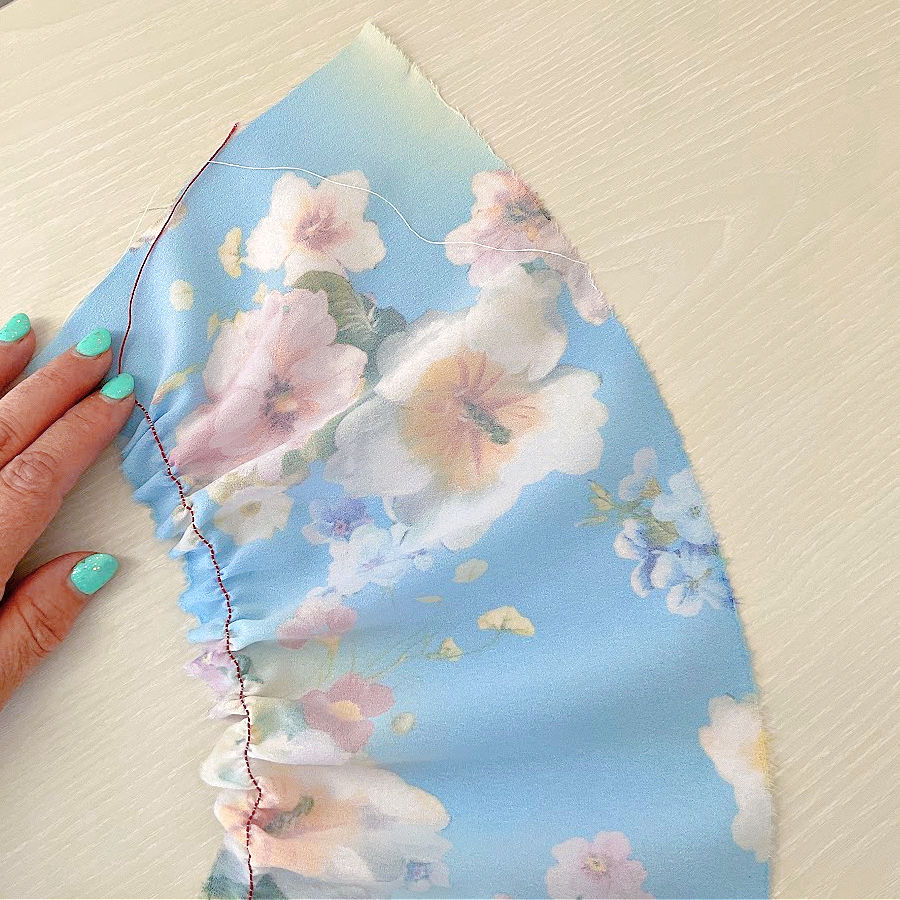
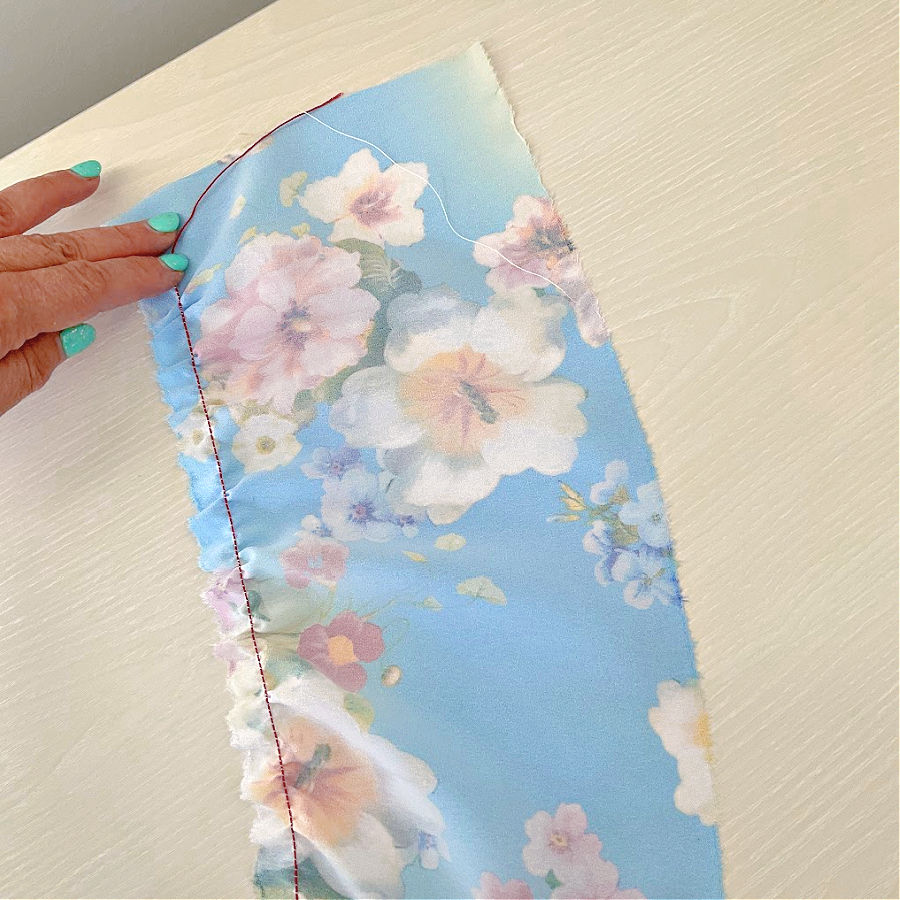
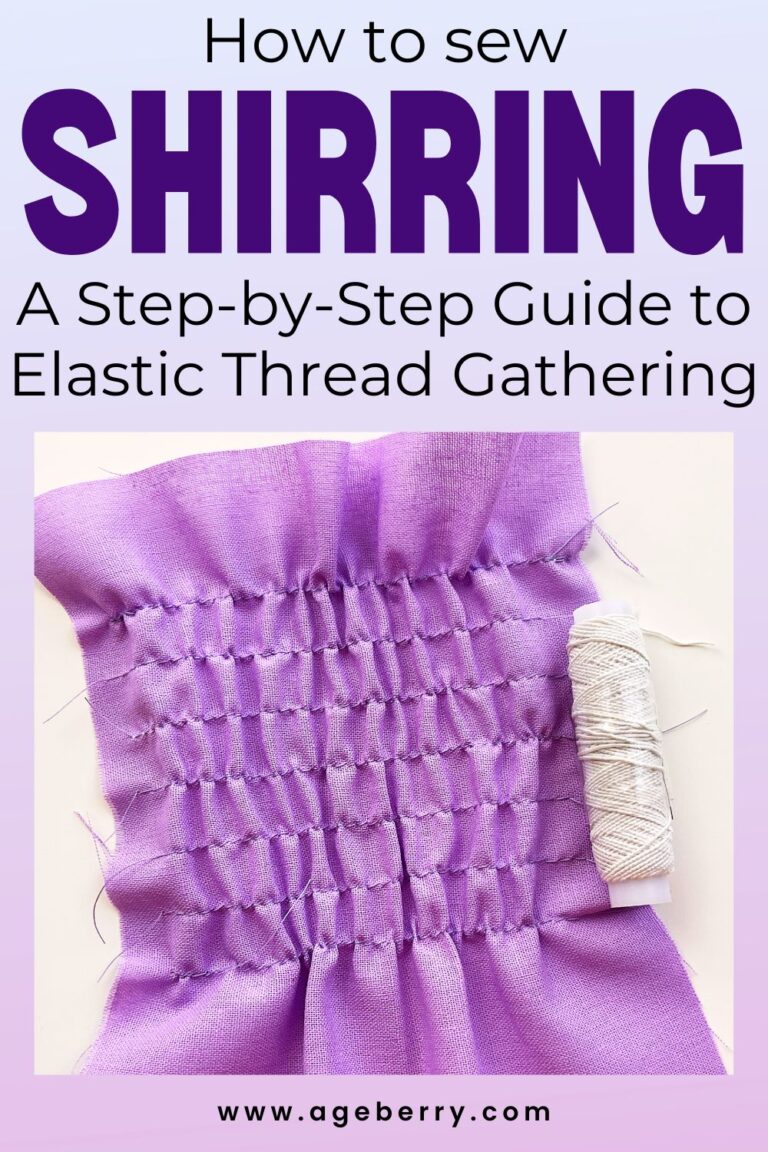
That’s the beauty of elastic‑thread gathering — the finished seam has built‑in stretch. It’s perfect for waistbands, cuffs, and anywhere you want the comfort and flexibility of elastic without having to insert it separately. The effect feels almost like shirring, but you get it in a single pass with the gathering foot doing the work.
Using the Janome Gathering Foot
My Janome gathering foot is one of my favorites because it’s a snap‑on style, which means I can attach or remove it in seconds. No screws to lose, no adapters to misplace — just click it on and it’s ready to go. It makes beautiful, even gathers every time, and works wonderfully with the same settings and techniques I’ve shared in this guide.
Besides – and if you read my articles, you already know that – I absolutely LOVE my Janome machine!
✅ Related tutorial: The best sewing machine for advanced sewers: Janome 6600P
Unlike some other gathering feet, it doesn’t have a slot for feeding in a flat fabric layer while gathering the bottom one. For me, that’s actually a plus. I don’t use that feature anyway, and I prefer keeping my gathering foot simple and focused on one job — making perfect gathers. And that’s exactly what it does.
Perhaps you noticed in one of the images above a magnetic seam guide on my machine (the Janome); I find that a very useful tool and I wrote about it recently in my article Magnetic Seam Guide Review – Sewing Straighter Just Got Easier.

Gathering Foot – Frequently Asked Questions
What Are Some Tried-and-tested Tips for Sewing With a Gathering Foot
If you want to get the best results with a gathering foot, here are some tried‑and‑tested tips from my experiments.
- Tension and stitch length matter. For most fabrics, a tension setting of 7 or 8 works beautifully. For very lightweight fabrics, 6 is often enough. I usually set my stitch length to 4, or sometimes 3.5. This combination gives consistent gathers without stressing the thread.
- Speed helps. The faster you sew, the neater and more even your gathers will be. Slowing down too much can sometimes create irregular spacing.
- Fabric choice makes a difference. Lightweight fabrics are the easiest to gather. Quilting cotton is the heaviest fabric that still behaves nicely with a gathering foot. Knits can work too — but stick with thicker, more stable ones. And don’t forget, this foot works wonderfully for ribbons when you want fast, decorative ruffles.
- Grainline trick. If you want maximum fullness, sew your gathers on strips cut perpendicular to the grainline rather than along it. You’ll notice more gathers forming this way.
- Test first. Always try your settings on a scrap before committing to your project piece. Gathering can look different depending on fabric weight, weave, and finish.
Why Use a Gathering Foot Instead of the Traditional Method?
The gathering foot is quick. It eliminates the need for sewing two long basting rows, carefully pulling up the bobbin threads, and then redistributing the gathers by hand. With this foot, you sew once, and the gathers appear instantly. It’s especially handy for long strips like ruffles, skirt tiers, or bed skirts where hand‑adjusting miles of gathers would feel endless.
Where Can You Use Gathers?
Gathers are everywhere in sewing. Here are a few common uses:
- Skirts and dress waists
- Ruffled hems and sleeves
- Aprons
- Pillow and cushion trims
- Bed skirts
- Children’s clothing
- Tiered dresses and skirts
- Decorative home décor accents
What About Heavyweight Fabrics?
The gathering foot isn’t the best match for thick, heavy fabrics — it can struggle to scrunch them evenly. For those, I recommend using a ruffler foot. It’s built for the job and produces deep, regular gathers and pleats even on sturdy materials. I have a detailed tutorial on how to use it here: How to Use A Ruffler Presser Foot.
The Challenge of Getting an Exact Gather Length
One of the quirks of the gathering foot is that you can’t easily predict exactly how much it will gather your fabric. If you’ve cut a pattern piece and it needs to be gathered to match a specific length, you won’t know the finished measurement until after you’ve sewn it. That’s very different from the traditional two‑rows‑of‑basting method, where you can pull the threads and adjust the gathers until the piece matches perfectly.
With the gathering foot, you can do a quick test on a scrap to measure how much it gathers for a given fabric and setting, but it’s a bit fiddly. And we often just want to sew and get it done. My workaround? Cut your strip longer than needed. Gather it, then trim it down to the desired length afterward. It’s much quicker than fussing with measurements mid‑project.
If you’re gathering a looped piece, like a skirt waist that’s already sewn into a circle, that’s trickier because you can’t trim afterward. In that case, I recommend using elastic thread in the bobbin. It will give you the gathered look and the stretch you need to fit the loop exactly where it belongs.
Final Thoughts
The gathering foot is a speed-loving little gadget. It’s perfect when you need quick gathers without fussing over perfection. It’s not a universal “one foot fits all” solution, and it has its limits — especially with tricky fabrics or projects that demand exact measurements. But for fast ruffles, decorative trims, and fabric play, it’s a joy.
If you like this gathering foot guide, don’t let it get lost in the depths of the internet. Save the pin below to your sewing or presser‑feet board on Pinterest so you can find it the next time you need to whip up some instant gathers. And follow me on Pinterest to get a steady stream of sewing tips, presser foot tricks, and a little inspiration for your next project.