Mastering the Side Cutter Presser Foot / What It Is / How To Use
Have you ever heard of side cutter presser feet for sewing machines? If so, you may be wondering what they are and why you might want to use one.
If you’re looking for a way to get the serger-like look on your sewing projects without having to own a serger machine, then you’ll want to check out the side cutter presser foot.
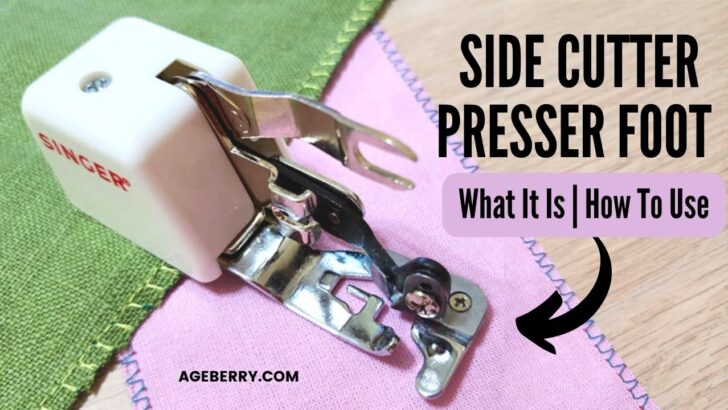
A side cutter presser foot is an accessory that attaches to your sewing machine and allows your sewing machine to cut fabric as it sews, creating a stitch that mimics the look of a serger overlocking stitch. In this tutorial, I will explain what a side cutter presser foot is, how it works, and if you should consider using one.
What Is A Side Cutter Presser Foot?
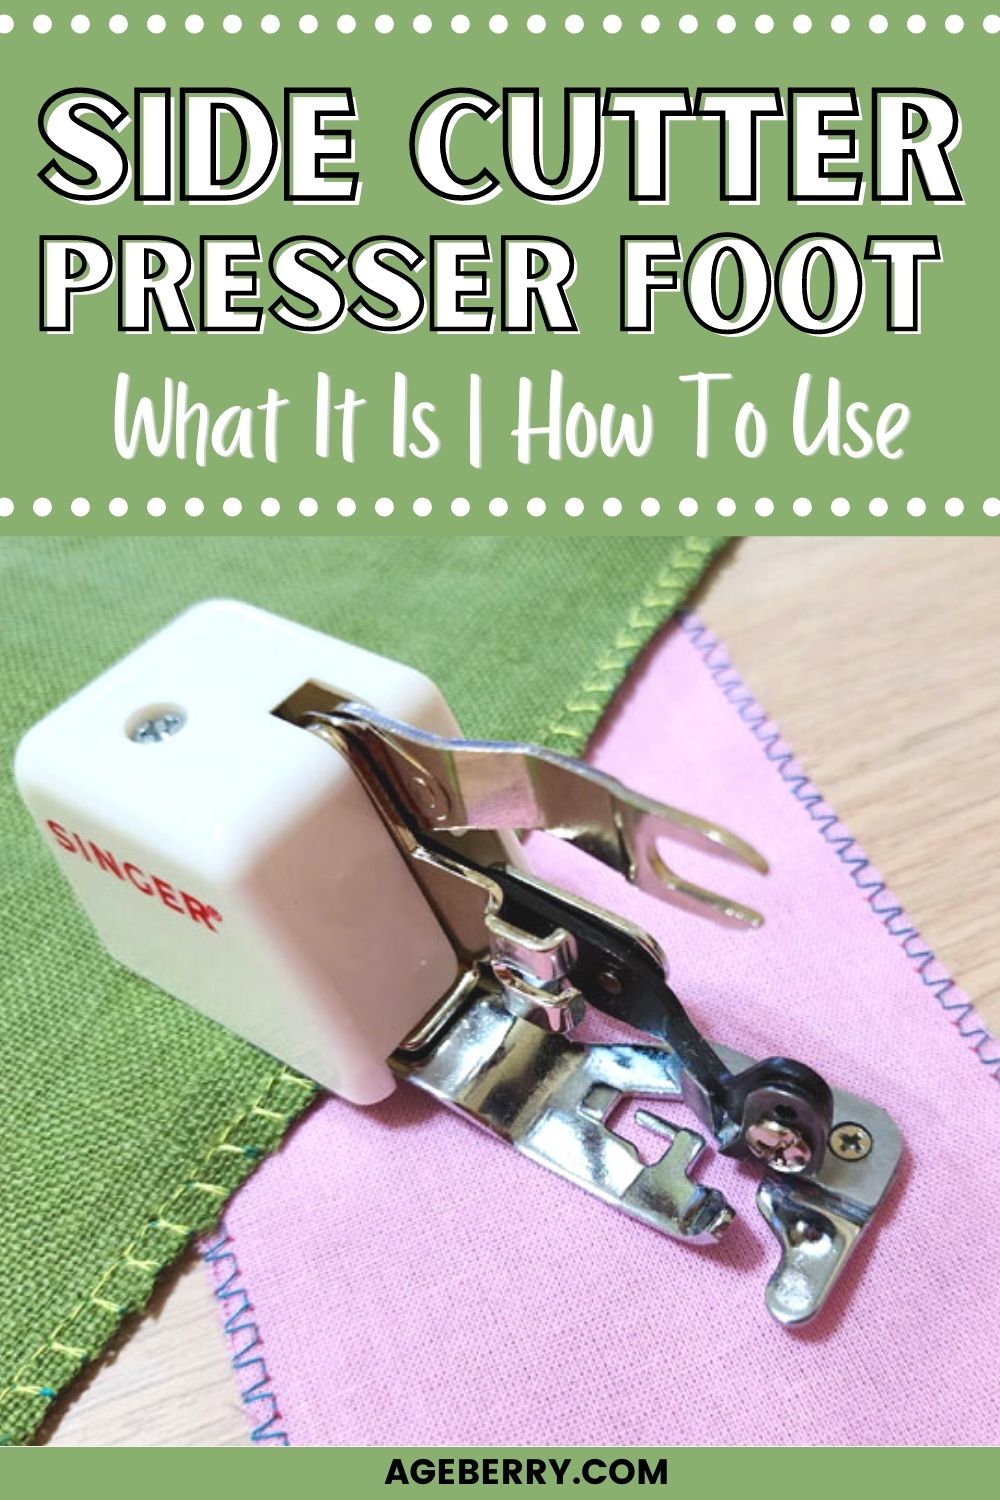
A side cutter presser foot (also known as an overlock presser foot or cut and hem foot) is a special attachment for most standard home sewing machines. It looks similar to a walking foot – the same bulky and heavy due to its extra features.
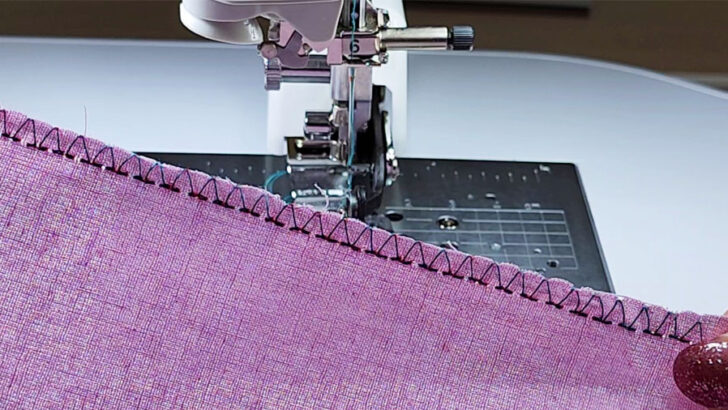
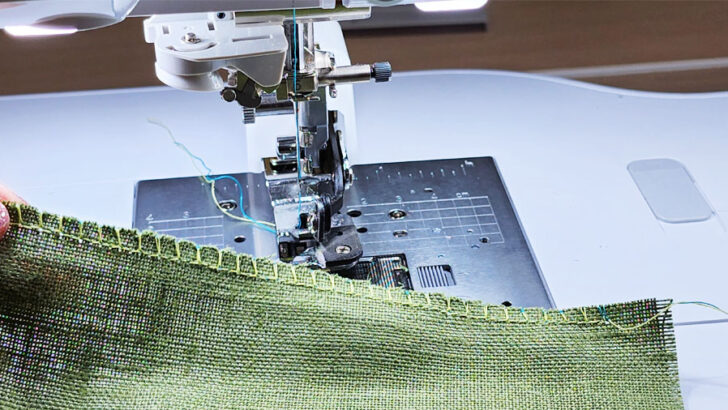
The top of the presser foot contains a lever that goes over the needle clamp screw, while the bottom has both a guide plate and a small blade that cut away excess fabric. This creates a neat edge to your fabric that looks like it was cut with scissors.
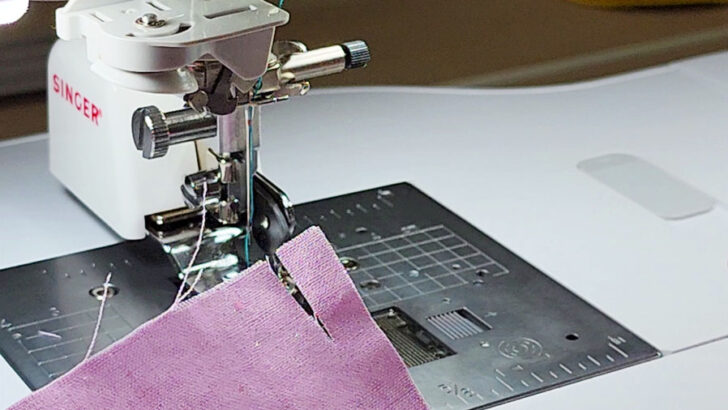
Here I have a Singer side cutter foot.
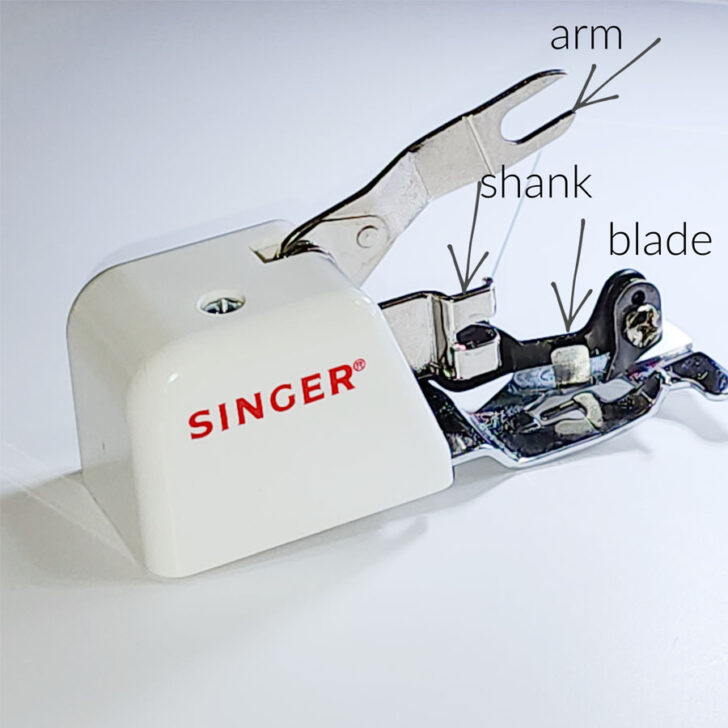
It has a very sharp blade located at the bottom of the foot. This will help to quickly and precisely cut fabric as you sew. There is a small arm that goes on the needle holder and ensures an exact fit so the foot stays secure and slides smoothly across the fabric during use.
There is a shank that connects the foot to the machine securely to ensure the presser foot won’t slip or move during sewing.
Note: Some of the links on this page are affiliate links. This means I will receive a commission if you order a product through one of my links. I only recommend products I believe in and use myself.

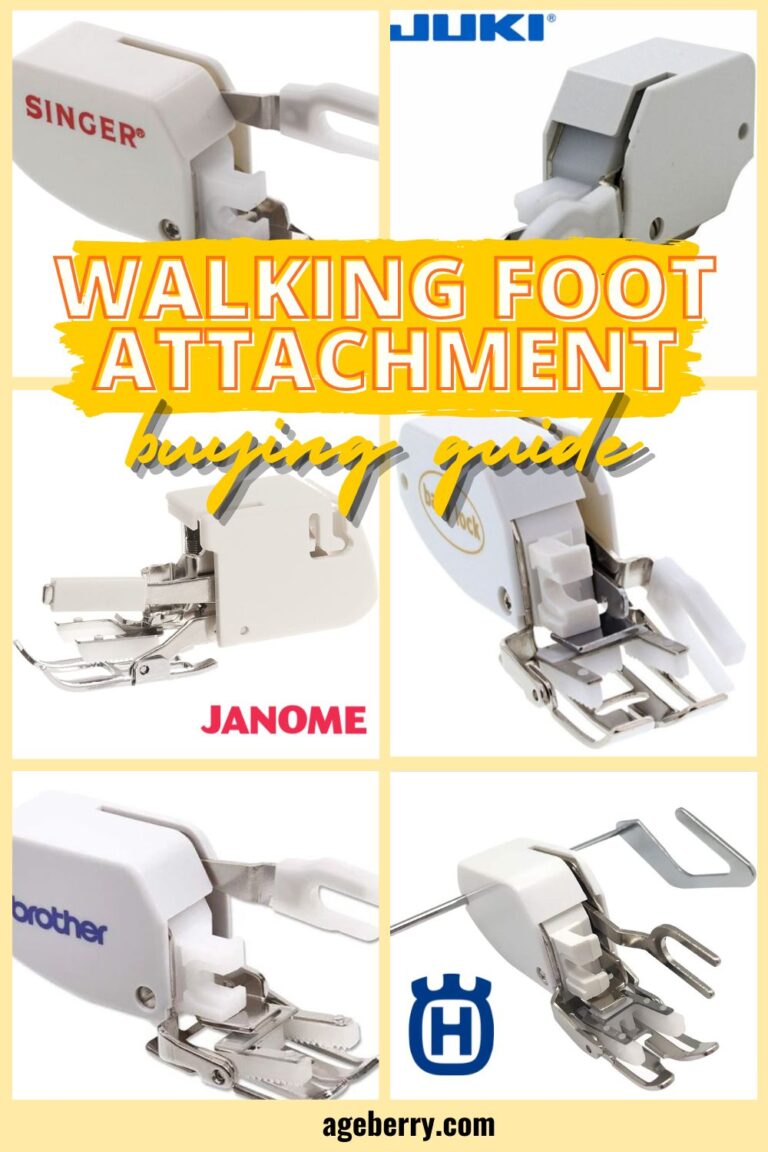
The Singer side cutter foot can be used with many low shank machines and some high shank machines too. For example, I am using it for my Brother Luminaire. But my machine is a high shank machine so I am using a special attachment to convert it to a low shank machine.
But there are other types of side cutter feet available.
Brother also has its own side cutter foot (and it looks a bit different). And there is a generic side cutter that works with most standard low shank machines including Babylock, Brother, Singer, Janome, Juki, Kenmore, Necchi, New Home, Pfaff, Simplicity, White. But I see that the generic foot has many bad reviews on Amazon so I guess it’s not a good buy even if it’s cheaper.

But you’ll have no trouble finding the right one for your needs. Just do some research on which type is best for your specific sewing machine model so that you get maximum use out of this handy accessory.
Installation And Setup
The first thing you need to do before using a side cutter presser foot is to make sure that it is installed correctly.
Installing the side cutter presser foot is fairly simple.
Turn off the machine and remove an existing presser foot.
Attach it to the shank of your machine by loosening the screw and then sliding the foot onto the shank. Tighten up the screw so that it’s snugly in place.
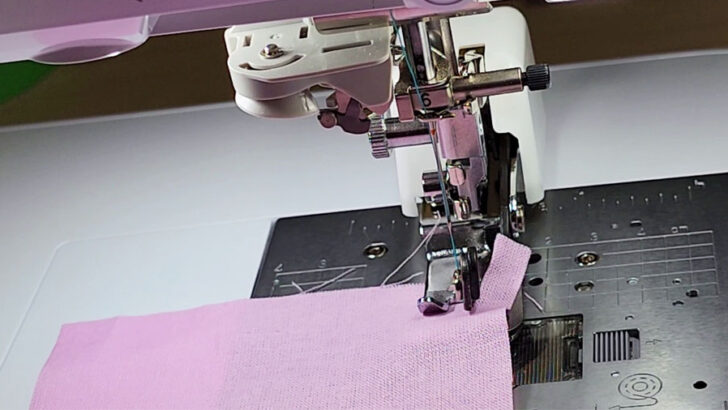
Make sure the little arm on the operating lever goes around the needle clamp screw as shown in the image below.
Depending on your machine’s model, it may have a dedicated shank adapter that allows you to attach the foot securely and easily. If not, then you’ll need to purchase one separately.

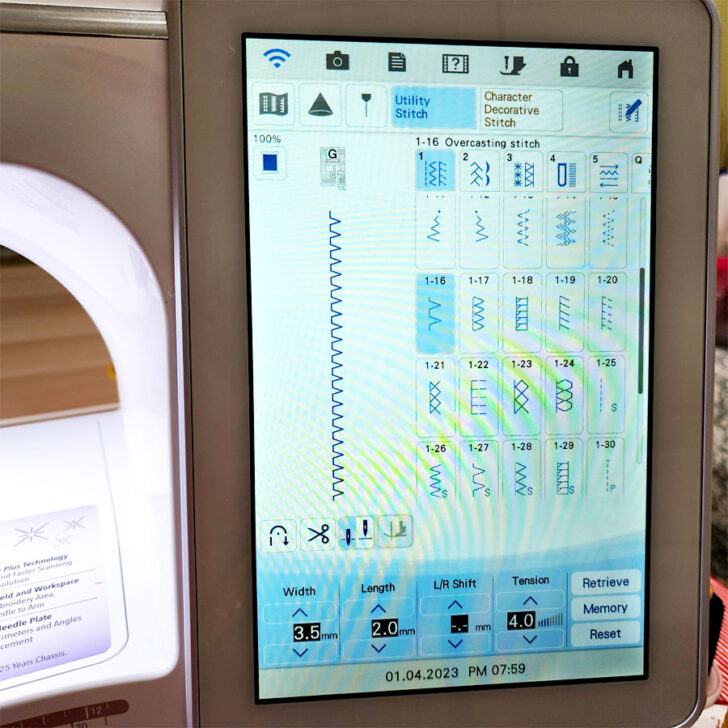
Choosing Overcasting Stitches
Once everything is set up correctly and ready to go, select one of several stitch options available for use with this presser foot. You can choose a simple zigzag stitch or special overcasting stitches specifically designed for use with this type of foot.
✅ Related tutorial: How to use overcast presser feet for sewing overcasting stitches
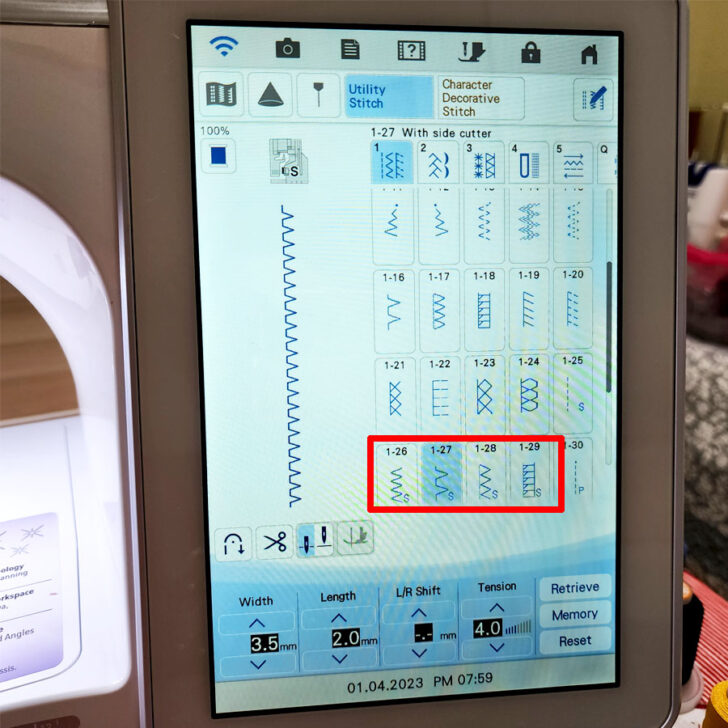
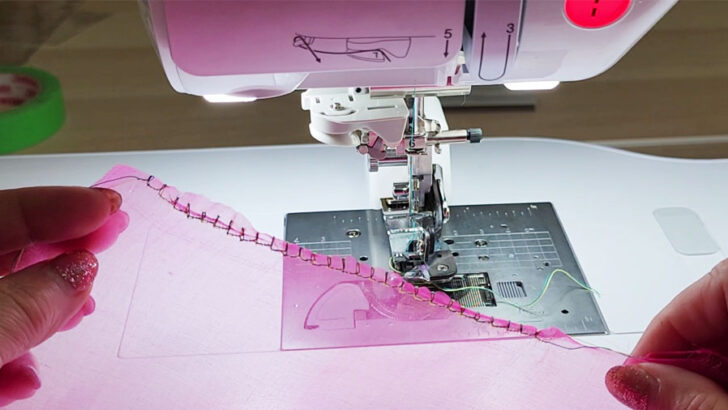
Some machines also feature dedicated side cutter stitches (as pictured below).
On my Brother Luminaire machine, there are a few side cutter stitches that I didn’t even know I had before using this particular presser foot.
If you’re not sure which stitch to choose for your project, test out each one on scrap fabric.
Top 10 Tips for Using A Side Cutter Presser Foot
Now that the foot is properly installed, let’s discuss how you can use it on your projects. The purpose of this presser foot is to trim away excess fabric from the edges of your project while simultaneously stitching down a seam allowance or overcasting the fabric edge. When using this handy attachment there are some things you should keep in mind.
#1. Cut a small slit in the seam allowances
Cut a small slit in the fabric (about ¾ inch) that you want to sew on. It is important so that your side cutter presser foot knows where to start cutting when it comes into contact with the fabric. If you start sewing with the fabric without the slit, you’ll quickly find yourself in trouble, as everything can easily get jammed.
#2. Position the side cutter foot correctly
It’s important to get the positioning of the foot right. The best place to position the blade is at the end of the slit towards you so that it can simply continue cutting with the already made incision. Additionally, make sure your fabric is held securely so that it does not move as you make your cut.
Line up the slit with the needle of your machine if you want to avoid a jam or other complication.
#3. Correctly place fabric under the side cutter presser foot
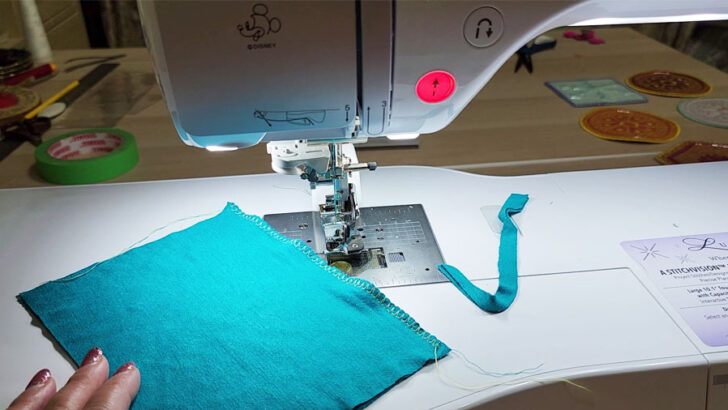
You can’t just put the fabric under the presser foot and start stitching; instead, you have to place the right part of the fabric on top of the guide plate, while leaving the left side of the fabric under the presser foot itself. See how in this image – the slit is spread across both parts of the fabric. That’s exactly what needs to happen for your side cutter presser foot to work.
#4. Make sure that the needle won’t be hitting any part of the foot
Once everything is in place, lower your side cutter presser foot onto your project and give it a few stitches – make sure that the needle won’t be hitting any part of the foot when it goes up and down by using the handwheel to do a few test stitches.
#5. Start sewing slowly
It’s also important to start sewing slowly before increasing speed; going too fast can cause problems. If everything is set up correctly, you can begin stitching as normal and watch as your side cutter presser foot automatically cuts off any excess fabric while leaving behind a neat and tidy edge. I recommend sewing at medium speed or even lower until you feel comfortable with how your machine is behaving with this particular presser foot attached.
#6. Adjust sewing machine settings
If you find that your stitches aren’t being cut off evenly or if they don’t appear neat enough for your liking, then try adjusting the width setting of the overcasting stitch on your machine as well as playing around with different tension settings until you find one that works best for you and gives you better results. You may need to adjust for different materials, so always check with a test run before making the final stitching.
Make sure that all tension settings are set correctly before starting so that your stitches will turn out looking their best.
✅ Related tutorial: Sewing Machine Tension Adjustment
#7. Don’t sew over pins
Don’t sew over pins as they can interfere with smooth operation of this foot.
#8. Line up fabric properly
Make sure that both layers of fabric are lined up properly before starting so that they won’t shift while being sewn.
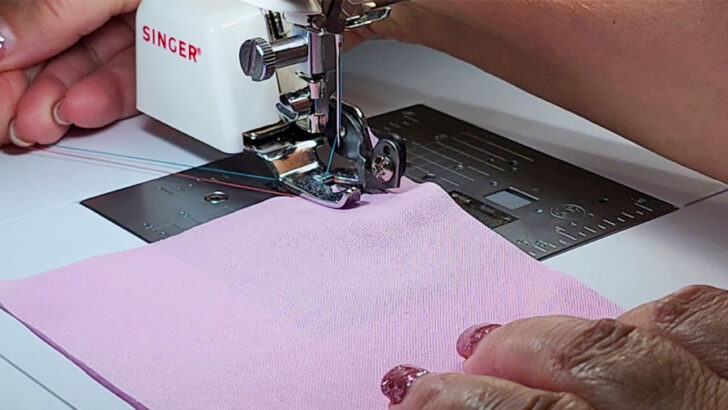
#9. Pull top and bobbin threads behind the foot
Your top thread should be going behind the foot, so carefully pull it back from the needle eye. Pull also the bobbin thread to the back. This will help you get started with a cleaner stitch.
#10. The side cutter presser foot can work on a variety of fabrics
The foot works best on woven fabrics that are not too thick or bulky, such as cotton, linen, polyester, and other lightweight materials. It can also be used on some types of knits, though you may need to adjust the settings slightly for the best results.

When it comes to heavier fabrics like denim, velvet or canvas, the side cutter presser foot can still provide good results – but only with one or two layers at most. You may find that thicker fabrics cause your machine to struggle if there are too many layers in place at once. As such, it’s important to keep the number of layers in mind when using this type of presser foot.
Jersey knits and very stretchy knits can be tricky when using the side cutter presser foot due to their tendency to roll at the edges. You may find that this causes your fabric to bunch up or become distorted as you sew – not ideal. But I managed to use it on jersey without big problems (except that the fabric stretched).
✅ Related tutorial: All About Modern Types Of Knit Fabric
If you’re working with multiple layers of heavyweight fabrics like wool or velvet, it might be easier (and less stressful!) to use a serger (or scissors) instead of the side cutter presser foot.
The Pros and Cons of Using a Side Cutter Presser Foot
The main benefit of using a side cutter presser foot is that it allows you to sew a seam, finish fabric edges, and trim away any excess fabric in one step. This can save you time when sewing because you don’t have to stop after each seam to trim away any excess fabric before moving on to the next step of your project.
Using this type of presser feet makes it easier to achieve professional looking results (kind of) because you’re creating neater seams than if they were done by hand.
The foot creates a stitch that looks similar to a serger overlocking stitch – perfect for preventing fabric from fraying – without having to invest in an expensive machine.
✅ Related tutorial: How To Stop Fabric From Fraying: 21 Proven Ways That Work In 2022
However, not all fabrics are compatible with this foot, so if you plan on working with heavier fabrics or very lightweight fabrics (like chiffon) it may not be the best choice for you. It didn’t work with my silk organza fabric.
Although this type of stitch looks similar to a serger stitch, it can’t replace one completely as a sewing machine does not have the same types of stitches as a serger does.
The foot doesn’t always provide the most accurate results, especially on more intricate projects.
The side cutter presser foot also tends to make quite a bit of noise when in use and requires that seams are finished before pattern pieces are sewn together—so it may not be ideal if speed is important to your process.
Side Cutter Presser Foot vs. Serger
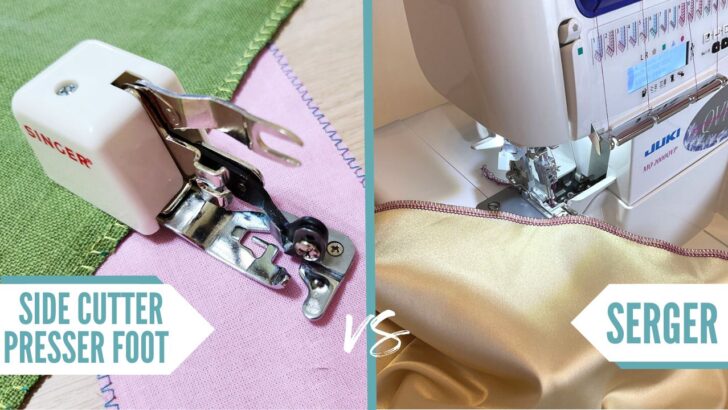
There’s no clear-cut answer when debating side cutter foot vs serger—it all depends on what type of sewing project you’re working on at any given time. If you only plan on making simple items like bags or pillowcases then a side cutter foot may be enough. However, if you want to work with knits and create professional-looking garments then investing in a serger may be necessary.
The side cutter presser foot can seem like a viable solution for those wanting to explore the usefulness of a serger without spending the money just yet. After all, if you’ve gone without one for years and want to find out what you’re missing, then it seems like an experiment worth trying.
For those who are debating between investing in either a side cutter foot or a serger, it really comes down to personal preference and budget. If you have the extra funds and space in your sewing area, then I highly recommend investing in a serger – it will really level up your projects. On the other hand, if funds are tight or space is limited then go ahead and try out using just a side cutter foot attachment – it will still give you great results without having to break the bank.
As for me, I tried this presser foot and my conclusion is that I don’t really like it. If you’re choosing between a side cutter foot and a serger and have the budget and space, I recommend a serger.
If you’re looking for a way to add professional-looking hems, edges and seams to your garments, home goods and other fabric projects, then it might be time to invest in a serger. To help with this process, I’ve written an in-depth article on how to buy a serger and the advantages of owning one, so check it out here.
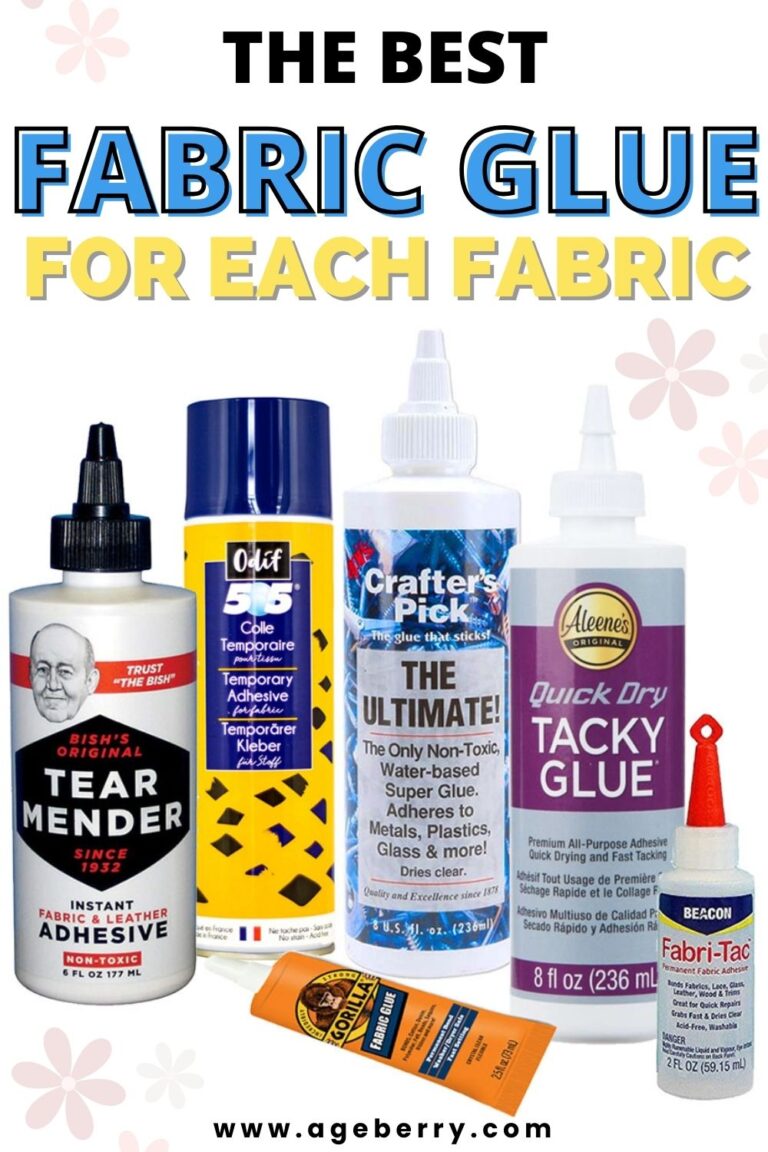
You may also want to read about another unusual foot…
Did you find this tutorial helpful? If so, save this pin (see below) on your sewing board so you can come to this tutorial later when you need this information on the side cutter presser foot, and follow me on Pinterest for more tips, tutorials, and inspiration!
latest posts
- Butterfly Quilt Block Tutorial – Foundation Paper Piecing
- How To Sew Quilt Squares So The Corners Match
- Sewing With Fork Pins: How They Help With Pattern Matching, Slippery Fabric, And Seams
- How Much Fabric Do I Need? 21 Helpful Tips For Calculating Fabric Yardage
- Easy Simple Sewing Project: Fabric Jar Opener
- DIY Oven Mitts: Step-by-Step Sewing Tutorial
- Easy DIY Potholder: New Design
- Tailor’s Clapper: What It Does, Why It Works, And How To Use It Right
- Heat Resistant Batting for Sewing: What It Is, How It Works, and What Makes a Difference