
How to sew straight
I often get a question from my readers – how to sew straight? For someone who never sews, like my husband, this is a funny subject – what can be simpler than sewing straight lines? But everyone who actually TRIED to sew knows things are not quite what they seem. Sewing straight is one of the most important things, a crooked seam will definitely ruin whatever you sew. Fabric doesn’t usually have guides or rulers and it’s very easy to either deviate from the straight line.
In this Sew Straight guide, I will show you how to easily keep stitching lines straight. I will talk about topstitching mostly because keeping seam allowances equal is a different topic and I have a separate sewing tutorial on it and on using different types of seam guides – check it out here.
Topstitching and sewing a straight line
Topstitching is an essential skill in the world of garment construction, and it’s one that can take a bit of practice. Creating beautiful lines of stitches can totally transform a piece of clothing, giving it extra visual flair or a polished look. Topstitched seams also provide extra strength and support to fabrics as they help hold them together.
To master the art of topstitching, you will need to learn how to create perfectly straight lines. The topstitching must be straight or else it would affect the overall look of the piece.
✅ Related tutorial: How To Topstitch | 17 Topstitching Tips Every Beginner Should Know
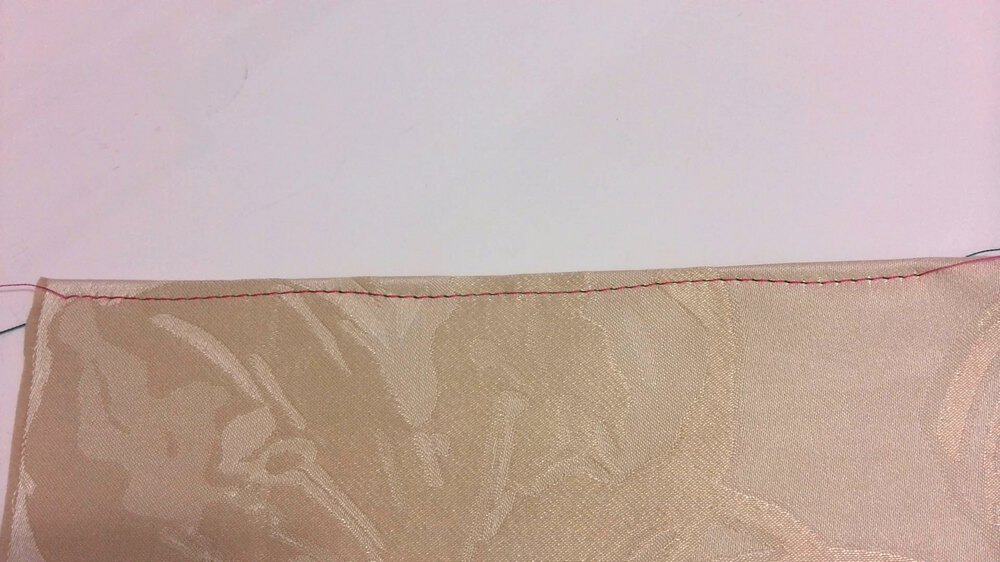
Have you ever had problems with crooked stitching lines? I bet you had. Even intermediate sewists are struggling sometimes to do it and had to rip and redo stitching. The example below is very clear:
Attention! If you like the video format, at the bottom of this post, look for a YouTube video version where there is a step-by-step video sewing tutorial on how to sew a straight line on a sewing machine. For a more complete picture, I recommend exploring both versions.
It’s nice to look at the work of a professional seamstress – all the stitching lines are straight, the seams look perfect. And you always have this feeling that it’s so easy to replicate! But as soon as you start sewing you see that it’s harder than you thought before and it’s unlikely that you will sew straight from the beginning.
To me, it’s often enough to look at the topstitching and immediately determine who made the item – an amateur or a pro. I like to wear clothes I made myself but I will never ever wear something if the stitching lines are not straight and done carelessly.
When I learned sewing I used to always worry about making topstitching for my project I worked hard to create. Sometimes I even avoided any topstitching because I was afraid I wouldn’t make it right. I was told that I need more experience and practice and then I can always do it properly. But I wanted to have beautiful stitching lines from the beginning. And I think you are the same – you want to sew straight even if you are just a beginner.
Modern technology gives us so many different tools we can use to improve our sewing skills and sewing straight is one in which tools help. It is also very likely you already have the tools, if not they are quite cheap and readily available.
Sewing in a straight line is much simpler than you think. And in this guide, I want to help you to sew straight every time.
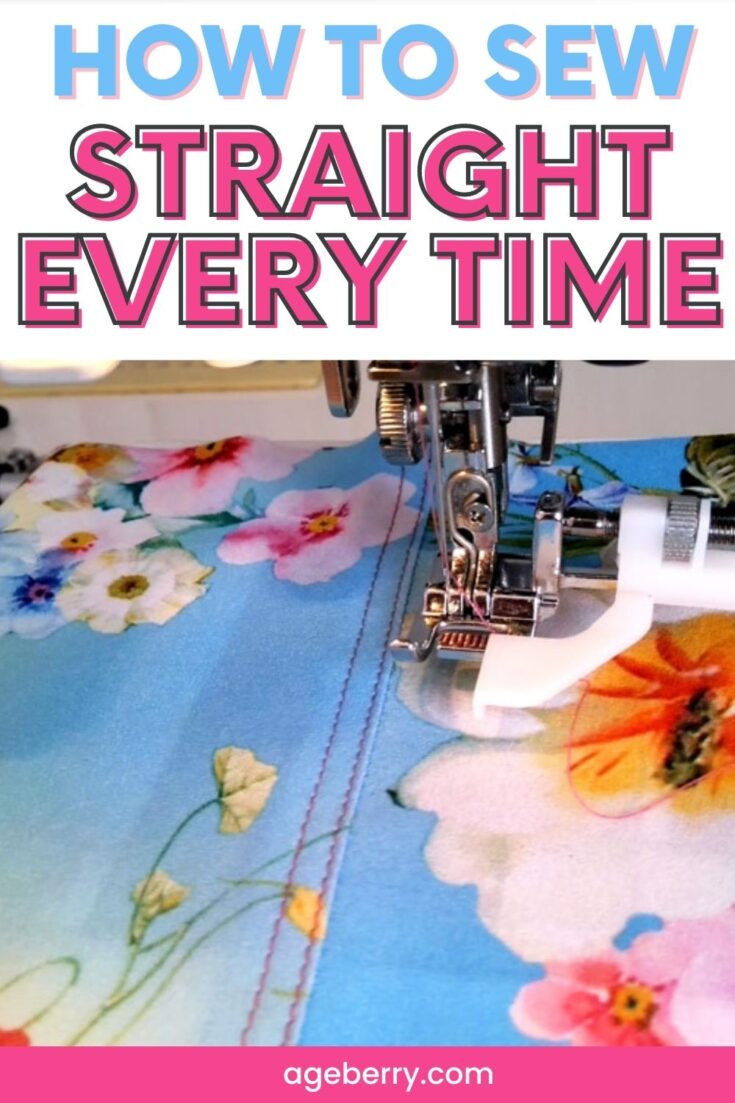
First of all, let me show you how to make straight topstitching close to the fabric edges and keep the stitching line parallel to the edge. Remember, the edge itself must be straight.
Of course, we can use a sewing machine throat plate but for me, it works mostly when I am stitching not so close to the edge and mostly for sewing seams not topstitching.
Note: Some of the links on this page are affiliate links. This means I will receive a commission if you order a product through one of my links. I only recommend products I believe in and use myself.
How To sew Straight Using An Edge Guide Foot
I use special presser feet for straight topstitching with ease.
The first foot is called Edge Guide foot (from Janome). My sewing machine is Janome Memory Craft 6600 P, so I tend to use presser feet made by Janome. But this foot works with all low-shank modern machines. I have a Babylock sewing machine and the foot works perfectly also.
 Blindhem Foot for Janome, Elna Sewing Machine")
The foot comes sometimes with the machine but can also be bought separately (this is a sewingmachinesplus.com link), or just click on the image below for an Amazon link.
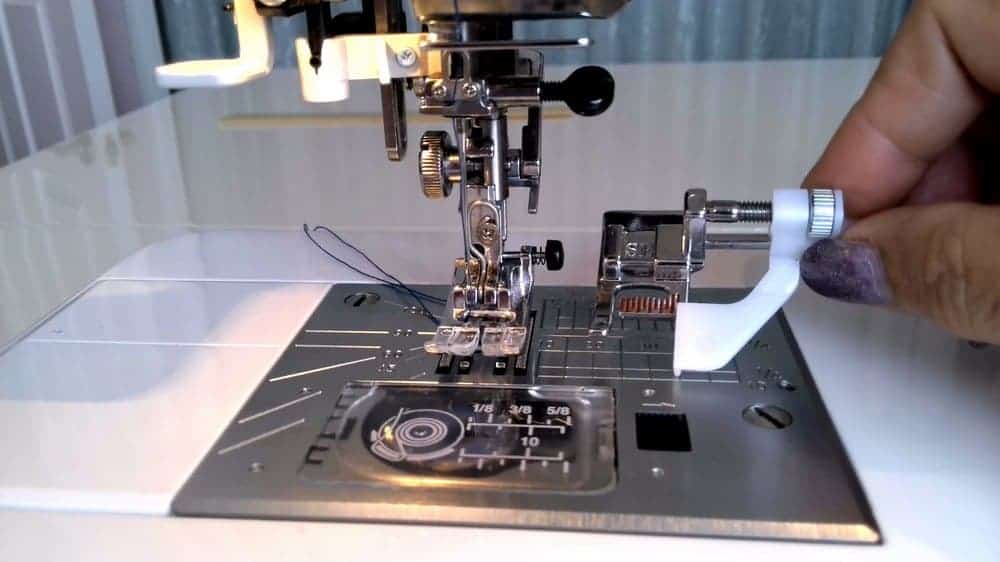
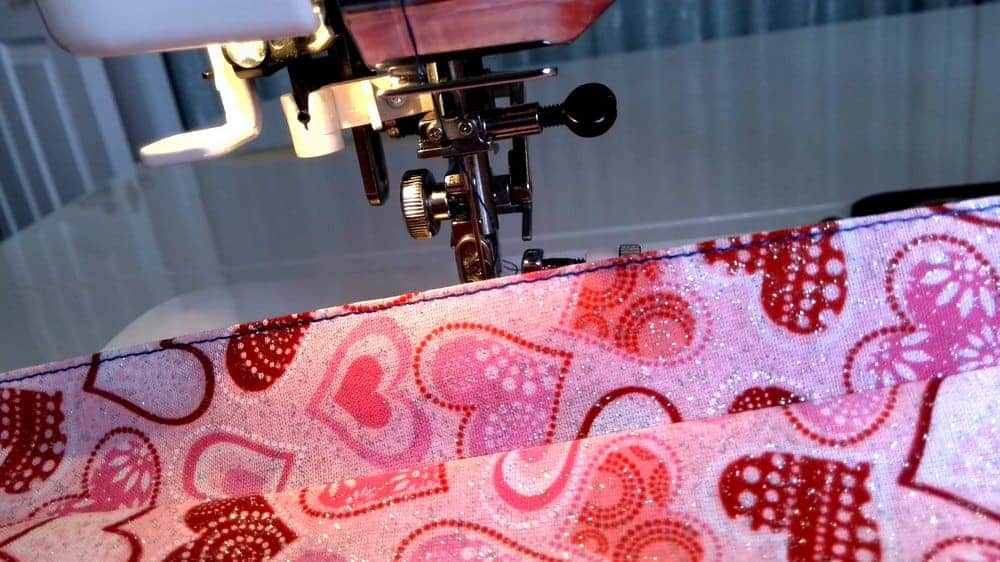
It has a screw that you can turn to adjust a white plastic guide and align it with the fabric edge. It also has small red lines – the distance between them is exactly 1 mm so you can sew as close to the edge as 1 mm, and as far from the edge as 10 mm.
This foot is a snap-on foot as practically all modern presser feet are. Remove the other foot from the sewing machine and install this one – it’s really easy. Just clip it on.
Position the needle at the distance you want the stitch to be from the fabric edge, and lower the needle. I want it to be just 1 mm from the edge.
Lower the foot and turn the adjusting screw to carefully align the plastic guide with the fabric edge.
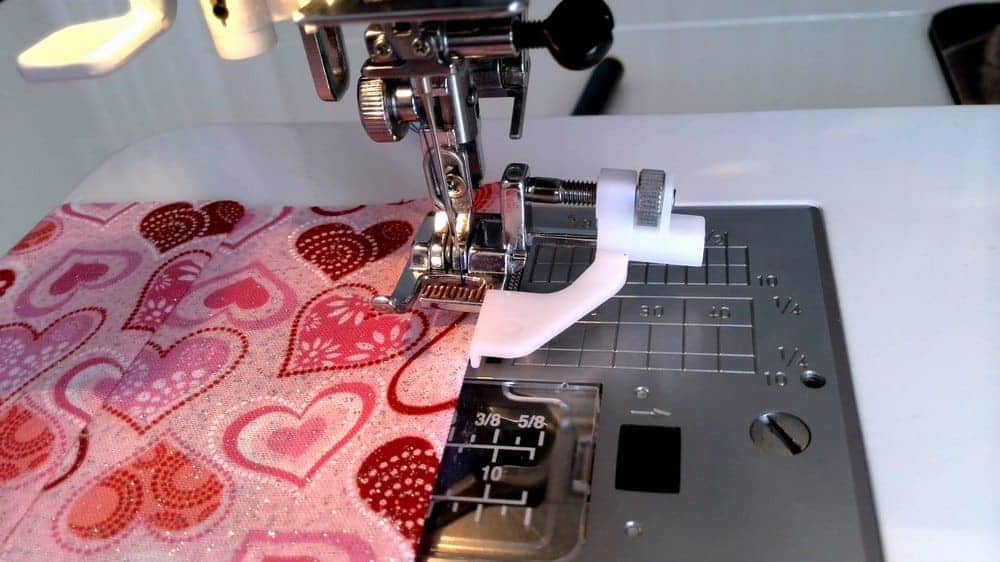
While sewing, keep guiding the fabric edge along the guide – this is really easy to do!
There are some simple rules you need to remember here:
- Don’t look at the needle, focus on the white guide bar
- Hold the fabric lightly – don’t pull or push
- Don’t sew very fast also
It works well even when the distance between the seam line and the edge of the fabric is very small. See for yourself now – I easily created the perfect topstitching line 1 mm from the fabric edge. It’s nice and even.
You can topstitch all types of cuffs, collars, belts, hems. The foot can be used with all kinds of fabric – from heavyweight denim to fine lightweight chiffon. In the video clip below you can see how I make straight stitching lines with different fabrics.
Even if I try to stitch badly the foot will not let me – every time the stitching lines are perfectly straight.
If you would like to buy this Edge Guide presser foot check out this link.
And now let’s see how we can topstitch along a seam made when we join 2 pieces of fabric together.
Line up the white guide bar with the seam. Stitch at a close distance – 1 mm for example. And after that, you can do the second line very easily.
How To Sew Straight Using A Blind Stitch Foot
There are also other presser feet that can be used for the same purpose. They look a little bit different from the foot I have but it seems they work the same. And sometimes they even called differently (like Blind Stitch foot). Here is an example on a merchant’s site: blind stitch foot with guide, or the same thing at Amazon: blind stitch foot with guide.


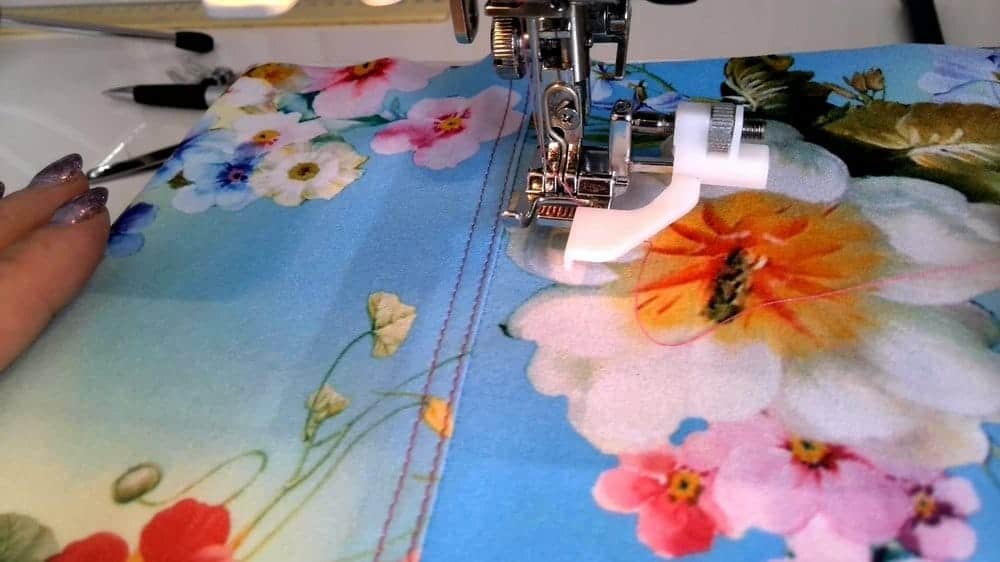
I have another presser foot that’s called Blind Stitch foot, but I use it for straight even topstitching also.
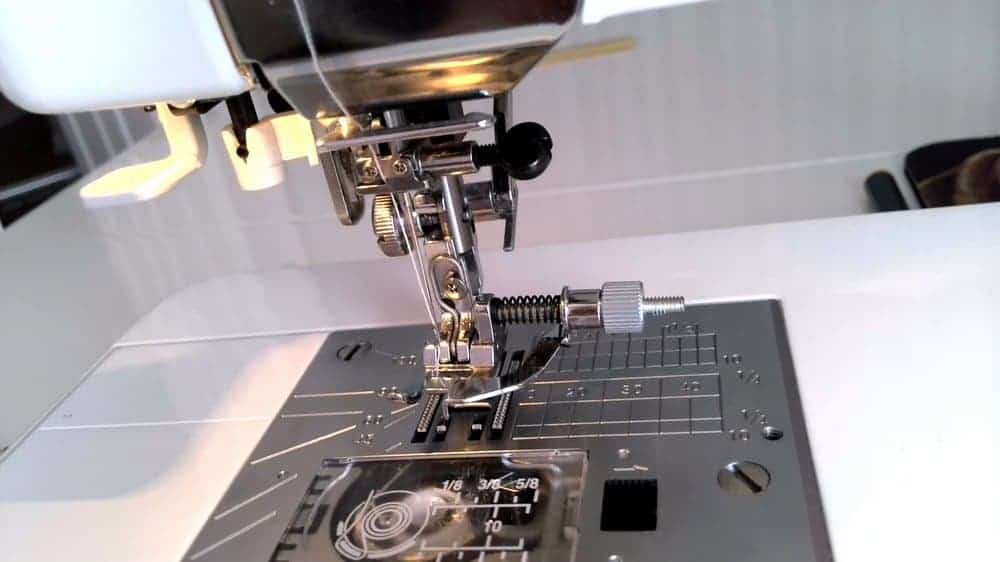
The fabric guide is metal in this case (there are variants with a plastic guide) and there is also a screw and you can move the metal guide with this screw and align it with the fabric edge. How to use this one? It’s exactly the same as the previous one.
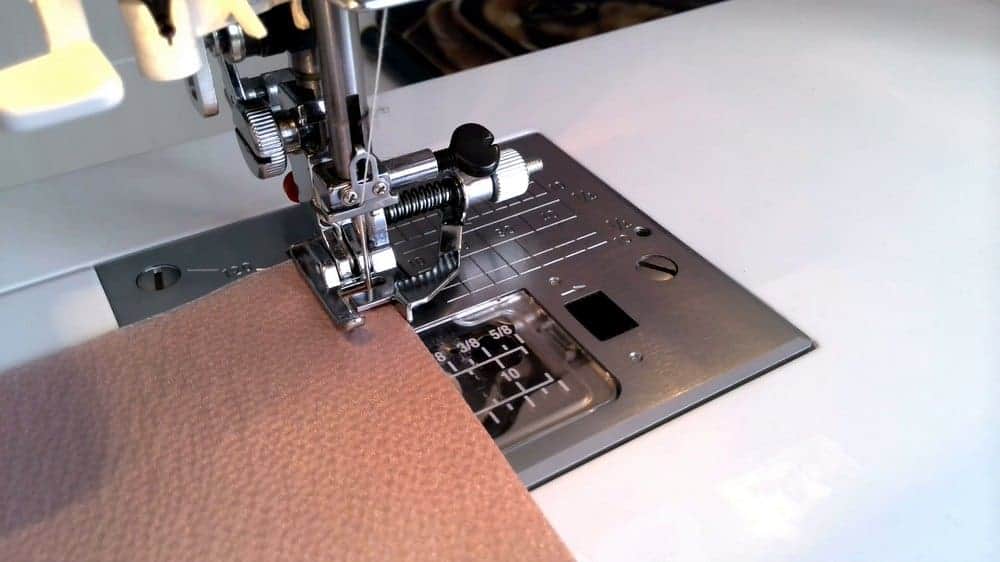
Install it first. Lower the needle at the starting point. I want it to be 1 mm from the edge. Now align the guide with the fabric edge by turning the screw. Lower the foot and sew keeping the fabric edge along the guide.
I got a comment on my pin for sewing straight (from Pinterest) – one lady found an easier solution to the problem: “Don’t drink and sew”. While it certainly can help to sew straight it’s all just preference. I personally don’t like to have a drink while sewing but as long as you’re having fun and not crashing your sewing machine who cares.
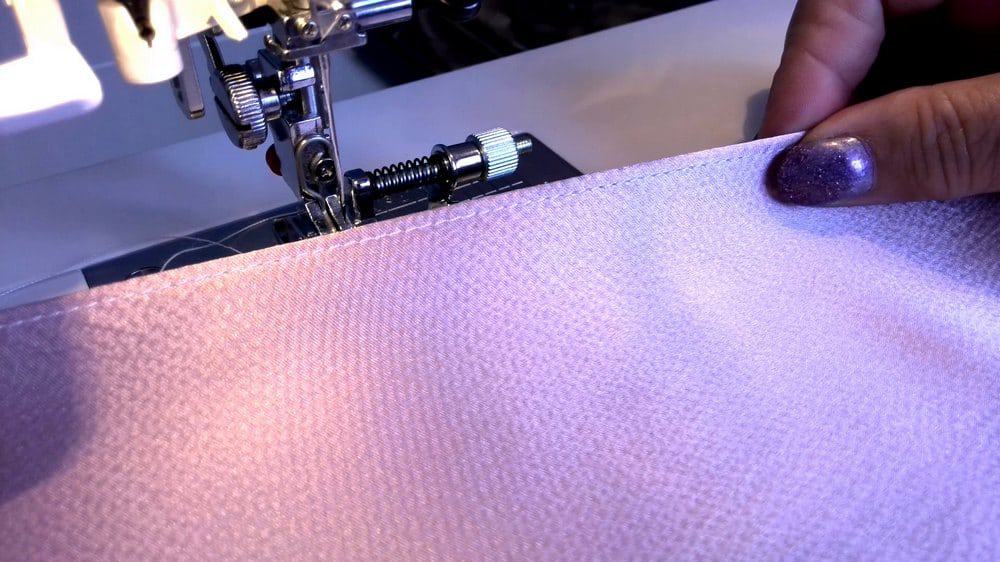
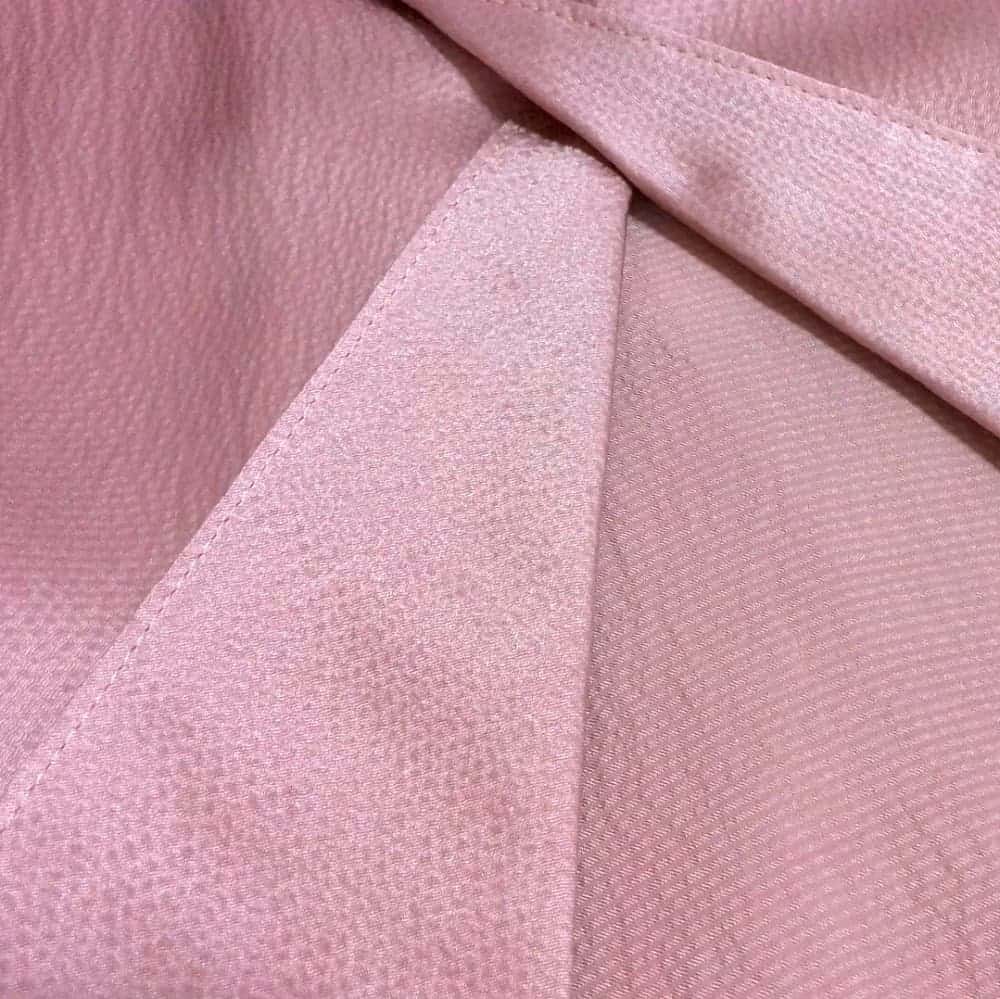
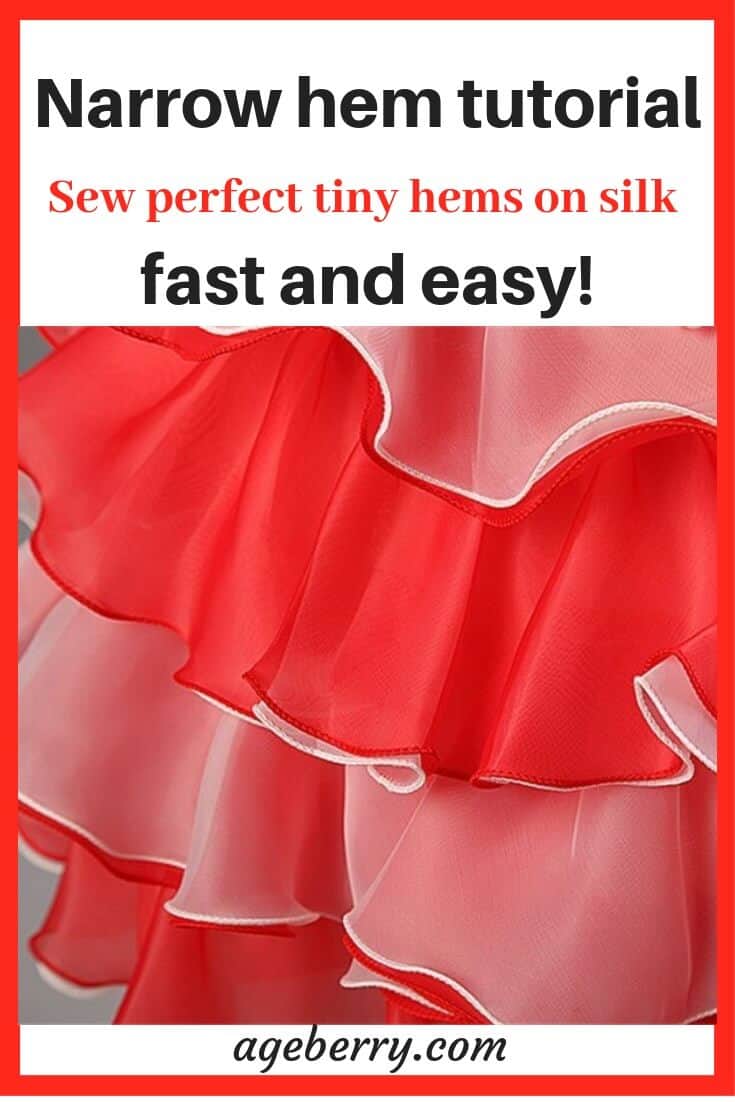
In the images below you can see how I use this foot for my 100% silk fabric, I stitch very very close to the edge. I made a blouse and a skirt in vintage style from this natural silk fabric and straight topstitching had to be perfect because you can’t rip stitches on silk fabric – you will have holes from needles. I used these magic presser foot and all topstitching was good.


I also have sewing tutorials about other interesting presser feet I use almost daily. Check them out below.
So here is my YouTube video. Check this out if you like to see a helpful video on sewing in a straight line (instead of reading).

Did you find this tutorial helpful? If so, save this pin (see below) on your sewing board so you can come to this tutorial later when you are ready to learn sewing straight and follow me on Pinterest for more tips, tutorials, and inspiration!
Ready to take the next step in your sewing journey? Check out more step-by-step tutorials from my blog and don’t forget to share !
latest posts
- What Do You Call a Person Who Sews? I Asked My Readers and Got 1,408 Opinions
- DIY Round Purse: PDF Sewing Pattern and Detailed Instructions
- Mini Wonder Clips By Clover: Useful Sewing Tool Or Just Another Notion?
- Non-Slip Grips For Quilting Rulers: A Small Notion With A Useful Job
- Fabric Eraser for Sewing: What It Removes and When to Use It
- What Is The Best Thread For Sewing Machine Projects? Let’s Find Out!
- Butterfly Quilt Block Tutorial – Foundation Paper Piecing
- How To Sew Quilt Squares So The Corners Match
- Sewing With Fork Pins: How They Help With Pattern Matching, Slippery Fabric, And Seams

Thoroughly enjoy this website!
Thank you for your kind words!
Great tutorial! I can’t sew straight no matter how much I try; I will follow your instructions. ?
It was very good ? love ❤️ it
This website is most helpful. I have a new sewing machine and need to learn about the various presser feet that came with it and also which ones I should purchase. Thanks for your website.
Your 1920’s dress looks good!
Thank you! Please don’t hesitate to contact me directly at [email protected] if you have questions, it would be my pleasure to answer if I can.
I took your advice about a year ago and bought a presser foot kit. Best investment I made, and with all of your tutorials I can always figure out how to use them.
Thank you very much for your sweet note, Joe! Sewing is so much easier and more fun with all these presser feet.
Thank you can you use this edge guild foot on fleece fabric.
Yes, the foot can be used with almost any fabric including fleece but it’s not good to use it with 4 layers of fleece, for example – it will be too thick. In this case, use other seam guides – I have another tutorial on sewing straight – “Seam guide tutorial – all you need to know about how to sew a straight line and keep seam allowances equal“.
Viking Husqvarna is not listed will it fit Tooaz 50?
I am not sure what foot exactly you are referring to. All feet mentioned fit my low shank sewing machines (Janome and Babylock) but this is of course not a guarantee that they fit all. I don’t have experience with the Husqvarna machines and I could not even find out if they accept interchangeable feet from other brands. But I think they will fit. I have the following alternatives for you: if the foot in question is sold by a dedicated sewing site (like sewingmachinesplus.com), ask them. They sell both the foot and the Topaz line so I presume they have knowledge. If not, all sites I am referring have a solid return policy, at most, you will be asked to pay for shipping back (Amazon even offers free drop off at Kohls stores for returns). So you can try and if it doesn’t work, return it. You can also try to ask the manufacturer, or a dealer if any is within reach for your location.
i have a brother a150
Where would I find the “Presser Foot Kit” as I would like to purchase it. Thank you so much for your tutorials and your amazing knowledge! 🙂
In my article “How to use a cording foot” https://www.ageberry.com/cording-foot-sewing-tutorial/ I have a link to a foot set kit on Amazon which is very well rated. Here is another one (affiliate link) https://amzn.to/3cDTrwC. I am not sure if they are available in Canada though. If you need three or more feet from the set, you are probably better off buying the set. If you need only one, then buying it alone would probably be a better deal.
I have always had a problem sewing straight, avoided top stitching at all times.
I would like to buy the first edge guide pressure foot, are you able to tell me if it would fit my Bernina Sport. It’s an older machine but still sews really well, or advise me who could let me know if this pressure foot would fit.
Many thanks. (New Zealand)
I have never seen this Bernina, so what I did I looked at a manual online for the model 801 Sport. The feet presented in that manual seem to be proprietary so regular low shank feet will probably not fit your machine if it is like the 801 Sport I have seen. It is nevertheless possible that Bernina might have an equivalent foot, ask your local dealer or perhaps the manufacturer. If you like the machine and it works well, I see no reason why not keep it, but it is also possible that the manufacturer no longer supports it if it is too old and not compatible with newer models.
On the other hand, if you are serious about sewing, you will probably end up with more than one machine so buying a newer one is also an option.
@Olga Balasa, Bernina are high shank and will probably need a Bernina foot. any low shank will not work on it. There is usually a seam guide with a screw that fits into the bed of the machine just to the right of the presser foot. It;s a simple guide and will also work. If not just use washi tape or blue painters masking tape. With students I mark the sewing line with pencil or chalk until they are sure of themselves.
I am a beginner quilter and sewing Has always been difficult for me. I think it’s because I didn’t realize the different foots and what they do. Thank you for helping me to understand how the different feet work. I think it’s going to make cool thing a bit easier.
We learn continuously; there are literally dozens, if not over 100 feet, and probably each and every one was created with a specific need in mind. And sewing straight is not a problem for beginners; it is a problem for everyone, no matter how advanced, for long seams.
You are adorable, thank you for this video.
Thank you! My husband specifically asked me to tank you and say that he agrees.
Thank you so much for these tutorials. I learned so much from them. I am just so happy to come across you. Thanks again
I am of course equally happy that my articles are useful! Thank you.
Thank you so much for sharing your sewing knowledge. This one little tool will make a huge difference! Now I need to watch ALL your other videos to see what else I’m missing. Thank you again
Thank you. Let me know please if you have observations, suggestions or simply you think something should be improved.
I absolutely love this website! I have learned a lot from you. Thank you so much. I especially enjoyed the information about straight fabric. I have found that purchasing the fat quarters (18″x21″) are a waste of time because by the time it’s prewashed, I find that I’ve lost an inch of material through fraying! I also love the dresses you posted, but video too fast!
What is low shank? Is there a high shank?
Yes there are high shank machines. Many industrial machines are high shank, and even my two embroidery machines (Brother Luminaire and Babylock Destiny II) fall in this category. But all my machines that are high shank have an adapter which allow connecting low shank feet to the machine. There are many articles on this already, a good one is here https://sewingiscool.com/low-shank-vs-high-shank-sewing-machines/
While the feet with guides are extremely helpful when edgestitching and topstitching, they lose their effectiveness when the sewist watches the needle instead of the guiding point on the foot. Please encourage everyone to direct the eye to the point where the fabric meets the guide on the presser foot for the best straight stitching. Also I notice that you guide lightly with one hand in front of the presser foot and that is another point to make for perfectly straight stitching. I see many sewists using the left hand behind the presser foot and the right hand in front of the presser foot. So many things wrong with that technique. Let the feed dogs move the fabric and guide lightly with one hand in front of the presser foot for best results.
Thank you; I did not even realize I was doing it, I guess it was reflex already. Very good point with observing the foot.
Over the years I have tried so hard to sew straight seams. I have unfortunately never heard of any of your tips on how to sew a straight seam. I was very happy to find your website. I am going to try some of your suggestions. Thank you.
Carol Yates
Thank you; glad it was useful. I have another article which you might find interesting here: Seam Guide Tutorial , same subject, different tools.
This is life-changing! Thank you!!
With beginner sewing students I ask them if they would like me to mark the stitch line at first and they really like that. So you all might try that until you learn where to keep your eye. I like to watch the edge of the fabrid and line it up with whatever width I decide on. don’t watch the needle -it will take care of itself.
Is the plastic guide able to accommodate right and left-handed sewers?
Honestly, I have tried every one of these and still have trouble sewing a straight line. I have several suspicions as to why. If you could comment on these, it would help.
1. Where do I put my hands? I am not sure if I grip and guide the fabric in a good way to help. Years of errors to try to correct!
2. What kinds of needles do you like? I think that perhaps the more rounded heads just push the fibers around and leave a slightly crooked stitch in doing do.
3. How do you keep the seam straight as you stop and start the machine to reposition hands, manipulate fabric, etc?
4. I keep my machine as clean as I can. Would there be something done i servicing the machine that could improve this?
Thanks so much. Sometimes I could just sell the machines and stop sewing due to this!!
You are right, all these points are important when you’re trying to sew straight. But I really didn’t pay attention to them thinking that if I use this foot everything else is secondary. So let me try to answer your questions.
1. Keep your right hand in front of the needle, approximately 2-4 inches. Guide the right edge of the fabric with this hand. As you stitch, the fabric will naturally bunch up a bit on the left side of the needle. To keep everything moving smoothly, use your left hand to gently guide the fabric along. You may find it helpful to hold the fabric taut but not stretched; if it’s too loose, your stitches may be uneven, and if it’s too tight, the fabric could pucker. Just take your time and experiment a bit until you find a comfortable position that works for you. Don’t pull the fabric behind the needle.
2. I like (and use) all kinds of needles. It’s not the type of needle that’s important for straight stitching. What’s important is that the needle should be new, not dull, not scratched, not bent. And the type of needle should match the fabric and the thread you are using for the project. Most of the time I use universal needles. The needles with the rounded heads are called ball point needles and they should be used only with knits. I didn’t notice crooked stitches when using ball point needles but the truth is I don’t really use a regular straight stitch with ball point needles, I use stretch stitches
3. When you stop the machine you must keep the needle in the fabric, or keep the needle down (as the manual says). And you still have to keep the fabric edge in the same place along the guide on the presser foot.
4. Yes, it’s important to kee the machine clean. Servicing the machine is recommended one per year. Take the machine to the service center, and the professionals will clean everything inside.
This was a lot of help
Thank you!
Thank you for the helpful tutorial. I have the Janome foot and use every time. Question. What are the patterns you used for the two silk blouses that you show in the Blog? Look lovely.
Hilary, I make patterns myself and I often sew without any pattern. Unfortunately, I can’t put on the site every pattern I made. But I still have some tutorials where I share the pattern-making process. So if you are interested check the following tutorials How to sew a maxi dress without a pattern , How to draft a pattern for a simple dress with your own measurements , Off the shoulder dress pattern drafting sewing tutorial , DIY Wrap Dress Pattern | How To Draft A Pattern For A Wrap Dress From Knit Fabric
@Olga Balasa,
Hi Olga,
your tutorials seems to be very helpfull. I bought a New sewing / embroidery machine last weekend. There are a lot of things to learn. Now I know where should I contact and get advice.
I thoroughly enjoyed your video and can’t wait to get on and try out your tips. A bonus fir me I already have some of the feet mentioned. 👍
Good luck! We all have somewhere feet that we know nothing about, but prove to be very useful for certain operations.
Do you know if this foot fits a Husqvarna Viking Designer machine?
I am not familiar with Husqvarna but from what I read the regular low shank feet will not fit those machines. I think (take this with a grain of salt) that the bar for mounting the feet is a little more narrow for Husqvarna, so the feet LOOK the same, but are not EXACTLY the same. That being said, I am 100% sure that Husqvarna makes simi8lar feet for their machines.
I love all your tips Olga!! I’ve been sewing for about 63 years but still I’m happy to admit I can always learn something new from you. Your Ban Roll method for sewing narrow seams is absolute genius!
When I saw the heading on this tip “How to Sew Straight” I thought, “I know how to do that!” But then again, your tips are always great, so I checked it out anyway and was very gratified to learn I use the blind hem foot as well. But if I need a double row of stitching, I “cheat” and use twin needles – it feels as though I’m being naughty and I love how it turns out!
Please don’t stop sharing your wonderful tips and ideas. Thank you!
Thank you; I am myself learning new things, learning indeed never stops!
I have 45 sewing feet but I cannot find a long/high attachment for them .I have a Vevor sewing machine. Commercial type. Any advice?
I do not kn ow the Vevor brand. If it is a high shank machine you should be able to use a generic adapter like this one (this is an affiliate link). If however it has a proprietary foot adapter, the only source is the manufacturer. But as I said, I do not really know the brand, sorry.
Just found your site; it’s very informative! Thank you.
And thank you for the advice for sewing straight. I’m on my second machine and I still have issues with that.
Well, I still have issues after 40 years of sewing, so you are not alone!