Presser Foot Guide: How To Use An Open Toe Presser Foot
Let’s talk about the supermodel of the sewing world – the open toe presser foot. No, it’s not a fancy pedicure for your sewing machine, but it might just make your stitches look as glamorous as freshly painted toenails.
The open toe presser foot gets its name from its most obvious feature: a wide-open front that gives you a crystal-clear view of your needle and stitching area. This openness makes it a favorite for tasks where precision is key, like topstitching, decorative stitching, applique, and free-motion quilting.
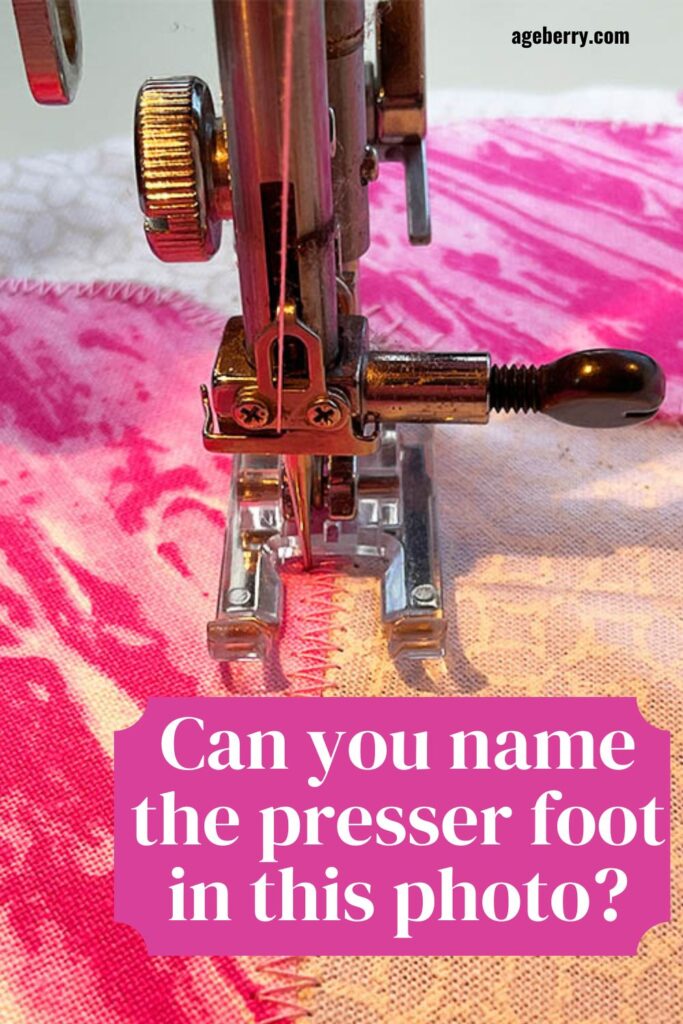
Ever felt like sewing with regular presser feet is like driving with a fogged-up windshield? The open toe presser foot fixes that. Its wide-open design gives you a clear path to success.
With this foot, no more squinting or guessing where your needle will land.
Want to nail that intricate appliqué? This foot’s got your back (or should I say, your front?).
With better visibility comes greater confidence – with nothing blocking your view, you can focus on perfecting your stitching skills.
Free motion quilting becomes less “free motion panic attack” and more “look at me, I’m dancing with fabric!”
The open toe presser foot is here to make your sewing life easier, more precise, and dare I say, a bit more exciting! Let’s discover how this little foot can lead to big sewing adventures.
Types of Open Toe Presser Feet
The open toe presser foot comes in several variations, each with a specific function, material, or attachment style. Whether you’re stitching decorative designs, working on quilts, or perfecting applique, there’s a version to suit your needs. Let’s explore the most popular types and their uses.
#1. Snap-On vs. Screw-In Open Toe Feet
Snap-On: These are easy to attach and remove. They “snap” onto the shank of most modern, low-shank sewing machines and are perfect for sewists who frequently switch between presser feet.
Note: Some of the links on this page are affiliate links. This means I will receive a commission if you order a product through one of my links. I only recommend products I believe in and use myself.
Screw-In: These attach more securely to the machine with a screw. They are ideal for heavier tasks like free-motion quilting, where stability is key. Screw-in feet are also made for high-shank machines.

DREAMSTITCH P60792 High Shank Open Toe Presser Foot
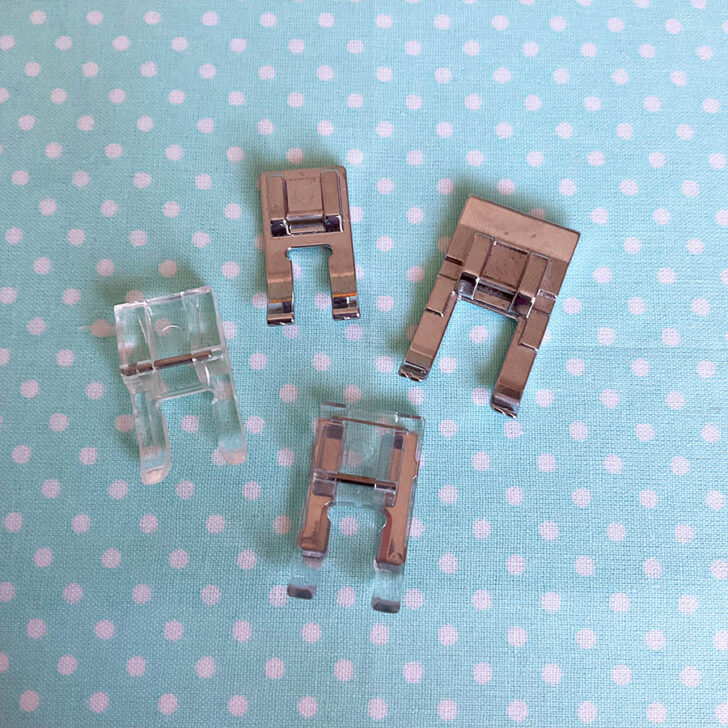
#2. Metal vs. Clear Open Toe Feet
Metal: Metal open toe feet are durable and glide smoothly across most fabrics. They are great for general sewing and heavier projects.
Clear: Clear plastic open toe feet offer maximum visibility, allowing you to see the fabric and stitches underneath. This makes them ideal for applique, detailed embroidery, or working with delicate materials.
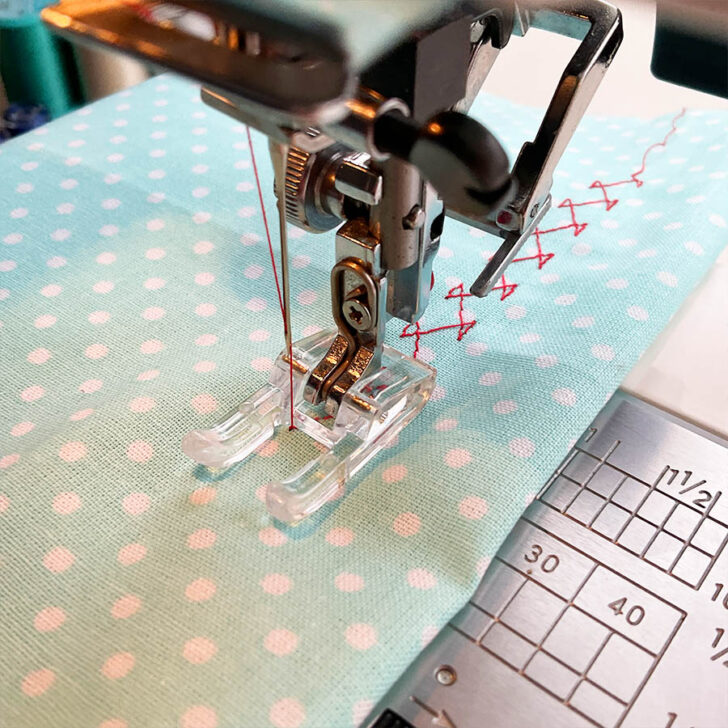
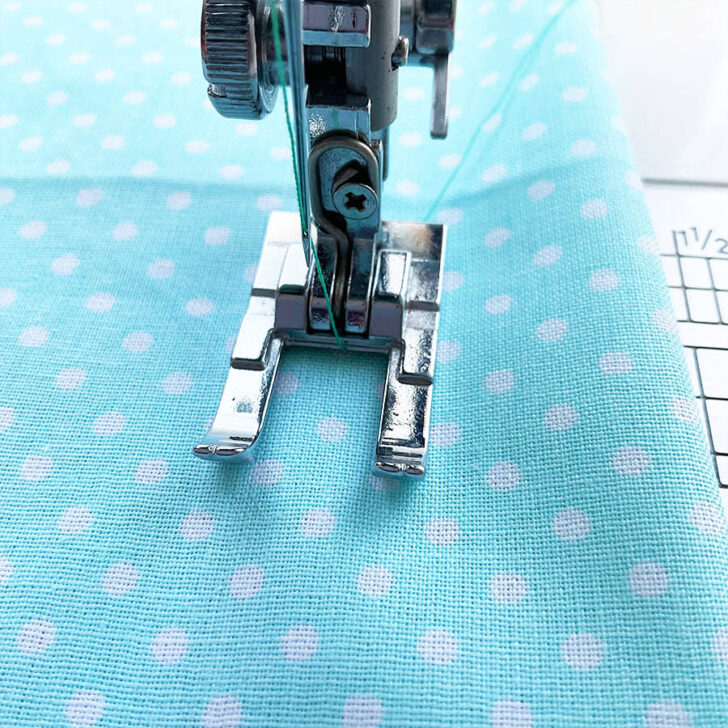
#3. Standard Open Toe Foot
This is your basic open toe presser foot, usually made of metal with a square opening in the center. It is designed for:
- Straight stitching
- Simple decorative stitches
- General sewing on a variety of fabrics
The square opening provides stability for basic stitching while still offering excellent visibility.
, Babylock,Euro-pro, Janome,Bernina (Bernette Series) Sewing Machines and More")
YEQIN Clear Open Toe Embroidery Presser Feet
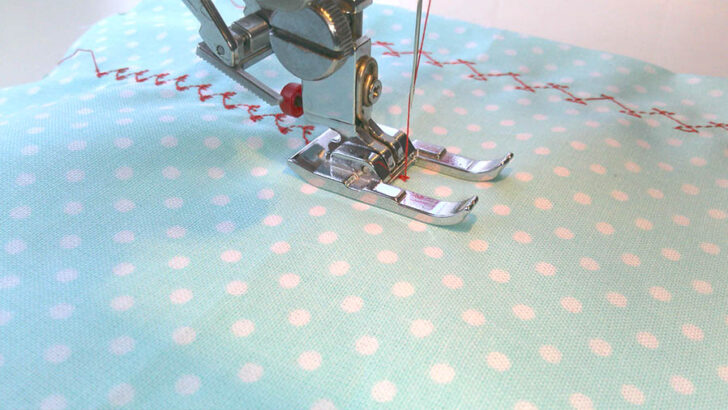
#4. Satin Stitch Open Toe Foot
The satin stitch open toe foot stands out with its elongated curved edges. It’s also designed with a deeper channel on its underside, allowing dense stitches like satin and zigzag to form cleanly without pressing too heavily on the fabric. This feature helps prevent puckering and ensures smooth, even stitching.
- Best for: Satin stitches, dense zigzag, decorative borders, and embellishments.
- The deeper tunnel lets the foot glide effortlessly over heavy threadwork, while the curved edges keep the fabric moving smoothly.


, Euro-pro, Janome, Kenmore, White, Juki, Bernina (Bernette Series)")
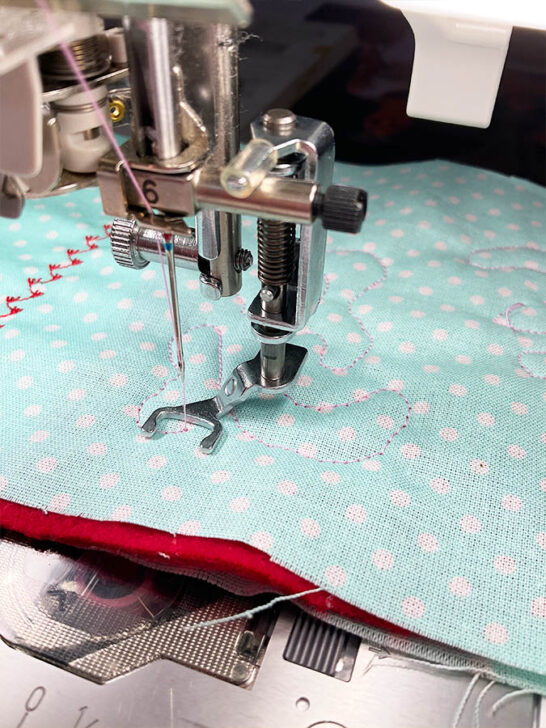
#5. Free Motion/Darning Open Toe Foot
This foot has a completely different look, as shown in the image. It features a spring-loaded design and a wide open front, which allows the needle to move freely while the foot “hops” with each stitch.
- Best for: Free-motion quilting, embroidery, and darning.
- The spring action keeps the fabric stable while allowing free movement in any direction.


#6. Open Toe Walking Foot
The open toe walking foot includes built-in feed dogs that move in sync with the machine’s feed dogs to guide multiple layers of fabric evenly. It works wonderfully for quilting or sewing heavy fabrics.
- Best for: Multi-layer sewing, quilting, and thick materials like denim or fleece.
- The open design offers better visibility compared to regular walking feet, which is especially helpful for aligning stitches

Madam Sew Open Toe Walking Foot
✅ Related tutorial: How to use a walking foot
#7. Janome AcuFeed Open Toe Foot
This specialized foot, as shown in the uploaded image, is part of Janome’s AcuFeed System. It combines the features of an open toe design with superior fabric feeding for precise stitching.
- Best for: Quilting, applique, and projects that require even feeding of multiple fabric layers.
- The AcuFeed mechanism ensures perfect alignment and eliminates shifting, making it ideal for detailed work on layered or tricky fabrics.
So, these are the types of open toe feet, and you can choose the perfect one for your sewing project.

Janome AcuFeed Open Toe Satin Stitch Foot
✅ Related tutorial: Sewing Machine Presser Foot Guide: Types to Elevate Your Projects
How to Determine Compatibility with Your Machine
Before adding an open toe presser foot to your collection, make sure that it’s compatible with your sewing machine. Here’s how you can determine the right fit.
Check Your Machine’s Shank Type
- Low Shank Machines: Most home sewing machines are low shank. Snap-on open toe feet are commonly designed for these machines.
- High Shank Machines: High shank machines typically require screw-in open toe feet or specialized high shank attachments.
- Slant Shank Machines: A few vintage models, such as older Singer machines, use a slant shank design. Ensure the foot you purchase is compatible with this unique style.
Your sewing machine’s manual will provide detailed information about presser foot compatibility, shank type, and additional requirements.
Look for Brand-Specific Attachments
Some brands, like Bernina and Janome, have proprietary attachment systems. For example:
- Bernina machines often require an adapter for presser feet made by other manufacturers.
- Janome’s AcuFeed system uses specific open toe feet designed for its built-in dual-feed technology.
Always confirm with the product description or retailer before purchasing.
Consider Needle Placement and Stitch Width
- Ensure the open toe foot you choose is compatible with the stitch width your machine offers. Wide zigzag stitches or decorative stitches might require a foot with a broader opening.
- Double-check that the needle aligns properly with the foot to prevent breakage.
Techniques and Projects with the Open Toe Presser Foot
The open toe presser foot is very useful for tasks requiring precision. You can use it for various sewing techniques and projects.
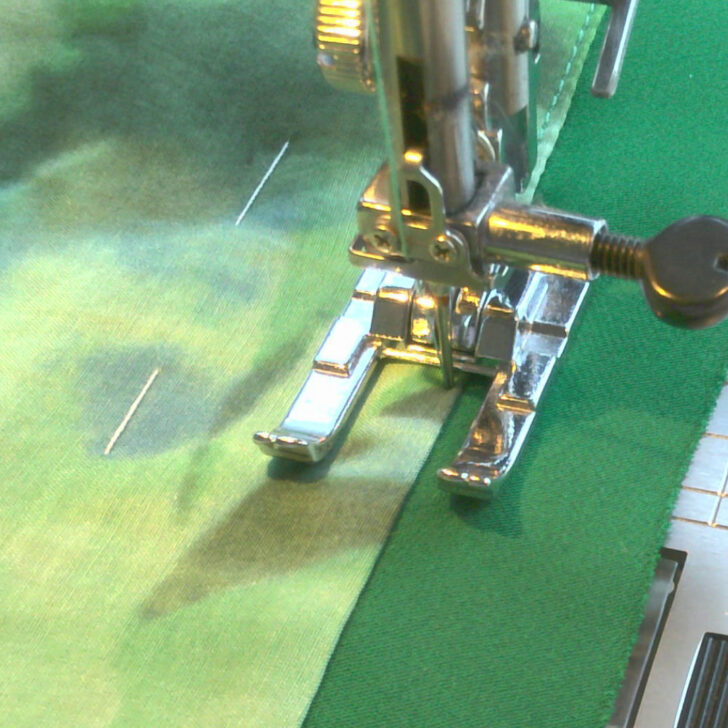
Topstitching
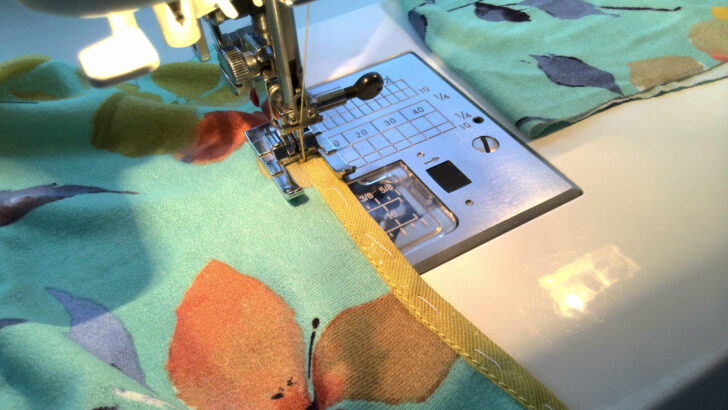
I often use the open toe presser foot for topstitching close to the edge. Its open front gives me a clear view of the needle, which makes it much easier to keep my stitches even and perfectly aligned.
✅ Related tutorial: How To Topstitch | 17 Topstitching Tips Every Beginner Should Know
Another time I reach for the open toe presser foot is when I need to fix stitching mistakes. In the image, you can see that I removed about 2 inches of stitches because they weren’t straight. With the open toe foot, I was able to align the new stitches perfectly with the ones that were still intact. The open design gives me a clear view of the stitching line, making it much easier to correct mistakes without creating new ones. It’s especially helpful when precision matters and you don’t want your repair work to be noticeable.
✅ Related tutorial: Topstitching Troubles? This Simple Trick Will Turn It Around Instantly!
Decorative Stitches
- Select the decorative stitch on your sewing machine.
- Place the fabric under the open toe foot, ensuring the needle starts at the correct position.
- Use the open design of the foot to guide your fabric along the stitching path.
- Use a marking tool or seam guide to keep everything neat.
✅ Related tutorial: Decorative Sewing Machine Stitches: Ideas, Projects and Inspiration
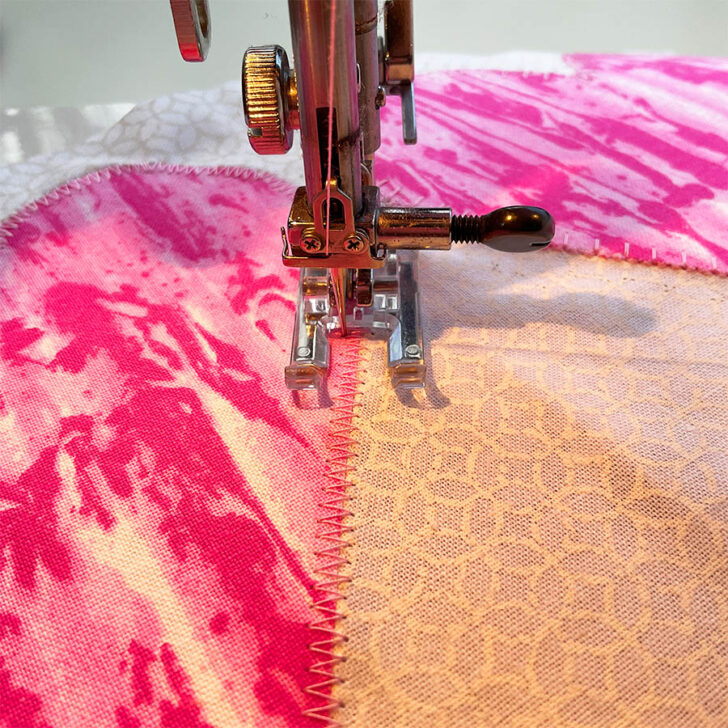
Applique
The open toe foot is perfect for applique because it offers maximum visibility and control.
- Cut out your applique shape and position it on your base fabric. Use a temporary fabric glue or pins to hold it in place.
- Choose a stitch type, like a zigzag or blanket stitch, depending on the look you want.
- Align the edge of the applique under the open toe foot, keeping the needle just outside the shape.
- Sew slowly, adjusting the fabric as needed, to ensure even stitching along curves or corners.
Practice on scrap fabric to perfect your stitch width and length. Use a stabilizer under your fabric to prevent puckering. Pivot the fabric carefully at sharp corners, lowering the needle to turn the fabric smoothly.
✅ Related tutorial: Brother Luminaire Tutorial: How To Applique With An Embroidery Machine
Free Motion Embroidery, Quilting, and Darning
I learned how to do free motion quilting and even bought on open toe free motion foot but it didn’t quite go as planned. My attempts at it looked less like elegant swirls and more like a drunken spider had a dance party on my quilt. Let’s just say, if “abstract” becomes the next big thing in quilting, I’m totally ahead of the curve.
So I retreated to my trusty embroidery machine.
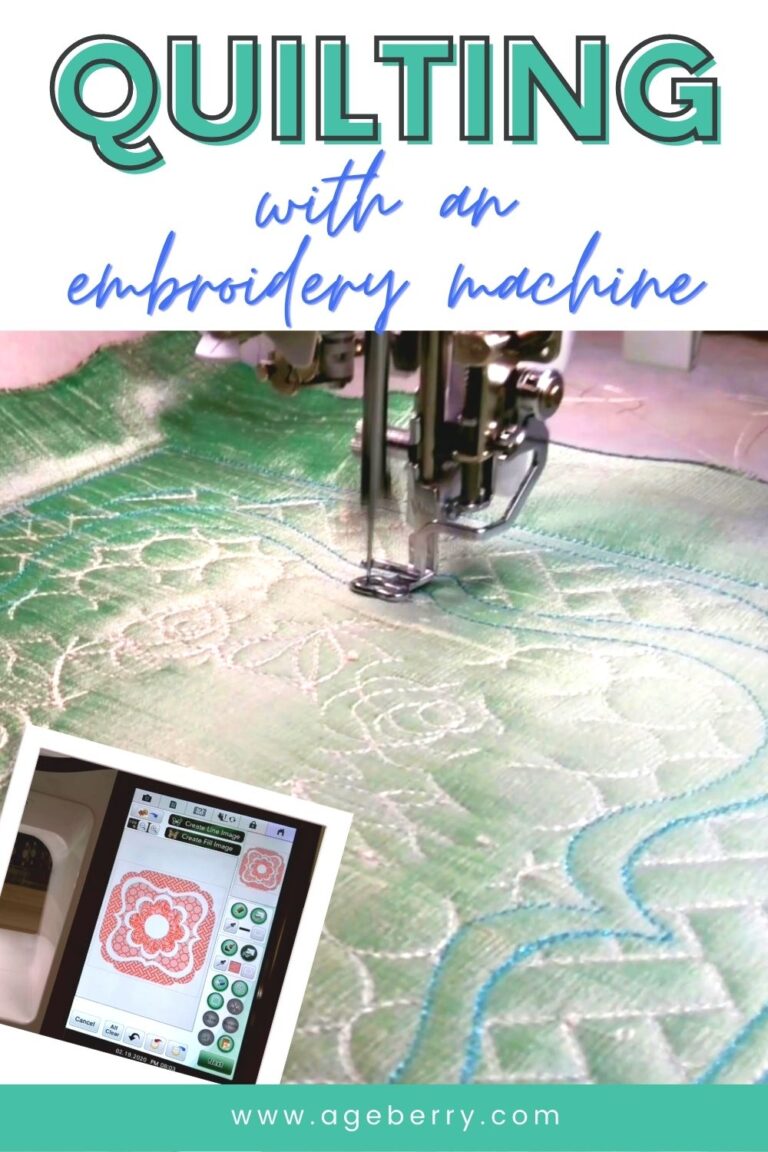
✅ Related tutorial: Quilting with an embroidery machine – be amazed!
But if these are part of your sewing repertoire, here’s how the open toe foot can help make your work smoother and more precise.
- Use scrap fabric to get a feel for how the fabric moves under the foot.
- Lower the feed dogs on your machine. This allows the fabric to move freely in any direction.
- Attach the free-motion open toe foot – it’s like roller skates for your needle.
- Move the fabric smoothly. Think of it as a very slow, very precise dance.
- Maintain consistent speed. This isn’t a race, so sew slowly and steady.
- Keep a light grip to avoid jerky or uneven stitching.
So, whether you’re a free motion pro or a “stick to the embroidery machine” kind of quilter like me, consider this: the best kind of quilting is the one that makes you happy.
Quilting
The open toe walking foot is a fantastic choice for quilting.
- Mark your quilting lines on the fabric using a washable fabric marker.
- Position the fabric under the foot, aligning the needle with your marked line.
- Follow the pattern carefully, using the open toe design to ensure accuracy.
✅ Related tutorial: Walking Foot Attachment For A Sewing Machine: What It Is And Why To Use It
Have you used an open toe presser foot before? Or are you trying it for the first time? I’d love to hear about your experience. Share your feedback, tips, or even your challenges in the comments. If you have questions about techniques or projects, don’t hesitate to ask – sewing is always more fun when we learn from each other.
Looking to expand your sewing skills even further? Explore my other presser foot tutorials to discover more tools that can help you.


Did you like this presser foot guide? If you did, don’t forget to bookmark this pin (see below) on your sewing Pinterest board! That way, you can easily return to this post on an open toe presser foot whenever you’re ready to start using it. Plus, make sure to follow me on Pinterest to stay updated with more sewing advice, step-by-step guides, and creative inspiration!
latest posts
- Corset Pressing Board for Sewing: What It Does and How I Use It
- 7 Essential Tools and Settings for Sewing Denim on a Regular Sewing Machine
- That Purple Thang: 10 Smart Ways to Use This Weird Little Tool
- 20+ Reasons Your Sewing Machine Thread Keeps Breaking (+ Solutions)
- Dresden Plate Quilt Block: 4th of July Fireworks
- How To Sew Curves the Easy Way Using a Curve Master Presser Foot
- 30 Sewing Hacks That Turn Ordinary Items into Useful Sewing Tools
- Seam Allowances in Sewing Patterns: What They Are and How to Use Them
- What Do You Call a Person Who Sews? I Asked My Readers and Got 1,408 Opinions