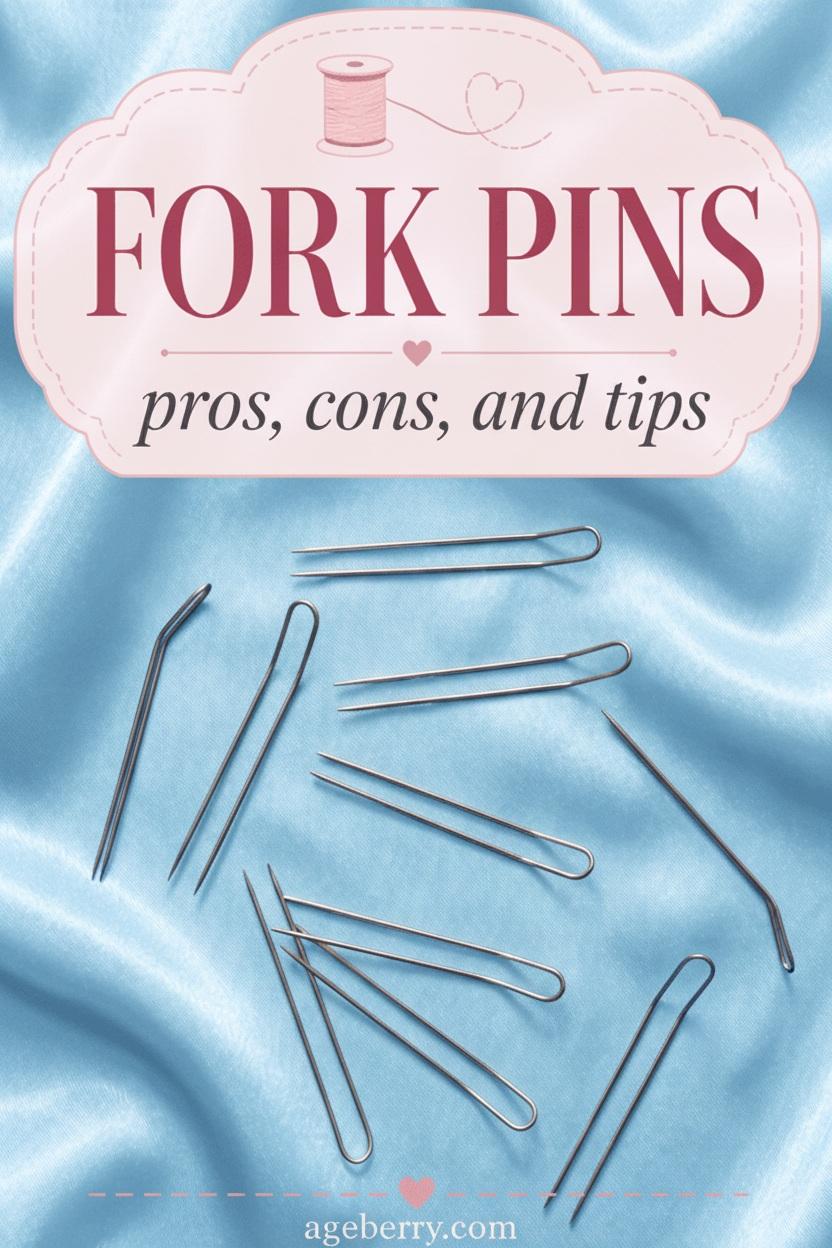
Sewing With Fork Pins: How They Help With Pattern Matching, Slippery Fabric, And Seams
Today I want to show you a sewing tool you may not have tried yet: fork pins. I bought the Clover fork pins because I was curious about their double-point shape. After using them on plaids, stripes, seams, and quilt blocks, I can see why sewists keep them nearby. In this tutorial, I’ll show you what fork pins are, how I use them, and what I like and do not like about the Clover fork pins I bought.
What Are Fork Pins?
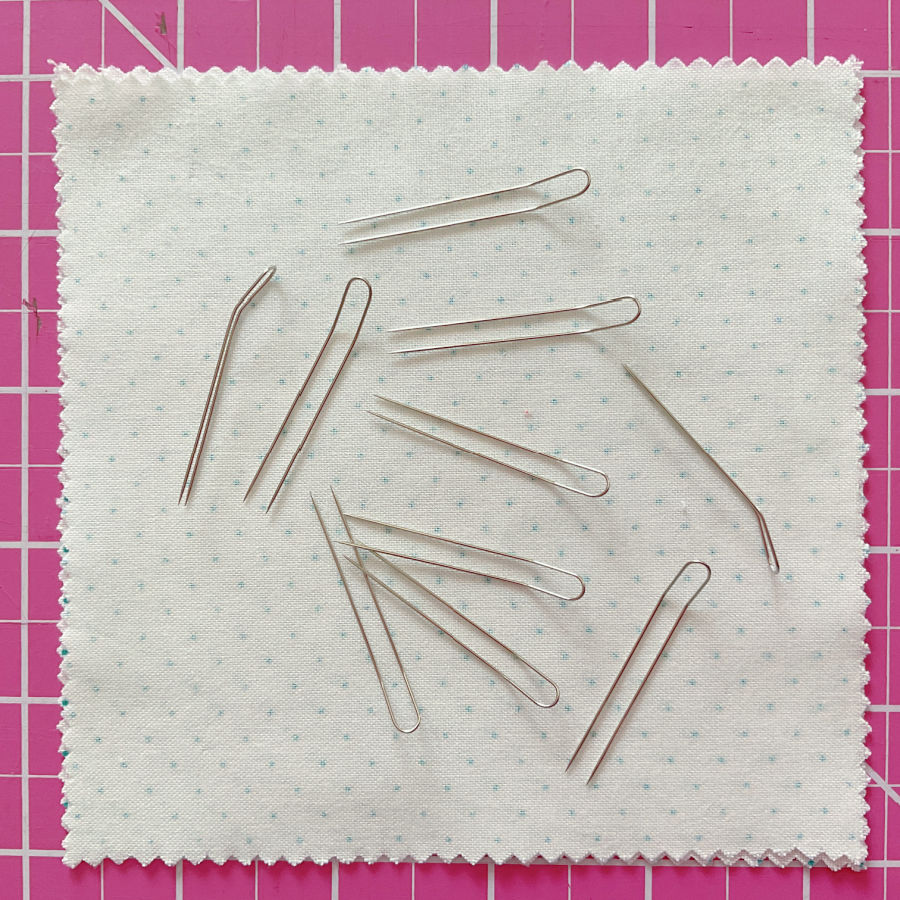
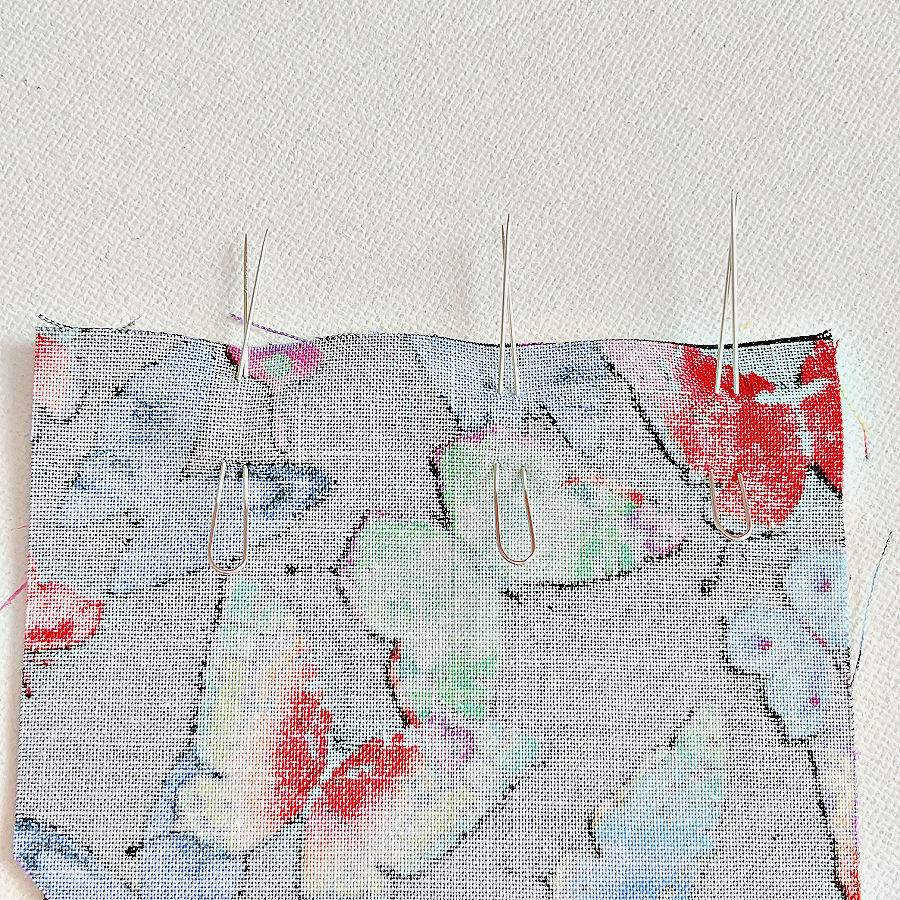
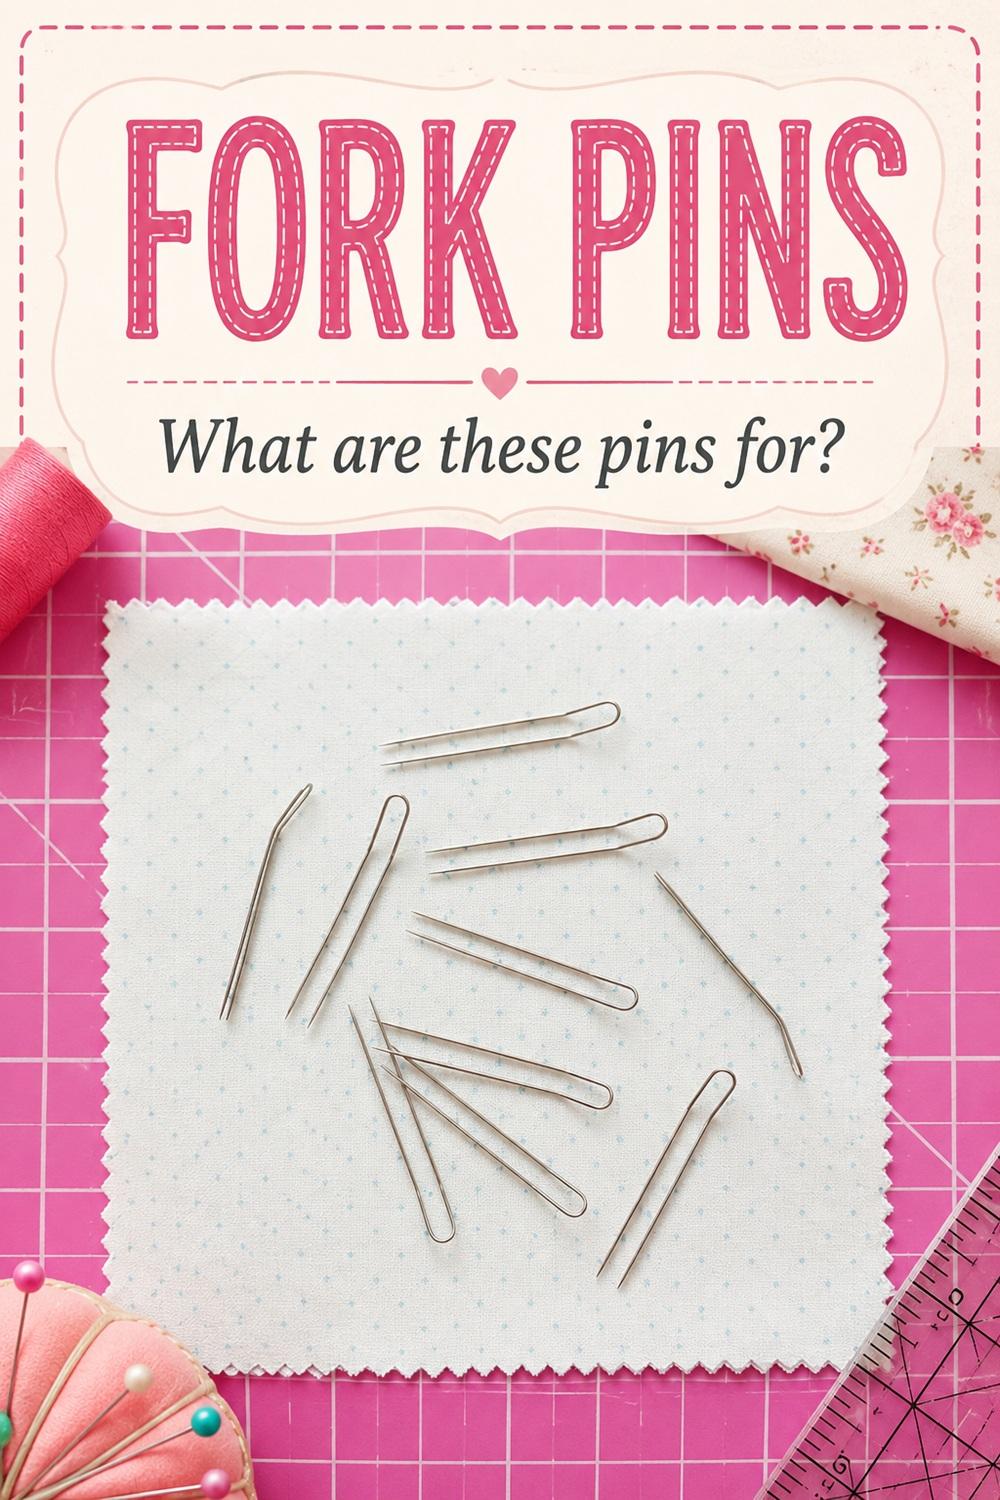
Fork pins are sewing pins with two points instead of one. Both points are joined at the top, so the pin looks a bit like a tiny metal fork. The two points slide into the fabric close together and hold the layers in place.
The slight bend near the top curve helps your fingers grip the pin. It also makes the pin easier to insert and remove.
A regular pin holds one spot. A fork pin holds two nearby spots. That little difference can matter a lot when a plaid line, stripe, seam, or pocket edge needs to stay in one place.
The linked double points on fork pins help lock fabric down better than one regular pin. They are especially useful when one tiny shift would show right away.
Fork pins are useful for:
- Matching plaids and stripes
- Lining up seam intersections
- Holding quilt blocks
- Anchoring patch pockets
- Holding slippery lining fabric
- Keeping pattern pieces or small fabric shapes in place
- Working with areas where regular pins do not give enough control
Note: Some of the links on this page are affiliate links. This means I will receive a commission if you order a product through one of my links. I only recommend products I believe in and use myself.
My Clover Fork Pins
The fork pins I have are Clover Fork Pins.

These pins are thin. That is one reason I like them. A thick pin can push fabric layers apart. It can lift the seam area and create a bump. These Clover fork pins disturb the fabric less, so they are helpful when accuracy matters.
They work well on many quilting cottons, shirting fabrics, lightweight woven fabrics, and lining fabrics. They also help with plaid and stripe fabric because the pin can hold the printed or woven line in place.
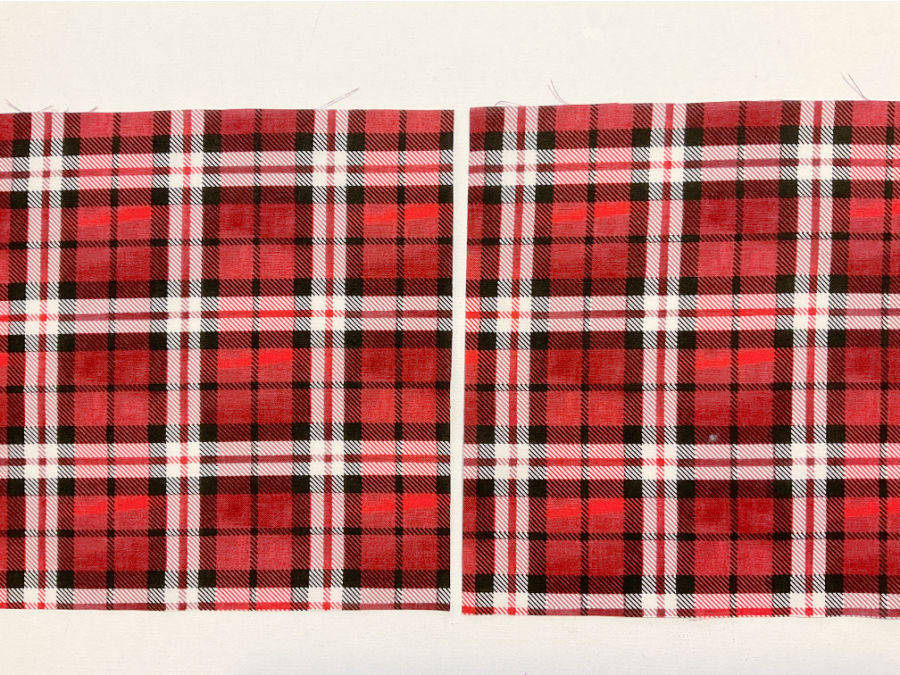
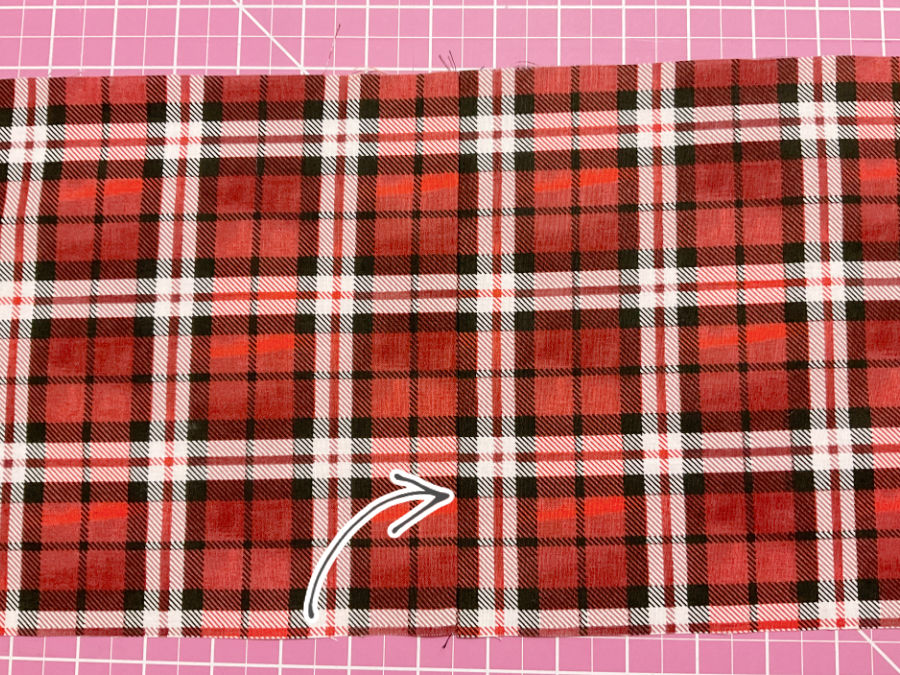
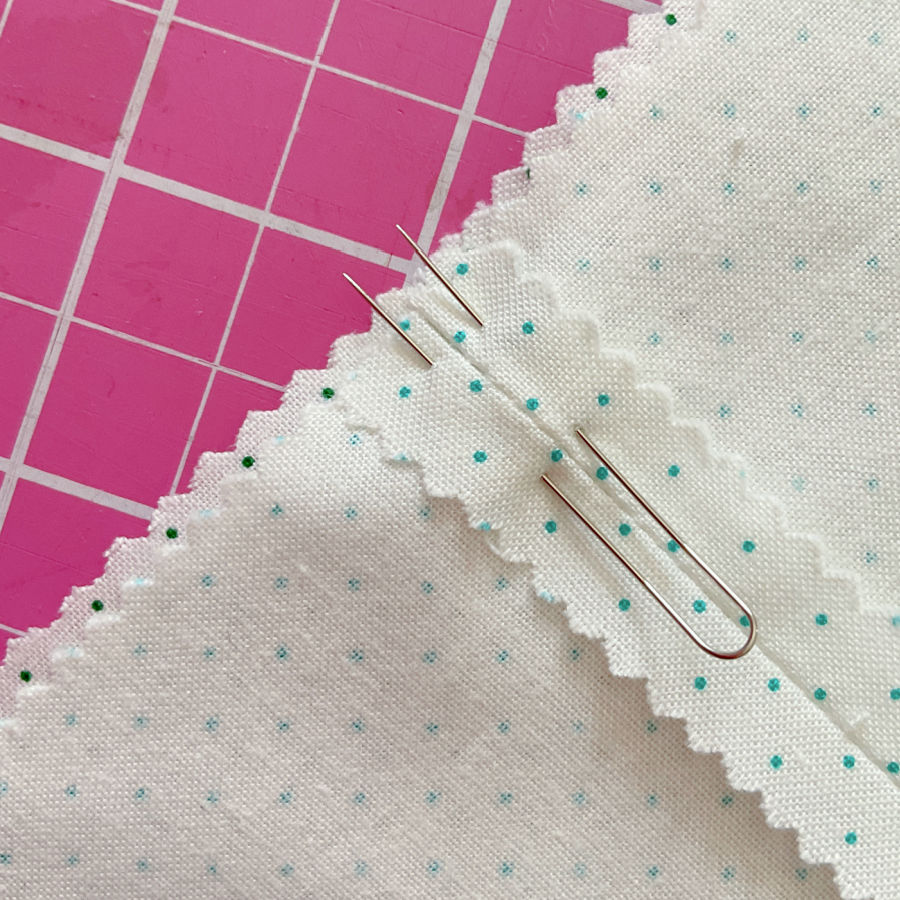
How To Use Fork Pins For Plaids And Stripes
Plaids and stripes are one of my favorite uses for fork pins.
The lines are printed or woven into the fabric. They are not seams yet. Your goal is to line up one fabric line with the same line on the second fabric piece.
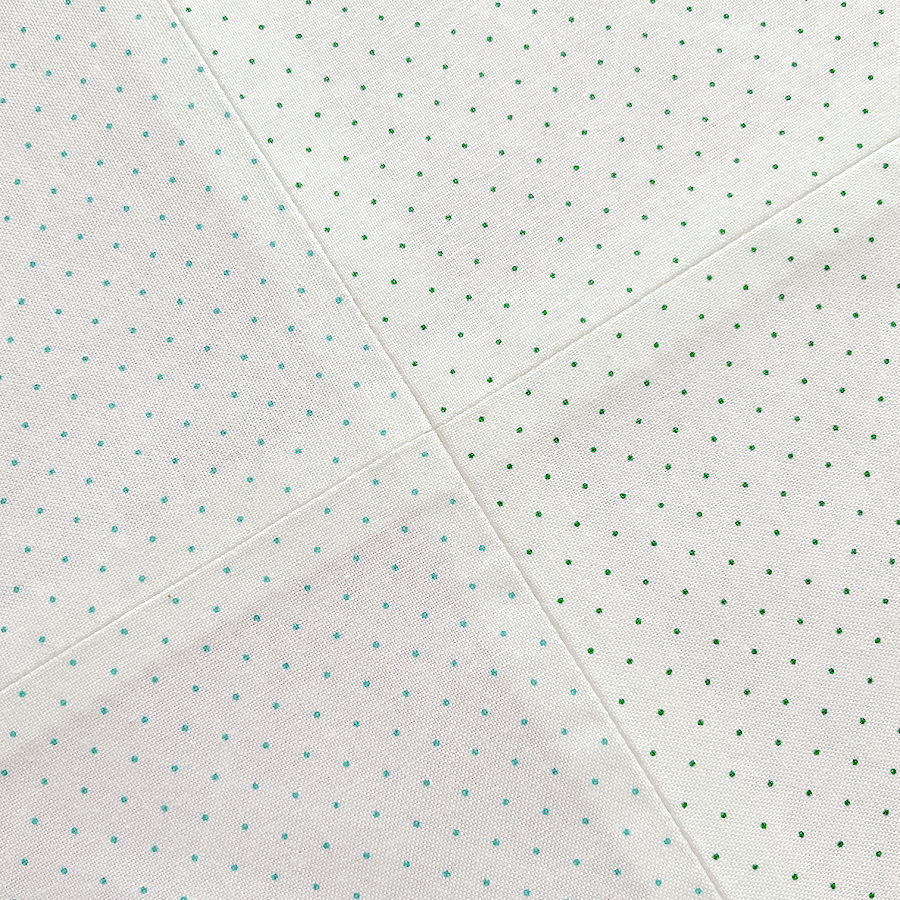
Many fabrics have hidden lines in the design, even when they do not look striped at first glance.
Look closely at some floral prints, polka dots, novelty prints, abstract designs, border prints, and geometric fabrics. The motifs often repeat in rows. Flowers may sit on an invisible diagonal. Polka dots may create a clear grid. Leaves may form a soft stripe across the fabric. Even a scattered print can have a rhythm once you study it for a minute.
These hidden design lines can matter at seams. A large flower cut in half at one side seam may look fine. The same flower mismatched across center front may look distracting. A row of polka dots that jumps at a pocket edge can make the pocket look crooked, even when the stitching is straight.
So don’t think you can avoid pattern matching just by skipping plaids and stripes. Once you start sewing with prints, matching those lines becomes a skill worth learning.
Step 1. Start with pressed fabric
Wrinkles can throw off your match before you pin anything. Press both fabric pieces and let them cool flat on the table.
✅ Related tutorial: Pressing Matters: 15 Common Ironing Mistakes to Avoid
Step 2. Place the fabric pieces right sides together
Choose one plaid line or stripe line that needs to match. Use the same line on both pieces.
Do not rely only on the raw edges. Raw edges can be slightly uneven. The match needs to happen where the seam will be stitched.
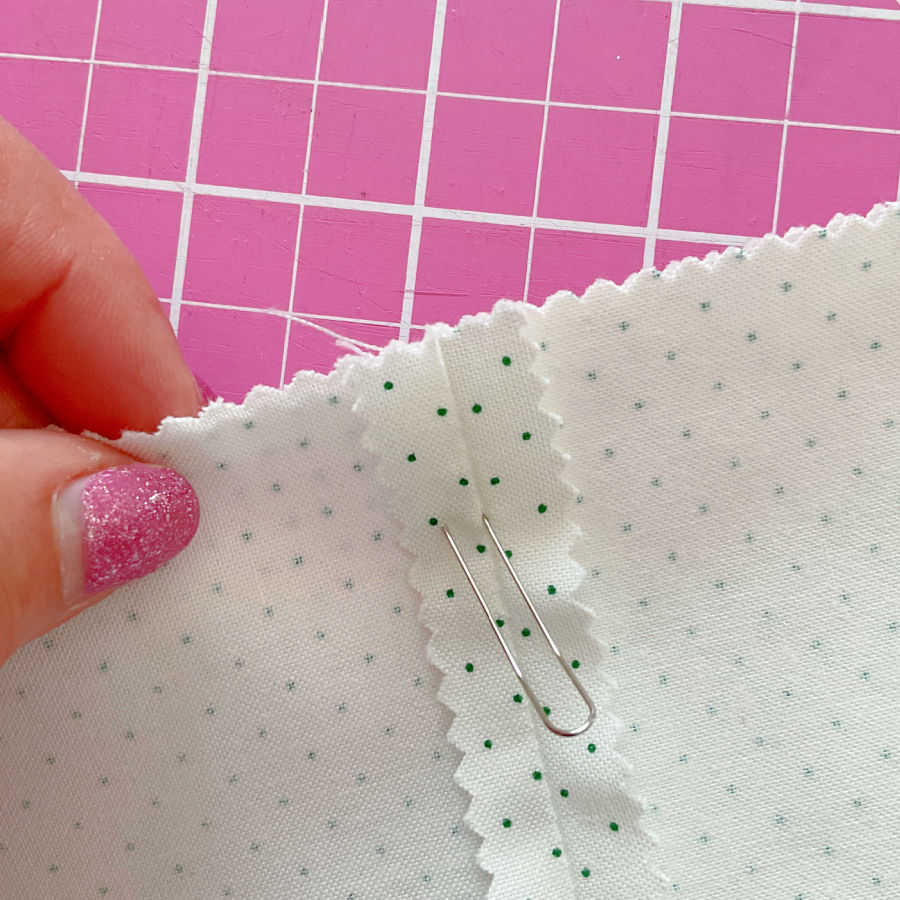
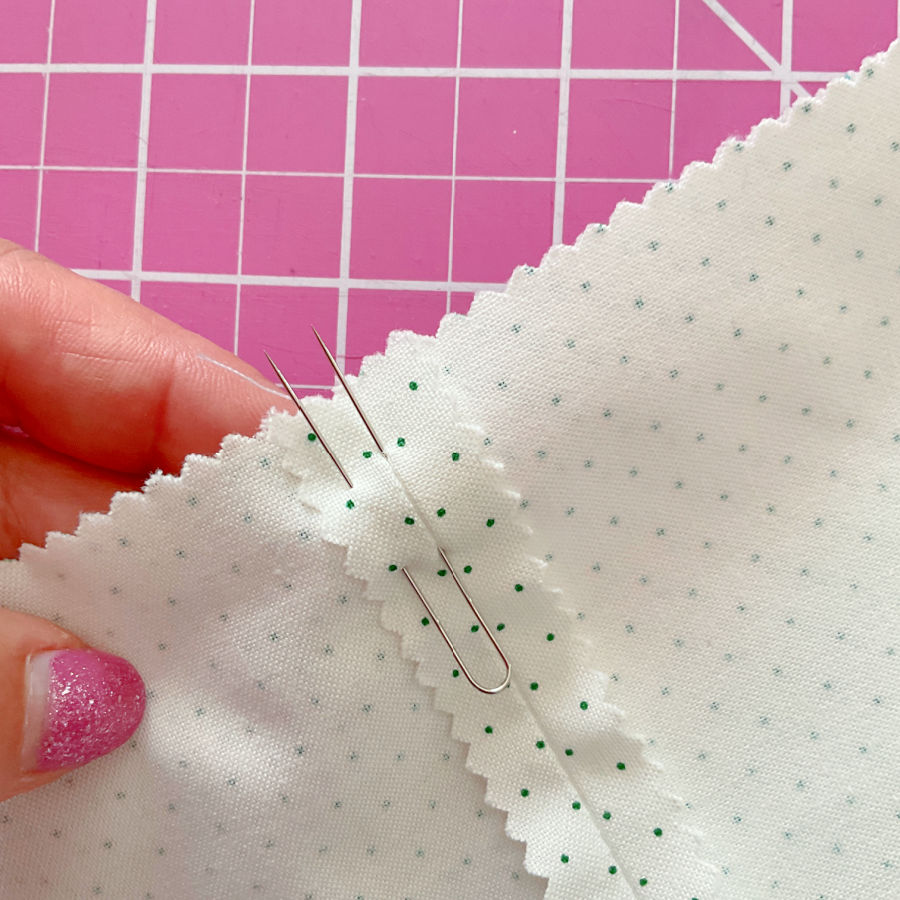
Now take the fork pin.
Insert one point of the fork pin exactly into the printed or woven line on the top fabric. Then guide that same point into the matching line on the bottom fabric.
This first point is the important one. It must go into the line on both layers.
The second point of the fork pin goes into the fabric nearby. It does not have to go into the plaid or stripe line. Its job is to help hold the layers steady while the first point protects the match.
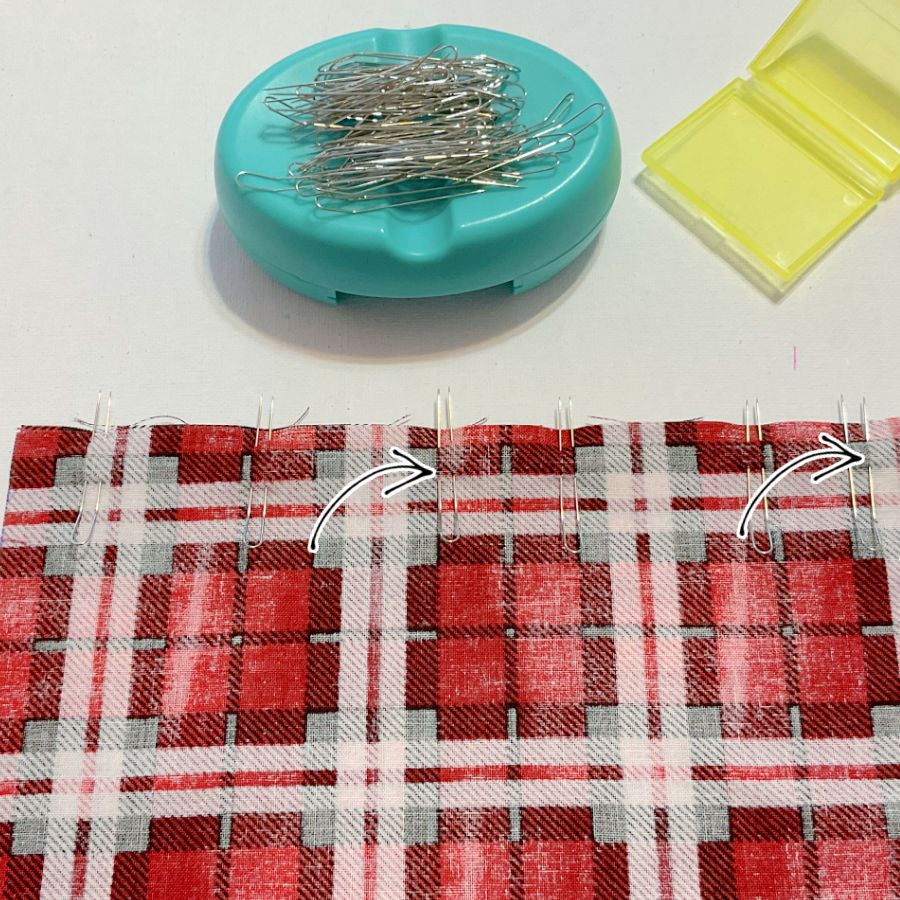
Keep the fork pin flat. If it sticks up like a tiny metal hill, it can distort the fabric. Remove it and insert it again at a lower angle.
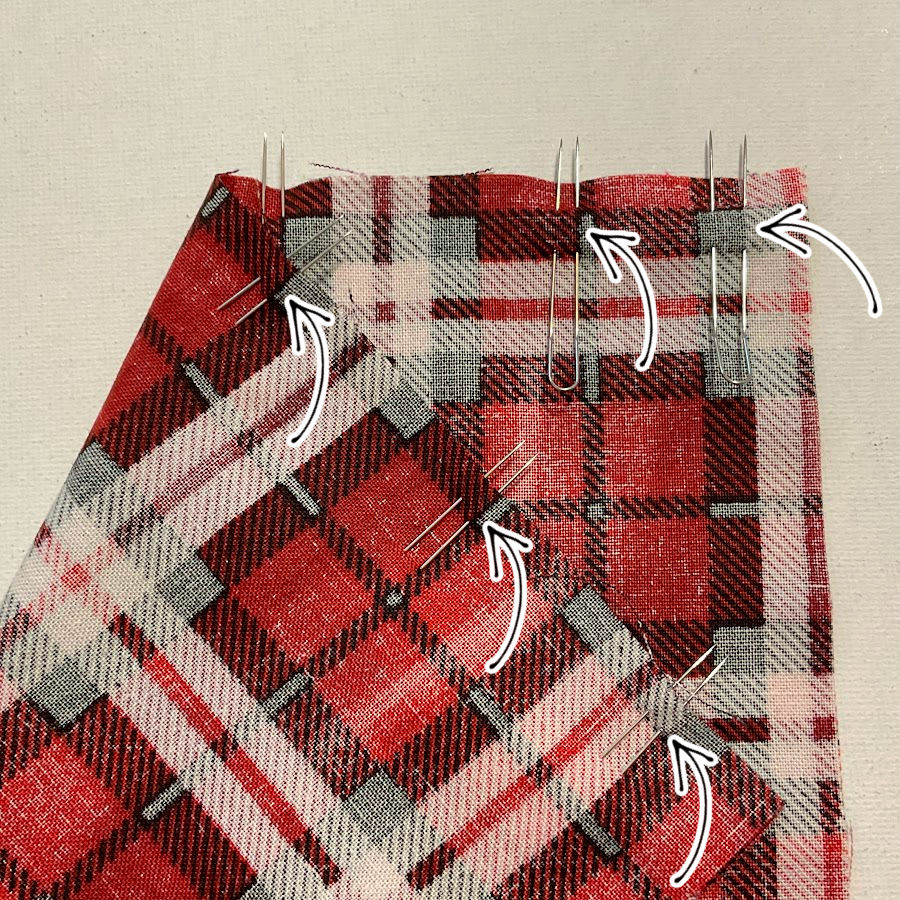
Step 3. Add more fork pins at several repeat points
Use them where the fabric lines must match.
For slippery fabric or knit plaid fabric, hand basting may help. Fork pins can hold key points, but basting gives the whole seam more support. This is useful for soft rayon, stable jersey stripes, lightweight shirting, or loose weave fabric.
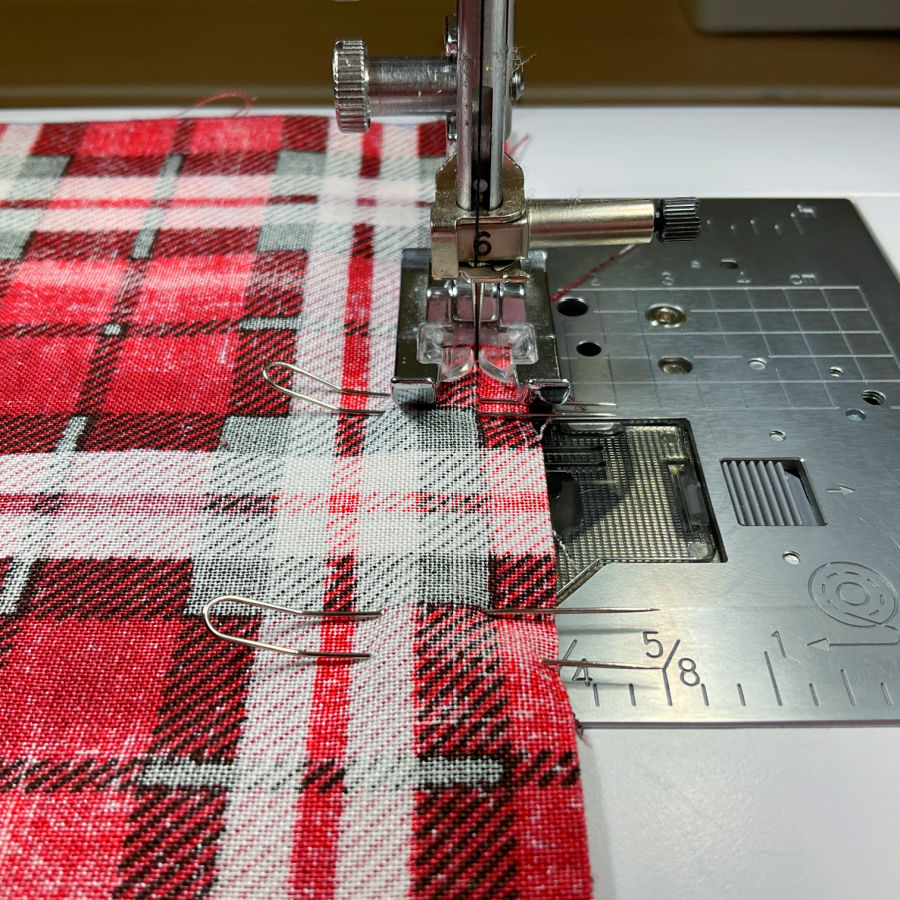
Step 4. Sew slowly as you get close to each fork pin
Do not sew over fork pins. Remove the pin before the needle reaches it. A fork pin has two points, so it gives your needle twice the opportunity for drama.
After the seam is sewn, open the fabric and check the match. A good match means the plaid or stripe continues across the seam without a jump.
A tiny mismatch can happen, especially with soft fabric. But if the mismatch bothers you, remove that small section and sew it again.
✅ Related tutorial: How to perfectly align checkers, stripes and other lines when inserting an invisible zipper
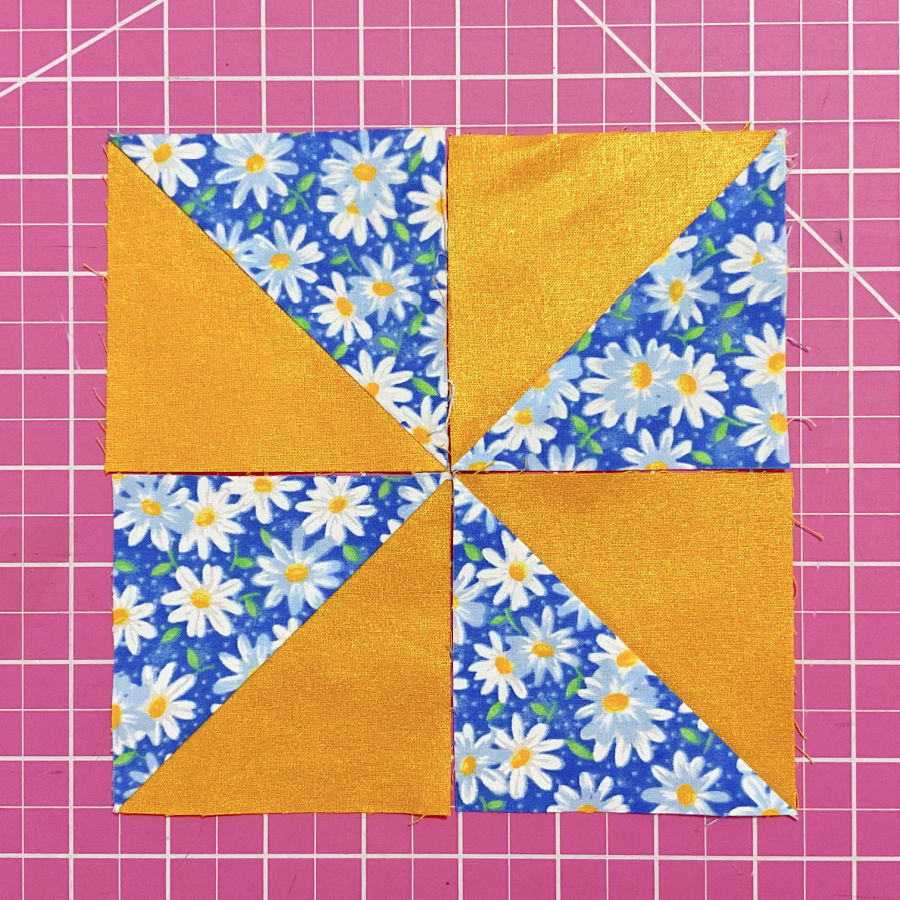
How To Use Fork Pins For Quilt Blocks
Fork pins are also useful for quilting. Let me show you how I use them for quilt blocks to match seams.
Start with well-pressed seams. A flat seam is easier to match. A tailor’s clapper can help here. It is a simple piece of wood, but paired with a hot steamy iron, it can make seams wonderfully flat.

✅ Related tutorial: Tailor’s Clapper: What It Does, Why It Works, And How To Use It Right
Press the seam with steam, place the clapper over the seam, and let the fabric cool under pressure.
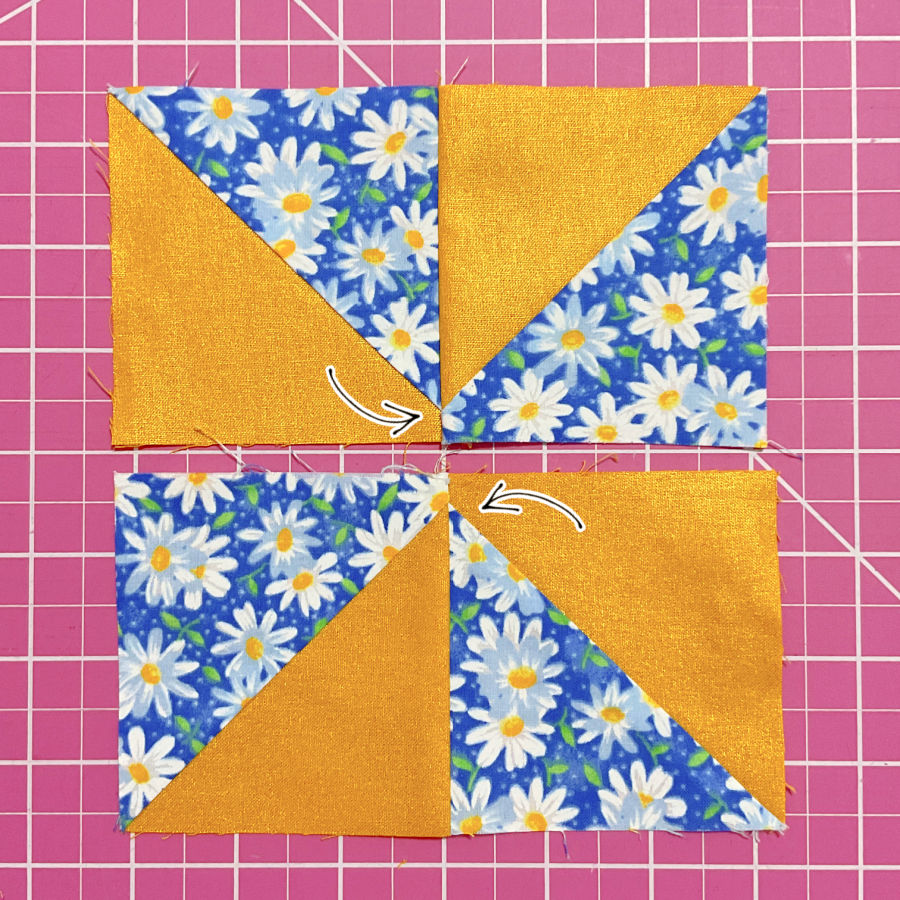
Place the pieces right sides together. You should notice that seam allowances are pressed in opposite directions.
Then nest the seams. The seam allowances should sit snugly against each other.
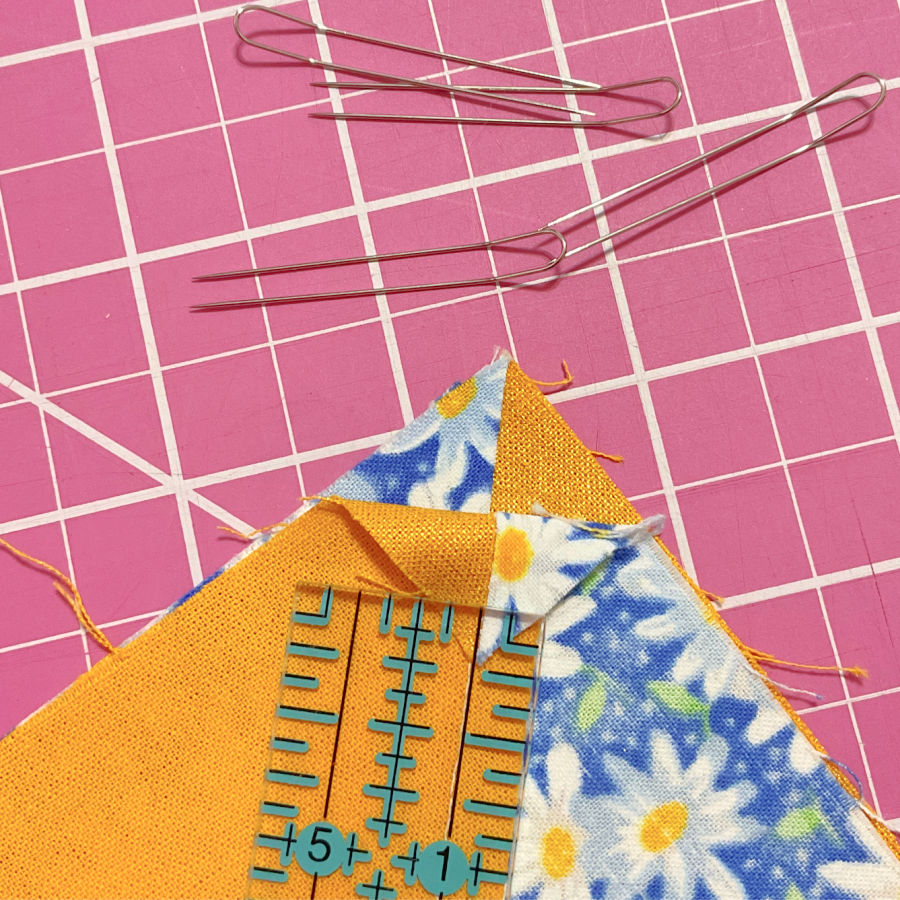
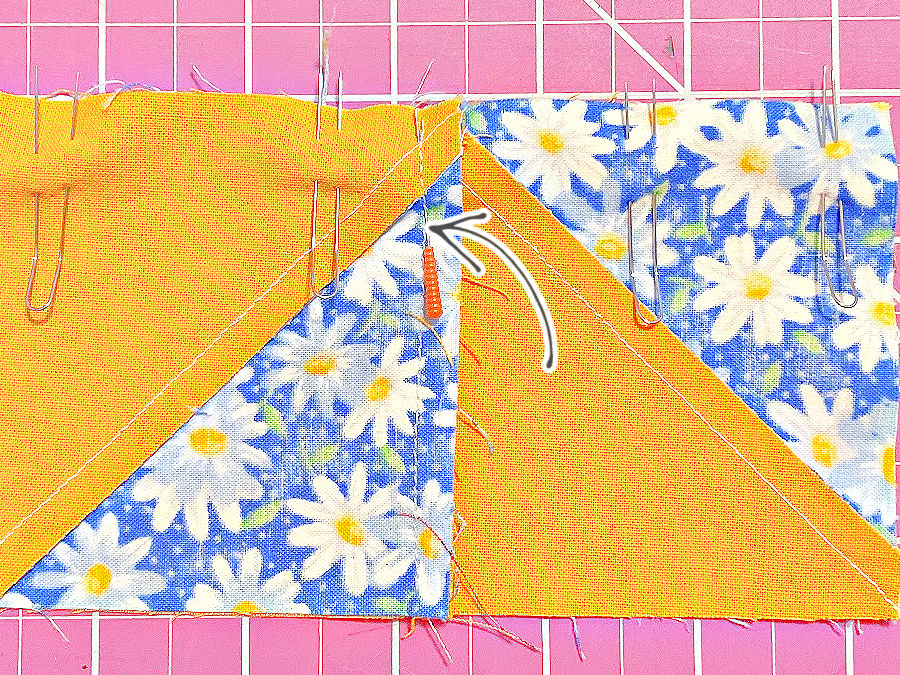
Place the fork pin. Keep the pin flat. Add more fork pins if needed.
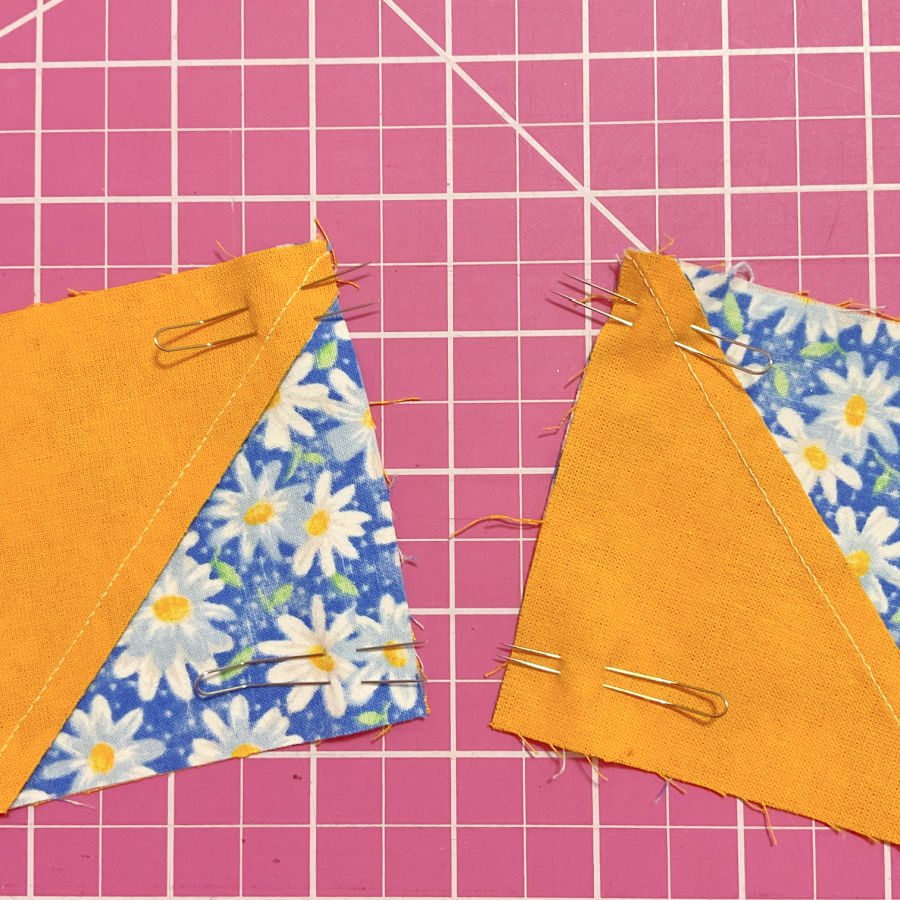
Sew slowly and remove the fork pin before the needle reaches it. Open the block and check the seam match.
But I could not use these Clover fork pins further to match eight points on a pinwheel block. The seams were too bulky, and the pins did not want to go through all those layers.
For a bulky pinwheel center, I used a regular pin through the exact point.
Fork pins are helpful, but they have limits.
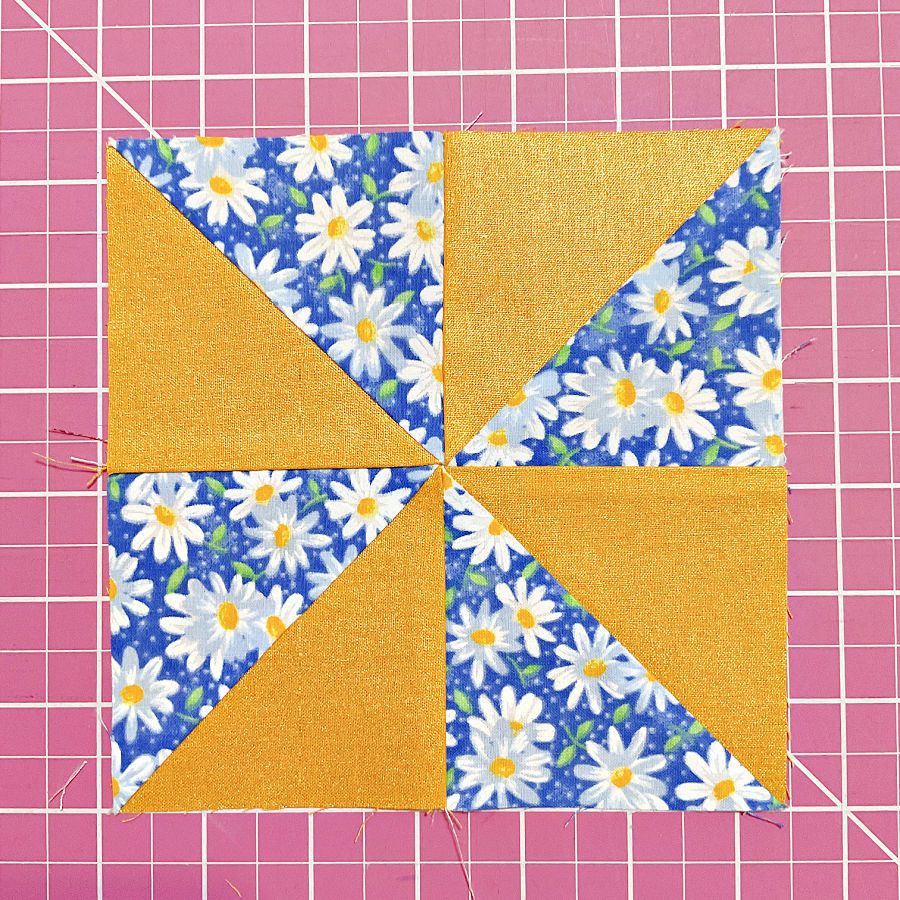
Here is the pinwheel block after sewing the units together. You can see how all the points meet in the center, which is exactly the area where accurate matching matters most.
✅ Related tutorial: How To Make Perfect Pinwheel Quilt Blocks
How To Use Fork Pins For Matching Seams In Garment Sewing
Garment seams are different from quilt seams. Many garment seams are pressed open. Some have bigger seam allowances, often ⅜ inch. In those cases, you can’t nest the seams the way you might in quilting. So here is what I do.
Press the seams first. Then press the seams open. A flat seam is easier to match. A tailor’s clapper can help with garment seams too, especially when the fabric has some thickness.
Place the fabric pieces right sides together. Match the seam lines carefully.
Many tutorials recommend placing the fork pin so the seam sits between the two points of a fork pin. You can use that method, but I think there is one important step before that.
First, you need to know if the seams match.
Here is how I prefer to do it.
Insert one point of the fork pin directly into the seam on the first fabric piece. Then guide that same point directly into the opposite seam on the second fabric piece.
That point confirms the seam match.
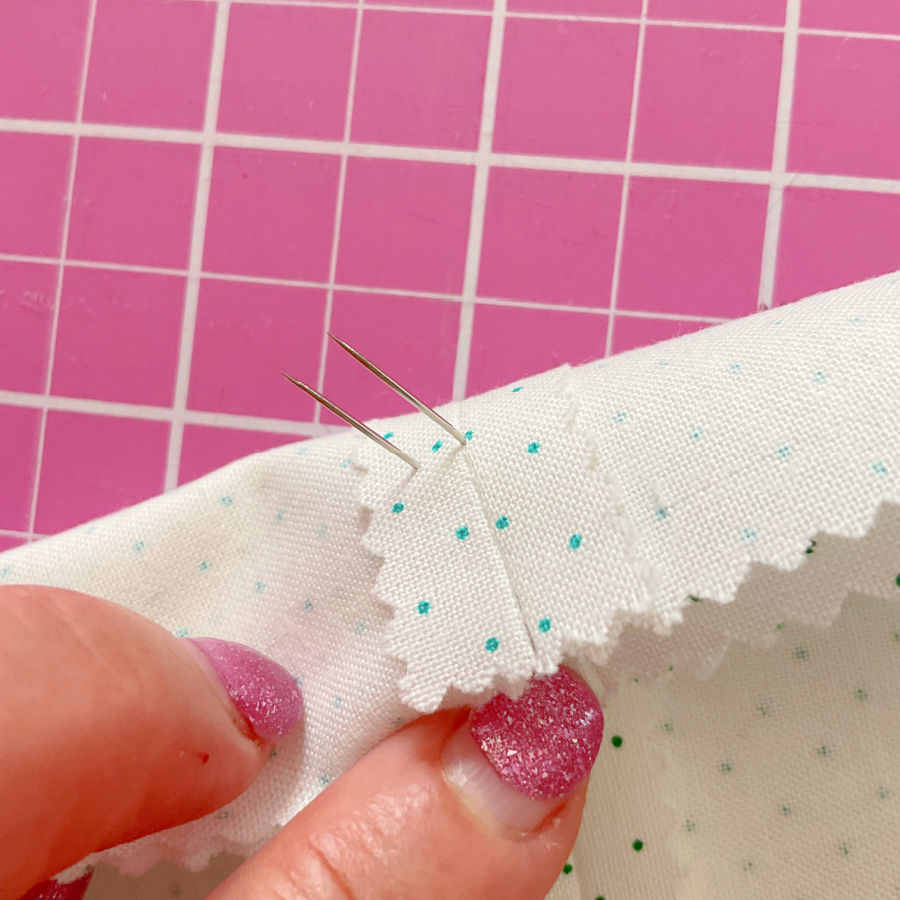
The second point of the fork pin goes into the fabric nearby. It helps hold everything steady.
Keep the pin flat. Add more fork pins as the seam needs more control. Sew slowly and remove the pins before the needle reaches them.

For garment sewing, I often prefer to match the seams first with a regular pin. I have a full tutorial for this method here: How to Match Seams Perfectly: Step-by-Step Tutorial.
And after the seams are matched, you can place the fork pin so the seam sits between the two points and take out the regular pin. But I do not rely on that first. If the seam is only sitting between the two points, you may not know if the seams are truly aligned. If I use the single pin first, I am sure because it goes through both seams.
This is the result after the seams were matched and stitched. The seam intersections line up well, which is always satisfying to see.
Where Fork Pins Help In Garment Sewing
Fork pins are useful in garment sewing anywhere a visible match matters.
They can hold side seams and waist seams on skirts, pants, aprons, and dresses. This is helpful when one seam needs to meet another seam.
They can help with facings and linings. Lining fabric often shifts as if it has somewhere better to be. A fork pin can hold a key point while you sew.
They are also useful for patch pockets. Fork pins can hold the upper corners, center mark, or plaid lines.
Collars and cuffs can also benefit from fork pins, especially at notches and seam points. Small curves need care, though. If the area is too tight or curved, hand basting or regular fine pins may work better.
Fork Pins For Velvet, Faux Fur, And Fabrics With Nap
I also found my Clover fork pins surprisingly useful for sewing velvet, faux fur, and other modern fabrics with nap.
✅ Related tutorial: What is NAP in sewing
These fabrics can be tricky because the surface has direction and texture. The top layer and bottom layer do not always feed through the machine at the same rate. You may match the edges at the beginning, pin everything carefully, and still find that the bottom piece does not match the top piece by the time the seam is sewn.
Velvet can shift because the nap grips and slides at the same time, which sounds impossible until you sew it. Faux fur can do the same thing, especially when the pile gets caught between the layers. Some plush fabrics also seem to crawl under the presser foot.
Regular pins often do not control this movement enough. They hold one spot, but the fabric can still shift around that point.
Fork pins helped me because the two points held the layers more securely. They gave the fabric less room to slide while the seam moved under the needle. The nap still needed care, but the layers stayed matched better than they did with regular pins.
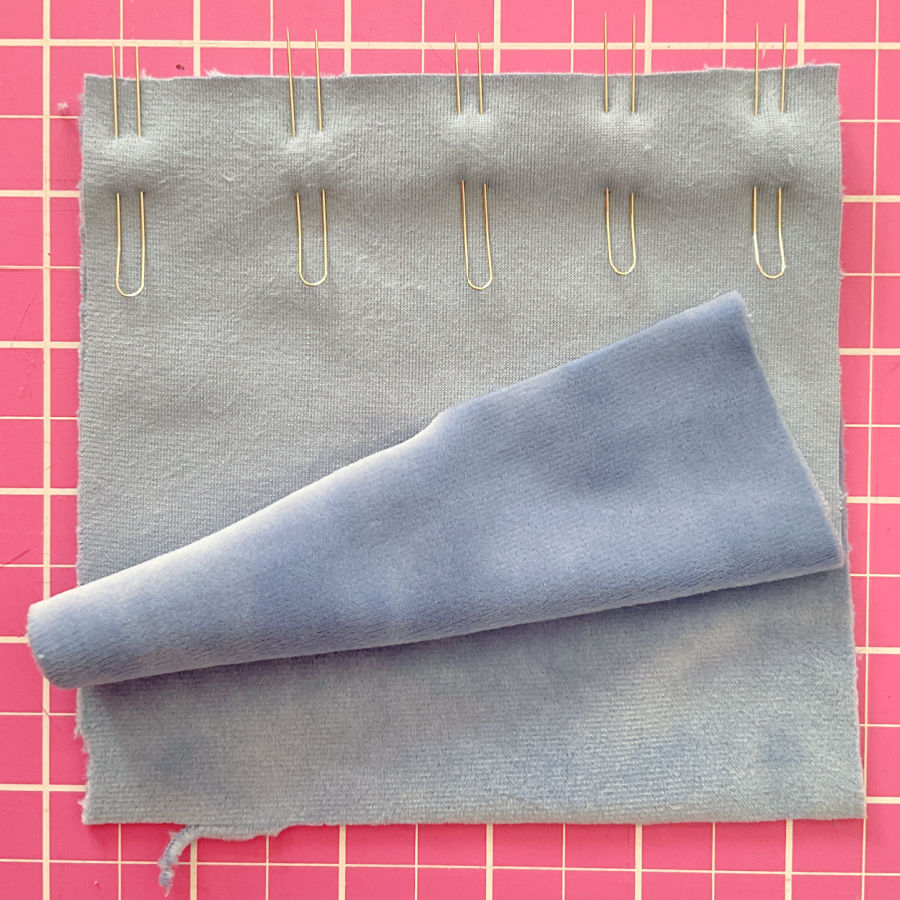
Fork pins do not replace all the usual nap-fabric precautions. You still need to respect the nap direction, cut pieces carefully, and keep the layers from stretching. But for me, they made these fabrics easier to control. The seam stayed aligned better, and the nap did not push the layers out of place as much under the needle.
Tips For Better Results With Fork Pins
#1. Insert both points evenly.
If one point goes much deeper than the other, the fabric can twist.
#2. Keep the pin flat.
A raised pin can distort the fabric and create a bump near the seam.
#3. Use fork pins only where they help.
#4. Remove the pin at the last safe moment.
This keeps the fabric controlled for as long as possible, but protects your needle.
#5. Store them properly.
Thin pins can hide in fabric. A safe storage spot helps keep them from disappearing into a project.
When I first got my fork pins, I stored them in a magnetic pincushion. That seemed like a smart choice because I use magnetic pin holders all the time for regular pins.
But it was not a good choice for fork pins.
The pins became magnetized very quickly, and then they started sticking to each other. Instead of picking up one fork pin, I would get a tiny metal tangle.
Now I keep them in this butterfly dish with some of my other small sewing tools. It works much better. The fork pins stay loose, easy to pick up, and easier to see.
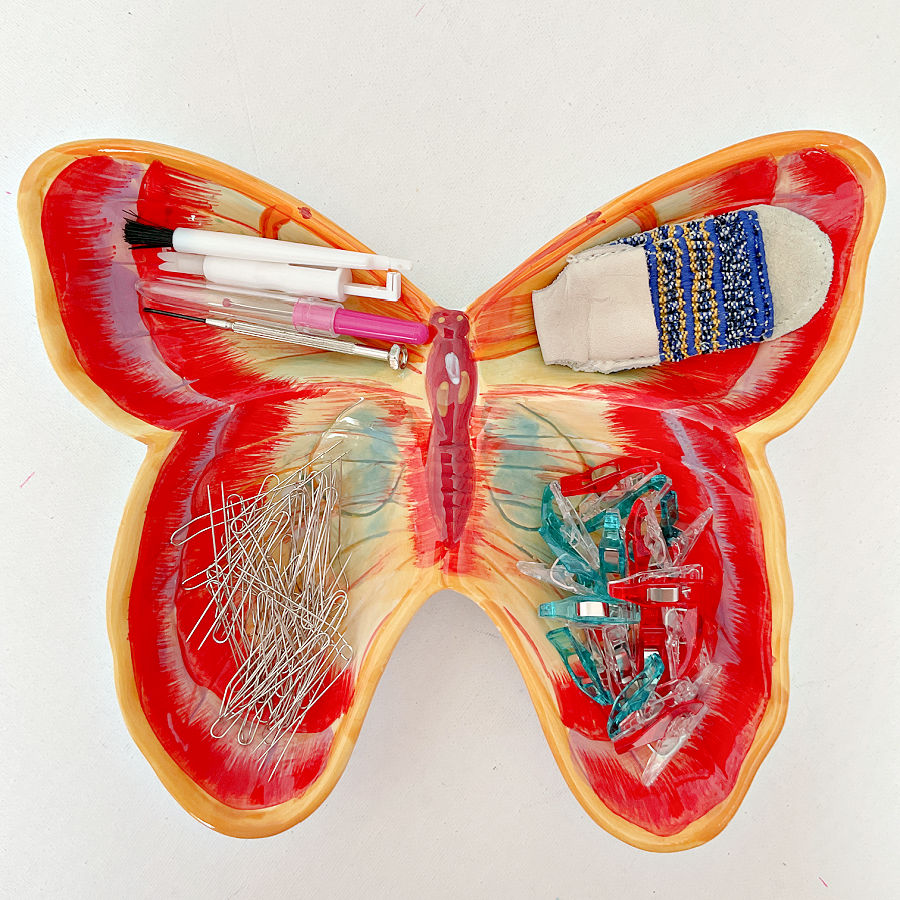
A small dish, box, or pin case is a better storage choice for fork pins than a magnetic pincushion. You want them contained, but not magnetized into one shiny little nest. I like my butterfly dish very much, but I did not find it anymore on Amazon; I found instead a similar dish which is also quite beautiful.

#6. Test on scraps.
This matters with every new tool, but especially with fork pins. Try them on your project fabric first. Check if they slide in easily, or if they bend, distort the fabric, or leave holes. Some fabrics show pin holes. Some fabrics shift no matter what pin you use. A small test saves frustration later.
Common Mistakes With Fork Pins
One common mistake is placing the fork pin too far from the stitch line. If the pin sits too far away, the fabric can still shift where the seam will be sewn.
Another mistake is forcing thin pins through bulky fabric. Clover fork pins are thin and precise, but they can bend. If the seam has too much bulk, use a sturdier pin, clips, or basting.
Do not sew over fork pins. Remove each pin before it reaches the needle.
Fork pins also cannot fix poor cutting. Plaids and stripes need careful layout from the beginning. If the fabric pieces were cut off grain or the design lines were not aligned during cutting, pins can only help so much.
When Fork Pins Are Not The Best Choice
Fork pins are not ideal for very thick fabric layers. Heavy denim, thick coating, and bulky seam intersections can bend thin fork pins.
They may not be right for delicate fabrics that mark easily.
They are not my first choice for tiny curved seams. Fork pins work best when the fabric can stay fairly flat. Sharp curves may need hand basting, clips, or regular fine pins.
Be careful in areas that need pressing with pins in place. Clover fork pins are metal, but pressing safety depends on the fabric, the pin, and the full setup. If you use fork pins with plastic or comfort-grip heads from another brand, check the product information before heat gets near them.
Different Types Of Fork Pins
Clover fork pins are the ones I have and I used. They are thin and precise. Their size is 0.56 mm (needle thickness) x 40 mm (length), and the package has 70 pins.
I like them for lighter fabrics, plaid and stripe matching, seam control, pockets, lining fabric, and some quilt seams. I do not like them for bulky seams because they can bend.
Generic fork pins are also available. Some generic fork pins look similar, but the ones I tried felt thicker and indeed the reviews on Amazon site mention that they are thicker.

That is not always bad. Thicker pins may feel sturdier, but they can be less pleasant on lighter fabric. They may also distort finer fabric more than thin pins.
If you try generic fork pins, check the sharpness and thickness before you use them on a real project.
Magic Fork Pins by Taylor Seville are another option. These have comfort grip handles and two tines. The larger handle may be easier to hold than the slim curved top on Clover fork pins.
Fine Magic Fork Pins are a thinner version. They may be useful if you want a fine fork pin with a larger handle.


Regular Magic Fork Pins are meant for medium to heavier fabrics. They may work better than Clover fork pins when the fabric has more body or the seam has more layers.
Each type has a place. Clover pins feel slim and precise. Magic Fork Pins may feel easier to grip. Generic fork pins may feel sturdier, but they are thicker.
Pros And Cons Of Fork Pins
Fork pins give more control than regular pins at key points. They hold two close spots at once, which helps with plaids, stripes, seam intersections, pockets, linings, and some quilt blocks.
Thin fork pins disturb fabric less than thicker pins. That makes them useful for accurate work.
But there is a trade-off. These pins are very thin, so they are also flexible. The tips can close toward each other if you are not careful.
They can bend too.
There is also a learning curve. That happens with many sewing tools. The first time you use fork pins, they may feel awkward. Your fingers need to get used to the two points, the angle, and the way the pin slides into the fabric.
I also have to say this: these pins may be difficult for hands with arthritis. They are slim and a bit flimsy. If your hands prefer a larger grip, you may like another type of fork pin better.
These Clover fork pins are tools for precision, not tiny crowbars. If the fabric says, “No, thank you,” do not force the pin. That seam may need a different method.
I see them as a specialty tool. Not for every seam. Very useful for the seams that need extra control.
Fork Pins FAQ
Can I sew over fork pins?
No. Remove them before the needle reaches the pin. Fork pins have two points, so they are even riskier than regular pins under the needle.
Do fork pins leave holes?
They can leave holes in some fabrics. Test on a scrap first, especially with delicate fabric.
Why are Clover fork pins bent at the top?
The bend near the top makes them easier to handle and remove. It gives your fingers a small grip point.
Can I use fork pins on thick fabric?
Use caution. Thin Clover fork pins can bend in bulky seams. For medium or heavier fabric, a sturdier fork pin, clips, or basting may work better.
Are Clover fork pins better than no-name fork pins?
Clover fork pins are thinner than some generic fork pins I tried. That makes them nice for lighter fabrics and accurate work. No-name pins may feel sturdier, but they may also be thicker.
Are Magic Fork Pins better than Clover fork pins?
They are different. Magic Fork Pins have larger handles, so they may be easier to hold. Clover fork pins are slimmer and simpler. The better choice depends on your fabric, your hands, and the kind of seam you need to control.
Did this tutorial make you curious enough to try fork pins in your own sewing room? Save the pin below to your sewing board so you can find this guide again when you need help with seam matching, plaids, stripes, or tricky fabrics. You can also follow me on Pinterest for more sewing tips, tutorials, and ideas.
latest posts
- Sewing With Fork Pins: How They Help With Pattern Matching, Slippery Fabric, And Seams
- How Much Fabric Do I Need? 21 Helpful Tips For Calculating Fabric Yardage
- Easy Simple Sewing Project: Fabric Jar Opener
- DIY Oven Mitts: Step-by-Step Sewing Tutorial
- Easy DIY Potholder: New Design
- Tailor’s Clapper: What It Does, Why It Works, And How To Use It Right
- Heat Resistant Batting for Sewing: What It Is, How It Works, and What Makes a Difference
- How To Cut Fabric Straight: 8 Easy Ways Explained
- Narrow Hem On Curves: A Unique Sewing Hack For Slippery Fabrics