Buttonhole Presser Foot 101: What It Is And How To Use A Buttonhole Foot To Create Nice Buttonholes
Learn all about different types of buttonhole presser foot styles and how to use a buttonhole foot for your sewing machine to create precise and appropriately-sized buttonholes the first time.
Sewing, like any other skill or craft, has a learning curve. There may be particular tasks that take longer to master and feel comfortable doing than others. There are specific sewing tasks that tend to strike fear in new (and some experienced) sewists. Other than working with knit fabrics, two of the most common that come to mind are sewing zippers and buttonholes.
When I was pretty new to sewing, I seemed to pick up the technique of sewing zippers pretty quickly. Although I was intimidated at first, it only took a few attempts to feel more comfortable with it. Buttonholes, on the other hand, well, that was a whole different ball game!
Buttons add a nice touch to garments and are very useful, too. So, learning how to sew a button and a buttonhole the right way are handy techniques that I recommend learning. But that doesn’t necessarily mean learning how to do it comes easily.
Although you can sew buttonholes by hand, I highly recommend using your machine to make it easier. My sewing machine (well, one of them, as now I have a few) came with a buttonhole presser foot, and that alone threw me for a loop at first (talk about a learning curve!). Thankfully, after a few disastrous tries followed by a little bit of success, I was on my way to confidently sew great buttonholes.
If you’ve found yourself feeling anxious or intimidated about sewing buttonholes, I just want to send you a little encouragement. You can learn how to do it – it just takes practice!

Today, I’m going to expand on the topic of buttonholes and share with you all my insider knowledge about the buttonhole presser foot. This single sewing attachment alone can be intimidating, but after you read this post, you’ll have all the knowledge you need to practice this skill with confidence.
What is a buttonhole presser foot, and what does it do?
I’m a big proponent of using the right tool for the job. It just makes the job so much easier (and usually gives better results). Although you can sew buttonholes without a buttonhole presser foot, this sewing machine attachment makes the process easier and gives you a very professional-looking buttonhole.
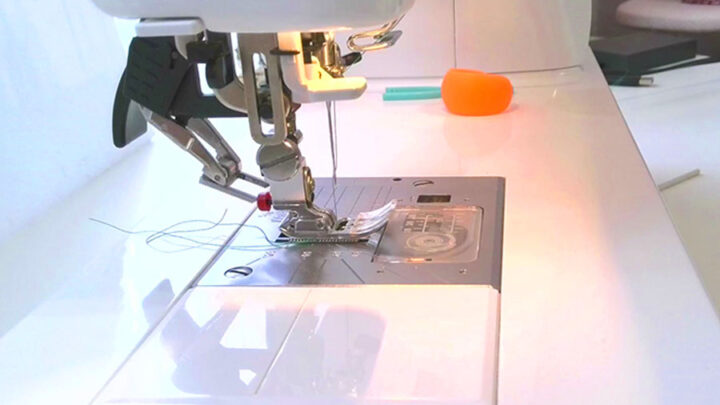
Many older machines and almost all newer machines come with several attachments, including a buttonhole presser foot. It’s an odd-looking attachment that replaces your standard presser foot to help make sewing holes for buttons a cinch.
Note: Some of the links on this page are affiliate links. This means I will receive a commission if you order a product through one of my links. I only recommend products I believe in and use myself.
Different Types Of Buttonhole Presser Feet
One of the things that makes sewing buttonholes so challenging is that there are several different designs of buttonhole presser feet. Unfortunately, you can’t simply watch a YouTube video demonstrating one type and automatically know how to use each different kind.
To help with that, I will give a quick overview of different types of buttonhole presser feet. My goal is to help you figure out which kind of presser foot you have so you can learn how to use it easier.
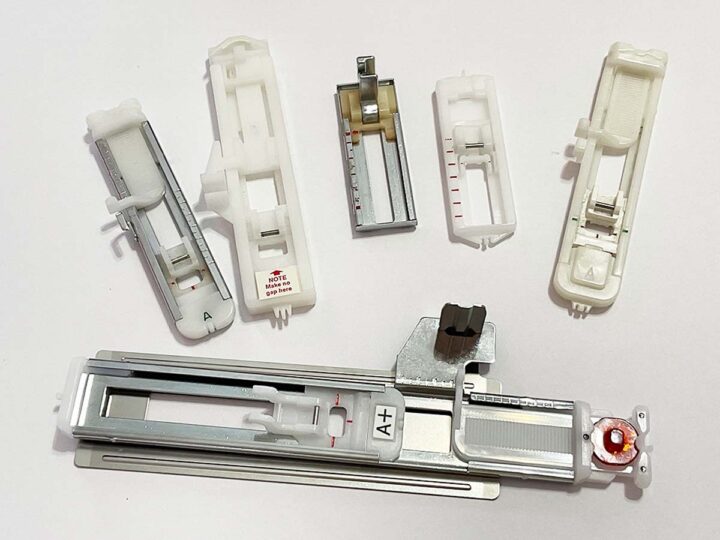
Automatic buttonhole presser foot
This is the most popular type of buttonhole presser feet. The automatic buttonhole presser foot is used on modern computerized sewing machines with an automatic buttonhole feature and works for making 1-step buttonholes.
The automatic presser foot (sometimes also called mechanical) has a slot in the back of the foot to hold the button you are using. The foot works with a sensor on your machine to create a buttonhole that’s the perfect size for your button. These buttonholes are as fail-proof as you can get!
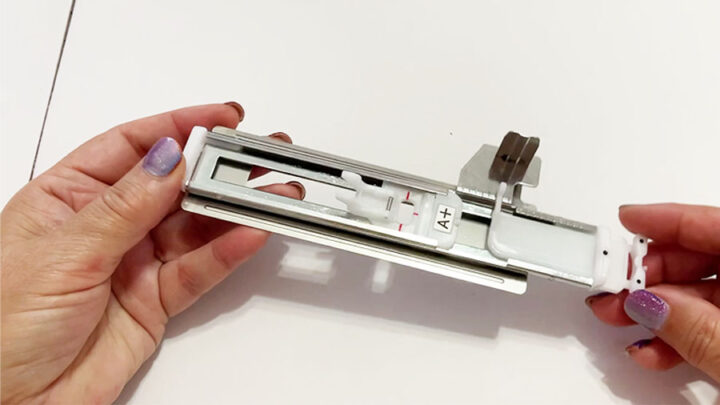
The extra-long sliding foot provides a full view of the buttonhole as you sew to help you accurately make the stitch. It’s usually a snap-on presser foot. The snap-on presser foot feature allows you to easily snap-on presser feet and release them with the pull of a lever. There’s no need for screwdrivers or other tools.
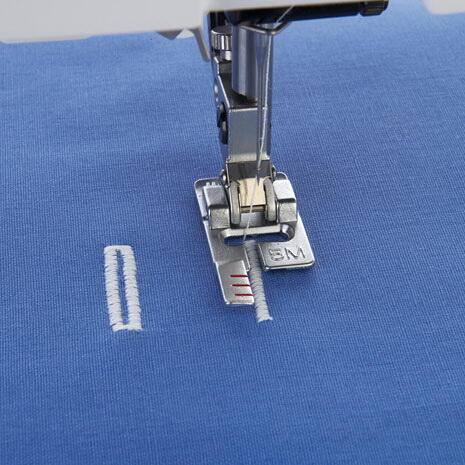
There are several different models of automatic buttonhole feet to choose from. For example, these feet from Brother and Baby Lock have colorful markings on them which are so helpful for positioning the buttonhole on your fabric.
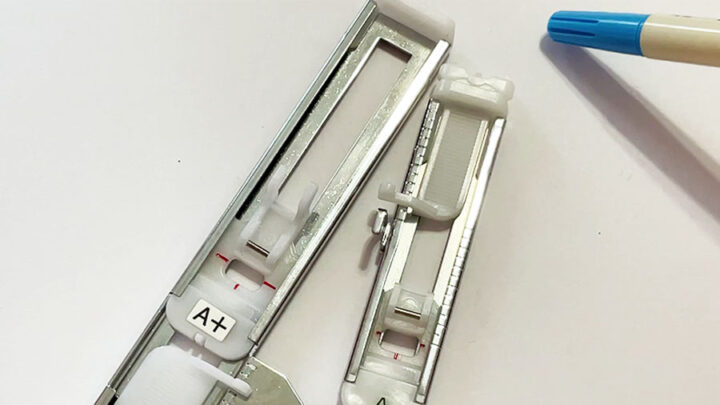
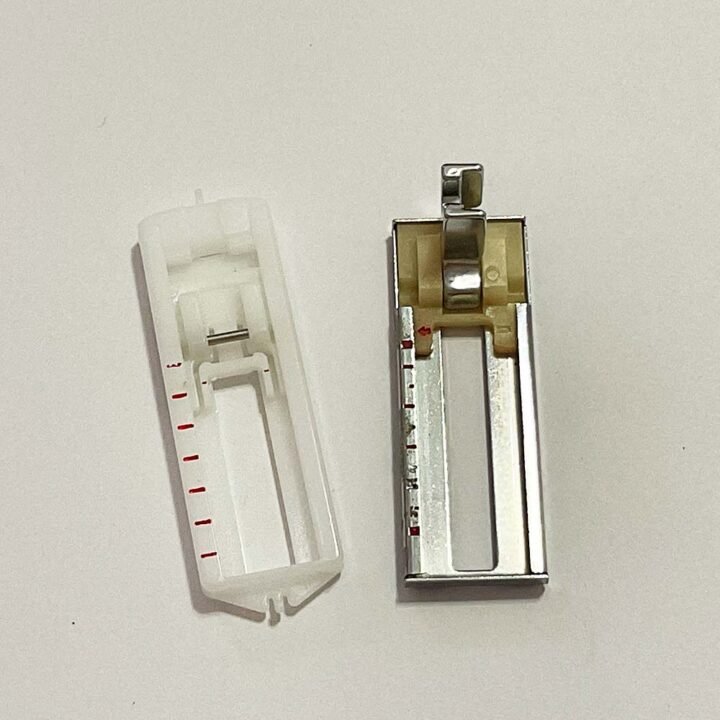
Some automatic buttonhole presser feet are fully plastic and some others have metal “rails”. I noticed that the metal ones perform better than the plastic ones.

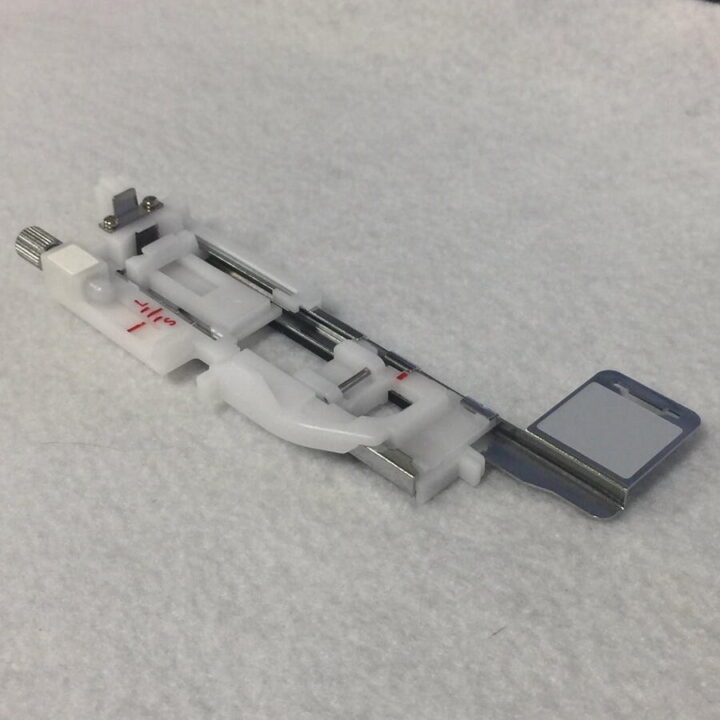
There are automatic buttonhole presser feet with sensors. They are called SENSORMATIC sometimes. This buttonhole presser foot from Janome has a sensor right on the foot that works with sensors in the sewing machine to create buttonholes in the exact size needed for your buttons.
And this newer buttonhole foot from Brother also has sensors to make buttonholes – these 3 dots are the sensors.
The newer buttonhole presser feet might have a stabilizer plate (called also a buttonhole plate or underplate).
What is the purpose of a buttonhole stabilizer plate?
Sewing buttonholes can be challenging on their own, but they can be even harder to do well when working with uneven layers or certain types of fabric like fleece, denim, heavyweight wool, or knit fabrics. A buttonhole stabilizer plate (underplate) attaches to the presser foot to feed the fabric between the foot and the stabilizer plate. It helps to smoothly feed uneven layers so that your buttonholes come out even and precise every time.
The underplate from Janome works with all Janome sewing machines that have the Automatic Buttonhole Foot R. To use this plate, all you have to do is slide the buttonhole foot onto the plate holder and make a few small adjustments to the plate.
This buttonhole presser foot (in the image below) with the stabilizer plate is from the Brother Luminaire machine.
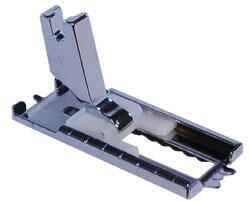
Sliding buttonhole presser foot
Sliding buttonhole presser feet are shorter than the automatic buttonhole presser feet and work for making 4-step buttonholes. The sliding foot has markings on it and provides a full view of the buttonhole markings as you sew to help you accurately make a correctly-sized hole. It’s used on older machines and also on basic modern ones.
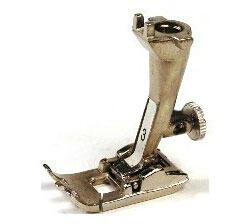
Low shank and high shank buttonhole presser feet
There is a metal rod in your sewing machine that holds the presser foot – it’s called SHANK. In the low-shank sewing machine, the distance between the attachment screw and presser foot is lower than in high-shank machines and usually is about 3/4 inch. The distance in high-shank sewing machines is about 1 inch or more. Most home sewing machines are low-shank machines.
Most low-shank buttonhole feet are also snap-on feet.
And this is a high-shank buttonhole foot for older machines.
1-Step Buttonhole vs. 4-step Buttonhole
With both of these types of buttonholes, the machine does the work for you. The main difference is that with the 1-step version, the machine uses an automatic presser foot and creates the entire buttonhole without stopping. You’ll have a buttonhole where both sides look the same.
By contrast, a 4-step buttonhole breaks down the process into four steps. The machine will stop after each part and wait for permission to do the next step. Some people prefer this method because it allows them to have more control over the process.
Manual buttonhole presser foot
Most modern machines have an automatic buttonhole setting (and presser foot). However, many older machines don’t have this feature. In that case, you need to use a manual presser foot like this one from Bernina and manually make your buttonhole.
This manual buttonhole presser foot in the image below is from Pfaff.
Transparent buttonhole presser foot
There are also transparent buttonhole presser feet made from clear plastic. You can see through them.
For example, a transparent buttonhole presser foot from Janome is the tool you might want to use when making buttonholes in tight areas such as collars or sleeves.
How To Use A Buttonhole Presser Foot On A Sewing Machine
I mentioned earlier that one of the challenges with using a buttonhole presser foot is that the exact process varies between presser foot designs and sewing machine models.
Here I will show you how to use the most popular automatic buttonhole presser foot. I am going to use my Janome 6600 sewing machine.
Step 1
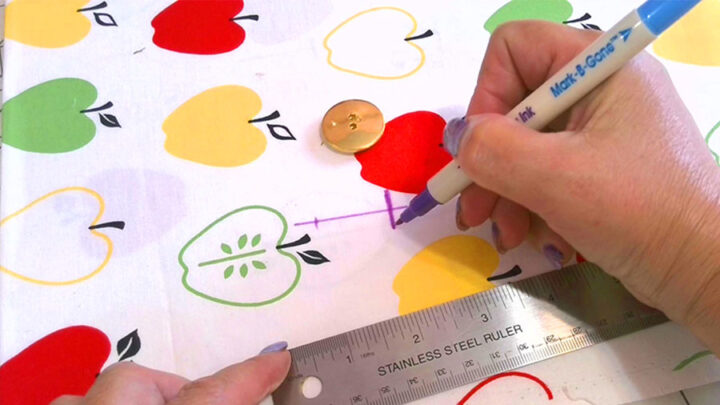
Mark the buttonholes on your fabric
Choose the buttons for your project. They should be the correct size for your buttonhole foot.
Mark the position of the buttonholes on your fabric. The maximum length of the buttonhole for most automatic buttonhole feet is about 1 1/16 inches. But the foot I have from Brother Luminaire is about 1 ¾ inches.
You should mark the center line (it’s actually a buttonhole cutting line) and the start line. The machine will automatically make the buttonhole of the desired length. But you can also mark the full length of the buttonhole.
Step 2
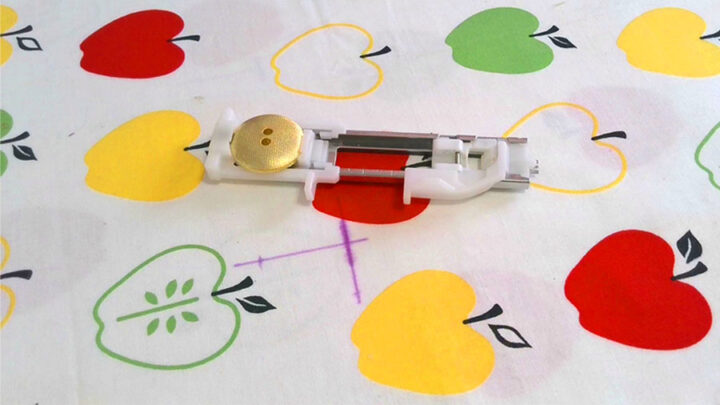
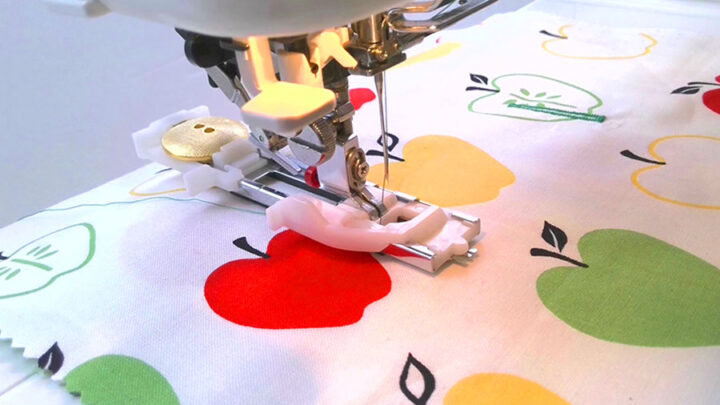
Insert the button into the buttonhole foot
Pull out the holder plate on the buttonhole foot and place the button there. Then tighten the holder plate around the button.
Not all buttons will stay in the holder plate though. If it’s a shank button it might fall off right away. This is no problem, just pull out the holder plate for the size of the button and keep it without the button.
Step 3
Prepare your sewing machine for making the buttonholes
Thread the machine with the proper thread for your project.
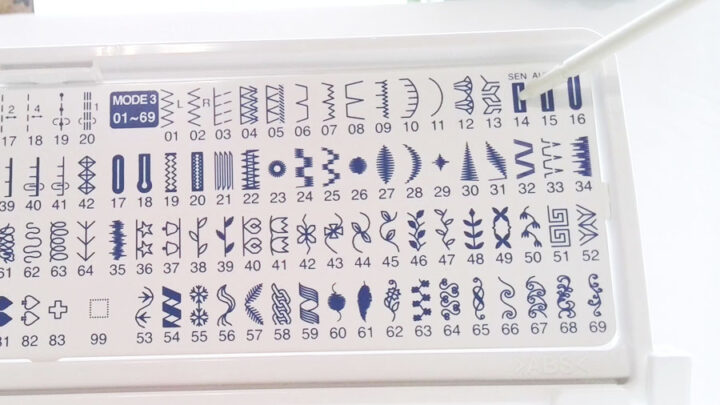
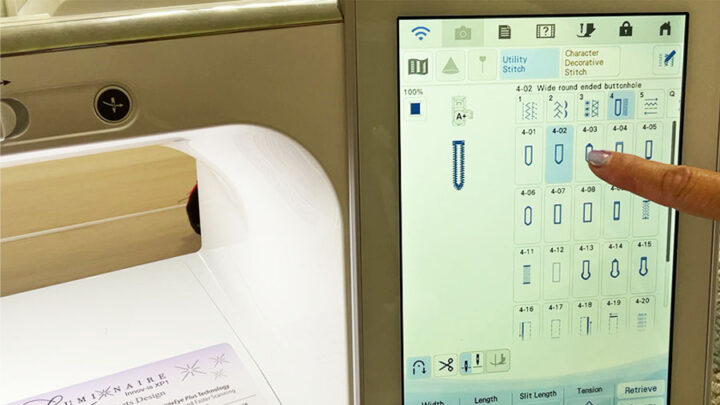
Select a buttonhole stitch you want to use.
For example, my Janome has 7 types of buttonholes. I use all of them but for the cotton fabric I have chosen for this demonstration, I use a rectangular buttonhole stitch number 14.
And Brother Luminaire machine has 15 buttonhole stitches.
Step 4
How To Attach A Buttonhole Presser Foot To Your Sewing Machine
In the past, you would need to use small screwdrivers (or other tools) and try to hold the foot with one hand while you screwed in an unstable screw with the other hand. Now, most sewing machine models have redesigned the attachment configuration into the snap-on version.
To start, turn off your machine (or lock all keys and buttons on high end sewing machines like Brother Luminaire) because you might accidentally press the “start” button on your machine (or even another button) and the machine will start. It may be dangerous and cause injury.
Manually raise the needle in the highest position (if it’s not in this position already).
Raise the presser foot lever.
Press the button on the presser foot holder (mine is red) and remove the presser foot that was on the machine before.
Position the buttonhole foot under the holder and align the foot pin with the notch in the holder. Make sure that you place the foot in the correct direction, because otherwise the needle may hit the foot and break when you start to sew.
“Snap” the foot into its place.
Step 5
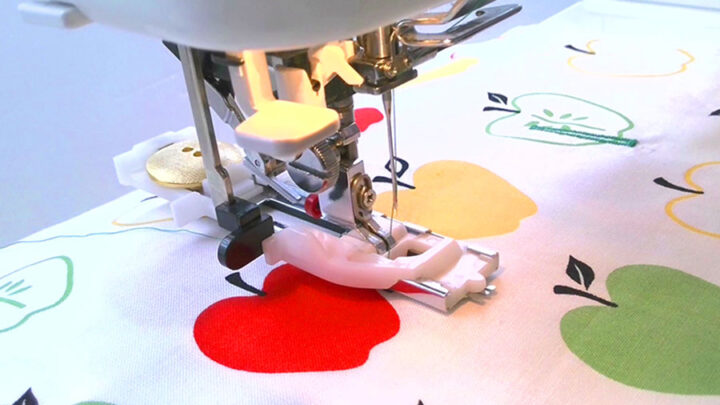
Position the presser foot on your fabric
Place the fabric under the presser foot. You have to align the presser foot markings with the marks you made on your fabric. Lower the presser foot.
Pass the thread underneath the presser foot.
Step 6
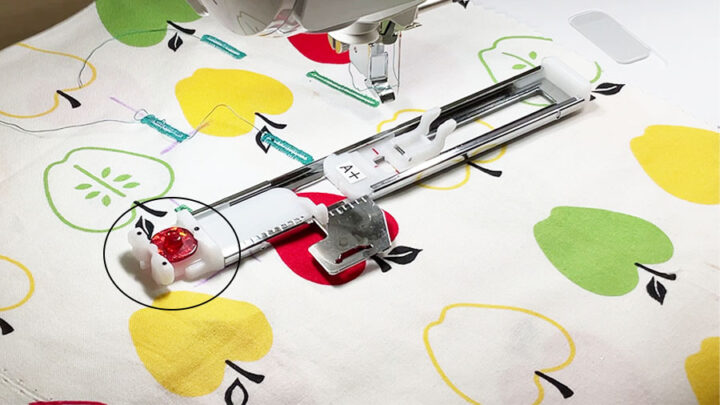
Lower the buttonhole lever (if your foot doesn’t have a sensor)
This is a very important step in the process of making buttonholes with an automatic buttonhole foot on many machines. But many people often forget to do it and the result is that the machine doesn’t make a correct buttonhole because it doesn’t know the buttonhole size. The buttonhole lever must be positioned behind the metal bracket on the buttonhole foot so that the sewing machine makes the buttonhole exactly the size you need.
Step 7
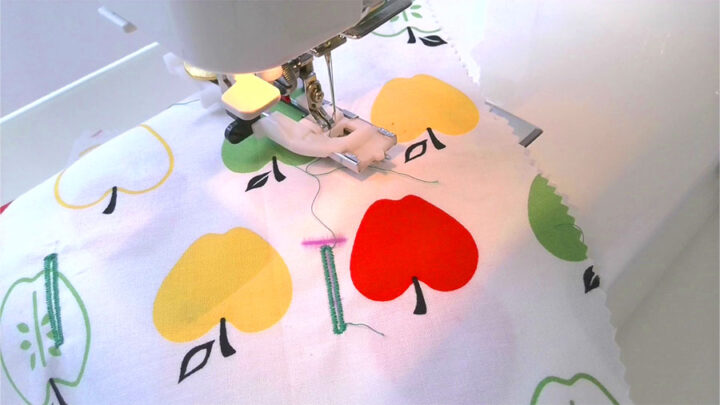
Sew a buttonhole
Start sewing. Feed the fabric gently by hand while the machine is making the buttonhole.
The machine will sew the buttonhole and stop when the buttonhole is complete.
Well, it seems easy enough, right?
But you might have many different problems with sewing buttonholes. I address a few of them in a different tutorial Sewing machine buttonhole troubleshooting, so check it out, it’s a very helpful video.

I also want to give you a quick overview of the different types of buttonhole presser feet all in one convenient place: here!
Examples Of How To Use A Buttonhole Presser Foot In Various Situations
Here’s where I’ll go over some of the differences between presser foot styles and machine models and offer some resources for more information.
Please remember to use your sewing machine manual as your first resource since it will have the most accurate information for your exact model.
Sliding Buttonhole Foot
You can see how to make a 4-step buttonhole using a sliding foot in this tutorial.
Bernina Buttonhole Foot
Here’s a great video tutorial from Made To Sew for using a Bernina machine to make buttonholes. It walks you through the settings on your machine as well as the entire process from start to finish.
Pfaff Sensormatic Buttonhole Foot
HeirloomCreations made a great tutorial video for making buttonholes with your Pfaff machine. It even covers the Sensormatic foot as well as the manual presser foot.
Tips For Using A Buttonhole Presser Foot
- Add some stability to your fabric by using interfacing between the layers of material where you want to make a buttonhole.
- Use a fabric marking tool to mark the start and stop points of your buttonhole before sewing.
- Once you’ve finished sewing your buttonhole, use a seam ripper (or other cutting tools) to open it up. You can insert a sewing pin at the end of your buttonhole to prevent you from cutting too far.
- Always do a test run on a scrap piece of fabric before making one on your project!
Where To Buy A Buttonhole Foot
If you have recently purchased or plan to purchase a sewing machine, your machine probably includes a buttonhole foot as part of the accessories it comes with.
However, if you need to buy a buttonhole presser foot, look for a presser foot designed to fit your sewing machine model before buying. You are the most likely to find what you need at your local sewing store or online on Amazon or Sewing Machines Plus.
————————————————————————-
I hope this buttonhole presser foot guide helps to answer your questions and take the difficulty out of making buttonholes! If you have any questions that I didn’t cover, please leave them in the comments section so I can answer them for you.
✅ What if you don’t have a buttonhole foot? Then read my article How to Make a Buttonhole with a Zigzag Stitch without a Buttonhole Foot!
Did you find this tutorial helpful? If so, save this pin (see below) on your sewing board so you can come to this tutorial later when you need this information on how to use a buttonhole foot, and follow me on Pinterest for more tips, tutorials, and inspiration!
latest posts
- Butterfly Quilt Block Tutorial – Foundation Paper Piecing
- How To Sew Quilt Squares So The Corners Match
- Sewing With Fork Pins: How They Help With Pattern Matching, Slippery Fabric, And Seams
- How Much Fabric Do I Need? 21 Helpful Tips For Calculating Fabric Yardage
- Easy Simple Sewing Project: Fabric Jar Opener
- DIY Oven Mitts: Step-by-Step Sewing Tutorial
- Easy DIY Potholder: New Design
- Tailor’s Clapper: What It Does, Why It Works, And How To Use It Right
- Heat Resistant Batting for Sewing: What It Is, How It Works, and What Makes a Difference