Secrets to Sewing with Difficult Fabrics: Tips for Perfect Results
Sewing with difficult fabrics can turn a simple project into a long, frustrating afternoon. Chiffon slips while you cut it. Velvet and fur layers shift as you stitch. Jersey seams stretch out of shape. Vinyl sticks to the presser foot, and denim gets too thick to sew where seams cross.
Each of these fabrics causes trouble for a different reason. That’s why there’s no single technique that works for all of them.
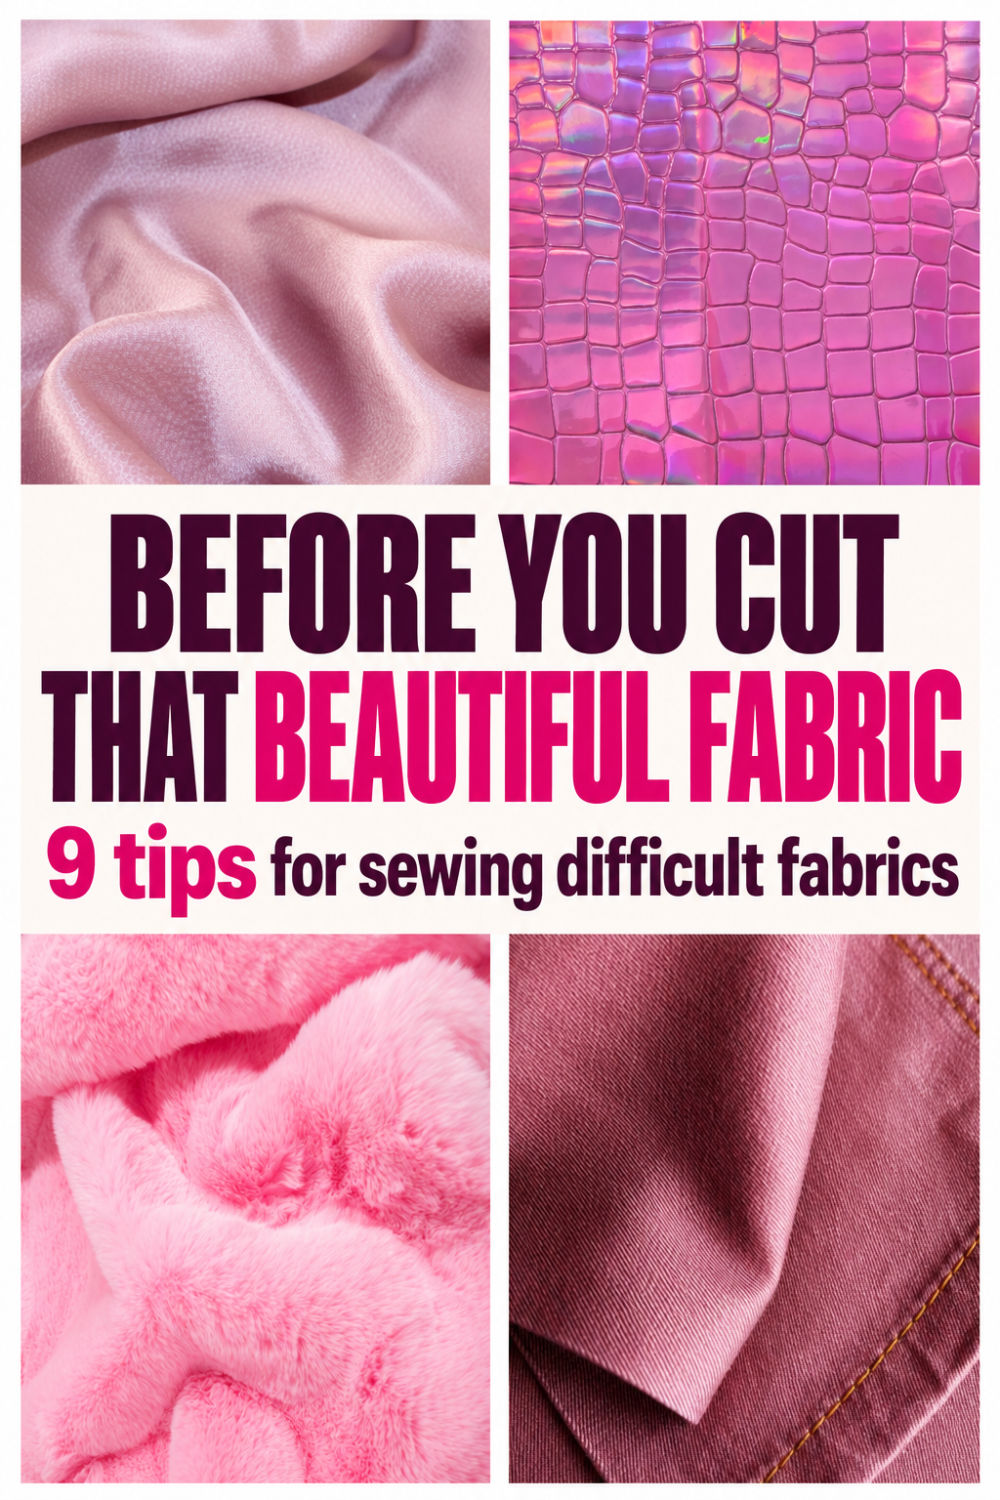
The good news is that a handful of smart habits prevents most of these problems before they start. Below, you’ll find essential tips that work for almost any tricky material, plus quick advice for specific fabrics.
Prefer to read without ads?
I created a PDF version of this guide for anyone who likes to keep sewing guides saved, printed, or easy to read without ads. It includes the same helpful information in a simple format you can download and use whenever you need it.
The PDF is available in my shop for a small fee. It’s a nice option if you want to support my work and keep this tutorial close to your sewing machine.
Why Are Some Fabrics So Difficult to Sew?
Difficult fabrics aren’t all difficult in the same way. Each one has its own special talent for ruining your afternoon.
- Slippery fabrics shift during cutting and stitching. They have the grip of a buttered noodle.
- Stretchy fabrics get distorted. Pull a little, and your straight seam turns into ocean waves.
- Thick fabrics create bulky seams. Stack enough layers, and you’ll want a ladder to get the presser foot over the top.
- Delicate fabrics snag, fray, or show needle holes. They remember every mistake. Forever.
- Fabrics with pile or special coatings need careful handling. Velvet bruises. Vinyl sticks. Both hold grudges.
So before you pick a fix, figure out which problem you actually have. You can’t treat a slippery fabric like a thick one. That’s like giving the cat a bath because the dog rolled in mud.
Yes, some fabrics are difficult to sew. And yes, I keep buying them. Cotton is wonderful. I love cotton. Cotton is the sensible shoes of the fabric world. But sometimes you want the high heels. You know they’ll hurt. You wear them anyway, because they look fabulous.
That’s me with satin. And velvet. And faux fur. And leather. And anything that comes with a warning in the sewing forums.
Is there extra unpicking? Yes. Extra hand basting? Yes. But when someone looks at the finished project and asks, “Where did you buy that?”, I suddenly forget the three hours I spent fighting one seam.
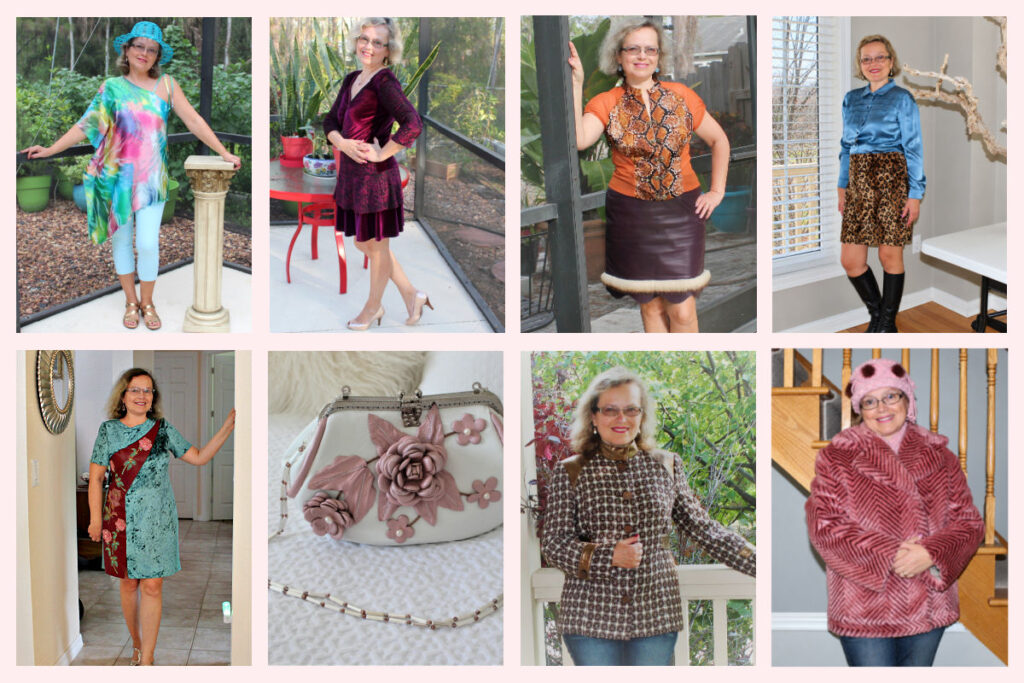
Here are a few of my projects made with difficult fabrics. Proof that sometimes the hard way is the fun way. Or at least the shiny way.
Essential Tips for Sewing Difficult Fabrics
Tip 1. Choose Your Pattern Carefully
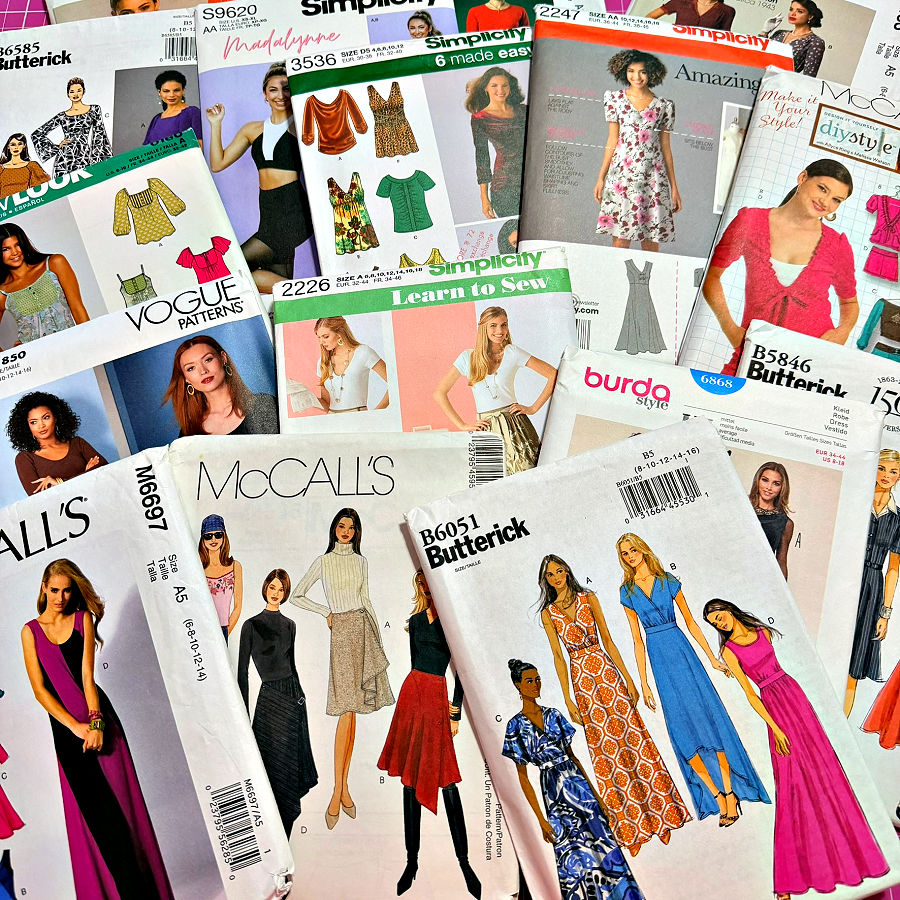
Picking a pattern for a tricky fabric is basically matchmaking. Some couples just aren’t meant to be.
Soft, drapey chiffon wants a simple design with gentle gathers. It does not want twelve darts, a welt pocket, and a structured collar. And if you ask stiff denim to make a flowy ruffle, it will laugh at you.
- Match the pattern to the fabric’s weight, drape, and stretch. Check the “suggested fabrics” list on the pattern. It’s there to help, not to fill the space.
- Keep construction simple with difficult materials. Fewer seams mean fewer chances for things to go sideways.
- Think about seam bulk before you cut. That cute bag pattern with six layers meeting at the strap? Lovely in quilting cotton. In vinyl, it’s a speed bump with stitches.
For your first project with an unfamiliar material, choose a design with fewer seams and construction details. You can concentrate on handling the fabric without also working through a complicated pattern.
Tip 2. Prepare Your Fabric
“Prepare your fabric.” Every sewing book says it. It’s easy to say. It’s a lot harder to do when the fabric in your hands is silk chiffon, the most beautiful thing in your whole stash. Do you wash it? Do you not wash it? Do you just stare at it for three weeks?
If you’re a professional seamstress, you already know the answer. You probably have a dry cleaner on speed dial too. I’m a hobby sewist. It never once crossed my mind to walk into a dry cleaner with a piece of fabric and ask them to “prepare” it. I don’t even take my clothes to the dry cleaner anymore. Chemicals? No, thank you.
So I prewash my silk. And I keep washing everything I make from it. Silk is much tougher than it looks.
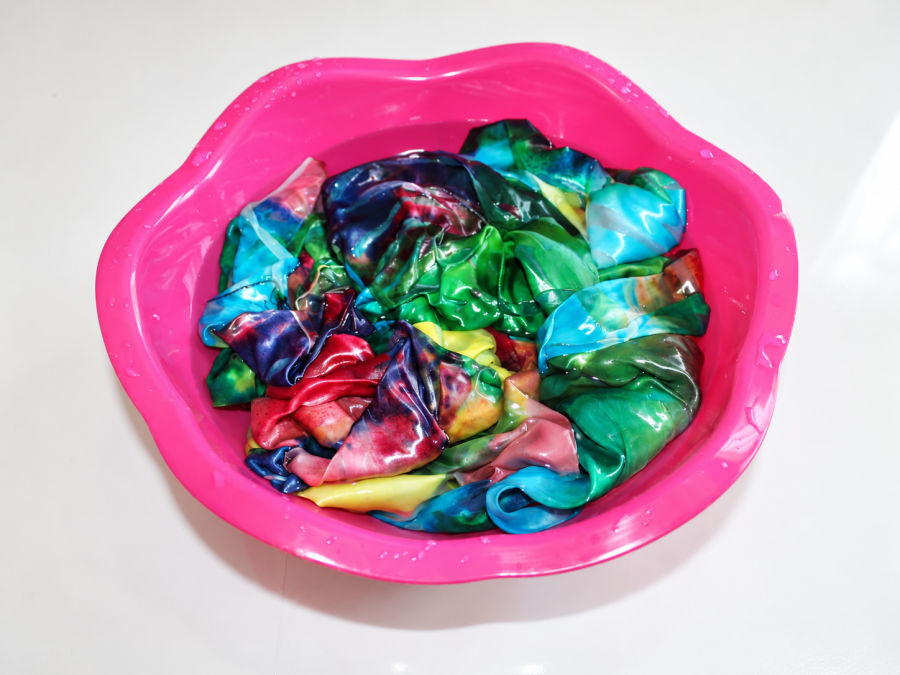
My rule is simple: prepare the fabric the same way you’ll clean the finished project. If I’m going to wash it later, I wash it now. Sew first and wash later, and your silk scarf might come out as a handkerchief.
Here’s what that looks like with difficult fabrics in my sewing room:
- Silk: I prewash it by hand in lukewarm water, roll it in a towel to remove the water, and iron it while it’s still a little damp. Before washing chiffon, I finish the raw edges with a serger or zigzag stitch. Otherwise, it comes out of the water with a fringe of tangled threads. The two exceptions: heavy home décor silk for curtains or pillows, and embroidered silk, which may not shrink evenly. I don’t prewash them.
- Denim: Always prewashed. It can shrink, and dark denim loves to share its dye. Wash it on its own, or toss in a color catcher sheet. Unless you’ve always dreamed of light-blue dish towels.
- Stretchy knits: Always prewashed. Knits often shrink more in length than in width. A wash also helps them relax back onto the grain after months of being wound tightly on a bolt. Dry them the same way you’ll dry the finished project.
- Velvet: Yes, I prewash velvet too. I’ll admit I didn’t use the most expensive kind. Wash it gently, and shake it out well before drying so the pile fluffs back up. If your velvet cost more than your sewing machine, test a scrap first.
- Minky: I prewash it too, even though it barely shrinks. The point is the fluff. A wash gets rid of loose fibers and factory finishes, so they end up in the lint trap instead of all over your sewing room.
- Faux fur, leather, and vinyl: No prewashing. Water can mat the fur, ruin leather, and damage the vinyl coating. The good news is that these materials need very little preparation. If they have folds or wrinkles from the roll, I sometimes press them with a hot iron, but only through my pressing cloth. Never directly.
A pressing cloth tip: My favorite pressing cloth is a piece of silk organza. You can see right through it, so you always know where the iron is. And it handles high heat and steam without a fuss.
What about the care instructions? In the store, they’re printed on the end of the fabric bolt. Online, they’re in the product description. Honestly? By the time I get home, I’ve forgotten what the bolt said. What matters more is knowing the fiber: silk, cotton, polyester, wool. That tells you most of what you need to know.
And “dry clean only”? Many manufacturers put that label on silk because they don’t prewash the fabric themselves. If you prewash your fabric, you can usually wash what you make from it. Not sure? Wash a small scrap and compare it with the rest of the fabric.
✅ Related tutorials:
Tip 3. Cut Your Fabric Carefully
Cutting difficult fabric can be a real nightmare. If the pieces come out crooked, no amount of careful sewing will fix them. Trust me, I’ve tried.
Start with the right tools and setup:
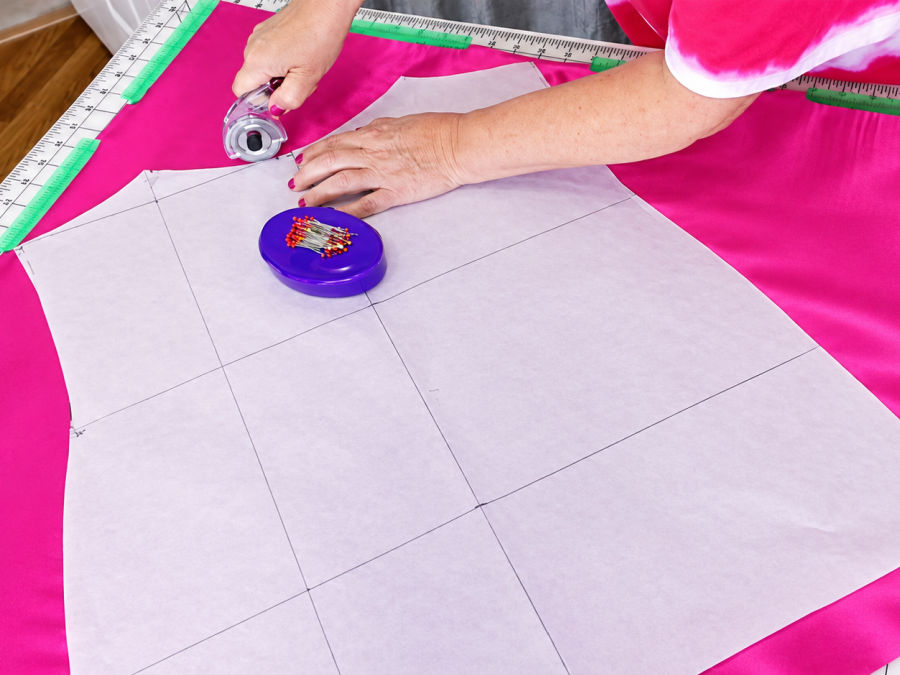
- Scissors or a rotary cutter? I use both. And yes, I cut most of my patterns with a rotary cutter, even the ones with curves. Here’s why. Scissors lift the fabric off the table with every snip, and slippery or stretchy fabric moves the moment it’s lifted. A rotary cutter keeps everything flat. For tight curves, a smaller 28 mm blade turns much more easily. I keep my scissors for notches, corners, and fur.
- Use pattern weights instead of pins. Pins shift slippery fabric and leave permanent holes in vinyl and leather. Fancy pattern weights are lovely. So are your phone, a coffee mug, and a can of beans. The cat also works, but only on her schedule.
- Check the grainline, stretch direction, or nap. Velvet looks darker from one direction and lighter from the other. Cut your pieces facing different ways, and your pillow will look like two different pillows that met in the middle.
Then adjust for the fabric you’re cutting:
- Slippery fabrics: Spray silk, chiffon, or satin with Faultless spray starch and press it dry before cutting. The fabric gets a little crisper and handles almost like cotton. The starch washes out later. Cut in a single layer, because folded chiffon means two layers sliding in two directions, and two pieces that don’t match. Painter’s tape along the edges holds the fabric to the table.
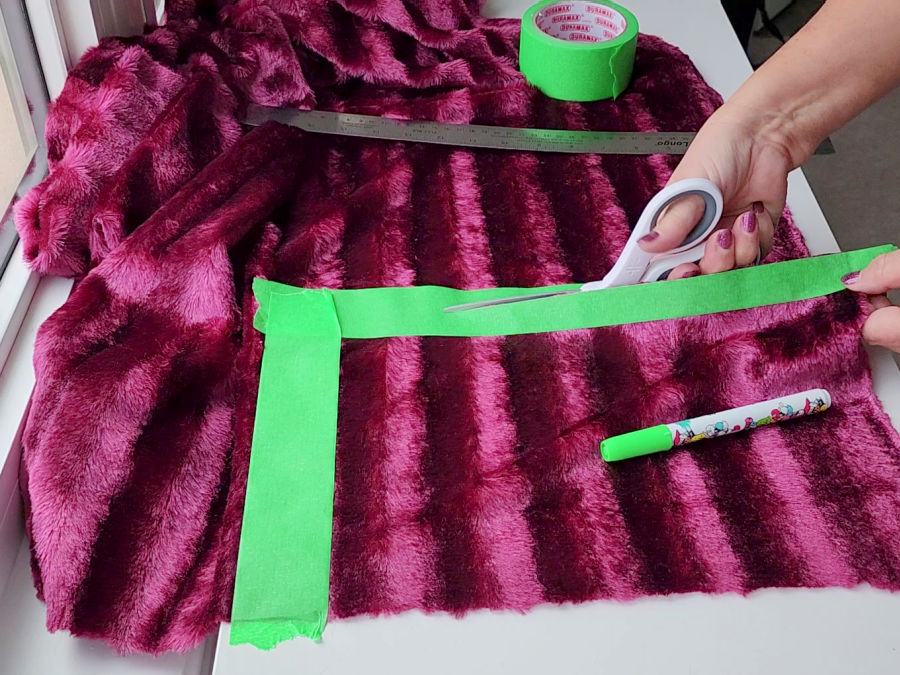
- Faux fur: Most fur projects have straight lines, like pillows, throws, or trims. Here’s my trick. On the back, cover the cutting line with painter’s tape, then cut right through the tape. Cut the backing only, with the tips of sharp scissors, so you don’t chop the fur. The tape keeps the edge neat and catches a lot of the fluff that would otherwise end up on your floor.
- Vinyl and leather: Good news! They’re actually easy to cut. They don’t fray and don’t slip. Just use a sharp tool. A dull blade drags and leaves jagged edges. A rotary cutter with a fresh blade gives you the cleanest cut. Mark your lines on the back.
- Stretchy knits: The edges love to roll up. Lay the whole piece flat on the table, with nothing hanging over the edge, since hanging fabric stretches. A light spray of starch along the edges, pressed flat, stops the rolling. Cut with a rotary cutter, and follow the little vertical ribs to stay on grain.
Tip 4. Choose the Correct Sewing Machine Needle
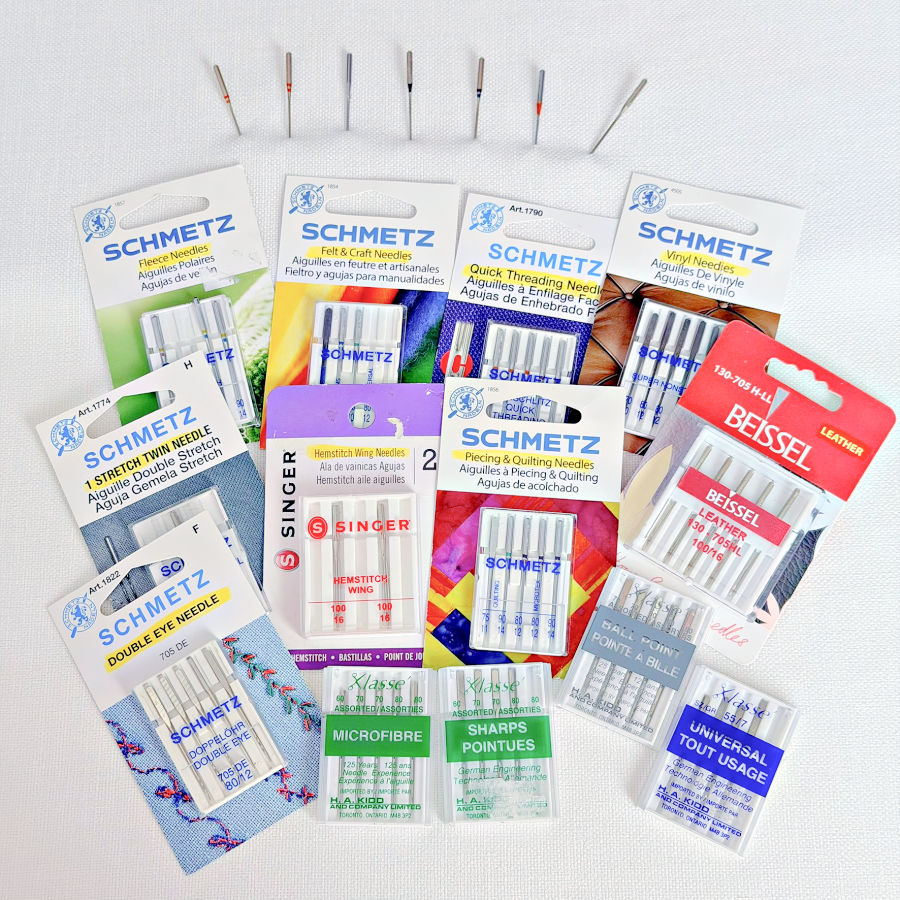
Needle type matters just as much as size. But you don’t need to memorize a giant needle chart. The easiest way to choose is to start with your fabric. (If you’d like the full rundown on every needle out there, it’s in my guide 19 Types of Sewing Machine Needles and What They’re Used For.)
Here’s what I reach for:
- Chiffon and lightweight silk: A fine Universal or Microtex needle, size 60/8 to 70/10. For silk chiffon and charmeuse, my secret favorite is a tiny Universal 55/7. Most sewists don’t even know this size exists, and it’s hard to find. But when I tested it on silk chiffon and then pulled the stitches out, there were no holes left at all. A needle that’s too thick does the opposite: it leaves a row of holes in silk that never goes away. Confused by all the numbers on the package? Here’s Sewing Machine Needle Sizes Explained.
- Stretchy knits: A Jersey (ballpoint) needle for regular knits like cotton jersey and interlock. Its rounded tip should slide between the loops instead of piercing them – that what they say, I have no way of checking it though. For anything with spandex or Lycra, switch to a Stretch needle, which helps prevent skipped stitches. Not sure what’s in your knit? A Stretch needle never hurts. A sharp needle, on the other hand, can start a run in a knit, just like the one in your best pantyhose.
- Denim: A Jeans needle, 90/14 for lighter denim and 100/16 for heavy denim. Hemming just one pair of jeans? A Universal 90/14 will do the job. Just not a thin 75/11, because that one will snap. Making denim bags every month? Buy the Jeans needles. I go through this and many more fabric-and-needle pairings in How to Choose the Right Sewing Machine Needle for Your Project.
- Velvet: A Universal 80/12 or 90/14 for lighter velvet, and 90/14 or 100/16 for thick velvet. If your velvet stretches, it’s a knit, so use a ballpoint needle instead.
- Minky and other plush knits: These are knits too, so use a ballpoint or Stretch needle. Size 80/12 works for lighter plush, and 90/14 for thicker ones.
- Faux fur: A Universal 90/14 or 100/16, and 110/18 for really thick fur. (Real fur is a different story. It needs a Leather needle.) When you’re done, clean out the fluff from around the bobbin. Faux fur finds its way into everything.
- Genuine leather: A Leather needle. Its wedge-shaped point cuts a clean slit instead of punching a round hole. Size 90/14 or 100/16 works for most projects, and 110/18 for thick leather. I’ve read that Universal and Microtex needles work on leather too. They didn’t work for me. I got skipped stitches every single time. More in Leather Sewing Needles: What They Are and How to Use Them.
- Vinyl and faux leather: My favorite is a Non-Stick (Teflon-coated) needle, size 80/12 or 90/14. The coating keeps sticky residue from building up on the needle. A Leather needle works too, especially for heavy upholstery or marine vinyl, in size 100/16. Whatever you choose, go as small as the vinyl allows. Bigger needles make bigger holes, and in vinyl, holes are forever.
Every time I switch fabrics, I switch needles. Which creates a brand-new problem. A few days later, I look at my machine and have no idea which needle is in it. Universal? Stretch? 75 or 90? The tiny numbers on the needle are no help unless you keep a magnifying glass next to the machine. These days, I track the needle in the machine with a little dial, and I store partially used needles by type and size. Here’s the needle organization system I tried.
And please, replace dull or damaged needles. A dull needle doesn’t announce itself. It just quietly causes skipped stitches, snags, and pulled threads, then lets you blame the machine.
Pro tip from the School of Hard Knocks: If you can’t remember when you last changed your needle, that’s your answer. A new needle costs less than the fabric it saves.
Tip 5. Use the Right Presser Foot
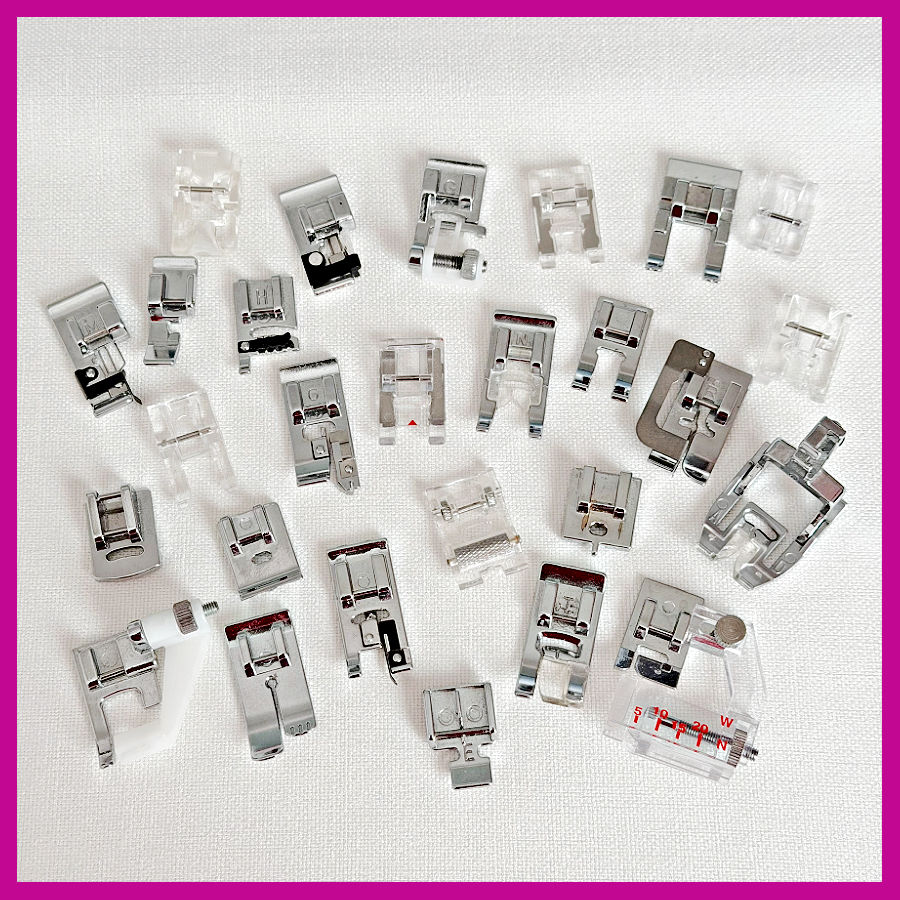
Your regular presser foot is a wonderful all-rounder. But some fabrics need a specialist.
- Walking foot (also called an even feed foot). It has its own feed dogs on top, so the top and bottom layers move together. Without it, the top layer often reaches the end of the seam two inches before the bottom one. Use it on: velvet, quilt layers, fleece-backed projects, plaids and stripes you need to match, thick bag fabrics, and knits that keep turning into waves. Fair warning: it’s bulky, and installing it takes a minute because it hooks onto the needle clamp. It’s worth the minute. I explain how it works in Walking Foot Attachment for a Sewing Machine: What It Is and Why to Use It, and how to get the best results in How to Use a Walking Foot.
- Roller foot. Small rollers under the foot keep the fabric moving instead of dragging. Use it on: vinyl, faux leather, cork fabric, real leather, faux fur, velvet, and even slick organza. On faux fur, it gives me neat stitches without bald patches along the seam. My full tutorial: Must-Have Presser Foot for Sewing Challenging Fabrics: The Roller Foot.
- Teflon (non-stick) foot. Instead of rolling, it glides on a slick non-stick sole. The simplest way to remember the difference: the Teflon foot glides, the roller foot rolls. Use it on: vinyl, oilcloth, laminated cotton, faux leather, foam, and microfiber. Anything that grabs a regular metal foot and won’t let go. No Teflon foot? A strip of matte tape on the bottom of your regular foot works in a pinch. More vinyl tricks in Sewing Vinyl: 17+ Expert Tips for Beginners.
- Gliding foot (also called a jeans hemming foot or hump-jumper foot). Very few sewists even know this foot exists. Its sloped sole and spring adjust to sudden changes in thickness, so it doesn’t get stuck when the fabric goes from 3 layers to 7. Use it on: jeans hems, bulky seams on coats and upholstery, sherpa, leather, vinyl, and fur. One catch: the needle opening is narrow, so it’s for straight stitch only. Here’s my guide: Mastering the Gliding Presser Foot.
- Knit foot (tricot foot). It helps knits feed without stretching out of shape. Use it on: jersey and other lightweight knits sewn on a regular machine. (Confession: I sew most of my knits on my serger. But on a regular machine, a knit foot is a big help.) I tested one in Knit Presser Foot: How It Works, How to Use It, and My Sewing Tests.
- Regular foot when specialized feeding isn’t necessary. You don’t need a special foot for every fabric. Your drawer full of feet you used exactly once agrees with me.
Tip 6. Adjust Your Stitch Length and Machine Settings
The default settings on your machine are made for medium-weight cotton. Silk chiffon, vinyl, and four layers of denim are not medium-weight cotton. Four things make the biggest difference: stitch length, presser foot pressure, thread tension, and the needle plate.
Stitch length
- Chiffon, lightweight silk, and organza: around 1.8 to 2.2 mm. Shorter stitches hold fine fabric flat and help prevent puckering. Just don’t go too tiny, or the stitches start to perforate the silk.
- Stretchy knits: a narrow zigzag (about 1 mm wide and 2.5 mm long) or your machine’s stretch stitch. A straight stitch on a stretchy seam will snap the first time it’s stretched. Usually in public.
- Velvet and minky: about 2.5 to 3 mm. A slightly longer stitch helps the layers feed without creeping.
- Denim and canvas: 3 to 3.5 mm, and 3.5 to 4 mm for topstitching. Short stitches on thick layers bunch up and look cramped, like too many people in one elevator.
- Leather and vinyl: 3.5 to 4 mm. Every stitch is a permanent hole. Short stitches turn the seam into a sheet of postage stamps, ready to tear along the dotted line.
I explain how stitch length works on different fabrics in What Is the Stitch Length and How to Adjust It for Different Fabrics.
Presser foot pressure
This is the dial most sewists never touch. It controls how firmly the presser foot holds the fabric against the feed dogs. On my Janome, the normal setting is 3, and it works for most everyday projects. Difficult fabrics are exactly when it needs a turn.
- Lightweight fabrics (chiffon, silk, voile): decrease the pressure. Too much pressure causes rippling and puckering.
- Knits: decrease the pressure. If your knit seam comes out longer than the edge you started with, the foot is pressing too hard.
- Velvet and minky: decrease the pressure, so the foot doesn’t crush the pile.
- Vinyl and cork: reduce the pressure slightly, and pair it with a Teflon or walking foot.
- Denim, canvas, and wool: increase the pressure, so thick layers get enough grip to feed evenly.
- Bulky joins like jeans hems or bag seams: increase it temporarily, then turn it back.
Don’t see a pressure dial? Check your manual. Some machines hide it, and some don’t have one at all. More in 5 Sewing Machine Settings Nobody Mentions (But Should).
Thread tension
This is the big one. Wrong tension can ruin a difficult fabric faster than any other setting.
But before you touch the tension dial, rule out the usual suspects. Most “tension problems” aren’t tension problems at all.
- Rethread the machine with the presser foot up, so the thread sits between the tension disks.
- Put in a fresh needle of the right type and size.
- Use the same type and weight of thread on top and in the bobbin.
- Clean out the lint around the bobbin.
Still not right? Now test. Sew a 6-inch line on a scrap of your actual fabric, with the same number of layers. Use a different thread COLOR (not type) in the bobbin, so you can see which thread is misbehaving. Then read the stitches:
- Bobbin thread shows on top: the upper tension is too tight. Turn the dial to a lower number.
- Loops of top thread on the underside: the upper tension is too loose. Turn it to a higher number.
- The seam puckers or the thread snaps: the tension is too tight for that fabric.
Here’s how difficult fabrics usually react:
- Chiffon and lightweight silk: they need lower upper tension. Tight tension gathers fine fabric along the seam, and no amount of pressing will flatten it.
- Stretchy knits: lower the upper tension a little, so the seam can stretch without popping.
- Denim and canvas: check both sides of the seam. Heavy fabric sewn with the default tension often puckers or breaks the thread. If you’re using thick topstitching thread, lower the tension too.
- Leather and vinyl: aim for a balanced, slightly relaxed stitch, and get it right on a scrap first. You can’t unpick your way out of a mistake here. Every hole stays.
Change one number at a time. Make one small change, then watch it very closely. When you find the setting that works, write it down.
And the bobbin? Leave it alone in most cases. On drop-in bobbins, the manufacturer sets the tension. On a metal front-load bobbin case, you can adjust the bigger screw in tiny turns. Never touch the small screw unless you enjoy taking the whole bobbin case apart. (I’ll also skip the famous “yo-yo test” for bobbin tension. When I tried it, my bobbin kept jumping out of the case.)
More on tension in my guides:
- Sewing Machine Tension Adjustment
- Most Common Sewing Machine Tension Problems (+ Solutions)
- Everything You Need to Know About the Bobbin Tension
Straight stitch needle plate
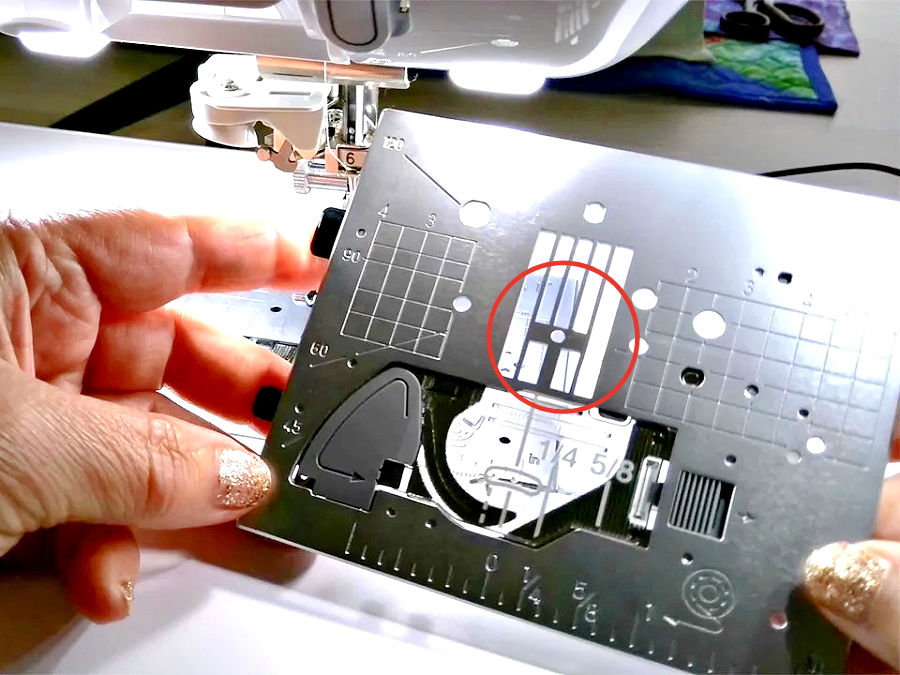
This one is easy to forget, and it solves a very specific problem. A regular needle plate has a wide oval opening, so the needle can swing for zigzag stitches. But that wide opening is exactly where chiffon, silk, and organza get pushed down and swallowed by the machine, especially at the start of a seam.
A straight stitch plate has a single small round hole. It supports the fabric right around the needle, so fine fabric can’t be pulled into the feed dogs. You get neater stitches and fewer skipped ones.
- Use it on: chiffon, silk, organza, lightweight lining, and seams that start right at a corner or a narrow edge.
- Pair it with: a straight stitch foot, if you have one.
- Very important: it works with a straight stitch in the center needle position only. Switch back to the regular plate before you sew a zigzag, or the needle will hit the plate and break. Some computerized machines detect the plate and block other stitches for you. Many machines don’t.
Not every machine has a straight stitch plate available, so check your model before you shop.
Tip 7. Stabilize Fabric When Necessary
Some fabrics just need a little support. Like the rest of us on Monday mornings.
- Hand basting. When I started sewing, I basted everything. These days I mostly pin or clip, and I save basting for the fabrics that won’t stay put any other way. It feels like extra work. It also saves you an hour of unpicking. Use a fine size 10 hand needle and thin, contrasting thread, so you don’t leave holes and can see the stitches when it’s time to pull them out. Use it on: silk, chiffon, velvet, and very stretchy knits.
- Machine basting. Faster, and great for long seams. Set the longest straight stitch (4 to 5 mm), turn the tension down to almost 0, and don’t backstitch. Then sew your real seam right next to the basting line, not on top of it, so the basting pulls out easily. More in Basting Stitch: Why, When and How to Baste in Sewing.
- Wash-away thread. Honestly, I don’t love it for dresses. I’d rather not splash water on a finished garment. But for knits I sew on my serger or coverstitch machine, it’s a lifesaver. Regular basting thread gets trapped under all those serger threads, and picking it out is pure misery. Wash-away thread just disappears with a little water. Steam won’t dissolve it, by the way. It needs actual water. And test a scrap first, because some fabrics show water spots. Use it on: knits, and printed fabrics, where a little water won’t show. My full guide: Water Soluble Thread: The Ultimate Guide.
- Wash-away Wonder Tape. It holds a zipper or a narrow hem in place without a single pin hole. You sew right through it, and it washes out later. Use it on: zippers and hems in slippery fabrics. I show it in action in Think You Know Zippers? This Installation Guide Might Surprise You.
- Tissue paper. Sew right through it, then tear it away. It keeps sheer fabrics from getting swallowed by the needle plate. Bonus: tearing it off is weirdly satisfying. Use it on: chiffon, organza, and other sheers.
- Staystitching. A line of stitching through a single layer, just inside the seam line, keeps curves and bias edges from stretching while you work. Is it always necessary? I’d say it depends. Fusible interfacing on the same edge can do the same job. And on knits, staystitching can take away the stretch you actually need, so I only use it on very unstable knits. For knit shoulders and necklines, I prefer knit stay tape. Use it on: curved and bias edges of silk, chiffon, and loosely woven fabrics. Read more in Stay Stitching 101: Essential Techniques for Fabric Stabilization and Knit Stay Tape: Why and How to Use It.
- Stabilizer or interfacing. The line between the two is blurrier than most sewing guides suggest. One trick worth knowing: water-soluble stabilizer can work as temporary interfacing on delicate fabric, and it washes away when you’re done. Tear-away stabilizer under decorative stitches keeps thin fabric and knits from puckering. I sort out the confusion in Interfacing vs Stabilizer: Is There Really a Difference?
- Clips or pins? On leather, vinyl, and laminated cotton, a pin hole isn’t a mistake. It’s a permanent souvenir. Use sewing clips there, and on thick layers and bag seams too. For silk, use fine silk pins, and keep them inside the seam allowance. For slippery linings, fork pins hold two layers better than one thin pin. For tiny projects, mini clips are much easier to handle. More in Sewing Clips vs. Pins: Which to Choose?, Types of Sewing Pins and Their Uses and Mini Wonder Clips by Clover.
Tip 8. Don’t Pull or Stretch Fabric While Sewing
When fabric isn’t moving the way we want, our hands jump in to help. Our hands are not helping.
- Support the fabric’s weight. Heavy fabric hanging off the table drags the seam sideways, and you end up fighting the pull without even noticing. Let the table hold the fabric, not your stitches. An extension table helps, and for really big pieces, I push a second table right up against the sewing table. Use it on: velvet, faux fur, minky, denim, and vinyl. Anything heavy or grabby. More in How to Choose the Best Sewing Table.
- Let the feed dogs move the material. Your job is to guide, not to pull. You’re the driver, not the tow truck. Pulling doesn’t just distort the seam. It bends the needle just enough to hit the needle plate and snap. A thin 60/8 needle for chiffon is the first to go. (I once broke a needle that flew off somewhere I couldn’t find. Later that night, I found the broken piece on my pillow. Lesson learned.) More in Why a Sewing Machine Needle Keeps Breaking.
- Start the seam right. Chiffon, silk, and lace love to get pulled down into the needle plate in the first few stitches, because the feed dogs have nothing to grab yet. Start sewing on a small scrap or a piece of paper, then feed your fabric in right behind it. Hold both thread tails for the first few stitches too. Use it on: chiffon, silk, organza, and lace. More in Why Is My Sewing Machine Pulling Fabric Into the Machine?
- Sew slowly over bulky seams. This isn’t a race. Nobody hands out medals at the end of a seam. If your machine has a speed slider, turn it down. For the very thickest spots, like a jeans hem crossing a side seam, turn the handwheel by hand. Use it on: denim, faux fur, leather, and bag seams.
- Watch your knits. A knit can stretch while you sew, and the worst part is you won’t notice until you take it out of the machine. If the seam comes out longer than the edge you started with, stop pulling and lower the presser foot pressure. Use it on: jersey, spandex, and other stretchy knits.
- Keep the layers properly aligned. Peek every few inches to make sure everyone’s still traveling together. On velvet and fur, the top layer creeps ahead no matter how careful you are, so use a walking foot or hand-baste first. For mirrored seams, like two sides of a pillow cover or a bag, sew both in the same direction. Any shifting happens the same way on both sides, and they match. More tips in How to Sew Curved Seams: 21 Helpful Ideas.
- Stop to adjust the fabric as needed. Needle down, presser foot up, smooth things out, and carry on. If your machine has a needle up/down setting, set it to stop with the needle down, so the fabric can’t shift while you adjust. Stopping isn’t failing. Stopping is sewing. More in Sewing Machine Settings Explained: Needle Up/Down, Lock Stitch/Backstitch.
Tip 9. Test Stitches and Pressing on Scraps
If you only remember one tip from this whole article, make it this one. It works for almost every difficult material on the planet.
A scrap test is a dress rehearsal. Mistakes are cheap, and nobody’s watching.
- Test with the same number of layers as your real project. One layer of denim tells you nothing about four layers at the bag strap.
- Try different needles, stitch settings, and feet. Play a little. Scraps don’t mind.
- Check both sides of the seam. The top can look perfect while the underside is secretly hiding a bird’s nest.
- Test pressing temperature and technique. Better to melt a scrap than the front of your new pillow.
- Keep the winning sample and write down the settings. Note the needle, stitch length, tension, and foot, and pin the note right to the sample. Future you will be so grateful.

Difficult fabrics aren’t impossible. They’re just high-maintenance. Once we understand what the fabric needs, a few small adjustments make all the difference.
Test on scraps. Write down the settings that work. And when a specific fabric starts acting up, the detailed tutorials above are waiting for you.
Now I want to hear from you. Which fabric gives you the most trouble? Tell me in the comments.
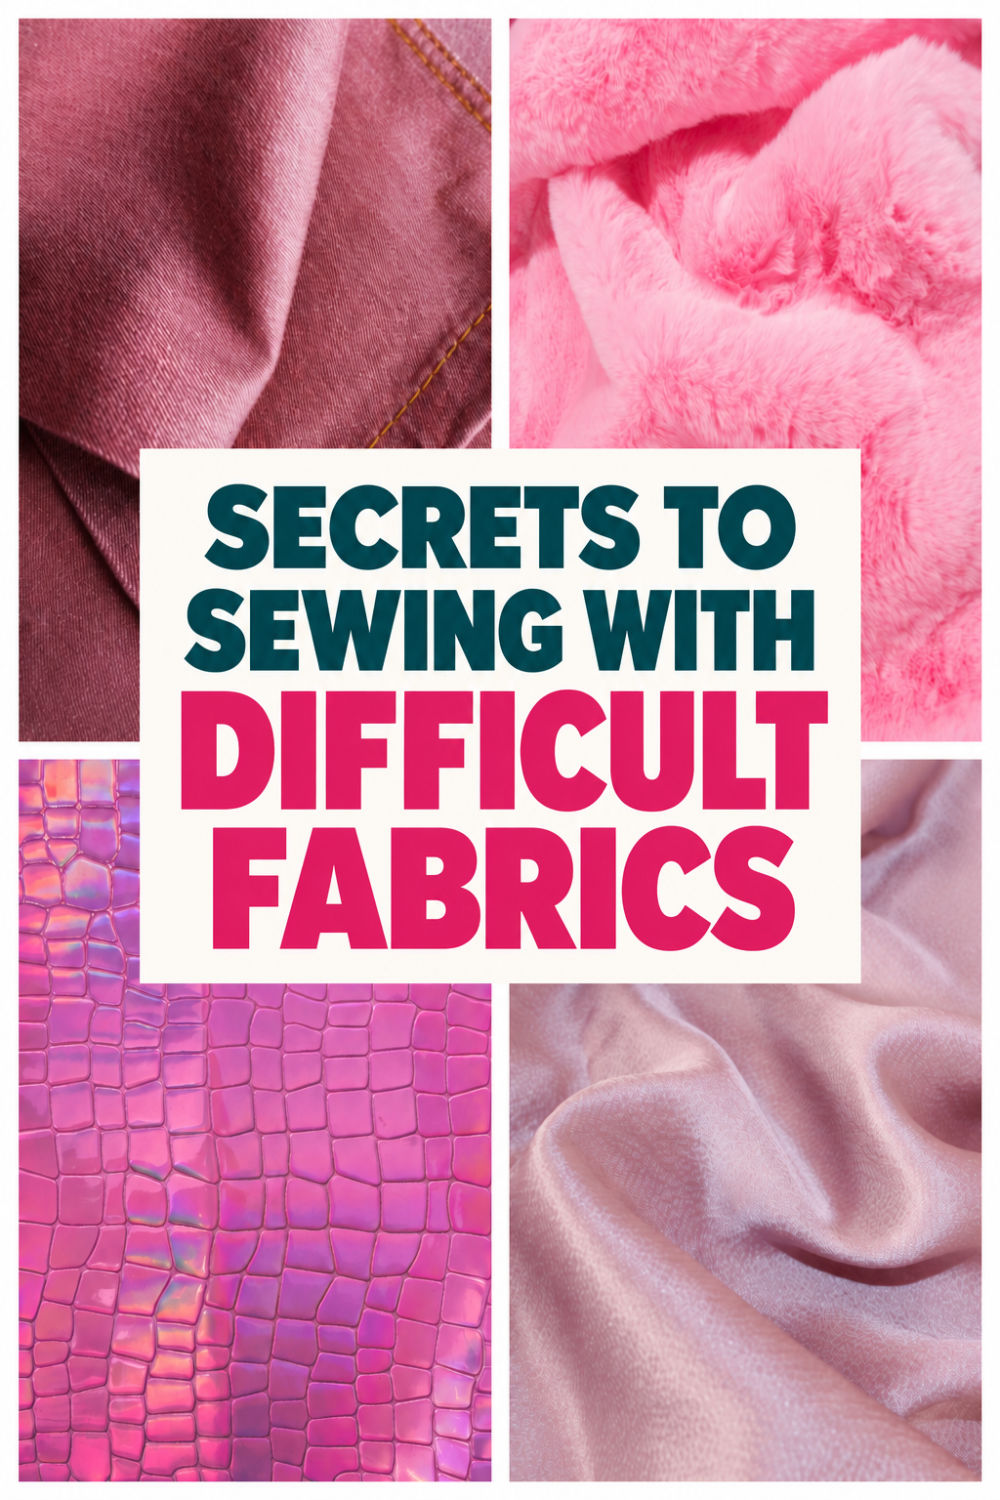
Did you find this tutorial helpful? If so, save this pin (see below) on your sewing board so the next time chiffon slides off your table, you’ll know exactly what to do. (Catching it before it hits the floor is still your job).
Follow me on Pinterest for more tips, tutorials, and inspiration!

latest posts
- Secrets to Sewing with Difficult Fabrics: Tips for Perfect Results
- How to Add a Fabric Insert to a Hemmed Edge: The Wrap-and-Turn Trick
- The Little Triangle Trick for Clean Hem Corners
- 25 Little Sewing Habits That Make Your Work Look Better
- How to Sew a Pointed Fabric Zipper End Tab
- 15 Sewing Machine Parts You See All the Time — But Probably Ignore
- Adjustable No Buckle Elastic Belt DIY: Sewing Tutorial
- 23 Useful Things to Watch for on Amazon Prime Day
- Sewing Thread Secrets: 8 Tiny Details You Probably Never Noticed — But Should