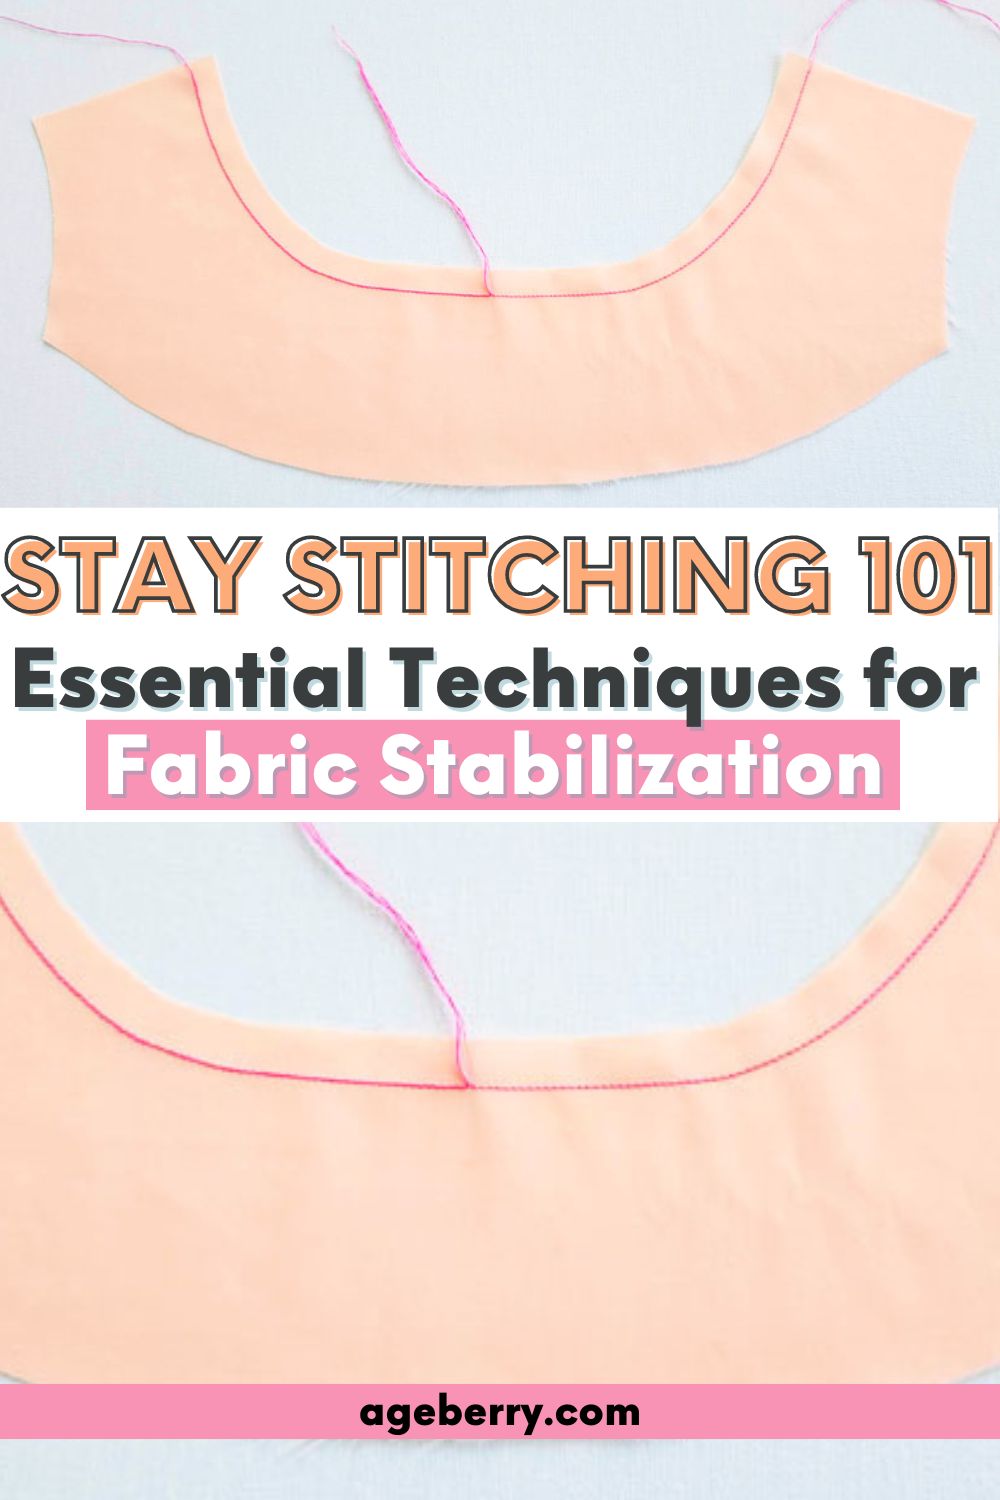
Stay Stitching 101: Essential Techniques for Fabric Stabilization
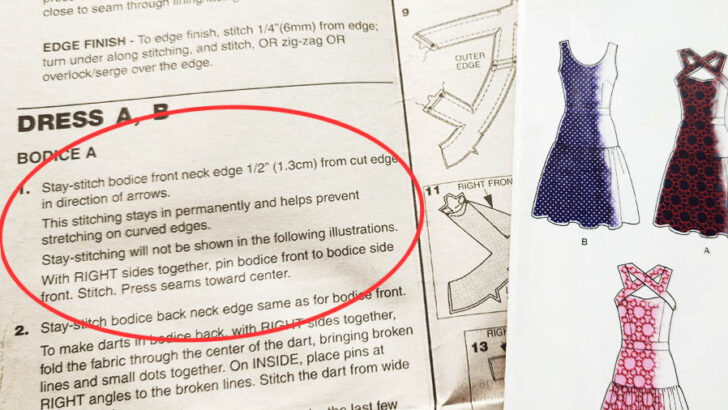
If you have just begun to learn to sew and you are using commercial patterns, you’ve probably seen the term “stay stitching” in your instructions. If you are a novice, this row of stitching probably seems like a silly waste of time. Why is a single row of stitching around a neckline or armhole that important? Can you just skip the stay stitching and move on to the more interesting parts of assembling the garment?
Before you skip out on stay stitching, you might want to read this article. Stay stitching is an important and often underrated part of sewing clothing. Read on to learn what staystitching is, why it is considered essential by many sewing experts, and when it may not be necessary. We will also discuss alternative approaches to achieve similar results.
So, 30 years ago, when I started sewing, I used a magazine called Burda Moden (now called Burda Style). It had patterns and tutorials, but it was in German and translated into English and many other languages. I had never encountered the term “stay stitching.” When I moved to America and used my first Simplicity pattern, I was really surprised to discover this technique.
But is it important? Well, many sewing experts say it is, but I would say – it depends. Stay stitching is a way to keep fabric from stretching or distorting while you’re sewing it. But if you use fusible interfacing to stabilize the fabric, like Burda Modern recommended, you might not need to stay stitch. So, it’s not that Burda Modern was wrong for not mentioning stay stitching. They just had a different method to keep fabric stable.
Stay Stitching Basics
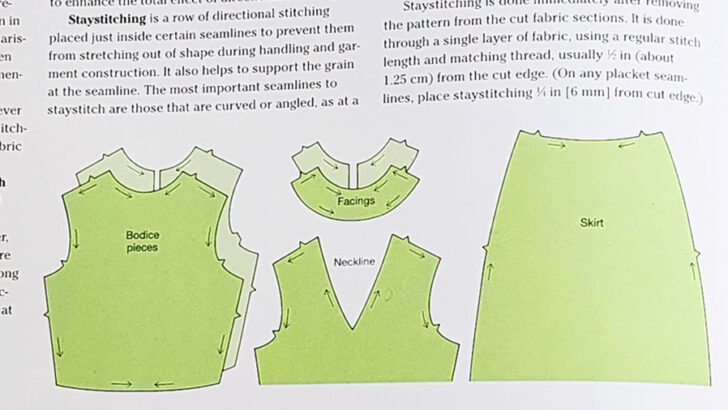
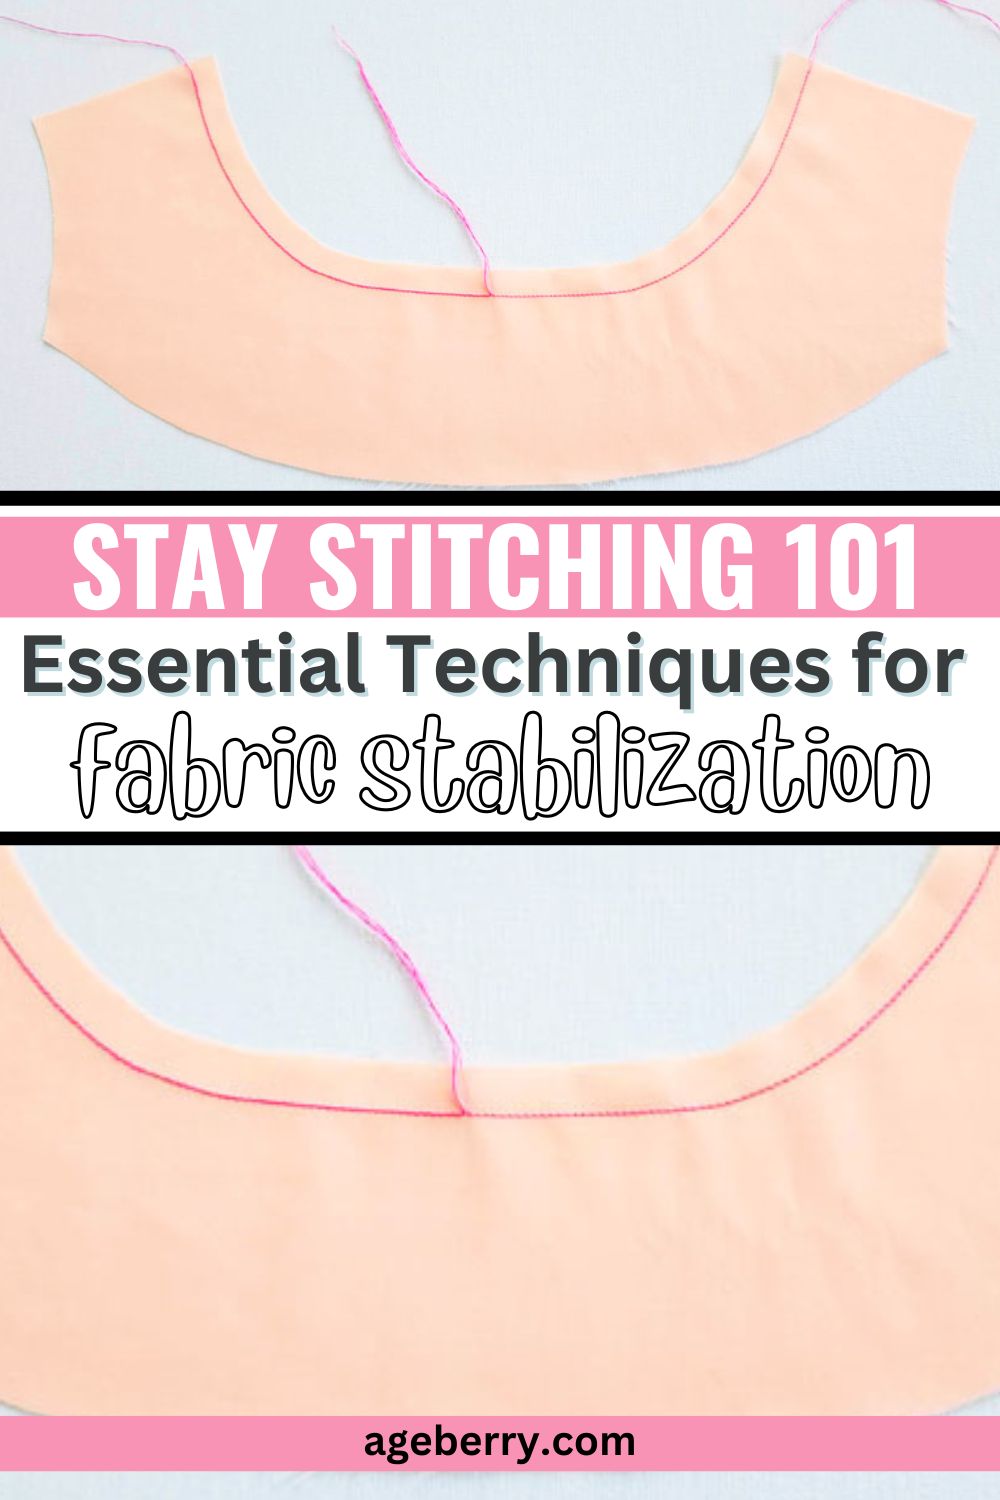
Staystitching is a sewing technique that involves stitching along the edge of a pattern piece to stabilize it and prevent distortion during the construction process. It is typically done using a regular straight stitch on the sewing machine, within the seam allowance, to ensure that the fabric retains its shape and does not stretch.
It’s a line of stitching that follows the curved contours of a garment. Usually, the instructions will tell you to stay stitch the neckline, armholes or any other curved line of the garment that crosses the bias. This stitching is sewn through a single layer of fabric.
The bias of the fabric is the diagonal length of the fabric. Because the threads are at an angle to one another, the bias has lots of stretch to it. When you have curves in a pattern piece, these lines cross the bias of the fabric and because of this, curves are inclined to stretch. Stay stitching on curves reinforces these stretchy spots on the garment so that your neckline or armholes will not stretch out of shape when you are stitching it or wearing it.
✅ Related tutorial: How to cut fabric on the bias
Here are the main reasons why it is considered important:
- Prevents Stretching: Fabrics like lightweight cotton, silk, or linen have a tendency to stretch or shift during handling. Staystitching helps to anchor the fabric in place, preventing it from losing its shape.
- Maintains Accuracy: Staystitching keeps the edges of pattern pieces stable, ensuring they retain their original shape and dimensions. This accuracy is crucial for aligning and assembling multiple fabric pieces accurately.
- Reduces Seam Puckering: Staystitching along curved edges like necklines and armholes helps to distribute the fabric evenly, reducing the risk of puckering when sewing these curved seams.
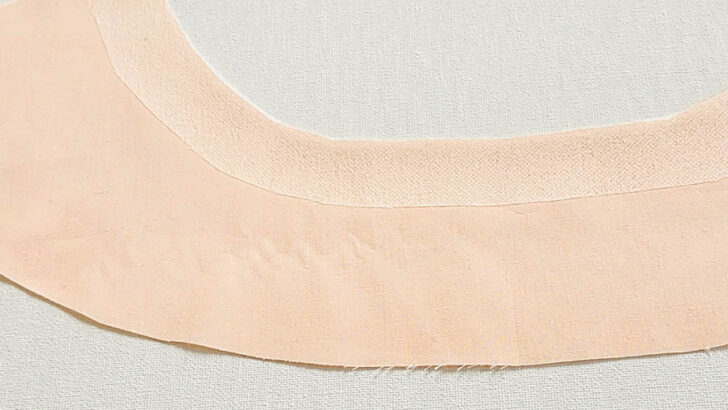
Another reason for stay stitching is to reinforce curved seams that must be clipped. When you add a facing to a curved neckline, the curve must be clipped so that the seam will lie flat when the facing is pressed into place. The stay stitching helps to keep the clipped part from tearing further into the seam.
There are many different kinds of stitching, like basting, topstitching, or understitching. Basting is a loose kind of stitching that temporarily holds garment pieces together so that you can get a good fit. Topstitching is visible stitching on the outside of the garment along the seams. It can be decorative, but also helps create crisp edges on your garment. Understitching is a kind of stitching that helps a facing stay in place.
Stay stitching is not like any of these. Stay stitching happens at the very beginning of garment construction, and it is best to do your stay stitching immediately after you’ve cut the pieces, even before you handle them much to prevent any stretching of the curves on the garment. Stay stitching only goes along the curves in a pattern piece and it only goes through one layer of fabric.
Many types of fabric will benefit from stay stitching. But tightly woven fabrics have less need for it, but it is still important. It is particularly essential for loosely woven fabrics. Stay stitching is one of those “better safe than sorry” kind of things.
While staystitching is beneficial in many sewing scenarios, there are instances when it may not be strictly required:
Stable Fabrics: If you are working with a stable, non-stretchy fabric like denim or heavyweight cotton, the need for staystitching is reduced. These fabrics are less likely to distort during handling.
Straight Seams: When dealing with straight seams that don’t involve curves, staystitching might not be as critical.
Immediate Construction: If you plan to sew the fabric pieces together right away without any prolonged handling, staystitching may be omitted. However, keep in mind that staystitching usually doesn’t take much time and provides valuable “insurance” against potential issues.
Stay stitching is one of the more boring steps of garment construction, but without it, your garment will likely have a neckline that is just a bit off or an armhole that will never quite lie flat.
What Specific Areas In A Garment Need Stay Stitching?
The most common area where sewists need stay stitching is on the necklines of garments. Necklines are generally long curves and definitely need stay stitching to stabilize the shape of the neckline.
Armholes are another area that needs stay stitching. Without it, your armholes are quite likely to be warped or distorted, ruining the lines of your garment.
Shoulder seams are often sloped at an angle. This means that they will also benefit from stay stitching to keep them in the correct size and shape.
If you have any curved pieces, these pieces will need stay stitching as well.
Is Stay Stitching Necessary For Knit Fabrics?
Stay stitching is generally not needed for knit fabrics because they have a certain degree of elasticity, and are less likely to lose their shape during handling in the sewing process.
Usually knit fabrics have good recovery, which means that when knit fabric stretches, it returns to its original shape after the stretching force is released. In other words, the fabric has the ability to bounce back and recover its initial form, maintaining its original dimensions and structure.
However, stay stitching can still be helpful for knit fabrics when working with particularly unstable knits.
Not all knit fabrics are the same. Some knits have more stretch and may benefit from stay stitching more than others. For example, lightweight and delicate knits like jersey or lace knits may require stay stitching to stabilize the edges and prevent them from stretching out of shape. On the other hand, stable knits like ponte or double knits might be less prone to distortion, and stay stitching may not be as crucial.
✅ Related tutorial: All About Modern Types Of Knit Fabric
Knit fabrics are known for their stretchiness, which can make it difficult to achieve a stable stitch. While a serger is often recommended for sewing knits, it can’t be used for stay stitching. This can leave many sewers wondering how to achieve the stability they need.
Using a regular sewing machine for stay stitching knit fabrics is possible, but it requires special settings. If your machine does not have a stretch needle, for example, it may struggle to create a stable stitch.
✅ Related tutorial: The Ultimate Guide to Stretch Needles
Also, stay stitching can actually reduce the stretchiness of a knit fabric. This can be problematic if you need to maintain the stretch in a particular area, such as the neckline.
In these cases, using fusible interfacing or knit stay tape as a stabilizer can be a good alternative.
✅ Related tutorial: Knit Stay Tape | Why And How To Use It
The decision to stay stitch knit fabrics will depend on the specific fabric and the sewing project at hand.
Step-By-Step Guide to Stay Stitching
While stay stitching is boring, it’s definitely not hard. Just follow these steps and your stay stitching will be done in a snap.
Step 1. Selecting Seam Allowance
When stay stitching, the first thing that you need to do is select your seam allowance. Most sewing patterns call for a 5/8 inch seam allowance. The stay stitching should go between the normal stitching line and the raw edge of the pattern. This means that for a 5/8 inch stitching line, you should have a stay stitch that is about 1/2 inch from the raw edge of the fabric. If the seam allowance differs, simply stay stitch 1/8 inch inside the normal stitching line.
Be sure to sew within the seam allowance to avoid stitching lines showing on the finished garment.
Step 2. Choosing Stitch Length
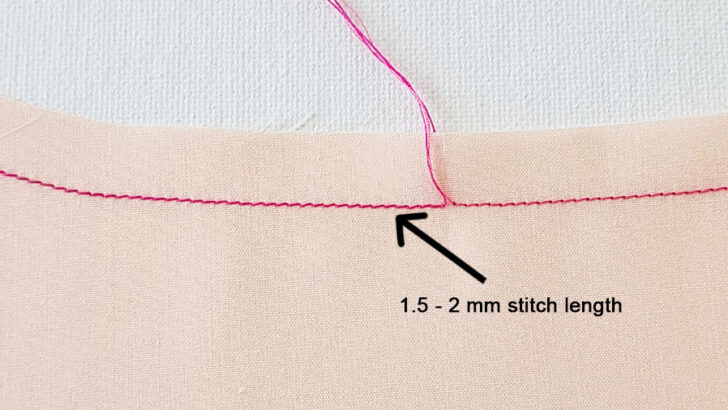
Next, you need to choose your stitch length. Some people use stay stitching that is exactly the same switch length as typical stitching, but that’s not necessarily best. It’s better to use a stay stitch that is a bit shorter than typical to help the stay stitching be a bit more sturdy. To be sure that your stay stitching will provide the correct reinforcement for your curves, choose a stitch length that is about 1.5 – 2 millimeters in length.
✅ Related tutorial: What is the stitch length and how to adjust it for different fabrics – a sewing tutorial
Step 3. Stitching Direction
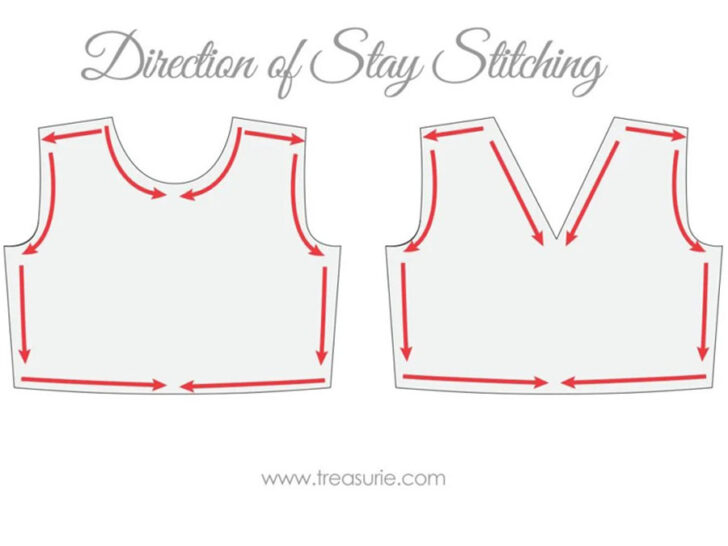
Finally, you will begin stitching. However, you can’t stitch in any direction that you feel like. To keep your pattern pieces shaped correctly, you do have to stay stitch in a particular direction.
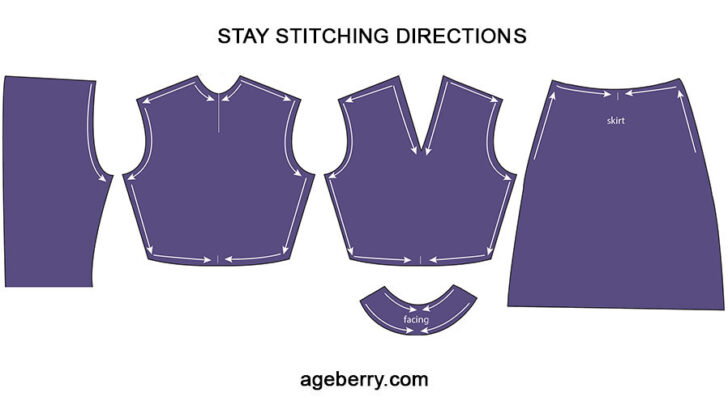
For instance, on necklines, you should start at the shoulder seam and stitch toward the center of the garment, stopping when you get to the center. Then start at the other shoulder seam and stitch toward the center of the garment. If you do not do this, you may end up with wrinkles or puckers at the end of your seam.
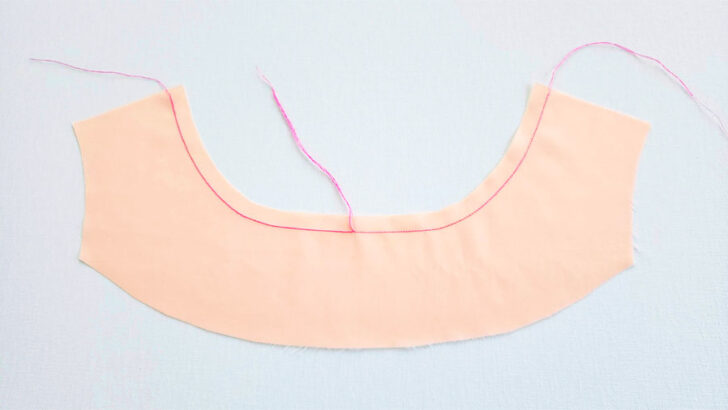
It’s recommended to sew stay stitching on a neckline in two passes, sewing from one shoulder to the center and then turning the work and sewing from the other shoulder to the center. This method allows for more control and precision, helping to prevent wrinkles and ensure that the stitching is evenly distributed on both sides of the neckline.
While it is possible to sew stay stitching all in one pass on a neckline, it may be more difficult to achieve consistent and even stitching. Sewing in two passes can help to ensure a smoother and more stable result.
For armholes, start at the shoulder seam and stitch down toward the under arm seam.
For shoulder seams, begin at the neckline and stitch out toward the shoulder.
Stitching in the correct direction will keep your pattern pieces perfectly sized so that your seams will lie smooth and match correctly.
In summary, for curved areas, start staystitching from the highest point and work towards the lower points.
But I noticed, that there are different opinions and recommendations on the direction of stay stitching. For example, in the case of a bodice with a V-neck some sources suggest stitching from the center up towards the shoulders. The bodice with a V-neck in the image (that I made) from the book “New Complete Guide to Sewing” by Reader’s Digest (published in 2002) shows staystitching direction going up from the center to shoulders.
However, according to most online tutorials, the staystitching on a bodice with V-necks should go down from the shoulder to the center.
So, who is right? I think, both directions can be effective. In general, it is best to follow the instructions provided in the sewing pattern or tutorial you are using, as these will be tailored to the specific design and fabric. However, if you are unsure or working without specific instructions, you can experiment with both directions to see which works best for your particular project.
In the case of the bodice with a V-neck, if you feel more comfortable stitching from the shoulders down towards the center, then go ahead and do so. As long as the stitching is done evenly and consistently, it should help to stabilize the fabric and prevent stretching or distortion during the sewing process.
Stay Stitching Tips
Handling Curved Areas
Those curved areas can be super tricky because they stretch so very easily! However, you really want the pattern pieces to stay true to their original shape and size.
When you are stay stitching curves, go as slowly as you need to, and do not pull the pieces under the sewing machine’s presser foot. Allow the feed dogs to gently move the fabric and you can help guide the fabric around the curves. You want the fabric to stay as flat as possible as you sew.
It’s crucial to stitch around the curves rather than trying to sew in straight lines. This is because the shape of the armhole or neckline is naturally curved. To accomplish this, gradually pivot your sewing machine while following the curve of the fabric.
✅ Related tutorial: Basic sewing techniques: How to sew corners and curved seams
Dealing with Basting Stitches
Basting stitches are long, loose temporary stitches that are pulled out once the final seams are sewn. However, as the name indicates, stay stitching stays in the garment, even after it is sewn with the final seams. You can pull out your basting stitches, but leave the stay stitching in place. Remember, stay stitching stays put!
Alternatives to Staystitching
Have you ever seen stay stitching in mass-produced clothing? While stay stitching may be less common in store-bought garments, manufacturers likely employ other stabilization techniques to ensure the longevity and fit of their products. They may use interfacing, fusible tapes, or specific construction methods to achieve similar results as stay stitching.
In the context of home sewing, stay stitching remains a valuable technique, particularly when working with delicate fabrics or garments that require precise shaping and fitting. Home sewists have the luxury of dedicating more time and attention to each project, allowing them to use traditional sewing techniques like stay stitching to achieve the best possible results.
So, what are the alternatives to staystitching that can achieve similar results?
Tape reinforcement: Applying fusible tape or knit stay tape along the fabric’s edges can offer stability without the need for traditional staystitching.
Fusible interfacing: Using fusible interfacing can be an effective alternative to stay stitching for curved edges. It provides a stable and consistent level of stabilization, and can be quicker and easier to apply than traditional stay stitching. I actually prefer this method over stay stitching for curved edges.
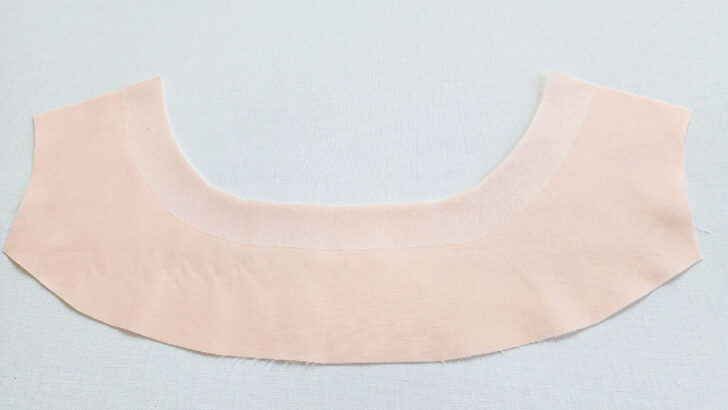
To use fusible interfacing, simply cut a piece of interfacing to the shape of the curved edge. Then, place the interfacing onto the back of the fabric, with the adhesive side facing down. Use a hot iron to press the interfacing onto the fabric, applying firm pressure and holding the iron in place for several seconds. Be sure to follow the manufacturer’s instructions for the specific type of interfacing you are using, as different types may require different temperatures or application times.
✅ Related tutorial: How To Use Fusible Interfacing (Video + Tips And Tricks)
Common Stay Stitching Mistakes
Stay Stitching Puckers Or Gathers – Why And How To Fix
Sometimes your stay stitching will pucker. This usually happens because the tension is off. Adjust your tension and use a sample piece of fabric to try sewing with various tension adjustments until the stay stitching lies flat and smooth.
Another reason that your stay stitching might pucker could be that you are not sewing in the right direction. Stitch your stay stitching as directed above. Also, be sure that you are not stretching or pulling the fabric as you stay stitch, because that could also cause puckering.
Wrong Stitch Length
Remember that stay stitching is meant to increase the stability of these curved lines. You should use a shorter stitch length for stay stitching, about 1.5 – 2 millimeters. If you get the stitch length wrong, stitching it with a stitch length that is too long, you may not want to try to pick out the stitches, because that might cause more problems than it solves. Picking out stitches could cause the fabric to stretch. Instead, stay stitch it again with the correct stitch length right over the top of the longer stitches.
Frequently Asked Questions
Do You Backstitch When Stay Stitching?
Stay stitching is not meant to keep two pieces of fabric together. Rather, it is a kind of stitching that is meant for keeping the shape of the pattern pieces accurate while the garment is assembled. Therefore, there really is no need to backstitch when you are stay stitching.
Can You Stay Stitch By Hand?
While you can stay stitch by hand, I recommend using a sewing machine for this process. Stay stitching with a sewing machine provides a more consistent, secure result, ensuring that your fabric is stabilized quicker and with greater accuracy.
What Is The Appropriate Stitch Length For Stay Stitching?
While many people simply use their typical stitch length for stay stitching, it is actually better to choose a shorter stitch length. This allows the stitching to be very stable and sturdy. Most people set their stitch length to 1.5 or 2 for stay stitching. This shorter stitch length provides a stronger hold on your fabric, preventing it from stretching or distorting.
Is It Necessary To Remove Stay Stitching After?
Because the stay stitching is between the normal seam and the raw edge of the fabric, you will never see the stay stitching when the garment is complete. Therefore, you do not have to remove stay stitching after you have assembled the garment. It actually adds a bit of stability to the garment even after it is assembled, so it’s fine for it to stay in the garment. In fact, as the name indicates, the stay stitching stays forever in the garment.
If you enjoyed learning about stay stitching, be sure to check out my tutorial on topstitching. Topstitching is a great way to add a decorative touch to your sewing projects and can also help to reinforce seams and edges. In my topstitching tutorial, I’ll share tips and tricks for achieving a professional-looking finish, including how to choose the right thread, how to sew straight lines, and how to use topstitching to enhance your garments. So head on over to our tutorial on topstitching How To Topstitch | 17 Topstitching Tips Every Beginner Should Know
Did you find this tutorial helpful? If so, save this pin (see below) on your sewing board so you can come to the article later when you need this information on stay stitching , and follow me on Pinterest for more tips, tutorials, and inspiration!
latest posts
- What Do You Call a Person Who Sews? I Asked My Readers and Got 1,408 Opinions
- DIY Round Purse: PDF Sewing Pattern and Detailed Instructions
- Mini Wonder Clips By Clover: Useful Sewing Tool Or Just Another Notion?
- Non-Slip Grips For Quilting Rulers: A Small Notion With A Useful Job
- Fabric Eraser for Sewing: What It Removes and When to Use It
- What Is The Best Thread For Sewing Machine Projects? Let’s Find Out!
- Butterfly Quilt Block Tutorial – Foundation Paper Piecing
- How To Sew Quilt Squares So The Corners Match
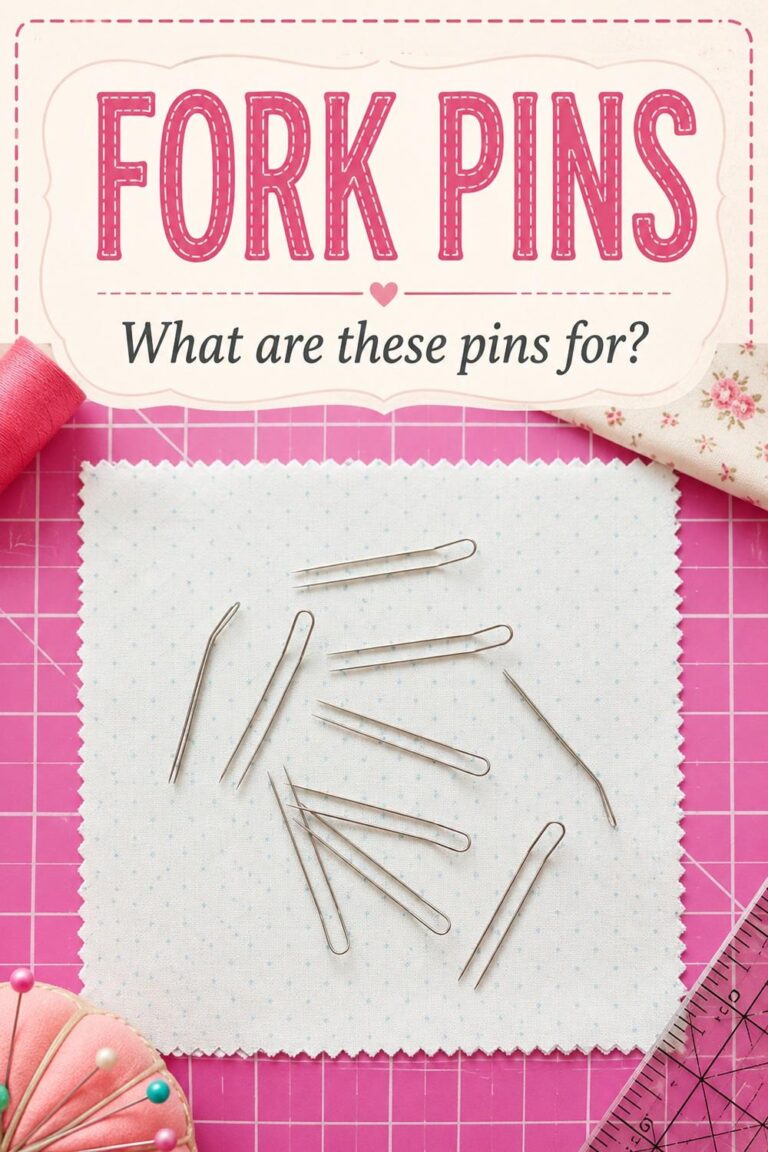
- Sewing With Fork Pins: How They Help With Pattern Matching, Slippery Fabric, And Seams