
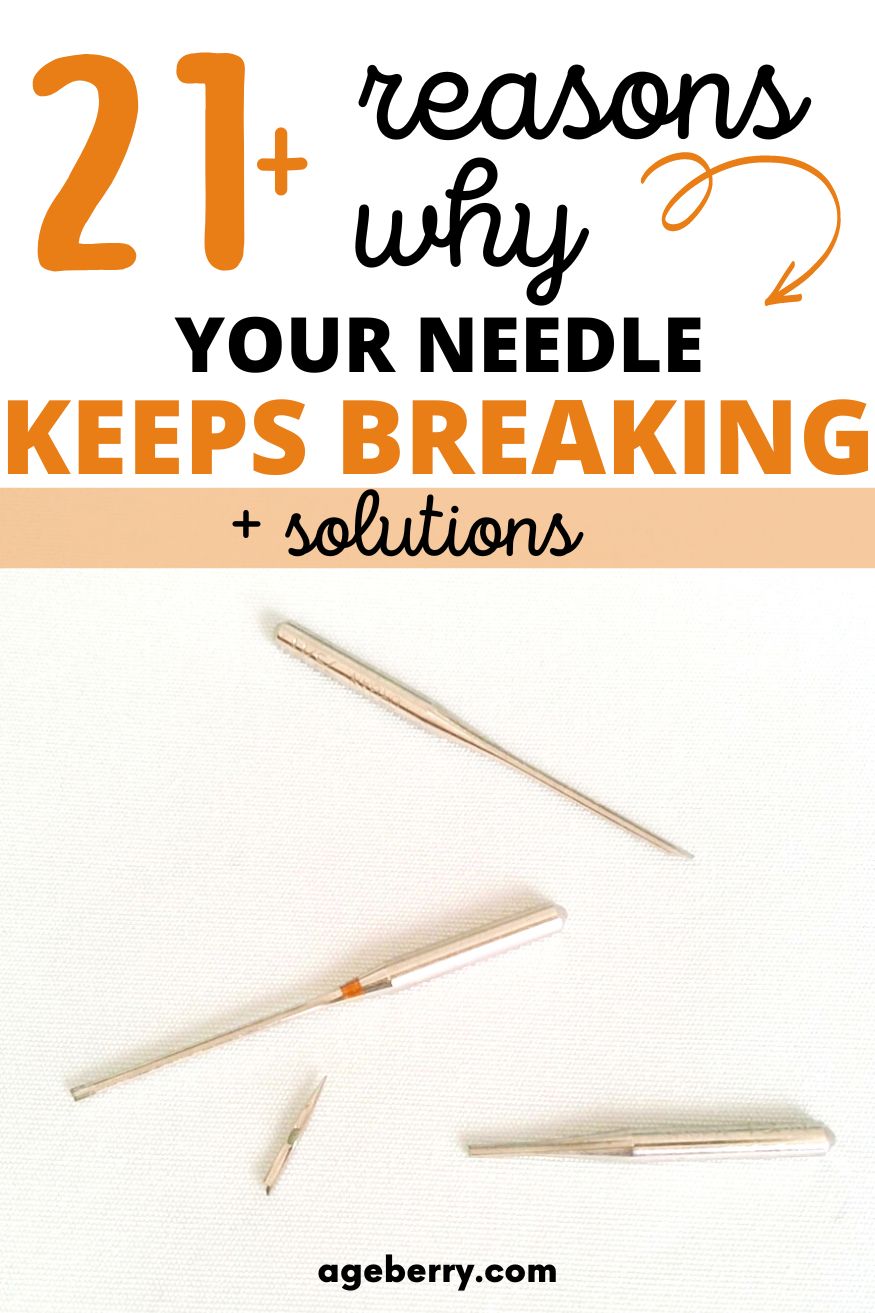
Why A Sewing Machine Needle Keeps Breaking (21+ Reasons & Solutions)
If you find yourself pleading, “why does my sewing machine needle keep breaking?” this article will help you troubleshoot the problem and solve the issue.
Let me set the scene: I’m happily sewing along, when all of a sudden, BAM! My sewing machine’s needle breaks in half and shoots away in a completely random direction. I’m left with a wad of thread and a few choice words ringing in my ears. But one thing is missing: the broken piece of the needle. After frantically searching all around my workspace, I resigned myself to having lost it after all…that was until later that evening when I found the exact same needle piece on my pillow! Talk about luck – imagine if it had ended up poking me right in the eye while I was sleeping.
Most people wouldn’t consider sewing dangerous, but if your needle repeatedly breaks and flies across the room, I think that’s dangerous!
It’s also very frustrating to work on a project and stop to replace a broken sewing machine needle.
Unfortunately, there are times when even the most experienced sewists have to deal with needles that break in the middle of a project.
In this article, I’ll cover 21+ common reasons why your sewing needle keeps breaking, so you can understand the causes and take the necessary steps to fix it (and prevent it from happening).
Why do I keep breaking my sewing needle?
You probably want to pull your hair out in frustration if you’re working on a project and dealing with repeated broken sewing machine needles.
I have some good news and some not-so-good news. First, let’s go with the “bad” news: diagnosing a sewing machine needle-breaking problem is not always straightforward.
Now for the good news: finding and fixing the problem is possible (and sometimes very easy)!
Here are the 21+ most likely reasons why your sewing machine needle keeps breaking to help you troubleshoot the issue and find solutions for each problem so you can fix it and return to sewing.
1. Your Needle Is Bent
If your needle is just slightly out of place (or you weren’t using the correct needle for the material), it can bend a little without you realizing it. When this happens, it can damage the sewing machine and your project. And since it doesn’t come down in the correct position, it will eventually break.
Solution: Sewing machine manufacturers recommend using a new needle for each project you sew. If you don’t think you need a new needle, I recommend at least inspecting it to ensure it’s straight, sharp, and smooth (without any burrs). If you see any damage at all, replace it immediately.
2. Your Needle Has Gotten Weak
As with anything else that people use often, sewing needles can become weak and worn out after a certain amount of time and use. This can lead to them snapping or breaking when you least expect it.
Solution: Change your needle regularly (ex: frequently, if not for each new project) and always take a little time to make sure that it’s sharp and in good condition before you begin sewing.
If it looks okay and you still need to replace your needle often, this could indicate that it is not the right needle for your project. You may want to switch to a different size or type of needle.
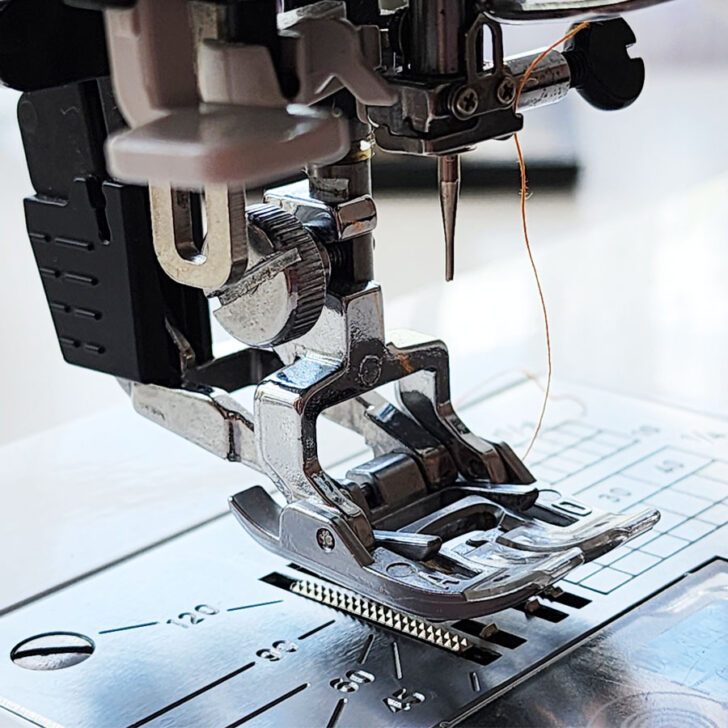
3. Your Needle Hits The Throat Plate
If you replace your needle and it almost immediately breaks again, it could be hitting the throat plate. This puts extra pressure on the needle, causing it to break (and can also damage your throat plate). A sewing machine needle might hit the throat plate due to improper needle insertion, a bent or damaged needle, incorrect needle position, incorrect thread tension, fabric thickness, etc.
Solution: When you replace your needle, take a little time to ensure it’s lined up directly with the needle hole in the needle plate before you begin sewing again.
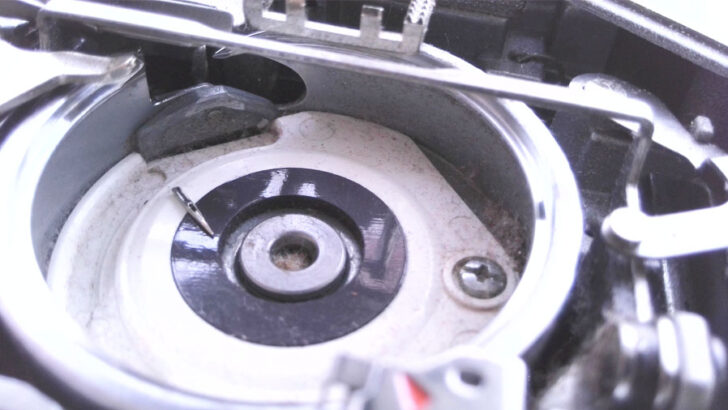
4. Your Needle Strikes The Bobbin Case
One common culprit of broken needles is hitting the bobbin case. Since the bobbin case is below the throat plate, this issue may be more challenging to determine.
However, if you’ve confirmed that the needle isn’t striking the needle plate as it comes down but keeps breaking, it’s time to check the bobbin case.
Solution: Take everything out of the bobbin area, look over the bobbin and case for nicks, and clean out any lint. After you clean the bobbin area, ensure the case returns to the correct position and insert a new needle.
5. Your Needle Is In The Wrong Position
A common cause for why your needle keeps breaking is that it’s not in the correct position. If the needle is too far to the left or right, instead of being in the center of the needle plate, it can strike the presser foot or throat plate and break.
This issue often happens when you switch between types of stitches (ex: zig-zag stitches and straight stitches) and forget to adjust a setting. This happens most often with mechanical sewing machines.
✅ Related tutorial: Mechanical vs Computerized Sewing Machine
It can also occur when you use a different presser foot.
Solution: Thankfully, there’s an easy fix for this problem! First, use your handwheel to bring your needle down manually and see if it’s hitting the presser foot or needle plate.
If it is too far to the right or left, simply adjust the needle’s position by using the machine’s needle position lever or adjust your stitch width setting if your device doesn’t have a position lever. Check your machine’s manual for instructions on how to adjust the needle position.
6. Your Needle Doesn’t Match To Your Project
As sewists, we’ve all tried using the same size needle for every project, but it just doesn’t work. A thin needle with leather, thick materials, or multiple layers of fabric will break under the strain.
Think about sewing a quilt. At first, when you’re piecing together the cotton quilt squares, a thin universal needle may be enough. However, as you add layers and batting, that thin needle will break under the additional strain.
Another example could be sewing a handbag. Your needle may work well when sewing together the initial basic pieces. But once you get to the point of stitching multiple layers of materials, your needle won’t be able to handle the strain.
✅ Related tutorial: Sewing Machine Needle Sizes Explained
Solution: Consider the weight of the fabric or thread and the type of needle needed to sew the material and get the best results.
Since your needle type and size need to match the project that you’re doing, you may need to change your needle for different phases of the same project (ex: sewing multiple layers of a handbag together vs. topstitching).
Here’s a quick reference for the types of needles to use for various projects:
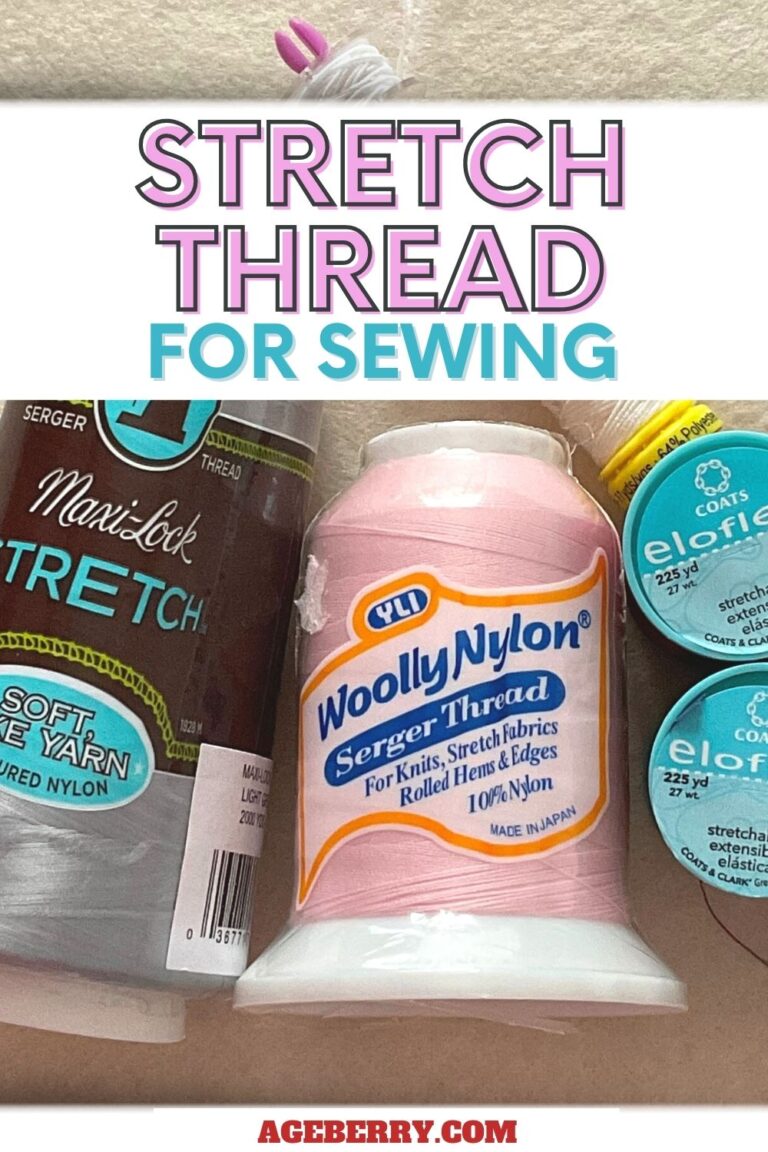
- Universal needle – it has a tip that is slightly sharp and slightly rounded, meaning that it can stitch both traditional woven fabrics and stretchy woven fabrics and even not very stretchy knits.
- Stretch needle – this kind has a rounded tip for working with knit fabrics and very elastic materials without tearing the fibers.
- Ballpoint needle – has a rounded tip for working with knits to penetrate fabric without tearing or damaging it.
- Leather needle – this needle is specially designed for piercing leather (and other similar materials) without damaging it.
Refer to this quick reference to choose the correct needle size for the fabric weight in your project (note: the higher the number, the stronger the needle):
- Lightweight materials (organza, chiffon, rayon) – 60/8, 70/10, or 75/11
- Medium-weight materials (cotton, linen, wool) – 80/12 or 90/14
- Heavyweight materials (denim, leather, wool, canvas) – 100/16 or 110/18
7. The Needle Isn’t Fully Inserted
If your needle isn’t inserted the way it’s designed (all the way to the top), it won’t be properly aligned and can strike the presser foot or throat plate and break. Even a slight misalignment can cause significant headaches.
Solution: Inspect the needle. Was it inserted backward or not secured tightly?
If you don’t see any damage to your needle, insert it back into the sewing machine with the flat side of the shank facing the back of your device. Push it all the way to the top and tighten the screw to hold it firmly in place.
8. Your Needle Screw Is Loose
This is a pretty common problem because various sewing machines require different methods for tightening the needle screw. If your device uses a screwdriver to tighten the screw and you just use your fingers, it won’t be tight enough.
Solution: Check your needle screw. If it’s loose, remove the needle and reinsert it to ensure it’s all the way at the top and properly aligned. Tighten the screw according to your sewing machine’s manual.
Then, get in the habit of checking your needle screw to make sure it’s tight before you begin sewing.
9. You Sew Over Pins
This trips up almost every new sewist and many experienced sewists, too. Sewing over your pins may seem like an insignificant thing because there are times when the sewing needle will go right over the pins without any problem.
But those times when the needle squarely hits the pin will wreak havoc on your needle (breaking it), your pin, and your machine.
Solution: Thankfully, there’s a simple solution. Just remember to remove the pins before you sew over them.
10. You Sew Over A Zipper With Metal Teeth
Trying to sew over a zipper with metal teeth is nearly a guaranteed way to damage or break your needle.
Solution: I recommend using the hand wheel to stitch manually until you reach the other side of the zipper. This will slow things down and give you enough control to avoid hitting those zipper teeth!
11. You’re Using the Wrong Throat Plate
Here’s another one that trips up many sewists: leaving the straight stitch plate on when using a zig-zag or decorative stitch. Your needle will hit the throat plate and quickly break when that happens.
Solution: To prevent needle breakage, switch out the throat plate for one specifically designed for the type of stitching you will be doing. It’s a simple fix that can save time, energy, and money in the long run.
Some newer sewing machines (including some Brother, Baby Lock, Pfaff, Husqvarna, and Viking) even have sensors in the throat plates that will alert you if the straight stitch plate is still on and may prevent you from selecting a problematic stitch setting.
12. Your Sewing Machine Thread Isn’t Threaded Correctly
If this has happened to you, you are NOT alone because this is one of the most common causes of broken sewing machine needles. Every single sewist has threaded their machine incorrectly at least once!
Unfortunately, threading your sewing machine wrong can lead to many issues, including knots and tangles that lead to broken needles or thread.
Solution: Incorrect threading is the root cause of many sewing machine issues. Unless you see another obvious problem, I recommend troubleshooting by rethreading both your upper and bobbin threads.
13. Your Thread Tension Is Wrong
When sewing, you need to adjust your tension to match your fabric. If it’s too tight, it can cause skipped stitches and broken needles. The same can be true when your upper tension and bobbin tension don’t match.
Solution: Always test your tension on a piece of scrap material that matches or mimics the weight and thickness of your project fabric. Adjust your tension by turning the tension dial if you spot skipped stitches, tangles, or pulled thread.
Consult this sewing machine tension tutorial to learn more.
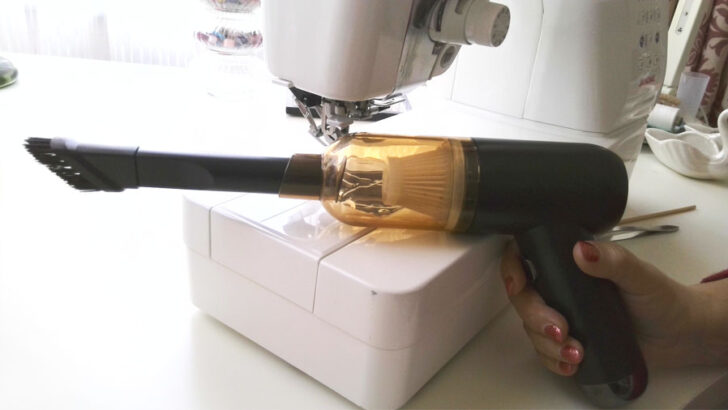
14. Your Bobbin Case Is Full Of Lint Or Debris
Lint and small obstructions accumulate quickly in your bobbin case from sewing machine use. Unfortunately, that can cause the needle to hit something and break.
Solution: Clean out your bobbin case regularly. Unscrew the case, remove the bobbin, and remove any accumulated lint or debris. Then replace everything correctly and rethread your bobbin thread. You’ll be back to sewing in no time!
✅ Related tutorial: Choosing a Mini Vacuum for Sewing Machine
15. You Pull Your Fabric While You Sew
Pulling and tugging on your fabric as you sew can put a lot of strain on your needle, causing misalignments so that it hits the throat plate, particularly if it is a thinner needle.
Solution: Keep your hands away from the fabric while you stitch, lengthen the stitch length, and let the machine pull the fabric through.
When you work with stretchy or slippery fabrics, use a fabric-feeding device like a walking foot or a roller foot to hold the material and feed it through the machine so you can sew without pulling on it.
16. Your Spool Catches Your Thread
Check your thread and spool if you’re dealing with frustrating sewing machine needle breaks and none of the previous causes (and solutions) seem to fix the problem. How is the thread wound on the spool (cross-wound or parallel)?
Is the spool placed on your machine correctly according to how the thread is wound and your machine’s instructions?
Also, check the edges of your spools. Some thread brands put a notch in the edge, which is excellent for holding thread you aren’t using, but it can be bad for pulling thread (and breaking needles) when you’re sewing.
Solution: Check your thread spool and ensure it’s wound and loaded onto your machine correctly.
17. Your Spool Cap Is Missing (Or Not Installed Properly)
Some sewing machines require a spool cap to hold the spool of thread in place. A missing cap or a gap between the spool and the cap can cause the thread to bounce, get tangled, pull on the needle, and break it.
Solution: Ensure that your spool cap is placed correctly so there’s no gap between the spool cap and the thread spool. If you’re missing a spool cap, purchase a replacement for your machine.
18. The Thread Wraps Around A Thread Guide
Here’s another common issue. When there’s a threading error, the thread can wrap around a thread guide more than once, causing extra resistance and pulling the needle out of alignment so that it hits the presser foot or throat plate and breaks.
Solution: Rethread your sewing machine and ensure that both the upper and bobbin threads are threaded correctly before you begin sewing again.
19. Your Bobbin Is Threaded Or Positioned Wrong
Correct bobbin placement and threading are just as crucial as proper threading of the upper thread. If your bobbin is out of place, the needle can hit it and break off. Likewise, threading problems can cause tangles, knots, and tension issues that break your needle.
Solution: Double-check your bobbin case and ensure it’s installed correctly and locked into position. Also, rethread your bobbin (and upper) thread.
20. Your Bobbin Is The Wrong Size
Although bobbins all look the same, there are slight differences in their shape and sizing. It’s essential to make sure you’re using the correct bobbin for your sewing machine to prevent the bobbin from shifting in the bobbin case and causing your needle to hit it (and break).
Solution: Always use bobbins designed for your machine. If necessary, consult your machine instruction manual to make sure you purchase and use the correct size bobbin.
21. Your Sewing Machine Hasn’t Been Properly Maintained
Taking care of your sewing machine is essential to ensure that it functions properly and lasts many years. If you’re having trouble with sewing machine needles that keep breaking and can’t find another cause, the problem may actually be that your machine isn’t being lubricated and oiled regularly.
Solution: Regularly servicing your machine will help ensure that it stays in tip-top shape and operates as designed.
22. Your Presser Foot Doesn’t Match Your Project
A mismatch between the type of presser foot you’re using and the needle position is the recipe for a sewing machine needle to keep breaking.
Solution: Use the correct presser foot for the fabric and stitch you are using for your project.
Broken Sewing Machine Needle FAQs
I see many questions from readers and other sewists around the topic, “why does my sewing machine needle keep breaking?” Here are a couple that the information above didn’t cover.
How do I remove a broken needle from my sewing machine?
When you have a needle that breaks, you need to replace it immediately with a new needle so you don’t damage your project.
Here’s how to remove your broken needle:
- Turn off your sewing machine ( and even unplug it from the power source).
- Remove the presser foot.
- Locate the needle clamp and loosen the screw that holds the needle in place. This will allow you to remove any remaining piece of the needle.
- If the broken part is still stuck inside the machine, you may need to use a pair of tweezers to carefully pull it out.
- If you’re having trouble reaching the broken needle piece with your tweezers, you may need to remove the throat plate or bobbin case to get better access. This will give you better visibility and access to the inside of your machine. Follow the instructions in your machine’s manual for removing these parts.
- Shine a flashlight or use a magnifying glass to carefully inspect the inside of your machine for any signs of a broken needle. Look for any metal shards, bent pieces, or unusual debris that could indicate the presence of a broken needle.
- Be careful not to damage any other parts of your machine as you search.
- Once you’ve removed the broken needle, examine your machine carefully to make sure there are no other broken pieces inside. If you find any, repeat the process to remove them.
- Insert a new needle, making sure it’s inserted all the way up into the needle clamp, and tighten the screw securely.
- Plug in your machine and turn it on to make sure everything is working properly before you start sewing again.
It’s always a good idea to take your time and be very careful when working with a sewing machine, especially when trying to remove a broken needle. If you’re unsure about any part of the process, consult your machine’s manual.
What happens if a broken needle falls inside my sewing machine?
If a broken needle falls inside your sewing machine, it can cause a number of problems. The broken needle can get stuck in the feed dogs, hook, or bobbin case, which can cause your machine to jam or even break.
In addition to causing damage to your machine, a broken needle can also pose a safety hazard. If you continue to use your machine with a broken needle inside, it can fly out at high speeds and potentially injure you or someone else in the vicinity.
Therefore, it’s important to stop using your machine immediately if you suspect that a needle has broken and fallen inside.
Follow the steps for removing a broken needle that I explained earlier, and be sure to thoroughly inspect your machine for any other broken pieces before resuming sewing. It’s always better to take the time to remove broken parts of the needle and avoid potential damage and injury.
If a broken needle falls inside your sewing machine and you can’t see it, it’s possible that it has gotten stuck in a hard-to-reach place. If you’re unable to locate the broken needle, you may need to take your machine to a professional for repair. They will have specialized tools and knowledge to help locate and remove the broken needle safely.
In conclusion: There are many reasons why your sewing machine needle may keep breaking. From using the wrong type or size of needle to sewing over pins or through thick layers of fabric, etc. each issue can lead to frustration and wasted time. I hope this article of common reasons why your needle keeps breaking helps to make troubleshooting easier and that the solutions help you get back to your project quickly.
Is your sewing machine acting up? I created the ultimate troubleshooting guide to help you out and compiled a detailed list of solutions to common sewing machine problems. Many of these problems can be solved with some basic troubleshooting or maintenance. Is your thread getting tangled or breaking? I’ll walk you through the steps to fix it. Are you struggling with tension settings, broken needles, or jammed threads? I have tips for that too. Don’t let sewing mishaps get in the way of your creative flow. Check my guide and show your sewing machine who is the boss – Troubleshooting Common Sewing Machine Problems (+ Solutions)
Useful Info – Sewing Machine Troubleshooting
Owning a sewing machine means eventually, you’ll need to learn the ins and outs of troubleshooting it. Some issues may be avoidable, but certain complications are just part of the sewing machine experience. My downloadable PDF eBook guides you through the process of diagnosing and fixing your sewing machine’s problems. It’s a valuable resource for both mechanical and computerized machine models, providing you with the know-how to tackle issues on your own before considering the purchase of a new machine or seeking professional repair services.
Did you find this tutorial helpful? If so, save this pin (see below) on your sewing board so you can come to this tutorial later when you need this information on why your sewing machine needle keeps breaking, and follow me on Pinterest for more tips, tutorials, and inspiration!
latest posts
- What Do You Call a Person Who Sews? I Asked My Readers and Got 1,408 Opinions
- DIY Round Purse: PDF Sewing Pattern and Detailed Instructions
- Mini Wonder Clips By Clover: Useful Sewing Tool Or Just Another Notion?
- Non-Slip Grips For Quilting Rulers: A Small Notion With A Useful Job
- Fabric Eraser for Sewing: What It Removes and When to Use It
- What Is The Best Thread For Sewing Machine Projects? Let’s Find Out!
- Butterfly Quilt Block Tutorial – Foundation Paper Piecing
- How To Sew Quilt Squares So The Corners Match
- Sewing With Fork Pins: How They Help With Pattern Matching, Slippery Fabric, And Seams


Hi Olga, very interested to read your article about breaking sewing machine needles, but I have a few more on my sleeve !! Position the needle with the flat side to the back of the needle holder is sometimes first time sewers dont know, which is standard for most domestic sewing machines. For industrial sewing machines as my own Phaff the needle is inserted so that the eye of the needle is treaded from left to right, and there are needles for sale who are a lot cheaper then for instance schmetz or a other good brand, and they often give problems too, specially with the overlockers, which I have experienced in my sewing classes I teach. Sewing thread to thick can for a needle to thin can give big problems too, and yes as you say there is a lot to think about when you want to sew correctly !!
Happy sewing Olga, I,am always interested in your emails, thank you!!
Cheers from Petra Beckers from New zealand