How To Cut Knit Fabric: Ultimate Guide
Knit fabrics don’t behave the same way that woven fabrics do. For beginner (and even some intermediate) sewists, sewing with knit fabric is a frustrating experience that provides good material for funny stories. Use these tips as you learn how to cut knit fabric, so you can avoid wanting to pull your hair out!
If you’ve ever worked with different types of knit fabrics in your sewing projects, you know just how frustrating they can be to work with. Those same qualities that make knit fabrics comfortable to wear also cause their edges to curl and give them their stretchiness.
I’ve had my fair share of experience with cutting knits and I’m laying out everything I’ve learned to make your experience much easier than mine was at first.
Here are helpful tips to make your experience of sewing and cutting knit fabric from annoying to enjoyable.
Attention! If you like the video format, at the bottom of this post, look for a YouTube video version where there is a step-by-step tutorial on how to cut knit fabric. For a more complete picture, I recommend exploring both versions.
Preparing Knit Fabric For Cutting
There’s a common misconception that because knit fabrics stretch, they don’t shrink. Unfortunately, that couldn’t be less true! In fact, these stretchy fabrics often shrink more than some other materials.
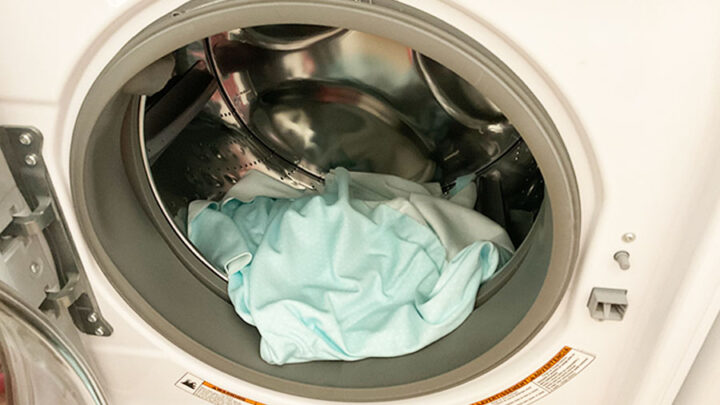
So, that means the first step is to prepare your fabric for sewing by pre-washing it.
What is pre-washing? It’s the process to make sure the fabric won’t lose its shape, shrink, or be discolored when you use it for your sewing project.
How to pre-wash knit fabric? Well, it depends. What type of knit fabric is it? Is it natural fabric (like cotton, linen, wool, or silk) or synthetic? Or is it a blend? The problem is that when you make a garment from some knit fabric you don’t put a laundry label on it.
For example, if your knit fabric is 100% cotton, and you make kids’ clothes with it, you would wash it in hot water and put it in a dryer on high heat. But if your knit fabric is 100% polyester ( but it looks exactly like the cotton knit) and you make a skirt from it, you would wash it in cold water and use a dryer on delicate. But will you remember the fiber content of the fabric in a year or so? You don’t have labels to remember how to do the washing.
What do I usually do? I want to pre-wash and dry my fabrics in a way that will make them shrink the most. So I go ahead and shrink them now so that when I finish sewing my garments, they will maintain their size and shape with repeated washes.
I wash all cotton-like fabrics in hot water and dry them on high heat (unless I clearly see that the fabric is NOT cotton). Doing this will cause them to shrink as much as they can (and will also wash out any excess dyes from manufacturing).
Note: Some of the links on this page are affiliate links. This means I will receive a commission if you order a product through one of my links. I only recommend products I believe in and use myself.
And if I use other types of knits like rayon, silk, lace, fleece, velvet, etc. I still pre-wash them but in cold water and use a dryer on low heat or even no heat.
Pre-wash your fabric without any laundry detergent. Do not use bleach, because some fabrics may be damaged by this chemical.
Some fabrics bleed, and if we don’t pre-wash them, the color might go everywhere. Or another possibility – is if you use a dark knit fabric for your sewing project and it’s not pre-washed, you could end up with a lighter shade after the first washing.
But some knit fabrics are “dry clean only” (wool, mohair, cashmere) and these knits shouldn’t be pre-washed of course if you don’t want to ruin them.
What knit fabrics shrink more than others? It’s cotton, linen, and anything made of natural fibers. But if you pre-wash them, it is less likely that they are going to shrink further during washing.
After pre-washing, the line dries the fabric or tumble dry and then iron it if necessary. This ensures that there are no creases and wrinkles in the fabric before you cut it for your sewing project.
Knit fabrics don’t usually wrinkle much, but they can curl at the ends. Ironing the fabric helps it stay straight and flat when measuring and cutting.
Some knit fabrics (especially ones with elastane) often require a lower iron temperature or using a pressing cloth.
Finding The Grainline On Knit Fabric
Just as you would with woven fabrics, find the grainline on knits before cutting because you have to match the grainline on your pattern with the grainline on your fabric.
The grainline on knits is completely different from woven fabrics and can be tough to find. But it’s still there and it’s important to find it before cutting the fabric. Be prepared to get up close – very close! – to inspect your material.
Maybe you’ve had a jersey dress at one point that laid nicely at first. Then after wearing and washing it, the fabric started to twist. Suddenly it’s not hanging nicely at all! As frustrating as that is, the reason it does that is that it wasn’t cut along the grainline.
So, how do we look for the grainline on knit fabric?
First, you should find the right side.
Yes, knit fabrics have a “right side” and a “wrong side.” When you work with a material with a print, it’s easy to tell which side is the “right side” because it’s the side with the print. However, if your material is a solid color, it may be difficult to tell which side is which.
Thankfully, there is a way that makes it easier to determine the difference: the “right side” has very small vertical lines, while the “wrong side” may look like it has a horizontal texture or a slightly different tone in the light. (try using a magnifying glass if needed!)
But some knits have the “right side” on both sides of the fabric – double knits, interlock knits. And if your double knit fabric has a solid color you can use both sides as the right side.
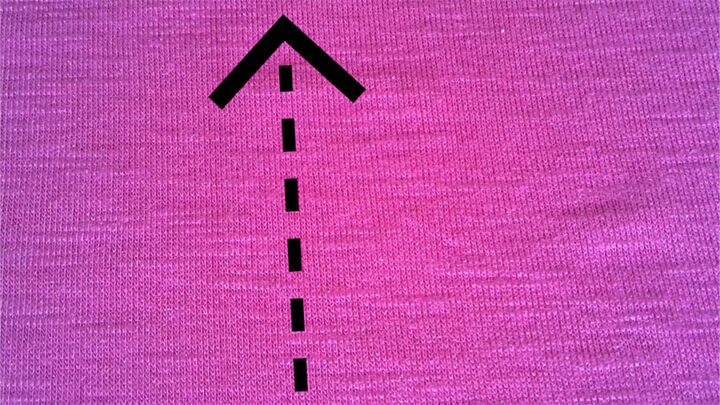
So, look at the right side of your fabric – do you notice these tiny little vertical lines on the surface that resemble “ribs”? It looks like knit purl loops that you see in a sweater, just a lot smaller.
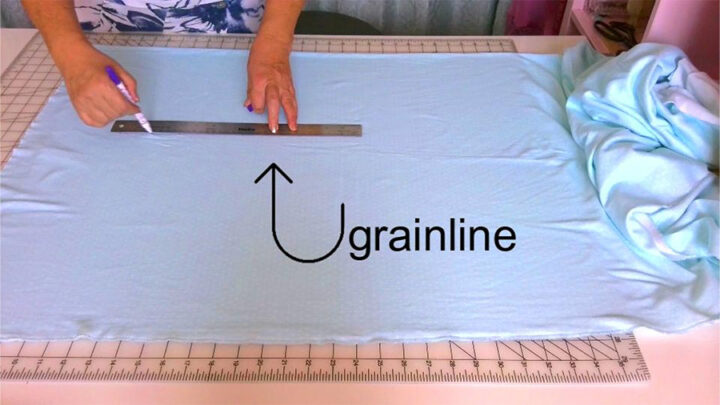
And if you follow one of these vertical lines you will find the grainline of your knit fabric.
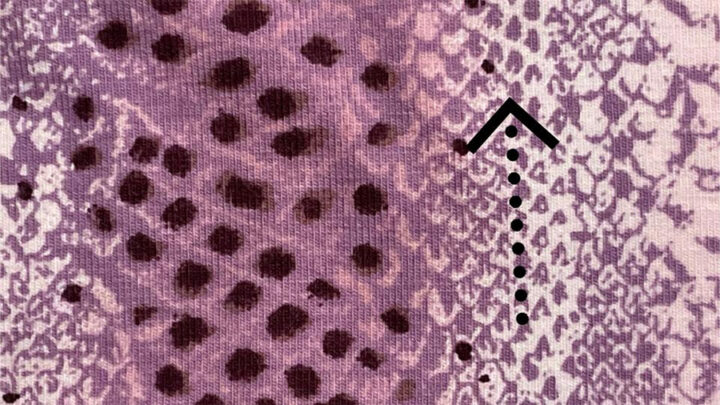
Usually, it’s parallel to the selvage ends of the fabric. So if the loops are really tiny and you can’t really see them without a magnifying glass you can use a ruler and measure the same distance from the selvage edge and mark it with pins, tape, or fabric markers.
Finding the grainline is important for cutting your knit fabric. But when it comes to cutting along the grain, knits are quite forgiving. The fabric might stretch and if you go off the grainline 2 or 3 millimeters you would not have a problem. As long as you cut close to on-the-grain, you will not see a big difference in your garment.
How To Stop Knit Fabric From Curling
Some knit fabrics have an unfortunate tendency to curl back on themselves, while some others don’t. So it’s always better to use knit fabrics that don’t curl after cutting. Interlock knits, and double knits are the easiest knits to sew with because their edges don’t curl. So if you don’t want to deal with curling edges you can always choose a more stable knit fabric.
But the most common knit fabric is jersey knit and if you like to use knits you can’t avoid jerseys. The most difficult part of cutting jersey knits is dealing with the curling.
Knit fabric curls to which side?
Most of the time cut edges of jersey knit fabric curl towards the right side. But sometimes you might see
selvages rolling toward the wrong side of the fabric. And while curling is annoying, if you have solid color jersey fabric this rolling may help to find the right side of the fabric.
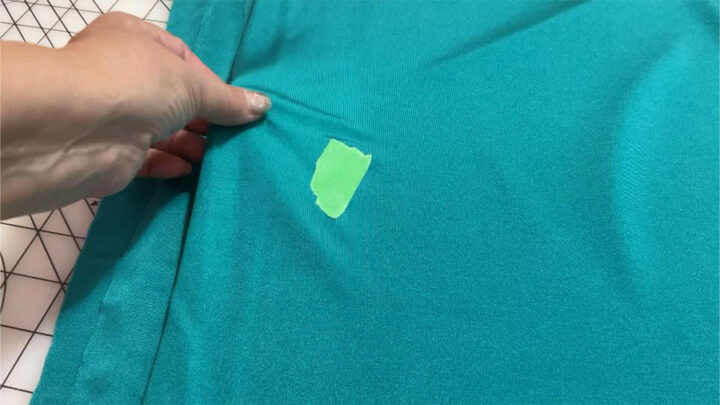
Let me give you a small but useful tip: you found the right side of your knit fabric but you can easily lose it again while handling the fabric. So mark the right side with a piece of painter’s tape.
If you’re working with a jersey knit fabric that wants to curl up after you cut it, there are a few things you can do to help straighten those edges out. Sometimes the curling seems to get even worse after pre-washing, but it’s easy enough to fix! First of all, don’t stretch your fabric edges: stretching will curl them more.
Here are some things you can try to make jersey fabric flat.
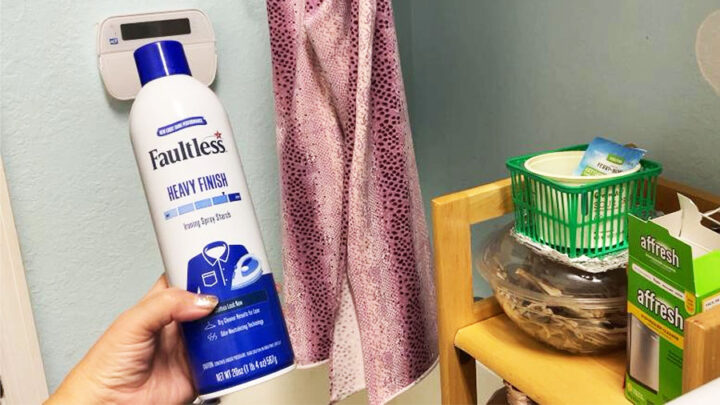
Use Spray Starch.
✅ Related tutorial: The Essential Guide To Spray Starch: What It Is | How To Use It | Types
This is my preferred method of handling curled edges. The spray starch doesn’t make the fabric very stiff or crunchy, but it smooths out the fabric and stops the curling. If you can use eco-friendly starch made with cornstarch. But I have this one – Faultless Heavy Finish, and it works great!
- I don’t like using the spray in my sewing room near an iron. The bottle may contain flammable chemicals. So I usually take the fabric to the laundry room and spray it over a sink. There’s no need to starch the entire piece of fabric. Instead, focus on the areas that are trying to curl up on you.
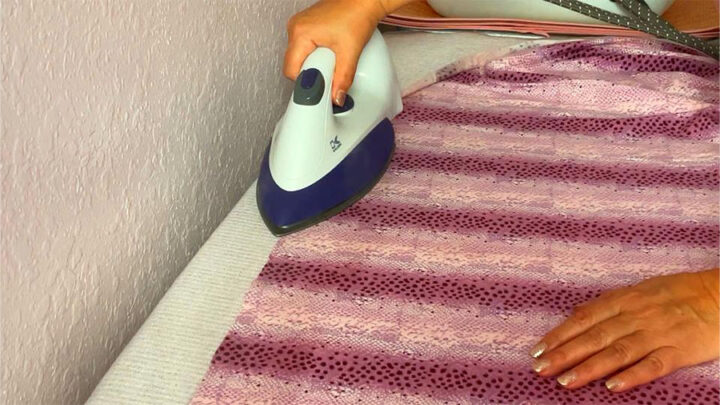
- Place the fabric on your ironing board wrong side up, uncurl the edges, and pin the edges to the ironing board.
- Test the iron on a small part of the fabric first.
- Press with a hot iron without steam. Don’t slide your iron across the fabric, just press. It may take a few seconds for the starch to get dry. You may notice that the iron is sticking to the fabric. Not a problem, it will not leave any residue on the iron or on the fabric. Use a pressing cloth for some knit fabrics. `Repeat this process on different areas of fabric until you’ve finished all of them.
You might want to wash the garment made with this method but the starch will wash out easily.
And if you are allergic to those sprays you can easily make your own starch at home.
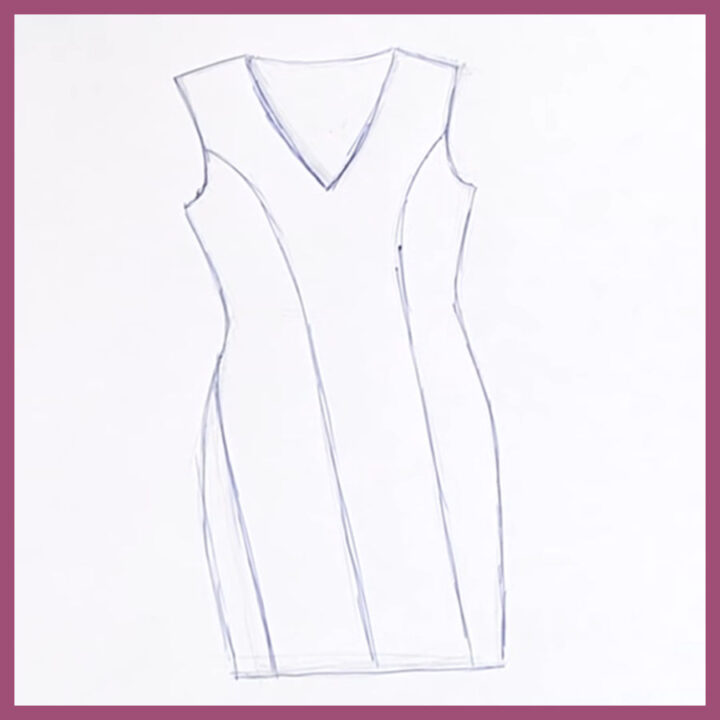
Sometimes curling edges can be used as a decorative element of a garment. And that’s exactly what I did when making my 30-minute dress without a pattern.

Sometimes edges curl but not so much especially if you don’t stretch the fabric if the cut fabric pieces are small and you need to sew the pieces together. You don’t need to use the starch in this case.
I just use pins and uncurl the edges by hand. And after that, I just use my serger stitch, 4 thread 2 needles stitch, which give ¼ inch seam allowances. With seams allowances this size, your Serger foot will trap them underneath, keeping them from curling.
Place The Fabric On The Cutting Table
The key to cutting knit fabrics is to ensure that there isn’t any tension placed on them. Find a place to put your material where there won’t be any pieces hanging down and causing tension.
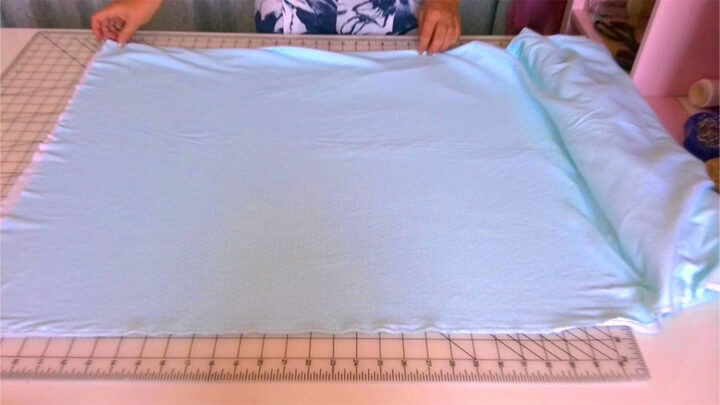
A large cutting table with a cutting mat to protect it is a great location. If the table isn’t large enough to hold the entire piece of fabric, loosely roll the material just enough so that it’s all on the table.
It’s important that there are no fabric ends hanging off the table because they might stretch the fabric out of alignment. This will help you to avoid having a messy seam where different lengths of material won’t match up properly.
When following a pattern, my preferred way to cut knit fabrics is using a single-layer cut. I find this method to be the easiest for both cutting along the grain and avoiding pulling on the fabric, adding unnecessary tension. I get much better results if I cut knits in a single layer. But for this, I usually need to make full patterns of all the pattern pieces (I mean I am not using half bodice, half back, I make a full pattern for each piece).
As a bonus, I also have found that I tend to use (or waste) less fabric when I cut a pattern in a single layer.
But cutting on the fold is also a possibility.
Finding the vertical lines of your fabric grain is important for this method.
Once you locate the vertical lines, fold your fabric along one or two adjacent lines. If you are cutting on a fold you need to place the fabric wrong sides together. After the material is folded correctly, pin it along the fold line to hold it in place. Next, smooth your fabric away from the fold. This will make sure that your cuts are on-grain.
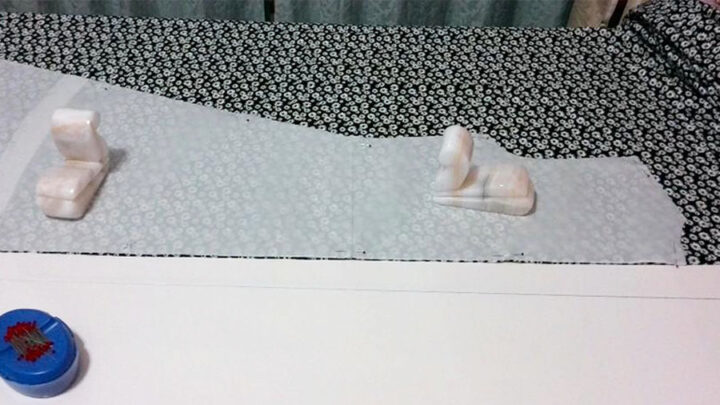
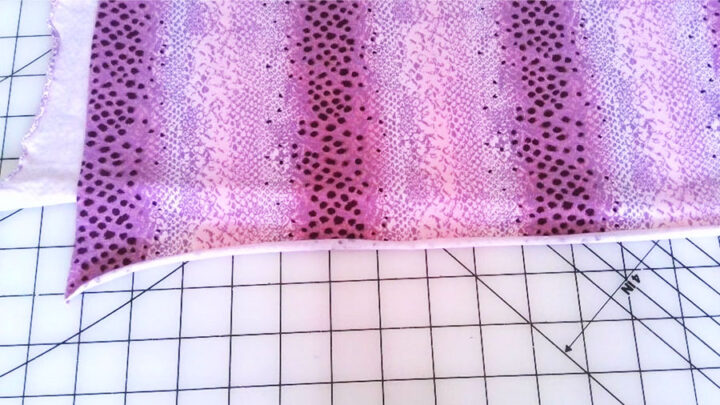
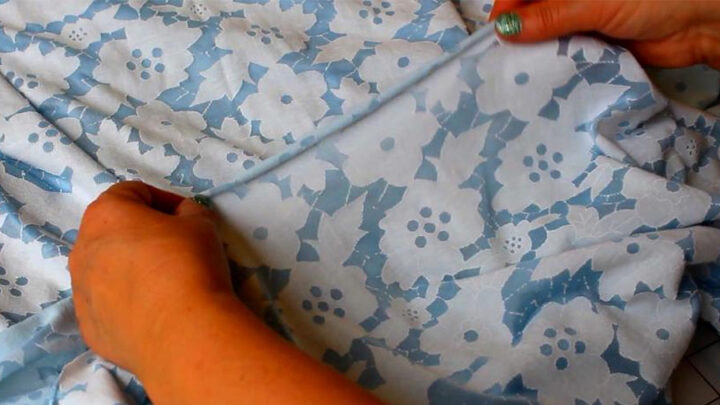
You can also fold the fabric for cutting aligning fabric selvages. It’s easy to do if they don’t roll. Just line them up, and your fold should be on-grain. But make sure that the fold looks completely flat. If the folded edge is twisted as you see in the image below, the fabric is not correctly folded and is not on-grain. Move one of the selvage edges left or right until the fold is flat and nice and there are no twists in the fold.
Cutting Out A Pattern
Once you have your fabric prepared on the cutting table, it’s time to start cutting out your pattern. Keep your fabric nice and flat with no tension.
I usually cut the selvages because they are pulling the fabric out of a flat shape.
I smooth the fabric on the cutting mat so it’s completely flat and there are no “bubbles”.
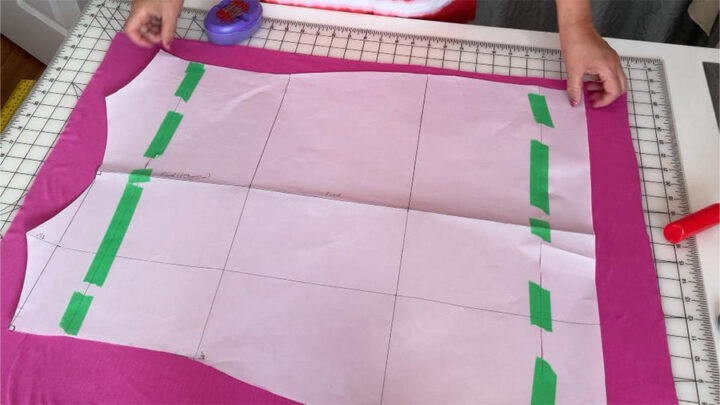
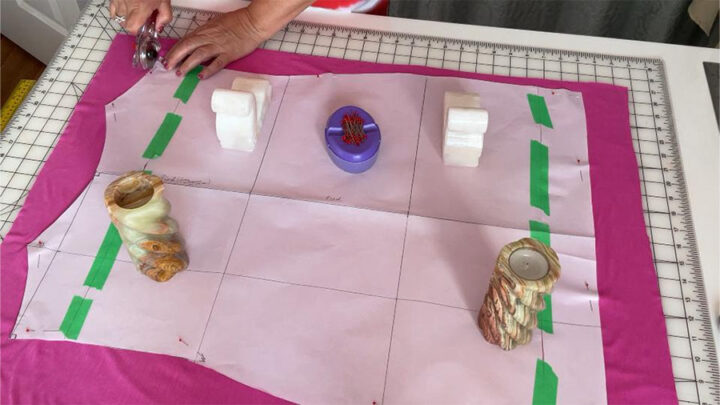
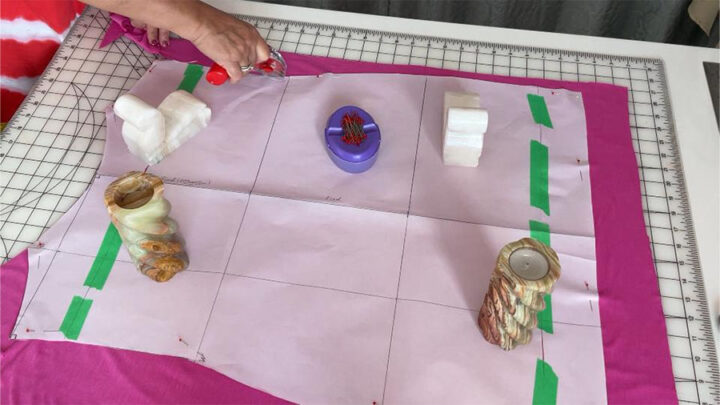
You can proceed by pinning the pattern to your material. But if you don’t like fiddling with pins you can add weight to it with pattern weights to help it stay in place. This will prevent any last-minute stretching that your knit fabric may want to do. They leave no holes in delicate knit fabrics and they are heavy to really anchor the fabric and paper down while you cut your pattern.
I see that people like pattern weights from Dritz but you can make your own pattern weights if you hesitate to buy them. To be honest, practically anything with good weight and also a small size is likely to work well as pattern weights. I am using my stone figurines.
From here, you might use a dressmaker’s carbon paper and a tracing wheel to trace the pattern before cutting it out.
However, if you don’t have that, you can cut out your paper pattern on the lines for your desired size and trace it with chalk or a special fabric marker onto your material. Sometimes chalk can tug the thin knit fabric a little and the fabric will stretch. Not much but it’s still better to avoid that.
But I usually don’t trace the pattern with a fabric marker. I prefer just to cut the fabric around the pattern.
✅ Related tutorial: Cutting Tools For Sewing: Ultimate Guide
Using scissors on knit fabric will work, but it isn’t ideal. Unless you’re a master with them, your edges will likely look at least a little jagged. You might get a mess of uneven cuts with some tricky types of knits, regardless if you are being careful or not.
My preferred way to cut knit fabric is to use a rotary cutter. This simple tool will quickly give you nice clean edges. You will get a better cut with greater accuracy. You won’t have to worry about fraying because knits don’t fray.
I like to use a Martelli rotary cutter
If you’re not already familiar with how to use a rotary cutter, I recommend checking out this tutorial first.
When I’m cutting long lines, or when the pattern lines are straight (like shoulder lines), I use a quilting ruler to guide my rotary cutter and get a straight line.
Keep the blade pressed against the fabric so you don’t get any skipped spots.
Also, make sure you put a new blade in your rotary cutter because knit fabrics with elastane can be effectively cut only with a very sharp blade. But even with a new blade I sometimes have a few missed threads that are not cut and have to go back and cut them.
Keep your rotary cutter blade in good shape by cleaning off any fuzz that may accumulate after each use.
The best way to learn how to use a rotary cutter for pattern cutting would be by getting some scrap fabric and practicing until you’re comfortable with the process.
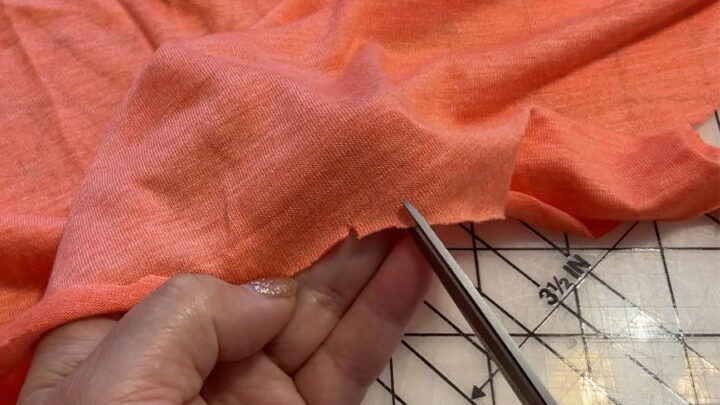
But of course, you can cut knits with regular fabric shears. And if your pattern has a lot of small details and curves you probably should cut it with scissors anyway because they’re usually better at handling detail work.
Simply pin the pattern and carefully follow it around as best possible. Take care not to lift up the fabric too much when doing this so that there will be no shifting off-grain in either direction during cutting.
If you want to avoid snags, make sure your scissors are really sharp. But again, if the knit fabric has elastane fibers they can catch on your scissors from time to time and if your scissors are not sharp enough this will happen more often.

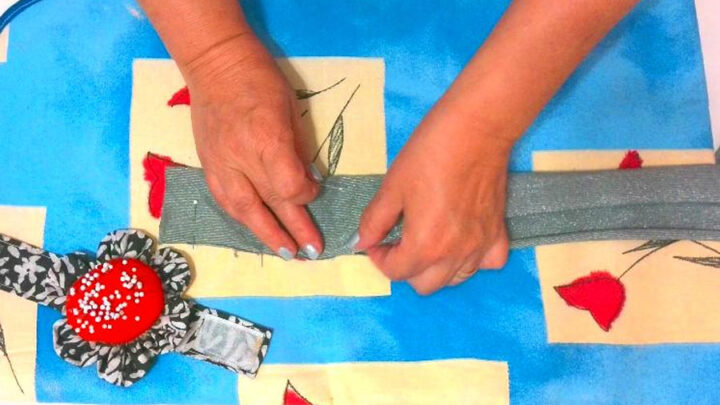
The last step in cutting knit fabric is transferring all of the markings onto the fabric before you start sewing it.
The essential marking to make is the notches. These allow the two pieces of fabric to line up along edges when they need to be sewn together.
You can either mark notches with a fabric marker and pins or make small snips with scissors. Make sure that the snips don’t go too far into seam allowances.
But some knit fabrics run where you snip them, so in this case, don’t snip and mark pattern lines on the wrong side of the fabric with a fabric marker and make sure that the notches stay visible while you sew it.
Learning how to cut knit fabrics takes time and patience, no doubt. But with these tips and the right tools, you’ll quickly gain confidence in working with different types of knit fabrics.
So here is my YouTube video. Check this out if you like to see a helpful video on how to cut knit fabric (instead of reading).

Did you find this tutorial helpful? If so, save this pin (see below) on your sewing board so you can come to this tutorial later when you need this information on how to cut knit fabric, and follow me on Pinterest for more tips, tutorials, and inspiration!

latest posts
- Corset Pressing Board for Sewing: What It Does and How I Use It
- 7 Essential Tools and Settings for Sewing Denim on a Regular Sewing Machine
- That Purple Thang: 10 Smart Ways to Use This Weird Little Tool
- 20+ Reasons Your Sewing Machine Thread Keeps Breaking (+ Solutions)
- Dresden Plate Quilt Block: 4th of July Fireworks
- How To Sew Curves the Easy Way Using a Curve Master Presser Foot
- 30 Sewing Hacks That Turn Ordinary Items into Useful Sewing Tools
- Seam Allowances in Sewing Patterns: What They Are and How to Use Them
- What Do You Call a Person Who Sews? I Asked My Readers and Got 1,408 Opinions