Sewing Vinyl: 17+ Expert Tips For Beginners
If you want to add versatility to your sewing projects, using vinyl may be the perfect way to do that. Sewing vinyl can be a little trickier than working with other fabrics, so use these top vinyl sewing tips and tricks to help make the process easier.
Vinyl is a synthetic fabric ideal for many different indoor and outdoor sewing projects. However, its sticky surface and wide range of finishes, textures, and weights can make it challenging for beginner sewists to work with.

What is Vinyl Material?
“Vinyl” has become the go-to phrase for any plastic material or fabric with a plastic coating. Vinyl materials are available in a wide range of colors, weights, and textures, so there isn’t a one-size-fits-all option. This range of availability correlates to the material’s almost countless uses for both indoor and outdoor projects – especially projects where you want stain or water resistance.
Various vinyl materials that you can find on the market include:
- upholstery vinyl fabric
- marine vinyl
- clear vinyl fabric for sewing
- pvc vinyl fabric
- vinyl leather (faux leather, pleather)
- outdoor vinyl fabric
- vinyl mesh
- flannel backed vinyl
- stretch vinyl (knit backed vinyl)
- quilted vinyl
- vinyl coated polyester fabric
- oilcloth
Many different types of vinyl fabric are available, and the plastic surface provides versatility (and challenges) that traditional fabrics don’t have. Although these materials differ in their production, they have similar characteristics that make them popular, like being durable, easy to clean, water-resistant, stain-resistant, abrasion-resistant, and flexible.
✅ Related tutorial: Different Types Of Vinyl Fabric For Sewing
Some examples of projects that vinyl is ideal for include:
- Purses or bags
- Pouches
- Tablecloths
- Outdoor patio furniture cushions
- Upholstery
- Placemats
- Baby bibs
- Seat covers
- Toys
- Aprons
Where To Buy Vinyl Materials
There are a few different places you can buy vinyl for your projects. Your local JoAnn Fabrics store is always a great option, and most of them carry a decent selection. If they don’t have what you’re looking for, or you want more options, check out Amazon. Both of these websites have a wide variety of vinyls to choose from, in all different colors and patterns. You’re sure to find something that fits your project perfectly.
Proven Tips For Sewing Vinyl
Sewing on vinyl (just like sewing leather) gets a bad reputation for being too hard for home sewists. However, it’s much easier to do than it may seem, and I have some tips and tricks that will simplify the process for you!
1. Prepare Vinyl Fabric For Sewing
Prepping vinyl materials may look a little different from preparing standard fiber materials, but the process is just as essential before you begin cutting and sewing.
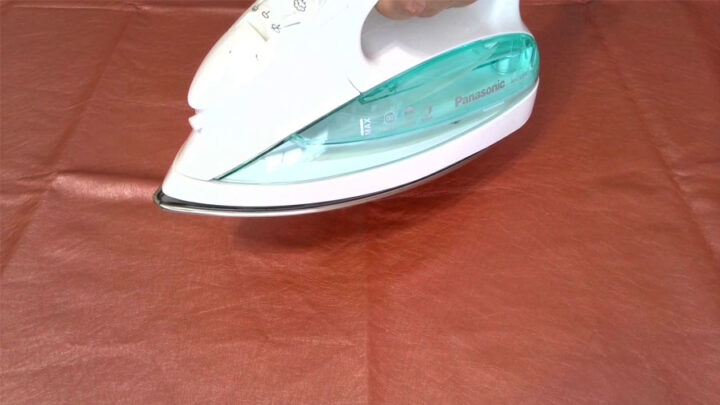
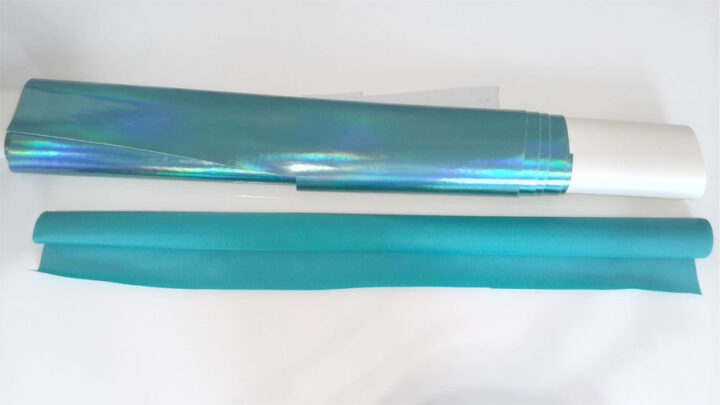
Before sewing with vinyl fabric, it’s important to prepare the fabric so that it lies flat and doesn’t have any creases. This is especially important if the vinyl has been stored folded or on a roll, as creases or rolling can make it difficult to work with.
To prepare the vinyl, hang it on a clothesline or use a low-heat setting on an iron to press it through a thick piece of fabric (to heat it up a bit) or just hover your iron over vinyl (but don’t use steam!). This will help to remove any creases or rolling so that the vinyl lies flat and is easier to work with. But make sure you don’t actually touch the vinyl with your iron.
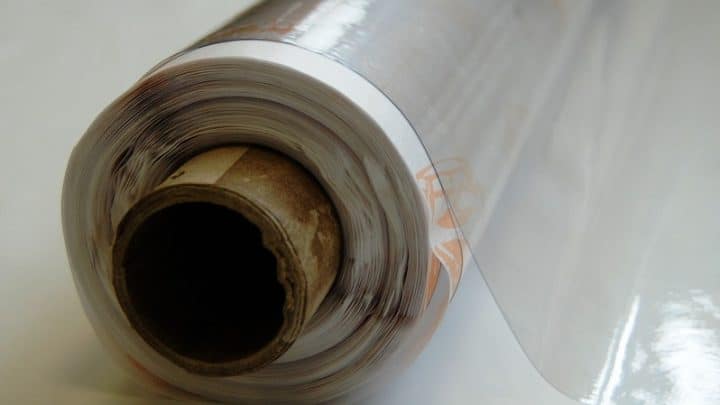
2. Store Vinyl Properly
I recommend storing vinyl differently from how you would store standard fabrics because folding it can create creases that are difficult (or impossible) to straighten fully. Try rolling your vinyl ( you can use a cardboard roll) to avoid folding it entirely. Then store your cardboard cores standing in a basket or box.
I can say from personal experience that it is definitely best to store vinyl rolled. I bought some nice faux leather fabric a while back, in silver and pink colors. I didn’t know at the time that I needed to store it on a roll, so I just kept it folded as regular fabric. As a result, the fabric got creases and it was hard to get rid of them.
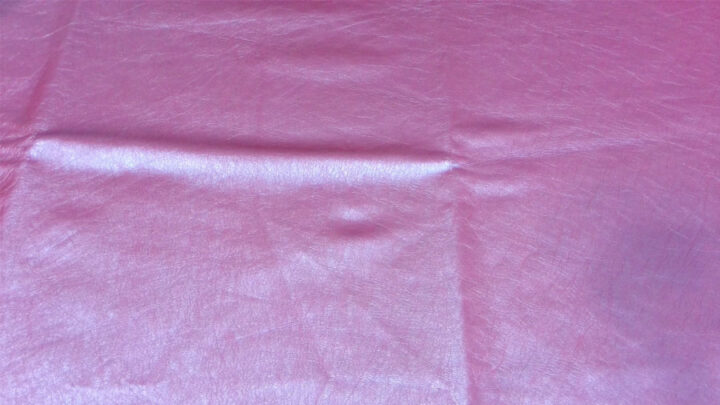
Since then, I have been storing my vinyl rolled and I haven’t had any issues with creases or damage.
But if you don’t have room to store them that way, you can “fold” the fabric into loose accordion folds and hang it vertically with skirt clips on a hangar. It won’t work as well as rolling, but this method will prevent the worst creases.
Note: Some of the links on this page are affiliate links. This means I will receive a commission if you order a product through one of my links. I only recommend products I believe in and use myself.
3. Choose A Strong Thread For Sewing Vinyl
For projects that aren’t heavy-duty (like placemats or tablecloths), you can use an all-purpose polyester thread.
However, if you want your stitches to be more prominent or you’re sewing something that will need to withstand a lot of wear and tear (like bags or upholstery), I recommend a heavy-duty thread that will stand out more and keep everything together.
✅ Related tutorial: Sewing thread types and uses
One of the heavy-duty threads is bonded nylon. The thread is super strong and can be used in home sewing machines. Bonded nylon is a heavy-duty thread that is often used in upholstery, drapery, and other applications where a very strong thread is needed.
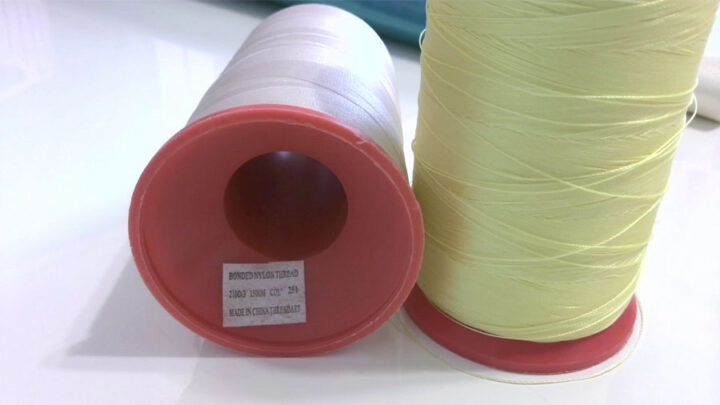
The bonded part of the name refers to the fact that the nylon fibers are bonded together with some kind of coating, making them stronger than uncoated nylon threads. Bonded nylon threads are available in a variety of colors, and they can be matched to the fabric or trim being used. In addition, bonded nylon threads are generally more resistant to sunlight and chemicals than other types of thread, making them a good choice for outdoor applications.
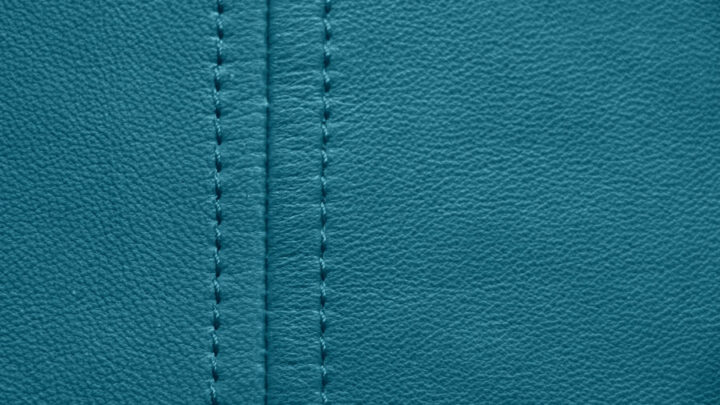
I use bonded nylon thread also for topstitching on vinyl. The thread is a bit shiny which is good and I like the look of shiny topstitching on bags made with vinyl. It looks more polished than if I used a matte thread.
4. Best Needles For Sewing Vinyl
There are a few different types of sewing machine needles you can use to sew vinyl, and the best needle to use may depend on the thickness of the vinyl and how sticky it is.
Universal needles may work just fine with thin vinyl, and for thicker vinyl use sizes 90/14, 100/16 and 110/18.
But also make sure the needle is not too thick for your vinyl as it can make big holes in the fabric.
You can also use leather needles, which are designed for materials that are tough to sew.
There are also special vinyl needles from Schmetz that have some kind of non stick coating, which helps the needle glide through the vinyl more easily.
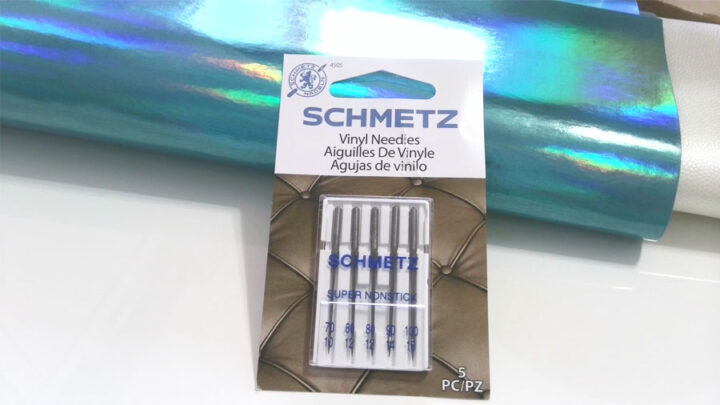
Ultimately, the best needle to use will depend on the specific vinyl you’re working with. Be sure to test your needle on a scrap piece of vinyl before sewing your project to ensure that it will work properly.
✅ Related article: Everything You Ever Wanted to Know About Schmetz Needles
Also, you need to make sure your needle is sharp and not bent. A dull or bent needle will cause skipped stitches and make holes in your vinyl fabric. It can also damage your sewing machine. So before you start a project with vinyl, be sure to change your needle to a new one.
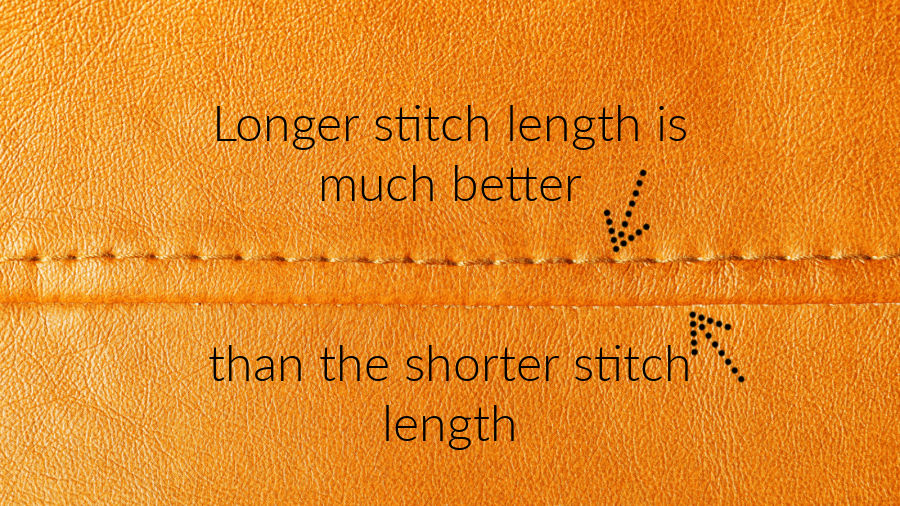
5. Use Longer Stitch Length
Because vinyl is a relatively stiff material, using small stitches can put a lot of strain on your thread or needle, causing them to break more easily. In addition, small stitches can weaken the overall structure of your fabric, making it more likely to tear (similar to perforated paper).
To avoid these problems, use a longer stitch length (3.0 or longer) than you would use on regular fabric, which will, in turn, help make your vinyl project stronger. Try different stitch lengths on your test fabric to see what setting works best with your project material.
6. Adjust Tension Setting For Sewing Vinyl
When you’re sewing with vinyl, you may find that you need to adjust your thread tension. Vinyl is often thicker than normal fabric, so you’ll likely need to lower the tension. If you find that your thread is breaking often, it’s probably because the tension is too high. Just be sure to test the tension on a scrap piece of vinyl before sewing your final project. That way, you can make sure the tension is just right.
✅ Related tutorial: How to Adjust Sewing Machine Tension
7. Don’t Use Pins On Your Vinyl Material
Pins work well in standard fabrics because the fibers slide back into place and hide the pinholes once you remove them. However, vinyl behaves more like leather because pins pierce the material, and the holes remain visible after removing the pins.
Keep in mind that those holes are permanent – there’s no way to get rid of them. That may be okay if you only use pins within the seam allowances where they will stay hidden.
However, you can avoid this problem altogether by using sewing clips instead of sewing pins to hold everything in place as you sew. Another option that works great in some situations is Wonder Tape.
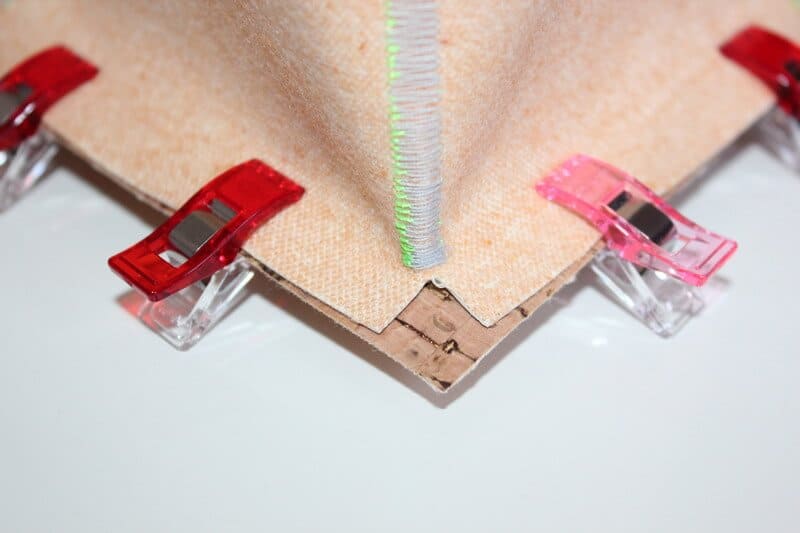
Pro Tip: don’t leave clips on your vinyl for long periods (or even overnight) because they will leave a permanent impression on the material.
Recently I have discovered SewTites. They are specially designed small magnets that you can use to secure fabric in place while you stitch. They are incredibly strong, yet still gentle enough to not damage vinyl fabric. Plus, they’re easy to use – simply place them on your fabric and they’ll do the rest! They are also very easy to remove. I highly recommend SewTites to anyone who is looking for a way to securely baste their vinyl fabrics.
8. How To Mark Pattern Lines On Vinyl
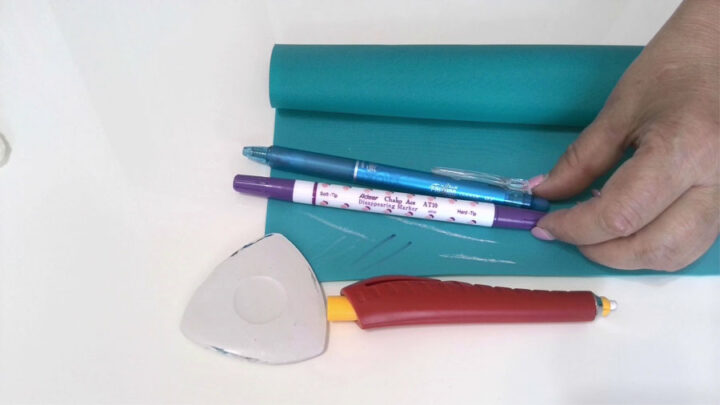
When it comes to marking tools for vinyl, there are a few things you need to keep in mind. First of all, not all marking tools will work with all types of vinyl. Fabric pens, chalk, washable pencils, and erasable markers might not work with some types of vinyl. So you should test all of these on scraps and choose what works.
Second, when you’re working with vinyl, you need to be extra careful not to damage the surface. Be sure to use the marking tool gently and evenly so that you don’t create any permanent markings or indentations.
9. Best Patterns To Use With Vinyl
Picking suitable patterns will make a night-and-day difference when working with vinyl fabric. Use these tips to help determine the best patterns to sew vinyl:
- Steer clear of making form-fitting or heavily tailored garments.
- Choose patterns that use little overlapping seams to reduce stiffness and bulkiness.
- If your pattern does require fitting, make alterations with a practice piece of cotton fabric and include those adjustments in your final garment.
10. How To Cut Vinyl Fabric
Most vinyl materials won’t have grainlines to worry about. However, laminated fabrics (woven fibers coated with plastic) will show a grainline on the underside, so you’ll need to pay more attention when cutting those fabrics.
I prefer to use a rotary cutter to cut smooth, even edges. Scissors will work too, but not as well as a rotary cutter. A cutting mat is necessary in protecting your work surface. When cutting vinyl, be sure to use a sharp blade.
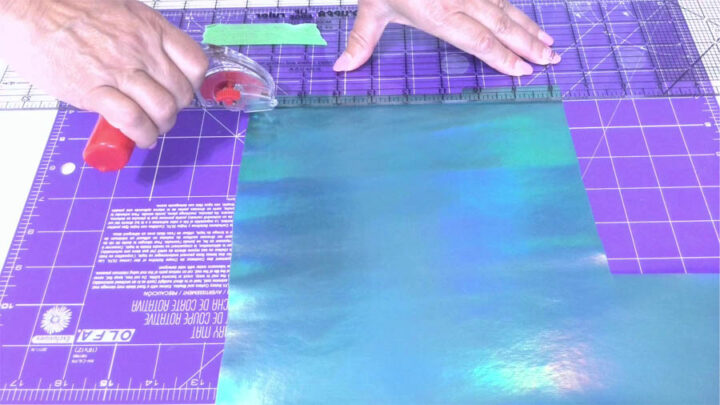
For best results, you’ll want to have a large, flat work surface that you can use for cutting the vinyl.
Take your time when cutting the vinyl – rushing will only increase the chances of making a mistake.
11. Best Sewing Machine For Vinyl
Many home sewing machines will be able to handle sewing vinyl, depending on how thick the material is and how many layers you need to sew together. My sewing machine Janome 6600P sews many types of vinyl very well.
That said, it depends on your brand and model because not every regular sewing machine will work well with vinyl fabrics. If you work with vinyl (or plan to) regularly, it would be worth it to invest in a heavy-duty machine such as a Singer Heavy Duty 4423.
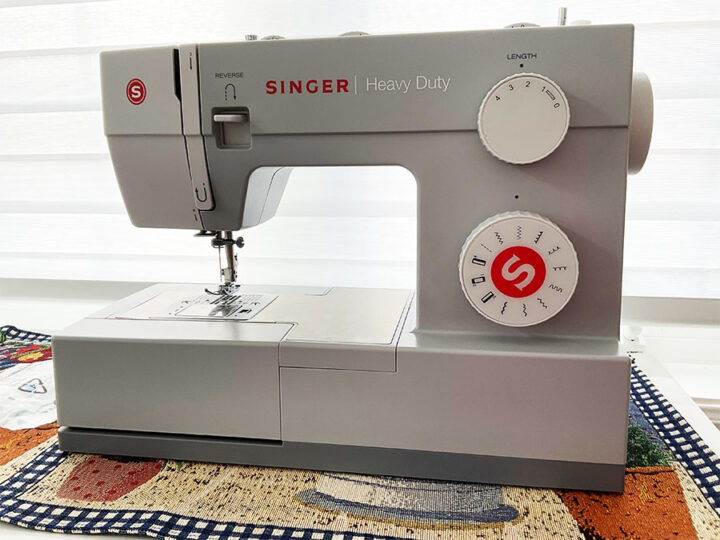
This mechanical machine will sew up to 1,100 stitches per minute, and the strong motor helps the needle go through thick seams like butter. With a 25-year warranty, 23 built-in stitches, and an automatic needle threader, you can’t go wrong! And my favorite part is that this sewing machine is not very expensive, just around $200.
✅ Related tutorial: Mechanical vs Computerized Sewing Machine
12. What Presser Feet To Use
One of the challenging qualities of vinyl is that it can be a little sticky, which can cause the standard presser foot to catch on the material. As a result, that stickiness will create tangled or skipped stitches and messy seams. Instead of using a standard presser foot when working with vinyl, I recommend using one of these:
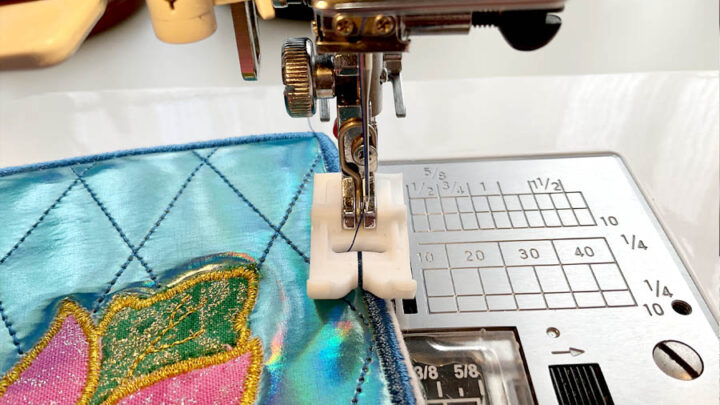
- Teflon-coated foot – The Teflon coating keeps the presser foot from sticking to the fabric to easily slide over the material as you sew.
- Walking foot – The upper feed dogs help feed both layers of fabric through the machine simultaneously and work well with grippier materials such as vinyl.
- Roller foot – This presser foot has little rollers to easily roll over fabric and provide more control.
13. What To Do If You Don’t Have A Teflon Foot
If you don’t have a Teflon foot (or one of the others I mentioned), there are a couple of ways you can work around this problem. First, you could attach a piece of scotch tape to the bottom of your presser foot. Then trim the tape so it doesn’t hang over the edges to help your presser foot glide over the vinyl easily.
Another (old) method is to place a piece of gift-wrapping tissue paper between your presser foot and your vinyl fabric. The tissue paper is light and will help your foot slide over the material. Then, once you finish stitching, you can simply tear off the tissue paper. The only problem is the you can’t see though the tissue paper and your stitches might be crooked.
14. Test Everything Before Using Your Material For Your Project
Although I always recommend finalizing your settings on a piece of scrap fabric, it’s even more important to do so when sewing vinyl.
Use some extra material to test how the fabric “behaves” under the presser foot. That same material will also be helpful for you to get your stitch length and tension settings where you want them to be before you begin your project.
15. Can You Iron Vinyl?
Direct contact between an iron and plastic is a sure way to ruin your vinyl and possibly your iron, too!
In general, I recommend against using irons on your vinyl – even if the manufacturer’s instructions say ironing on the “wrong” side is okay. But you can certainly hover over the vinyl fabric with an iron to make the vinyl warm – it will help to smooth some wrinkles. Or use a thick pressing cloth to put between the iron and the fabric.
If you have tough folds or wrinkles that you can’t press away with your fingers, a hairdryer on a low setting will provide just the right amount of heat to relax the wrinkles away without melting or discoloring your fabric.
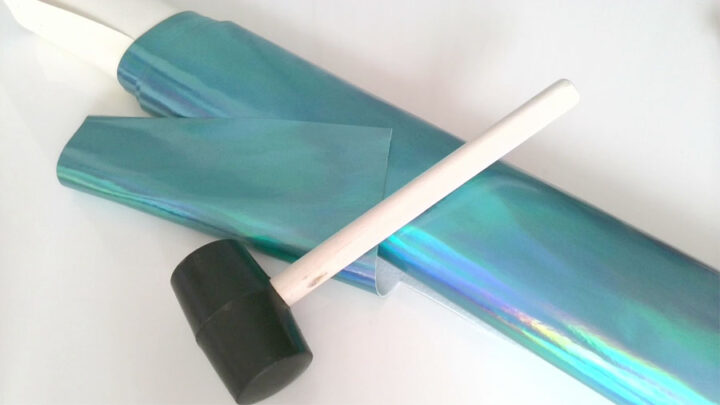
If you need to press seams open you can use a rubber mallet or open them with a leather edge press roller.
16. Clear Vinyl For Sewing
You may find that you want to use clear vinyl to make things like pouches or bags. This type of vinyl is measured using gauge numbers that refer to the sheet’s thickness (a smaller number means thinner, more flexible vinyl). Craft stores usually carry 8-20 gauge vinyl for sewing purposes.
Thin vinyl, such as 8-gauge, is best for bag lining or a window in a pouch, while a bigger gauge is what you would want to make pouches or totes because it will hold its shape.
Projects where I used clear vinyl
17. Use A Mallet For Sewing Vinyl
Since you can’t iron vinyl, you need another way to flatten those bulky seam allowances. A trusty rubber mallet is an ideal tool! You can pound the material flat with the mallet, and it will provide the same benefit of pressing your seams (with the bonus of letting out all your pent-up frustration, too – ha-ha!).
18. Don’t Backstitch
When it comes to backstitching vinyl, I’m a big believer in making the fewest number of holes necessary. That’s why I always tie off my thread with a knot at the end, instead of backstitching. This way, I don’t have to worry about adding more holes to my seams. Not only is it more aesthetically pleasing, but it’s also more durable in the long run.
My sewing projects with vinyl
Now that you have learned how to sew vinyl, it is time to put your new skills to the test. Below are some projects that are perfect for beginners. Each project come with step-by-step instructions so you can follow along and complete the project with ease.
DIY iPad case / cover
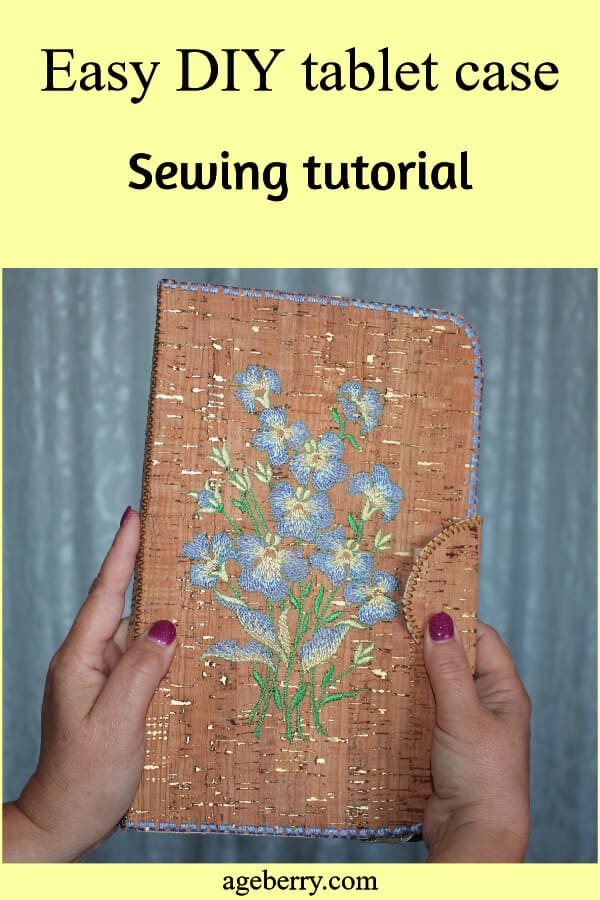
Looking for a unique and stylish way to protect your iPad or tablet? Why not sew your own case out of cork fabric? Cork fabric is a type of vinyl and is durable and easy to work with, and it adds a chic touch to any tablet. With a little time and effort, you can easily sew a beautiful case that will keep your device safe from scratches and other damage. Best of all, this project makes a great gift for any tablet user in your life. Follow the steps below to learn how to sew a DIY tablet case from cork fabric.
How to sew with cork fabric: fabric bin sewing tutorial

In this video sewing tutorial, I will show you how to make a perfect storage box for any space with popular cork fabric. Find out how to cover a box with fabric and make a useful and beautiful fabric bin. The key to success is in the details, and this video tutorial covers all the important steps, from cutting the fabric to attaching the lining. You’ll also learn how to embroider on cork fabric, adding an extra touch of personalization to your box.
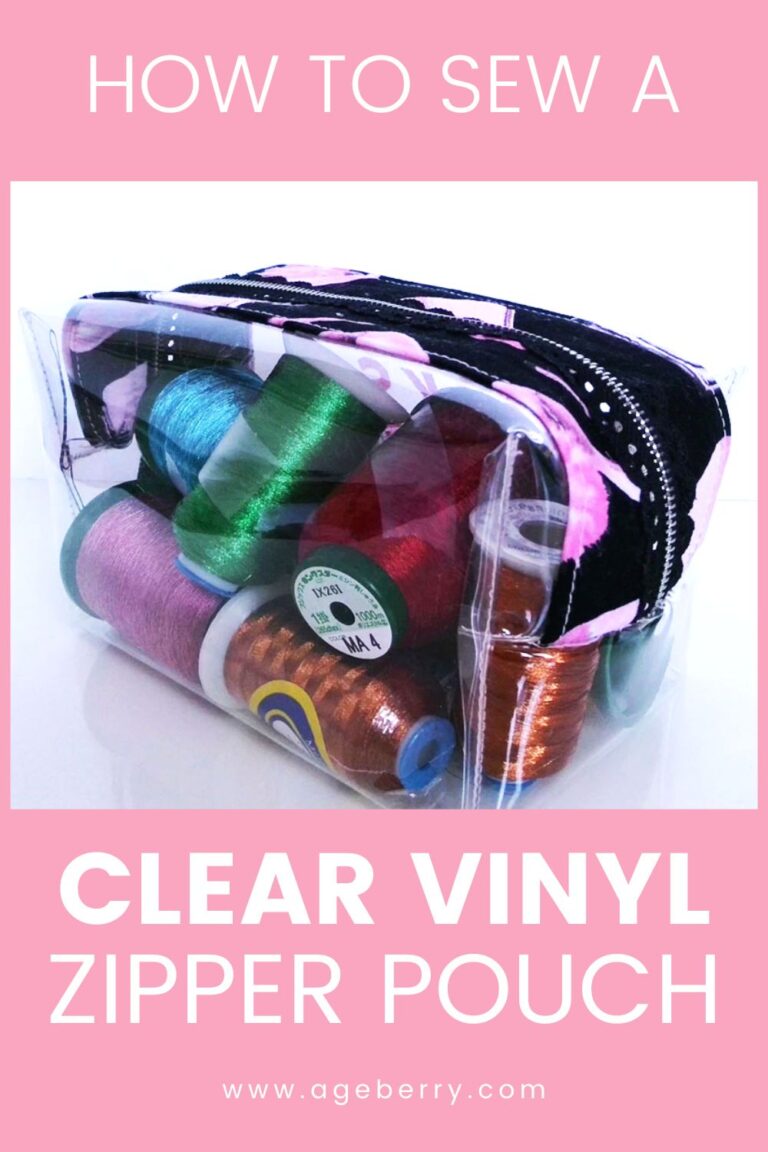
How to sew a zipper pouch from clear vinyl
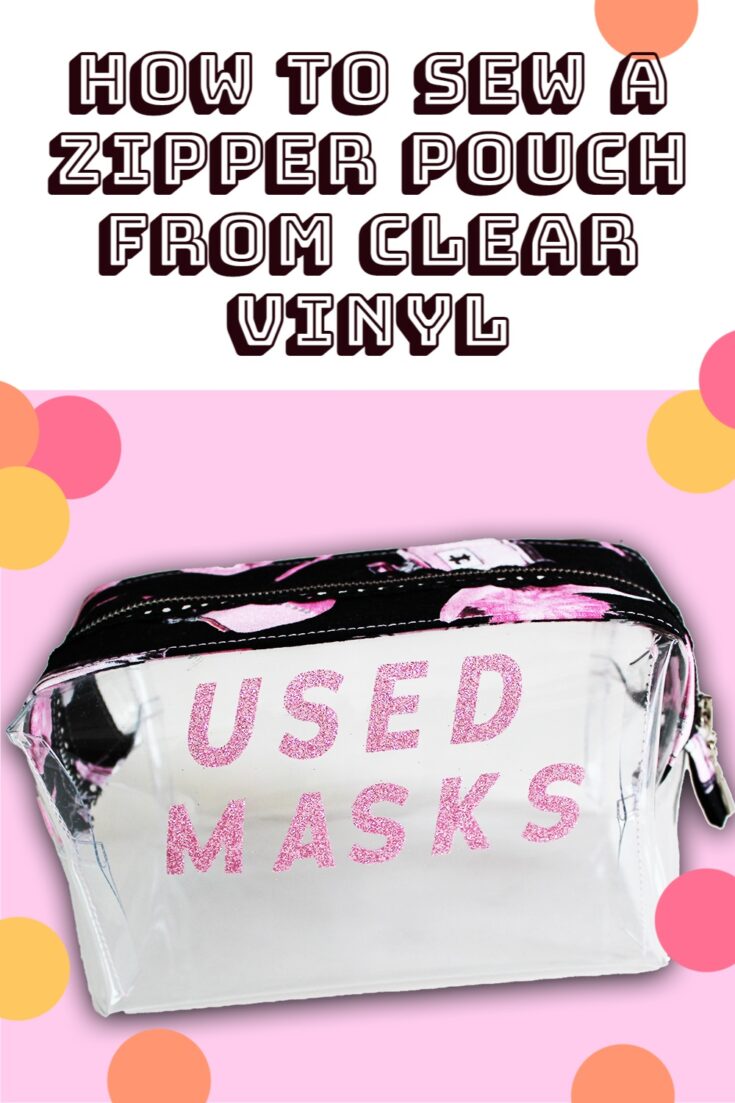
In this video sewing tutorial, I will show you how to sew a zipper pouch from clear vinyl. It’s an easy sewing project even for beginners. These DIY boxy flat bottom zipper pouches from clear vinyl are easy to sew and you can use them to store and organize many different items. The clear vinyl material is great for easily seeing what’s inside the pouch, and the flat bottom design means the pouch will stand up on its own – perfect for storing small items like makeup, jewelry, or sewing supplies.
DIY Makeup Bag | Easy Project with Step-by-step Instructions
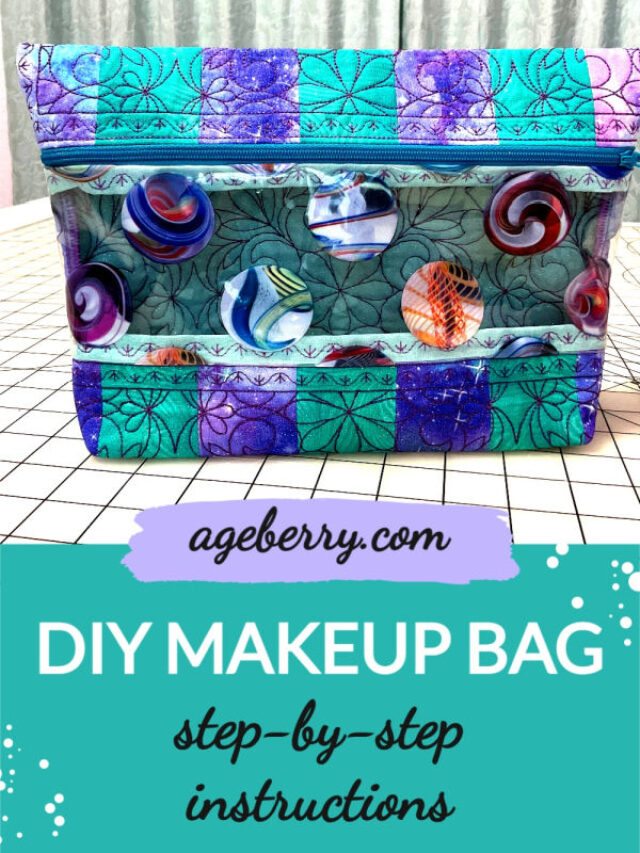
A makeup bag is a necessity for any cosmetics lover. Whether you’re packing for a weekend getaway or just need a place to keep your makeup organized at home, a makeup bag is the perfect solution. But why settle for a boring, off-the-shelf makeup bag when you can easily sew your own? This step-by-step tutorial will show you how to sew a quilted makeup bag with a clear vinyl window. Quilted makeup bags are not only stylish, but they’re also functional, thanks to the clear vinyl window that makes it easy to see what’s inside. And because they’re so quick and easy to make, you can easily customize the design to fit your own style.
DIY fabric coasters | in the hoop embroidery project

If you love stylish home decor, you’ll love making your own coasters from clear vinyl. These coasters are not only stylish, but they also protect your furniture from water damage. Plus, they’re really fun to make! This is an in-the-hoop embroidery project that can be done with an embroidery machine. All you need is some clear vinyl, some embroidery thread, and a little bit of time.
——————————————-
Working with vinyl can be a little tricky at first, but I hope these tips for sewing vinyl help reduce your learning curve and alleviate any apprehension you have about trying it. Once you learn how to sew vinyl, your world of projects will open to many new possibilities! Remember to always test your sewing machine settings on a piece of scrap material before beginning your vinyl sewing project.
Did you find this tutorial helpful? If so, save this pin (see below) on your sewing board so you can come to this tutorial later when you need this information on how to sew vinyl fabric and follow me on Pinterest for more tips, tutorials, and inspiration!
latest posts
- Butterfly Quilt Block Tutorial – Foundation Paper Piecing
- How To Sew Quilt Squares So The Corners Match
- Sewing With Fork Pins: How They Help With Pattern Matching, Slippery Fabric, And Seams
- How Much Fabric Do I Need? 21 Helpful Tips For Calculating Fabric Yardage
- Easy Simple Sewing Project: Fabric Jar Opener
- DIY Oven Mitts: Step-by-Step Sewing Tutorial
- Easy DIY Potholder: New Design
- Tailor’s Clapper: What It Does, Why It Works, And How To Use It Right
- Heat Resistant Batting for Sewing: What It Is, How It Works, and What Makes a Difference