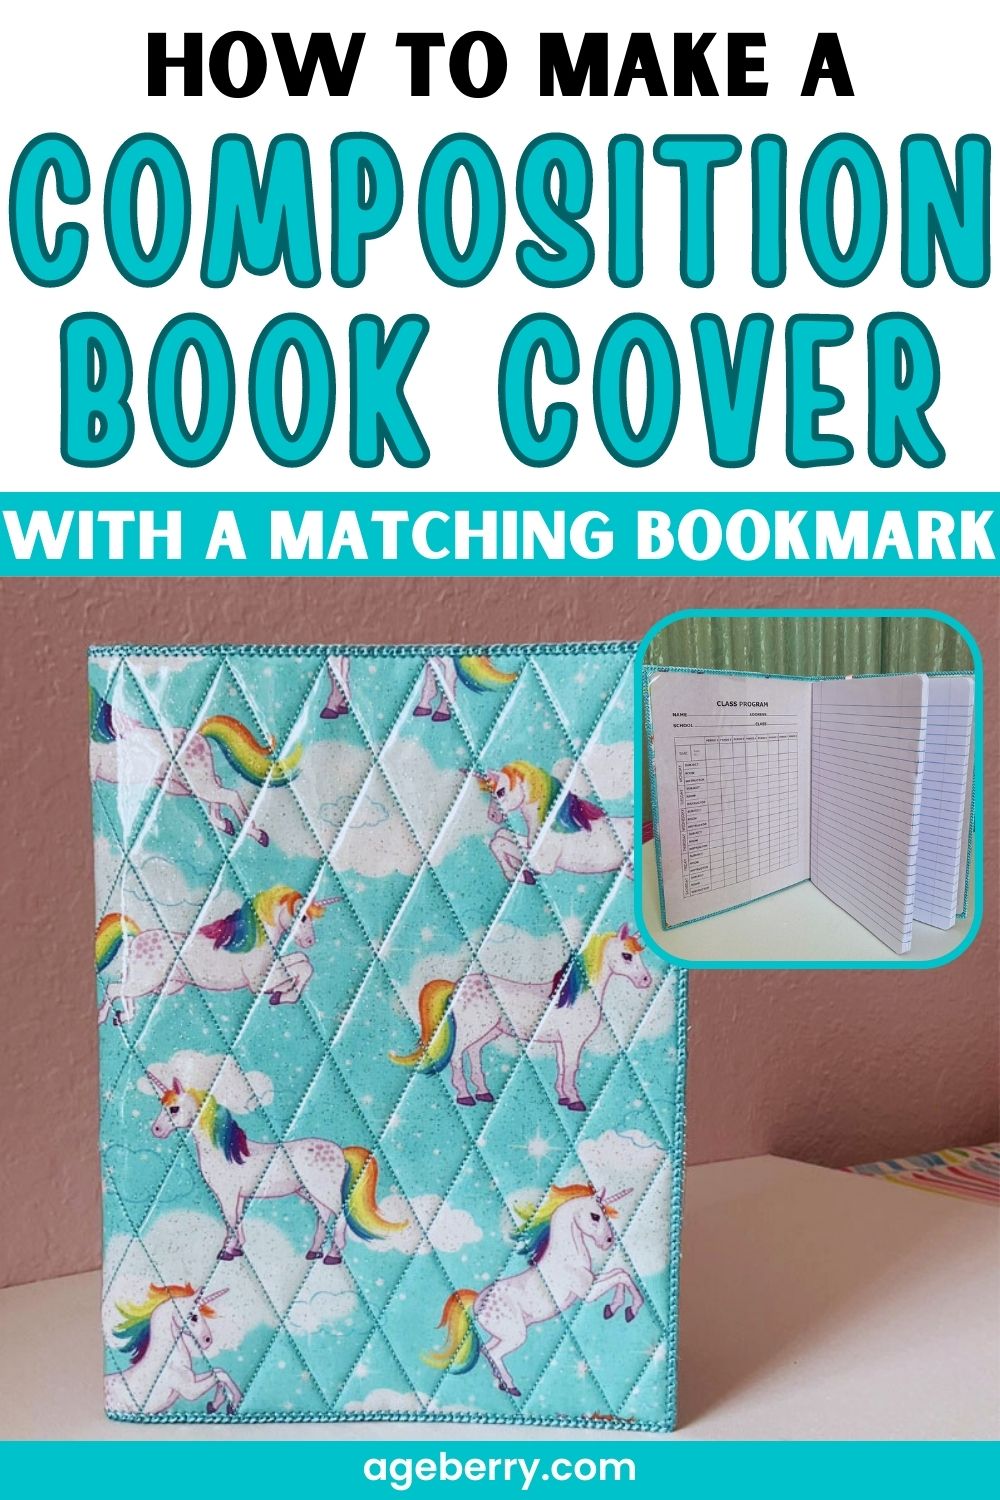
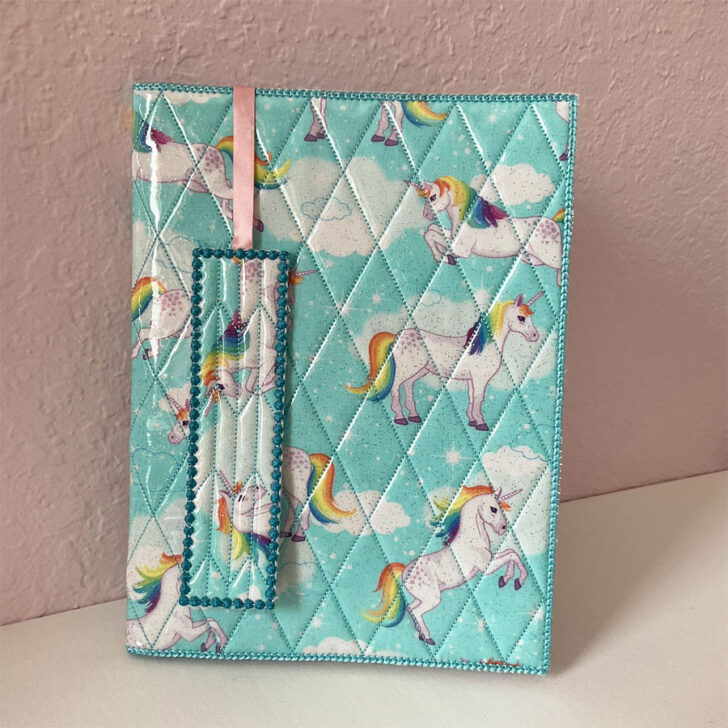
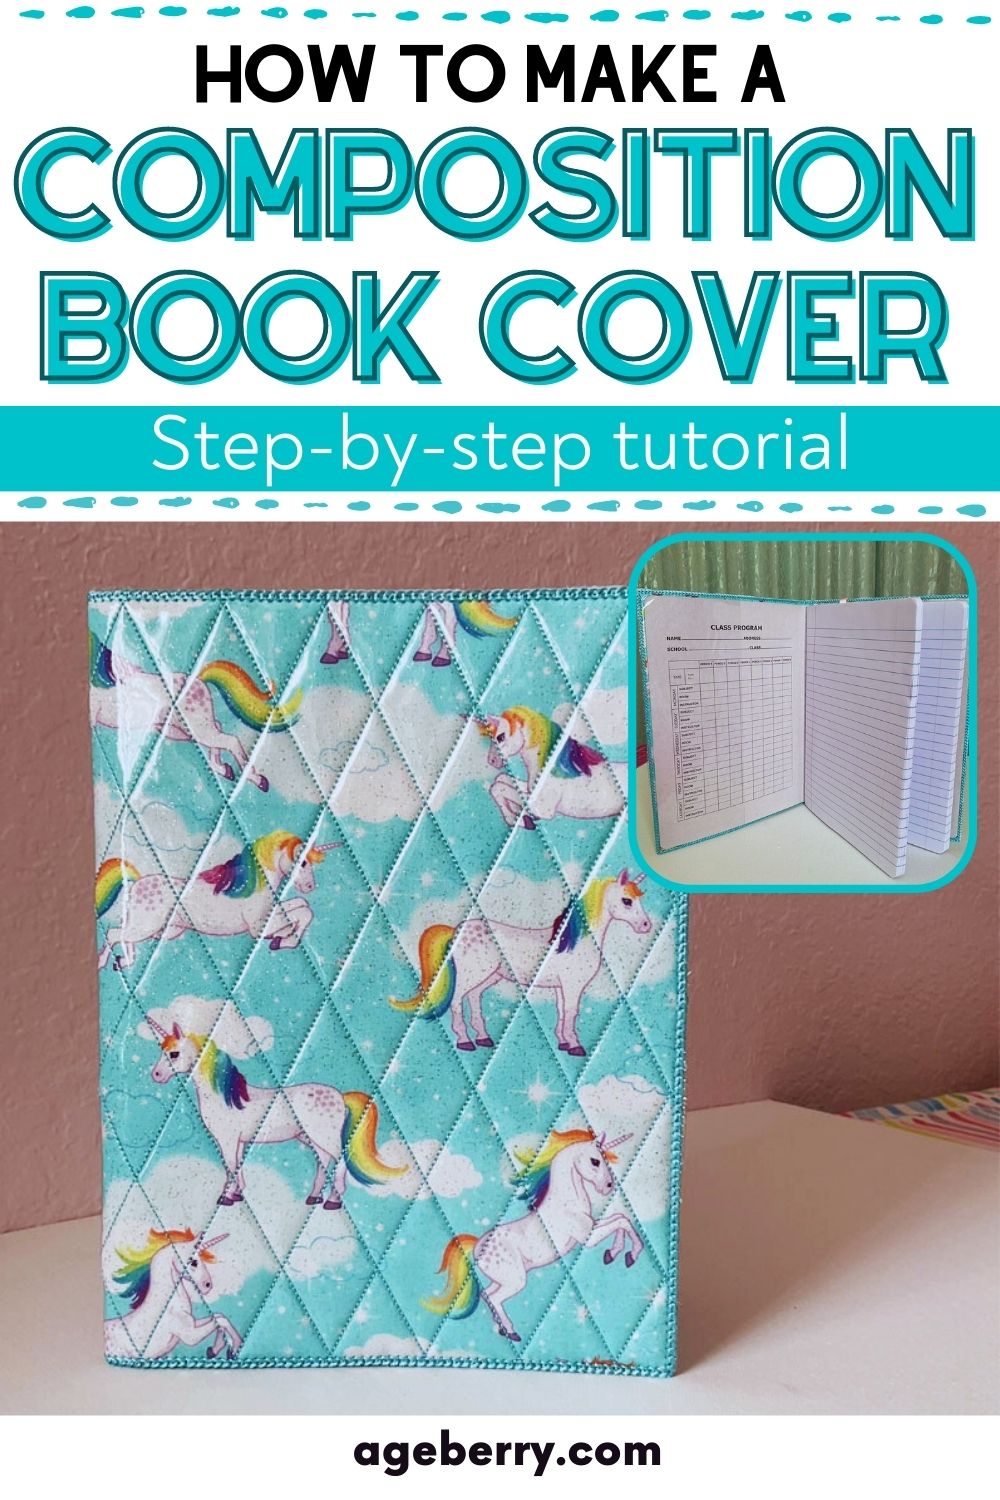
Composition Book Cover: In The Hoop Embroidery (Free Design)
In this tutorial, I will show you how to create a stunning composition book cover with a matching bookmark, using only your embroidery machine. Follow the step-by-step instructions and discover the art of making a personalized book cover in the hoop, using my exclusive free embroidery design.
The cover is made with clear vinyl, that provides protection for the composition book, keeping it safe from spills, scratches, and general wear and tear.
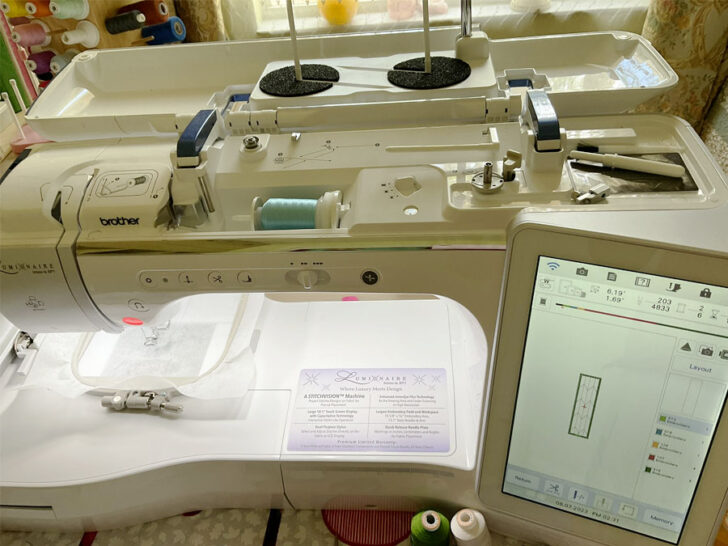
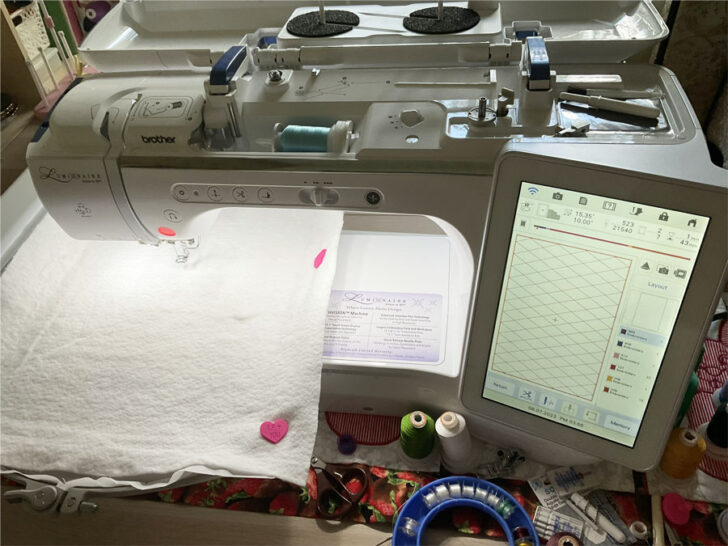
This project requires a sewing machine with the biggest hoop 10 ⅝” x 16 such as Brother Luminaire or Babylock Solaris, and various materials such as fabrics, batting, tear-away stabilizer, matching threads, etc. but the end result is worth the effort. Not only is this composition book cover beautiful, but it’s also functional – made with clear vinyl, it’s easy to clean and maintain. Give your child a one-of-a-kind book cover that they’ll love.
What You’ll Need To Make A Composition Book Cover In The Hoop
A composition book is a type of notebook that is used by students. It has a bound spine, lined pages, and a stitched binding. The standard size of a composition book in the USA is 9.75 inches by 7.5 inches.
Note: Some of the links on this page are affiliate links. This means I will receive a commission if you order a product through one of my links. I only recommend products I believe in and use myself.
Embroidery design (in the format for your embroidery machine) – you can get it free by subscribing to my weekly newsletter.
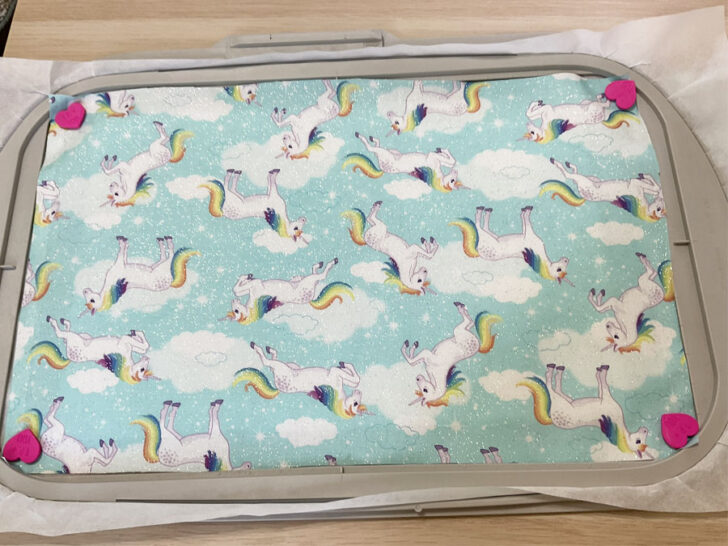
Printed quilting cotton fabric: This will be used as the main fabric for the composition book cover and bookmark. Choose a fabric that is sturdy and durable.
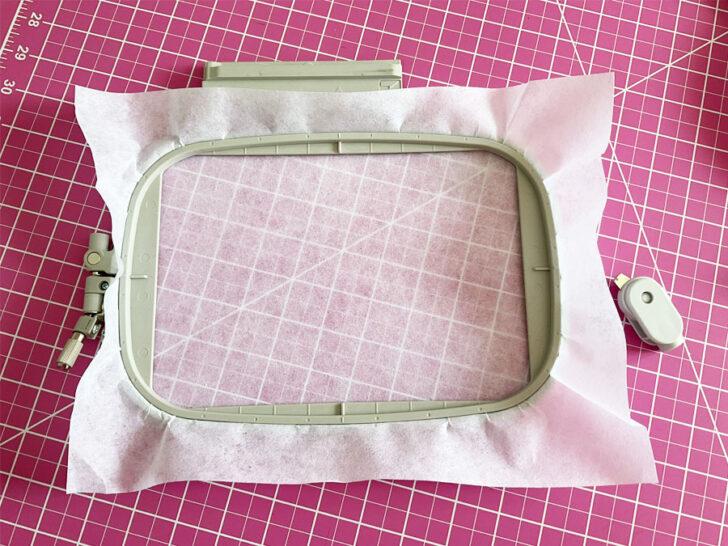
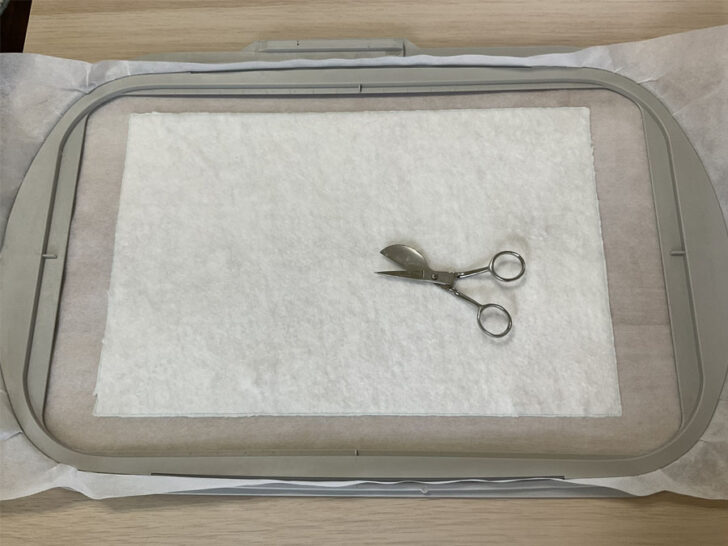
Tear-away stabilizer: This is a type of stabilizer that is used to support the fabric during the embroidery process. It is called “tear-away” because the excess stabilizer is easily torn away after the embroidery is complete.
2 embroidery hoops to hold the fabric in place during the embroidery process: A large embroidery hoop 10 ⅝” x 16” should accommodate the size of your composition book. A smaller hoop (the size 6” x 10”) will be used for the bookmark.
Threads: You will need embroidery threads to match your fabric. Make sure to choose high-quality threads that won’t break or fray easily.
Bobbin threads: For this particular project, you will need to wind 2 bobbins with the same thread as the top thread so that the quilting design will be visible on the back of the composition book cover as well. This is because the embroidery machine will stitch the design on both sides of the fabric, so the bobbin thread will be visible on the back of the book cover.
Make sure to wind the bobbins with the same thread color and type as the top thread to ensure that the design looks consistent and professional on both sides of the book cover. You can wind the bobbin using a bobbin winder on your embroidery machine.
Applique scissors: I recommend duckbill scissors. They are a type of applique scissors that have a unique shape with a flat bottom blade and a curved top blade that resembles a duck’s bill. They are designed to make precise cuts close to the stitching without damaging the fabric or stabilizer. Duckbill scissors are a great choice for this project because they allow for accurate trimming of excess fabric and stabilizer around the embroidery design.
A piece of thin clear vinyl (4 gauge): This will be used to create a protective cover for the book cover. Choose a vinyl that is thin enough to be flexible but thick enough to provide protection.
Batting: This will be used to add some thickness and padding to the book cover. Choose a batting that is thin enough to be flexible but thick enough to provide some cushioning.
Recommended Fabrics For The Composition Book Cover
The choice of fabric depends on your preferences.
Chose prints and designs for the composition book cover that kids will love. Consider their interests and personalities. Look for prints that are colorful, playful, and fun, and that will appeal to their individual tastes.
Some popular options include:
Animal prints: Quilting cotton prints featuring cute and playful animals like unicorns, dogs, cats, and elephants are always popular with kids.
Cartoon prints: Prints featuring popular cartoon characters like Mickey Mouse, SpongeBob SquarePants, and Paw Patrol are sure to be a hit with kids.
Floral prints: Floral prints featuring bright and bold colors are a great choice for girls who love all things pretty and feminine.
Novelty prints: Quilting cotton prints with fun and quirky designs like robots, spaceships, and dinosaurs can add a playful touch to the book cover.
Sparkle prints: Prints featuring glitter or metallic accents can add a touch of magic and whimsy to the book cover.
Step-By-Step Instructions For Making A Bookmark
Load the design of the in-the-hoop bookmark into your embroidery machine.
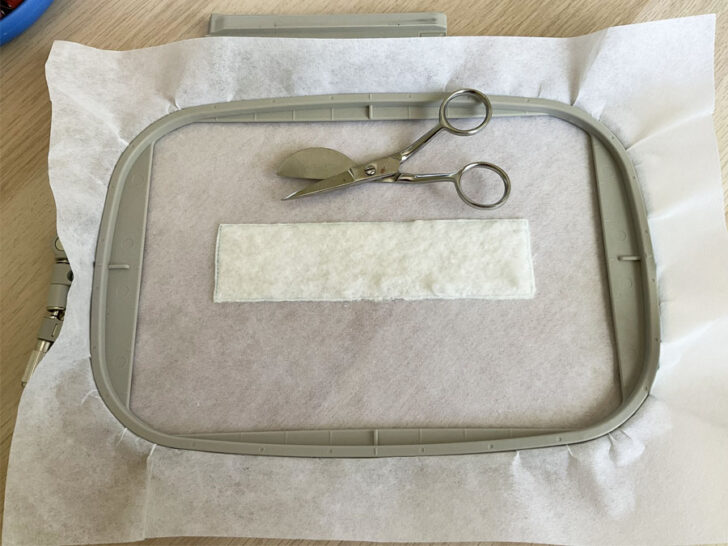
Step 1. To begin, cut a piece of tear-away stabilizer that’s slightly bigger than the hoop you plan to use. Place the stabilizer in the 6” x 10” embroidery hoop, ensuring that it’s stretched tight and free of wrinkles. Once it’s in place, tighten the hoop screw to secure it firmly.
Next, run Stitch Color 1, which is the placement stitch for the bookmark. This stitch will indicate where to position the batting for your project, providing a helpful guide for the next steps.
Step 2. Place a piece of batting over the placement stitch, making sure it completely covers the area. You can use painter’s tape to hold the batting in place or simply use your hands to keep it from puckering.
Once the batting is in place, proceed to run Stitch Color 2, which is the tack down stitch for the batting. This stitch will secure the batting in place.
Step 3. Remove the hoop from the machine but do not unhoop the project. To trim any excess batting, use duckbill scissors and cut as closely as possible to the stitches. If you’re not familiar with duckbill scissors, you can refer to my article on how to use them – Duckbill Scissors: What They Are And How To Use Them.
When trimming the excess batting, be careful not to cut the thread or unhoop the project.
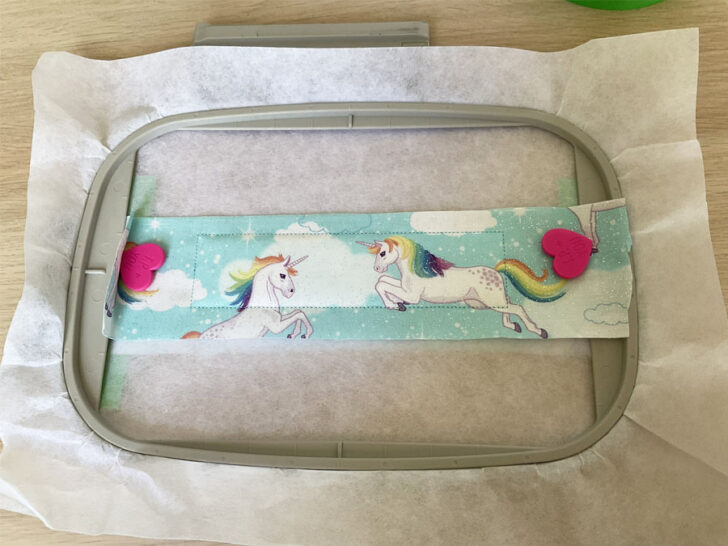
Step 4. Lay a piece of fabric right side up, completely covering the batting with some excess fabric on all four sides.
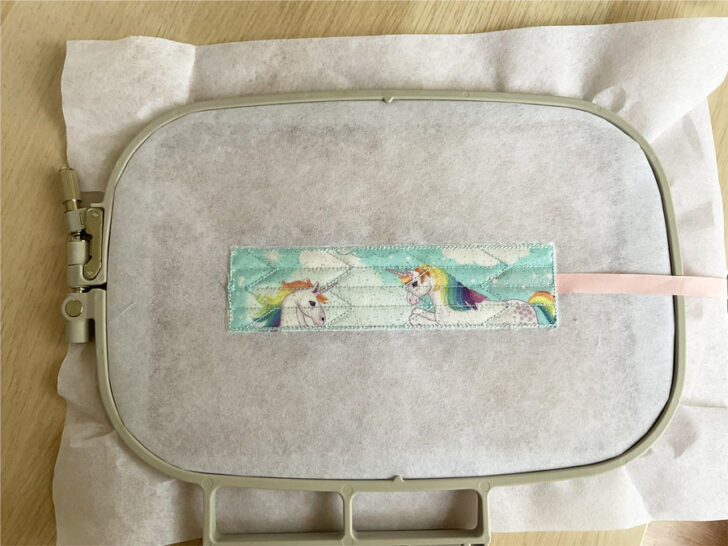
Flip the hoop over and place a piece of ribbon for the bookmark in the middle of the top side of the bookmark.
To secure the ribbon, you can use painter’s tape, but a fabric glue stick would be a better choice.
Once the ribbon is in place, put the backing fabric with the right side up on the back side of the hoop. In my case, I used the same fabric, but you can choose a different one if you prefer.
I find that using SewTites is a great way to secure fabric. If you’re not familiar with SewTites, you can learn all about them in my article The Essential Guide To SewTites: What They Are |How To Use|Types.

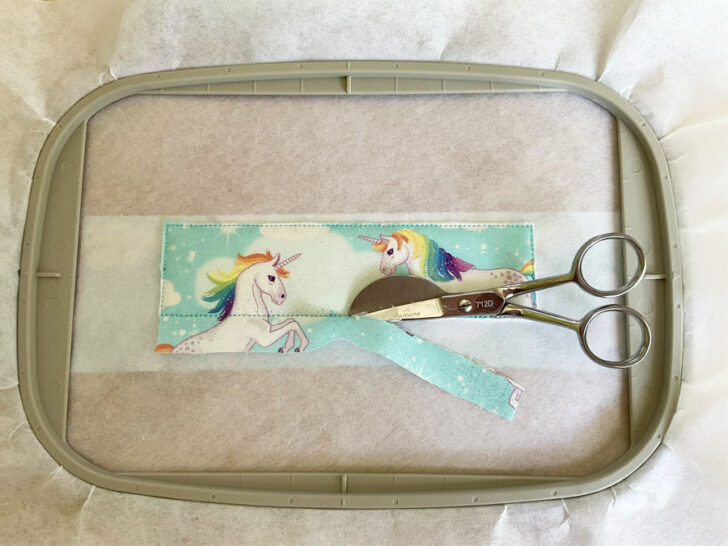
Step 5. Remove the hoop again and trim off any excess fabric around all the edges of the fabric on both the front and back of the hoop. Be careful not to cut any of the threads. Cutting the threads can unravel the stitches and ruin the entire project.
Take your time and be patient during this step to avoid any mistakes.
Step 6. Cut two pieces of clear vinyl that are slightly larger than the size of the bookmark. Place one piece of clear vinyl on top of the fabric on the front of the hoop, and then flip the hoop and place the second piece of clear vinyl on the back of the hoop. To secure the vinyl, you can use painter’s tape.
Once the vinyl is secured, return the hoop to the machine and run the next step of the embroidery design, which is the tack down stitch for the vinyl pieces and also quilting stitches.
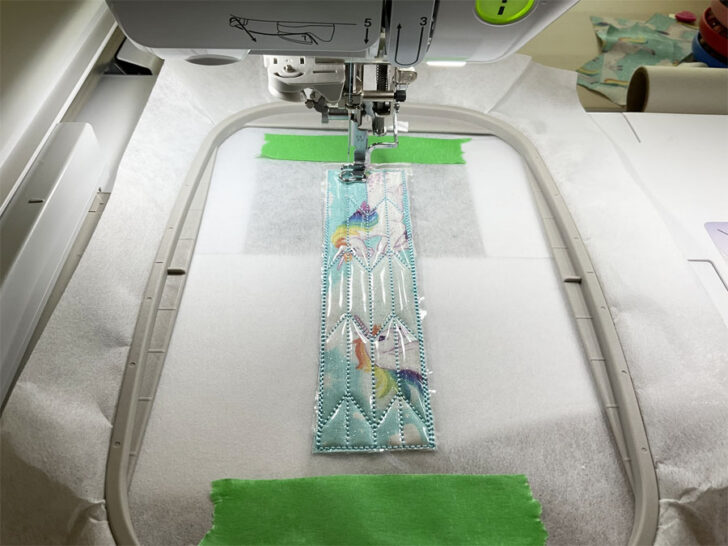
Step 7. Remove the hoop once again and cut off any excess vinyl on both sides of the hoop.
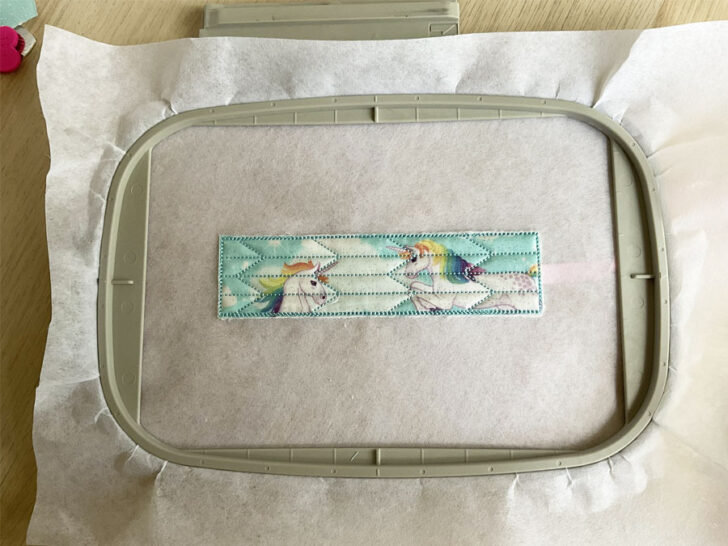
Step 8. Return the hoop to the machine and run the last step of the embroidery design. This step will create a border around the bookmark.
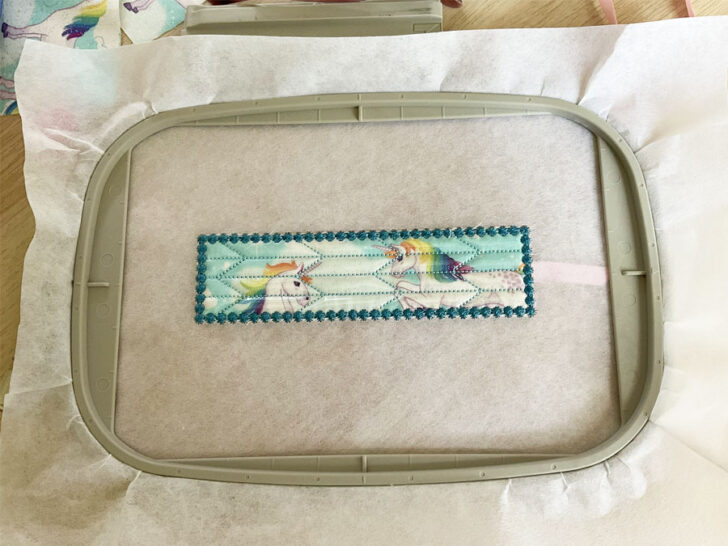
Step 9. Take the finished bookmark out of the hoop and remove the tear-away stabilizer. The stabilizer should come off easily. If there are any residues left behind, you can remove them with a wet sponge.
Step-By-Step Instructions For Making A Composition Book Cover In The Hoop
Load the design of the in-the-hoop composition book cover into your embroidery machine.
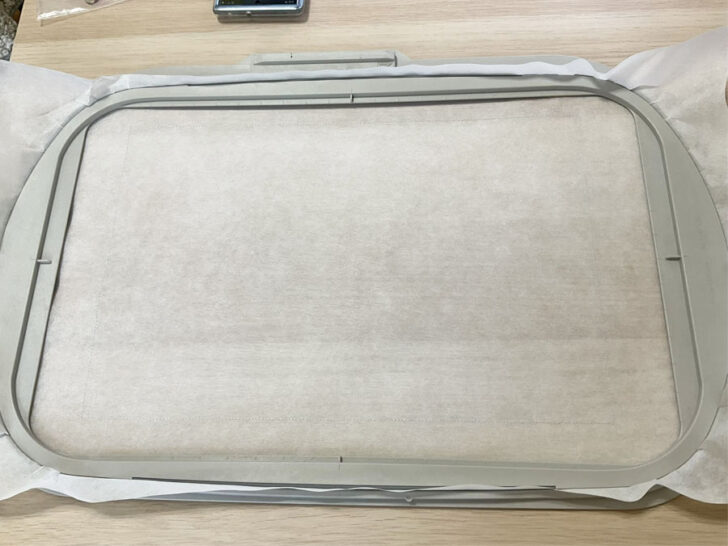
Step 1. Cut a piece of tear-away stabilizer that is slightly larger than the hoop you will be using. This will give you enough excess stabilizer to hold onto while hooping and will prevent the stabilizer from slipping out of the hoop during embroidery. Place the tear-away stabilizer in the embroidery hoop, making sure that it is taut and smooth. Once the stabilizer is in place, tighten the hoop screw to hold it securely in place.
Stitch Color 1 – the placement stitch for the design. This stitch will guide you on where to place the batting for the project.
Step 2. Place a piece of batting completely covering the placement stitch.
Although you don’t have to remove the hoop from the machine, I did it just to get an image.
You can use painter’s tape to secure the batting or hold it in place using your hands to avoid any puckering. Personally, I prefer using SewTites for this task, which you can learn about in my article The Essential Guide To SewTites: What They Are |How To Use|Types.
Proceed to run Color 2, which is the tack down stitch for the batting.
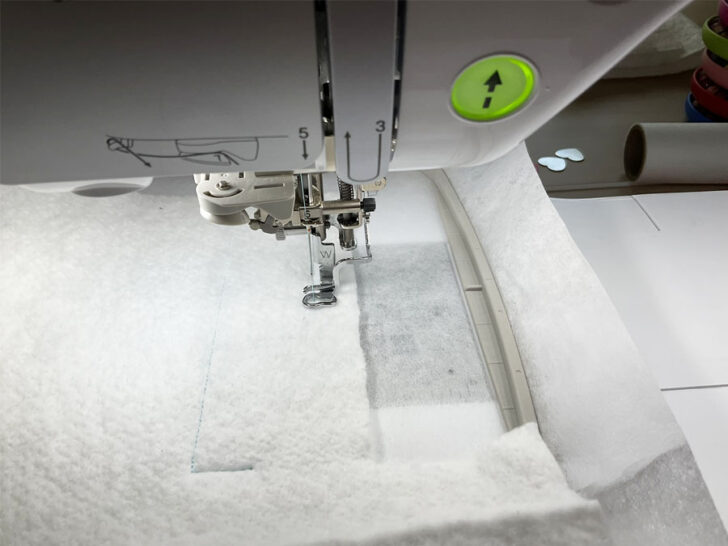
Step 3. After securing the batting, take the hoop out of the machine but don’t unhoop the project. Use duckbill scissors to trim off any excess batting as closely as possible to the stitches. In case you are not familiar with duckbill scissors, you can refer to my article Duckbill Scissors: What They Are And How To Use Them.
Be careful not to cut the thread while trimming the excess batting. Also, be careful not to unhoop the project.
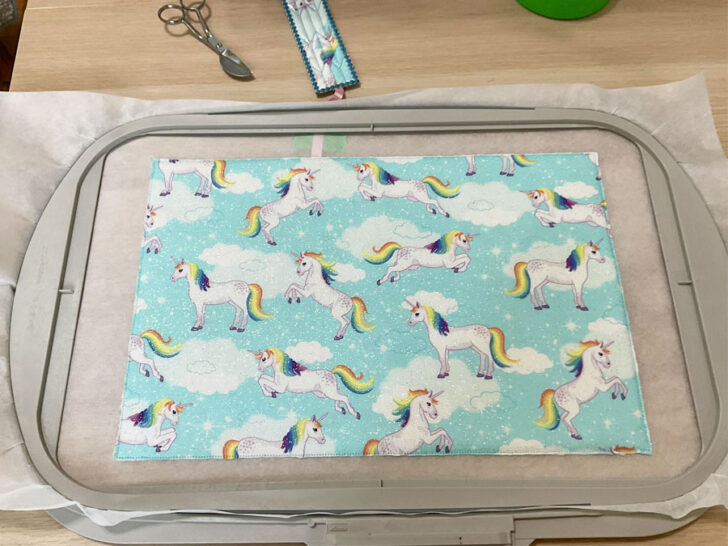
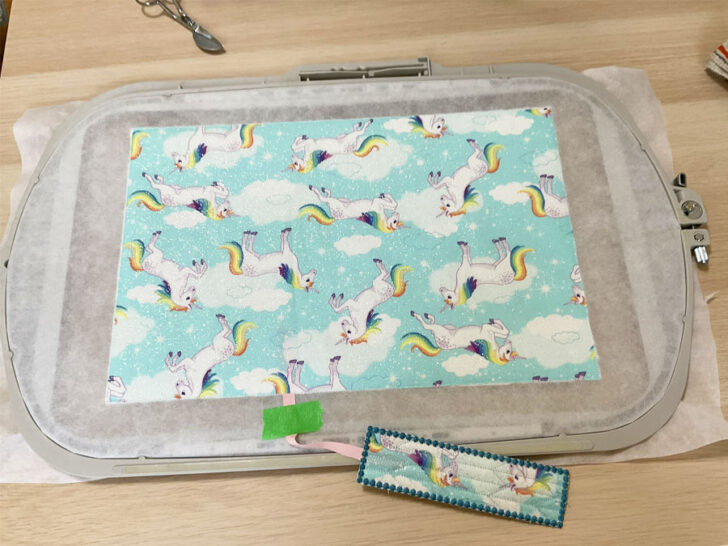
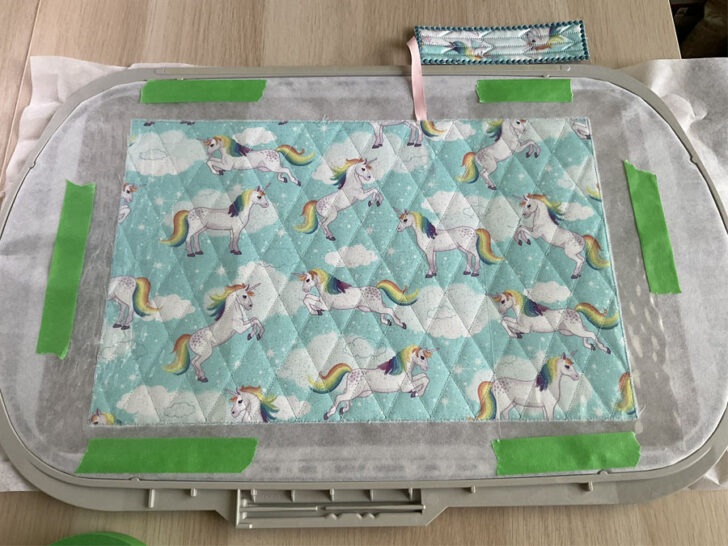
Step 4. Next, lay a piece of fabric right side up, completely covering the batting. Leave some excess fabric on all four sides.
Flip the hoop over and place the ribbon of the bookmark somewhere in the middle of the top side of the cover (or move it a little to the left).
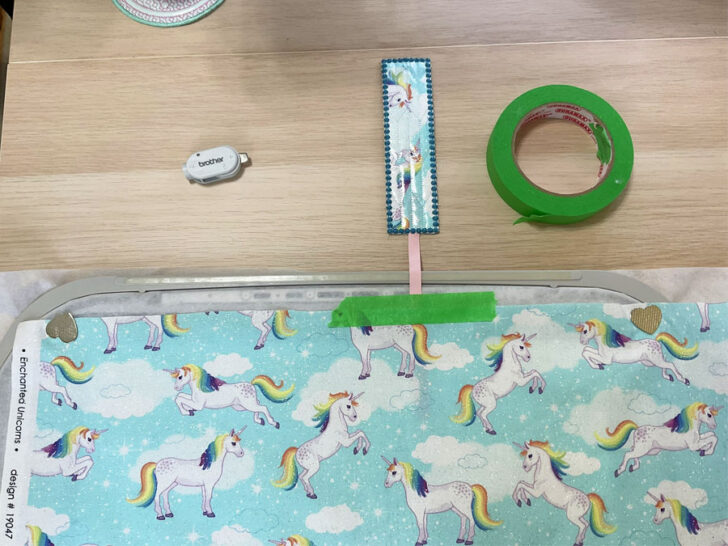
I used painter’s tape to secure the ribbon but I think a fabric glue stick would be a better choice for this.
Put the backing fabric (in my case, I used the same fabric, but you can choose a different fabric) with the right side facing towards you on the back side of the hoop.
Secure the fabric, return the hoop to the machine and run the next step of the design.
Make sure the bookmark doesn’t go under the hoop in the machine. Just hold it in your hand when the machine stitches the next color.
Step 5. Remove the hoop once again and trim off the excess fabric around all the edges of the fabric on the front and back of the hoop. It’s important to use duckbill scissors for this task and be careful not to cut any of the threads. Cutting the threads can unravel the stitches and ruin the entire embroidery project.
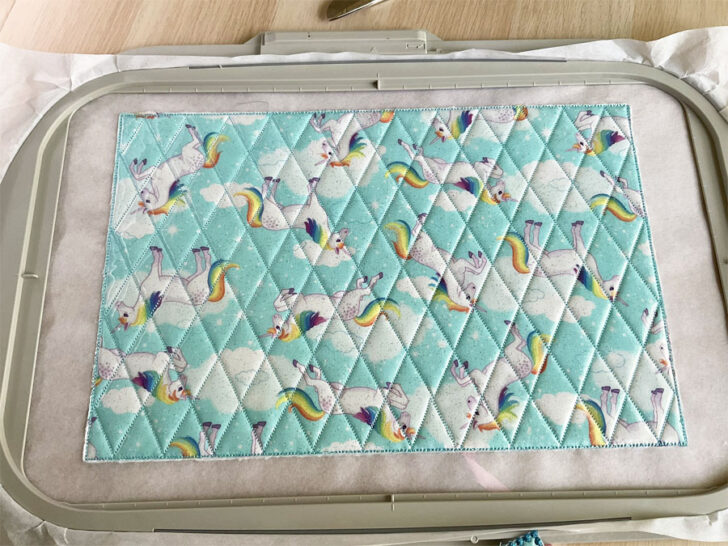
Step 6. The next task is to cut a piece of clear vinyl that is slightly larger than the size of the book cover and place it on top of the fabric on the front of the hoop.
To secure the vinyl, use painter’s tape or Sewtites, which are a great alternative to tape and can be seen in the image below.
Once the vinyl is secured, return the hoop to the machine and run the next step of the embroidery design, which is the tack down stitch for the vinyl and quilting stitches.
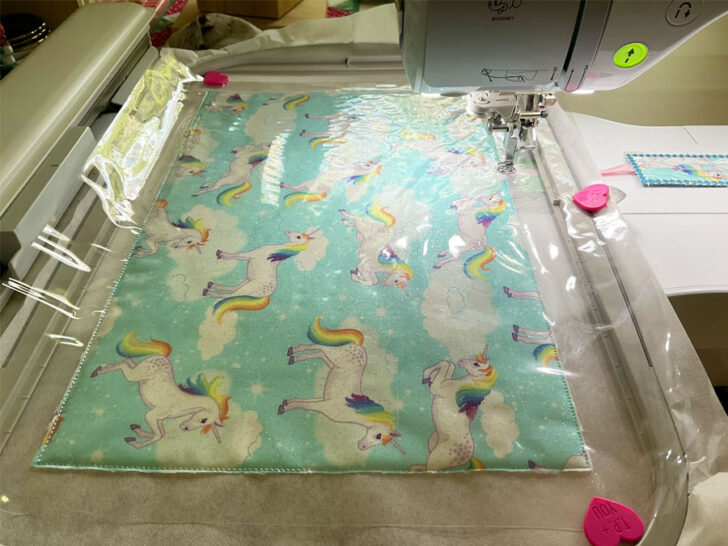
Follow these steps carefully to ensure that the vinyl is properly attached and the embroidery design is completed with precision.
You may encounter a small issue during the embroidery process. The bookmark may get in the way and potentially get attached to the back of the cover if it goes under the hoop. To avoid this, it’s important to be careful and use your hands to move the bookmark along with the hoop as you embroider. This will ensure that the bookmark stays in place and doesn’t interfere with the embroidery process.
Step 7. Cut two pieces of clear vinyl, each measuring 5 x 12 inches, for the back side of the book cover. These pieces will help keep the book sides in place. Let’s call these pieces “pockets”.
Remove the hoop from the machine once again and flip it over to the back side.
Place the vinyl pieces over the fabric on the back of the cover and secure them with painter’s tape. Leave about 1 inch of the vinyl on three sides of the hoop. It’s important to ensure that the sides of the vinyl pieces are straight and exactly parallel to the sides of the cover. These pieces will be used to insert the book and secure it in the cover.
Return the hoop to the machine and run the next step of the design – it will attach the pockets to the back of the cover.
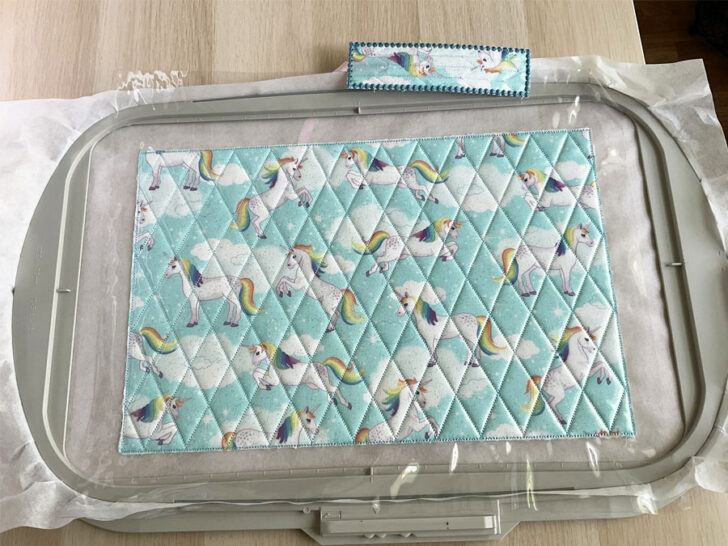
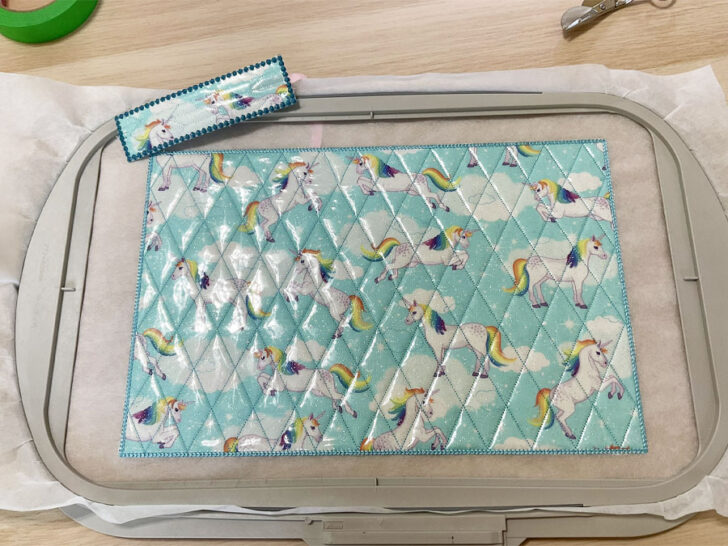
Step 8. Remove the hoop once again and cut off any excess vinyl on both sides of the hoop. Use duckbill scissors.
Step 9. Return the hoop to the machine and run the last step of the embroidery design. This step will create a border around the book cover.

Step 10. The final task is to take the finished book cover out of the hoop and remove the tear-away stabilizer. This is a simple process and the stabilizer should come off easily. If there are any stabilizer residues left, you can remove them with a wet sponge.
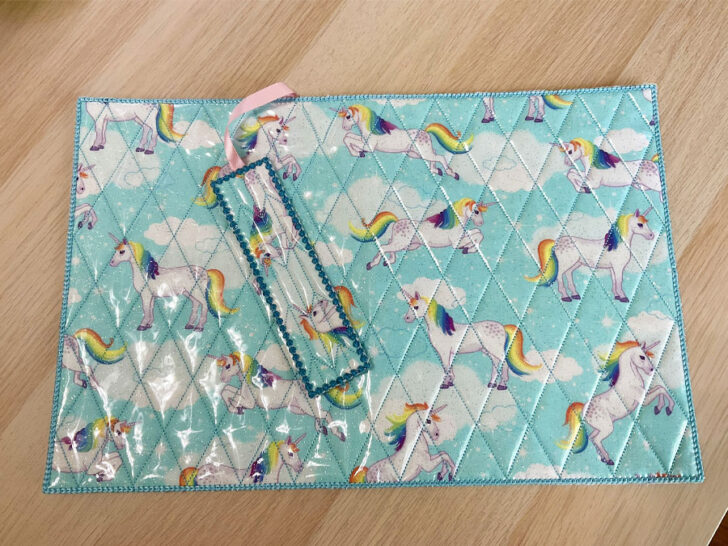
If you followed these steps to create a composition book cover, you should be really happy with the end result. The cover not only looks great, but it’s also practical for a student to take to school. The clear vinyl will help protect the cover from getting dirty or damaged. All in all, we’ve created a unique and personalized cover that will keep a composition book safe and add some fun to regular school supplies.
If you liked this machine embroidery tutorial on making a composition book cover in the hoop there may also be something else you’d enjoy. Check out these tutorials: In The Hoop Embroidery Projects.
In The Hoop Embroidery Projects


Did you find this tutorial helpful? If so, save this pin (see below) on your sewing board so you can come to the article later when you need this information on how to create a composition book cover using in the hoop embroidery, and follow me on Pinterest for more tips, tutorials, and inspiration!
latest posts
- What Do You Call a Person Who Sews? I Asked My Readers and Got 1,408 Opinions
- DIY Round Purse: PDF Sewing Pattern and Detailed Instructions
- Mini Wonder Clips By Clover: Useful Sewing Tool Or Just Another Notion?
- Non-Slip Grips For Quilting Rulers: A Small Notion With A Useful Job
- Fabric Eraser for Sewing: What It Removes and When to Use It
- What Is The Best Thread For Sewing Machine Projects? Let’s Find Out!
- Butterfly Quilt Block Tutorial – Foundation Paper Piecing
- How To Sew Quilt Squares So The Corners Match
- Sewing With Fork Pins: How They Help With Pattern Matching, Slippery Fabric, And Seams