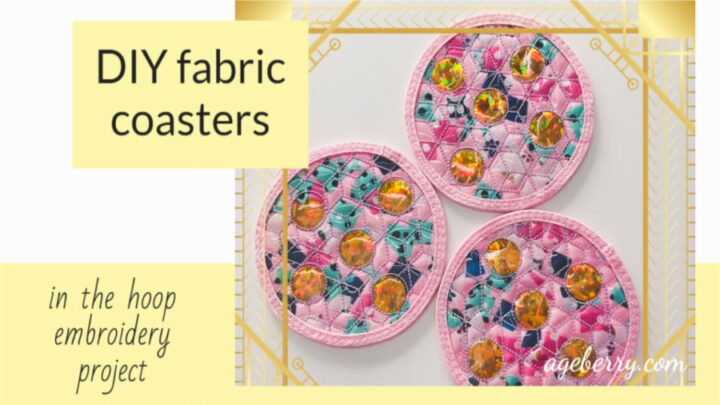
DIY Fabric Coasters | In The Hoop Embroidery Project
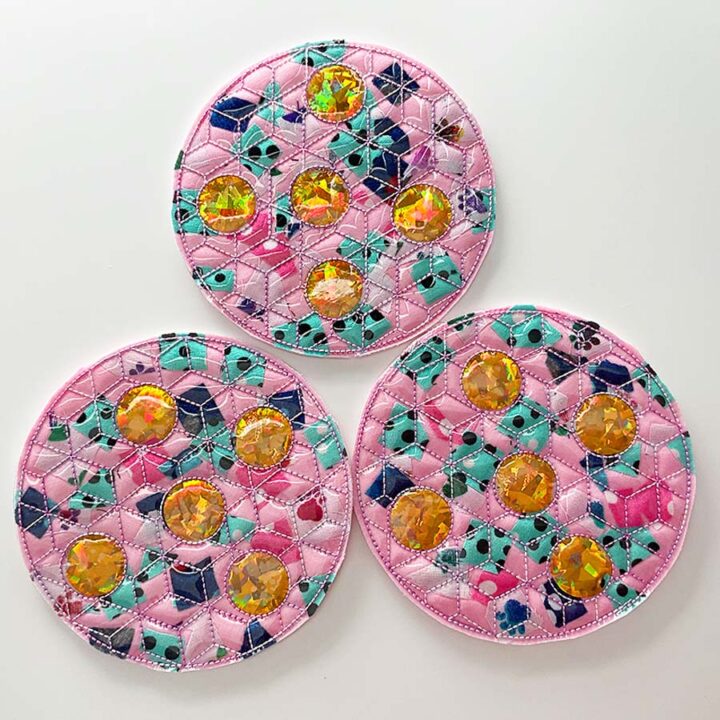
Do you love decorating your home with unique and stylish items? If so, you’ll love to make a set of DIY fabric coasters that look great and protect your furniture at the same time.
These little gems are also really fun to make. This is in the hoop embroidery project made with the Brother Luminaire machine.
But if you know free motion quilting you can make them with a regular sewing machine. So why not give it a try? You might just be surprised at how much you enjoy the process.
Fabric coasters are a great way to add a pop of color or pattern to any room. They’re also really useful – everyone will appreciate having a coaster to protect their furniture from drink rings and scratches. And they make perfect gifts for friends and family.
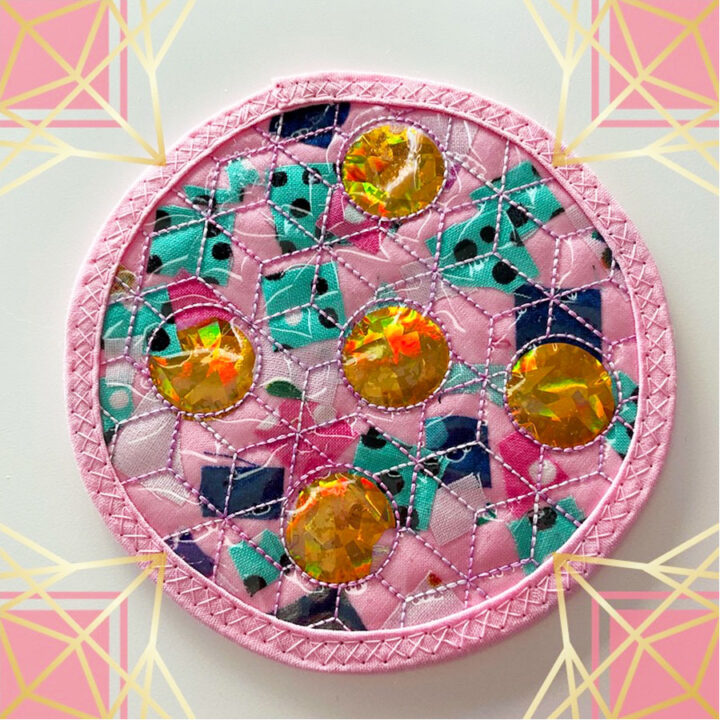
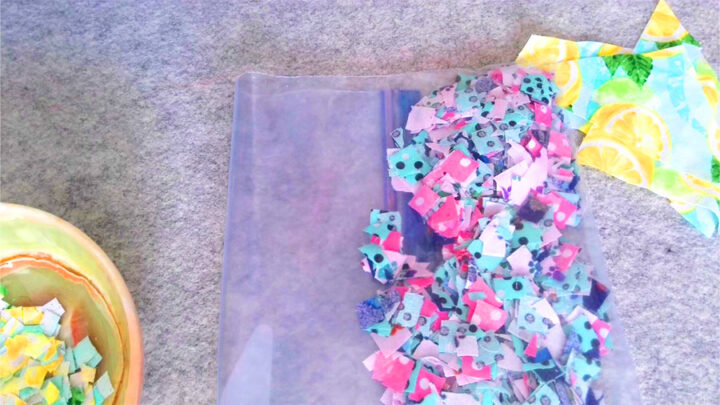
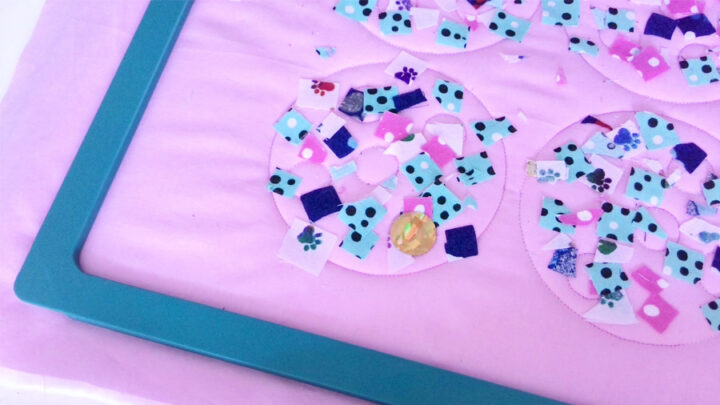
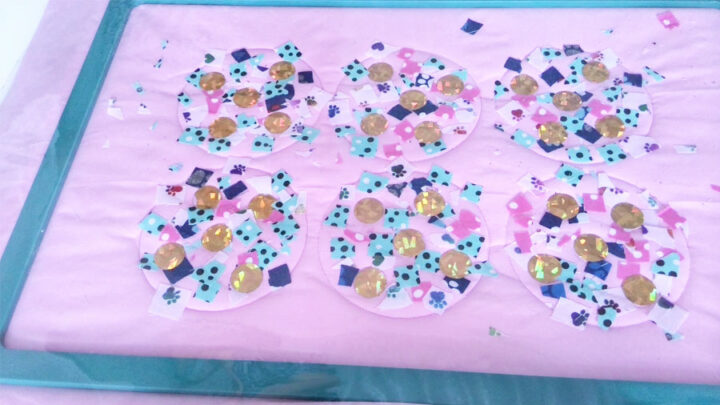
It’s also a great way to use up fabric scraps. I call these small cut pieces “fabric confetti”. Look at my coasters – do you see those small pieces of fabric under the clear vinyl?
I also used clear vinyl to make them – this way they are easily cleaned from drink rings. The clear vinyl is placed over fabric confetti and holds them inside the coaster.
Note: Some of the links on this page are affiliate links. This means I will receive a commission if you order a product through one of my links. I only recommend products I believe in and use myself.
What you’ll need
- Piece of fabric about 30” x 44”
- Piece of clear vinyl (see the size below)
- Piece of batting
- Fabric scraps
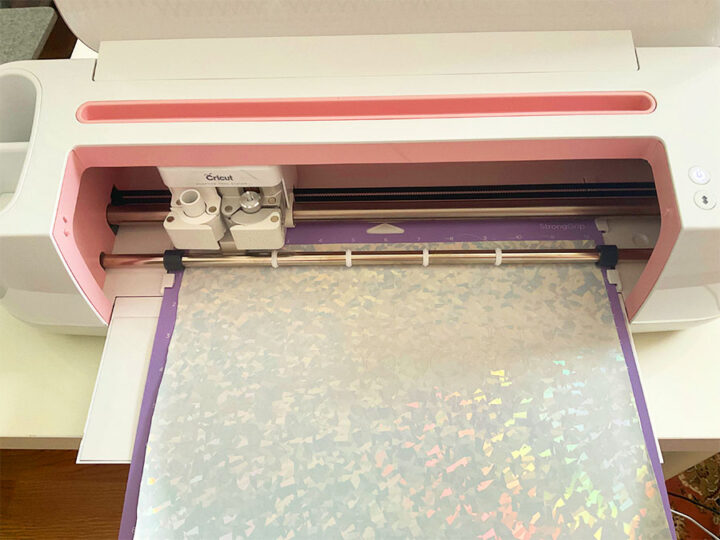
- Holographic iron-on vinyl
- Cricut to cut vinyl (optional)
- SewTites (optional)
- Regular sewing notions
- Modern embroidery machine (optional)
- In the hoop embroidery design – you can download it (free) from my Resource Library
1. Prepare All Necessary Materials
Pre-wash your fabric and press it with an iron to remove any wrinkles. You will need only small pieces of fabric for these DIY fabric coasters so you might use fabric leftovers from previous projects and the fabric might be already prewashed.
Cut 2 pieces of fabric about 15” x 22” each. I used pink quilting cotton.
Cut a piece of batting the same size and a piece of clear vinyl.
Download in the hoop embroidery design for these coasters from my Resource Library. It’s free for subscribers to my newsletter.
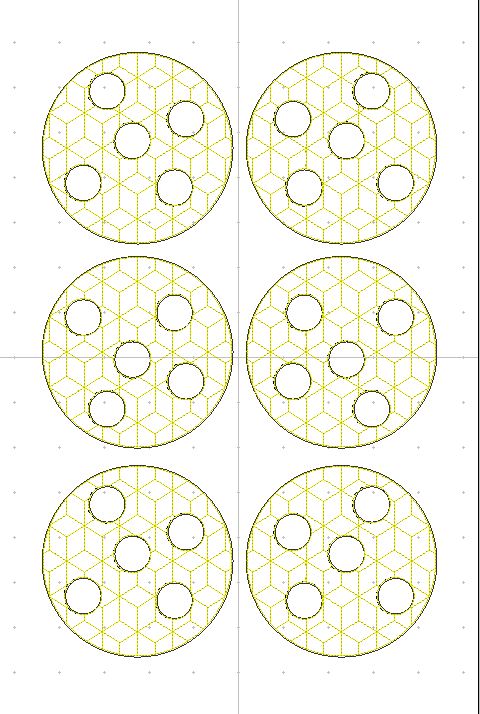
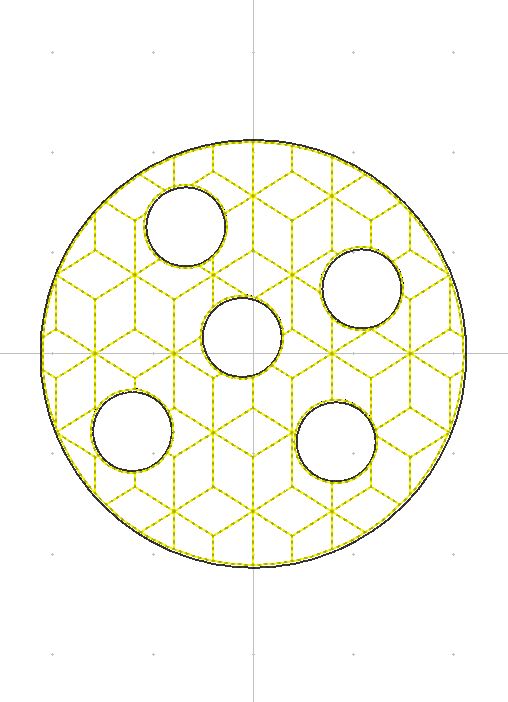
I have a design for the big hoop 10 5/8″ x 16″ in PES and other formats (6 circles at once) and another design for 5′ x 7″ hoop (1 circle only) for all embroidery formats.
Prepare your embroidery/ sewing machine – thread with suitable thread, insert a new needle.
Cut 30 small circles from holographic vinyl with your cutting machine – I used a Cricut Maker, the diameter of the circle is 25/32 inch or (much easier) 20mm.
Prepare fabric “confetti”. This project is a great way to use even the smallest scrap pieces.
I like to use my magnetic hoop from Dime.
2. Run The First Step Of The In The Hoop Embroidery Design
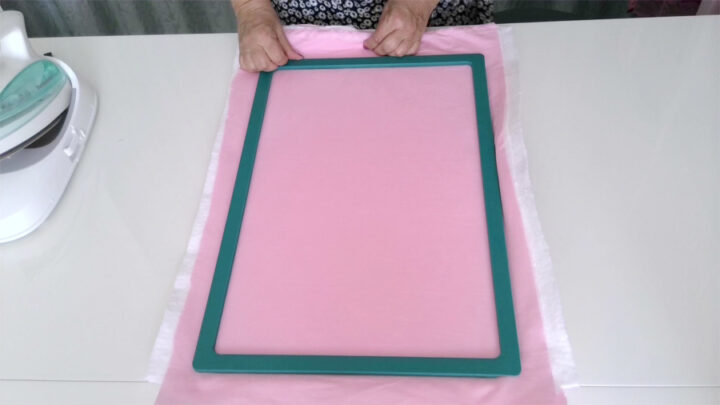
First, prepare the hoop. To begin, place the bottom part of the hoop on the table, next place a piece of fabric, next place a piece of batting, and then put the second piece of fabric. Place the upper part of the hoop and make both sides of the hoop very taut.
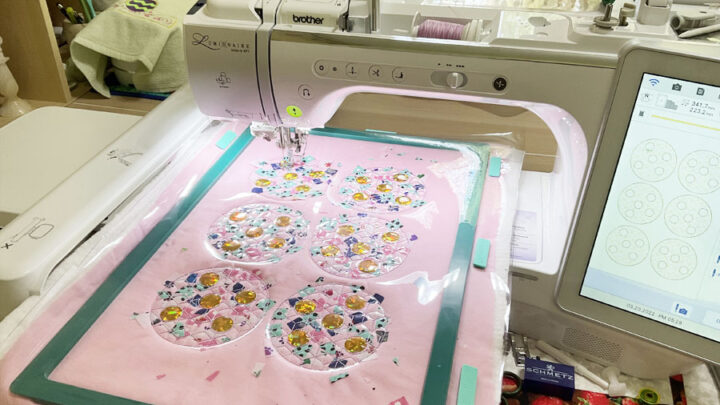
Run the first step of the in the hoop embroidery design.
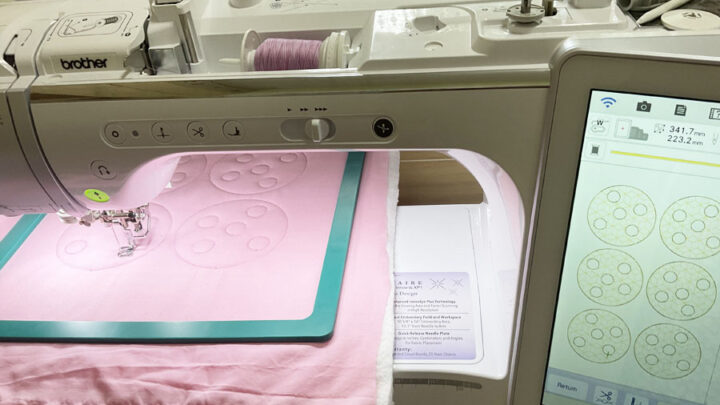
Take the hoop out of the machine (but don’t unhoop the fabric!).
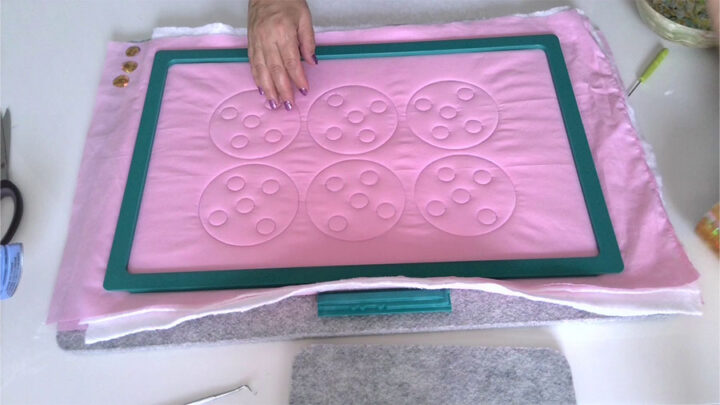
3. Scatter Fabric Confetti Pieces Over The Design
Adding fabric confetti to your design is a fun way to add color and texture. To do this, simply scatter the fabric confetti pieces over the design. It’s ok to get confetti over the circles’ edges – we will cut these circles later after the clear vinyl will be sewn in place.
Just be careful with the hoop – don’t move the fabric inside the hoop!
The fabric confetti will add an extra layer of interest to your design, making it truly unique.
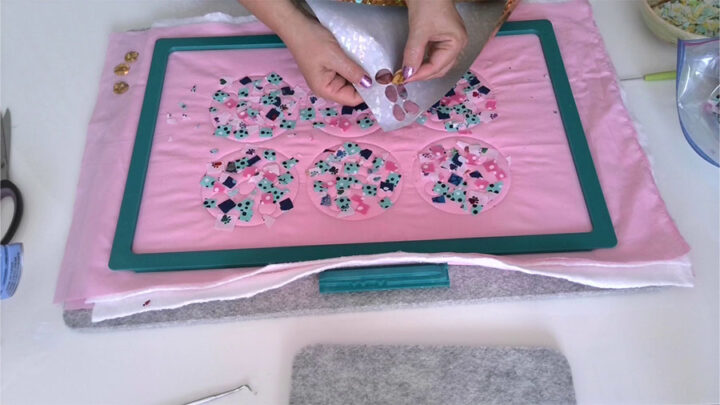
4. Fuse Vinyl Circles In Place
For this, I liked to use my mini iron. Before fusing these circles, I took off a clear plastic cover from each circle.
✅ Related tutorial: Mini irons for sewing and quilting
Parchment paper is an ideal material to use when fusing holographic circles to fabric. The paper is heat resistant and will prevent the circles from sticking to the mini iron.
Simply place the parchment paper over the circles and press the iron down for 10 seconds. The heat will cause the holograms to fuse to the fabric, creating a permanent bond. Parchment paper is also great for preventing scorching or burning of delicate fabrics. So, if you decide to attach holographic circles to fabric, be sure to use parchment paper.
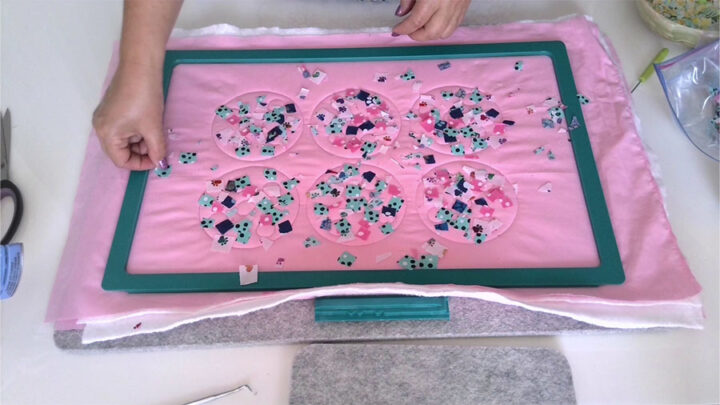
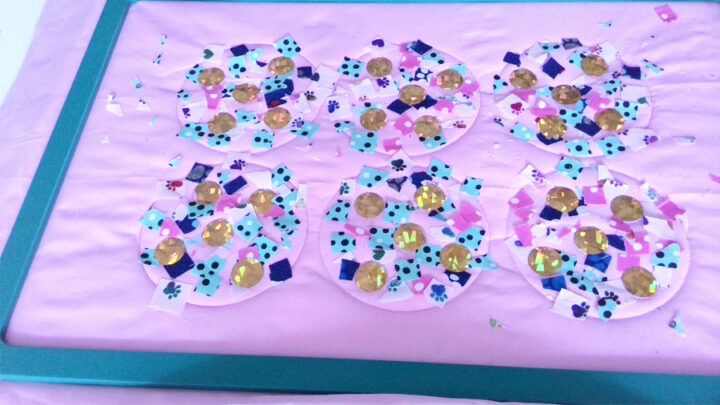
So, after I attached all 30 holographic circles it was looking like this.
5. Run The Next Step Of The In The Hoop Embroidery Design
Place a piece of clear vinyl over the fabric confetti area.
You can use tape to secure the vinyl and prevent it from shifting.
But recently I found a great tool called SewTites. Did you use them before?
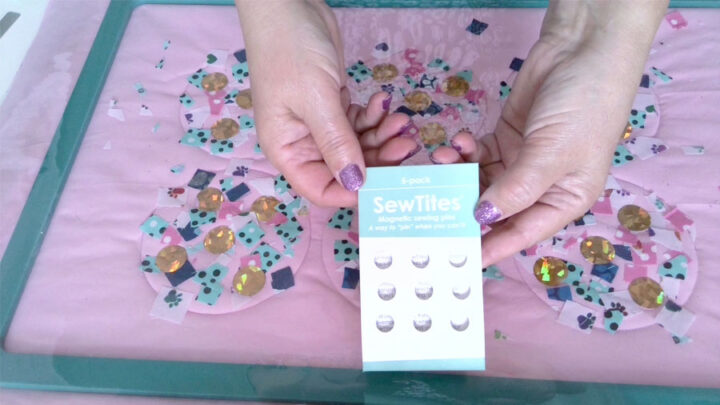
SewTites are small magnets that you can use to secure fabric (that’s not in the hoop) in place while you embroider. They are incredibly strong and hold the fabric firmly in place, even during the most vigorous stitching. SewTites are so affordable that I can use them on all of my future projects.
Now I can’t even imagine making in the hoop embroidery without these small magnetic “holders”. They have made my life so much easier and have helped me produce better results.
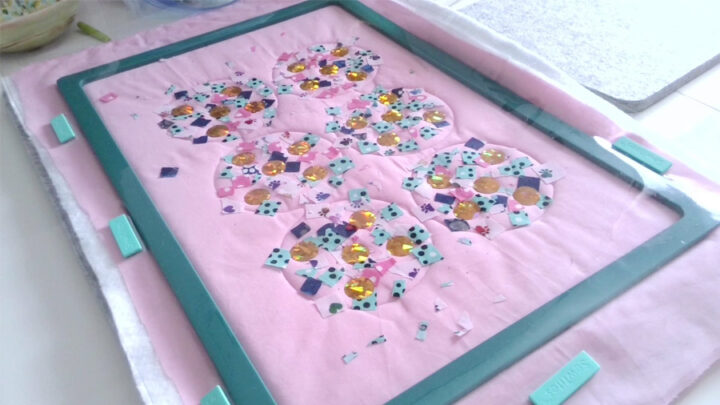
Return the hoop to the embroidery machine and let it run the next step of the design.
6. Finish The DIY Fabric Coasters
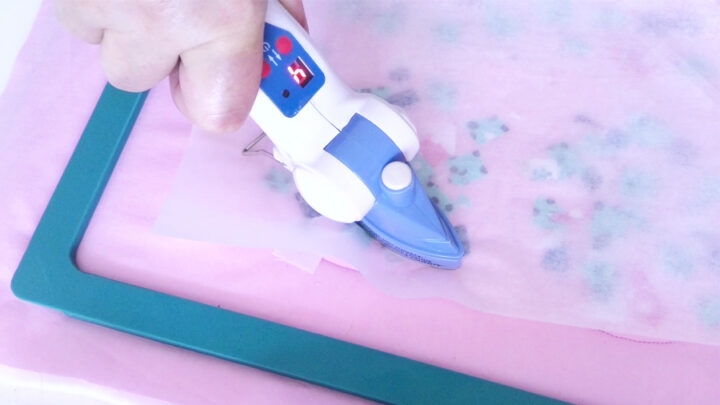
Once you’ve finished embroidery, it’s time to cut the fabric around the circles. Use sharp fabric shears for this, and it’s best to cut as close to the stitches as possible.
Once you’ve done that, you’ll be left with lots of fabric scraps. Don’t throw them away – instead, use them to make fabric confetti! This can be used in your future projects, like this one. It’s a great way to use up every last scrap of fabric, and it’s also fun to add a little bit of color and personality to your projects. So be sure to save those scraps – they might just come in handy.
Now the question is – do we need to bind the edges on these coasters?
Binding the edges prevents fraying and gives the coaster a more finished look I guess. However, it is not strictly necessary, and you may decide that you like the raw look of unbound fabric edges. Ultimately, the decision of whether or not to bind the edges on a fabric coaster is up to you and should be based on your personal preferences.
I have decided to bind the circles. For this, I made my own bias binding and sewed it in place.
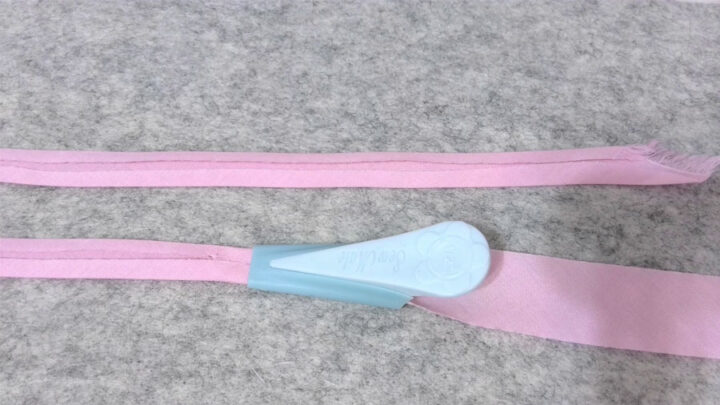
Binding involves sewing a strip of fabric around the edge of the circle, covering the raw edge and giving the circle a clean finish. While you can purchase binding tape, many sewists prefer to make their own bias tape.
It is a strip of fabric that is cut on the bias (i.e. at a 45 degrees angle) and then sewn around the edge of the fabric. Here’s a helpful guide on how to make your own bias binding.
You can find detailed instructions on how to bind a circle in my previous tutorials.
How To Make A Round Quilted Placemat | Free Printable Template
Once you have bound the coaster, you can then embellish the binding strip with any decorative topstitching you like. So get creative and have fun!
Did you find this tutorial helpful? If so, save this pin (see below) on your sewing board so you can come to this tutorial later when you are ready for DIY fabric coasters, and follow me on Pinterest for more tips, tutorials, and inspiration!

If liked this machine embroidery project you will also like my tutorial How To Make In-The-Hoop Lined Zippered Bags: A Step-By-Step Tutorial, Free Design that will equip you with all the knowledge and resources you need to create in-the-hoop lined zippered bags with your embroidery machine.
latest posts
- What Do You Call a Person Who Sews? I Asked My Readers and Got 1,408 Opinions
- DIY Round Purse: PDF Sewing Pattern and Detailed Instructions
- Mini Wonder Clips By Clover: Useful Sewing Tool Or Just Another Notion?
- Non-Slip Grips For Quilting Rulers: A Small Notion With A Useful Job
- Fabric Eraser for Sewing: What It Removes and When to Use It
- What Is The Best Thread For Sewing Machine Projects? Let’s Find Out!
- Butterfly Quilt Block Tutorial – Foundation Paper Piecing
- How To Sew Quilt Squares So The Corners Match
- Sewing With Fork Pins: How They Help With Pattern Matching, Slippery Fabric, And Seams