
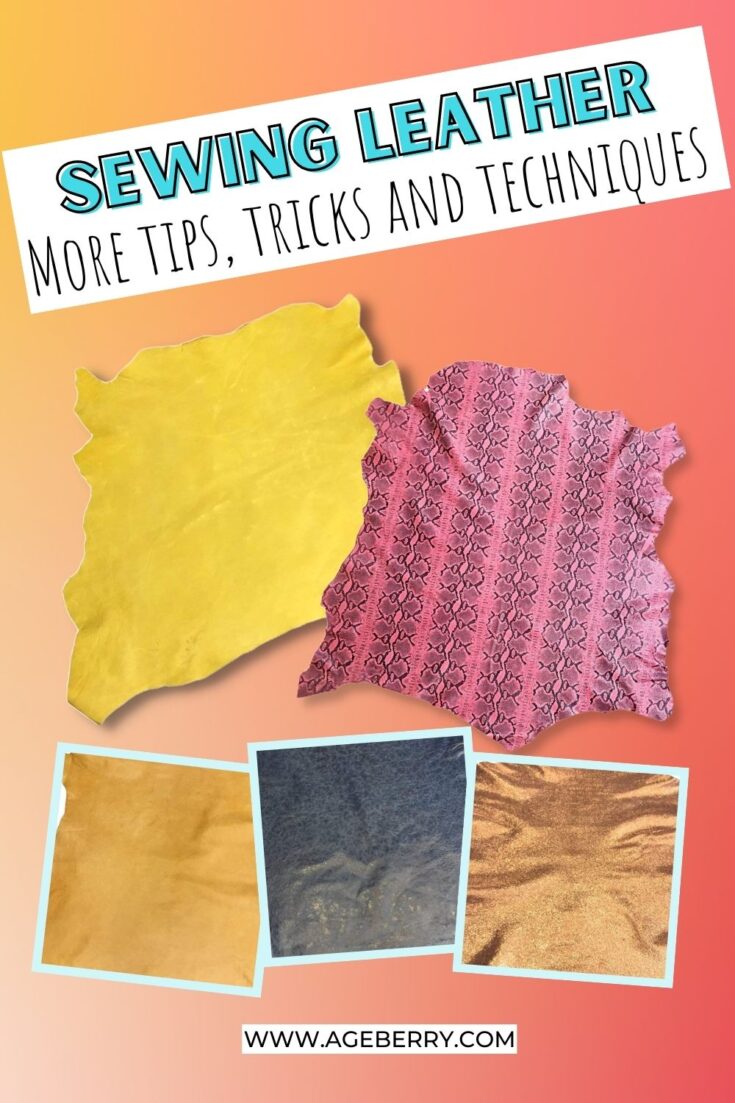
More tips, tricks, and techniques for sewing leather
In the first part of my tutorial about sewing leather on a home sewing machine, I was showing you what tools you can use to sew leather and how to use them.
In this part (which is the second one) I am going to show you some leather stitching techniques, how to prepare and use patterns for sewing leather on a home sewing machine, and what closures to use for leather garments.
Note: Some of the links on this page are affiliate links. This means I will receive a commission if you order a product through one of my links. I only recommend products I believe in and use myself.
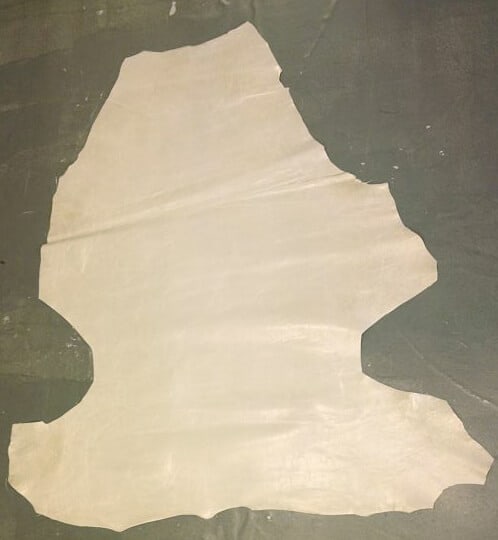
Leather is not easy to buy; unlike fabric, where the whole bolt is uniform, leather comes in unique skins. The soft, thin leather skins suitable for our projects are generally small and not easy to buy, especially online. However, I found that Amazon might be a good source, given their return policy. Here is a link to Amazon for buying skins.
What patterns are good for leather?
We can sew practically any garment from leather: from hats, dresses, and skirts to heavy jackets and winter coats. Leather is good also for home decoration projects, bags, accessories, and even jewelry making.
If you would like to sew clothes from leather you better choose simple patterns without many darts, pleats, or gathers. It’s easier to sew leather garments at home without button closures, invisible zippers, curved seams, elastic inserts, etc. You have to remember also that even soft leather is not a material that’s draping well.
Pattern makers (like McCall’s, Vogue, Simplicity, Butterick) practically never suggest using leather for their patterns (or at least I didn’t see it). None of the patterns I have recommends leather for a project. But it doesn’t really mean we can’t use those patterns to sew leather garments. For example, Simplicity 8300, McCalls 6450 fashion accessories, and McCalls 7611 are patterns very suitable for leather sewing in my opinion. I did not find the McCalls 6450 for sale online anymore, here is a link for a review (it might be available on eBay though)


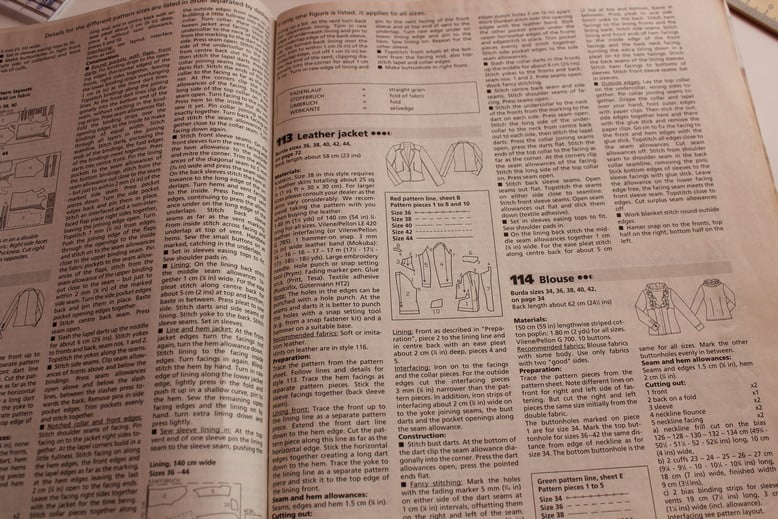
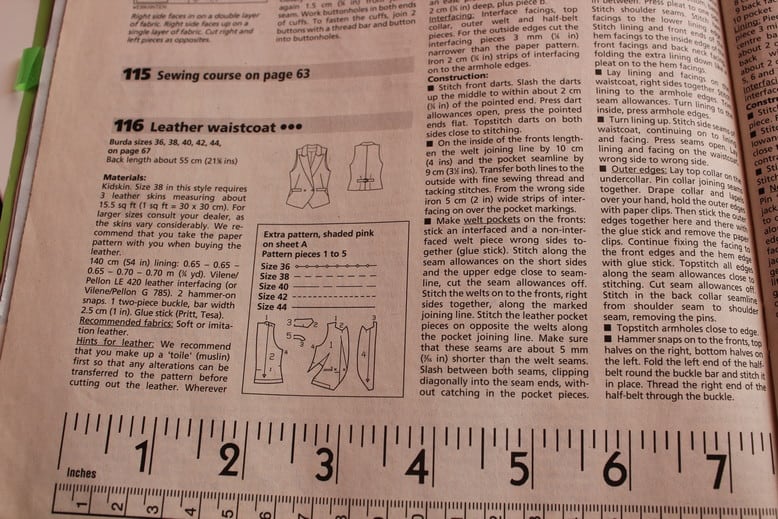
But in the BurdaStyle magazine, I see special patterns for leather from time to time. Burda is available in Europe everywhere, in North America I have seen it infrequently in European markets and it is available also for a subscription if you are interested please send me a message using the contact page (link at the bottom). I am not affiliated with the publisher but I really like the magazine.
Tips for working with leather
For your first attempt at sewing leather, it’s wise to pick a simple project and become more familiar with leather stitching techniques. Belts, hats, bags, vests, boleros, and pencil skirts are good projects if you are just starting to work with leather.
It’s better to choose simple patterns for leather sewing projects but also patterns that don’t require full-length pieces of leather and have smaller pieces that you can fit easier on skins. For example, if you want to sew a pinafore dress from leather you will have to choose a pattern that has a top and a skirt as separate pieces and has waist seams because otherwise, you will have a hard time fitting long pieces on a small skin.
Sometimes you will have to adjust a chosen pattern for small skins by making pattern pieces smaller. For example, if your pattern doesn’t have a center back seam (on a top or a skirt) you can add them, and then you will have more layout options on small skins.
Yes. You can combine leather with fabric and sew some pattern pieces from leather and other pieces from fabric; the sky and your imagination are the limits! Or you can use only embellishments made out of leather as I did here. 
Can I cut on the fold or multiple pieces at once?
You can’t cut pattern pieces on the fold or in layers – you have to work on a single thickness and cut out one layer at a time so make new pattern pieces for some parts that you are supposed to cut on the fold or in layers. For example, if some pattern piece is to be cut on a fold, make a duplicate (it will be in fact a mirror if it) of it and paste it together with scotch tape so you have a complete piece, rather than only half.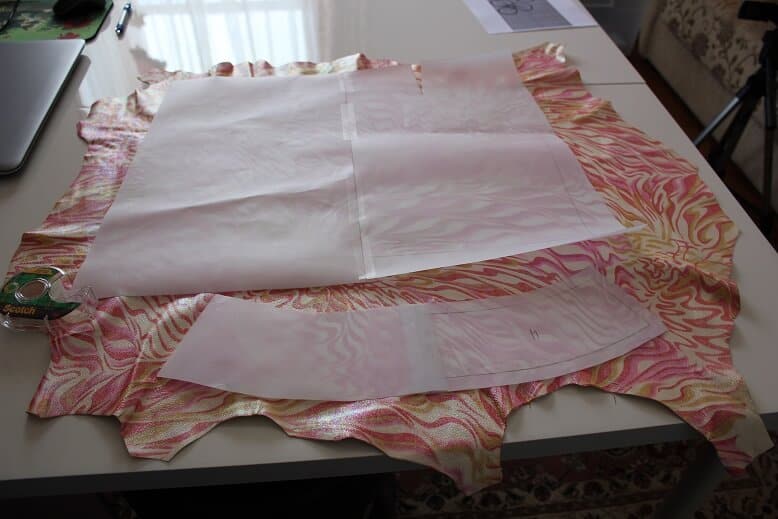
What about the seam allowances for leather?
Use patterns for sewing leather with seam allowances included or make sure you add them to your pattern pieces. BUT: Before cutting your leather trim the pattern’s seam allowances to ⅜” (1 cm ) or even ¼” because ⅝” (1.5 cm) seam allowances normally used in most commercial patterns are too big and your seams will be ungainly.
And finally, another tip: make a mock-up version of your project from fabric similar to your leather (I use home decor fabric in this case) so you can make all necessary alterations (if any), decide what length you want, and get to know all the steps to finish your project.
For example, you can see if you will need to sew 4 layers of leather at once and you can check if your sewing machine can handle this and if you have all the necessary tools to do it. Usually, we can’t rip leather seams if something doesn’t fit right because needles make permanent holes in leather, so better make sure we do it right the first time.
Or you can use your mock-up pieces after you checked the fit with it and made necessary alterations.
It is also good to have separate pieces for everything to plan how you will place your pattern on the skins. This also will make it easier to estimate the number of skins that you will need to complete the pattern.
How to place pattern pieces on a skin?
Does leather have a grainline?
Does leather stretch?
Well, there is some lengthwise grain that’s parallel to the animal’s backbone. Usually, leather doesn’t stretch in this direction but stretches a little bit crosswise which is similar to woven fabric.
Below you can see a short video where I am showing how to find lengthwise grain on the skin I bought recently (the skin is so beautiful with this gold/pink print!).

It’s better to align the biggest and most important pattern pieces ( like the front, back, and sleeves) with the lengthwise grain first and keep all the pattern grainline arrows parallel to each other. If you cut big pieces on crosswise grain the leather may bulge and hang unevenly after it’s sewed.
But for small pieces (like bands, cuffs, pockets, collars, tabs, flaps, etc.) grain direction is not that important – just place them however they better fit on a skin.
But if you want to use suede for your project which has a nap then you need to take it into consideration and use a “with nap” layout – place all pattern pieces in the same direction parallel to the lengthwise grain (which is parallel to the animal’s backbone).
I mark all darts and notches with a regular pen on the wrong side of the skin. Marking tools that have some traces of oil or wax are not good for leather because leather is quite absorbent and pattern markings can come out and stain the right side of the leather.
Use pattern weights to keep pattern pieces in place and outline all the details for cutting with a regular pen.
Leather stitching techniques
You will have many scrap pieces of leather left after cutting your pattern so before working on your garment test your sewing machine settings and stitches, practice sewing seams, try different presser feet, threads, and needles, and learn how your machine handles the leather sewing.
There is no basting, no finishing raw edges, no pressing – isn’t it nice?
You can use many basic and decorative stitches on your sewing machine with leather. The most popular is, of course, a straight stitch. The stitch length should be slightly longer – around 3 – 3.5 mm. Too short stitch length is no good because you will make more holes in the leather and too long stitch length is no good because it will be too big a distance between holes (and it’s not beautiful either). If you are sewing only 2 layers of leather make the stitch length a bit shorter (3 mm) and for sewing 3-4 layers at once increase the stitch length (3.5 mm).
I also decreased my thread tension to 1 (instead of the normal 3-4) and adjusted the foot pressure for sewing leather. Usually, I sew a lot with delicate silk fabric and because of this, I keep my foot pressure dial at 1 for sewing extra fine fabric. So I needed to put it to 3 which is good for thicker fabrics.
Test your stitches on scrap – if you see skipped stitches (and it’s the most common problem with leather) change your needle for a bigger size, change your presser foot (for a walking foot or a Teflon foot), change the thread ( make it thicker). Check the first part of this article about all these tools and how to use them for sewing leather.
I was taught to always sew seams from the top down on leather.
Never sew reverse stitches on leather for securing the ends of seams. Backstitching will make new holes in the leather weakening the seam. Instead of that tie the threads manually.
We can’t use an iron to press seams open, so to open seams we will use glue. Brush the seams with a thin layer of glue and press the seams open (with your fingers first). You can use a mallet to tap the seams flat a little bit (tapping is good for longer seams). Sometimes it’s necessary to fold seam allowances to one side and glue them.

If the seams are curved they have to be notched so no bulk appears along the seam line. But don’t make notches symmetrical on both sides of the seam, I noticed that there are issues with dimples if the notches are aligned.

Also, we need to trim corners and points.
Now a few words about darts. First of all, try to choose a design with as few darts as possible. But probably you can’t avoid them completely so sew darts from the widest part down, and tie the thread ends by hand. It may be a problem to sew near the dart tip and keep the stitching straight so go slowly while sewing darts.


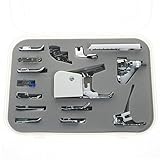
Did you notice the walking foot on my sewing machine? Absolutely necessary in this case. The walking foot is built-in on my machine but if you do not have it, this is the time to get it. It helps the leather glide through the machine so that the underneath layer (against the feed dogs) doesn’t bunch up under the foot and stitches stay even and not too close together. Just make sure you buy one that is compatible with your machine.
Sometimes the foot comes as part of a set or might have come bundled with your machine. It is a very good tool to have.


A very interesting type of walking foot is this: the Rotary Even Foot from Janome which will fit any low shank sewing machine. I tested it and the review is here: Presser foot guide: what is a Rotary Even Foot and how to use it.
Slit darts along the fold – first with scissors and afterward with a seam ripper. Stop cutting within 1/2 in (or 1 cm) of the dart’s tip. Keep the seams open with glue.
Hems on leather garments can be glued only – topstitching is not required but you can do it just for a decorative option. I try to avoid topstitching on leather because it’s really hard to keep it straight – a few layers of leather are thick and they can slip out from under the presser foot (especially that topstitching is done mostly at the edge). And also we can’t rip stitches if we make a mistake – so if topstitching is not done properly your project will be ruined.
On straight hems, we can use a special double-sided tape for leather to glue the hem. For curved hems use only glue. Hem allowances on leather clothes should be around 1 cm (⅜ in). Flatten the hem with a mallet (or with your fingers).


You can topstitch seams that were opened with glue but the glue can make the needle dirty so you may need to clean the needle from time to time.
When connecting different pattern pieces (for example when attaching a waistband to a skirt) sew each section between darts and seams separately: stitch up to each seam or dart, stop the stitching, and start stitching again on the other side of the seam or dart. It will be longer, of course, but your seams will be less bulky.
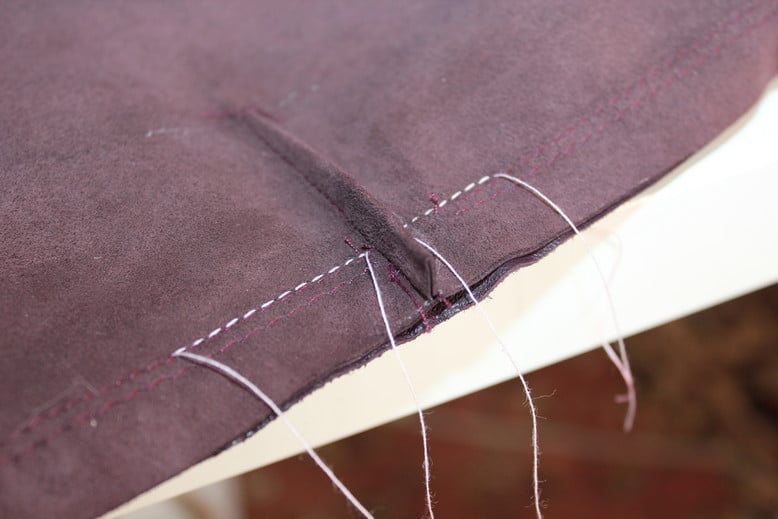
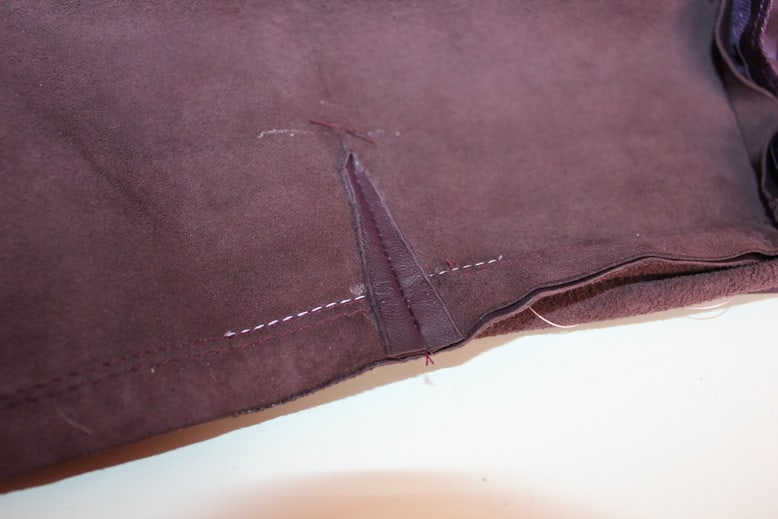
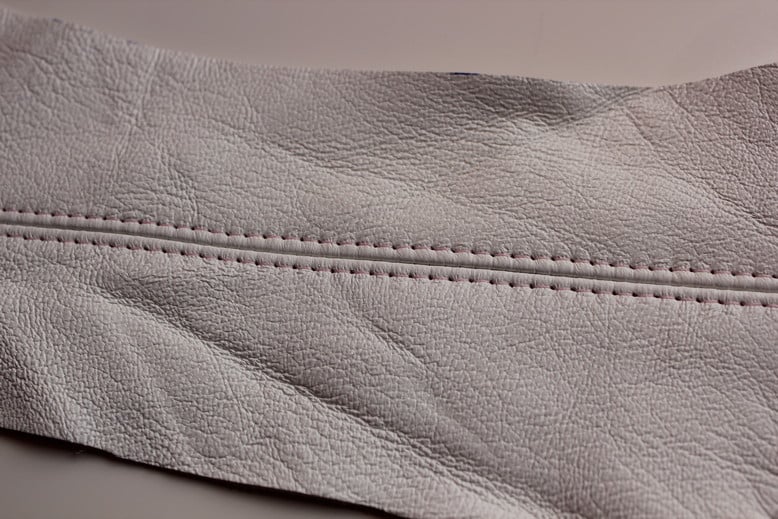
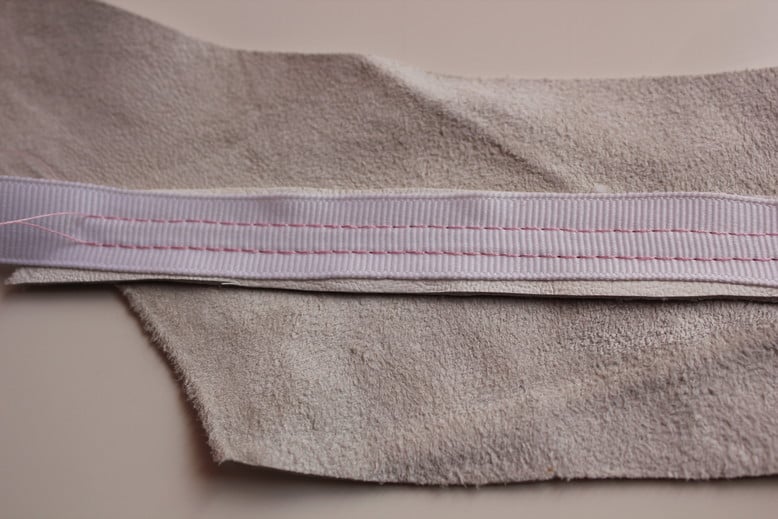
Sometimes it is necessary to reinforce long seams that are subject to stress or stretch – use a strong twill tape in this case. For example, center back seams can be sewn like in the images below. These types of seams are the strongest and they will never come apart.
What closures do we use for leather garments?
We can use zippers and buttons of course but the easiest closure to use are snap fasteners. Snap installation kits and instructions on how to do it like this video are widely available now for home sewists. Self-made ties are very easy also but most of the time they are not suitable.
Sewing zippers on leather garments also has its own requirements.
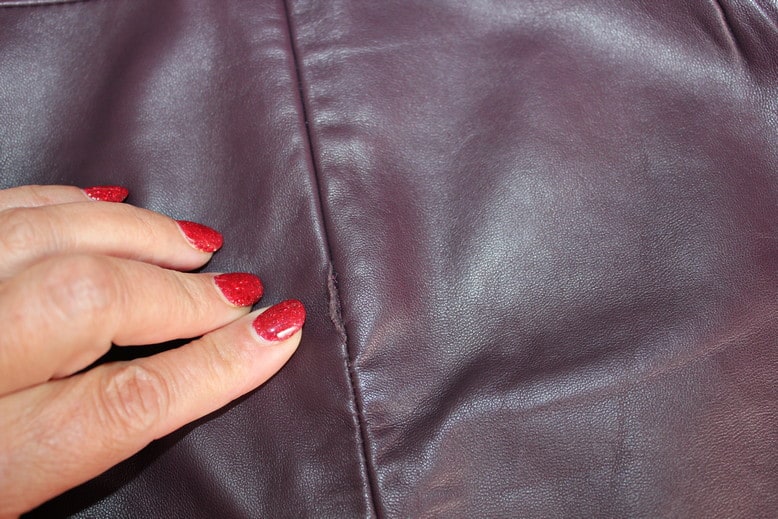
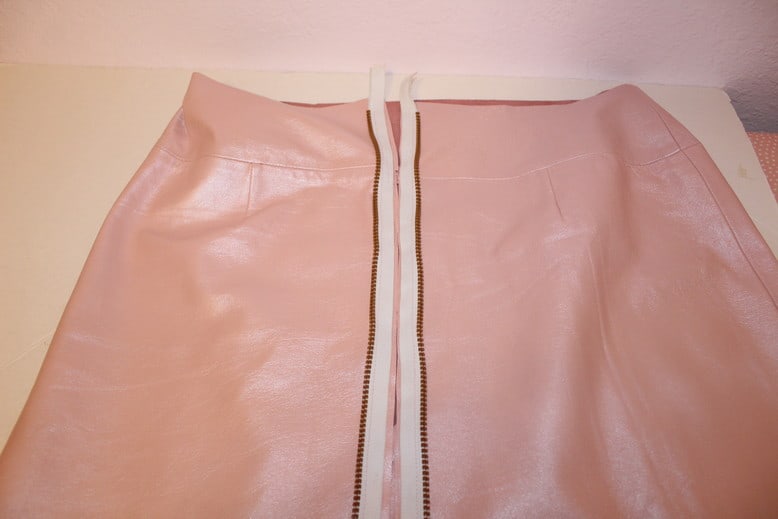
I attached an invisible zipper to my leather skirt the regular way – and look what happened after I wore the skirt only a few times. So I decided that invisible zippers are not good for the leather.
Zippers on leather
But regular zippers can be installed without big problems.
We can’t baste zippers so we have to use double-sided basting tape which makes the zipper sewing so much easier. This tape is usually dissolving in water which in our case (for leather) will not happen; however, in time the tape WILL disintegrate (if it was washed away in the first place) but that is not an issue since by then the zipper will be already sewn.

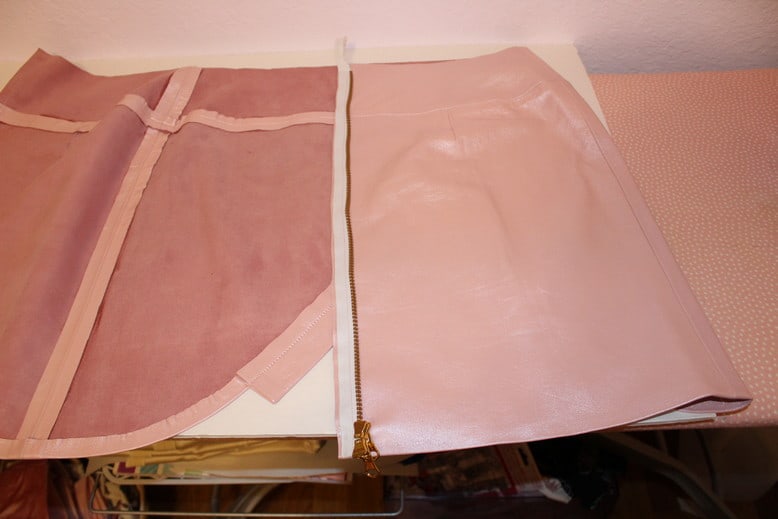
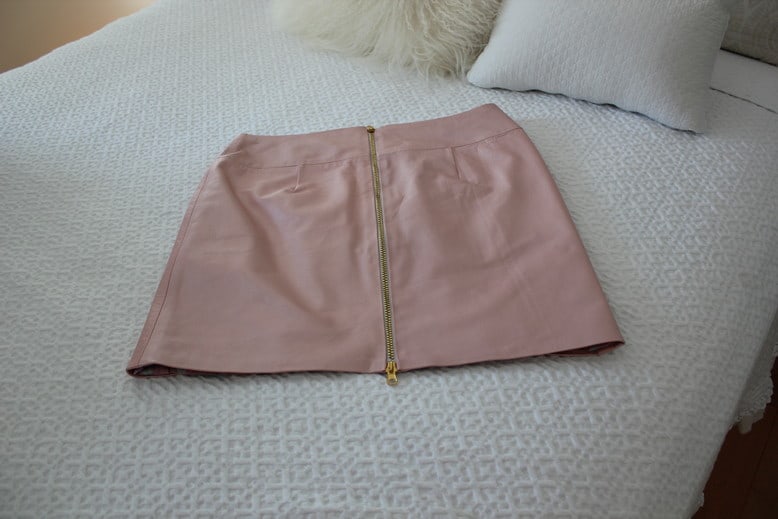
I installed a separating zipper on my leather skirt. As I said before I don’t like to topstitch (what if I will make a mistake?) so I sewed the zipper like a regular seam and afterward turned it in and glued the seams.

Buttonholes on leather
It’s not easy to make regular buttonholes by machine because stitches will cut leather and rip out. So make bound buttonholes – here is a great tutorial I found on YouTube (why reinvent the wheel).

When sewing buttons on make sure to reinforce them so you don’t end up with a hole in your leather garment instead of a button. Here is my video on how to sew reinforced buttons.

To see how all this tips and techniques work when I make a leather purse check my YouTube videos below.


Did you find this tutorial helpful? If so, save this pin (see below) on your sewing board so you can come to this tutorial later when you want to sew leather and follow me on Pinterest for more tips, tutorials, and inspiration!
Like sewing tips? I have other popular tutorials on my site that might be interesting for you. Check them out below.


latest posts
- Corset Pressing Board for Sewing: What It Does and How I Use It
- 7 Essential Tools and Settings for Sewing Denim on a Regular Sewing Machine
- That Purple Thang: 10 Smart Ways to Use This Weird Little Tool
- 20+ Reasons Your Sewing Machine Thread Keeps Breaking (+ Solutions)
- Dresden Plate Quilt Block: 4th of July Fireworks
- How To Sew Curves the Easy Way Using a Curve Master Presser Foot
- 30 Sewing Hacks That Turn Ordinary Items into Useful Sewing Tools
- Seam Allowances in Sewing Patterns: What They Are and How to Use Them
- What Do You Call a Person Who Sews? I Asked My Readers and Got 1,408 Opinions

Dear Olga Balasa, Your absolutely beautiful purse design made me so very happy, and the awesome instructions, especially the leather flowers makes me wonder – would you consider sharing more of your know how and purse designs?
Thank you so much,
Maria
Maria, thank you very much for your kind words! I am happy to know that my tutorials are useful. I am trying to publish one or two new tutorials every week. Are you interested only in purse designs? I didn’t make many purses – I actually made only two until now. But I plan to make a third one from cork fabric soon and then I will posts a tutorial on how to make it.
How do I re-attach an elastic insert into a leather belt? Is there such a thing as a ball point leather needle which seems necessary to prevent the elastic from being pierced and cut during stitching with a sharp leather needle.
Contact me by email please, I will need to understand better what the item is and how it is made before I can have an opinion.
I love the pattern for the ‘suit’ jacket in this article with fabric and leather accessories. Please tell me who makes it and how to get it. You are a wonderful seamstress. I have been sewing for over 60 years and you are teaching this old dog new tricks. Thank you for being,
Thank you, Carole, the original pattern was from an old Burda magazine. I was a subscriber to Burda magazine from 1988. And I always make small changes to the patterns. So I doubt you can get this particular pattern now unless you are also a long-time subscriber to Burda. But there should be similar patterns in pattern catalogs, I guess.
Very informative