
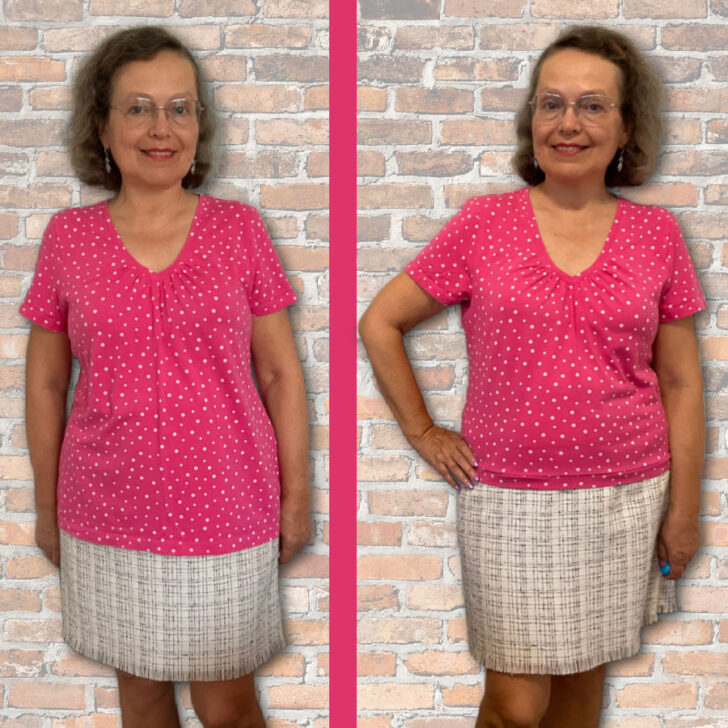
Altering Clothes DIY: How to Shorten a T-shirt with Style and Precision
Shortening a t-shirt might seem simple, but it’s more than just trimming off the extra fabric. If you want your shirt to look great and last, you’ll need to know a few key things about working with knit fabrics and finishing the hem properly. Whether you’re altering an old favorite or customizing a new purchase, this sewing tutorial will show you how to shorten a t-shirt with style and precision.
Just want the easiest method? Try the no-sew elastic hem version that gives your t-shirt a sporty, gathered finish without using a sewing machine. Jump to the no-sew method in this tutorial.
You can’t simply cut the t-shirt, fold the hem, and sew it with regular thread, a regular needle, and a straight stitch because these materials and methods don’t accommodate the stretch of t-shirt fabric. A straight stitch does not have the flexibility to stretch with the fabric. As a result, the stitching will strain and eventually pop or break, especially when the hem is stretched during wear.
So, let’s start with the basics. Before you grab your scissors, here are five things you’ll want to know about altering t-shirts.
5 Things to Know Before You Shorten a T-Shirt
1. T-Shirt Hems
Have you ever looked closely at the bottom edge of your t-shirt? That’s the hem. Most store-bought t-shirts use a coverstitch hem. It’s that neat, stretchy finish with two rows of stitching on the outside and a smooth enclosed edge on the inside. This type of hem is flexible, so it stretches with the fabric while maintaining its structure.
Why does this matter? Because when you shorten your t-shirt, you’ll need to recreate or adapt this type of hem. It’s what keeps the fabric from curling and allows the shirt to stretch when you wear it. Without a proper hem, the shirt might not hold up well.
2. T-Shirts Are Made from Knit Fabric
T-shirts are made from jersey knit, a fabric loved for being stretchy, soft, and super comfy. Unlike woven fabrics, which fray when cut, knits won’t unravel. But knits come with their own quirks.
For example:
- Knit fabrics can curl along the edges when cut.
- The stretchiness can make the fabric shift or distort as you sew, especially if you don’t use the right technique.
Understanding how to handle knits is essential to avoid wavy seams or hems that look “off.”
✅ Related tutorial: All About Modern Types Of Knit Fabric
3. You Can’t Just Cut the Length
You might be tempted to grab a pair of scissors and chop off the extra fabric. But cutting alone isn’t enough. T-shirt fabric can curl at the edges, making the bottom look unfinished. Plus, without a proper hem, the shirt might stretch unevenly or lose its shape over time.
Taking a few extra steps to finish the hem will make all the difference. Your shirt will look polished and last much longer.
4. You Might Need Special Sewing Tools
When working with t-shirt fabric, having the right tools can save you a lot of frustration. Depending on the method you choose, these tools can come in handy:
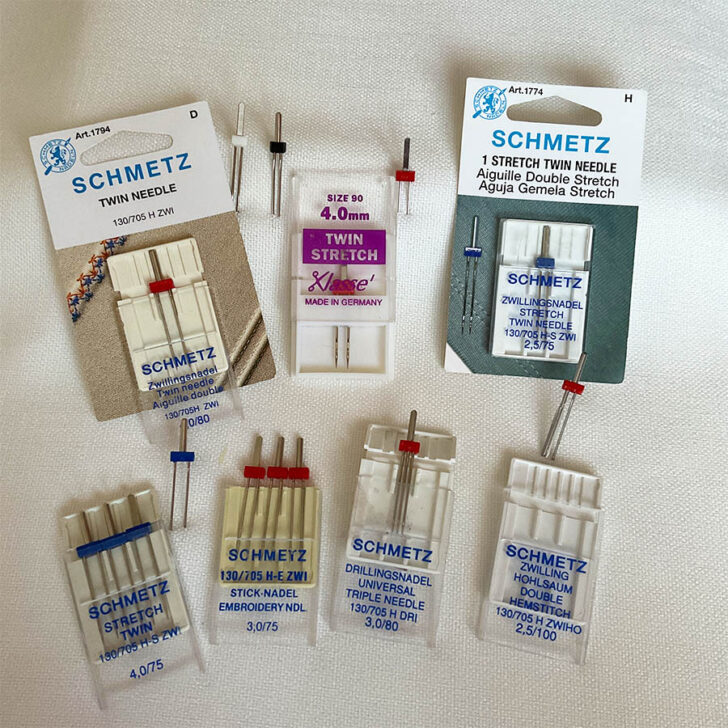
- Twin needles: These help you create a double-stitched hem using a regular sewing machine.
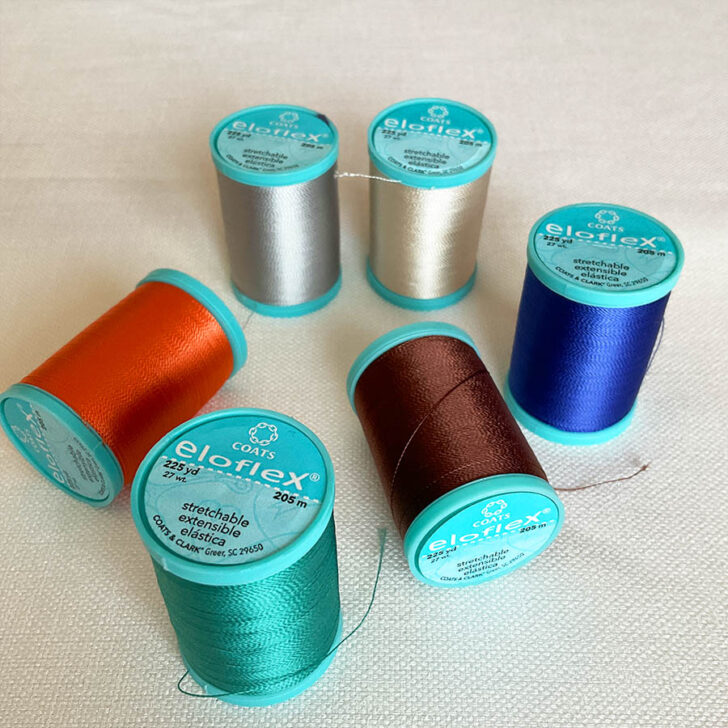
- Stretch thread (like Eloflex): It ensures the hem stretches with the fabric instead of breaking.
- Coverstitch machine: If you want a hem that looks like it came straight from the store, this is your best friend.
- Walking foot: This keeps the knit fabric from stretching or distorting as you sew.
Don’t stress if you don’t have all these tools. There are alternative techniques for every skill level and equipment setup.
5. Choose the Right Hemming Technique
There’s no one-size-fits-all way to shorten a t-shirt. The best method depends on your sewing skills, tools, and the look you’re going for. Here are some popular options:
- Sewing with a twin needle and stretch thread.
- Using a coverstitch machine for a factory-style hem.
- Shortening a t-shirt while keeping the original hem.
- Shortening a t-shirt by adding decorative serger stitches above the hem.
- No sew option – adding elastic for a gathered hem
- Shortening a t-shirt by adding a decorative knit band
Each method offers a different finish and allows you to customize the t-shirt to your liking so pick the one that works best for you.
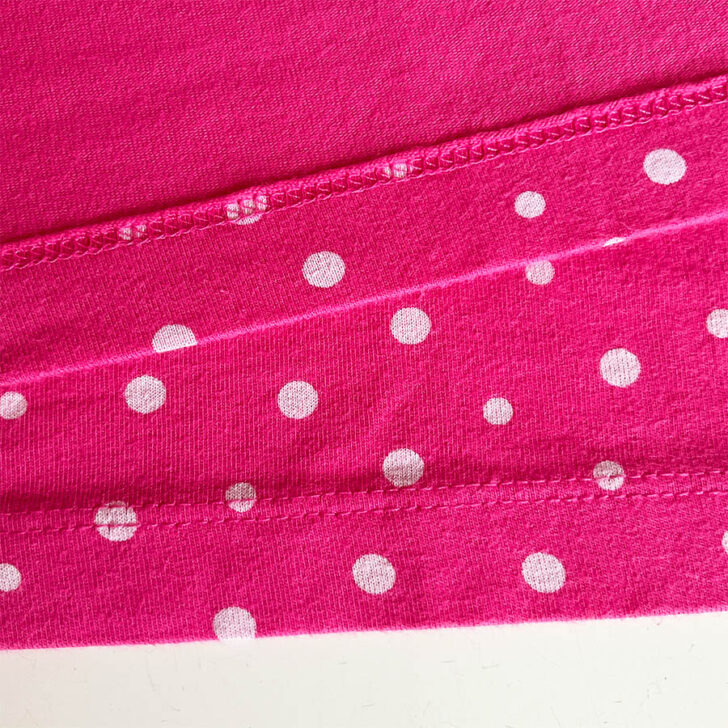
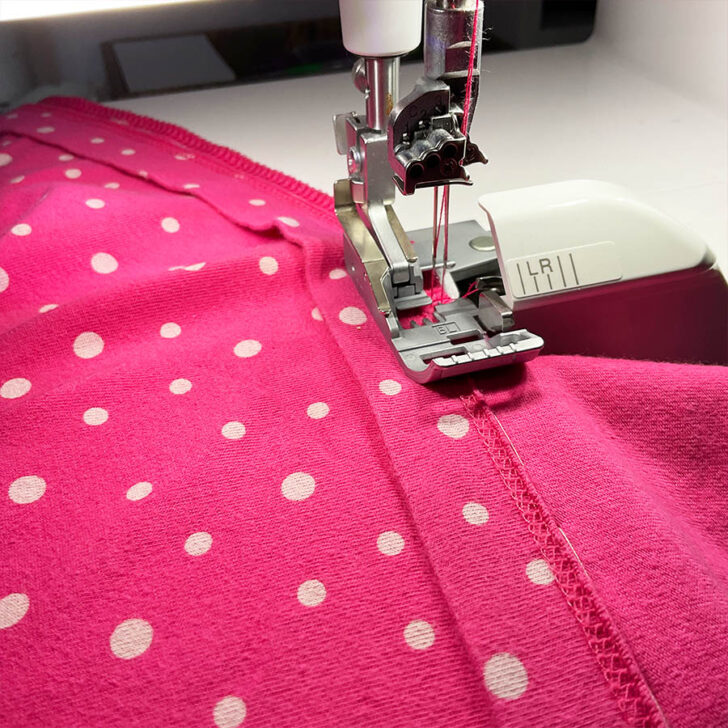
Technique 1: How to Shorten a T-shirt Using a Twin Needle and Stretch Thread
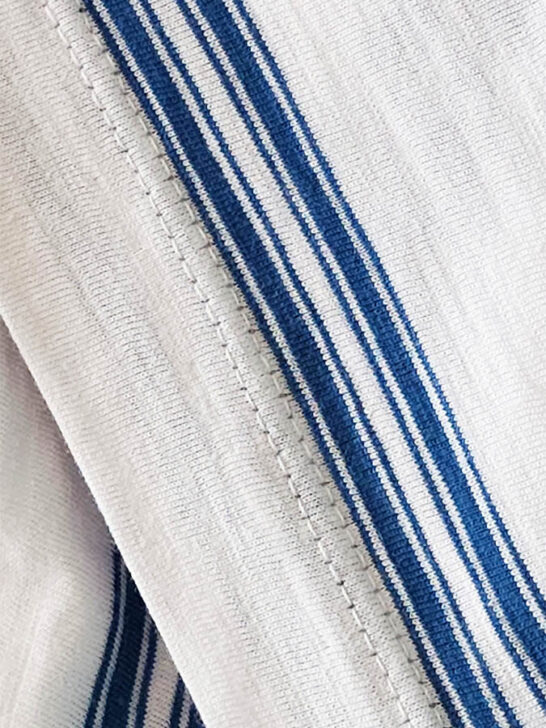
This method creates two parallel rows of stitching on the front and a zigzag stitch underneath. The hem remains flexible and stretches during wear without the threads breaking.
What You’ll Need
Twin needle: Choose one specifically designed for stretch fabrics, as not all twin needles are suitable for knits. For spacing, it’s best to use one with 2.5 mm spacing. The smaller spacing works well for t-shirt shortening and minimizes the risk of issues like tunneling. You can use a twin needle with 4 mm spacing, but it may not work properly with all t-shirt fabrics and could cause tunneling, especially on thinner knits.
Note: Some of the links on this page are affiliate links. This means I will receive a commission if you order a product through one of my links. I only recommend products I believe in and use myself.
")
SCHMETZ Stretch Twin Sewing Machine Needle
Eloflex thread: Use this stretch thread for both the top threads and the bobbin to ensure the hem retains its flexibility. However, keep in mind that not all machines can handle Eloflex thread smoothly. It’s known to be a “problematic” thread at times, depending on your machine’s compatibility and settings. While I personally like using it for knit projects, you may encounter some challenges. If you’re unsure or want to learn more, I have a detailed review of Eloflex thread on my site – check it out How to use Eloflex – an innovative stretchable sewing thread from Coats

- Sewing machine: Ensure it’s compatible with a twin needle setup.
- Regular sewing tools and notions: These include fabric scissors, a fabric marker, basting thread, pins, etc.
- Iron: For pressing the hem after sewing.
Steps to Shorten a T-Shirt with a Twin Needle
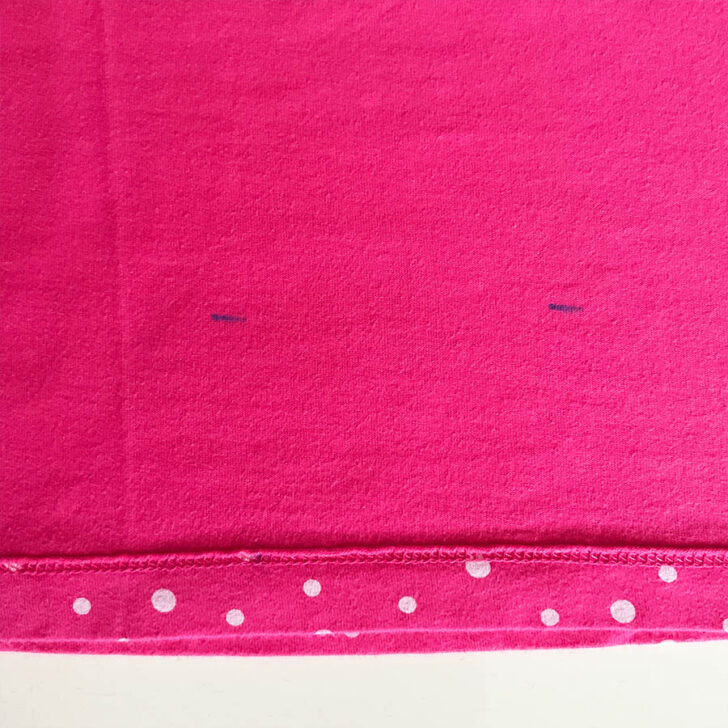
Step 1. Mark and Cut the T-Shirt
Put the t-shirt on and mark the new desired length.
Remove the shirt and draw a straight line using chalk or a fabric marker at the marked distance – this will be your folding line for the new hem.
Add about 1/2 or 3/4 inch to your marked line for the hem allowance and draw another line – this will be your cutting line.
Cut along the new line carefully.
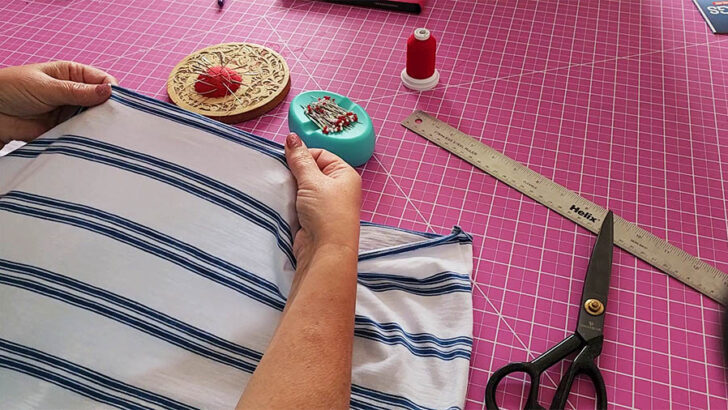
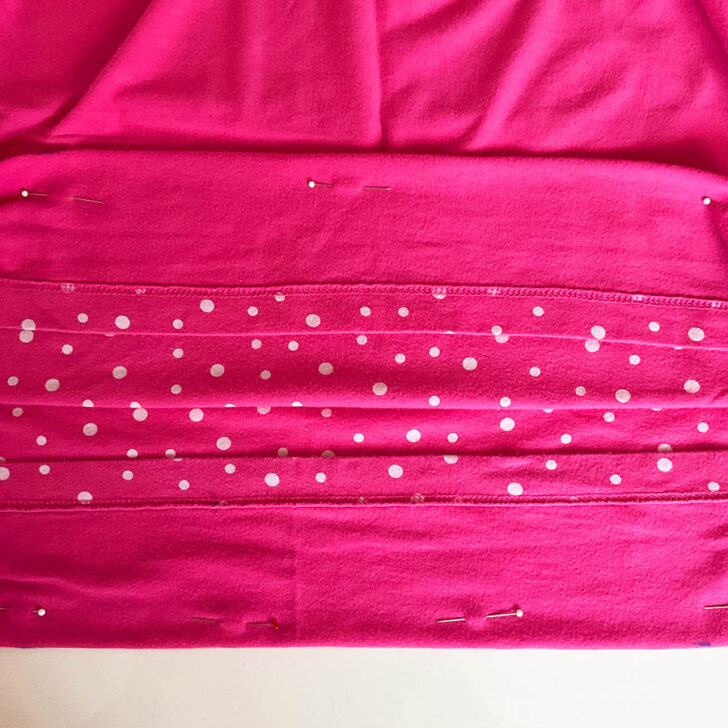
Step 2. Prepare the Hem
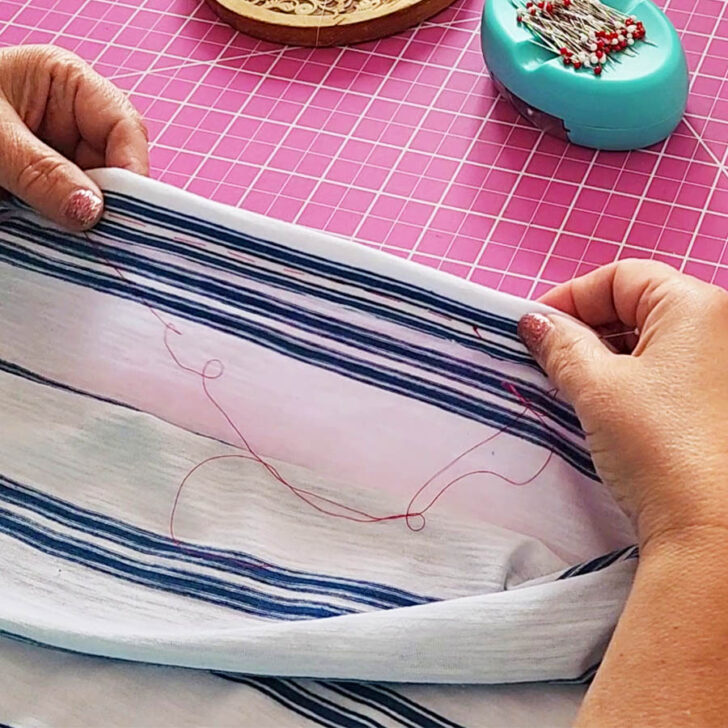
Fold the raw edge under using the marked line (just a single fold, not double).
Secure the hem in place with pins and basting thread. Basting holds the fabric evenly and avoids the shifting that pins sometimes cause, especially with stretchy materials.
Step 3. Set Up Your Twin Needle
Insert the twin needle into your sewing machine. Thread it using two spools of Eloflex thread, making sure to use matching or complementary colors for your project.
Wind your bobbin with Eloflex thread as well. This ensures the stitches stretch properly.
✅ Related tutorial: Twin needle sewing machine – everything you need to know about sewing with a twin neelde
Step 4. Adjust Your Sewing Machine Settings
Switch your machine to twin needle mode if it has one. Otherwise, set the correct tension and stitch length. I usually choose a medium-length straight stitch (3 mm).
Test your setup on a scrap of knit fabric (that you just cut) to ensure the tension is balanced and the needle sew without skipping.
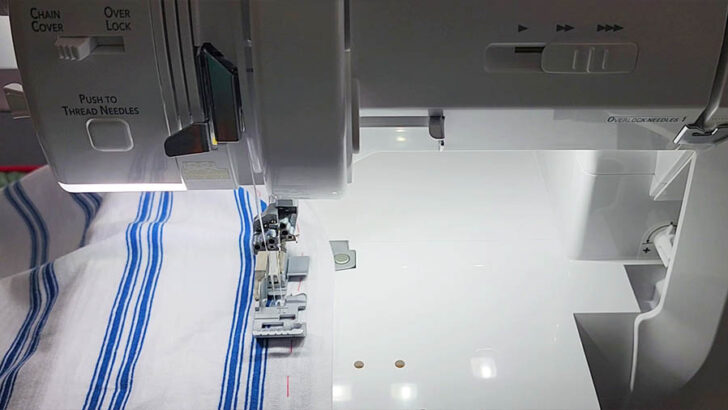
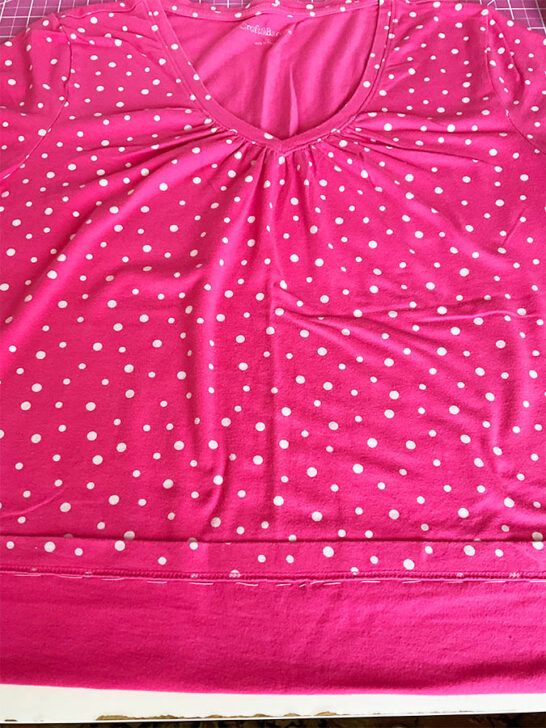
Step 5. Sew the Hem
Place the t-shirt under the presser foot with the folded edge facing up. The twin needles should sew parallel lines on the top side, while the bobbin thread creates a zigzag pattern underneath.
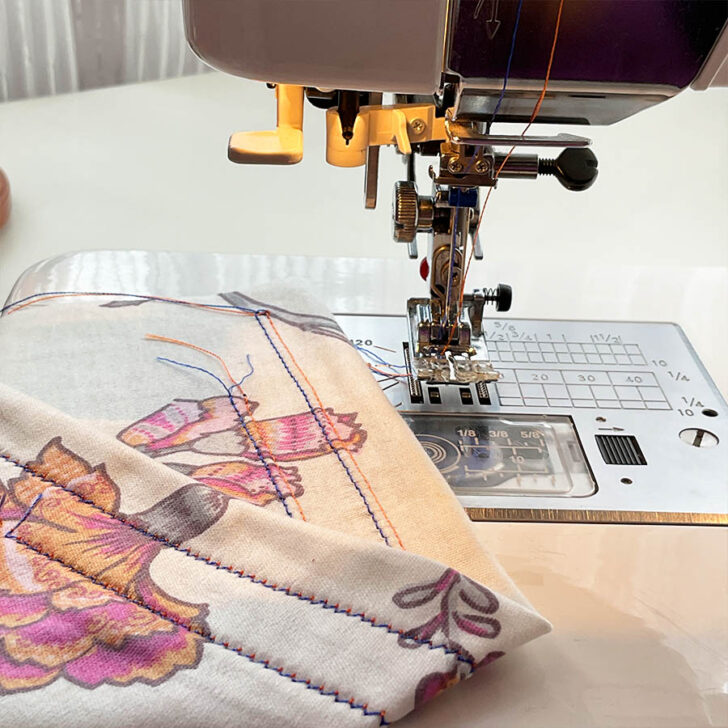
Sew slowly and steadily to avoid any skipped stitches or uneven lines. If the fabric starts to stretch, use a walking foot to keep the layers feeding evenly.
✅ Related tutorial: How To Hem Knit Fabric
Step 6. Press the Hem
Once the hem is sewn, press it with an iron. Use correct heat settings for your fabric and press on the wrong side to avoid shining the knit.
This method gives you the flexibility and durability of a professional t-shirt hem without needing a coverstitch machine. It’s also a great opportunity to play with thread colors. You can match for an invisible look or choose contrasting colors for a decorative detail.
Now, your t-shirt has a beautifully finished hem that stretches with you and holds up through wear and washing.
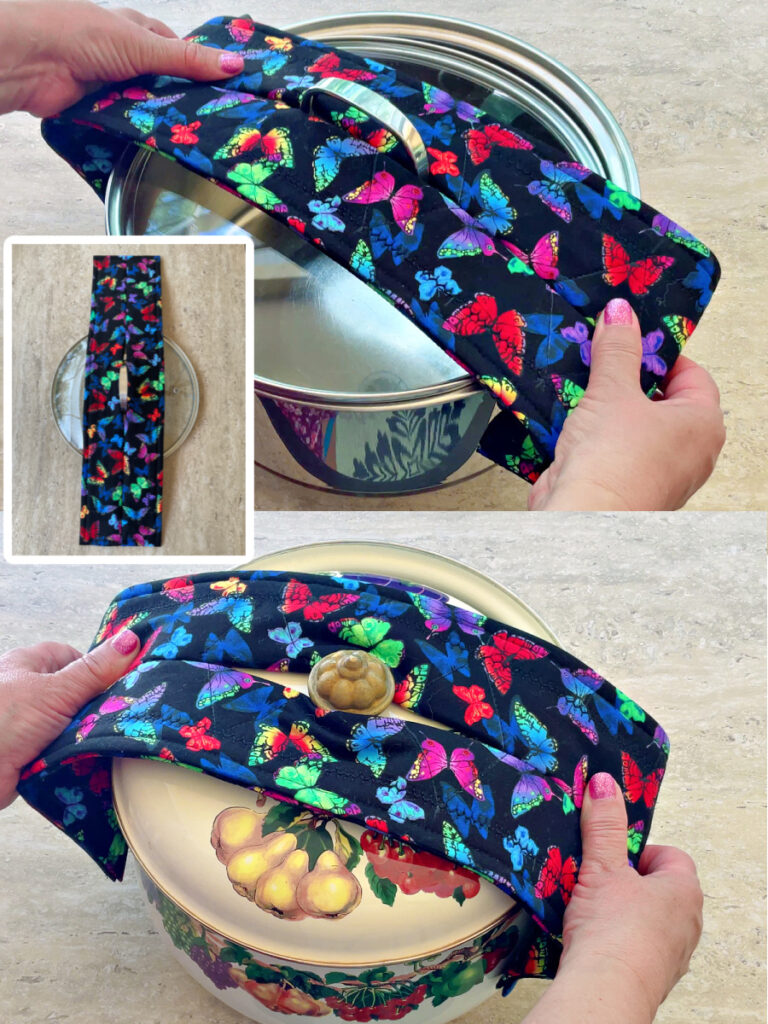
By the way, if you like quick, practical sewing projects, I recently made a potholder that works very differently from the usual ones. It wraps around the handle and stays in place, so you can lift pots or drain hot water safely. It’s quick to sew and makes a really nice handmade gift. I made a detailed PDF tutorial with all the steps – take a look here.
Technique 2. How to Shorten a T-shirt with a Coverstitch Machine
A coverstitch machine is an excellent tool for shortening a t-shirt. It creates a professional, flexible hem that stretches with the fabric.
What You’ll Need
- Coverstitch machine or a serger with coverstitch functionality.
- Serger thread or wooly nylon thread: You’ll need three cones of thread – two for the needles and one for the looper.
- Regular sewing tools: These include fabric scissors, a fabric marker, basting thread, pins, etc.
- Iron: For pressing the hem after sewing.

Steps to Shorten a T-Shirt with a Coverstitch Machine
#1. Measure and Cut the T-Shirt
Put on the t-shirt and mark the desired length with chalk or a fabric marker.
Remove the shirt and draw a second line ¾ inch or 1 inch below the marked length for your hem allowance. This second line is where you’ll cut.
Use sharp fabric scissors or a rotary cutter to cut along this line. Ensure your cut is straight and even, as this will become the edge of your hem.
#2. Fold and Secure the Hem
Fold the raw edge of the t-shirt up by the hem allowance (¾ inch or 1 inch, depending on your preference).
Secure the fold with pins and then use basting stitches for extra stability. Remove pins.
If you want to know all the details about using a coverstitch machine to shorten t-shirts, check out my detailed tutorial – How To Hem On A Coverstitch Machine
#3. Set Up Your Coverstitch Machine
Thread the machine with three cones of thread. You can use regular serger thread or wooly nylon thread for added flexibility.
✅ Related tutorial: Wooly Nylon Thread | What It Is And How To Use
The two needles will use separate threads.
The looper thread, which goes underneath the fabric, provides stretch and durability.
Adjust the stitch length and tension settings for your knit fabric. Practice on scraps.
#4. Sew the Hem
Position the t-shirt under the presser foot with the right side of the fabric facing up. The folded hem edge should be aligned with the needles.
But the hem edge is usually not visible from the right side. So, use a fabric marker to draw a guideline on the right side of the t-shirt, marking where the hem edge lies underneath.
Align the first needle of the coverstitch machine with this marked line before you start sewing.
Sew along the hem, keeping the fabric smooth.
The coverstitch will create two parallel rows of stitching on the outside and a looper stitch underneath that secures the raw edge.
A coverstitch hem not only looks professional but also ensures the t-shirt remains stretchable and durable. This method is ideal if you want your projects to have a ready-to-wear appearance.
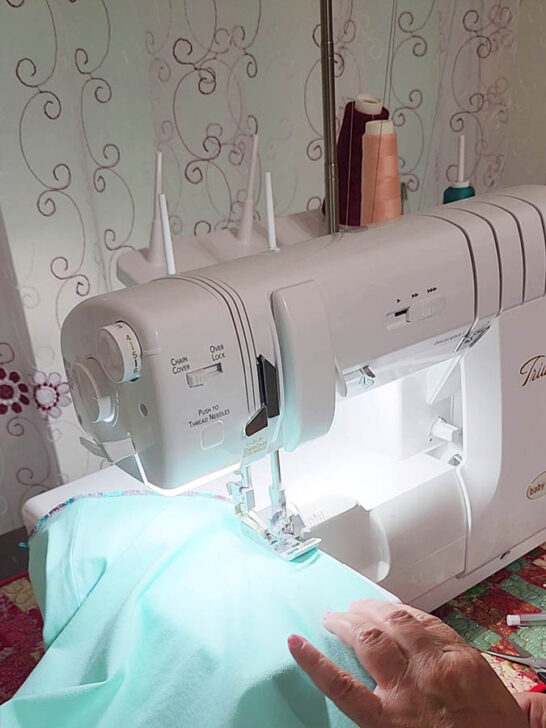
Technique 3. How to Shorten a T-Shirt While Keeping the Original Hem
Preserving the original hem is another way to maintain the factory-finished look of your t-shirt. This method works by folding the t-shirt to adjust the length, so the original hem stays intact. This technique is best done using a serger/overlocker for a clean and durable finish.
What You’ll Need
- Serger/overlocker
- Serger thread
- Regular sewing tools and notions
- Iron for pressing

Brother AIR1800 Air Serger with Jet Air Threading
Why a Serger Works Best
Stretch stitches on a sewing machine can handle knit fabrics, but they don’t always provide the best results for this technique. Sewing machines can sometimes stretch out the knit fabric during sewing, which may cause the seam to ripple or distort.
A serger, on the other hand, is ideal for this method because it cuts and sews the fabric at the same time. The cutting blade trims the excess fabric as you sew, creating a neat, even edge. The serger’s stitch also has built-in flexibility, which makes it perfect for stretchy knit fabrics of t-shirts.
✅ Related tutorial: What Is A Serger & What Can I Do With It?
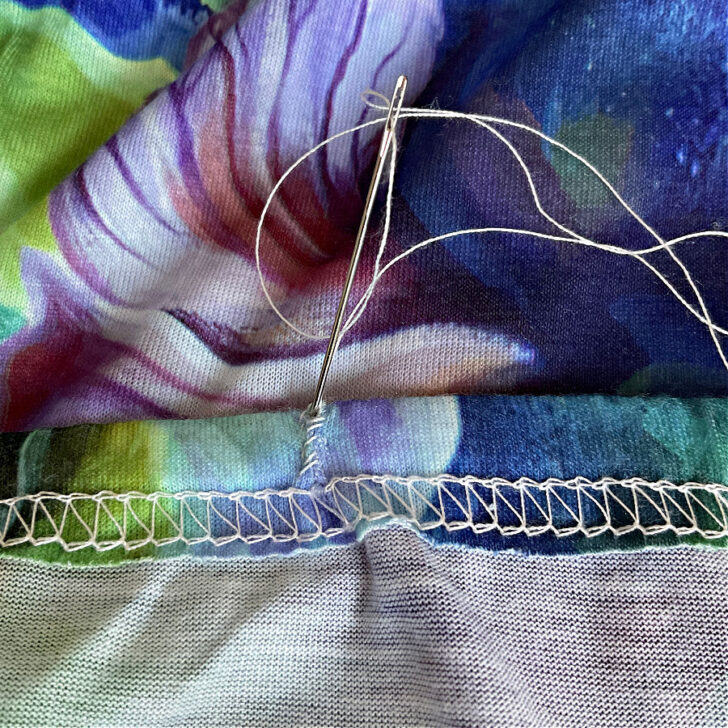
For this technique, use a 4-thread overlock stitch. This stitch combines two needle threads and two looper threads to create a strong, stretchy seam. It’s durable and perfectly suited for securing knit fabric without compromising its stretch.
Steps to Shorten a T-Shirt While Keeping the Original Hem
1. Fold the T-Shirt
Decide the new length for the t-shirt.
Fold the fabric above the hemline to shorten the shirt to the desired length.
Fold the t-shirt so the right sides of the fabric are facing each other. You will sew on the wrong side of the shirt, just above the original hem.
Pin and baste the fold.
2. Sew the Folded Edge
Set your serger to a 4-thread overlock stitch and align the first needle of the serger with the basting stitch. This will trim the excess fabric as you sew.
Keep the stitches close to the original hem but avoid sewing over the hem itself.
3. Press the Seam
- Press the seam down toward the original hem using an iron set to the appropriate temperature for your fabric.
- The seam will be visible but subtle and blends well with the original hemline.
This method gives you a professional finish while maintaining the original hem’s look and feel. Using a serger ensures the seam is clean, stretchy, and durable.
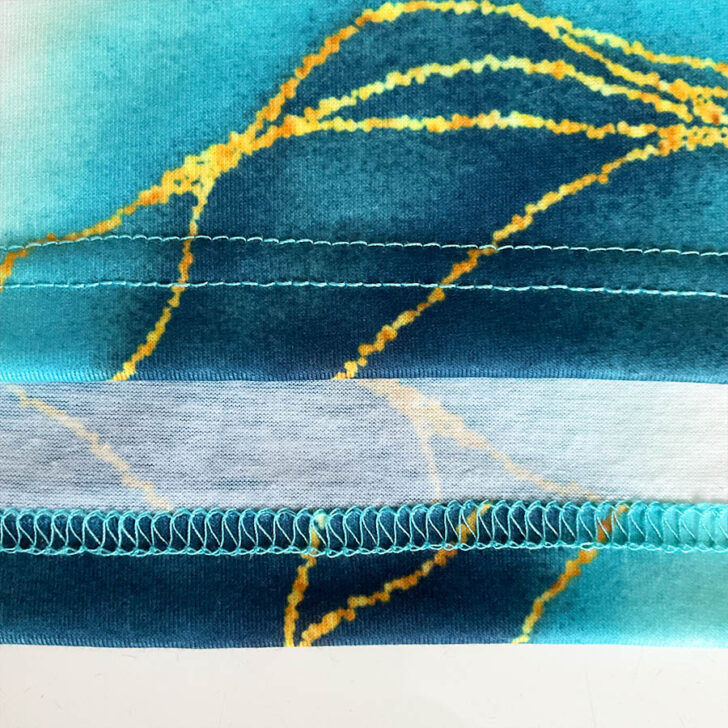
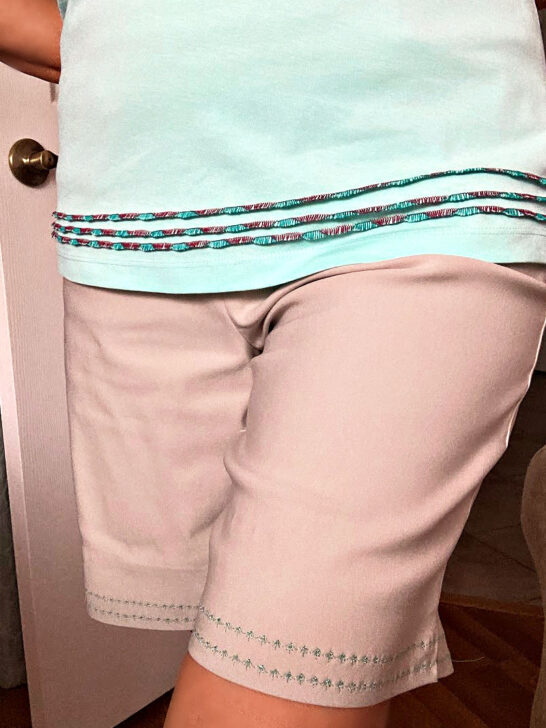
Technique 4. How to Shorten a T-shirt by Adding Decorative Serger Stitches Above the Hem
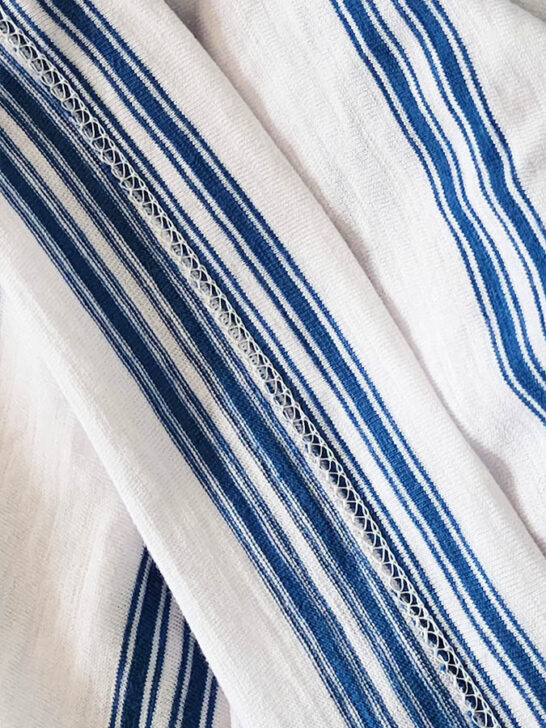
If you’re looking for a unique way to shorten a t-shirt and add a creative twist, try decorative serger stitches. This method combines practicality with style, using contrasting threads and serger’s decorative stitches to create eye-catching rows above the hem.
In the example here, I used my Baby Lock Triumph serger to sew three rows of decorative wave stitches on the right side of the fabric, just above the hem. The contrasting threads in light green and burgundy make the stitches pop against the t-shirt’s fabric. As the serger works, it will cut the fabric at the fold and create the decorative stitch at the same time.
What You’ll Need
- Serger with decorative stitch capabilities (e.g., Baby Lock Triumph).
- Contrasting threads: Select bold colors to create an eye-catching effect.
- Fabric marker or chalk for guidelines.
- Basting thread to hold the folds in place.
Steps to Shortening a T–shirt by Adding Decorative Serged Stitches
1. Prepare the T-Shirt
- Start with a t-shirt that has the original hem intact.
- Fold the fabric wrong sides together, creating a fold close to the hem (around ½ inch above the edge).
- Pin and baste the fold in place using basting thread. This will stabilize the fabric and provide a guide for stitching.
2. Set Up Your Serger
- Thread your serger with contrasting threads to make the decorative stitches stand out.
- Choose a wave stitch on a serger. Adjust the stitch length and tension as needed for a balanced, neat finish.
3. Sew the First Row
- Place the folded edge under the serger foot. The serger blade will cut the fabric at the fold as it stitches, leaving a clean edge and a decorative stitch.
- Serge along the basting stitches, keeping the stitching even and consistent.
4. Create Additional Rows
- Create a second fold slightly above the first stitched row (around ½ inch to ¾ inch higher). Pin and baste this fold in place.
- Repeat the serging process to create a second decorative row.
- Repeat the steps for a third fold, sewing the final decorative stitch row.
5. Finish the T-Shirt
- Remove all basting stitches.
- Press the fabric gently to flatten the stitches and enhance the appearance of the decorative stitches.

This technique not only shortens the t-shirt but also adds an artistic touch. It’s perfect not only for shortening a t-shirt but also for transforming a plain tee into a unique piece.
Technique 5. No Sew Option – How to Shorten a T-Shirt by Adding Elastic for a Gathered Hem
If you want a sporty, stylish look, adding elastic to the hemline is a great way to shorten a t-shirt and give it a unique twist. This method transforms the hem into a gathered style, perfect for casual or workout t-shirts. It’s also the simplest method for shortening a t-shirt, especially if you’re not skilled at sewing or don’t have access to a sewing machine or serger.

What You’ll Need
- Elastic: Choose an elastic width that fits snugly into the original hem casing (typically 1/2 to 3/4 inch).
- Safety pin or special elastic threading tool
- Fabric scissors: To create a small hole in the hem
- Needle and thread (optional): For closing the hole
Steps to Shorten a T-Shirt with a Gathered Elastic Hem

1. Prepare the Original Hem
- Keep the t-shirt’s original hem intact. This hem will serve as the casing for the elastic.
- Measure the width of the hem and choose elastic that fits comfortably inside.
2. Create a Hole for Inserting Elastic
- On the wrong side of the t-shirt, use scissors to make a small, neat hole in the hem. Be careful not to cut through both layers of fabric.
3. Insert the Elastic
- Attach a safety pin or elastic threading tool to one end of the elastic. Use this to guide the elastic through the hem casing.
- Work the elastic around the entire hem, ensuring it doesn’t twist inside the casing.

✅ Related tutorial: Safety Pins: Types, Sizes, and How to Use Them
4. Adjust and Secure the Elastic
- Once the elastic is threaded through, adjust it to your desired tension. Pull it tighter for a more gathered look or keep it looser for subtle ruching.
- Overlap the elastic ends slightly and sew them together securely, either by hand or with a sewing machine.

5. Close the Hole
- Use a needle and thread to close the hole in the hem.
This method is a great choice if you want a quick and simple way to shorten a t-shirt. It requires minimal sewing skills and tools, making it perfect for beginners or those working without a sewing machine. The gathered effect adds personality and makes the t-shirt versatile for both casual and sporty outfits.
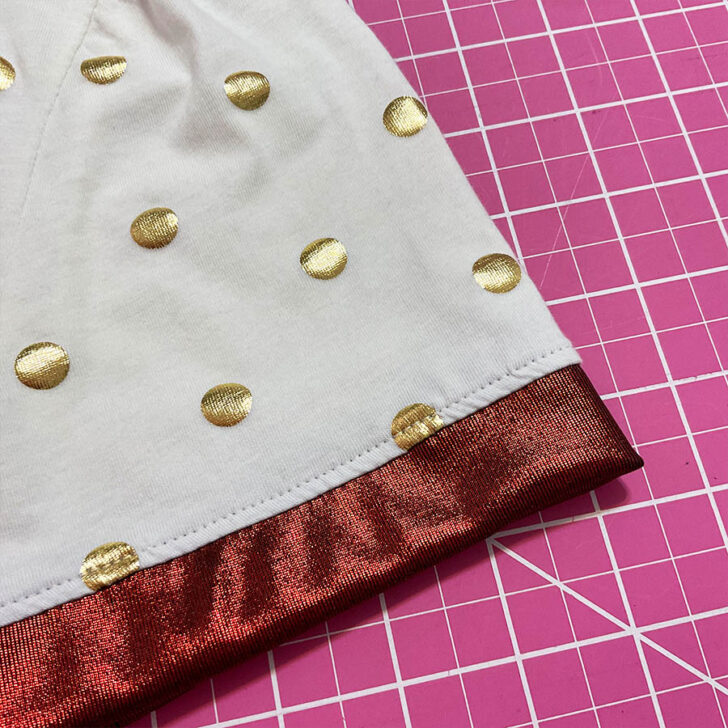
Technique 6. Shortening a T-Shirt by Adding a Decorative Knit Band
Adding a decorative knit band is another creative way to shorten a t-shirt while introducing a contrasting design element. You can use a different piece of knit fabric, such as spandex, to create a stylish and functional band at the hem.
What You’ll Need
- Knit fabric: Choose a stretchy fabric like spandex or jersey for the decorative band.
- Serger or coverstitch machine
- Matching threads
Steps to Shorten a T-Shirt with a Decorative Knit Band
1. Measure and Cut the T-Shirt
- Determine the desired length of your t-shirt and mark it with a fabric marker.
- Add the desired width of the decorative band to your measurement before cutting the fabric. For example, if the band will be 2 inches wide, account for this when cutting.
- Cut the t-shirt along the marked line.
2. Prepare the Decorative Knit Band
- Measure and cut a strip of the decorative knit fabric. The strip should be twice the desired finished width of the band (e.g., for a 2-inch band, cut a 4-inch strip) and slightly longer than the circumference of the t-shirt.
- Fold the strip in half lengthwise, with the wrong sides together, so the right side is visible on both the inner and outer layers.
3. Pin and Baste the Band to the T-Shirt
- Place the folded band against the raw edge of the t-shirt, aligning the edges. The raw edges of the band and the t-shirt should match up, while the folded edge of the band points downward.
- Pin the band in place, distributing it evenly around the t-shirt. Baste it with a long running stitch for stability before sewing.
4. Sew the Band
- Use a serger or coverstitch machine to attach the band to the t-shirt.
- Sew along the raw edges, letting the serger trim excess fabric as you go. If using a coverstitch, sew with the right side of the t-shirt facing up to achieve a professional finish.
5. Press the Seam
- Gently press the seam with an iron to smooth out the stitches and flatten the band. Use a heat setting suitable for knit fabrics.
This method not only shortens your t-shirt but also adds a custom decorative element. The contrasting band can highlight your creativity and give the t-shirt a fresh, trendy look. It’s a great option for personalizing plain tees or giving new life to an old favorite.
There are plenty of other creative ways to shorten a t-shirt beyond the techniques covered here. Methods like adding ruching to the sides, creating asymmetrical hems, or even turning a t-shirt into a crop top are all great options. However, this tutorial is already packed with ideas, so we’ll leave those for another time.
For now, you have six versatile methods to choose from – each with its own style and level of complexity. Whether you want to keep things simple with elastic or try your hand at decorative stitching or adding a contrast band, there’s something here for every skill level and design preference. So, have fun experimenting with your t-shirts!
Did you like this sewing tutorial? If you did, don’t forget to bookmark this pin (see below) on your sewing Pinterest board! That way, you can easily return to this guide whenever you’re ready to start shortening a t-shirt. Plus, make sure to follow me on Pinterest to stay updated with more sewing advice, step-by-step guides, and creative inspiration!

latest posts
- Butterfly Quilt Block Tutorial – Foundation Paper Piecing
- How To Sew Quilt Squares So The Corners Match
- Sewing With Fork Pins: How They Help With Pattern Matching, Slippery Fabric, And Seams
- How Much Fabric Do I Need? 21 Helpful Tips For Calculating Fabric Yardage
- Easy Simple Sewing Project: Fabric Jar Opener
- DIY Oven Mitts: Step-by-Step Sewing Tutorial
- Easy DIY Potholder: New Design
- Tailor’s Clapper: What It Does, Why It Works, And How To Use It Right
- Heat Resistant Batting for Sewing: What It Is, How It Works, and What Makes a Difference
Ms Ageberry excellent tutorial! I have a question for you. My neck to waist is longer than most all tops I buy. So if the shirt is too short other than adding lace ( don’t know what type) what else can I do to make top longer?
( why I want to make my own clothes & can alter top length myself ).
From tall upper half woman , thank you.
Hope you have a Merry Christmas & a Happy New Year
Depending on the material of the blouse (and the pattern) you can add other types of material. Yes, lace is an excellent choice, I guess you have to use also some lining. Chiffon is another excellent choice. You can add ruffles, an example is in this article. In the end it probably depends on the type of the blouse of course. Sorry without looking at the item I can only say general things.