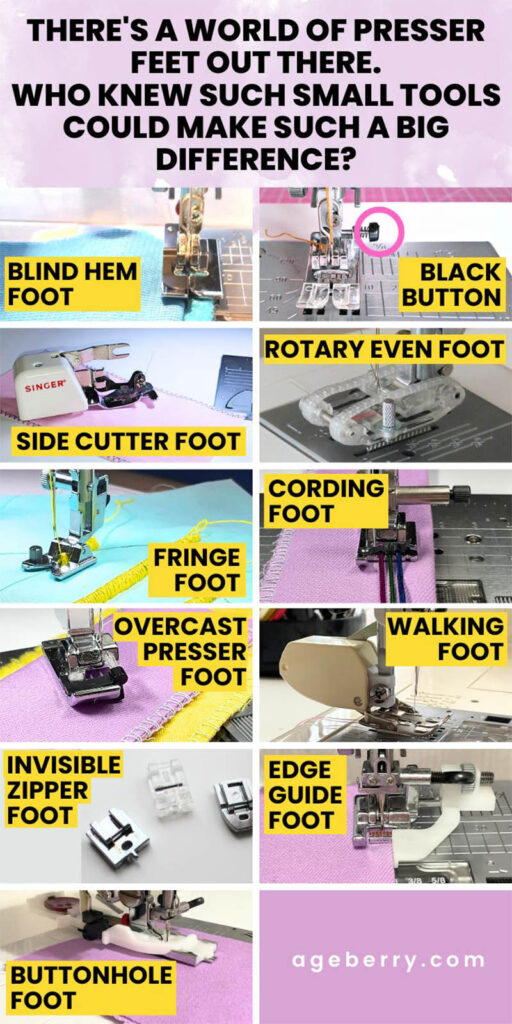
Sewing Machine Presser Foot Guide: Types to Elevate Your Projects
Curious about the different sewing machine presser feet? I’ve spent quite some time exploring the world of sewing machine presser feet, writing tutorials to share my discoveries along the way. Now, I’ve decided to bring all that knowledge together in a comprehensive roundup.
I find these presser feet incredibly handy, and I believe they’re a fantastic resource for anyone passionate about sewing. In this roundup, I’ll give you the lowdown on each foot, its uses, and how it can make your sewing projects more enjoyable and efficient. Stick with me, and let’s dive into the details that make these tools not just useful, but great to use.
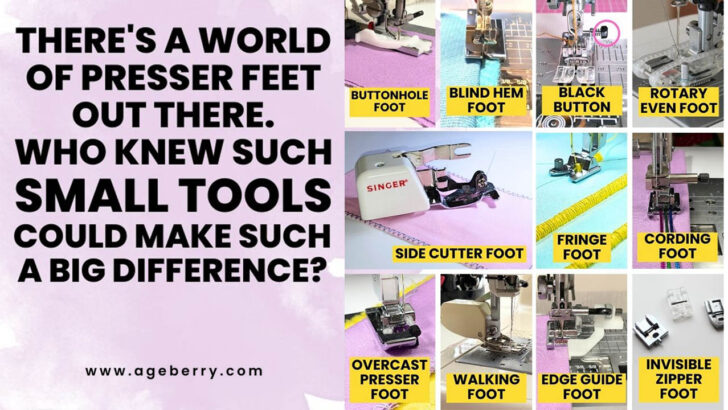
- Sew Perfectly Straight With An Edge Guide Presser Foot
- All-Purpose Presser Foot: What’s This Button For?
- Master Decorative Sewing with the Fringe Foot Tutorial
- Master the Side Cutter Presser Foot with Our Easy Tutorial
- The Ultimate Guide to Using an Invisible Zipper Foot
- How To Use A Walking Foot
- Did You Hear About A Rotary Even Foot?
- The Easy Way To Create Buttonholes With A Buttonhole Foot
- How To Use An Overcast Presser Foot For Professional Results
- How To Sew Invisible Hems With A Blind Hem Foot
- How To Use A Cording Foot For Decorative Detailing
Sew Perfectly Straight With An Edge Guide Presser Foot
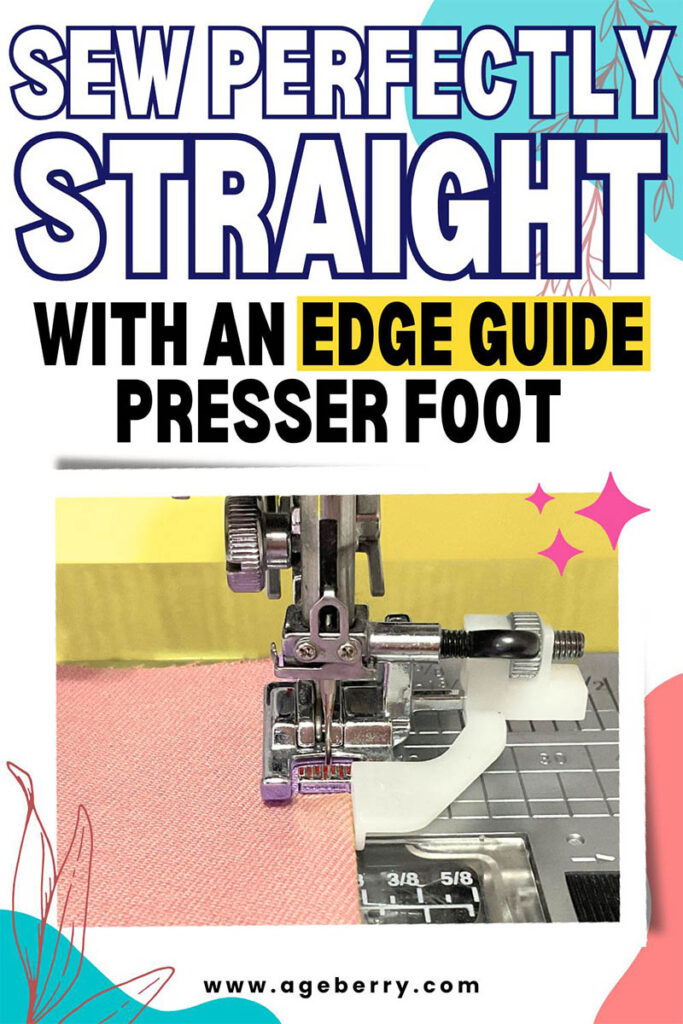
Sewing straight is easy, right? Well, this is where we see the difference between theory and practice. In theory, it is easy. But it turns out sewing straight lines is a challenge for most people, including advanced sewists. If you are looking to learn how to sew straight, this article is the perfect place to start.
This article will teach you everything about sewing in a straight line using special sewing machine presser feet like Edge Guide Foot. These feet are often overlooked, but there are situations where their use adds tremendous value to your projects.
All-Purpose Presser Foot: What’s This Button For?
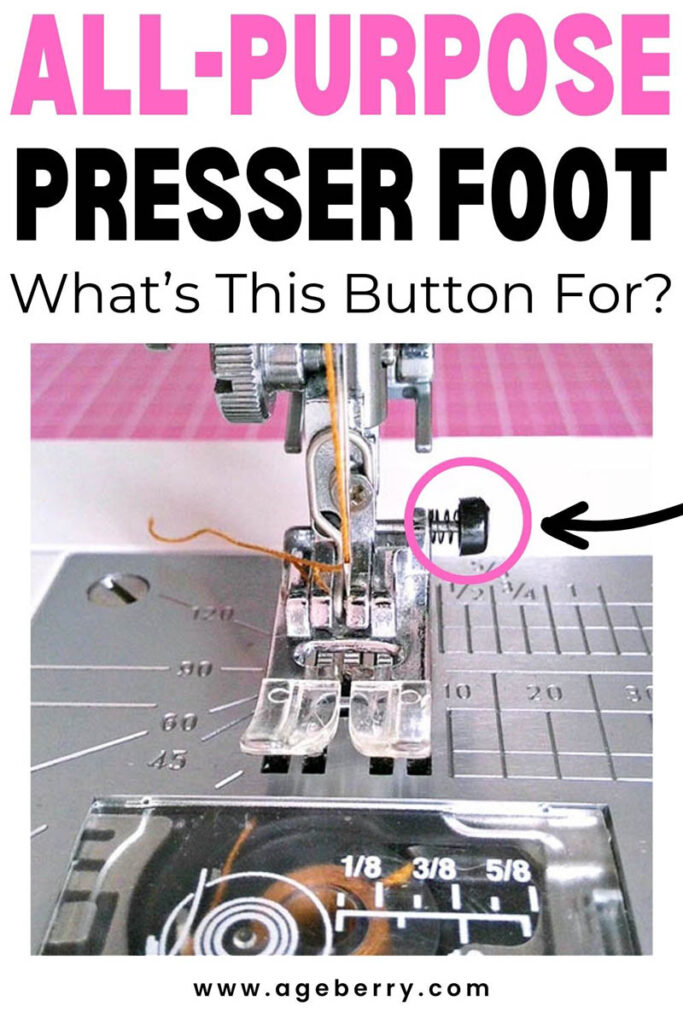
I guess, we all have been using all-purpose presser feet for ages, but did you know there’s a little secret not many are aware of? It’s the small black button on the side. This unassuming feature is actually a game changer! It’s designed to help you sew over thick seams or multiple layers of fabric.
When you come across a bulky seam, you can use this button to level the presser foot, which helps prevent skipped stitches and ensures a smooth stitch line. I’m excited to show you how to use this clever addition to your sewing arsenal in this guide. So, check it out to find out how to make the most of this clever tool!
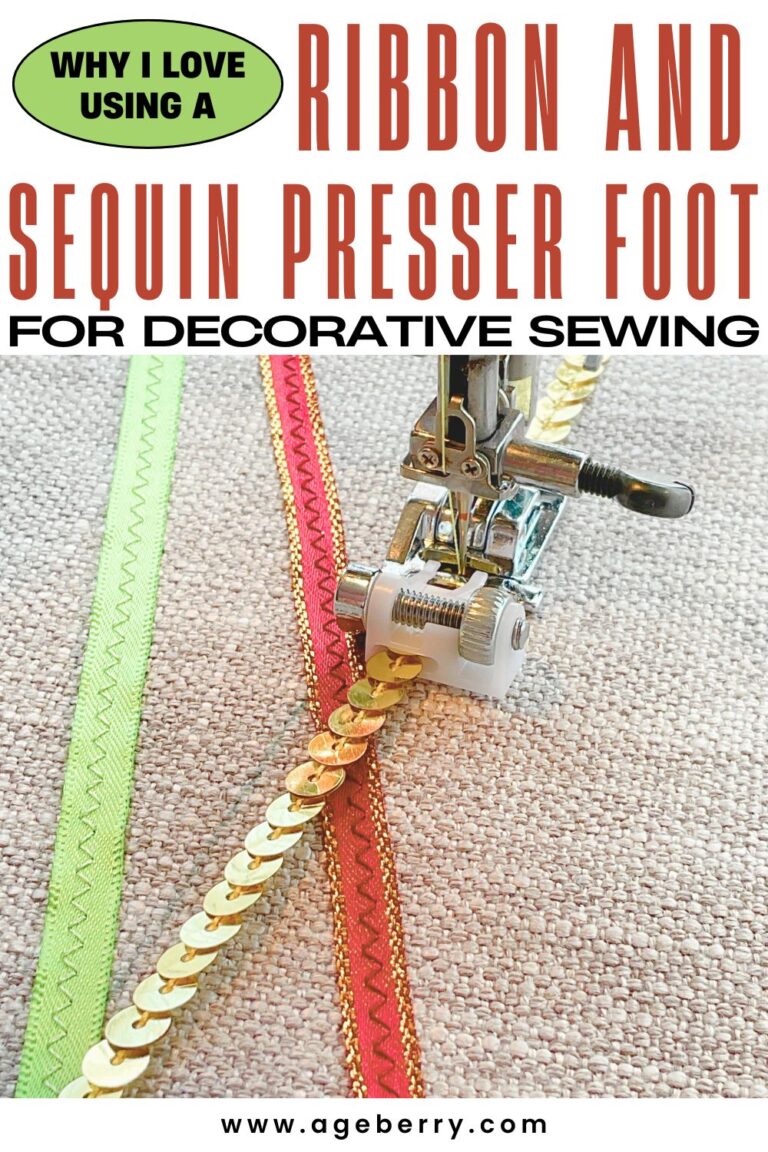
Master Decorative Sewing with the Fringe Foot Tutorial
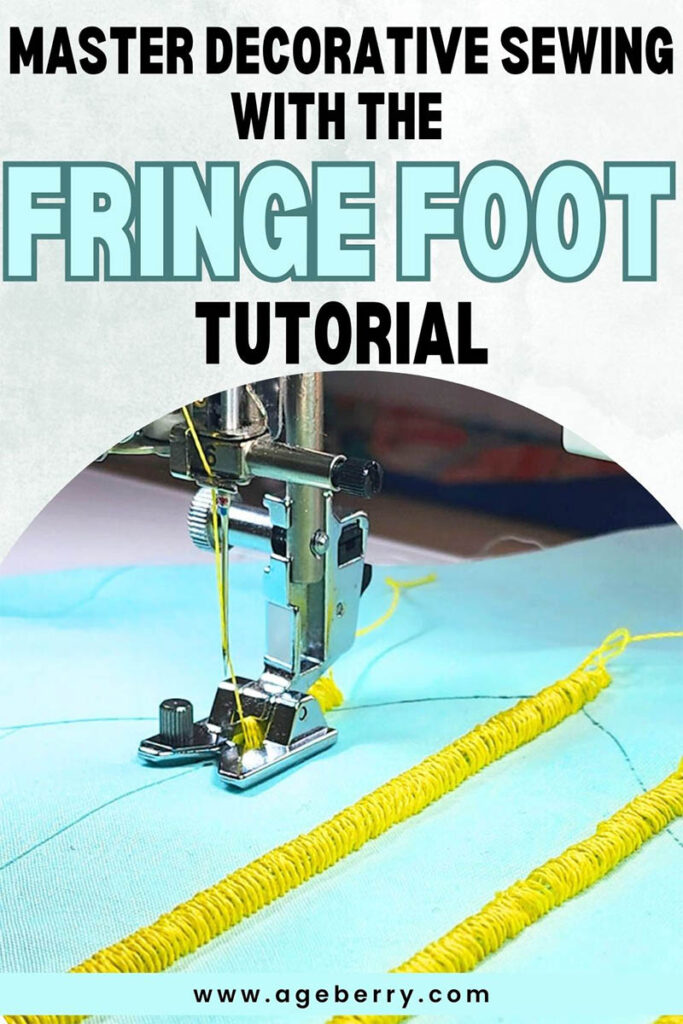
Oh, this foot is so interesting! The fringe foot is a fantastic little gadget that can add a whole new dimension to your sewing and quilting projects. It allows you to create loops, fringes, and 3D effects that bring texture and visual interest to your work.
In this sewing tutorial, I walk you through the steps of using this versatile and easy-to-use tool. You’ll learn how to create custom fringe and eye-catching embellishments. So, if you’re ready to add some flair to your fabric, visit my tutorial on this fun and functional presser foot!
Master the Side Cutter Presser Foot with Our Easy Tutorial
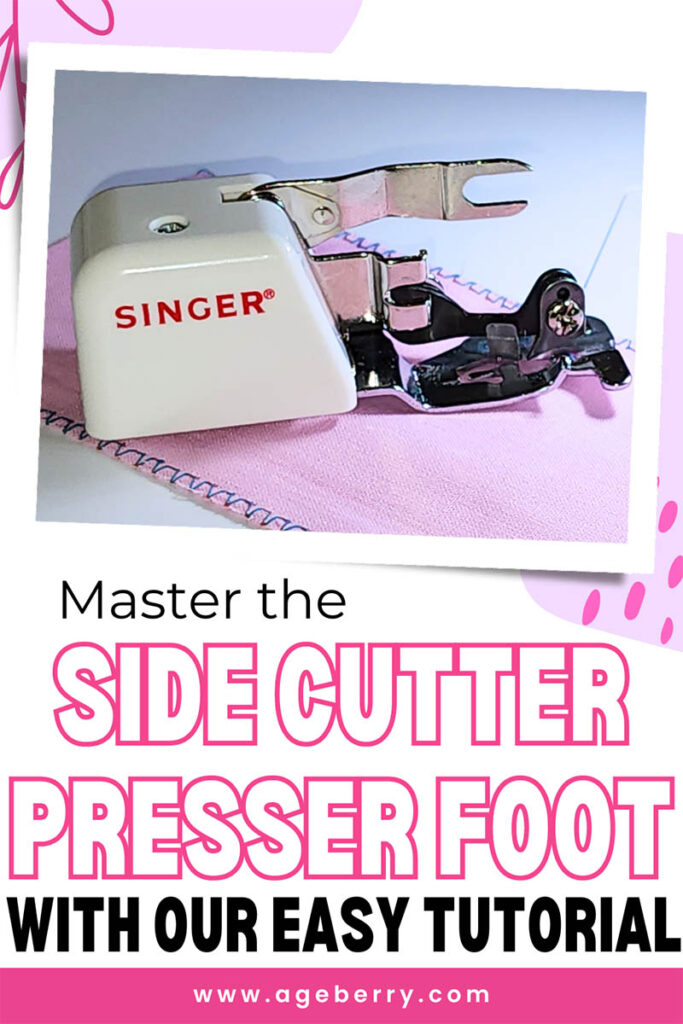
You do not have a serger (overlocker)? No problem! There are alternatives. You could use the overlock stitches on your sewing machine (in a pinch, you could use a simple zig-zag!), but there is a better way of finishing edges without a serger: the side cutter presser foot.
A side cutter presser foot is an accessory that attaches to your sewing machine and allows your sewing machine to cut fabric as it sews, creating a stitch that mimics the look of a serger overlocking stitch. In this tutorial, I will explain what a side cutter presser foot is, how it works, and if you should consider using one.
The Ultimate Guide to Using an Invisible Zipper Foot
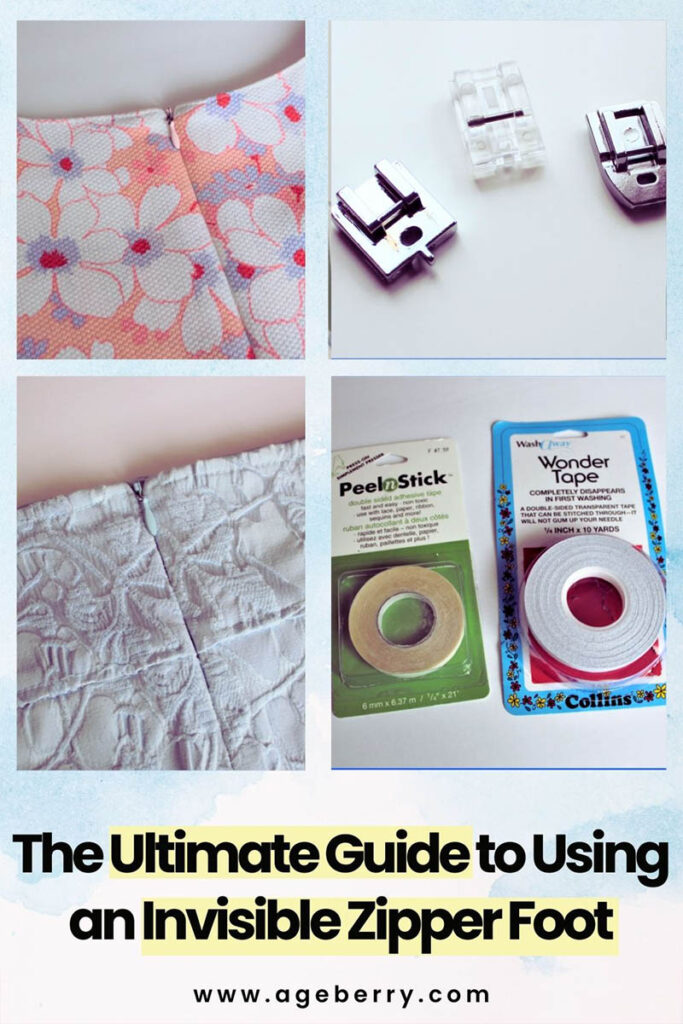
Very few dresses or blouses can be made without some kind of closure, and the most common of these is of course the zipper. The invisible zipper, that is. It is in fact improperly called “invisible” because there is nothing magic about it; it is merely hidden behind a layer of fabric! But the result is the same – the zipper cannot be seen if sewn properly.
How to sew it properly, and easily? This sewing tutorial will show you how to use an invisible zipper foot and what types of feet are available for inserting invisible zippers. Many beginner sewists dread sewing invisible zippers, but the right tool for the job can make all the difference. Use this invisible zipper foot guide to make sewing invisible zippers easy.
✅ Related tutorial: How to put in an invisible zipper using Wonder tape for sewing
✅ Related tutorial: Think You Know Zippers? This Installation Guide Might Surprise You
Note: Some of the links on this page are affiliate links. This means I will receive a commission if you order a product through one of my links. I only recommend products I believe in and use myself.
If you are interested in buying a presser foot set I recommend this one from Madam Sew.

How To Use A Walking Foot
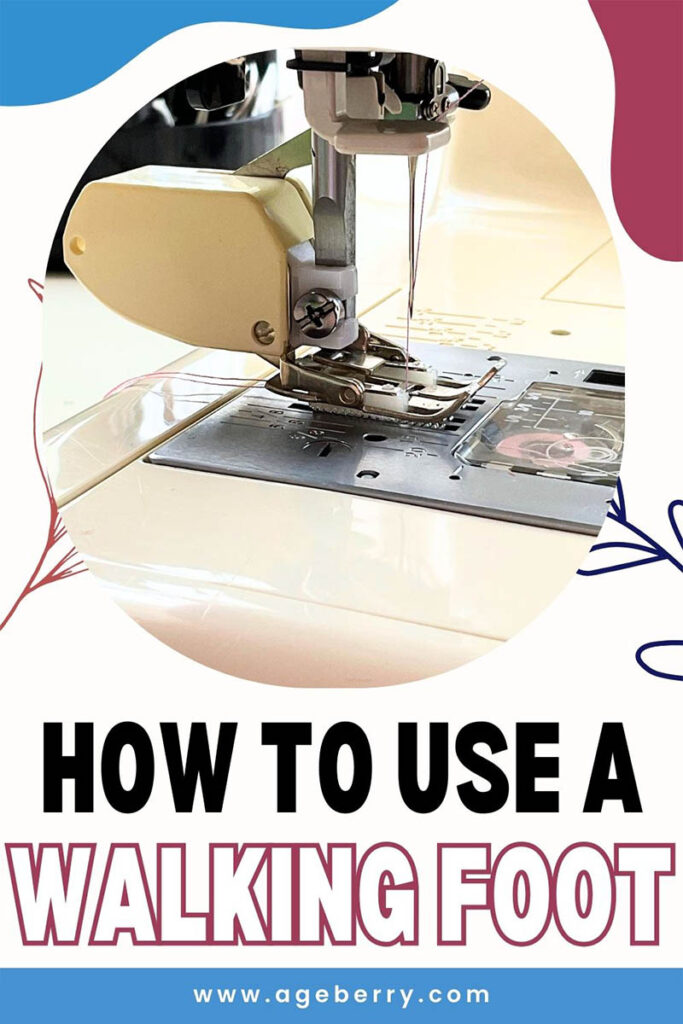
A walking foot attachment is one of the essential presser feet that sewists use on their sewing machines. It is sometimes absolutely necessary, when sewing slippery materials, or thick layers of material. It’s great for quilting, heavyweight materials, leather and vinyl, knit fabrics, and when you need to sew many layers together.
Many machines have some kind of walking foot built in, and my Janome 6600 is one example. But what to do if your machine lacks one? If you want to get more done with your machine, there is an alternative: the walking foot. If you are serious about sewing, this is definitely something worth investing in. You’ll never have to worry about your material shifting out of place again when using this walking foot attachment on your machine. This tutorial will talk about the walking foot features, why, how and when to use it.
✅ Related tutorial: Brands of walking foot attachments: buying guide
✅ Related tutorial: How to use a walking foot
Did You Hear About A Rotary Even Foot?
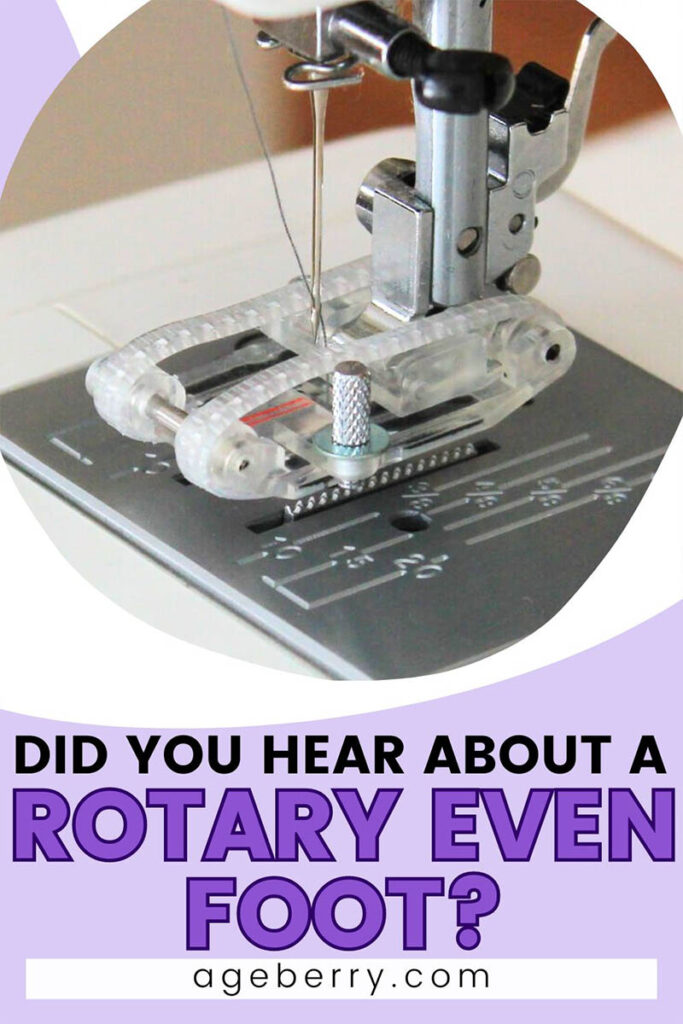
In this tutorial, I’m excited to talk about a presser foot that might not be in every sewist’s kit yet – the Rotary Even Foot. JANOME came up with a very interesting foot which can be used on any low shank machine (or any machine that has a low shank adapter) and performs the same function as a walking foot. It looks like a tank but it works on the flimsiest of materials: the rotary even foot.
The rotary even foot is in fact a collection of attachments that perform multiple functions: a blind hem attachment, a bias tape attachment, and rolled hem attachments in 3 different sizes.
It’s true that not many know about this tool, and it can be on the pricier side, but from my experience, it’s well worth the investment. I particularly love using the Rotary Even Foot for sewing challenging fabrics like fur, leather, vinyl, and velvet. It helps feed the fabric evenly, preventing the layers from shifting and puckering, which is a common headache when working with these luxurious materials. Join me as I talk about the benefits and techniques of using this presser foot, and discover how it can elevate the quality of your sewing projects.
The Easy Way To Create Buttonholes With A Buttonhole Foot
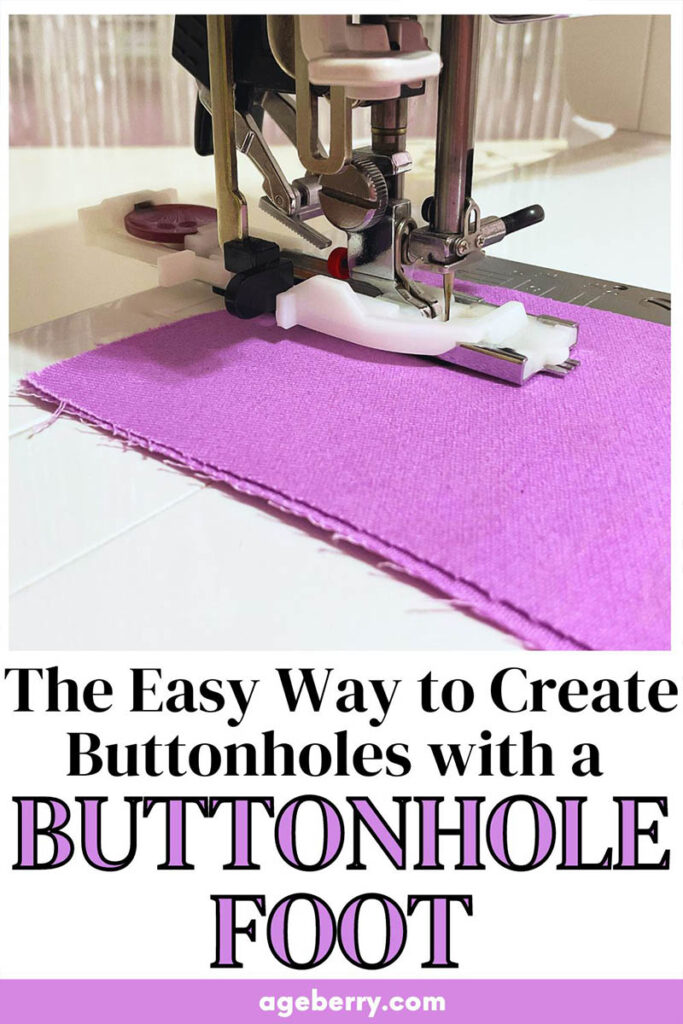
The button is by far the most common closure we have. And the oldest. And what does every button need to work properly? You guessed it: a buttonhole. Buttonholes are an essential part of sewing.
A buttonhole is relatively simple: a hole in the garment with reinforced sides. Unfortunately, the fact that it is simple does not make it simple to make.
Luckily, with the right tools and knowledge, making beautiful buttonholes is easy and here is where the buttonhole foot helps: it turns your sewing machine into a “buttonhole factory”. This guide will teach you everything you need to know about using your machine’s buttonhole presser foot so that you can create perfect buttonholes every time.
How To Use An Overcast Presser Foot For Professional Results
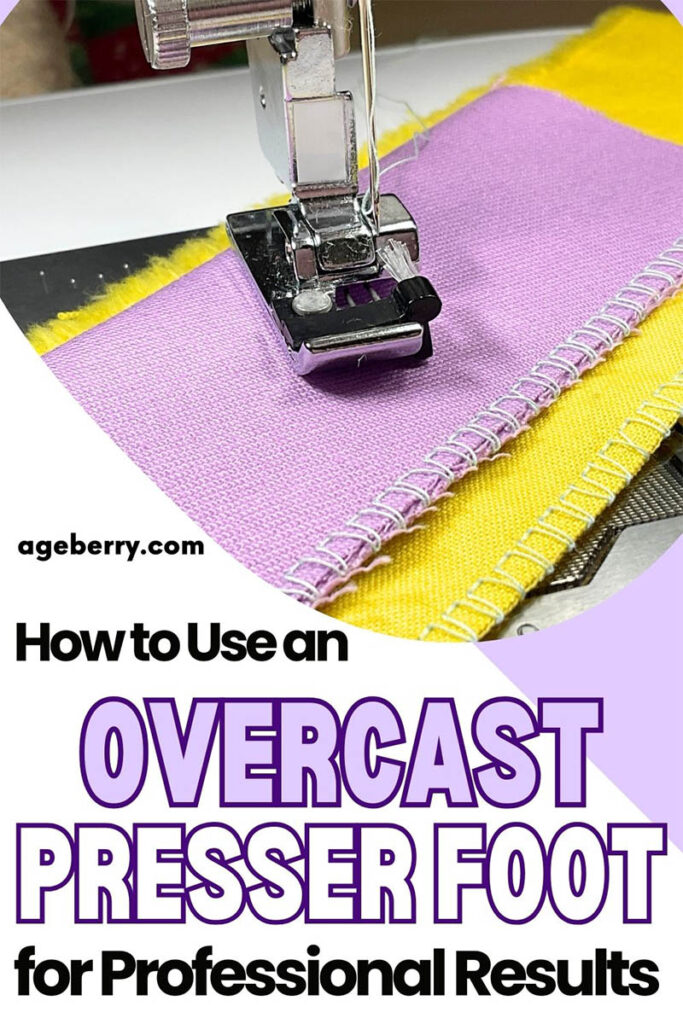
The side cutter foot (presented above) is not the only tool a regular sewing machine owner has when it comes to finishing edges with a regular sewing machine.
If you do not (yet!) own a serger, overcast presser feet may be a solution. In this presser foot guide, you will find answers to these questions: does my sewing machine have an overlock stitch, how do you stop seams from fraying with an overcast stitch, and how do you finish a seam with zig-zag, how do you overcast, is overcasting the same as overlocking?
I believe anyone will benefit from having a serger; just that if you are not sewing a lot, the expense might not be justified. And even if you can justify the expense, the storage space might not be there. So, use the overcast presser foot to finish raw fabric edges.
How To Sew Invisible Hems With A Blind Hem Foot
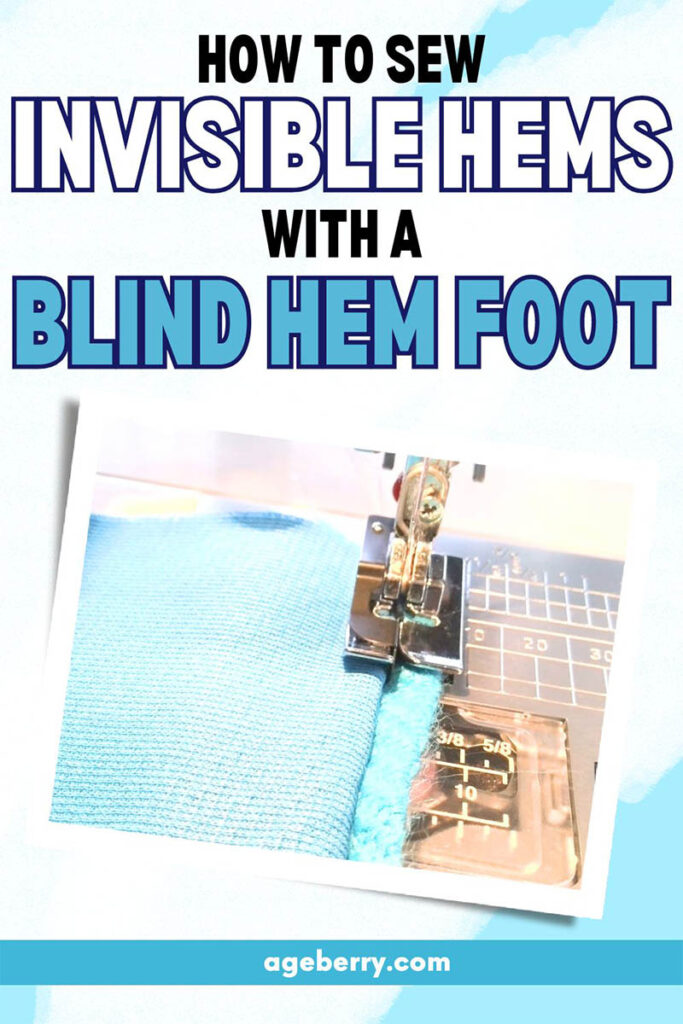
Making a pretty hem is very important; if you can hide zippers, darts or even belts, you can almost never hide a hem. But there is a way to hide the stitches on the hem by using a procedure called “blind hem”, or “invisible hem”. Well, the hem is neither blind, nor invisible.
Such a hem is professionally looking with nearly invisible stitches on the front of the garment. This sewing tutorial will talk about making such a blind hem using the appropriate presser feet. They help create barely noticeable, tiny stitches on the front of the item that cover only a few threads from the fabric structure giving your garment a polished and professional look.
How To Use A Cording Foot For Decorative Detailing
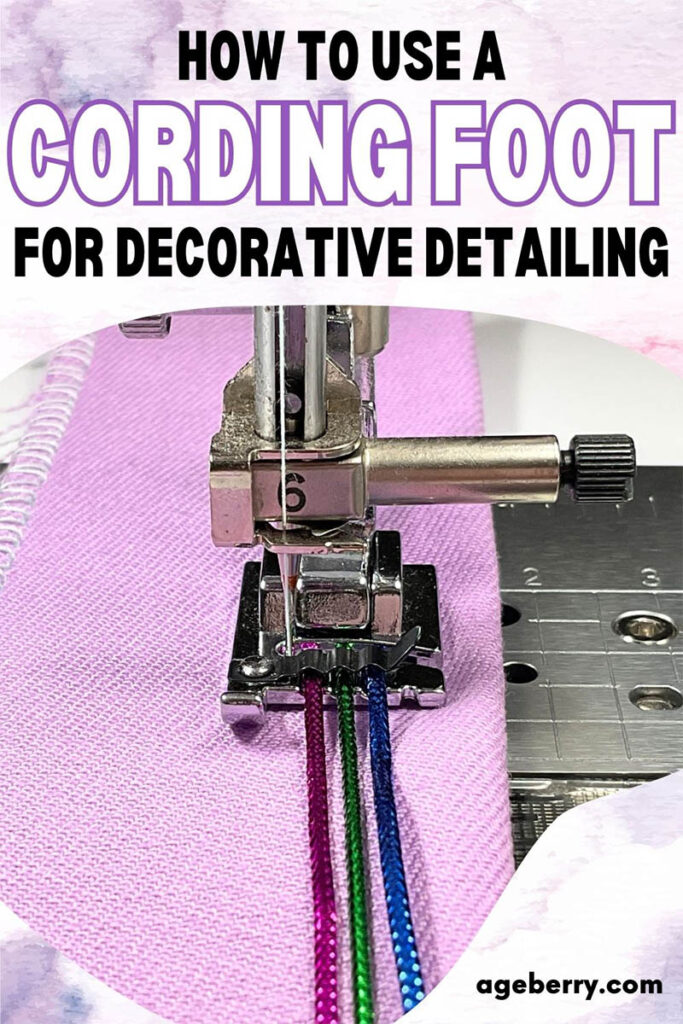
Have you ever found yourself wishing to attach an elastic cord to a garment, create delicate ruffles, or even add a 3D embellishment to your sewing project? All these can be achieved with a tiny yet mighty piece of equipment: the cording foot.
It’s a small, unassuming tool that won’t break the bank and doesn’t look overly complicated. Yet, it’s really effective for certain sewing tasks and adding unique touches to your work.
This sewing tutorial is your ultimate guide to the cording foot. You’ll learn how to use it to sew elastic cords and add embellishments, and understand why this tool is good for enhancing your sewing projects. Join me to unlock the potential of the cording foot and take your sewing to a whole new level of creativity.
latest posts
- Butterfly Quilt Block Tutorial – Foundation Paper Piecing
- How To Sew Quilt Squares So The Corners Match
- Sewing With Fork Pins: How They Help With Pattern Matching, Slippery Fabric, And Seams
- How Much Fabric Do I Need? 21 Helpful Tips For Calculating Fabric Yardage
- Easy Simple Sewing Project: Fabric Jar Opener
- DIY Oven Mitts: Step-by-Step Sewing Tutorial
- Easy DIY Potholder: New Design
- Tailor’s Clapper: What It Does, Why It Works, And How To Use It Right
- Heat Resistant Batting for Sewing: What It Is, How It Works, and What Makes a Difference