Have you ever asked yourself these questions: What is a free arm sewing machine, how does it differ from other machines, and do I need one? If you have, I’m here to answer them for you. Learn the answers to all of these questions and more, plus see my recommendations for the best models to purchase!
I remember in my early sewing days, I was working on a long sleeve blouse. The project had been going smoothly and I was excited to finish it up until it came time to hem the sleeves and I found myself in a quandary.
How do I sew sleeve cuffs?
You see, up until that point, I hadn’t given any thought to how to hem a tubular-shaped piece of fabric! I was just taking it step by step and following the instructions for the pattern but, when I came to that instruction, all of my work came to a complete stop. Ugh!
That’s when I learned the power and benefit of free arm sewing machines. They take the challenging task of sewing sleeve or pant hems (or other similar items) and make it much easier without the risk of sewing multiple layers of fabric together by accident. (We’ve all done it once or twice.)
Don’t believe me? Well, keep reading because, in today’s post, I will be sharing everything you need to know when it comes to free arm sewing machines and how they can help you and your sewing projects!
What Is A Free Arm Sewing Machine?
Before I dive into the differences between a free arm and other types of sewing machines, I want to talk briefly about the free arm sewing machine so that you know what it is.
When I first started sewing, the information you could find on the internet was thin, so I had a lot of learning to do on my own. Thankfully, times have changed!
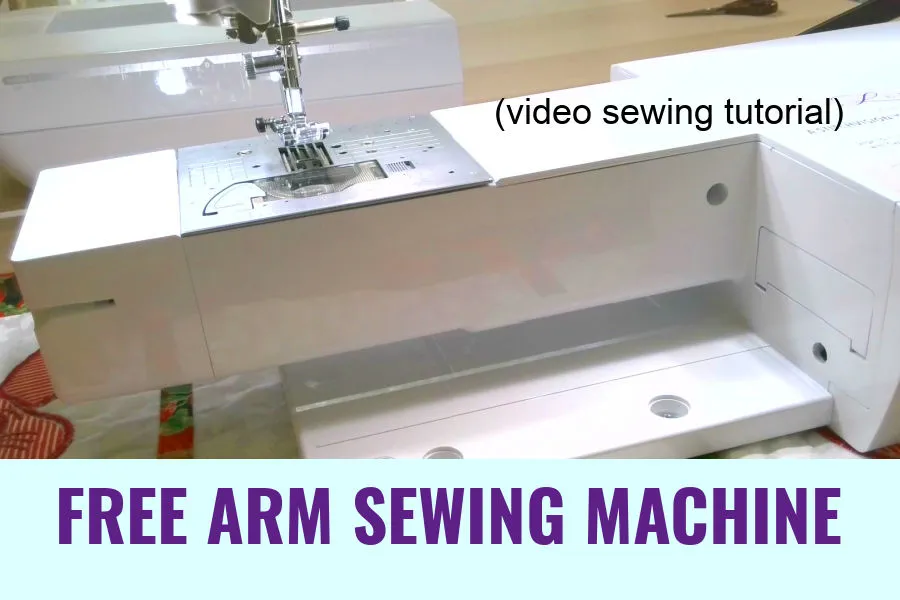
The term “free arm” simply refers to a specific part of a home sewing machine. Many sewing machines have a removable accessory tray where you can keep your bobbins and other essential sewing items. If you remove that, you expose the free arm.
The free arm is a narrow freestanding part of the machine with an open gap underneath and only connects to the main part of the machine in one spot (at the motor area of the machine).
The free arm’s purpose is meant for working with tubes of fabric such as sleeves, pants, etc. because you can slide those items over the free arm to sew. It allows you to work on sections of your sewing project without bunching up the fabric and without accidentally sewing them shut!
For the record, if your machine doesn’t have a free arm (almost all modern machines do), you can still do some of those projects, but the free arm makes them much easier.
If you see the term ‘free arm sewing machine’ and wonder what that means, it’s simply talking about that part of your sewing machine. It was confusing to me at first because the term sounded like it was referring to an entirely different machine.
In a way, it is doing that, but what it’s actually doing is distinguishing between older machines without a free arm and newer machines that have one.
So, first let me show you the basic use of the free arm.
Step 1 – Remove the flat bed attachment to use the free arm.
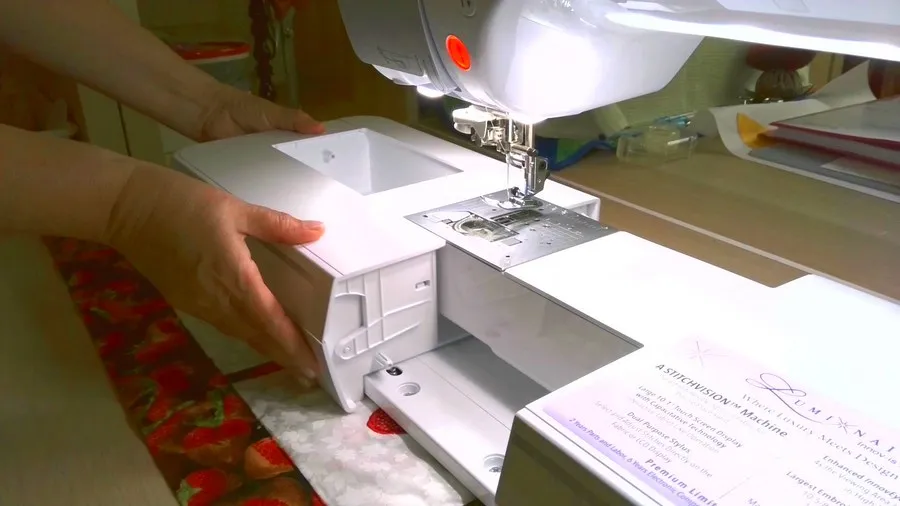
Step 2 – Slide the tubular piece of fabric that you want to sew onto the free arm. Make sure the fabric feeds correctly and there are no folds or wrinkles.
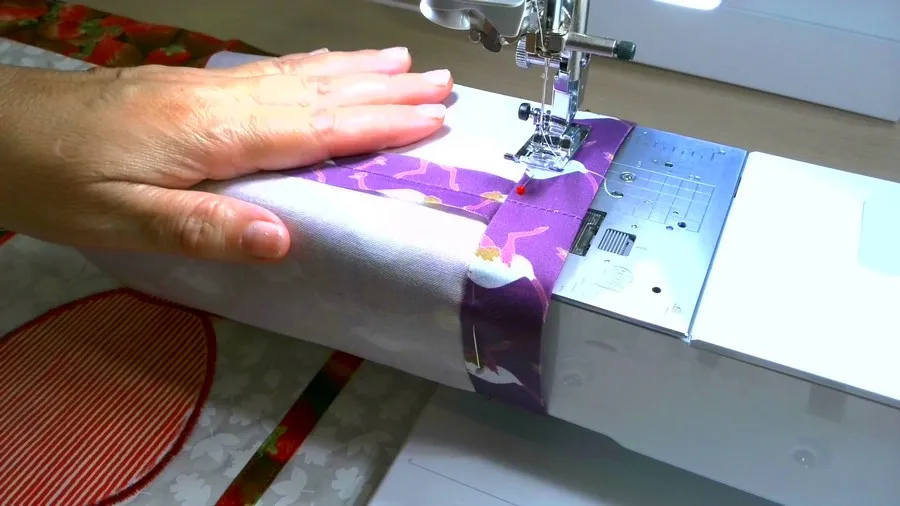
Step 3 – Start sewing guiding the fabric so it moves around the free arm.
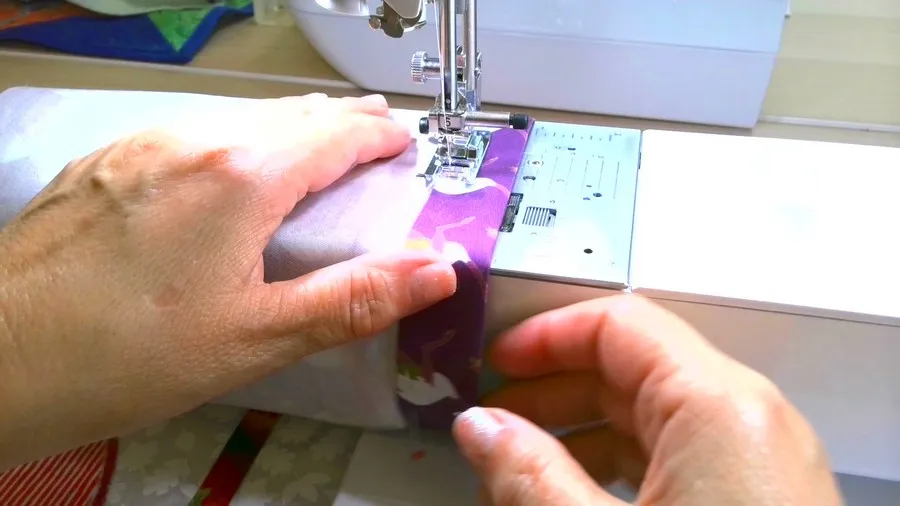
This is the most common use of the sewing machine free arm.
But now I would like to show you something different that you probably have never seen before.
Attention! If you like the video format, at the bottom of this post, look for a YouTube video version where there is a step-by-step tutorial on how to use a free arm on sewing machine to attach a rolled tab. For a more complete picture, I recommend exploring both versions.
I am going to use my Brother Luminaire machine. It has a free arm and I want to show you how I use it sometimes.
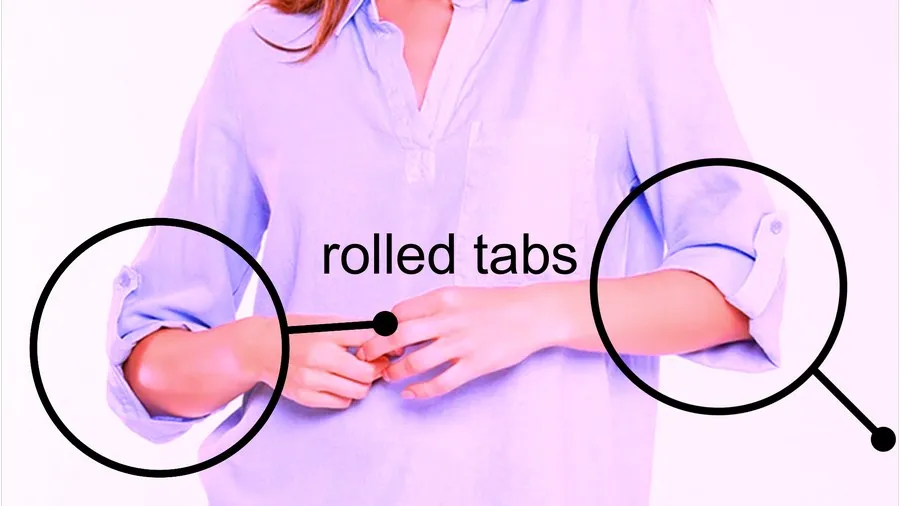
So, it’s very common for blouses and pants to have rolled tabs. You know what I mean. I have many blouses with rolled tab sleeves as you see in the image below. This design detail helps to make one of the most flattering sleeve lengths.
Note: Some of the links on this page are affiliate links. This means I will receive a commission if you order a product through one of my links. I only recommend products I believe in and use myself.
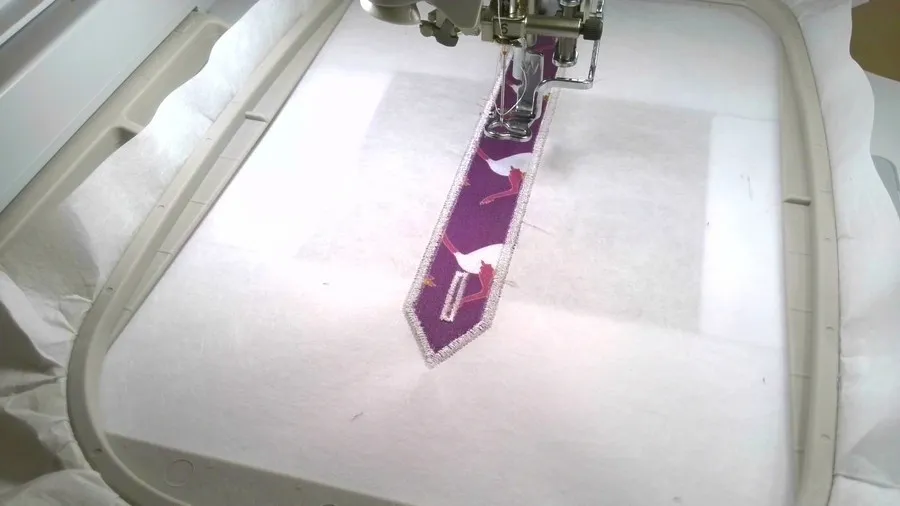
First of all, I like to make these tabs with my embroidery machine, it’s so much easier and faster. It’s not so easy to make this shape with a regular sewing machine.
The free design files to make the tab with an embroidery machine are in my Resource Library. If you are a subscriber to my newsletter you can get them free. The design is good for any embroidery machine that has a hoop 6 x 9 inches.
✅ Related tutorial: Brother Luminaire tutorials: How to applique with an embroidery machine
How am I attaching these tabs?
Let me show you. That’s where I absolutely need the free arm.
First decide where you want to attach this tab, pin it to the sleeve and make marks. I am using a Frixion pan. The marks disappear after I iron over them with a hot iron.
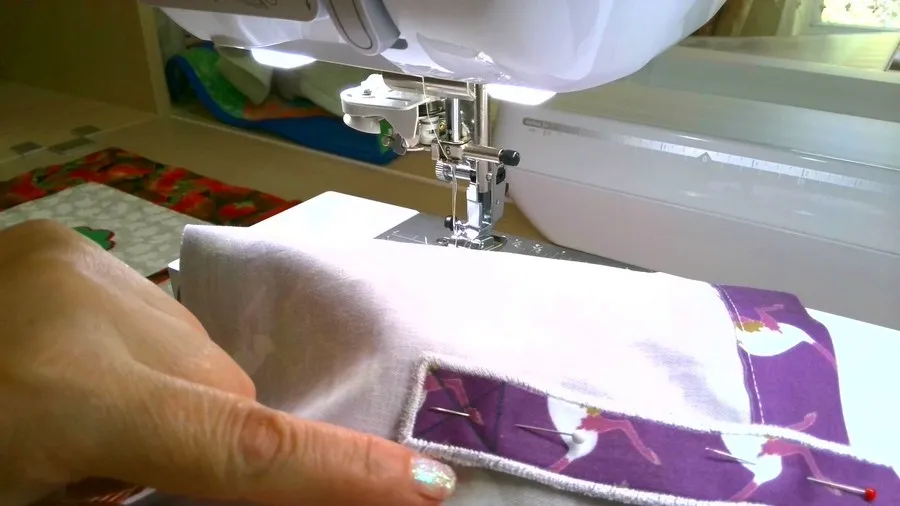
Insert the sleeve (I am just using a tubular piece of fabric) onto the free arm.
Now I will make the first stitch. It’s going sideways to the right. I don’t want to sew fast, so I put the speed to minimum. I set the needle in the fabric at the starting point in the left corner and sew the seam. You see that the fabric is moving sideways. Guide the fabric by hand to keep sewing straight.
✅ Related tutorial: Types of Sewing Machine Stitches: Unraveling the Mysteries of the Straight Stitch
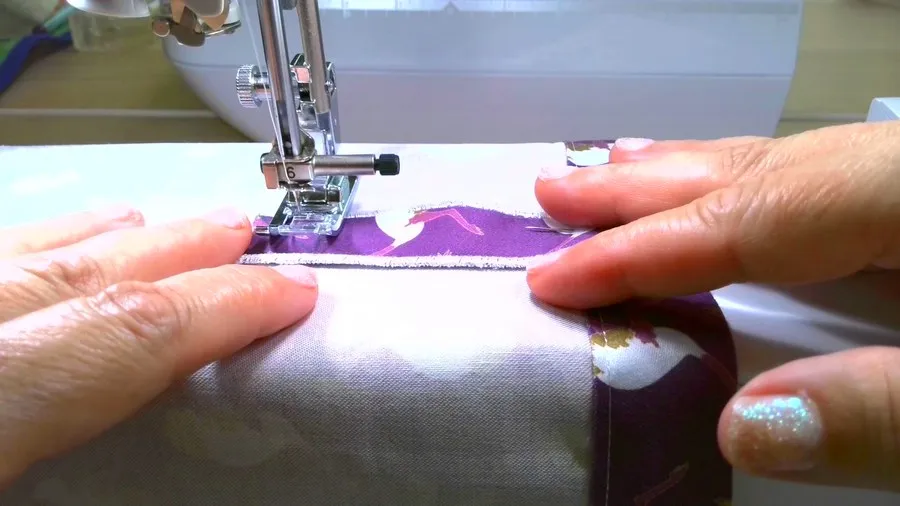
Select the next stitch and sew. This one is easy – just a regular straight stitch.
The next step – going sideways to the left.
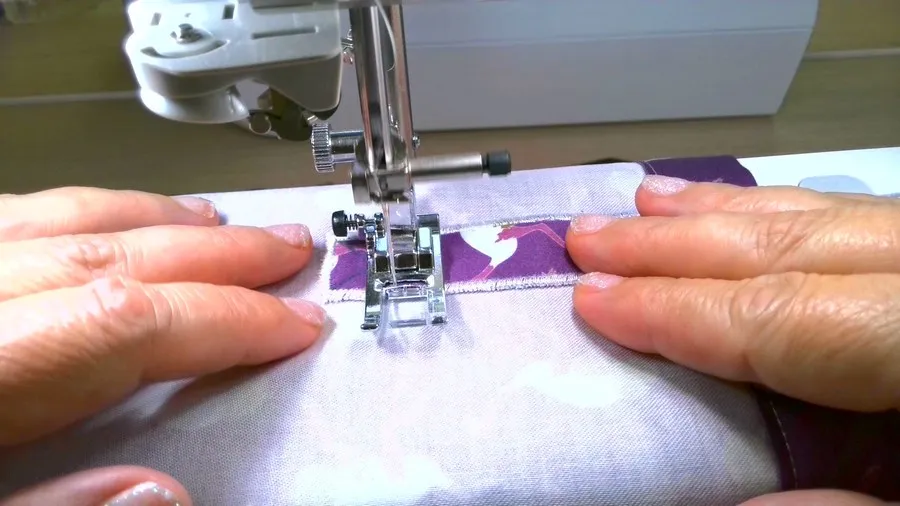
And now I will set the machine to go backward. The lines that I marked are very helpful. You see that the fabric feeds forward while the machine is stitching backward. The seam is connected to the starting point.
But I want to put 2 more diagonal seams.
This one is going to the right.
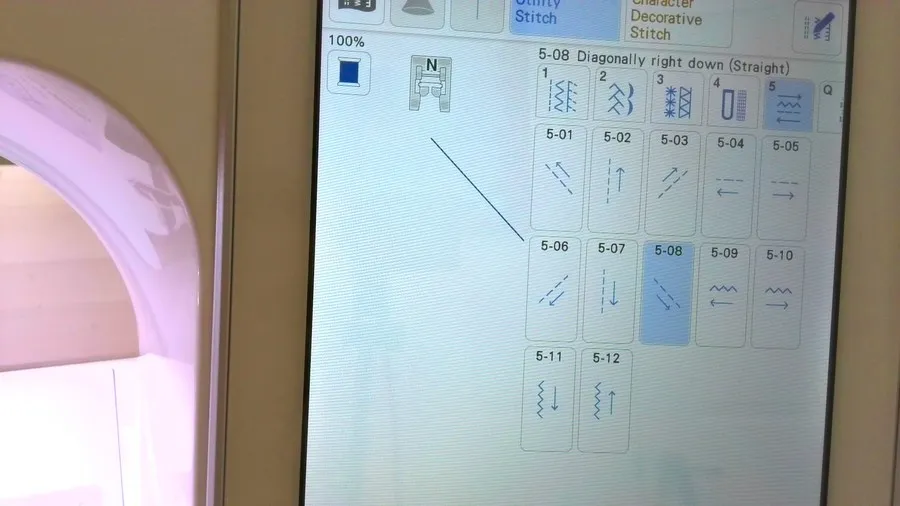
Another one is going to the left.
Ok, the tab is attached now. And for this kind of sewing I absolutely need the free arm, without the free arm it’s not even possible.
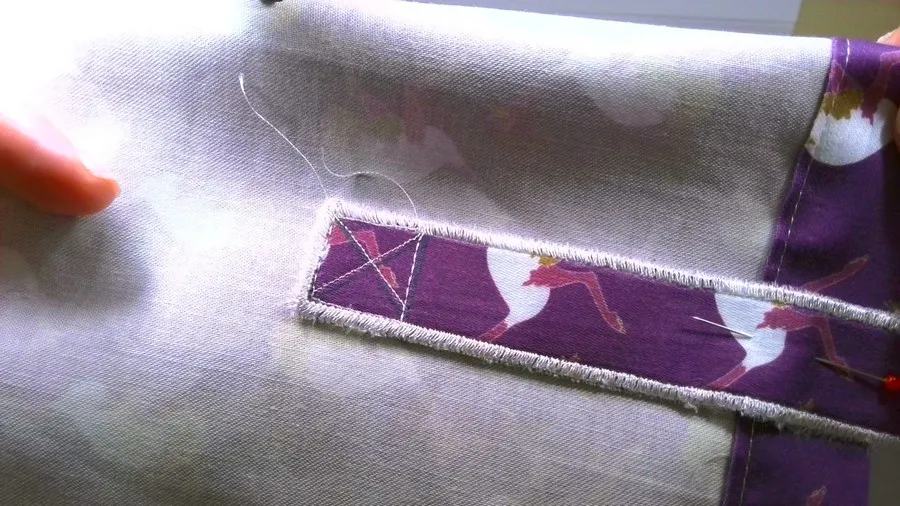
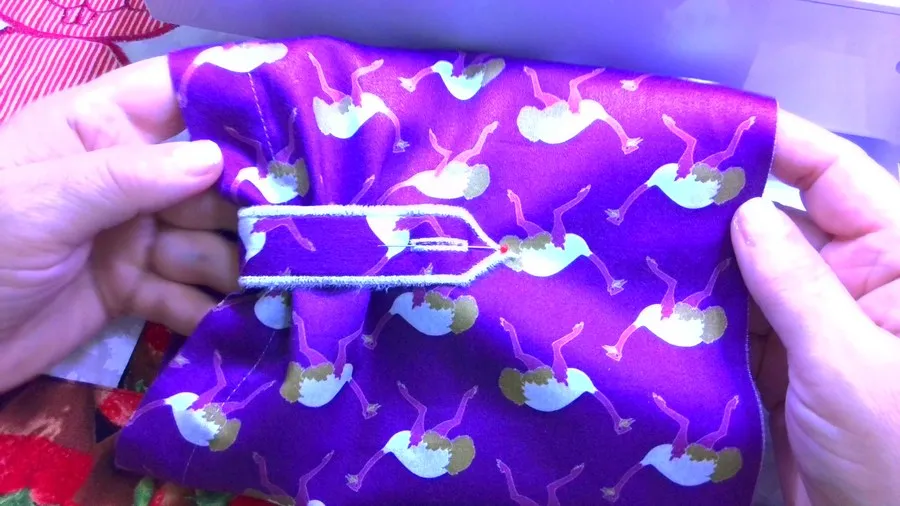
Here we put a button and the sleeve will be done.
Do I Need A Free Arm Sewing Machine?
I’ll admit – a free arm sewing machine is nice to have, but it isn’t essential. At the same time, most newer machines have a built-in free arm. If you have an older machine, it might not be worth investing in a new machine just to get a free arm.
You can still sew sleeve cuffs and hems by learning to “sew inside the circle” and eliminate the “need” for a free arm.
But, if you are wondering what the benefits of using a free arm could be (or not), let me help you break it down into a pros and cons list.
Free Arm Sewing Machine: Pros
Every type of sewing machine has pros and cons. Some are better for certain types of projects while other machines excel at other types of sewing projects. That’s why there are so many different machine types!
The free arm sewing machine is beneficial for sewing tubular projects like cuffs and hems.
Free Arm Sewing Machine: Cons
Just as every type of sewing machine has its strengths, each one has at least one weakness. When it comes to the free arm, you won’t want to use it for quilting or sewing long straight seams.
It just comes down to the types of sewing projects you are frequently doing.
How To Choose A Free Arm Sewing Machine
Every type of sewing machine has a variety of brands, options, and prices to choose from. Before you even begin looking at sewing machines to purchase, first determine which options (adding buttons, embroidery, monogramming, etc.) you need on your machine.
Then, take the time to research different brands and machine models and eliminate those that aren’t a good fit. Finally, compare the costs and your chosen brands and models to find the one that fits your budget.
There are many options available, so no matter what your budget or experience level, you’ll be able to find a good fit.
Here is a comparison between a free arm machine and 2 other different types of sewing machines to give you a better idea of what you might need or want.
Free Arm Sewing Machine vs. Flatbed
The difference between a free arm sewing machine and a flatbed sewing machine is pretty simple: It all comes down to the workspace size.
Remember that the workspace on a free arm sewing machine is pretty narrow because you reduce the workspace when you take off your accessory tray.
In contrast, a flatbed sewing machine provides a much larger workspace because the sewing machine sits down on a table so that the sewing machine work area and the table are at the same level. This type of sewing machine is ideal for large pieces that need to be laid flat as you work.
Free Arm vs. Long Arm Sewing Machine
A free arm sewing machine is much smaller than a long arm machine and meant for sewing tubular shapes of fabric.
On the other hand, the long arm sewing machine is much larger and consists of a large frame and a machine. It’s meant for quilting and takes up a lot of space.
Useful Info – Sewing Machine Troubleshooting
If you own a sewing machine long enough, you’re going to have to figure out how to troubleshoot your sewing machine at some point or another. While some sewing machine problems are preventable, others are inevitable. Learn how to troubleshoot your sewing machine with my printable PDF eBook. Whether you use a traditional sewing machine or a modern computerized one, work through this ebook before thinking about a replacement or going to a service center.
The Best Free Arm Sewing Machines On Amazon
With that being said, I have put together a list of highly-rated sewing machines from Amazon! They are all moderately priced but reliable and of good quality, so they will work for any budget.
Brother Sewing and Quilting Machine XR3774
This model has a versatile free arm and comes with:
- Wide table
- Machine cover
- 37 built-in stitches
- 8 sewing feet
- Instructional DVD
It’s a great price and has more than 2000 good reviews to back up what a good investment it is.
Brother Sewing and Quilting Machine CS6000i
Brother consistently makes high-quality, affordable machines, and the CS6000i is no exception. It has a free arm, an extension table, and comes with:
- Wide table
- Hard protective case
- Needle set including twin needle
- 10 sewing feet
- 3 bobbins
- LCD screen
- 25 year limited warranty
It has 15,000+ excellent ratings and its low price point will fit any budget.
Brother ST371HD Sewing Machine
This free arm sewing machine is affordable, highly rated, and easily transportable. It comes with:
- 37 unique built-in stitches
- Automatic needle threader and drop-in top bobbin
- 6 sewing feet
- Instructional DVD
- 25 year limited warranty
SINGER Heavy Duty 4432
Singer is another brand I trust! This free arm machine has a metal frame, making it very heavy-duty. It comes with:
- 4 sewing feet
- 32 built-in stitches
It is roughly the same price point as the others I have mentioned and has more than 4,000 great reviews.
SINGER Tradition 2277 Sewing Machine
Here’s another metal frame Singer model with an easy-to-use free arm in the same price range as other models I’ve highlighted. It has many good reviews and comes with:
- 3 sewing feet
- Automatic needle threader
Janome 2212 Free Arm Sewing Machine
This free arm sewing machine is a high-quality entry-level sewing machine. It’s lightweight and very easy to use – perfect for a beginner! It comes with:
- 12 built-in stitches
- 4-step buttonhole
- 5 sewing feet
Janome Horizon Memory Craft 9850
Here’s the difference a higher budget can make. This free arm sewing machine may cost more, but it’s a great machine and comes with:
- 200 built-in stitches
- 6 different one-step buttonholes
- Automatic thread tension
- Memorized needle up/down
- One-step needle plate conversion
- 7-piece feed dog
- USB design transfer
- Editing functions
- Full-color LCD touch screen
SINGER ProFinish 14CG754
In case you need a serger option with a free arm, this Singer model is a nice, moderately priced option. It comes with:
- 4 Built-in rolled hems
- All-purpose foot
- Needle set
- Spreader (for 2 thread stitches)
- Stitch guide
I hope this article answers your questions regarding free arm machines. If you’ve never tried using this part of your sewing machine, it can be very helpful and is worth a try! If you decide to purchase one for yourself, consider one of the highly-rated models I listed above according to your needs and budget.
So here is my YouTube video. Check this out if you like to see how I use a free arm on my sewing machine instead of read…
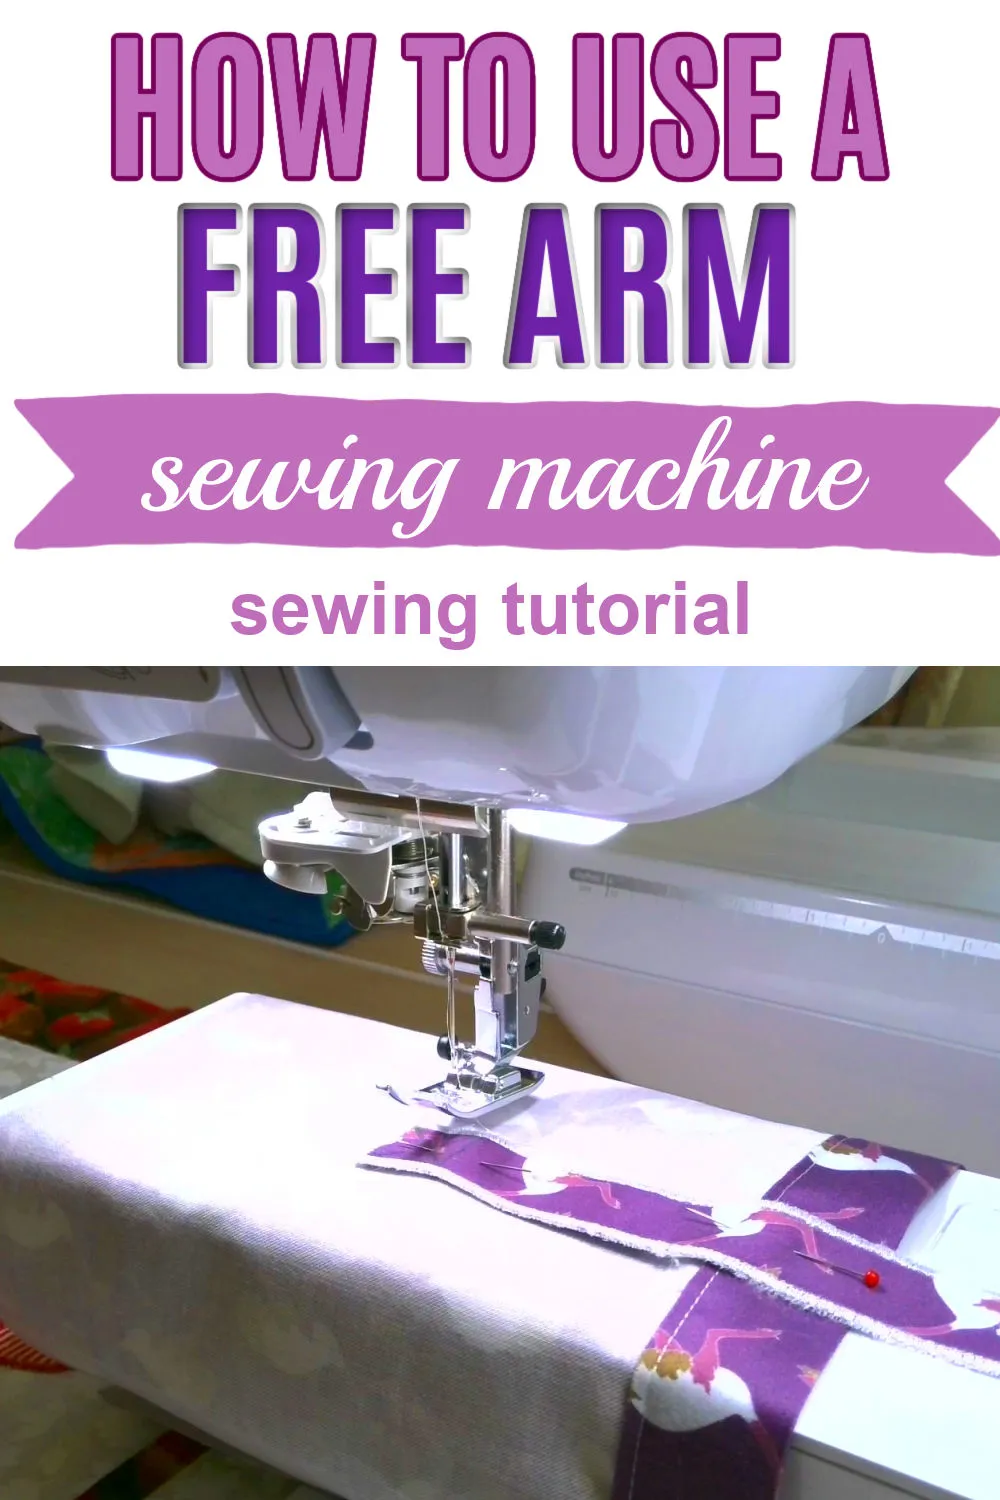
Did you find this tutorial helpful? If so, save this pin (see below) on your sewing board so you can come to this tutorial later when you are ready to use a free arm sewing machine, and follow me on Pinterest for more tips, tutorials, and inspiration!
latest posts
- Ever Tried This on Your Serger? This Differential Feed Feature Will Amaze You
- Ditch My Sewing Machine? Not in This Lifetime!
- Adorable DIY Needle Book | Easy Tutorial for Beginners
- Master the Seam Ripper: Your Ultimate Guide to Precision Stitch Removal
- Think You Know Zippers? This Installation Guide Might Surprise You
- Why Does Your Seam Ripper Have a Red Ball? Discover Its Purpose!
- Topstitching Troubles? This Simple Trick Will Turn It Around Instantly!
- How to Sew Shirring: A Step-by-Step Guide to Elastic Thread Gathering
- Are Self-Threading Needles Really Useful?
