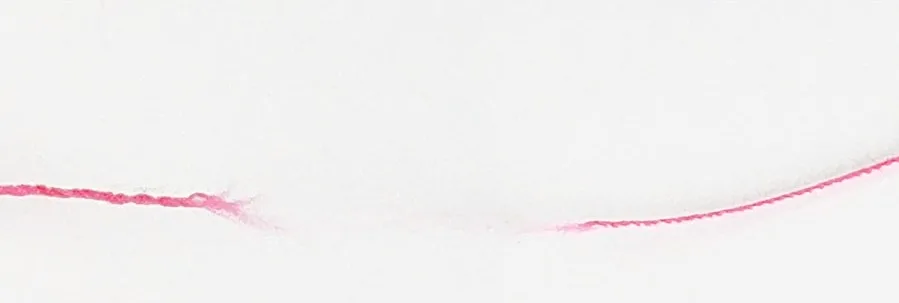
Here are 20+ common problems to help you diagnose why your sewing machine thread keeps breaking so you can identify the issues and solve them.
Picture this: You’re joyfully sewing your latest project (a new dress, perhaps?) when suddenly your thread breaks.
You stop your project, rethread your machine and start again, only to have your thread quickly get tangled up and break again. Agh!
After taking a couple of deep breaths to release the tension (pun intended) and frustration, you try to figure out what’s causing your sewing machine thread to break.
Sound familiar? I’ve been there – multiple times!

Why does my thread keep breaking?
Some sewing mistakes can be incredibly frustrating. And trying to complete a sewing project when your thread keeps breaking definitely falls on that list.
Unfortunately, dealing with breaking threads isn’t a problem that’s always easy to diagnose.
Since there can be many reasons why your thread is breaking, this isn’t a one-and-done problem (or solution).
I decided to take this opportunity to do a troubleshooting post. We’ll explore some common causes of thread breaking, and I’ll provide tips on how to fix the problem and prevent it from happening.
If you experience frustrating thread breaks, this post will help answer the question, “why does my thread keep breaking?” and help you determine how to fix it quickly so you can get back to the fun part…sewing!
1. Your Top Thread Isn’t Threaded Correctly
This is a frequent issue, and even experienced sewists have trouble threading their machines correctly from time to time – it just happens that you miss a thread guide or tension disks, etc.
Improper threading causes snags, which leads to thread breaks. Start troubleshooting by rethreading your top thread. It may sound like a waste of time, but it can solve many thread-breaking problems.
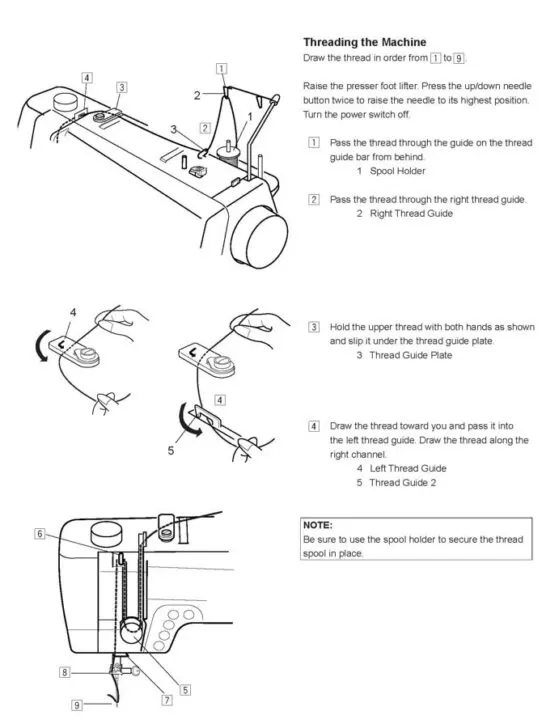
Solution: Rethread your machine. If you aren’t sure how to do it, look up the specific instructions for your sewing machine. It’s important to familiarize yourself with the exact steps on how to thread your sewing machine correctly and make sure all the necessary components are in place before attempting to operate. Taking the time to check everything thoroughly can save you a lot of headaches in the long run.
✅ Related tutorial: How to thread a needle on a sewing machine
Here is a page from my sewing machine manual on threading my Janome Memory Craft 6600P.
2. Your Top Thread Tension Is Wrong
You must adjust your thread tension as you work with different threads, stitches, and fabric types. When your tension is too high, your thread will keep breaking.
Solution: Loosen your top thread tension if your sewing machine thread keeps breaking while you sew.
Sewing machine manufacturing companies set the bobbin thread tension and recommend leaving it alone.
When you need to adjust the tension, focus on changing the tension for the top thread. An ideal normal tension setting is between 3 and 5, most often 4.
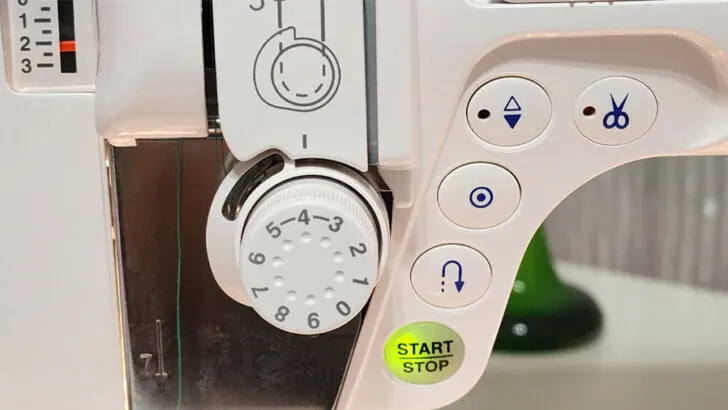
After adjusting your upper thread tension, ensure you’ve found the correct setting by doing a quick stitch test on a piece of scrap fabric that’s the same weight as the fabric you’re using in your project.
✅ Related tutorial: Sewing Machine Tension Adjustment
3. Your Bobbin Tension Is Wrong
If you have already rethread your machine and adjusted your upper thread tension but still have challenges, it’s time to look at your bobbin tension.
Although sewing machine manufacturers recommend leaving your bobbin tension alone, there are times when adjusting it is necessary to keep the thread from breaking.
Solution: Loosen the tension on your bobbin thread. Then test your stitches on a piece of scrap fabric to make sure the stitches are balanced before you return to working on your project.
Need more help with this? Check out my article Sewing machine tension guide: everything you need to know about the bobbin tension for plenty of information.
4. Your Needle Is Inserted Incorrectly
Sometimes, sewists install their needle into their sewing machine backward, which can cause it to hit the throat plate or the bobbin case and break the needle and/or the thread.
I only suggest this as a problem as it has happened to me in the past. Needles are quite tiny and it can be challenging to make sure they are facing the correct direction, especially if you have an older machine and install it in a hurry, eager to get back to your sewing projects. By the way, most modern computerized machines will not let you install a needle the wrong way, so this may not be a problem.
Another possibility is that the screw that holds your needle in place gets loose over time, so your needle slips out of place. This can also cause your needle to hit the throat plate or bobbin case and break the thread.
Solution: Look closely at the shank. Notice that it’s rounded with one flat side. Insert the needle with the flat side facing the back of the machine. Make sure to put it up in the machine as far as possible.
Also, check your needle from time to time to ensure it stays fully inserted and as tight as possible.
5. Your Needle Is Damaged
Your sewing needle should be sharp, smooth, and straight. Any variation from that, and your thread keeps breaking. Even if your needle is installed correctly, use over time can wear it down or damage it.
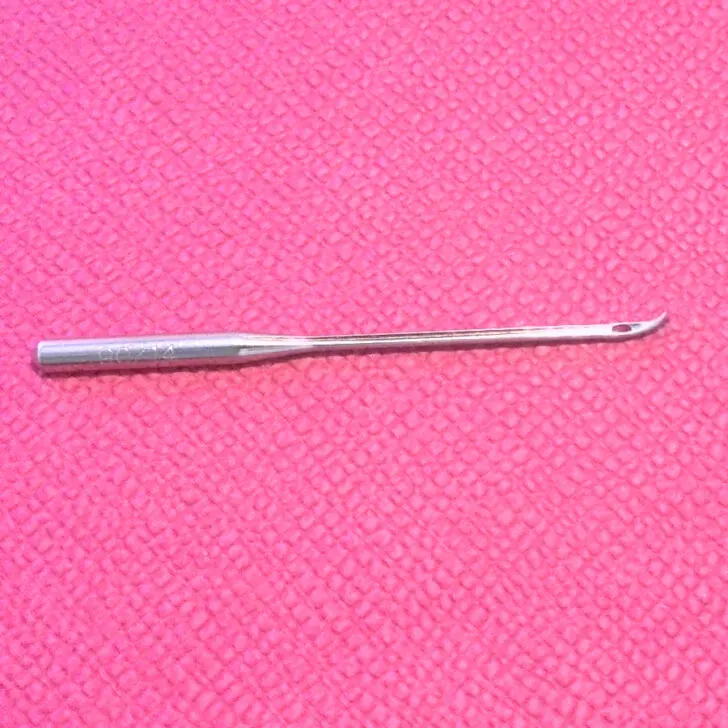
Solution: If you’re experiencing frustrating thread-breaking problems, check your needle to see if it’s dull or bent. Also, check for burrs and flaws, which can shred (and break) your thread.
And going forward, use high-quality needles, check them regularly, and replace them as soon as you notice them becoming dull or your thread breaking often. Needles are not expensive, I use both Schmetz and Organ needles with good results.
✅ Related tutorial: 19 Types of Sewing Machine Needles and What They’re Used For
6. Your Bobbin Thread Is Wound Incorrectly
Anytime you work with wound thread, you want it to be wound evenly. Improperly wound thread will cause snags or knots – and broken threads.
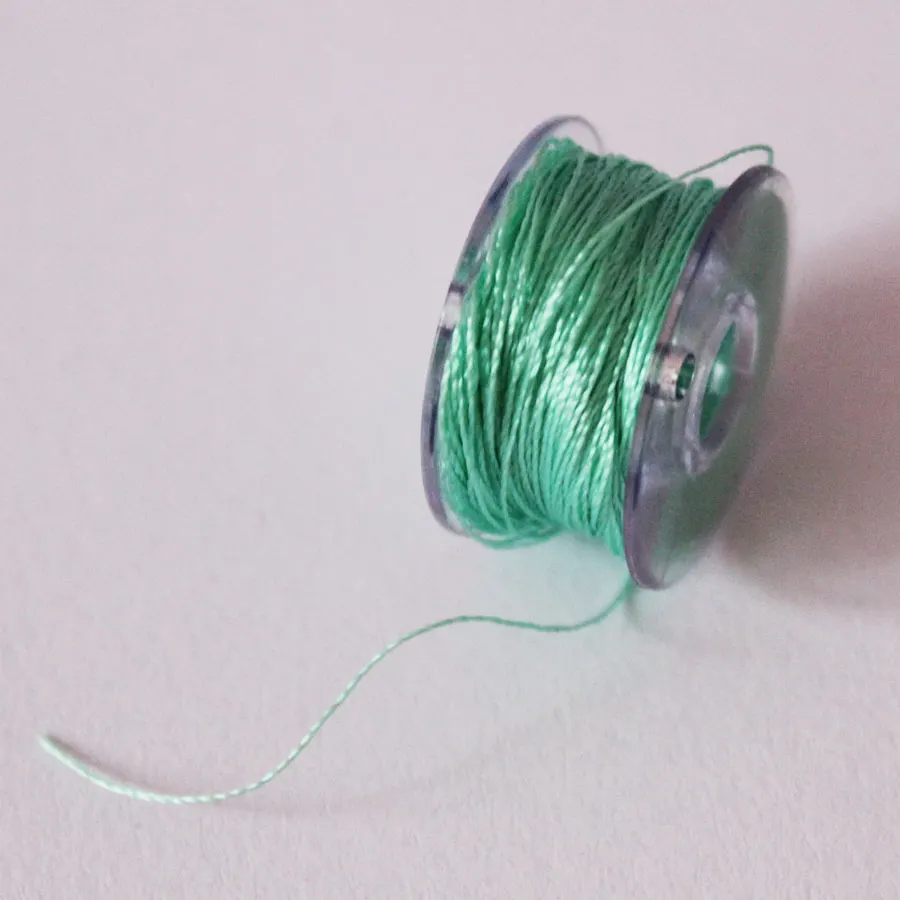
Solution: When a bobbin doesn’t wind correctly, it could be the result of winding too quickly so that it doesn’t happen evenly. Try slowing the process to ensure your bobbin winder keeps the thread even as it spins.
If you still notice problems, try replacing the washer on the winder. If that doesn’t work, have a service professional look at your machine or buy a stand-alone bobbin winder.
✅ Related tutorial: How to thread a bobbin
Bobbins can certainly cause issues when not wound properly. Here’s my article filled with common sewing machine bobbin problems, so you can double check if yours are done correctly.

144pcs Prewound Bobbins Size A Compatible with Brother Machines, Class 15, 15J, SA156, White Color, 100% Polyester, 60S/2 100 Yards
You can also buy prewound bobbins, they are available in black and white (most used colors) but not only. These bobbins will fit many other sewing machines not only Brother (all machines accepting bobbins size A/Class 15), but always keep in mind what kind of bobbin your machine needs.
7. Your Machine May Have A Lint Problem
As you sew, tiny bits of thread and dust collect over time under your needle plate, causing lint to build up in your bobbin case. If you don’t clean out the lint regularly, that lint build-up will eventually keep your hook from correctly forming stitches. The result: snags and broken threads.
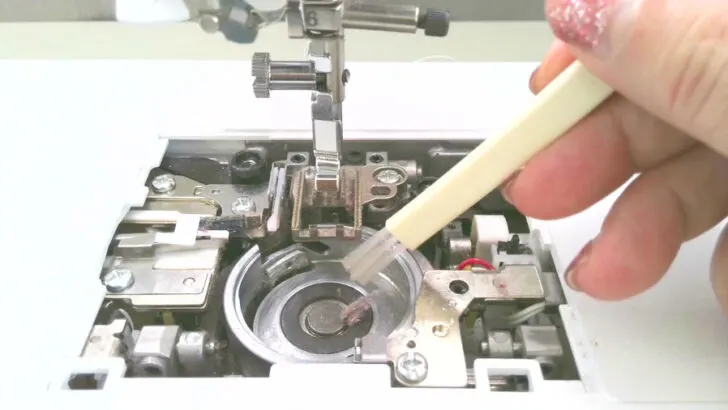
Solution: Clean your machine regularly to remove dirt, debris, and lint. Make sure to clean out the bobbin case.
Although it’s more common in industrial machines, some sewing machines have a spring in the bobbin case that can make the bobbin thread snag when there’s excess lint under it. If you have one of those bobbin case springs, take the time to remove any lint and debris.
✅ Related tutorial: Care Of Sewing Tools And Equipment
8. Your Top Thread And Bobbin Thread Don’t Match
No, I’m not talking about matching colors here. If your top and bottom threads aren’t the same thickness or thread type (ex: cotton, silk, polyester), they might throw off the tension and cause your thread to break.
Top thread should typically be comparable in thickness to bobbin thread – too much of a difference can cause problems with tension. It’s best to have exactly the same threads in the needle and in the bobbin. The bobbin thread in most sewing machines might also be finer than the top thread. But if you put thicker thread in the bobbin, you might experience thread breakage.
Also, if you decide to use rayon embroidery thread for topstitching and keep the thicker cotton thread in the bobbin you will have problems.
Solution: Choose threads for both the top thread and bobbin thread of equivalent weight and with an equivalent fiber content that are suited for the project and fabric you’re sewing with.
Take the time to wind your own bobbins to ensure the threads match.
Another piece of advice if you want easily match your top and bobbin thread – use these small gadgets called bobbin “pegs”. They can help keep the thread spool and its matching bobbin together.
This way, you won’t risk losing or mixing up similar types or colors of thread. You can even use two bobbins at once with the pegs. I found them particularly useful when I was working with Eloflex thread, which is designed for sewing knits on a regular sewing machine, as it’s stretchable. I had bobbins wound with Eloflex thread and I did not want to lose them because it was difficult to tell them apart from other threads.
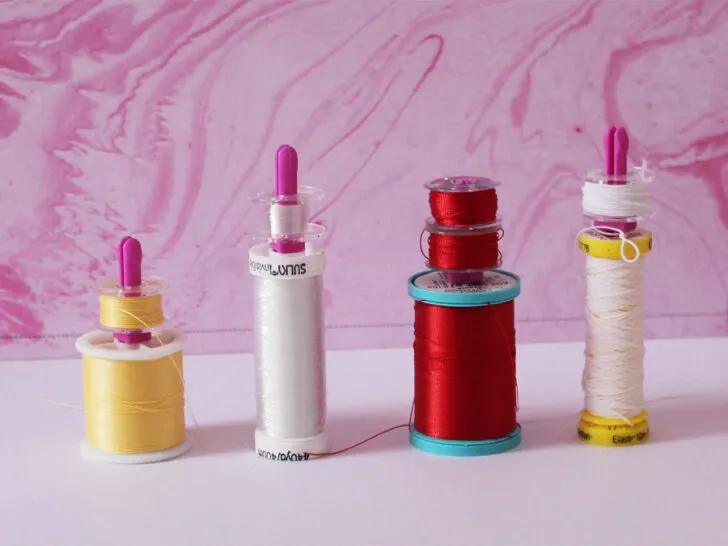
The type of peg that I showed you is just one option – there are plenty more called “Bobbin Buddies” which provide the same helpful function. They help to keep your spool and bobbin paired up so that you can easily access the bobbin when needed. So if you have been looking for a reliable way to keep bobbins and spools neatly organized, Bobbin Buddies can be an indispensable gadget. Use the below links to check the prices on Amazon.
✅ Related tutorial: Sewing thread types and uses
✅ Related tutorial: Top Bobbin Thread Holders and Organizers
9. Your Spool Isn’t Placed Correctly On The Machine or You Are Using a Wrong Spool
I would say this is actually the most common reason for thread breaking on a sewing machine.
Your sewing machine will work optimally when you install your spool of thread according to manufacturer instructions and use correctly wound thread spools for your sewing machine. If you are dealing with frustrating thread breaks, consider how the thread is on the spool (ex: cross-wound or parallel wound).
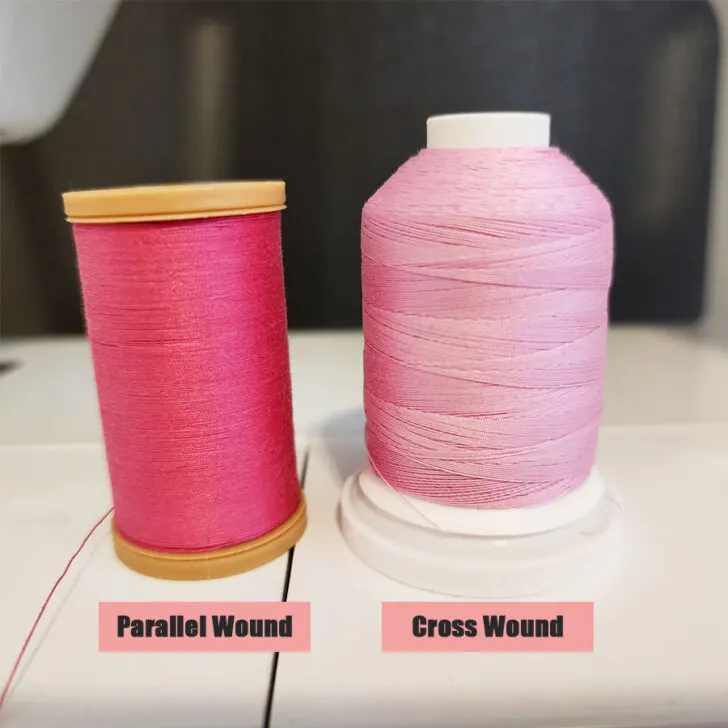
Sewing machines have vertical and horizontal spool pins. Check your sewing machine. Which type do you have? Maybe you have both?
With a modern vertical spool pin and a horizontal spool pin, the thread runs off the top of the spool that doesn’t move, while with an old vertical spool pin, the thread runs off the side of the rotating spool. Knowing which type of spool pin your machine has – either vertical and rotating or a pin that doesn’t rotate – is essential for ensuring your machine runs smoothly and doesn’t break the thread.
If you’re using an old-style vertical pin, make sure you use spools with parallel wound threads. For other types of spool pins, cross wound thread is the way to go. If you’d like more detailed information on this topic, I invite you to check out my YouTube video Thread Secrets.
Solution: Check your spool before placing it on your spool holder. Is it suitable for your sewing machine model?
10. Your Bobbin Isn’t inserted Correctly
Your bobbin could be inserted incorrectly, leading to thread breaks.
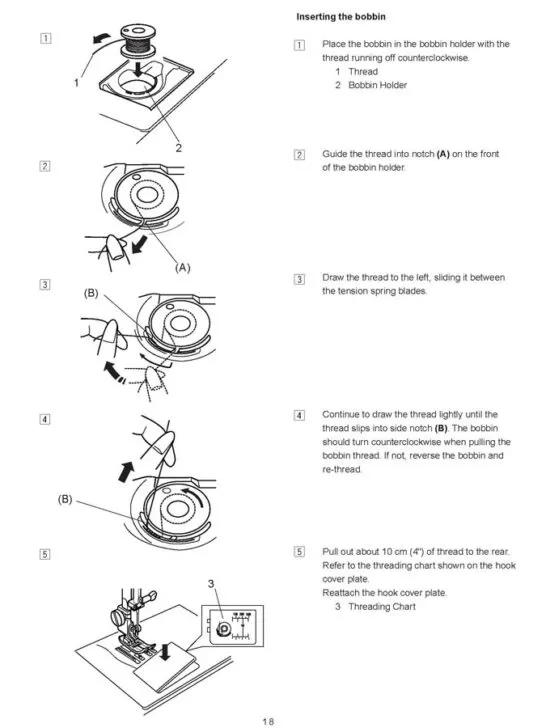
Solution: Check your bobbin to ensure the thread is in the slot on the side of the case and threaded correctly. Look for old, worn thread and knots. Avoid winding your bobbins too full. Follow any instructional diagrams on your bobbin case. If you don’t have a diagram, check your sewing machine instruction manual for proper placement.
Here is a page from the manual for my sewing machine – Janome Memory Craft 6600 P
11. Your Thread Catches On The Spool
If you notice your thread catching on your spool, you could have it installed incorrectly.
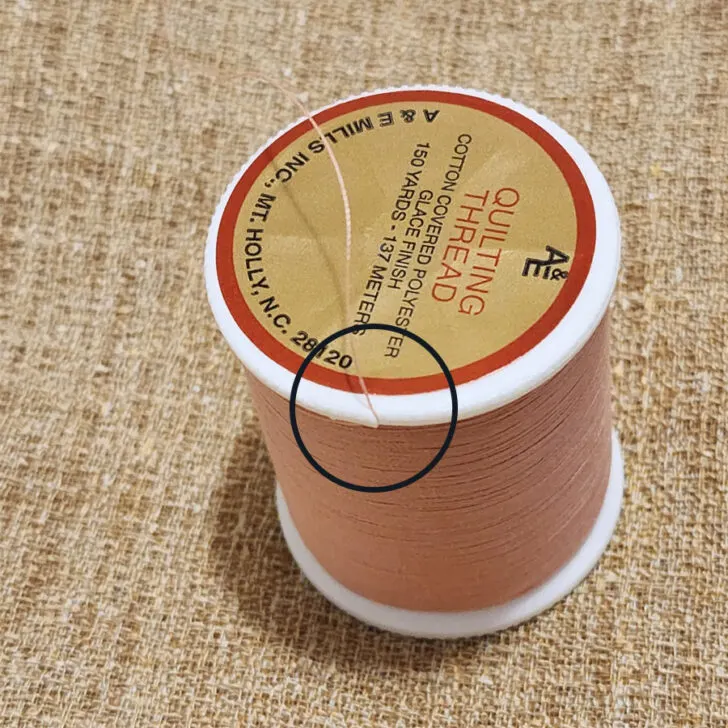
Take a close look at your spool. Sometimes one end will have a rough section to catch and hold the end of the loose thread when you aren’t using it. Unfortunately, if you install your spool wrong, that end can pull the thread as you sew and break it.
Solution: Double-check your spool of thread and ensure that it’s installed according to manufacturer instructions, with the thread feeding off the spool in the correct direction.
For example, if you install this spool (that are parallel wound) in such a way that the thread runs off the top of the spool that doesn’t move the thread will most likely catch on the spool and break.
12. Your Thread Wraps Around The Spool Pin
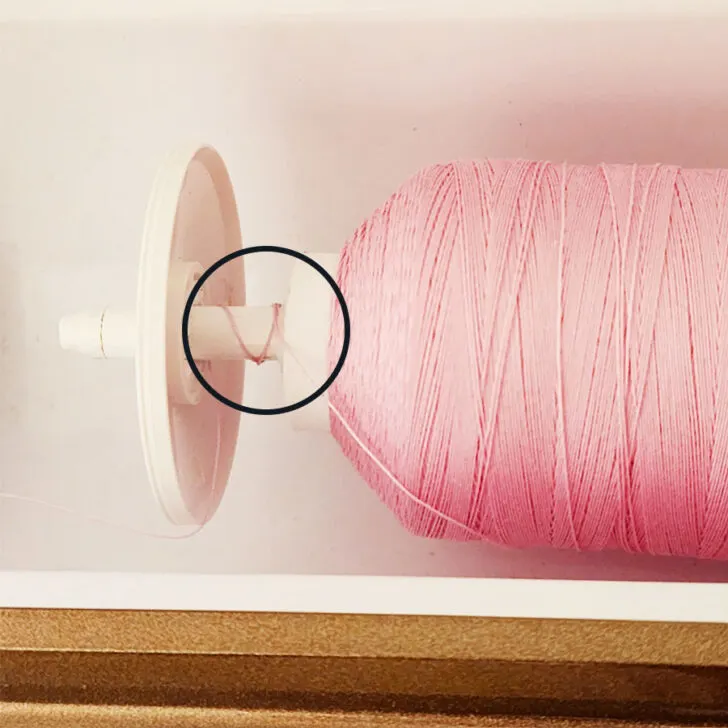
A spool cap holds your spool of thread securely in place. However, it can break if your thread wraps around a spool pin in between the spool and spool cap.
Solution: Use a spool cap size that correctly fits your spool. Ensure that it’s installed correctly, so there isn’t any space between the spool and the cap. But sometimes it happens anyway and you can’t avoid it. Just unwrap the thread, rethread the machine and continue sewing. It doesn’t happen often.
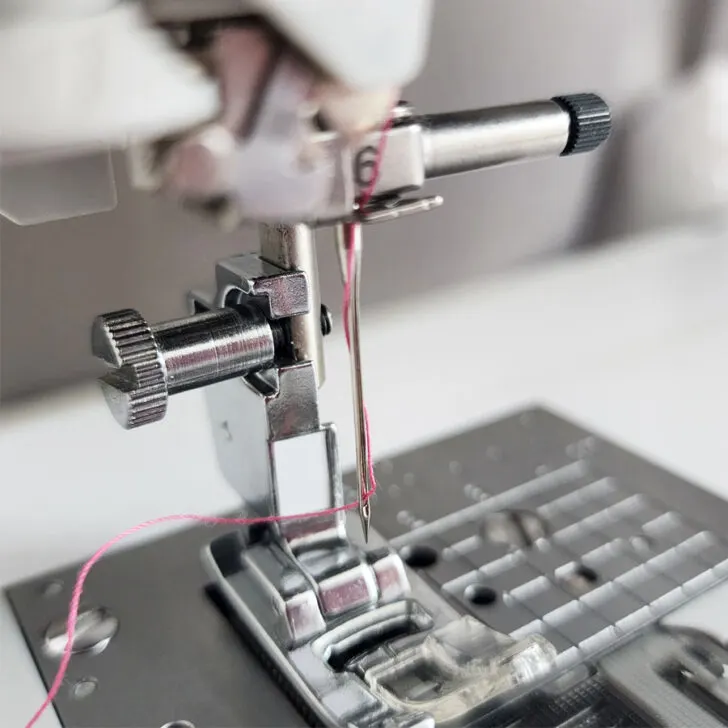
13. Your Thread Gets Wrapped Around A Thread Guide or a Needle
Your machine likely has at least one thread guide, which is like a loop (or eye) to help guide a thread where there’s a direction change. When it isn’t threaded correctly, it could wrap around or snag on the thread guide and break.
Solution: Follow the symbols on the machine (or your machine’s instruction manual) to ensure your thread is threaded correctly.
14. You’re Using Thread That’s Not Ideal For Your Machine or the Fabric
Anytime you use a thread that’s not matched to your project, it could break. If you use size 75/11 thread to sew denim or canvas your thread will break because it’s too thin.
It’s important to choose threads that are compatible with the fabric being used – if it’s a lightweight material such as silk or chiffon, use thin threads. On the contrary, heavier fabrics may require thicker threads for smooth stitching. Fortunately, there are plenty of great brands that cater to different fabrics and styles of sewing, so it should be easy to find the perfect option for your project.
✅ Related tutorial: Sewing thread sizes and how to choose
The same is true for your machine because it’s not necessarily able to work with every type of thread (ex: serger thread or embroidery thread can break on a regular sewing machine).
Solution: Check your thread. If it’s not “compatible” with your machine or the fabric you are using, change it.
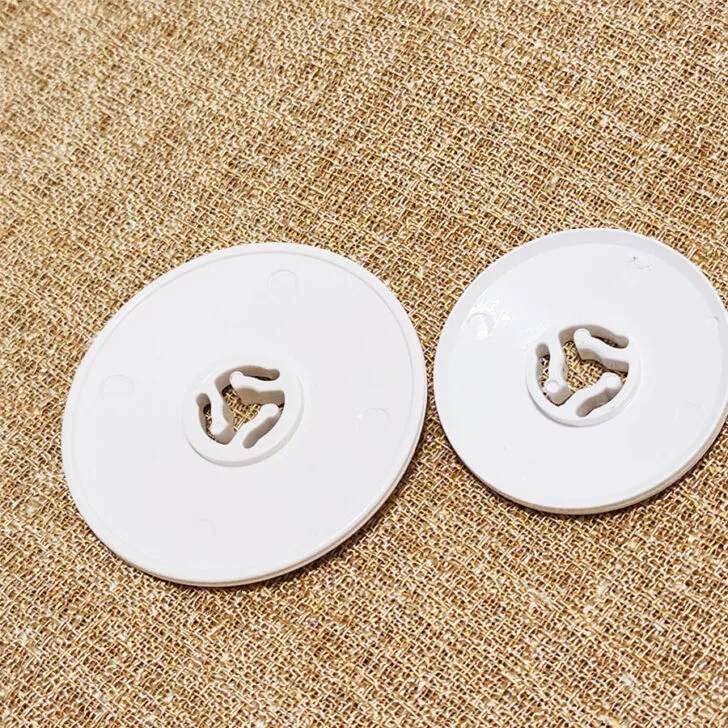
15. Your Spool Cap Is The Wrong Size
Your spool cap holds your thread spool in place, so it doesn’t slip (or fly!) off the machine as you sew. However, if it’s not fitted correctly for the size of your spool, it can cause the thread to wrap around or snag and break.
Solution: Check your spool cap and ensure it fits properly. If it doesn’t, change it out for one that does.
16. Your Thread Is Old
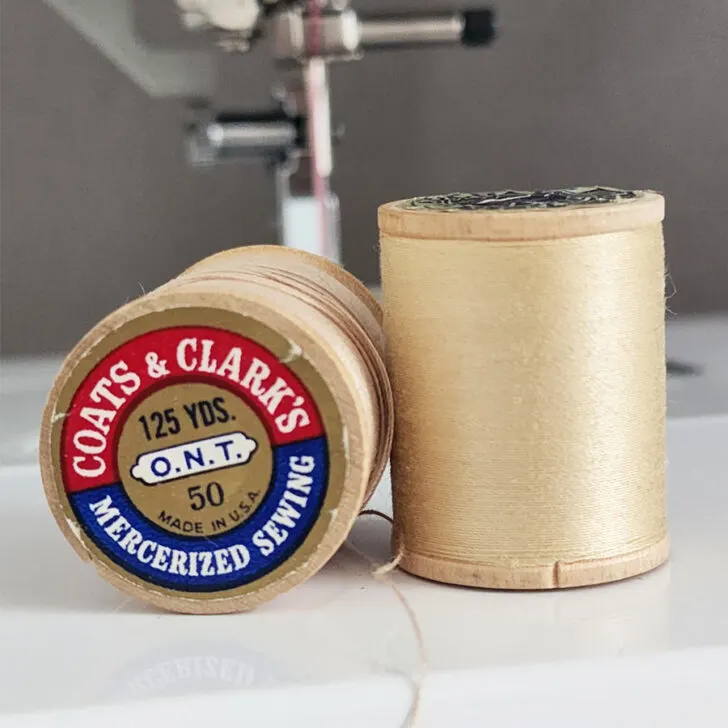
Believe it or not, thread does have a shelf life of some kind. While it is tempting to sew with the vintage thread you picked up from a local estate sale or antique store, it may not lead to the best results.
Damaged or old thread has less integrity than new thread does because it becomes weak or brittle over time. If you use old thread, it can break while you sew.
I recently tried using up some wooden spools of thread I had lying around and was really disappointed when they kept breaking under the strain. I discovered that their old age had resulted in them becoming very brittle and weak – causing them to break during basic usage.
Solution: Extend its lifespan by storing any thread in a dark, cool place where heat, sunlight, and UV rays can’t damage it. If your thread looks damaged, use a new spool. You can toss out the damaged thread or display it in a large glass jar…thread is beautiful, after all!
17. Your Thread Is Low Quality Or Has Snags
If you’re looking for quality thread for your sewing projects, it’s best to avoid the dollar store option. Cheap thread from a dollar store may seem like a bargain but its poor quality and low durability makes it far from a good buy. It doesn’t have the strength and usually breaks easily, leaving your project in tatters.
If you want successful results you should invest in stronger threads. Athough it might cost more money upfront, ultimately it could save you the trouble of having to start over due to inferior products.
Your spool of thread can have a knot or bad spot at any time. It’s not necessarily common, but it does happen and seems to be a little more frequent with dark threads.
Plus, some types of thread (cotton and rayon) can fray more frequently, causing snags and breaks.
Solution: Don’t use low quality threads. Replace the spool of thread on your machine. Simple fix!
18. You’re Using A Bobbin Not Designed For Your Machine
At first glance, all bobbins look nearly the same. But, their dimension does vary slightly between models.
Bobbins that are too small for your machine will bounce around inside your bobbin case and result in snags and breaks. On the other hand, if they’re too big, the bobbin won’t spin appropriately inside the bobbin case.
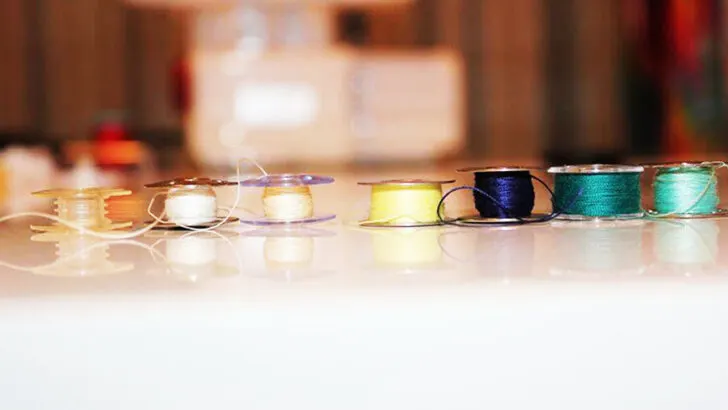
Solution: Only use bobbins designed specifically for your machine.
19. Your Bobbin Is Damaged
If you use plastic bobbins, they can become deformed from heat during sewing machine use and stop fitting in your machine correctly. And once in a while, metal bobbins can get damaged and misshapen.
Solution: To prolong your bobbins’ lifespan, be sure to store them somewhere that is cool and dry. If your bobbin thread continues breaking, just thread a new bobbin and replace the old one.
20. You’re Using The Wrong Needle And Thread
Different projects demand different needles and thread. When you use needles and thread that are incorrect for the task (ex: sewing thick fabric requires different needles and threads, etc.), your thread will keep breaking.
Solution: Adjust your needle and thread to match the fabric you’re working with (or the project you’re doing).
21. Your Needle Plate Is Damaged
You want a smooth, clean surface for your needle to slide as it goes up and down through the hole in the needle plate. If it’s been scratched or damaged, that burr will cut your thread.
Solution: If you suspect this is your problem, you’ll need to check your needle plate for burrs.
If you find a rough spot, it’s time to buy a new needle plate for your machine.
22. Your Needle Hits The Needle Plate
If the needle is loose, installed incorrectly, or bent, it may hit the needle plate. This could further damage (or break) your needle and cause thread breaks.
Solution: Remove the needle from your machine and carefully inspect it. Was it backward? Is it bent? Is the needle plate damaged?
Determine whether you can reinsert it or if you need to use a new needle and proceed.
23. Your Needle Touches The Presser Foot
If your thread keeps breaking after checking all these other areas, check to see if your needle touches or hits the presser foot as it passes through. This can happen if your presser foot is too high or you need to reposition it.
Solution: Adjust the height of your presser foot so that it rests on the needle plate when you lower the lever (consult your machine’s manual if you aren’t sure how to adjust it). Check both your needle and presser foot for damage. You’ll probably need to replace your needle.
Is your sewing machine acting up? I created the ultimate troubleshooting guide to help you out and compiled a detailed list of solutions to common sewing machine problems. Many of these problems can be solved with some basic troubleshooting or maintenance. Is your thread getting tangled or breaking? I’ll walk you through the steps to fix it. Are you struggling with tension settings, broken needles, or jammed threads? I have tips for that too. Don’t let sewing mishaps get in the way of your creative flow. Check my guide and show your sewing machine who is the boss – Troubleshooting Common Sewing Machine Problems (+ Solutions)
Thread Keeps Breaking FAQs
I receive a lot of questions from readers. Here are a few that pertain to the topic of “why does my thread keep breaking?”
Why Does My Metallic Thread Keep Breaking?
Metallic thread is synthetic and stiffer than other thread types, so there’s less “give” to it. Many lower quality metallic threads have thread twisting. And twisting metallic thread increases the tension on the thread, making it break.
One of the trickiest issues I often encounter is when the metallic thread wraps around the spool pin, leading to broken threads in my projects.
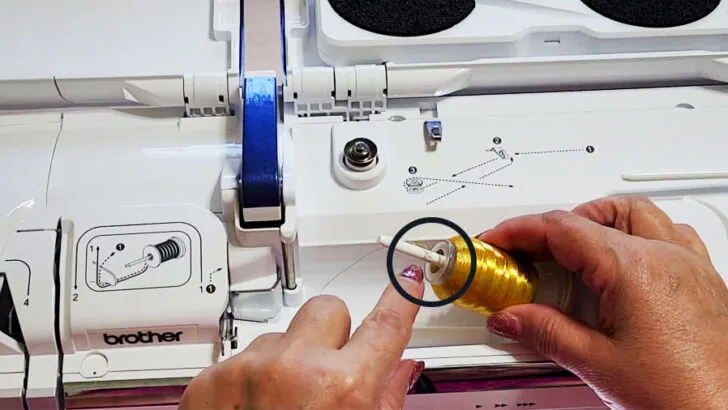
Solution: First, use high-quality metallic thread. It is sturdier than the cheap versions. Next, reduce the tension on your metallic thread to 1.0.
Then, another way to prevent breaking metallic thread is to set up your thread spool horizontally instead of vertically.
✅ Related tutorial: Metallic Thread For Embroidery And Sewing: Top 10 Tips You Must Know
Why Does My Thread Keep Breaking When Sewing Fleece?
Fleece is a much thicker material than many fabrics, and it stretches. Both qualities will require adjustments in needle size, type of thread, tension setting, and type of stitch, or your sewing machine thread will break.
Solution: When working with fleece, ensure that you’re using the correct needle and thread for the material (a size 90/14 universal needle with thicker polyester thread (size 40 or even 30) should work). Adjust your tension, use a special stretch stitch, and avoid pulling on the fabric as you sew.
Why Does My Needle Thread Keep Breaking In Thick Material?
When you change the thickness of your fabric, you’ll need to adjust several things on your machine. If your thread keeps breaking, your thread could be too thin, your thread could be old or damaged, or your tension could be too high.
Solution: When working with thick material, you may need to use a thicker needle, choose thread appropriate for the fabric, and reduce your tension setting.
Why Does My Upper Thread Keep Breaking When Using Stretch Thread?
There could be several reasons why your elastic thread keeps breaking while you sew. Check to make sure your needle is the correct size and installed correctly, your tension is set to the proper setting, and your spool of thread is installed (and threaded) perfectly.
Why Does My Thread Keep Breaking When Free-motion Quilting?
Suppose you experience a lot of thread breakage during free-motion quilting. In that case, there are several possible reasons why: your thread is old or brittle, your tension is set too high, your presser foot is too high, your needle is piercing your thread, or you have lint in your bobbin case.
The problem of having your thread breaking repeatedly can be tricky to troubleshoot since there are so many reasons it happens. And to make it even more challenging, many causes are not noticeable just by looking at the machine.
I hope these common problems help you diagnose why your sewing machine thread keeps breaking and enables you to get back to doing what you love faster.
Useful Info – Sewing Machine Troubleshooting
Owning a sewing machine means eventually, you’ll need to learn the ins and outs of troubleshooting it. Some issues may be avoidable, but certain complications are just part of the sewing machine experience. My downloadable PDF eBook guides you through the process of diagnosing and fixing your sewing machine’s problems. It’s a valuable resource for both mechanical and computerized machine models, providing you with the know-how to tackle issues on your own before considering the purchase of a new machine or seeking professional repair services.
Did you find this tutorial helpful? If so, save this pin (see below) on your sewing board so you can come to this tutorial later when you need this information on why your sewing machine thread keeps breaking, and follow me on Pinterest for more tips, tutorials, and inspiration!

latest posts
- Knot a Problem: Easy Ways to Secure Short Thread Ends
- Ever Tried This on Your Serger? This Differential Feed Feature Will Amaze You
- Ditch My Sewing Machine? Not in This Lifetime!
- Adorable DIY Needle Book | Easy Tutorial for Beginners
- Master the Seam Ripper: Your Ultimate Guide to Precision Stitch Removal
- Think You Know Zippers? This Installation Guide Might Surprise You
- Why Does Your Seam Ripper Have a Red Ball? Discover Its Purpose!
- Topstitching Troubles? This Simple Trick Will Turn It Around Instantly!
- How to Sew Shirring: A Step-by-Step Guide to Elastic Thread Gathering


