How to make a robe without a pattern from silk fabric / a video sewing tutorial
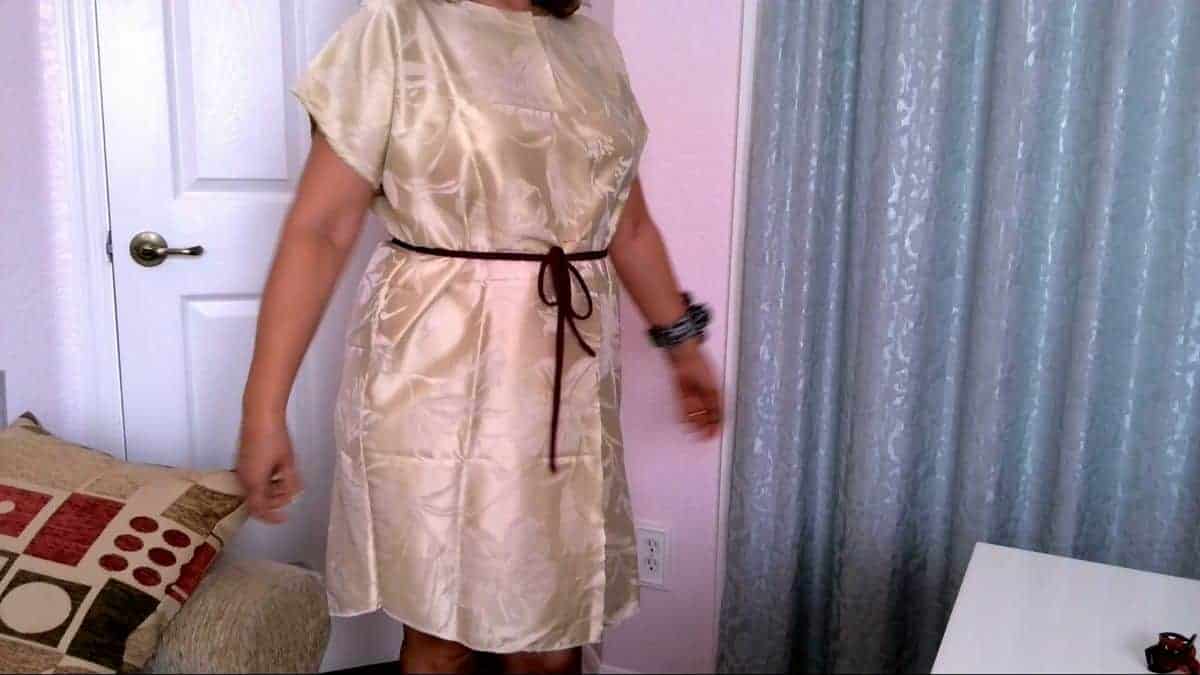
In this sewing tutorial, I am going to show you step-by-step how to make a silk robe DIY. You don’t need a silk robe pattern – I will show you how to sew the robe without a pattern. It has a very simple straight silhouette – no sleeves, no darts, and invisible zipper closure in the front.
By the way, have you ever seen an invisible zipper that is separating? Well, if you didn’t, you will see one now, that’s the kind of zippers I used for this project. I added some rose embroidery at the front for embellishment, but of course, it’s completely optional.
Why do I want to sew a robe from silk fabric? Because it is such a comfortable, breathable, luxurious fabric that it’s been considered the “Queen of textiles” for a few thousand years. Silk fabric is extremely soft and pleasant to touch. It doesn’t irritate even sensitive skin and you feel like you are hardly wearing anything at all. It is free of any chemicals and contains only natural substances.
If you would like to know more about the benefits of silk fabric check out my article“Great benefits of pure silk fabric”. I will never make a robe from synthetic fibers!

Note: Some of the links on this page are affiliate links. This means I will receive a commission if you order a product through one of my links. I only recommend products I believe in and use myself.
What you may need
Silk fabric
Fusible interfacing – it’s always recommended to use interfacing (fusible is easier) for sewing facings
Serger (for finishing raw fabric edges) – optional, OR
Overcasting feet for your home sewing machine – for finishing raw fabric edges – optional
Fabric scissors
Sewing machine, threads, needles, pins
If you prefer to watch the tutorial GO TO MY YOUTUBE CHANNEL TO SEE THE VIDEO

Step 1
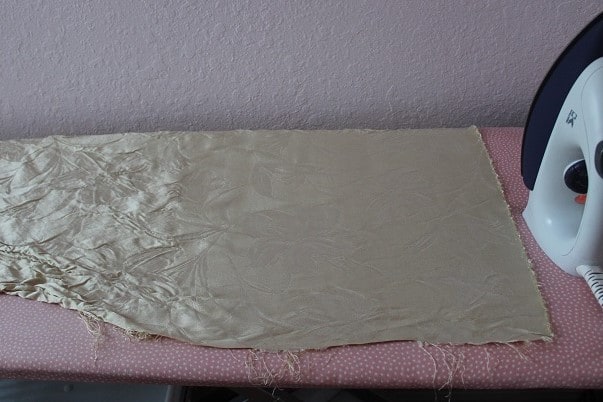
Prewash your fabric before cutting and iron it
We have to prewash the silk fabric if we want to be able to wash the robe at home. Check out my article “Some secrets of silk fabric care: preparing silk fabric for sewing; washing and ironing silk garments and bedding” if you are not sure how to do it.
Pre-wash your silk fabric in warm water and let it air-dry.
Before pre-washing it is better to serge (to finish) 2 raw edges (the other two are selvages, they don’t unravel) because the silk fabric is fraying a lot and if you pre-wash in the washing machine without finishing the edges first you will lose quite a lot of fabric in both ends. But I didn’t do it unfortunately, I thought about it already after I did the pre-wash.
So I pre-washed it in warm water (so it will not shrink later) and let it dry outside (not in the dryer). After that, I ironed it with a steam iron.
Step 2
Take your measurements
For this robe, you will need to take only 2 measurements: hips and desired full length of the robe. Write them down on a piece of paper.
Use a measuring tape with metric and imperial systems both. I give my numbers in metric but if you use this kind of measuring tape you can easily convert cm to inches.
It’s not very important in this case to take very precise measurements because we are going to make a loose-fitting garment. So 1 cm off will be no problem.
Step 3
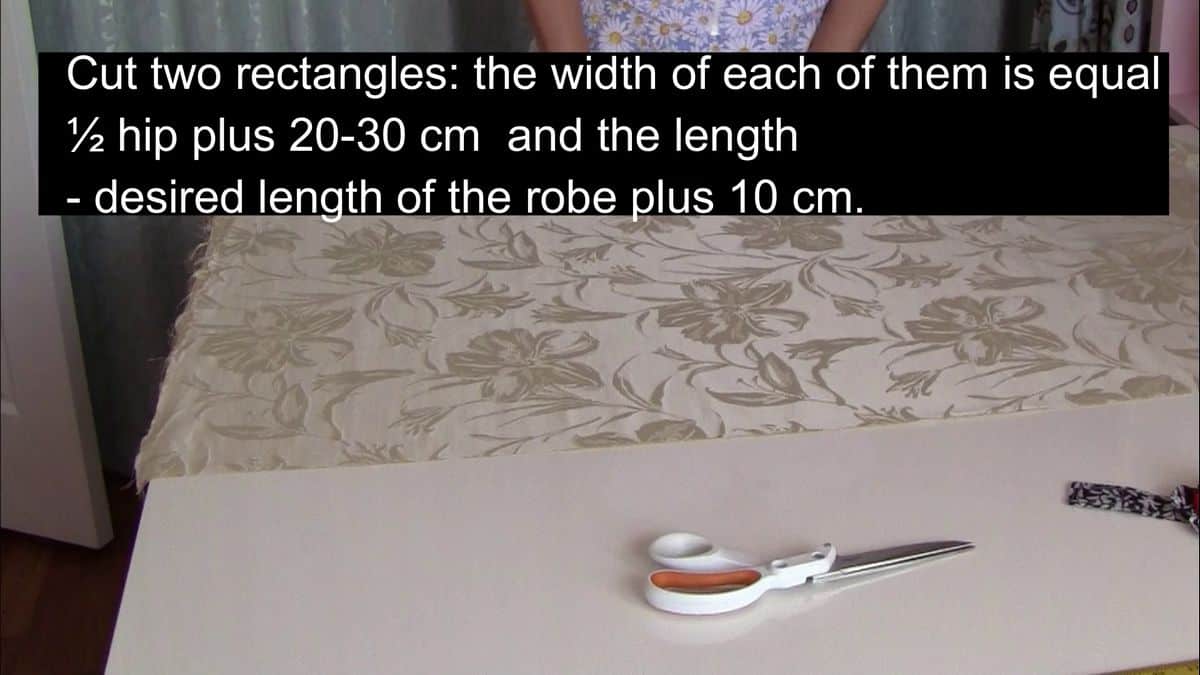
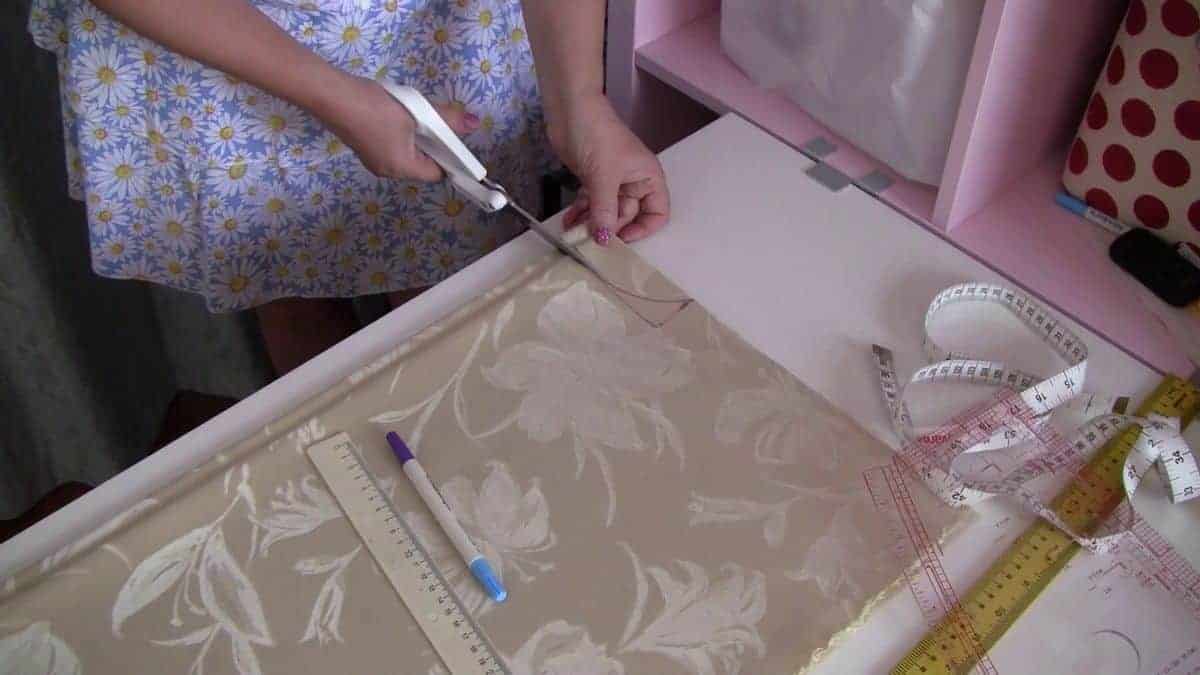
Cut 2 rectangles from your fabric
The width of each shouldn’t be less than your ½ hip measurement plus 20 cm and the length is desired full length of the robe plus 10 cm for seams and hems.
For my robe, I used 100% silk fabric that was left after I made 2 silk pillowcases (you can find a tutorial here). The width of my piece of fabric was 150 cm (60 in) and the length was about 122 cm (48 in). Your length will be different.
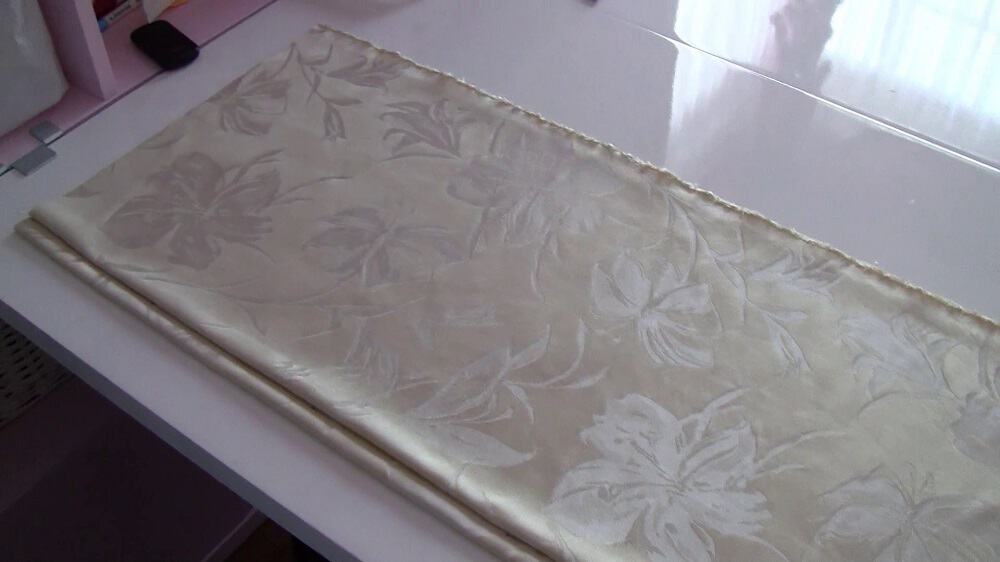
I fold this piece of fabric lengthwise and cut it in the middle lengthwise.
So I now have two rectangular pieces of fabric. The length of each of them equals the full length of the robe plus 10 cm for seams and the hem. The width of these rectangles is 75 cm – half the width of the fabric in this case.
If your ½ hip measurement plus 20 cm is bigger than 75 cm (half of the width of the fabric) then you will need to cut the fabric differently. The main thing is this – you have to cut two rectangles: the width of each of them – ½ hip plus 20-30 cm and the length – desired length of the robe plus 10 cm.
Fold both rectangles lengthwise along the grainline in the middle so the edges match.
Step 4
Place the folded pieces of fabric one on top of the other
Now we need to place the folded pieces of fabric one on top of the other. But place the fabric not to fold to fold. Measure 1.5 cm and put the top one along this line. The bottom piece will be the front of the robe and the top will be the back of the robe. Don’t forget, if your fabric has a print going in one direction or some kind of nap you have to check if you folded the pieces of fabric in the proper direction.
So that’s how you have to put the fabric.
Step 5
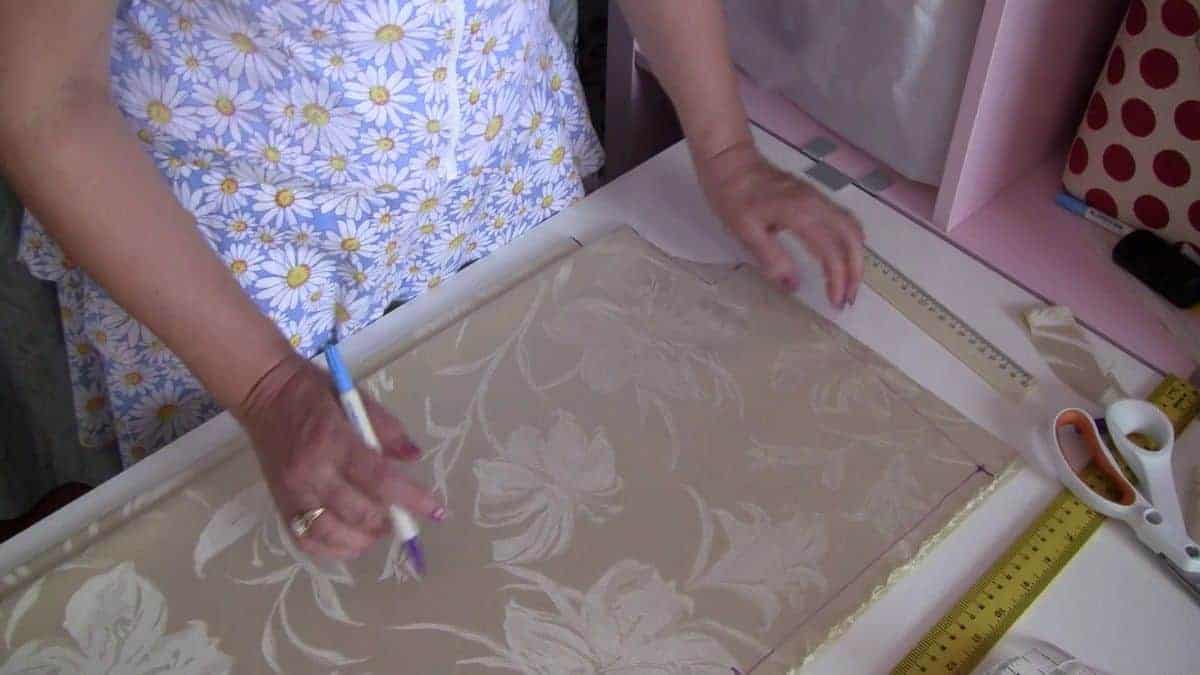
Let’s make a neckline
From the upper left point measure 8 -10 cm to the right for the neckline and make a mark. Mark 4 cm down. These marks will help us draw the neckline. Connect these points with a curved line. I am using this French curve ruler but if you don’t have it no problem, just draw the curve free hand.
This is our neckline. Have in mind that the line going to the center front has to be exactly perpendicular to the center front line.
Cut the neckline on both pieces of fabric. I am aware that not all necks are the same though. This cutting was done for an average neck. If you have a thicker neck you may need to cut more. This you can adjust when you will try on the robe.
But in the front, the neckline has to be deeper. You remember that the bottom piece of the fabric is for the front bodice. So measure 4 cm down the fold line on the bottom piece of the fabric, draw a curve joining two marks, and cut again for the front neckline.
Step 6
Create the shoulder and the sleeve lines
Now it is time to create the shoulder and the sleeve lines.
Measure 4 cm down from the other end of the fabric ( it is the upper right point) and draw a line. This is the shoulder line.
For the sleeve draw a line down (parallel to the grainline) and measure 23-25 cm ( 23 cm for thinner arms and 25 cm for fuller arms) down the line. Put a mark.
Step 7
Make the side seams
Let’s make the side seams line now.
On the hemline measure the ¼ hip measure plus 7-8 cm for all sizes and put a mark. As we are making a loose-fitting garment we need to incorporate quite a lot of ease in the fitting.
From this point draw a perpendicular line up and afterward draw a smooth curved line connecting these two points. These are our side seams.
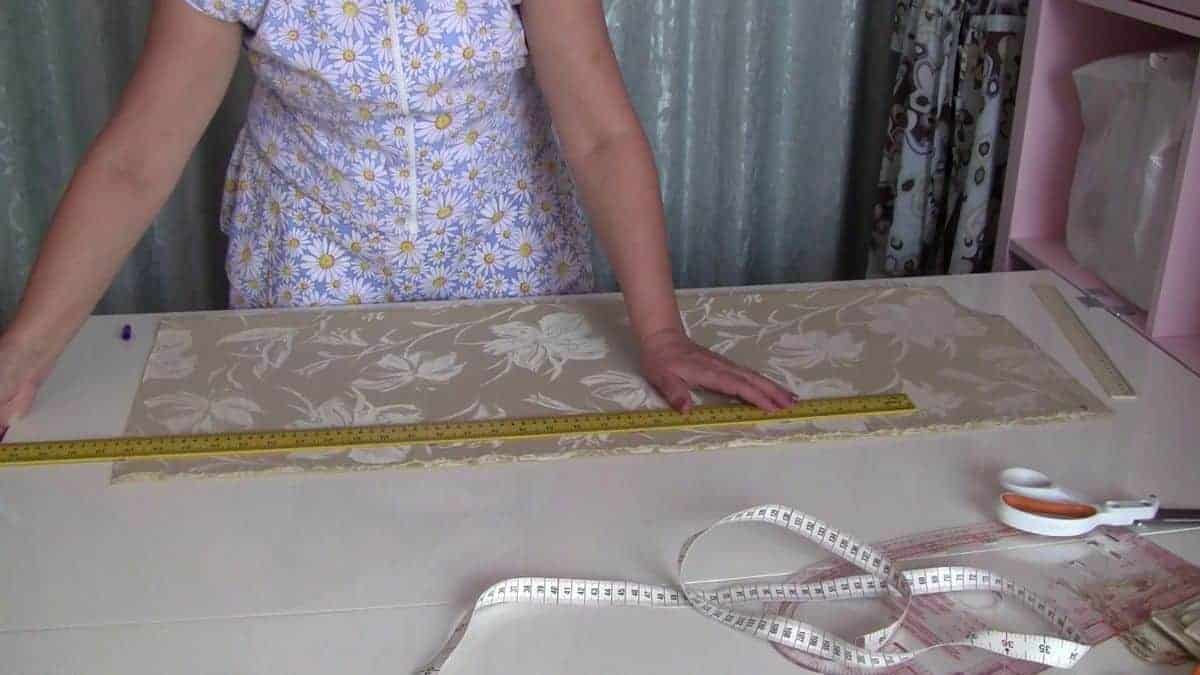
Step 8
Cut the hem
You can leave the hem straight but I decided to cut it as you see in the image below.
Step 9
Basting
After cutting is done, baste shoulder and side seams and try them on. If everything seems ok, and you don’t need to cut the neckline bigger, you can start sewing it.
Step 10
Sewing the robe
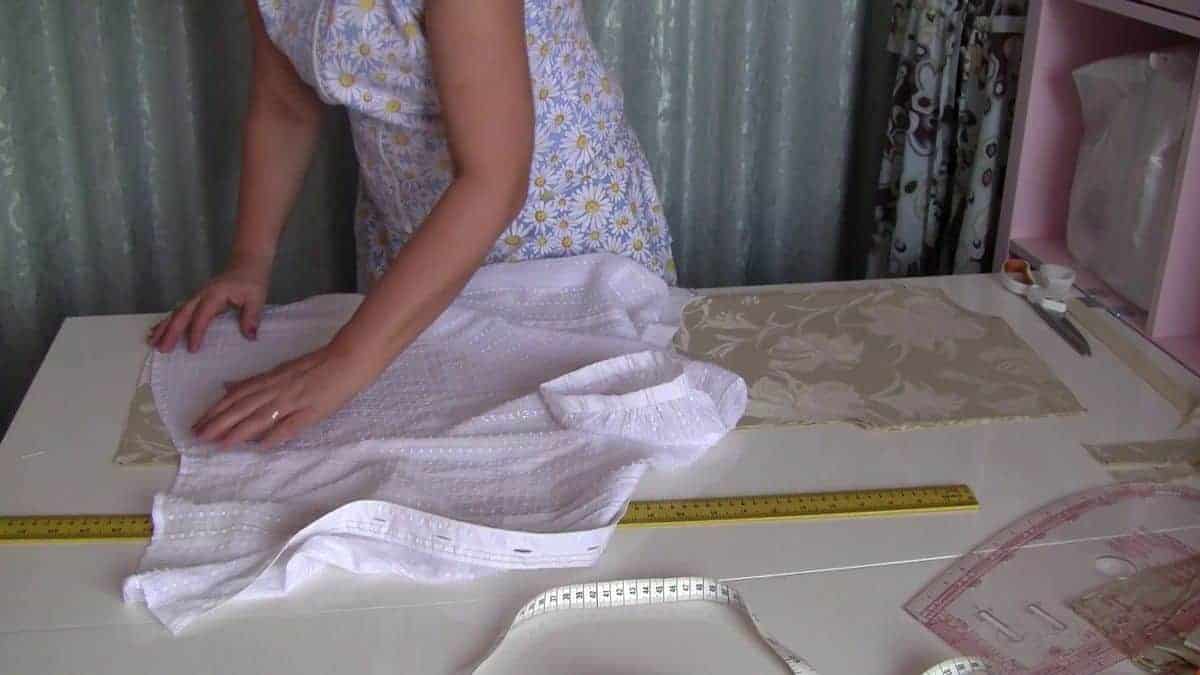
The first thing I like to do is to finish all raw edges. I use a serger for this, but you can also use the overlock stitches of your sewing machine ( zigzag, if none other is available ). I have a tutorial on overcasting stitches and overcasting presser feet – check it out here. My serger is a Janome serger which is a real workhorse and has not yet failed me.
The next thing is facing the neckline.
I have a separate YouTube video on making a shaped facing. Click on the image below to watch it.
Or you can read all about shaped facings here.

Now let’s sew a zipper.
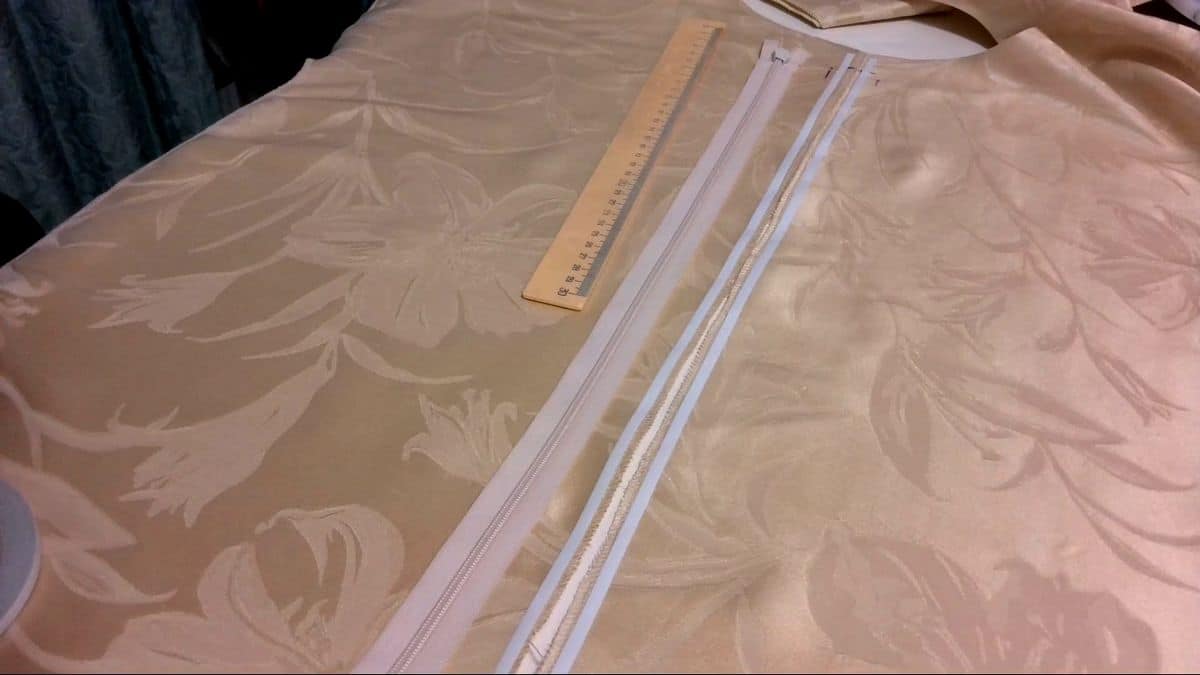
Of course, it can be any closure you want, but I decided to put in a separating zipper, and most of them are too big for the delicate silk fabric so I found an invisible zipper that is separating. A very useful notion.
Let’s mark 1.5 cm from the fabric edges – here will be our stitching line for the zipper. I make a mark also 3 cm from the neck edge – where the zipper teeth will start.
I like to use double-sided adhesive tape that secures the zipper during stitching. If you sew the zipper this way, you don’t need to pin or baste the zipper before stitching. The brand of tape I use is Wonder Tape but I have seen it under other names also ( Peel’n Stick, for example ). I have only used Wonder tape which can be sewn through and does not gum up my needle; I have not tested the others.
So, place the wonder tape on the seam allowances like this.
I have a separate YouTube video with step-by-step instructions on how to sew zippers using Wonder tape. So, check this tutorial below.
Place the zipper tape on it. Align the zipper teeth with the center front line which is our stitching line. The zipper is open and is placed so the slider stop is about 1 ½ inch from the neckline. Align the zipper tape nicely onto the area where you will make the invisible zipper stitches.
I press the zipper tape with my fingers to make it stick to the tape. No basting stitch is necessary once this is done.
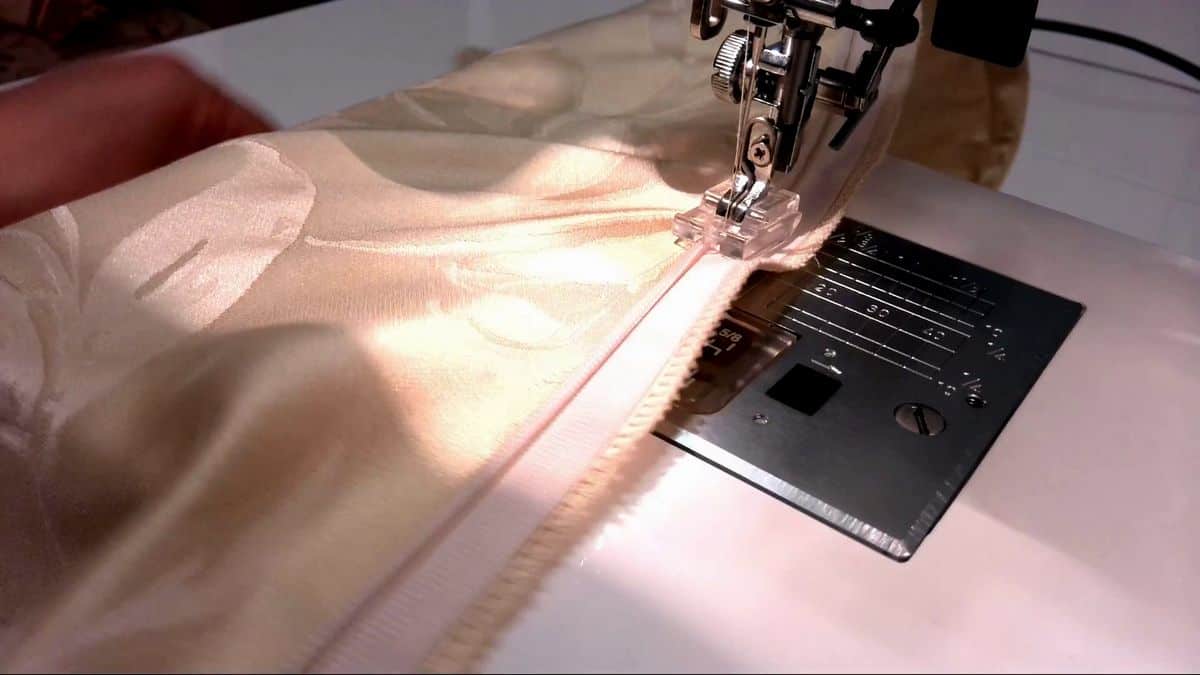
It’s more convenient to sew an invisible zipper with a special presser foot. You can use a regular zipper foot that comes with your sewing machine, but there are special presser feet for invisible zippers which you can buy separately. I prefer to use them – it’s really much faster and easier. What does a zipper foot look like?
The foot has a special channel that moves the zipper teeth out of the needle’s way and allows the stitch to be placed close to the zipper teeth easily. It will keep the distance between the stitch and the zipper teeth constant. The invisible zipper foot gives you more control to stitch very close to the zipper teeth, and the stitching line turns out to be equal and accurate. Here is a short video on these feet:

The design of the foot also prevents stitching over the teeth by mistake, which is an added bonus.
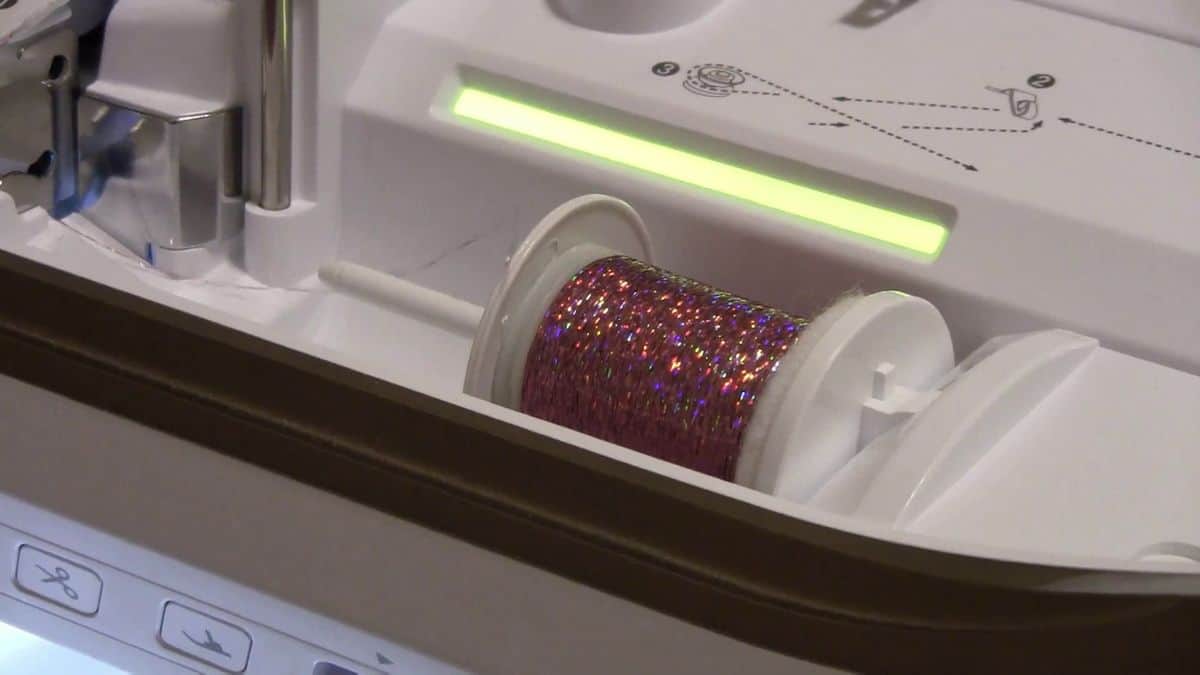
I decided to embellish my silk robe with rose embroidery. I am really addicted to my embroidery machine. I love everything shiny and sparkling so I used only metallic threads for this embroidery design.
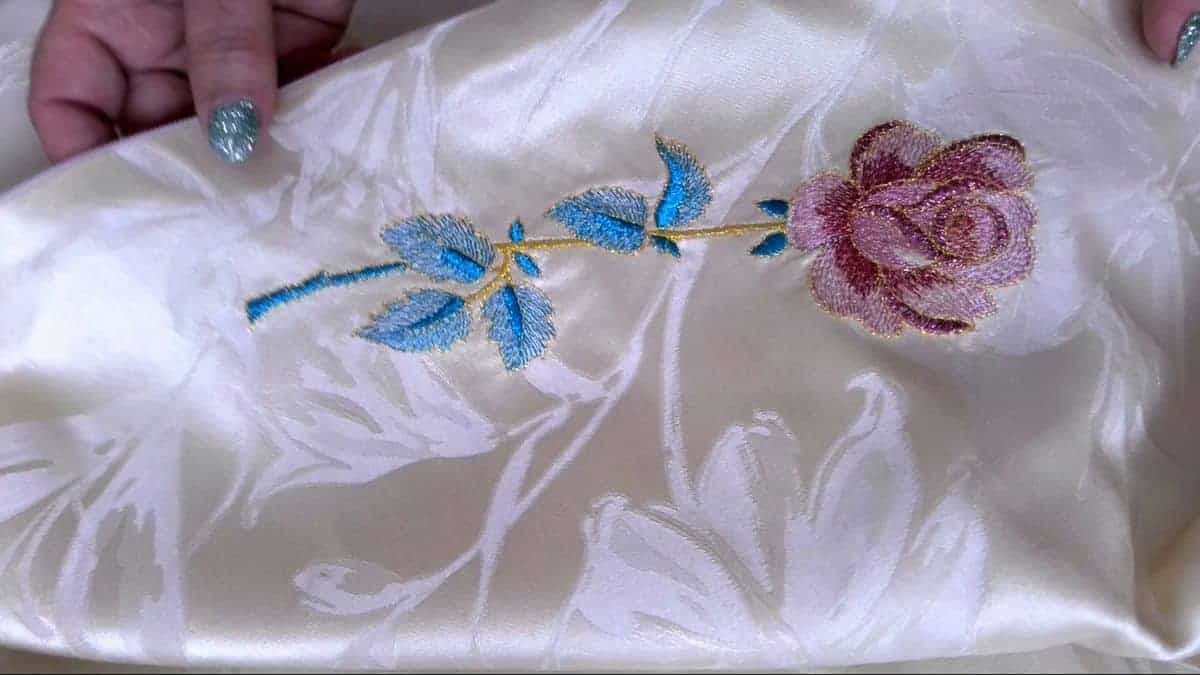
I want to show you some interesting thread I found recently – it’s called holographic – thin, flat, ribbon-like thread that is metalized with an aluminum holographic layer to give it a shimmery reflectiveness. It’s washable also.
Here is the link to an online store where you can buy good-quality holographic threads.
Now let me show you some interesting scissors. They are called The Duckling – Duckbill Applique scissors.
They are absolutely essential if you like sewing and embroidery. You can trim around edges without worrying you will cut the fabric or the thread. Look, you can cut very close to the stitches. They are great for applique also. I can’t live without them now.

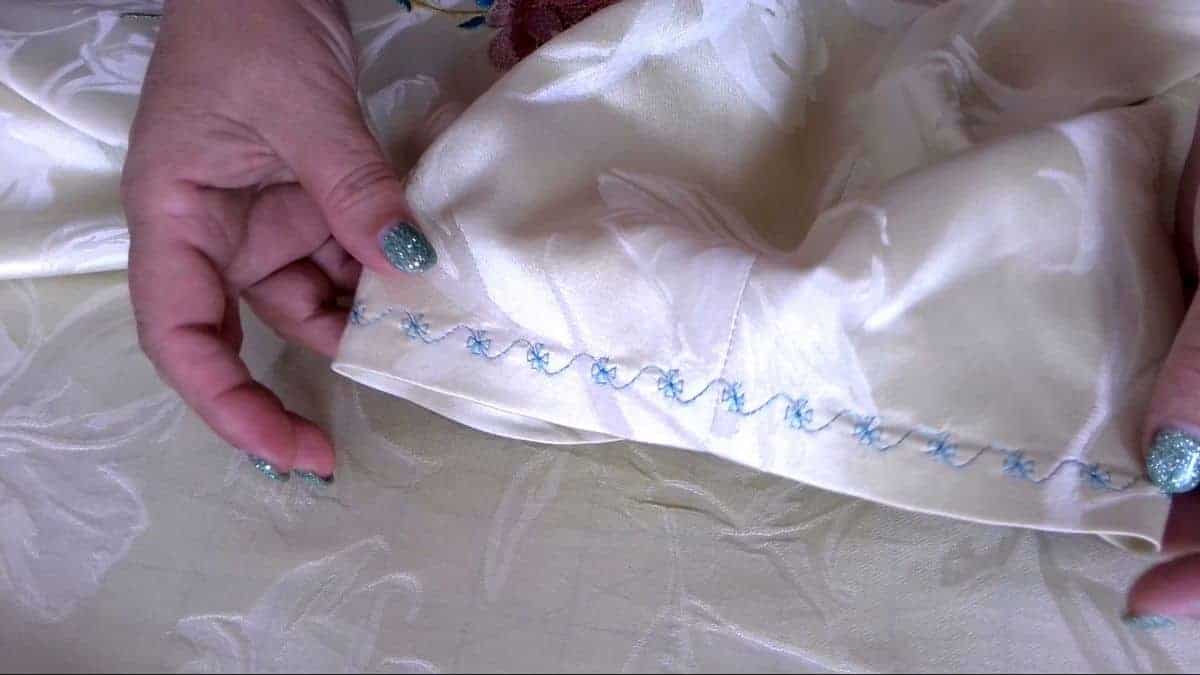
Now I am going to finish my sleeves. It’s not really a sleeve – just something around an arm, right? I used my Wonder tape again for basting. I also used decorative stitches from my sewing machine and metallic thread.
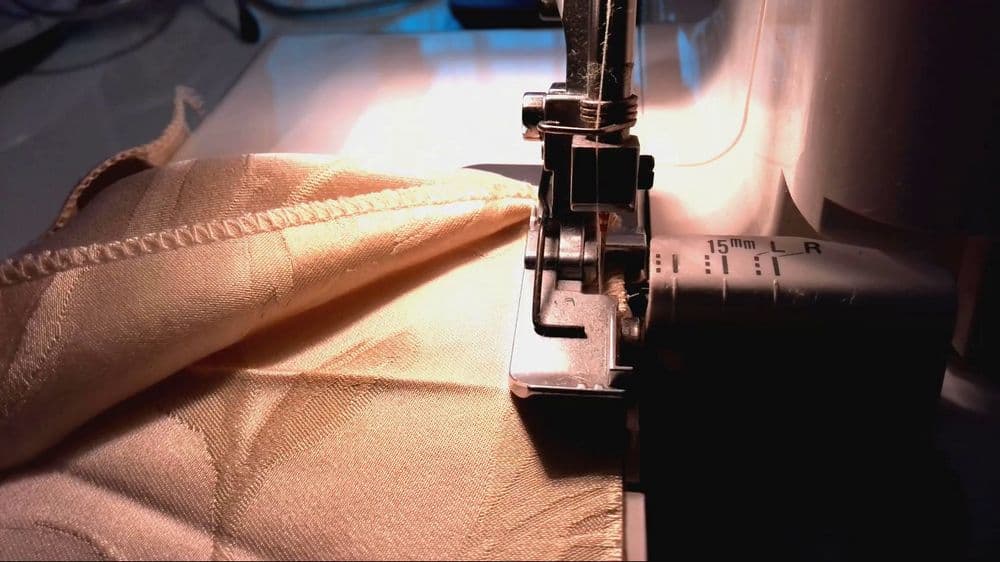
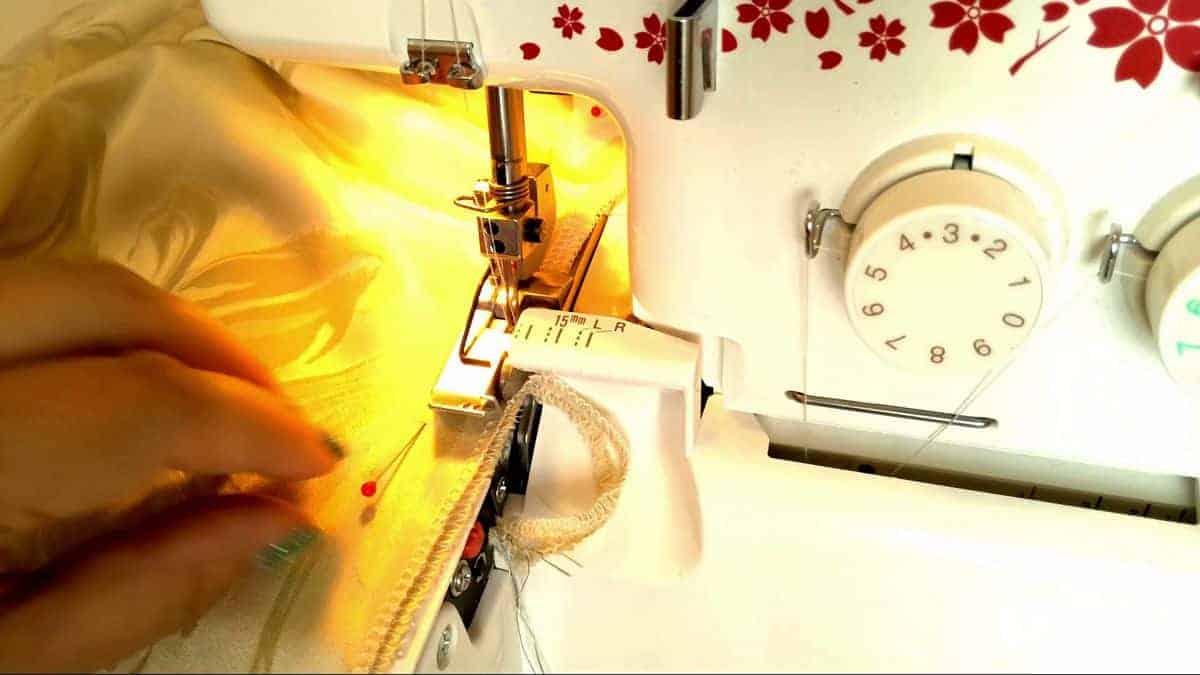
Now I am going to stitch the side seams of the robe on my serger. For this, I am going to use 2 needles 4 threads serger stitch. It is a very good stitch for the silk robe because the serger stitches the seams and finishes them at the same time. It is much faster and easier.
By the way, don’t forget to press all stitches after you are done with them.
The next step is finishing the hem. No image here, sorry. I forgot to film it.
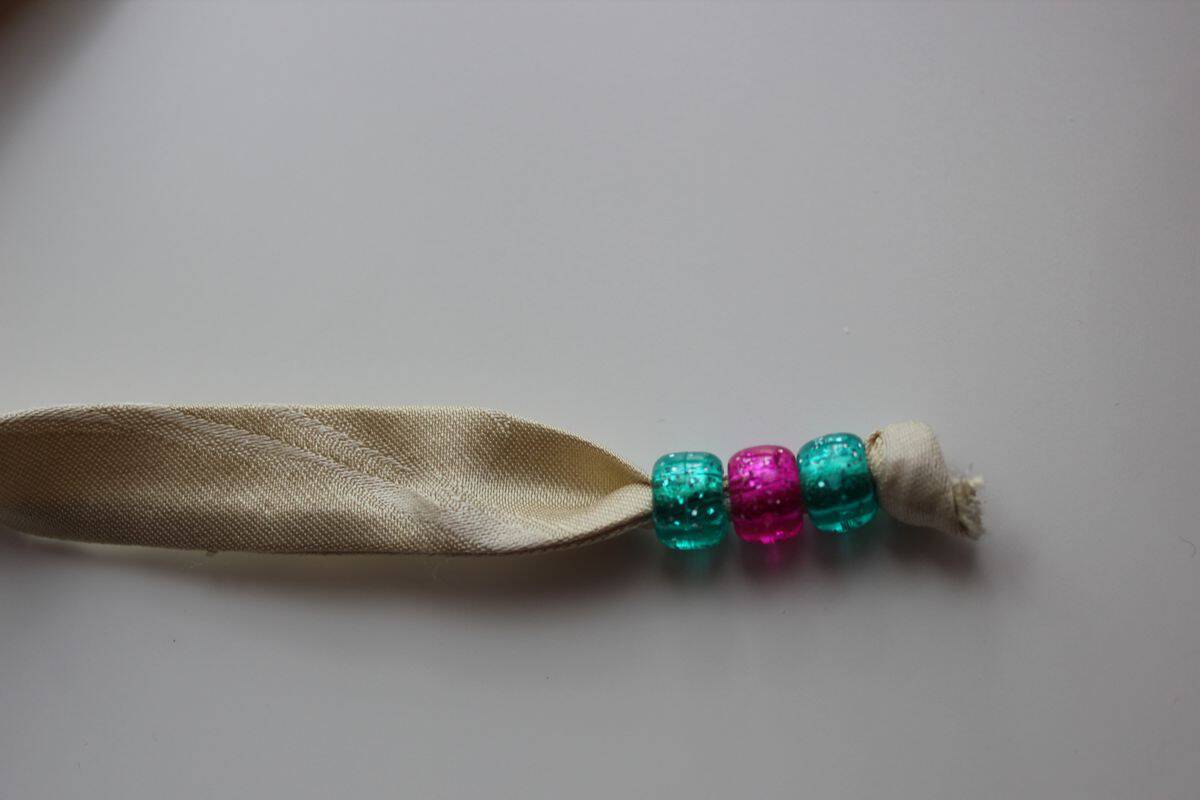
And the last step – let’s make a belt.
I stitched the belt using my serger. I use a safety pin for turning the belt inside out usually.
Baste the belt nicely and press.
I am finishing the belt’s edges with beads. I think it looks pretty, right?
Did you find this tutorial helpful? If so, save this pin (see below) on your sewing board so you can come to this tutorial later when you are ready to make a silk robe, and follow me on Pinterest for more tips, tutorials, and inspiration!

latest posts
- Types Of Sewing Machine Feet And Their Uses
- The Interfacing Cutting Guide: Methods, Folds, and Seam Lines
- Steam or Dry Heat for Fusible Interfacing: Which Actually Works
- Essential Sewing Tips: How to Apply Fusible Interfacing Correctly
- Types of Interfacing Explained: Woven, Non-Woven, Knit, Fusible, and Sew-In
- Fabric Eggs DIY: Quick Easter Craft Decorations From Scraps
- Stuffed Bunny Sewing Pattern And Tutorial (Free Download)
- Sewing Machine Basics: Simple Maintenance Tips Every Sewist Should Know
- Interfacing vs Stabilizer: Is There Really a Difference?