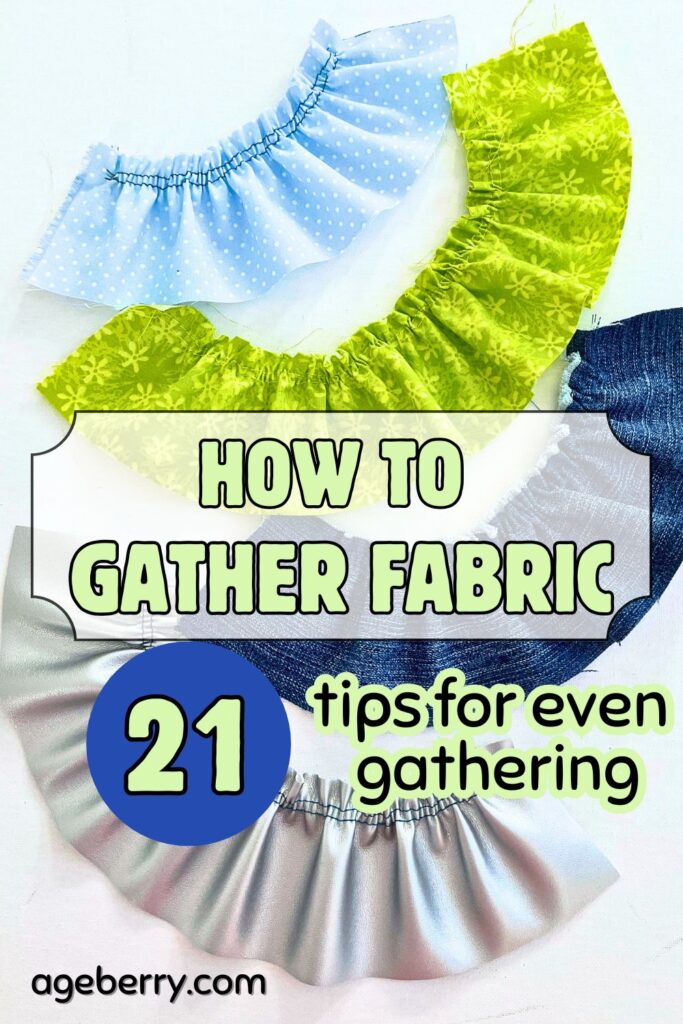
How to Gather Fabric: 21 Tips for Even, Beautiful Gathers
Gathering looks simple — until your thread snaps, your folds bunch unevenly, or your “soft ruffles” turn into fabric chaos. But gathering isn’t complicated once you understand what’s happening between your fabric, thread, and stitch. A few smart adjustments can turn frustration into smooth, even folds that look soft and effortless every time.
In this guide, you’ll find 21 tips and methods that cover everything from choosing the right fabric and thread to using your serger or elastic for quick, reliable gathers. You’ll also see creative ideas that show how versatile this technique really is — from delicate ribbon roses to full tiered skirts.
A printable version of this article is available for a small fee in my shop here How to Gather Fabric – 21 Tips for Even, Beautiful Gathers. You can read the article ad free, you can also download it to your device to read it offline and you may also print relevant parts of the article if you so desire.
Note: Some of the links on this page are affiliate links. This means I will receive a commission if you order a product through one of my links. I only recommend products I believe in and use myself.
#1. Choose the Right Fabric for Gathering
The best fabrics for gathering are soft, lightweight, and flexible. They gather evenly and create smooth, flowing folds. Lightweight apparel cotton (like cotton lawn, voile, or batiste), many types of rayon and silk (like challis, chiffon, georgette), lightweight jersey knit, tulle, mesh, etc. are all easy to work with and give you soft gathers without extra effort.
Medium-weight fabrics like linen or poplin still work well. The gathers will look fuller and have more structure, which suits certain designs. Just know that thicker fabric means more bulk in the seams.
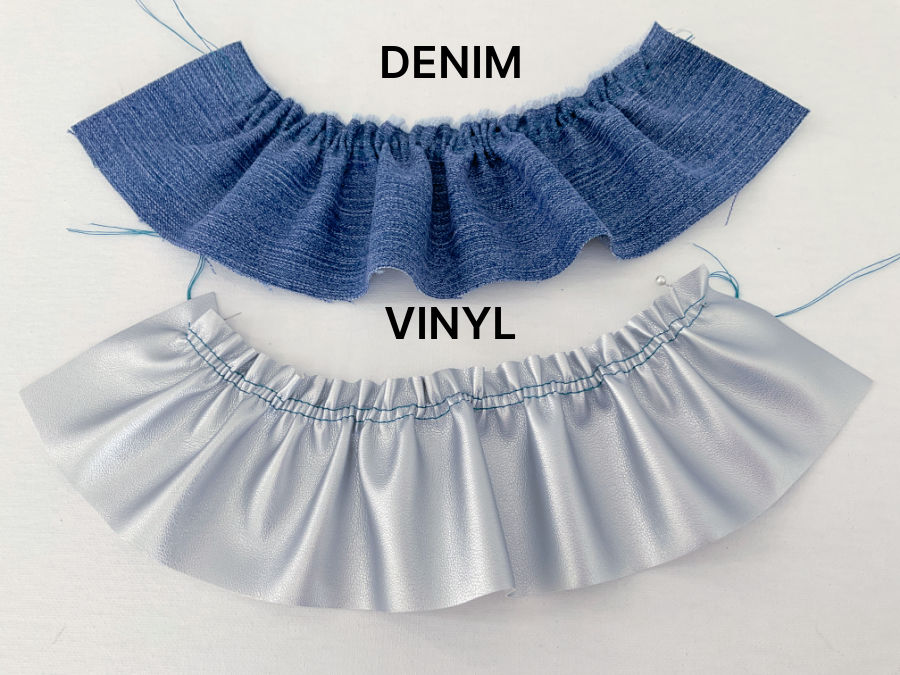
Very heavy or stiff fabrics like denim or uphostery are harder to gather cleanly. They resist soft folds and can look bulky or uneven. If your pattern calls for gentle gathers, they’re probably not the right match.
But what about fur, vinyl, or felt? These aren’t easy to gather, but it can be done with the right tools and method. The results will be more sculptural than soft. If you need gathers in these materials, expect a bit more planning and patience.
If your pattern includes gathers, always check the fabric suggestions listed. Most patterns recommend fabrics that gather well and suit the overall shape of the garment.
This helps you avoid pairing stiff fabric with a design meant for soft, flowing gathers.
Always test a small strip first. Some fabrics surprise you — in good ways and bad.
#2. Choose the Right Method for Gathering
There’s more than one way to gather fabric, and choosing the right method makes a difference. The fabric you’re using, the amount of fullness you want, and how visible the gathers will be — all of that helps determine which method works best.
Here are the most common gathering methods:
- Two rows (or three) of basting stitches
- Gathering by serger with differential feed feature
- Zigzag over cord or dental floss
- Gathering with elastic
- Gathering foot
- Ruffler attachment
- Shirring with elastic thread
- Sewing a casing
Read more about them below. Each method has its strengths. Some give you more control, some are faster, and others work better with heavy or stretchy fabrics. Choosing the wrong one won’t ruin your project, but it might make the process harder than it needs to be — or give you gathers that don’t sit quite right.
#3. Use Strong Thread
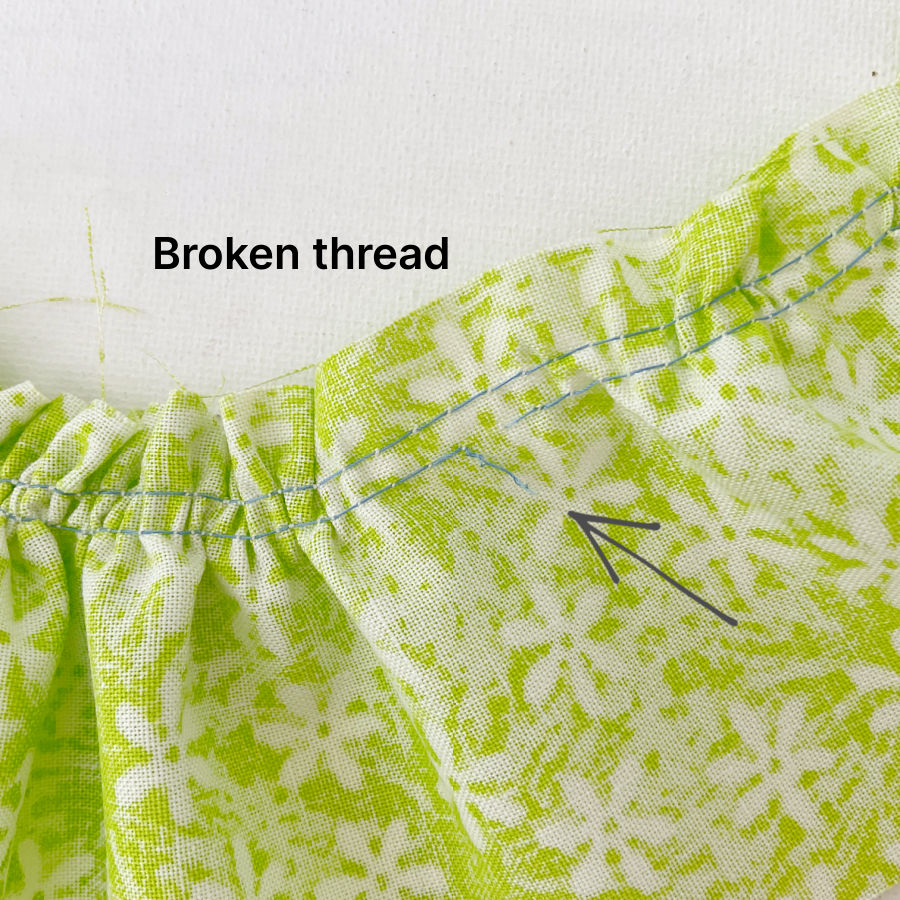
If your thread snaps mid-gather, it’s annoying and can ruin the entire section. Gathers put your thread under constant tension. Weak or worn thread will often break before the fabric even reaches your desired fullness.
That’s why strong thread matters. But strong doesn’t mean thick. For lightweight to medium fabrics, you still need a thread that glides smoothly and doesn’t strain your machine.
What to look for:
- Good-quality polyester – It’s stronger than cotton and resists breakage during gathering.
- Consistent tension – Cheap thread has uneven thickness that causes weak spots.
- Low lint – Less fluff keeps your tension smooth and stitches clean.
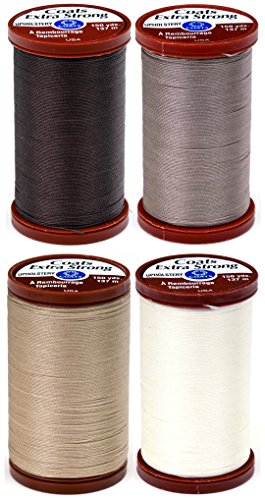
Recommended strong (but not thick) threads for gathering:
- Gütermann Sew-All Polyester Thread – Durable, smooth, and balanced. Works well on most fabrics, even light ones like voile or chiffon.
- Mettler Metrosene Polyester Thread – Strong, lint-free, and soft enough for fine fabrics.
- Aurifil 50wt Cotton – Strong for its weight, especially if you’re working on quilting cotton or voile.
- Superior Threads So Fine #50 – Designed for high-tension sewing; smooth and strong with a fine finish.
- Coats & Clark Dual Duty XP General Purpose Thread – A bit thicker than Gütermann but still usable for medium fabrics like linen or poplin.


For heavier fabrics, such as canvas or denim, move up to Gütermann Extra Strong, Gütermann Denim or Coats & Clark Upholstery Thread — just make sure your needle size matches, and test first to avoid
puckering.

#4. Gather in Sections for Long Pieces
If your fabric stretches farther than your arms can reach, gathering it in one go is asking for trouble. Long gathers put a lot of strain on the thread. The longer the stretch, the more likely the thread will snap mid-pull — especially if the fabric is heavy or the gathers are dense.
Break it up instead. Work in sections of about 18 to 20 inches. This keeps the tension manageable and lets you adjust the gathers evenly across each part before moving to the next. You’ll have more control and fewer tangled threads.
When do you need long gathers?
- Full skirts or gathered dresses
- Curtains, ruffled bed skirts, or tablecloths
- Multi-tiered garments or layered ruffles
- Anything with a gathered hem, waist, or panel longer than about 30 inches
So how long is too long?
If you can’t pin the full length to a base fabric without it falling off your table — it’s too long.
If pulling the bobbin thread takes more than one hand — it’s too long.
If you find yourself sweating just trying to keep tension — definitely too long.
Sectioning your gathers doesn’t take more time – it saves time.
#5. How Much Fabric Do You Need for Gathers?
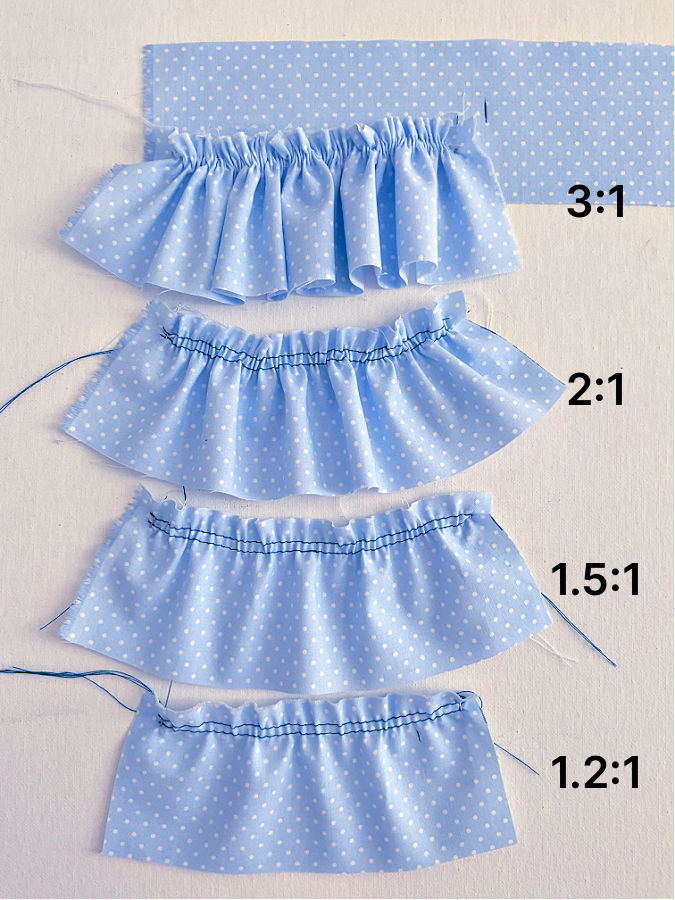
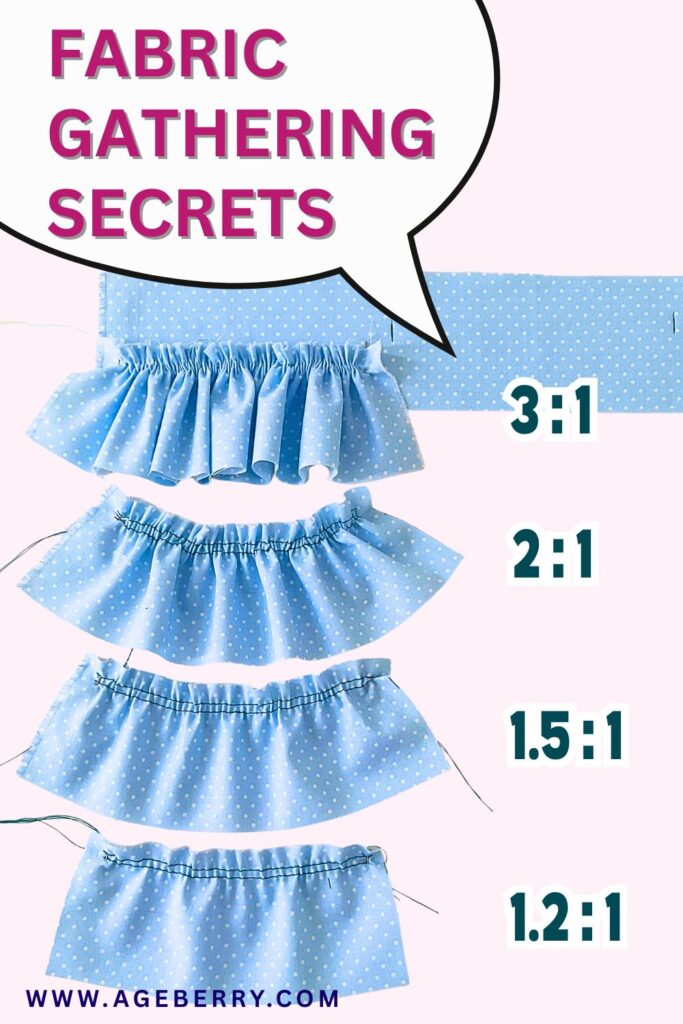
Not all gathers are created equal. The fullness of your gathered section depends entirely on how much extra fabric you start with. The more fabric you have compared to the section it’s being attached to, the fuller the gathers will be.
This is often called the gather ratio — the relationship between the gathered fabric and the base length. Even small changes in this ratio make a big difference in how your gathers look.
Gathering 1.5 times the base length gives you soft, subtle folds. Double the fabric and you’ll get a classic ruffle. Triple it, and you’ve got dramatic volume.
But what if the ratio is less than 1.5:1? That’s where things get tricky.
Gathering less than 1.5:1 creates barely-there gathers — more like easing than gathering. It can work if your fabric is very lightweight or if you just want a hint of softness at a seam. But go too low, and the gathers can look pinched or uneven, especially in stiffer fabric. You may not get the texture you expected.
Gather Ratios and How They Look:
| Gather Ratio | Description | Best Used For |
| 1.2 : 1 | Slight texture, subtle fullness | Very lightweight fabrics |
| 1.5 : 1 | Light gathers with gentle folds | Skirts with a classic drape, sleeve caps, home decor |
| 2 : 1 | Medium fullness, even ruffles | Ruffled hems, casual blouses, kids’ clothes |
| 2.5–3 : 1 | Full, bouncy gathers | Party skirts, decorative ruffles, sleeves with volume |
| 4 : 1+ | Dense, dramatic gathers or near-pleats | Tulle, petticoats, formalwear, costumes |
Before cutting your fabric, test a few ratios on scraps. You’ll see how the fabric behaves and how much fullness you actually want. Lightweight fabrics usually need less to look gathered. Stiffer ones often need more to avoid looking forced or clunky.
#6. Gathers vs. Ruffles: Are They the Same Thing?
Gathers and ruffles aren’t exactly identical, even though they both love extra fabric.
They look pretty much the same, right? Yes, and no.
A gather is a technique. It’s what happens when fabric is drawn up with stitches to create fullness. You’ll find gathers at waistlines, sleeve heads and cuffs, yokes, necklines — anywhere you need a soft shape or volume.
A ruffle is a design detail. It’s a separate strip of fabric that’s gathered and then attached to an edge — like a sleeve, hem, or neckline — to add decoration or movement.
Think of gathers as the “how,” and ruffles as the “what for.” One is a method. The other is the style that method creates. Every ruffle is gathered, but not every gather becomes a ruffle.
A few quick examples:
- Gathers: fullness at the top of a skirt
- Ruffles: a decorative gathered strip along a blouse hem
#7. Press Before You Gather
Wrinkled fabric doesn’t gather cleanly. Those creases shift your seam allowance and make it harder to control how the fabric folds.
Pressing your fabric before you gather smooths everything out. It helps the stitches go in straight and keeps the gathers even and predictable.
#8. Secure Gathers Before Stitching
Once you’ve pinned your gathered fabric to the base, it’s tempting to go straight to the final seam. But skipping the basting step may lead to trouble.
Even if you’ve pinned carefully, gathers can still shift as you sew — especially under a presser foot. The feed dogs pull unevenly, and the folds can flatten or bunch without warning. You might not notice until you turn it over… and by then, it’s stitched in.
Basting solves this. A row of long, temporary stitches helps “lock in” the gathers exactly where you placed them. It keeps everything from sliding out of alignment while you sew the final seam.
What about pins or clips? Yes, they help — especially if you place them perpendicular to the seam and close together. But they only hold the fabric outside the seam line. The gathers themselves can still shift between pins.
So think of basting as a backup plan: It keeps your gathers steady. One extra pass through the machine now saves you from ripping out uneven seams later.
Need help with basting? I have a detailed tutorial that walks you through basting by hand or machine — Basting Stitch: Why, When And How To Baste In Sewing.
#9. Finish Seams Neatly
Gathered seams have more layers, folds, and threads packed into one spot. That extra bulk can make your seams thick, messy, or prone to fraying — especially after washing.
To clean it up, trim the seam allowance if it’s too bulky, then finish the edges. A zigzag stitch, serger, or even bias binding helps seal the fabric and keeps everything looking tidy on the inside.
A neat seam isn’t just about looks. It prevents threads from unraveling over time and makes the garment more comfortable to wear — no scratchy bulk where you don’t want it.
#10. Press Again After Sewing
Once your gathers are stitched in, give the seam a final press. This helps set the stitches, smooth out any uneven folds, and shape the fabric so it lays cleanly.
Skip this step, and your seam might look slightly puffy or puckered — especially on thicker fabrics or tightly gathered sections.
Pressing isn’t just about appearances. It’s part of the construction. If you want your finished piece to look polished, pressing matters.
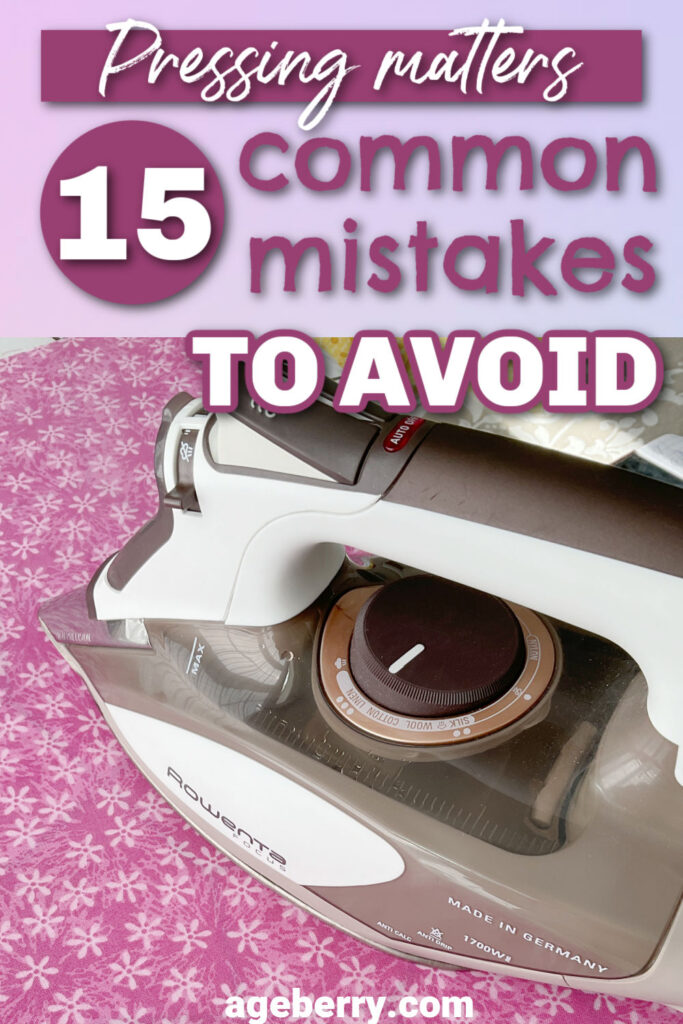
Speaking of which, I have a full article on this: Pressing Matters: 15 Common Ironing Mistakes to Avoid. It covers exactly what goes wrong when you rush the iron and how to fix it — including tips for delicate fabric, curved seams, and what never to do with steam.
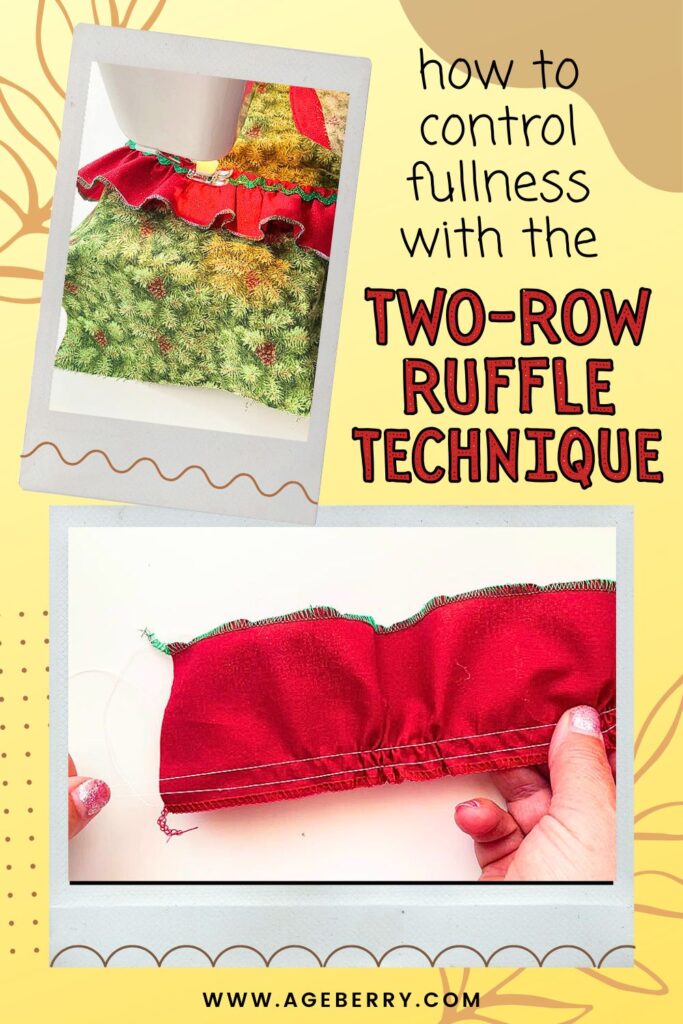
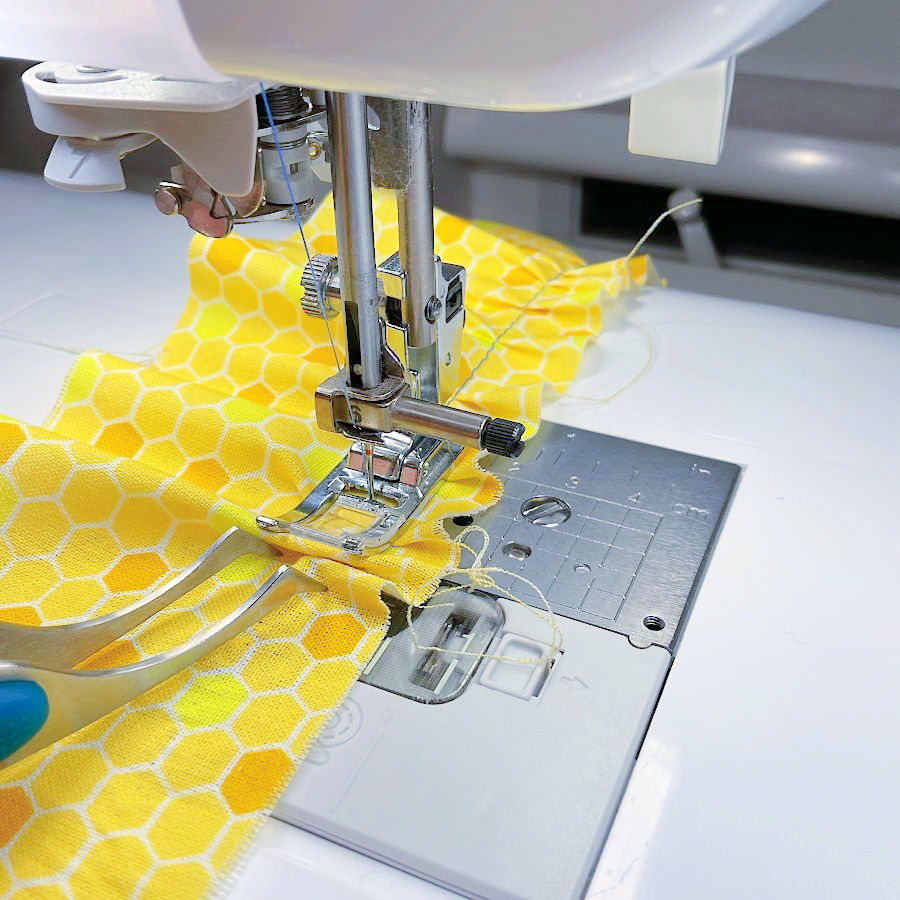
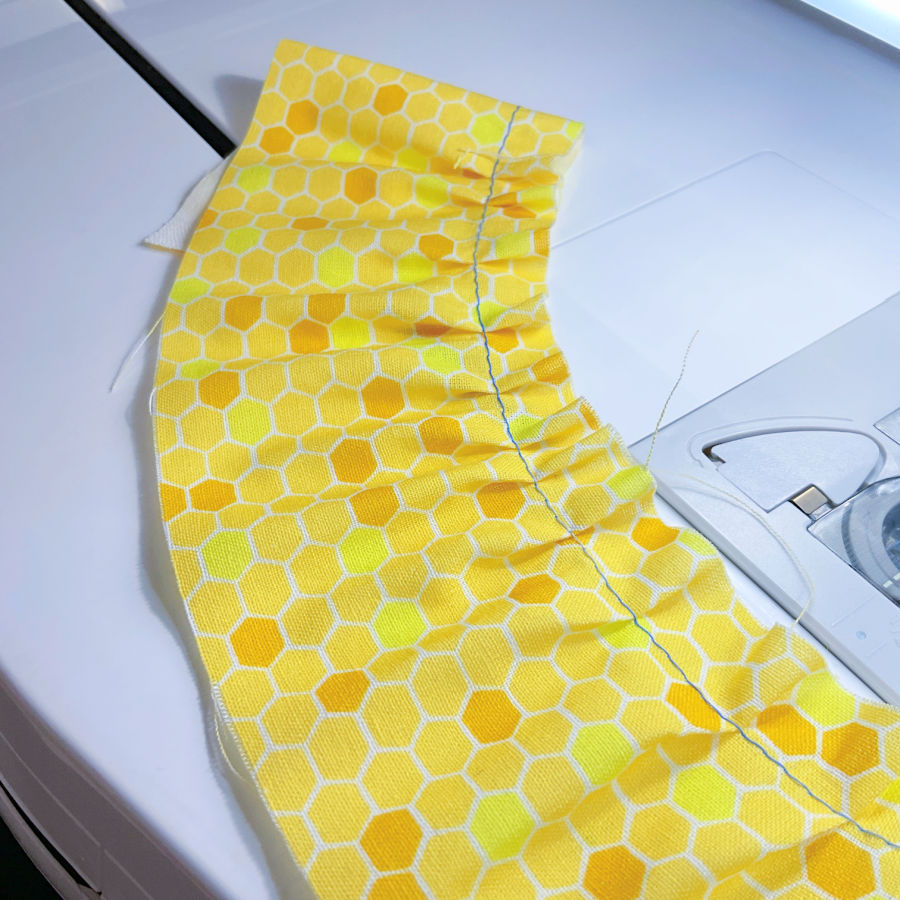
#11. Use Two (or Three) Rows of Basting Stitches
This is the most classic gathering method — and still one of the best. It’s simple, reliable, and gives you the most even gathers with the least stress.
- Two rows give smooth, controlled gathers.
- Three rows offer more precision — great for formal garments or when you want ultra-consistent folds.
Sew the rows about ⅛ inch apart, better if just inside the seam allowance. That spacing creates even tension and makes it easier to adjust the gathers without creating puckers.
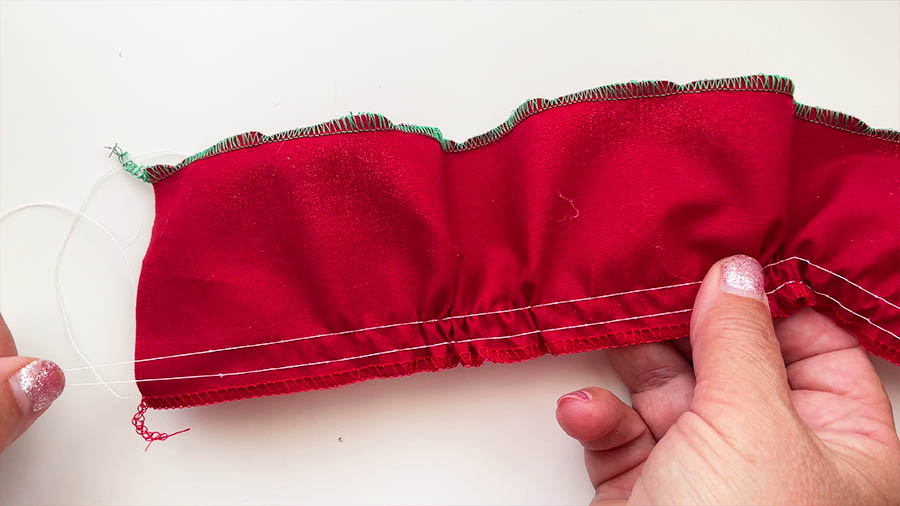
Set your machine to a long straight stitch — usually around 4–5mm. Short stitches are harder to pull and more likely to snap. Also, set your tension low or to zero so the threads slide smoothly.
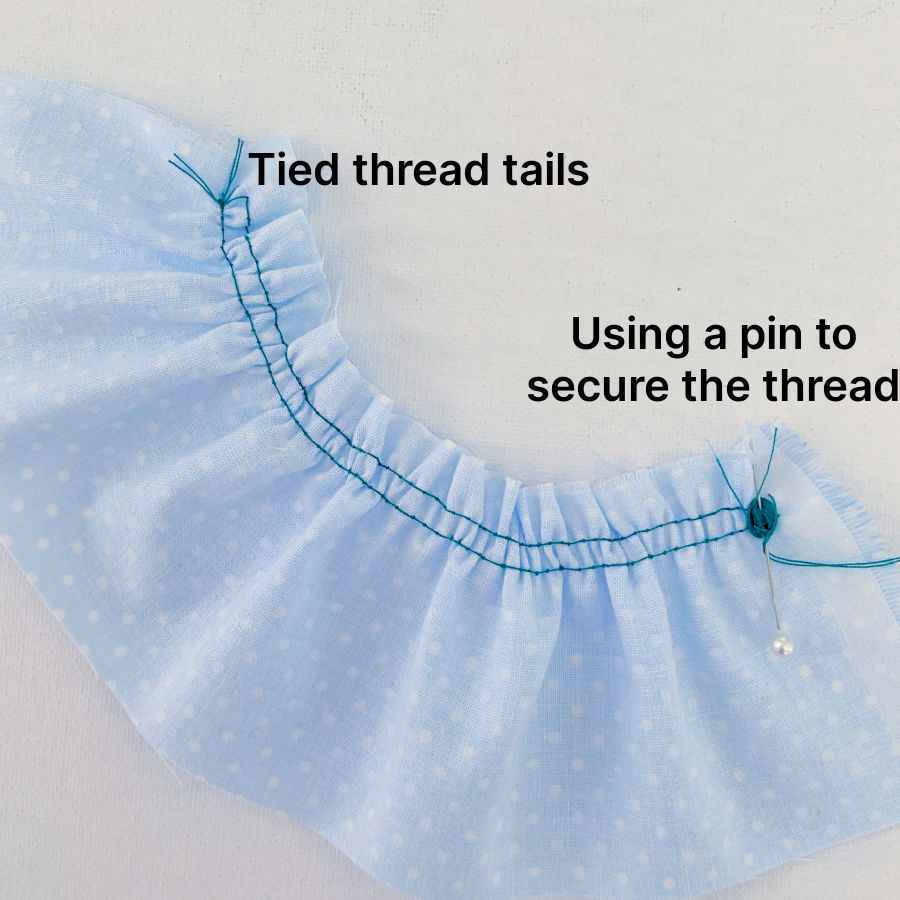
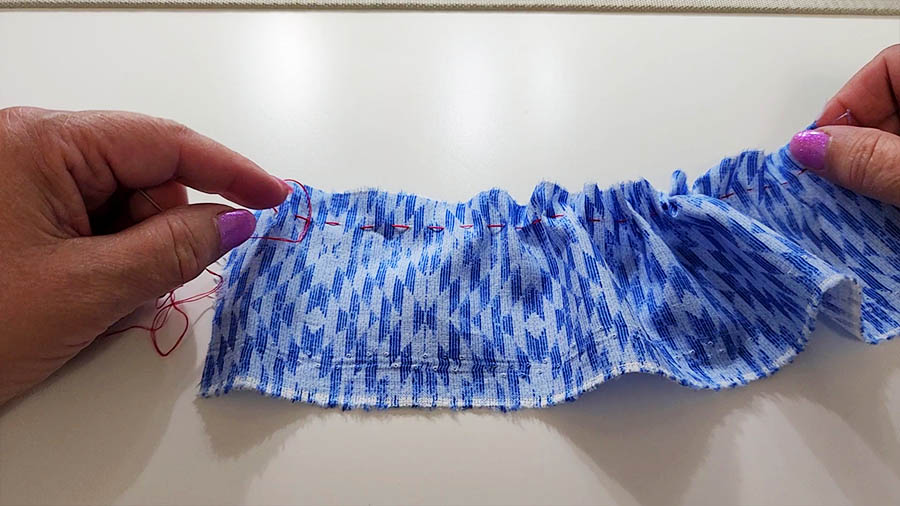
Don’t backstitch the ends. Leave long thread tails instead — you’ll need them to pull the gathers. Tie the threads together on one end to anchor them. On the other end, you can wrap the thread tails around a pin, just like in the photo. This holds the thread in place while you adjust the gathers without it slipping or pulling through accidentally.
Always pull gently from the bobbin threads only. Pulling from both sides can create knots or uneven gathers.
This method works well on most fabrics and gives you full control over the gather placement before you stitch the final seam.
Want a step-by-step demo? I have a detailed tutorial: How To Sew A Ruffle Using Traditional Two-Row Gathering Technique — perfect if you’re learning or just want a refresher.
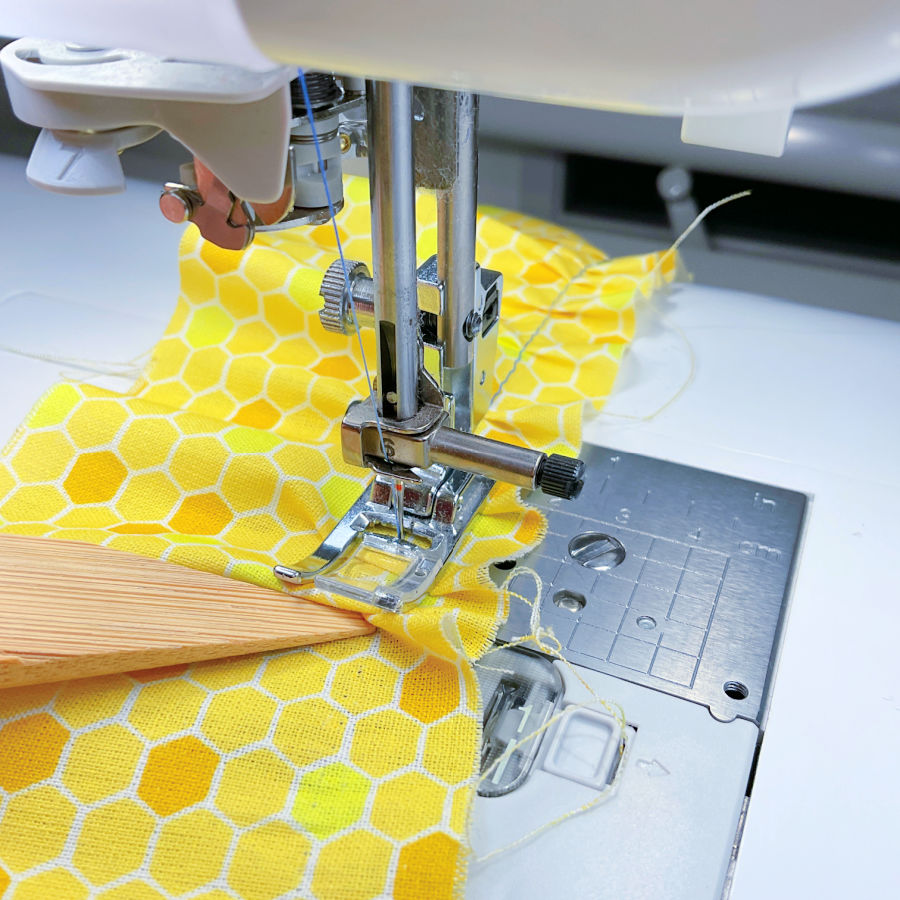
#12. Use a Gathering Foot
A gathering foot is one of those small sewing machine attachments that looks a little mysterious until you try it — then you wonder how you ever gathered fabric without it.
This foot automatically gathers the fabric as you sew, saving time and keeping your hands free. It slightly pushes more fabric under the needle than the feed dogs can move, which creates soft, consistent gathers in one pass.
It’s especially useful when you need to gather long lengths of lightweight fabric, like ruffled hems or layered skirts. You can even use it to gather and attach the ruffle to another fabric layer at the same time — a real time-saver for curtains, dresses, or children’s clothes.
That said, it’s not perfect for every job. It struggles with thick fabrics or when you need precise, controlled gathers (like at a waistband). Still, for quick, even gathers, it’s hard to beat.
I have a complete guide — How to Use a Gathering Foot: What Works, What Doesn’t, and How to Get the Best Results — where I show how it performs on different fabrics, what settings help, and when to skip it altogether.

#13. Try a Ruffler Foot
A ruffler foot looks a bit like a tiny metal robot attached to your sewing machine — and in a way, it is. This presser foot uses a small mechanical arm to create perfectly spaced gathers or pleats as you sew.
Unlike a gathering foot, which makes soft, continuous gathers, the ruffler foot creates crisp, regular folds. You can adjust both the depth of each fold and the distance between them, which gives you control over how dense or spaced your ruffles are. It’s very precise — ideal for projects like curtains, table skirts, or layered ruffles that repeat evenly over long lengths.
That said, I’m not sure it’s worth using for most home sewing. It’s bulky, noisy, and can be fiddly to set up. I much prefer my gathering foot for everyday projects — it’s faster, simpler, and gives me more flexibility. The ruffler foot does its job well, but it’s definitely more of a specialty tool than an essential one.
If you’re curious to see it in action, I have a detailed guide — How to Use A Ruffler Presser Foot — where I show how it works, when it shines, and when to skip it.

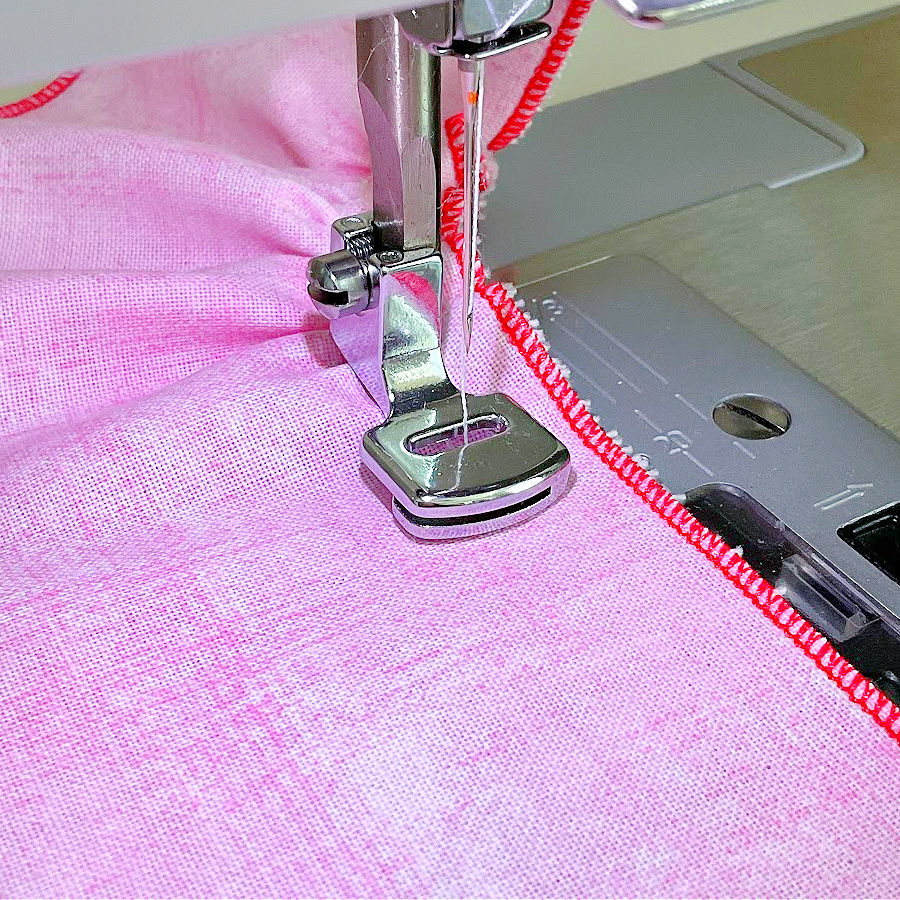
#14. Use a Zigzag Over Cord or Dental Floss
This method is clever, strong, and quick — a real lifesaver for long ruffles or thick fabrics that refuse to gather the usual way.
Here’s how it works: sew a wide zigzag stitch over a piece of cord, crochet thread, or dental floss without catching it. When you pull the cord, the fabric gathers smoothly along it. The cord acts like a drawstring, gliding through the zigzag tunnel while resisting breakage — something regular thread can’t always handle.
It’s especially useful for curtains, full skirts, upholstery ruffles, and tulle, where long gathers would snap a regular thread in seconds. A cording foot helps guide the floss evenly and prevents your zigzag from catching it.
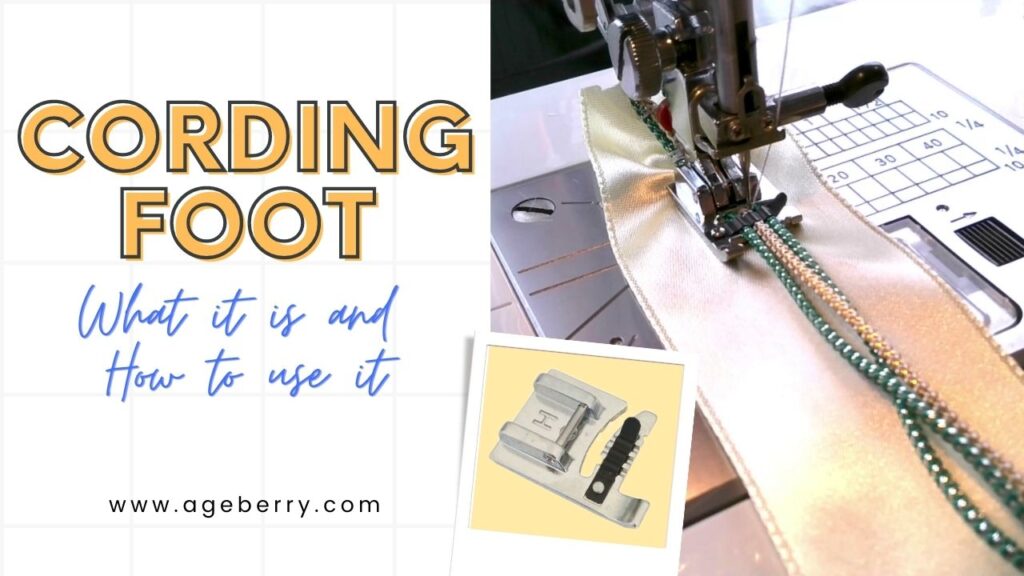
✅ Related tutorial: Cording foot – what it is and how to use it
Why it’s good:
- The thread won’t snap, even with heavy or long fabric
- Great for long continuous gathers
- Works beautifully with stiff, slippery, or sheer materials
But it’s not perfect: even gathers are tricky. It took me quite a while to make them look uniform. You can’t work in smaller sections the way you can with traditional gathering stitches, so adjusting the fullness evenly across a long length takes patience.
And once the gathered fabric is sewn to another piece, removing the floss isn’t easy — especially if your stitches overlap or the fabric layers are thick. Long gathers are never simple, and this method doesn’t completely change that. But it does make them stronger and far less likely to break midway.
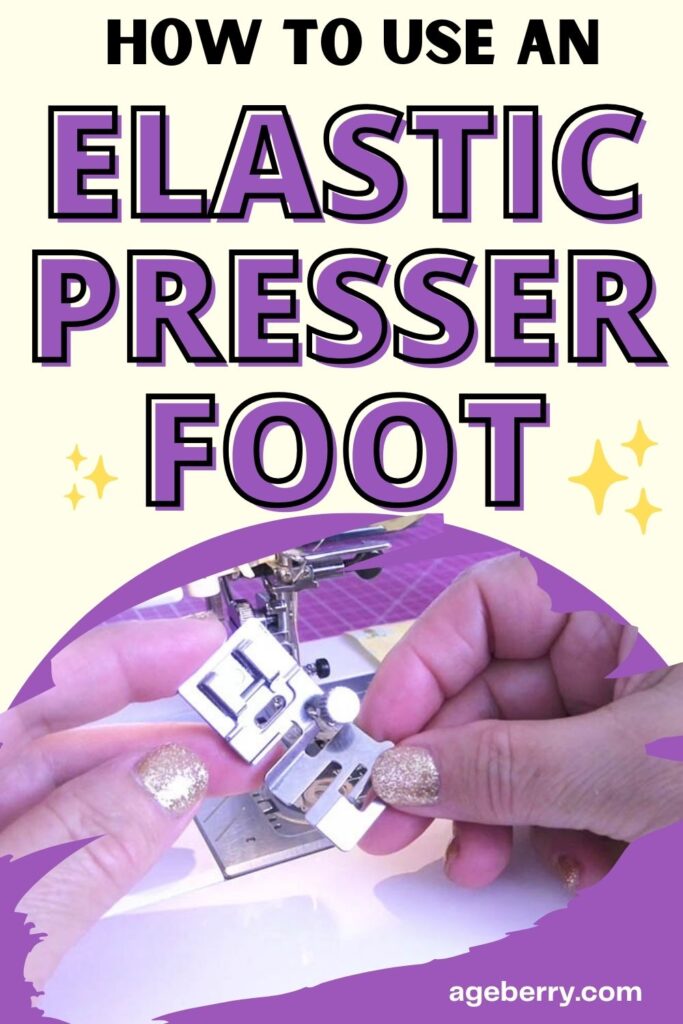
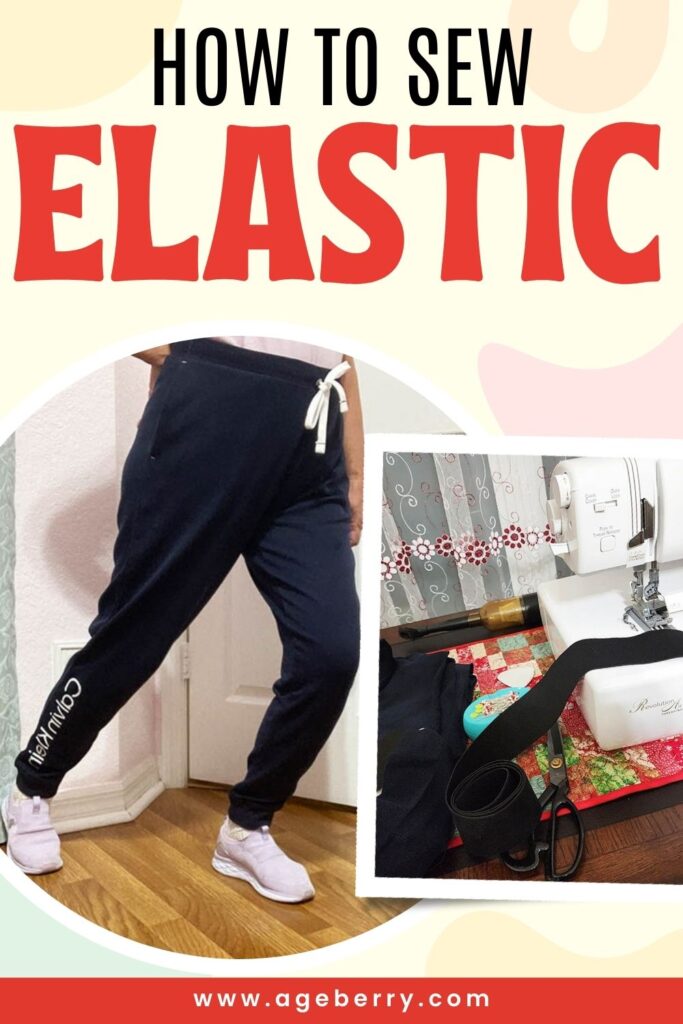
#15. Gather with Elastic
Gathering with elastic is a smart way to get fabric that moves and stretches naturally, instead of sitting stiff or pulling at the seams. The elastic gathers the fabric as you sew and then expands when worn, so your finished piece feels soft, flexible, and comfortable — never tight or restrictive.
It’s one of the best options for waistlines, puff sleeves, necklines, and cuffs, especially in garments meant to stretch or slip over the body. Because the gathers stretch and return with the elastic, they stay evenly distributed even after wear or washing — no flattening, twisting, or thread snapping.
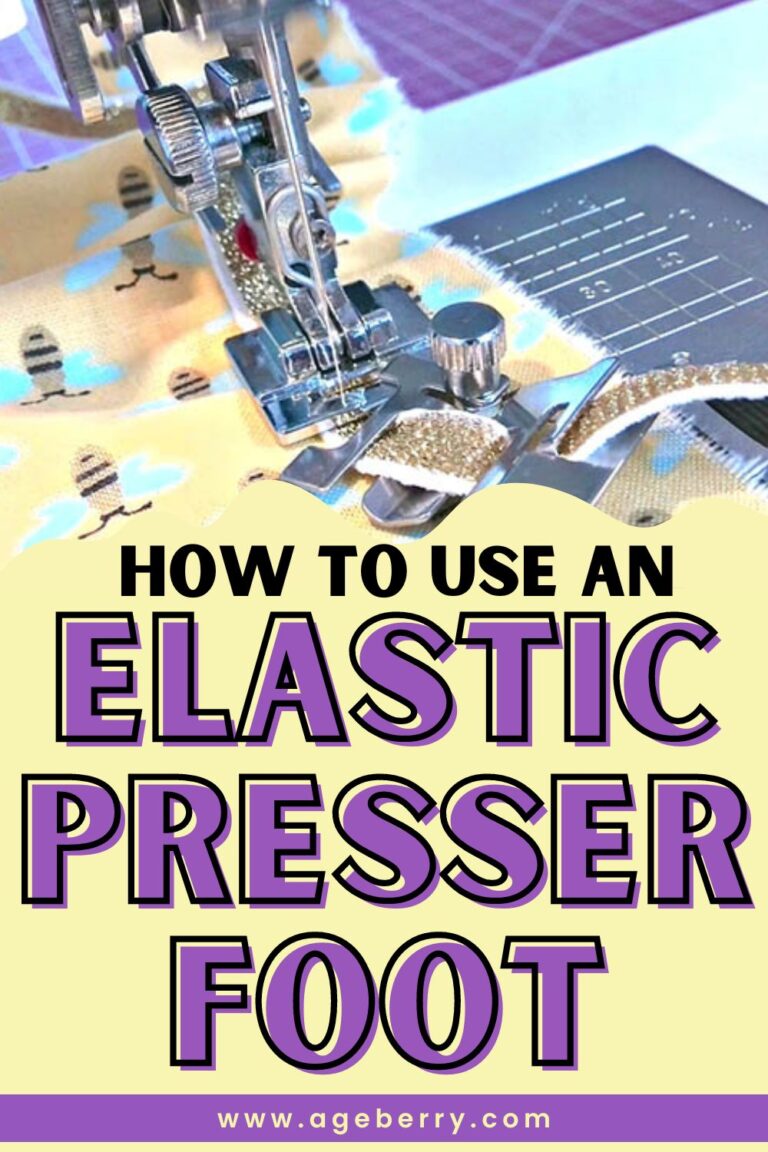
You can gather with regular elastic, sewing it directly to the fabric while stretching it gently, or use an elastic presser foot, which feeds and stretches the elastic for you as you stitch. The foot keeps the tension even and your hands free, so the gathers form smoothly and consistently.
This technique shines on knit fabrics. Traditional gathering stitches can distort knits or cause uneven puckering, but elastic keeps the shape flexible. It also works well on lightweight wovens where you want a comfortable stretch — like around off-shoulder necklines or adjustable waistbands.
The only limitation is control: elastic gathers aren’t as precise as hand-adjusted ones. You can’t fine-tune every fold, but you gain durability and stretch, which often matters more in everyday clothes.
I’ve written a full guide — The Presser Foot Nobody Knows How To Use: The Elastic Foot — where I explain how to set it up, what settings actually work, and how to get smooth, even gathers that move perfectly with your fabric.
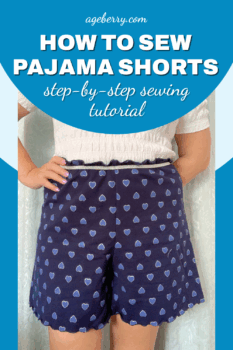
I also use this method in my tutorial How To Sew PJ Shorts (Elastic Waist) — A Step-by-Step Sewing Tutorial. It’s a great example of how elastic gathering works in practice — the waistband stretches, moves with the body, and always returns to its shape. It keeps the shorts comfortable without losing that soft, gathered look.
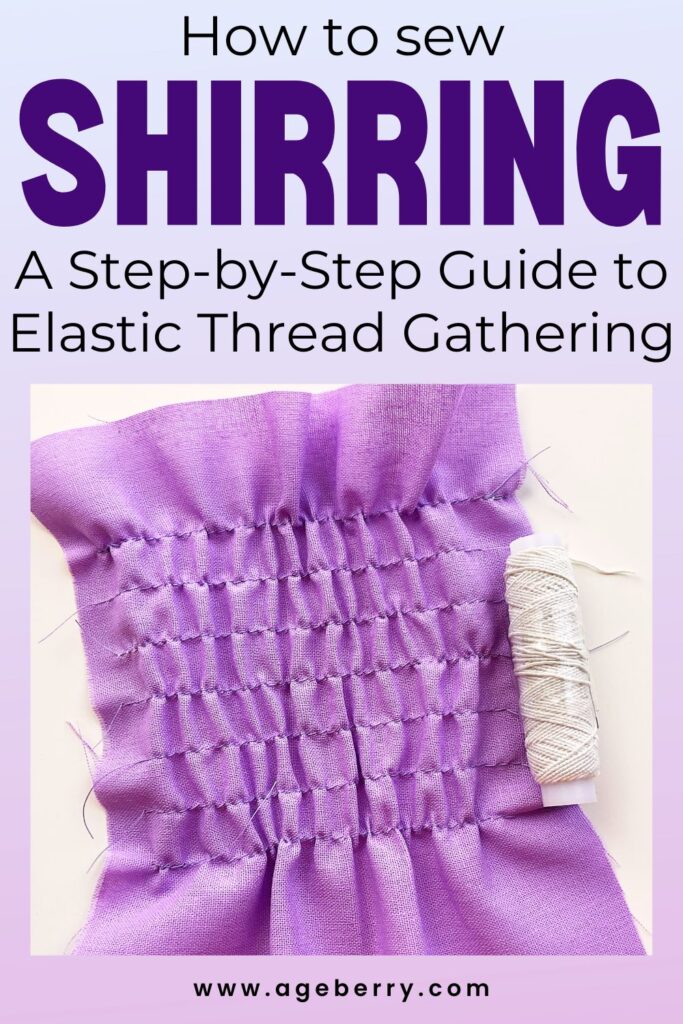
#16. Try Shirring with Elastic Thread
Shirring is another way to create gathers that stretch and move — but instead of sewing elastic directly to the fabric, you use elastic thread in the bobbin. As you stitch, the elastic pulls the fabric together, forming soft, flexible gathers that stretch beautifully when worn.
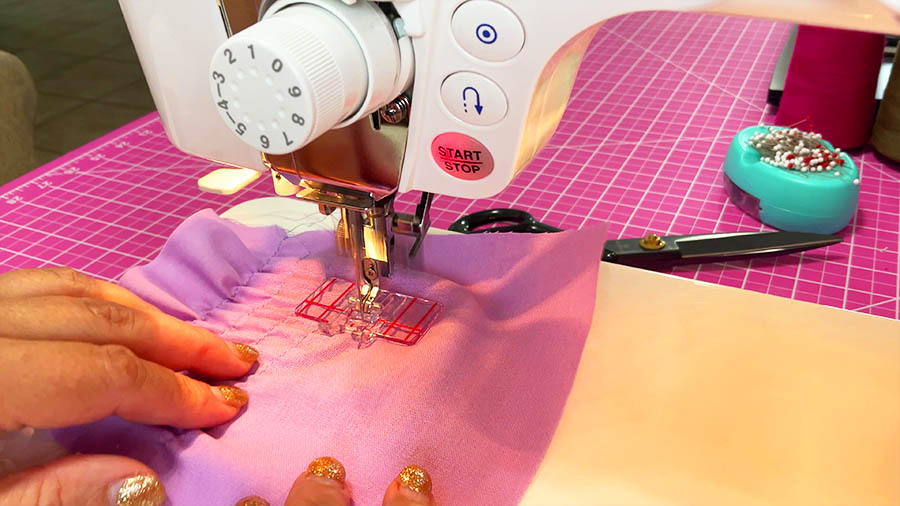
It’s perfect for summer dresses, blouses, waistlines, and puff sleeves — anywhere you want texture and comfort in one step. The result feels light and slightly springy, with gathers that expand and contract as you move.
Shirring works best on light to medium-weight fabrics like cotton lawn, voile, or rayon challis. You’ll need to hand-wind the elastic thread onto the bobbin (not too tightly), use regular thread on top, and sew several parallel rows. Each new row tightens the gathers a bit more until you get that signature shirred look.
What makes shirring special is how it changes both the fit and the feel of the fabric — it molds to the body but still looks soft and airy. You can use it across a whole bodice, just at a waistband, or even around cuffs to replace traditional elastic casings.
I have a full guide — How to Sew Shirring: A Step-by-Step Guide to Elastic Thread Gathering — where I walk through setup, stitching, and troubleshooting, plus how to make your shirring tighten evenly with a little help from steam.
#17. Use Casing Method for Gathering
The casing method is one of the simplest and most beginner-friendly ways to gather fabric. Instead of stitching and pulling threads, you create a small tunnel — a casing — and thread elastic or a drawstring through it. As the elastic or cord tightens, it gathers the fabric evenly and securely.
This method is ideal for waistbands and cuffs. It gives a soft, flexible fit that’s easy to adjust and comfortable to wear. You can replace the elastic later if needed, which makes it practical and long-lasting — especially for kids’ clothes or casual garments.
It’s also the most forgiving method for beginners because there’s no risk of snapping threads or uneven gathers. Once the casing is sewn, the elastic or drawstring does all the work for you.
I use this technique often in my tutorials, including:
- How to Make a Half-Circle Skirt with Elastic Waist | Beginner-Friendly Project
- How to Make a Gathered Skirt with an Elastic Waist Without a Pattern
- How to Sew Elastic into Waistbands: A Casing Method by Serger
Each of these projects shows a slightly different way to use the casing method, but they all share one thing — it’s simple, clean, and almost foolproof.
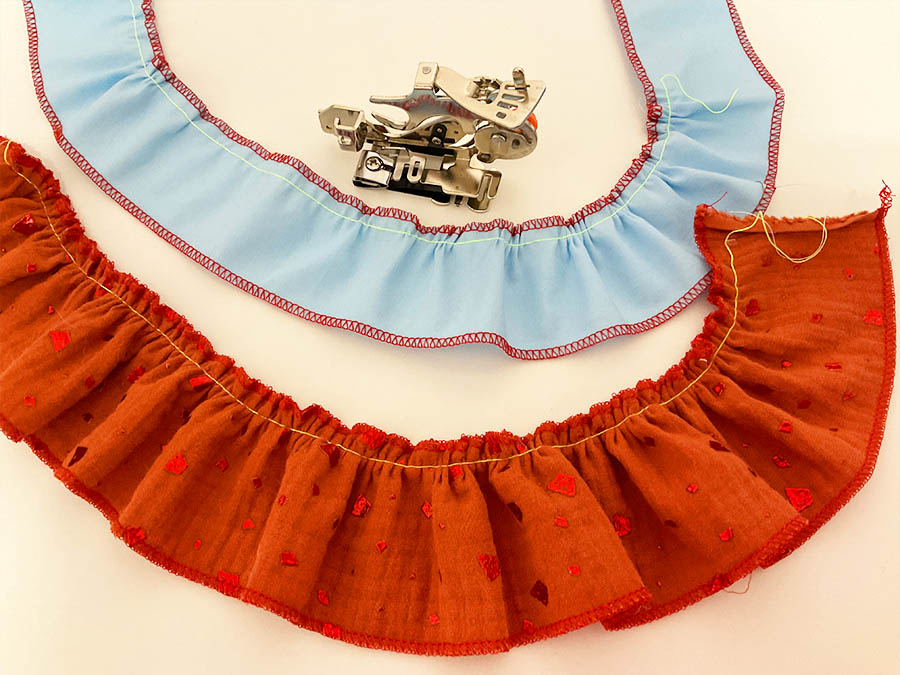
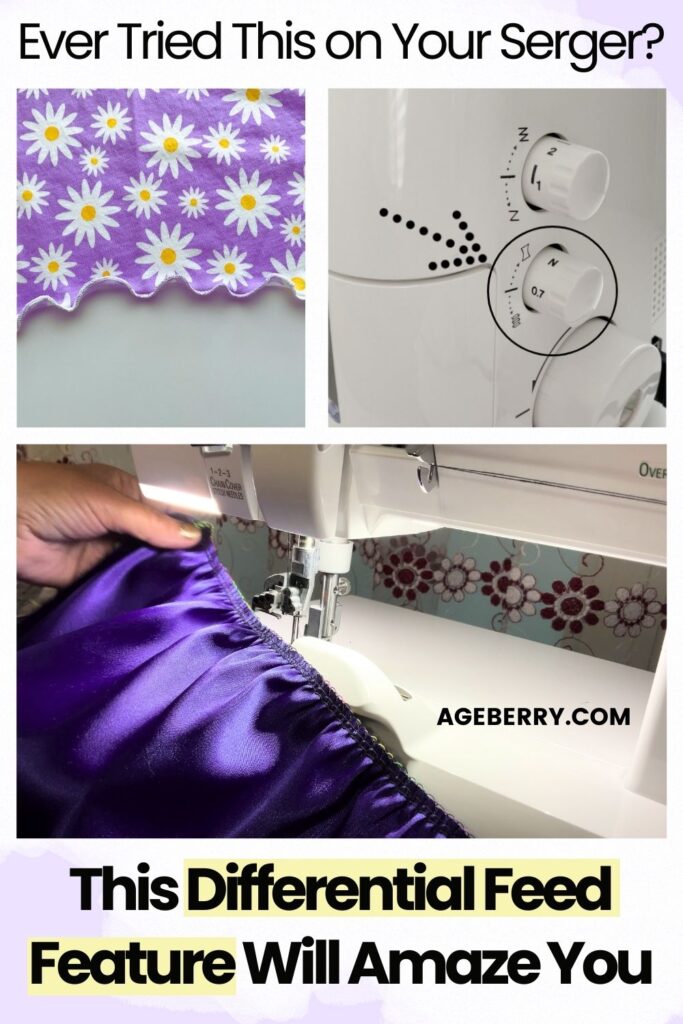
#18. Gather Fabric with Your Serger Using Differential Feed
If you have a serger, it can gather fabric faster than almost any other method — thanks to the differential feed feature. This setting controls how the front and back feed dogs move the fabric under the presser foot. When you increase the differential feed, the front feed dogs push the fabric faster than the back ones, which naturally creates gathers as you sew.
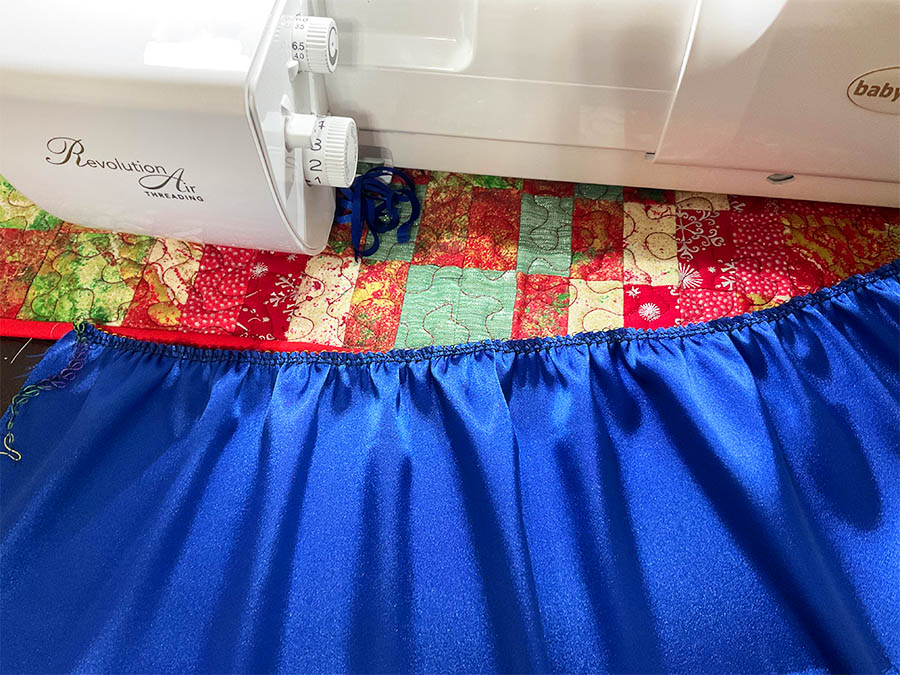
It’s quick, neat, and perfect for lightweight to medium fabrics. The gathers form automatically as the serger trims and finishes the edge in one pass — no pulling threads, no tangling, and no separate finishing step.
This technique is great for ruffles, sleeves, skirts, or any project where you want to save time while still keeping a clean, professional edge.
You can also fine-tune the look: increase the differential feed for tighter gathers or pair it with a slightly longer stitch length for a softer effect. For even more fullness, you can gently pull on the needle threads afterward to tighten the gathers further.
I explain this technique in detail in my guide Ever Tried This on Your Serger? This Differential Feed Feature Will Amaze You. It walks through how to set your serger, adjust your ratios, and get consistent gathers without ever touching a basting stitch.
#19. Check Unusual Methods from Creative Sewists
Some sewists love experimenting — and that’s how a few unexpected gathering tricks were born. While most people use traditional gathering methods, creative minds have found other ways to form gathers when usual methods just don’t cut it.
One example is using tweezers. Yes, tweezers. Some sewists pinch tiny folds of fabric with tweezers and feed them one by one under the presser foot to create evenly spaced gathers. It’s oddly satisfying, and it gives you some control over each little fold.
I also experimented with using a point turner and a Purple Thang to push the fabric under the presser foot as it gathers — and they work just as well as tweezers. Both give you enough control to guide the fabric while keeping your fingers safely out of the way.
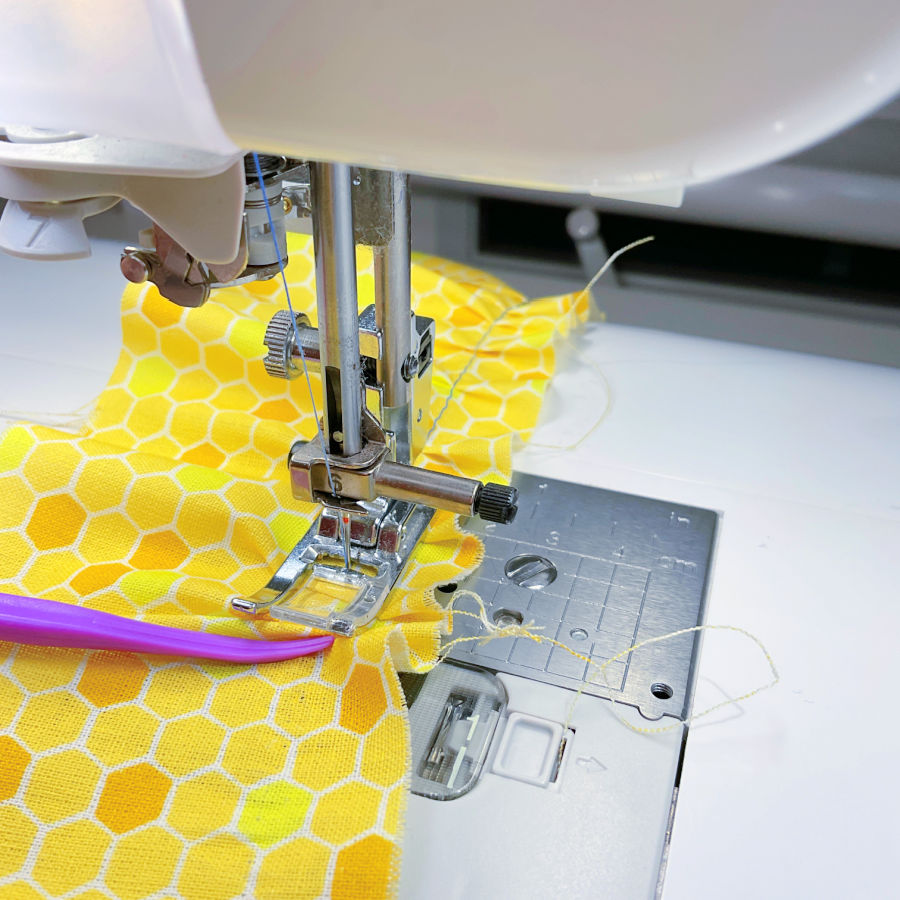
These methods aren’t always fast or practical, but they show how flexible gathering can be — it doesn’t have to follow the rules.
If you ever find yourself experimenting in your sewing room, remember: gathering is simply about controlling fullness. How you do it is up to you. A steady hand, some patience, and maybe a pair of tweezers are all it takes to create something uniquely yours.
#20. Gather Fabric by Hand
Gathering by hand is the oldest and most reliable method of all. No special foot, no settings, no machine required — just a needle, strong thread, and a little patience.
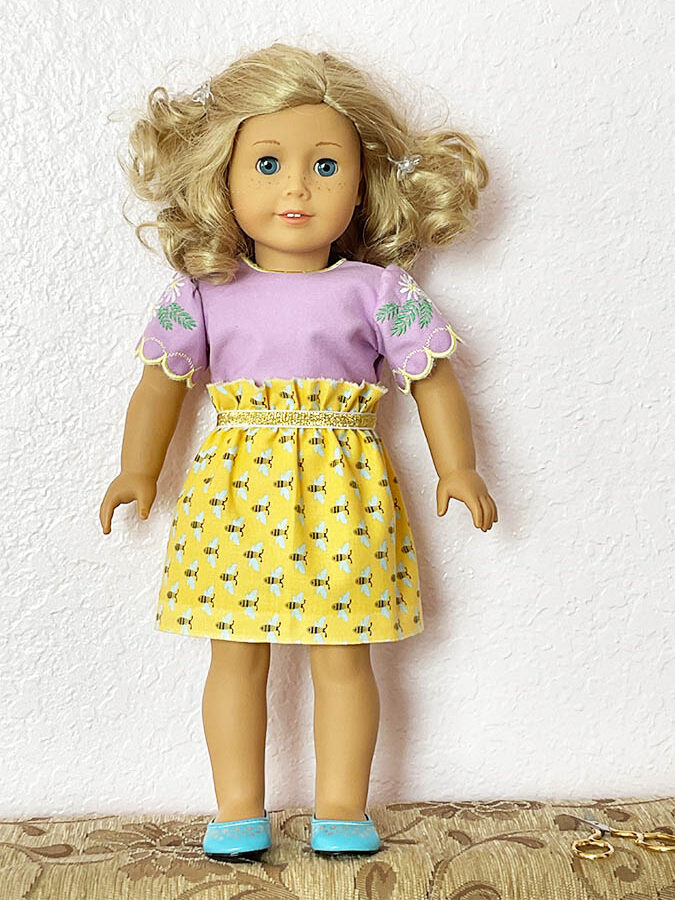
It’s especially useful when you’re working with delicate fabric, curved seams, or small areas that a sewing machine can’t handle easily. Hand gathering gives you full control over spacing and fullness. So it might be ideal for fine sewing, heirloom projects, or detailed work like doll clothes or sleeves.
To do it, you simply sew long running stitches along the edge of the fabric, then pull the thread to draw the fabric into gathers. Use double thread for extra strength, and make sure to knot one end so your stitches don’t pull out.
Machine gathering is faster, but hand gathering gives you precision. You can adjust each fold exactly how you want it — tighter here, looser there — until the gathers look balanced and even.
It takes more time, but it’s dependable and beautifully controlled. Sometimes the slow way really is the better way.
#21. Try Projects Where Gathering Steals the Show
Gathering doesn’t always have to be about skirts or sleeves. It can be the star of the whole project.
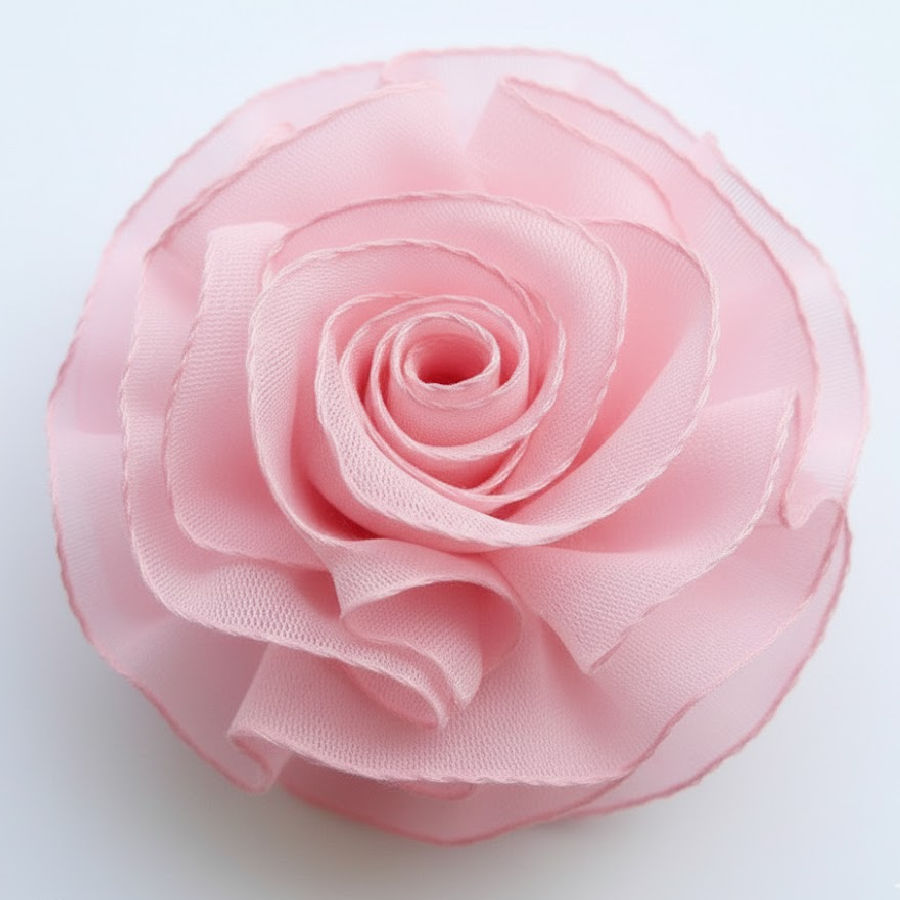
Start small with creative pieces that use gathering as decoration — fabric flowers, ruffled trims, or gathered appliqués.
A simple favorite is making roses from satin or organza ribbons. The soft gathers twist into petals that look elegant and airy, even though the process is simple.
You can also try gathered scrunchies, cuffs, or pillow trims to practice controlling fullness on a small scale. These projects teach you how fabric behaves when it’s pulled, folded, or layered — but they’re quick, fun, and low pressure.
It’s an easy way to enjoy the beauty of gathering without committing to a full garment.
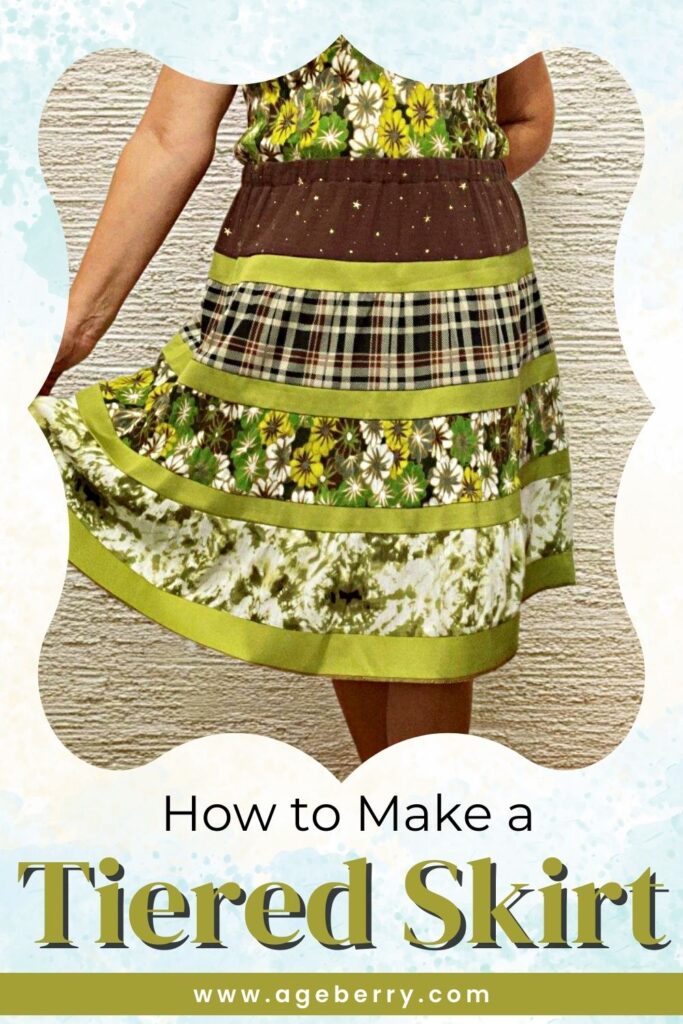
Once you feel comfortable, move on to something larger. My tutorial How To Make A Tiered Skirt: Free Pattern And Step-By-Step Instructions shows how gathering brings fullness and flow to every layer. It’s a great project for mastering long, even gathers while creating a garment that moves beautifully.
From small details like ribbon roses to full garments with sweeping ruffles, gathering can shape fabric into anything from soft accents to dramatic designs. It’s one of those techniques that rewards you every time you use it — simple, flexible, and endlessly creative.
If you like this guide don’t let these tips get lost in the fabric scraps—Pin this tutorial (the beautiful image is waiting below!) straight onto your favorite Pinterest board so you can instantly reference these secrets later. Plus, come follow me on Pinterest for more fun tips, tricks, and inspiration!
latest posts
- What Do You Call a Person Who Sews? I Asked My Readers and Got 1,408 Opinions
- DIY Round Purse: PDF Sewing Pattern and Detailed Instructions
- Mini Wonder Clips By Clover: Useful Sewing Tool Or Just Another Notion?
- Non-Slip Grips For Quilting Rulers: A Small Notion With A Useful Job
- Fabric Eraser for Sewing: What It Removes and When to Use It
- What Is The Best Thread For Sewing Machine Projects? Let’s Find Out!
- Butterfly Quilt Block Tutorial – Foundation Paper Piecing
- How To Sew Quilt Squares So The Corners Match
- Sewing With Fork Pins: How They Help With Pattern Matching, Slippery Fabric, And Seams