
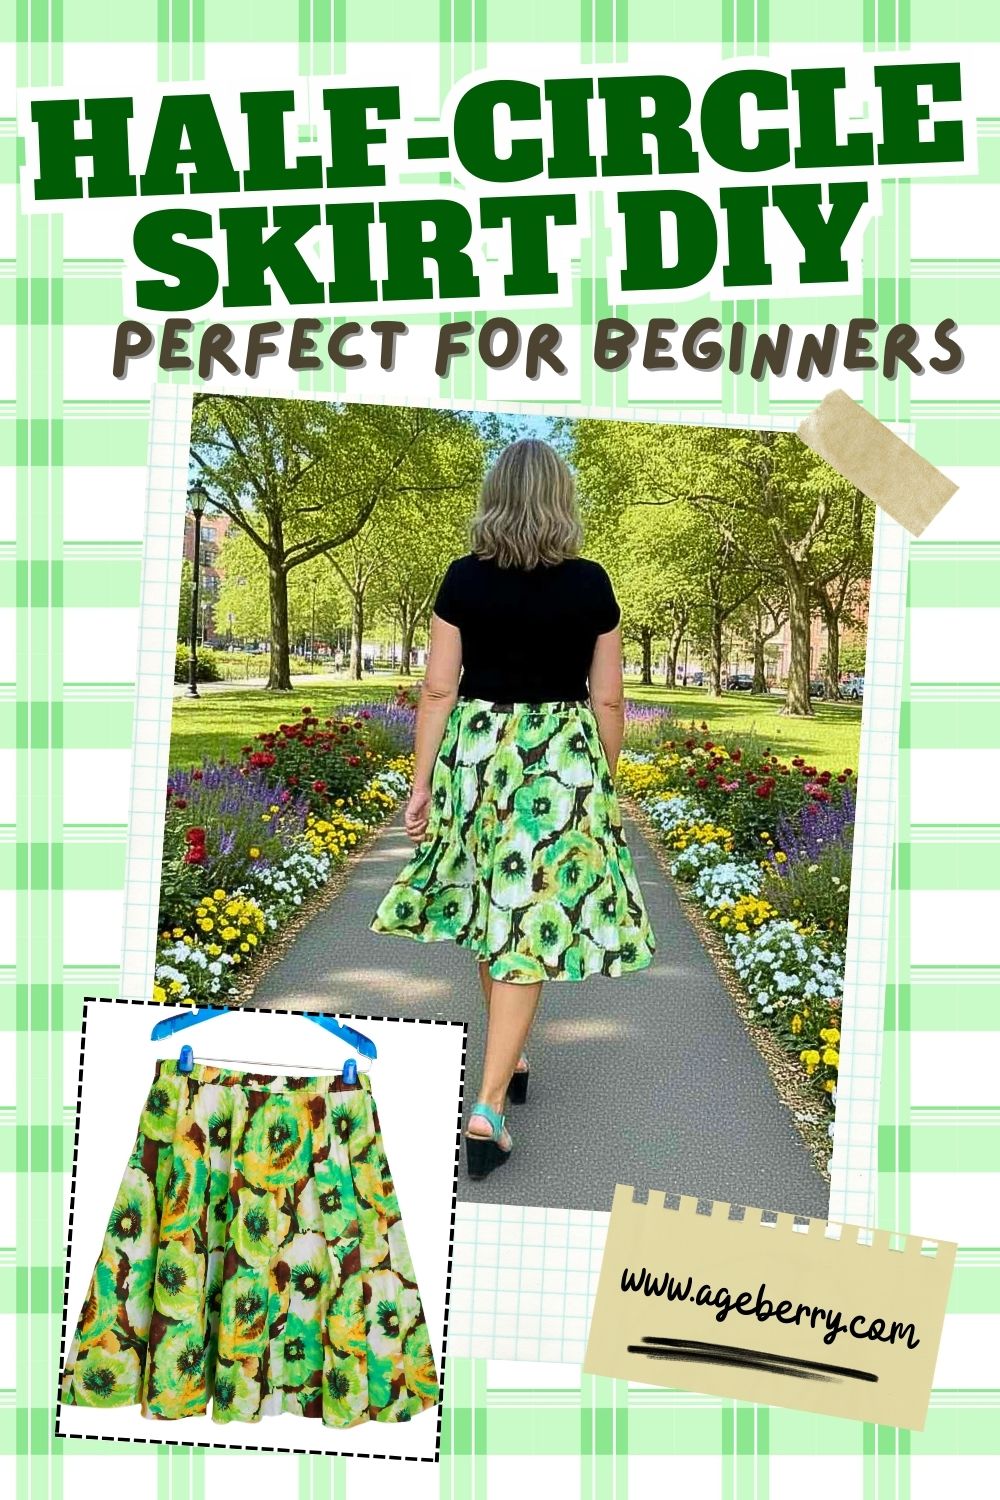
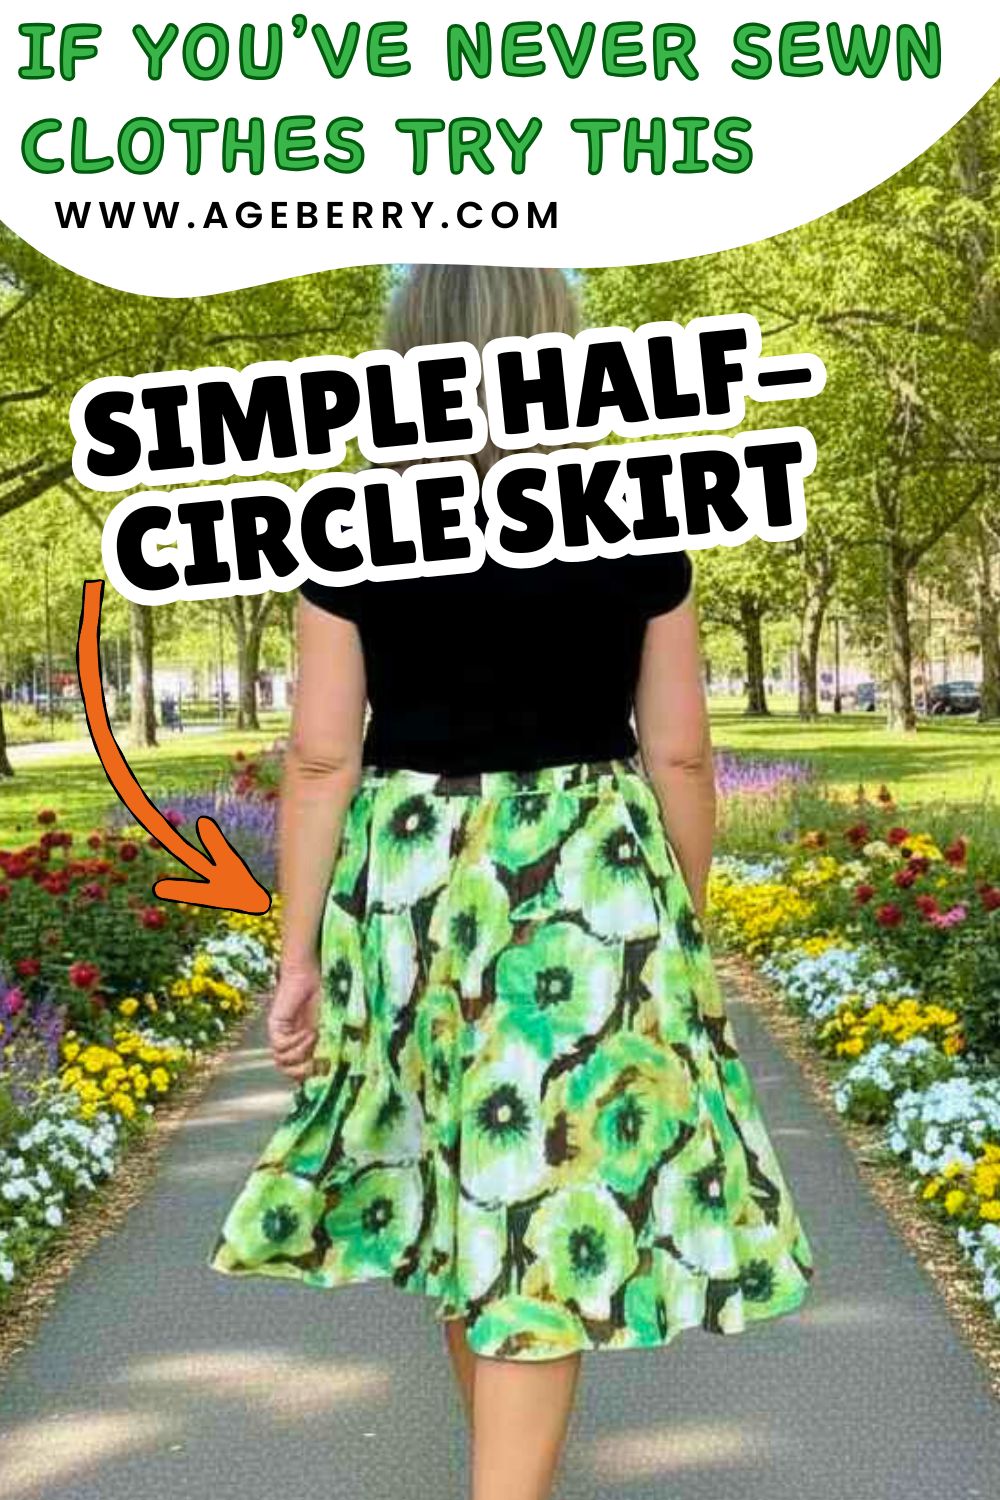
How To Make a Half-Circle Skirt with Elastic Waist | Beginner-Friendly Project
This sewing tutorial will show you how to sew a half circle skirt quickly and easily by serger. If you don’t have a serger, no problem! You can still sew this skirt on a regular sewing machine.
With just a few simple steps, you can create a stylish and unique skirt that will set you apart from the crowd. The best part about this project is that it can be made without a pattern, so it’s perfect for beginners. It’s very easy to draw all necessary lines right on the fabric. You just need some basic sewing skills and these step-by-step instructions.
I am sure, once you finish this project, you’ll want to make more skirts in different colors and fabrics. They are so easy to sew and can be dressed up or down for any occasion.
The skirt has an elastic waist and 2 side seams, no zipper closure and it’s a bit gathered at the waist.
My method of making the skirt is different from what you can find online – you actually don’t need to calculate much, let me show you how to do it without any math involved, well, almost any.
Attention! If you like the video format, at the bottom of this post, look for a YouTube video version where there is a step-by-step tutorial on how to make a half-circle skirt. For a more complete picture, I recommend exploring both versions.
What is a Half-circle Skirt?
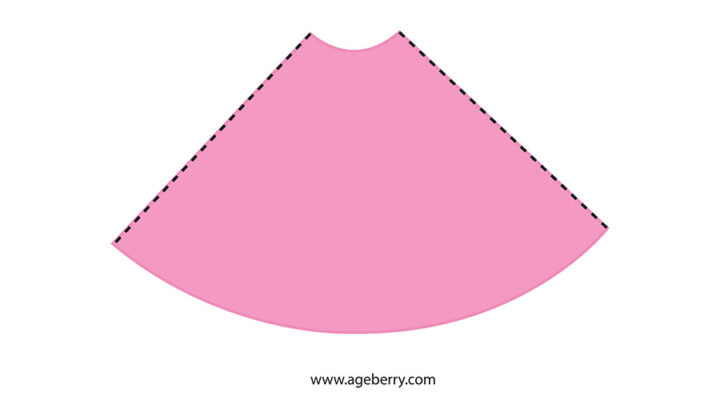
As the name suggests, a half-circle skirt is, well, a skirt that’s cut in a half-circle shape. It’s a fun and flirty skirt that’s made from just a half-circle of fabric so it takes less fabric than the circle skirt that is cut in the shape of a complete circle.
My half-circle skirt is made up of two quarter-circle panels, one for the front and one for the back. The reason this image below shows a quarter of a circle is because it’s just showing one of the panels. When you put both panels together, you get a half-circle.
I love this skirt paired with a crop top and sandals for a summertime look or dressed up with a blouse and heels for a night out in the town. No matter how you style it, the half-circle skirt is sure to become a wardrobe staple.
What Fabric Is Good For The Half-circle Skirt
When you are making a half-circle skirt, the fabric you choose is critical. The fabric will determine the shape of the skirt, how it hangs, and how it looks overall. The wrong fabric can make a half-circle skirt look frumpy, bulky, or cheap.
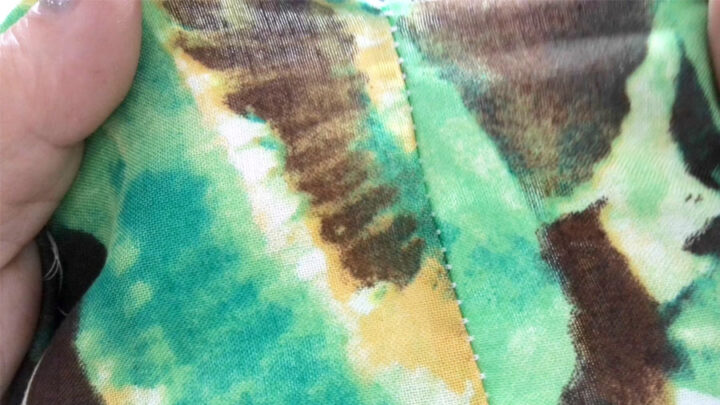
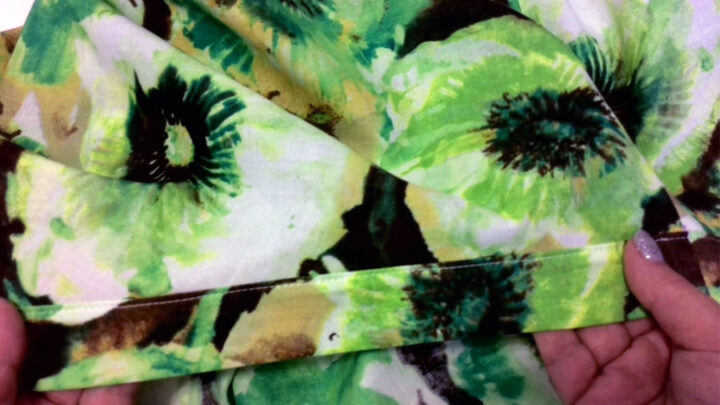
I recommend using 100% cotton-woven apparel fabric. It has to be lightweight but stable and quite dense and 60-inch wide. Don’t use knits for this project.
Note: Some of the links on this page are affiliate links. This means I will receive a commission if you order a product through one of my links. I only recommend products I believe in and use myself.
Cotton lawn fabric is a perfect choice! It’s light and airy cotton fabric, almost sheer, but has enough crispness for the skirt. Plus, the cotton lawn is easy to work with and easy to care for.
I don’t recommend using woven rayon because it’s very stretchable on bias usually and not as stable as necessary for the project.
Avoid thicker fabrics (like quilting cotton) if you don’t want any bulk around your waist.
Avoid stripes, plaids, and one-way prints.
How Much Fabric Do You Need For The Half-circle Skirt?
You will need approximately 2 yards of 60-inch wide fabric.
Pre-wash the fabric in warm water and iron.
Cut selvages – or better rip them. Cotton fabric can be ripped very well. This way you will keep the edges straight.
What You’ll Need To Make The Half-circle Skirt
- Fabric (about 2 yards, see above)
- Elastic (I used 1 inch wide, 1 or 2 yards long)
- Serger or sewing machine
- Threads of matching colors
- Regular sewing notions
Step #1. How To Measure For A Half-circle Skirt
For this half circle skirt, measure your hips and divide it by 4. My hips number is 42” so I divide it by 4 and the result is 10.5 “. And that’s all the math you need.
Why hips and not the waist measurement? Because the skirt has an elastic waist (no zipper) and it’s gathered around the waist. But you need the waistline of the skirt to be big enough so you can put the skirt on (so it can easily go through your hips).
Also, decide what length you want for the skirt. I prefer the length a bit below the knee – my skirt length is 24”.
✅ Related tutorial: How to take body measurements for sewing
Step # 2. How To Cut A Half circle Skirt
We are going to draw cutting lines directly on the fabric and then cut out the skirt.
1. Fold The Fabric
Fold the fabric as you see in the image below.
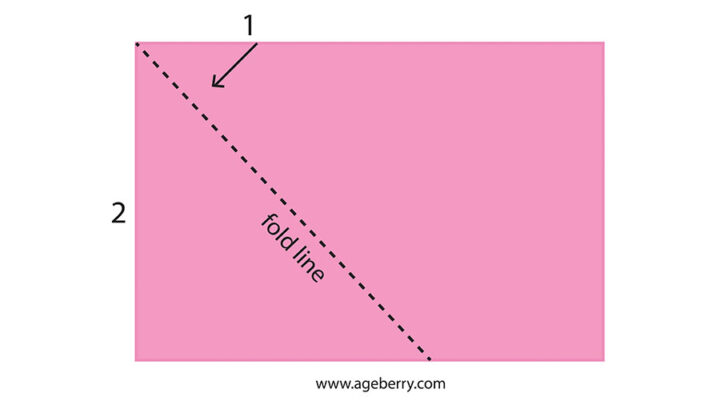
I am going to use a small piece of fabric just to show you how you should place your fabric. Place the fold toward you.

And now the real piece of fabric.
2. Draw The Waistline Of The Skirt On The Fabric
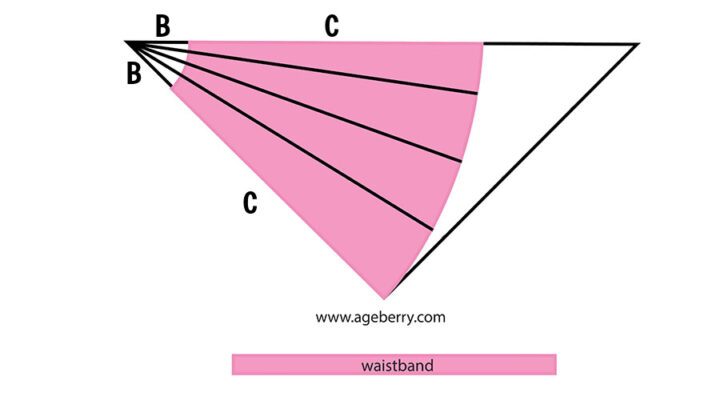
For this, you will need this number: your hips measurement divided by 4. Let’s name this number “A”. My number for this skirt is A = 10.5”. Your number will be different.
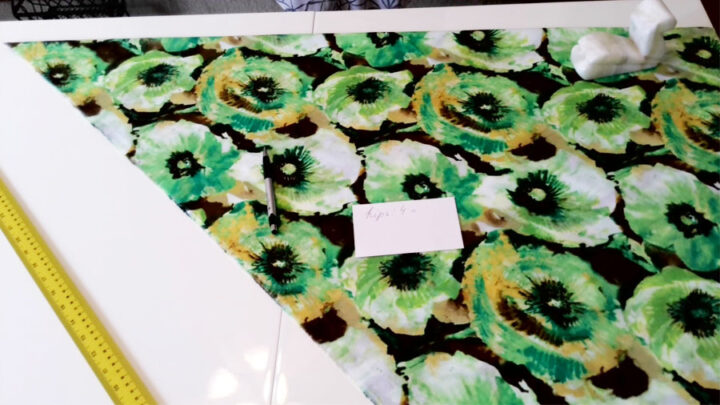
Take your flexible measuring tape, find the “A” mark on it (my A = 10.5”), and place it on the fabric as you see in the image – make kind of a quarter of a circle with the tape. You don’t have to be very precise, really. But try to place it at an equal distance from the corner point.
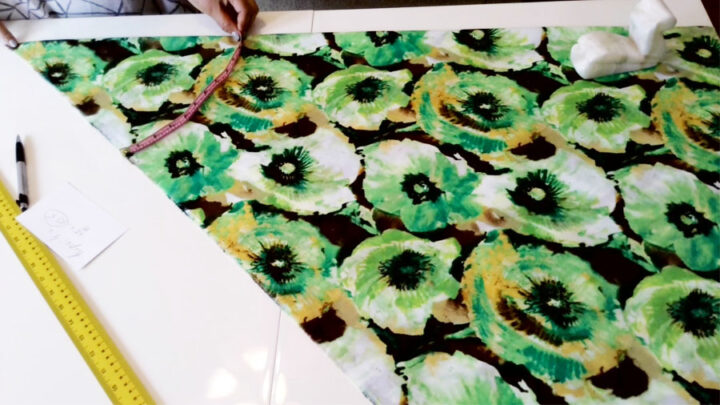
Next, find the approximate radius of the quarter circle this way. Mine was around 15”. Let’s name it “B”.
Draw a waistline (actually a quarter of the waistline) using this number (15” for me) as the radius.
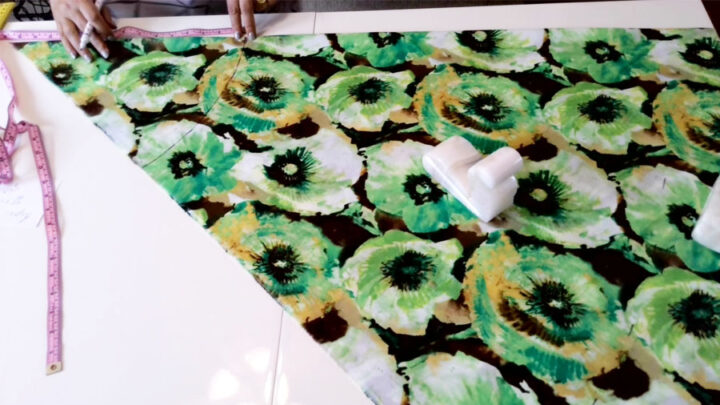
You don’t need to make the waistline exactly equal to your hips measurement. Also, you don’t need to be very precise with your measurements: you have room for some errors, half an inch more or less doesn’t really make a big difference. You will attach elastic to the waistline.
Use a measuring tape and a marking pen to draw your waistline (actually it’s a quarter of your waistline, remember?). Measure and mark the radius B from the top corner of your fabric and then connect the marks by hand drawing.
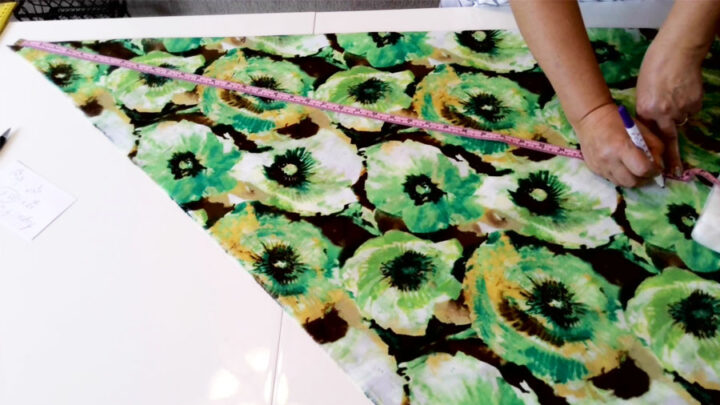
3. Draw A Hem Of The Half-circle Skirt
You already have decided what length you want for the skirt.
Add this number (let’s name it “C”, mine was 24”) to the waist radius “B” to get the hem radius. I wanted my skirt to be about 24 inches long, so 15” + 24” = 39”. Yours will be B + C.
Measure again to create a hemline, this time using the hem radius number. Connect all the marks with a marking pen.
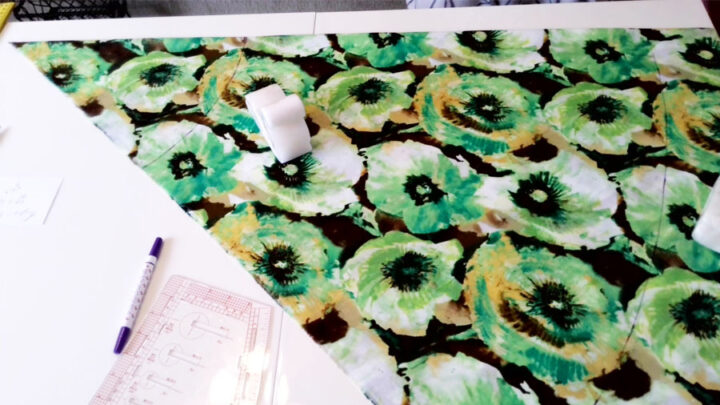
4. Cut The Fabric For The Half-circle Skirt
Cut along the lines.
We made half of the skirt – front or back (they are equal).
Now we need to make the other half – the process is exactly the same. Only now you don’t need to draw it from scratch. Just use the previously cut piece but fold the fabric as you did before.
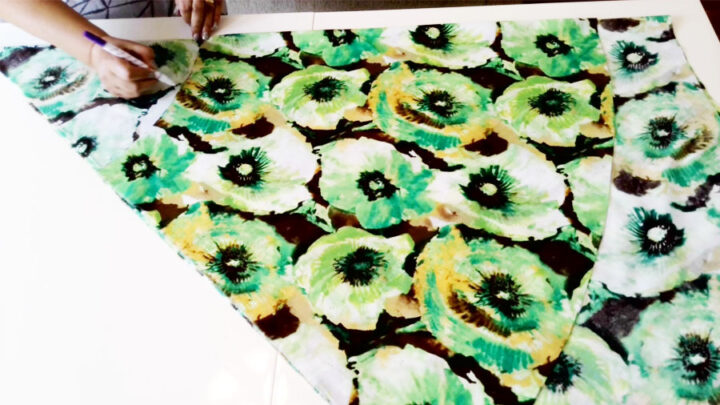
Cut also a piece of fabric for the waistband.
I used 1-inch wide elastic for my skirt. So the width of the waistband is 1 plus 1 (because it’s folded) plus 1 inch for the seam allowances, so I cut it 3 inches wide.
And what is the length of this piece of fabric? Cut it a bit longer ( like 5-6 inches longer) than your hips measurements.
Step # 3. How To Sew A Half-circle Skirt
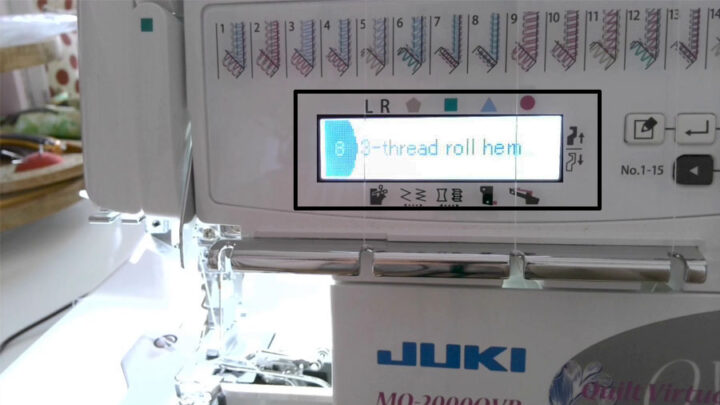
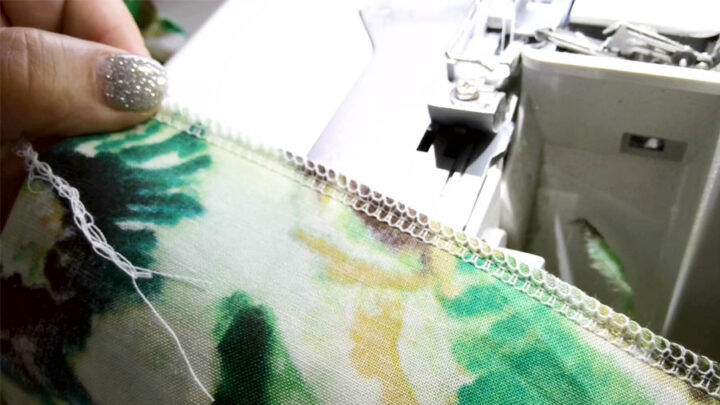
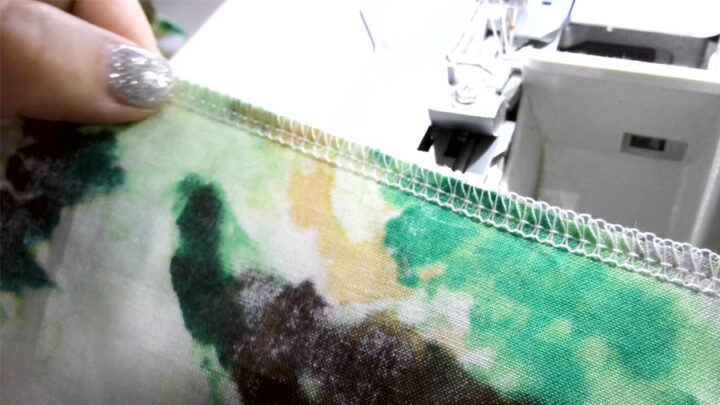
1. Sew A Rolled Hem By Serger
So, the first thing we are going to do is to finish the hem on both pieces of the skirt. If you used proper fabric (see above – lightweight woven apparel cotton) you will not have problems with the hem going out of shape. So it’s safe to hem the skirt before sewing side seams.
If you have a serger proceed with this step.
If you prefer to use a sewing machine instead of a serger you can hem the skirt later after you sew the side seams.
✅ Related tutorial: Serger vs. sewing machine
Set your serger for rolled hemstitching. I used a 3-thread rolled hem serger stitch. It’s very fast and nice hem finishing.

2. Sew The Side Seams Of The Half-circle Skirt
The next step is to stitch side seams with the serger.
This time set your serger for a 4-thread 2-needle serger stitch.
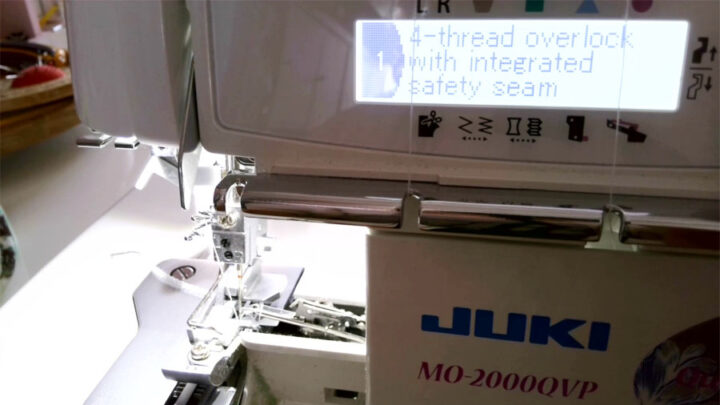
Try the stitch on scrap fabric and see if all the settings are correct.
I see that my test stitch is not good – I can see the left needle thread on the right side of the fabric. So, check yours too! Not good. Need to increase the left needle tension a little.
Now the upper looper thread is too tight, I have to decrease the upper looper tension.
Now the threads are connecting out of the fabric – I have to make the stitch wider.
Finally, the stitch is correct and I can start stitching the skirt.
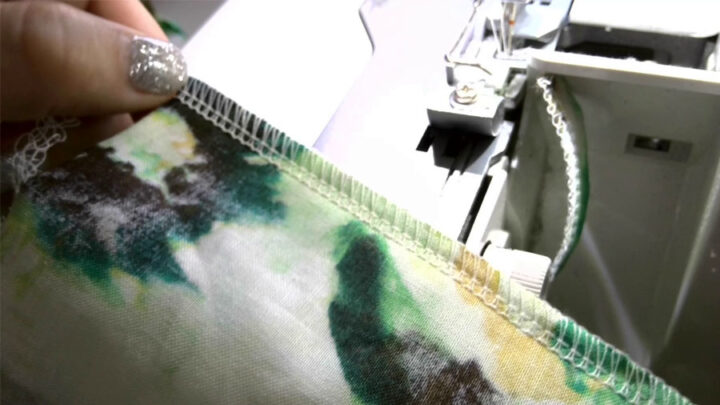
The main problem with stitching the side seams is to align the rolled hem edges. If you are not sure you can do it correctly you can baste them together by hand before going to the serger.
After that, you need to press the side seams.
3. Sew The Waistband Of The Half-circle Skirt
Now we need to sew the waistband.
Pin the piece of fabric you cut earlier to the waistline. Don’t sew the short waistband edges just yet.
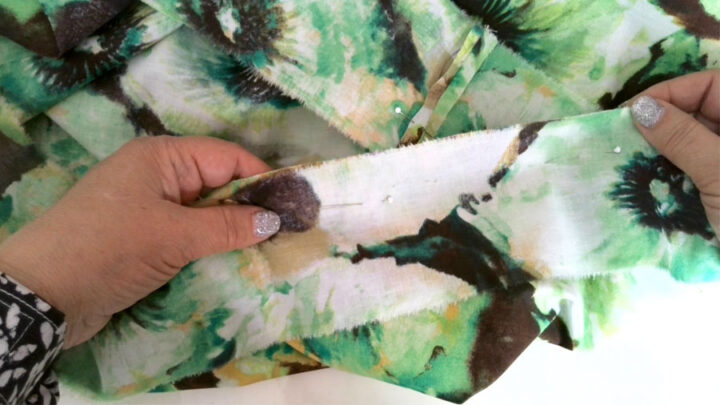
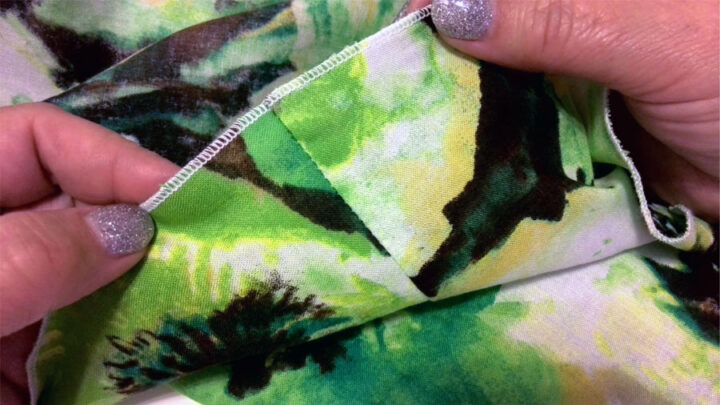
Mark the waistband ends at the side seam and cut making ⅜ in seam allowances.
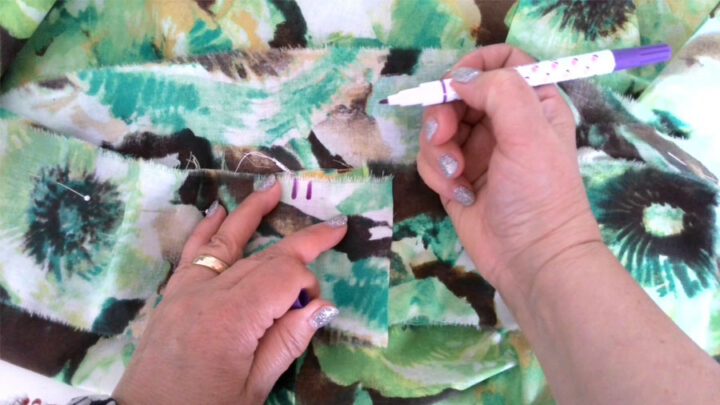
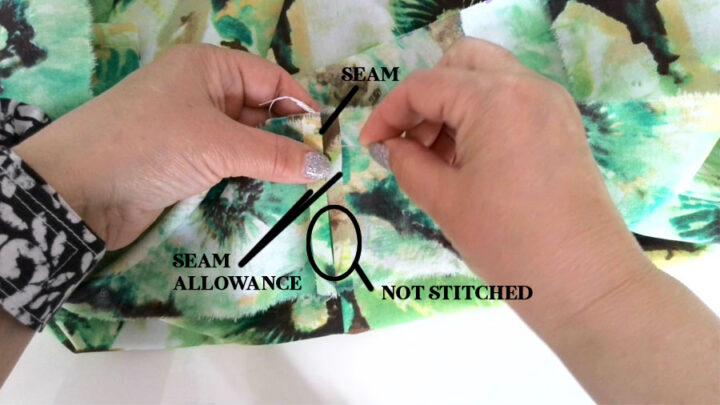
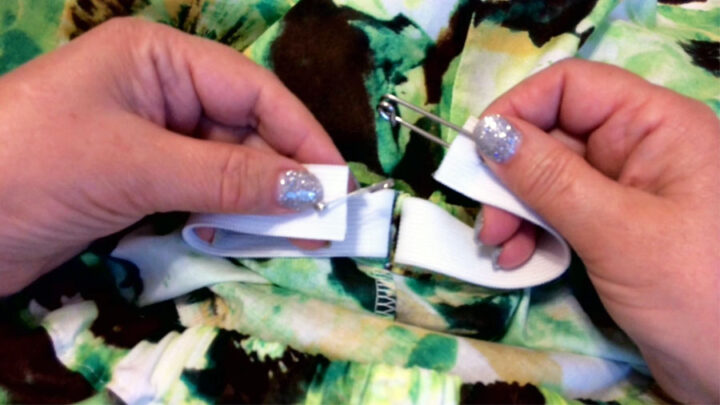
Sew the waistband ends using a regular sewing machine. But leave a small hole in the seam for inserting elastic – 1 inch wide. Leave the unstitched part that goes inside toward your body so the opening is not visible from the outside.
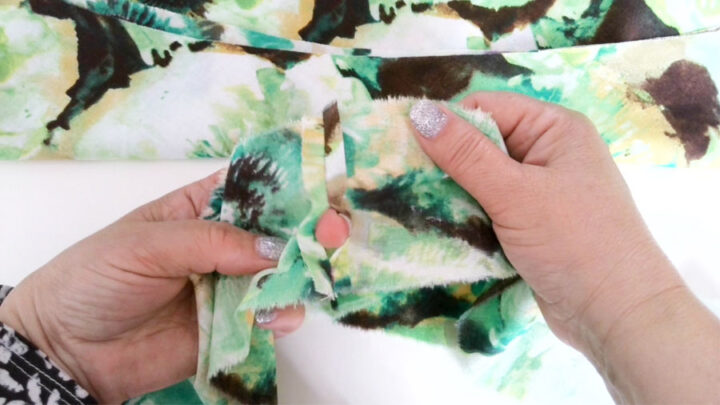
I stitched the short ends of the waistband and pressed the seams open.
Stitch the waistband to the skirt using your serger.
Fold the raw edge of the waistband inside ⅜ inch and press.
Finish the waistband using a straight stitch of your sewing machine.
Measure the elastic comfortably around your waist and insert the elastic into the waistband using safety pins.
4. Finish The Hem Of The Half-circle Skirt
And the last step – you will need to hide thread tails on each side of the skirt. I am doing it usually by hand sewing making a few stitches above the rolled hem.
Did you find this tutorial helpful? If so, save this pin (see below) on your sewing board so you can come to this tutorial later when you need this information on how to make a half-circle skirt, and follow me on Pinterest for more tips, tutorials, and inspiration!
So here is my YouTube video. Check this out if you like to see a helpful video on making a half-circle skirt (instead of reading).

If you’re looking for another easy sewing project, why not try making your own underwear? It’s a great way to get started with sewing lingerie, and it’s relatively simple to do. Plus, you can customize your panties to exactly the style and fit that you want. Interested? Then check out my other post – DIY panties tutorial – for all the details.

latest posts
- Corset Pressing Board for Sewing: What It Does and How I Use It
- 7 Essential Tools and Settings for Sewing Denim on a Regular Sewing Machine
- That Purple Thang: 10 Smart Ways to Use This Weird Little Tool
- 20+ Reasons Your Sewing Machine Thread Keeps Breaking (+ Solutions)
- Dresden Plate Quilt Block: 4th of July Fireworks
- How To Sew Curves the Easy Way Using a Curve Master Presser Foot
- 30 Sewing Hacks That Turn Ordinary Items into Useful Sewing Tools
- Seam Allowances in Sewing Patterns: What They Are and How to Use Them
- What Do You Call a Person Who Sews? I Asked My Readers and Got 1,408 Opinions

The fabric you choose is lovely but for easier teaching, plain fabric would be so much easier to see. I vanity determine anything with this fabric. I would love to make the skirt so will try to follow your written instructions.
looking at that fabric makes your eyes go funny. it is far too bright and garish. i too wanted to watch so i could copy and make a skirt. but sadly i can’t. all that time and work making this video, and people can’t see it properly. would be good if you could use plain light coloured fabric next time please.
The color is a funny thing; my husband thought the colors are quite subdued, and asked me why I did not use the yellow lemon fabric (I used it for a different dress, and it’s not his choice anyway 😀). I try to use for my projects fabric that I like so I get items that I can wear, but I will keep in mind to use colors that are less vivid.
Olga , thank you for this lovely skirt pattern. I am relatively new to sewing and this was a perfect garment to learn how to use additional features on my serger machine. Honestly, it took longer to make the adjustments with my machine than it did to create the skirt, but I did learn more than a few things along the way. I always use patterns, so it was exciting to learn how to make a skirt without one, especially this lovely skirt that has movement and style.
As, I mentioned I am learning as I go and while I was able to follow along and make this skirt, I obviously make a mistake somewhere along the way. My skirt is too large. I am wondering if I made the error making the waist radius? I was a bit confused about how to determine that measurement. I would appreciate any suggestions you can provide.
I look forward to exploring your library and learning more
Thank you!
Hi! Thank you so much for your half circle skirt tutorial. I would like to make the skirt with side pockets to accommodate a cell phone. What is the best way to do that? Thanks again.
I do not like these kind of pockets because they make the skirt look weird (to me) and bulky on the sides, so I do not do them. But I suggest search on Pinterest or YouTube for the idea, there are many tutorials on this issue. I do make sometimes patch pockets, and I have a tutorial about them here but I am not sure they would look nice on this kind of skirt.