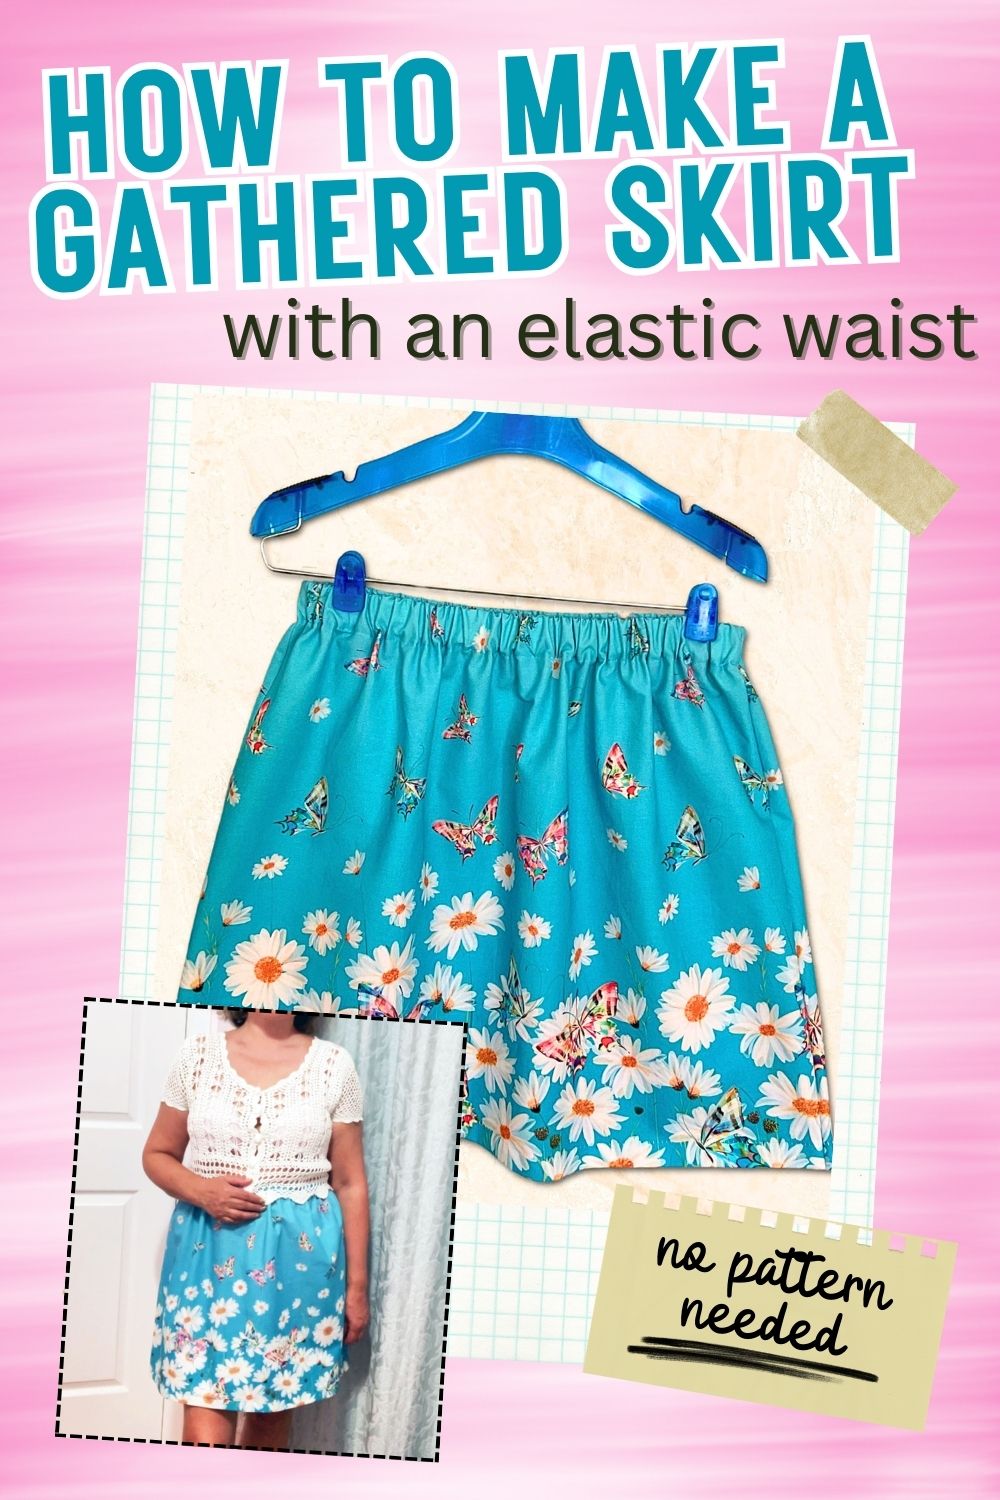
How to make a gathered skirt with an elastic waist without a pattern
Making a gathered skirt is a great way to add a new piece to your wardrobe. This sewing tutorial will show you how to make a simple gathered skirt with an elastic waist. You will not need a pattern, I will show you how to cut the fabric for the skirt using your own measurements.
A gathered skirt is a type of skirt that is gathered at the waist, creating fullness and a flared silhouette. The gathering at the waist can help to create the illusion of a smaller waist, while the fullness of the skirt can help to hide problem areas like hips and thighs. They are often seen as a young girls’ or teens’ style but can be flattering on any body type when done right.
The key to pulling off a gathered skirt is to balance the proportion of the skirt with the rest of your outfit. If you are petite, pair a gathered skirt with a fitted top and make a shorter hemline. This will prevent the skirt from overwhelming your frame and will give you a playful look. If you have a fuller figure, choose a gathered skirt that falls below the knee and pair it with a loose, flowy top.
No matter your size or shape, gathered skirts can be a fun and feminine addition to your wardrobe – just be sure to style them thoughtfully!

Also, when you make the skirt it’s important to choose the right fabric, the proper length, and to avoid making the skirt too gathered, as this can result in a skirt that is bulky and uncomfortable. When in doubt, try on a few ready-made gathered skirts of different lengths made from different fabrics to see which one looks best on you (you can do it in second-hand stores, for example).
There are many ways to sew a gathered skirt, but this method I am going to show uses a serger/overlocker for a quick and professional-looking finish.
If you are new to using a serger, don’t worry! I will walk you through each step of the process so that you can create a beautifully gathered skirt of your own.
Don’t know what serger is best for your sewing needs? Here are some things that you should look out for when shopping around. If you’ve never used a serger before but want something user-friendly and robust enough to handle future sewing projects as well, here is my guide on selecting a serger that will suit you and meet your needs today, while still being functional as you grow into a more advanced sewist. With so many options available on the market, it’s hard to select one without some help from experts.
But you can also use a regular sewing machine.
What You’ll Need To Make A Gathered Skirt
- Fabric – generally, 2 lengths of the skirt but some will need 3 lengths
- Elastic – around 1 yard
- Matching threads
- Serger
- Sewing machine
- Safety pins
- Regular sewing notions
Fabric for a Gathered Skirt
If you choose the wrong fabric, you might end up with a skirt that looks like a parachute. The best fabrics for gathered skirts are lightweight and have some drape to them. Silks, chiffons, and georgettes are all good choices. But in my opinion, the best fabrics are rayon and lightweight apparel cotton lawn/voila.
Avoid stiff fabrics with a lot of body like linen, denim, or canvas, as they will make your skirt look bulky. Quilting cotton might be good, however, it’s not always the best choice for everyone. You can also use stable 2-way stretch lightweight knits but avoid very stretchy fabrics.
Note: Some of the links on this page are affiliate links. This means I will receive a commission if you order a product through one of my links. I only recommend products I believe in and use myself.
For this gathered skirt, I chose lightweight cotton with a gorgeous border print. The cotton will breathe well in warm weather and can be machine washed, which is always a plus. I love the daisy border print that adds a lovely touch of femininity to the skirt.
Elastic for a gathered skirt
When it comes to elastic, there are a few things to keep in mind. First, you want to make sure that the elastic is not too tight. If it’s too tight, it will be uncomfortable to wear and can even cause pain. Second, you don’t want the elastic to be too loose. If it’s too loose, it will cause the skirt to sag and look frumpy.
The best length of elastic is one that is somewhere in the middle – not too tight and not too loose. It should provide just the right amount of stretch and support, resulting in a skirt that is both comfortable and flattering.
Also, you want to make sure that the elastic is not too stiff.
You don’t want to use elastic that is too narrow or too wide. I think ¾” or 1” elastic is the perfect width for a gathered skirt.
Finally, you want to make sure that the elastic is durable and won’t break easily.
Taking Measurements for a Gathered Skirt
In order to make a gathered skirt, you will need to take only two measurements – the waist measurement and the skirt length.
To take the waist measurement, simply wrap the measuring tape around your waist, making sure that it is level all the way around. If you’re planning on wearing the skirt below your waist, you may want to measure slightly lower.
Once you have your measurement, cut the elastic to that length.
To take the skirt length measurement, start at the waistline and measure down to the desired length of the skirt.
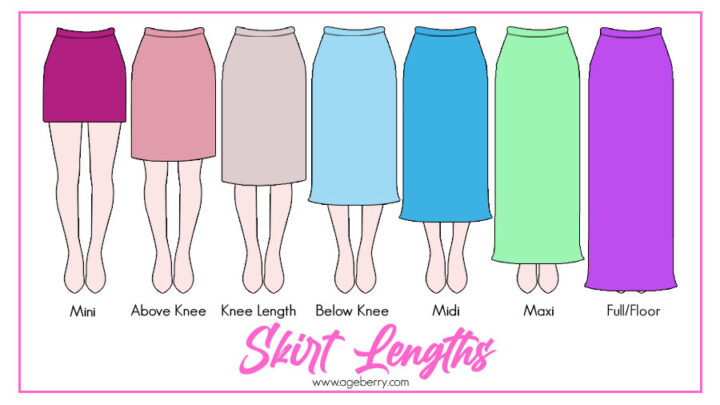
Gathered skirts can be made in a variety of lengths, from mini to maxi. Here is a simple chart to show you the most common skirt lengths.
When it comes to choosing the perfect skirt length, there are a few things to take into account.
First, consider your overall height and proportions. If you’re on the taller side, you may prefer a longer skirt length; if you’re petite, a shorter length will be more flattering (at least that’s what I think).
Second, think about the occasion for which you’ll be wearing the skirt. A longer length is more appropriate for formal occasions, while a shorter length can be worn for everyday or casual occasions.
Third, take into consideration the weather and season. A longer length is ideal for cool weather, while a shorter length is better for summer (especially for Florida summer – that’s where I live).
And fourth, don’t forget about personal preference. Ultimately, you should choose a length that makes you feel comfortable and confident.
Cutting Fabric For A Gathered Skirt
Once you have your measurements, you can begin cutting the fabric.
This skirt is made out of two rectangles – one for the front of the skirt and one for the back.
Now you should calculate the width of these rectangles.
To ensure your skirt has the right amount of fullness, the general rule of thumb is to multiply your waist measurement by 2. However, if you want a less full skirt, you can multiply your waist measurement by 1.5. For a very full skirt, you’ll need to multiply your waist measurement by 3.
For my skirt, I chose to use a gathering ratio of 1.5. So the width of one rectangle is my waist measurement multiplied by 1.5 and divided by 2. And I need to cut two rectangles like this. The length of the rectangles is equal to the desired length of the skirt plus about 5 inches for the waistband and the hem.

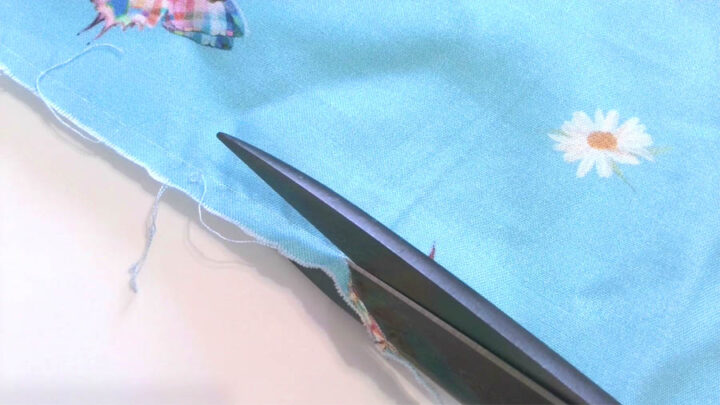
It is essential that these rectangles are cut in a straight, even line.
✅ Related tutorial: How to cut fabric straight
Setting Your Serger And Sewing Machine
Set your serger – thread it with matching threads (you may want to check my article Best serger thread),
choose a 4-thread 2 needle serger stitch, test the stitch on scrap fabric and adjust tensions if necessary.
How To Sew A Gathered Skirt: Sewing Instructions
Step 1. Sew Side Seams
Place the rectangular pieces of fabric right sides together. Use pins or clips to hold them together before going to the serger.
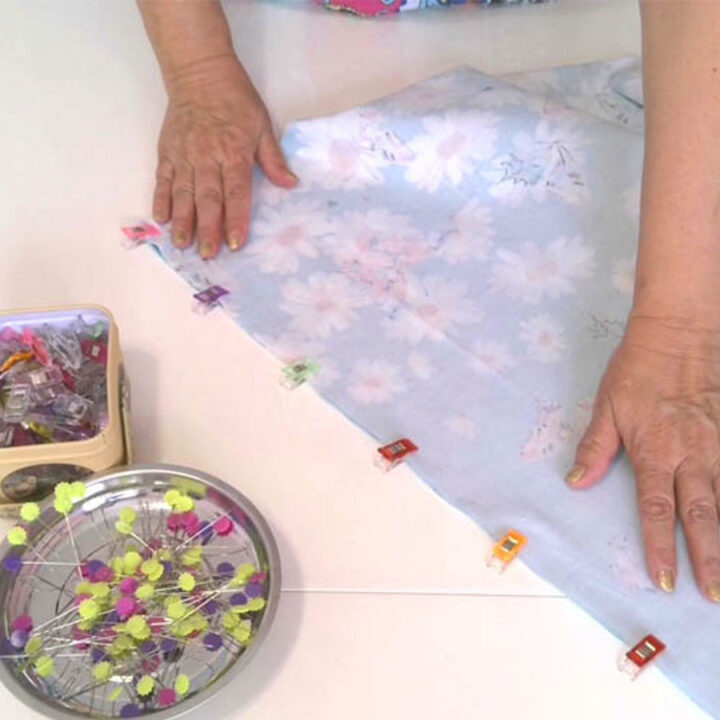
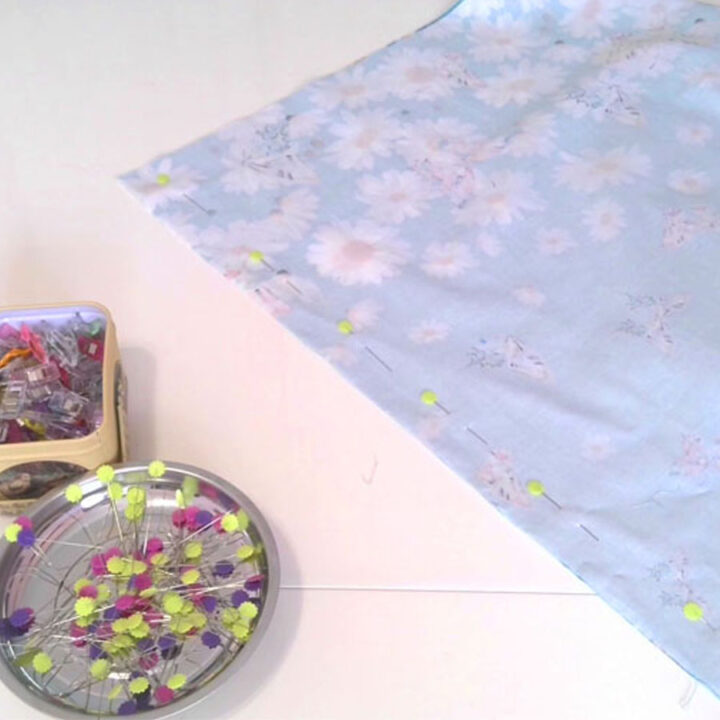
If you have fabric with a directional print (as I have) it is important to orient the fabric so that the design is facing the correct way on both pieces when you sew the two rectangles together.
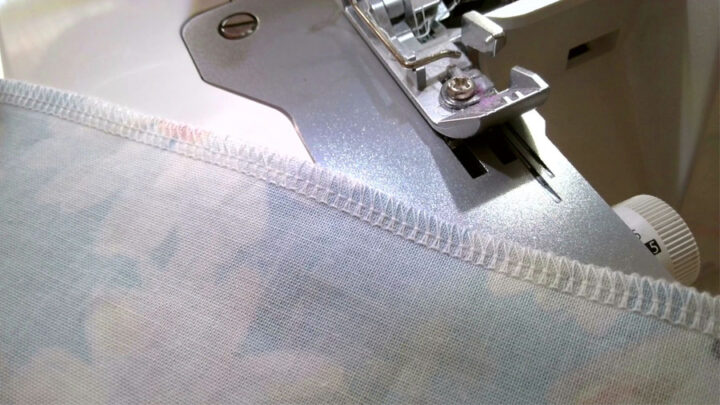
Stitch side seams using 4 thread 2 needle serger stitch. Press the seams on one side.
Step 2. Making A Casing For Inserting Elastic
The next step in making your gathered skirt is to create a casing for the elastic.
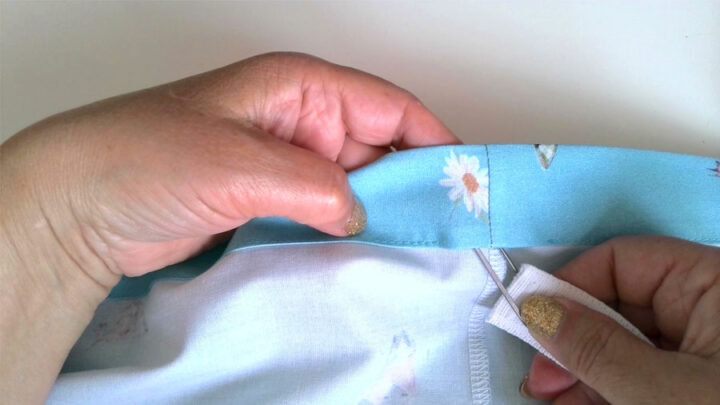
To make the casing, begin by turning under the top edge of the fabric ⅜ “ and pressing it flat.
Then, fold the fabric again – this time 1 ⅛ inch and press. Make sure it’s the same width all over.

You need to make sure there is enough room for the elastic to move around in the casing, but not so much that it gets loose.
Use your sewing machine to make a regular straight stitch along the folded edge of the fabric.
This will create a channel for the elastic to be inserted. Be sure to leave enough of an opening to easily insert the elastic.

Step 3. Inserting Elastic
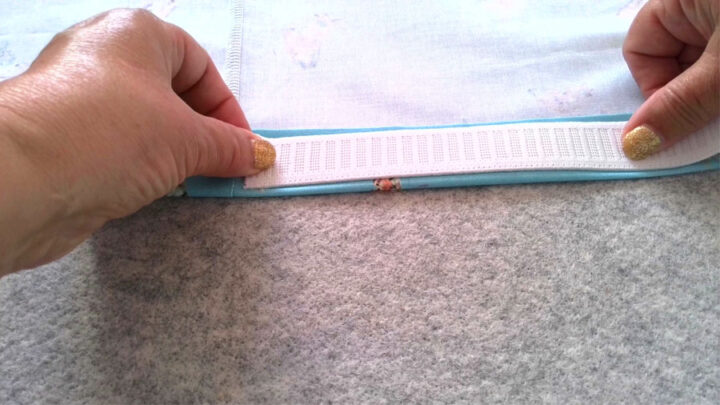
Once you have sewn the casing, thread a safety pin through one end of the elastic and then feed it through the casing until it comes out the other side. Be careful not to pull too hard, or you may unintentionally pull the other end of the elastic into the casing as well.
Actually, I usually place safety pins on both ends of the elastic in case I pull the elastic too much and the other end is pulled into the casing too. If you will have the safety pin on the other end too you will easily take the elastic out again.
Keep elastic from getting tangled and make sure there are no kinks or turns in the elastic.
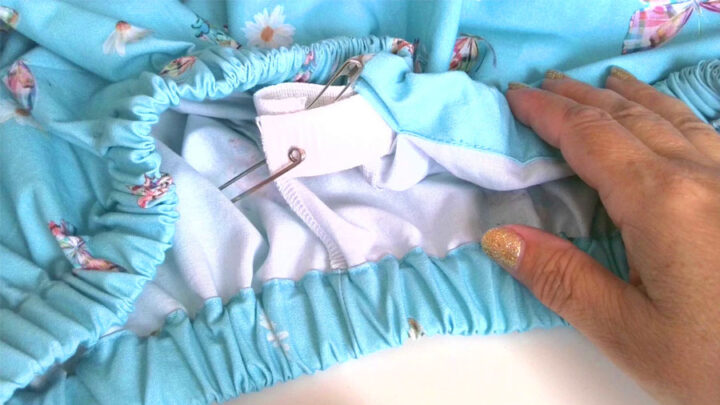
Before you sew the ends of the elastic together, it’s a good idea to try the skirt on and make sure that the elastic is tight enough. To do this, simply pin the ends of the elastic together and slip the skirt over your hips. If the skirt feels too loose, adjust the elastic so that it’s tighter.
Once you are satisfied with the fit of the skirt, you can proceed with sewing the elastic together by hand or sewing machine. Next, sew the opening in the casing closed – use your sewing machine for this. Be sure not to catch on the elastic.
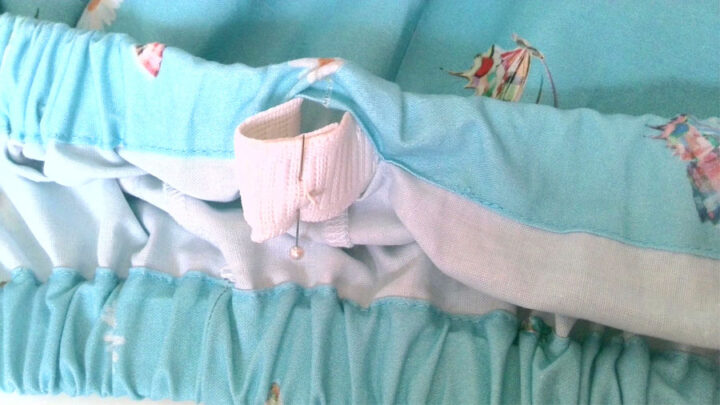
Finally, distribute the gathers evenly along the entire length of the elastic. Simply use your fingers to lightly tug at the fabric until the gathers are evenly distributed. Once you’re satisfied with the evenness of the gathers, you can sew the elastic in place on the side seams to prevent gathers from bunching up in one spot.
Step 4. How to sew a blind hem with a serger
The final step in making your skirt is hemming it. And there are many different ways that you can hem a skirt. Let me show you how to make a gathered skirt hem by serger.
✅ Related article: Hemming 101: A Guide To Different Types Of Hems
Hemming by serger is a quick and easy way to sew the blind hem while simultaneously finishing the raw edge of the fabric. Of course, it can be done on a regular sewing machine, but with a serger, the edge is finished at the same time.
There are special blind hem presser feet for different models of sergers. But I will show you how to do it using a standard presser foot.
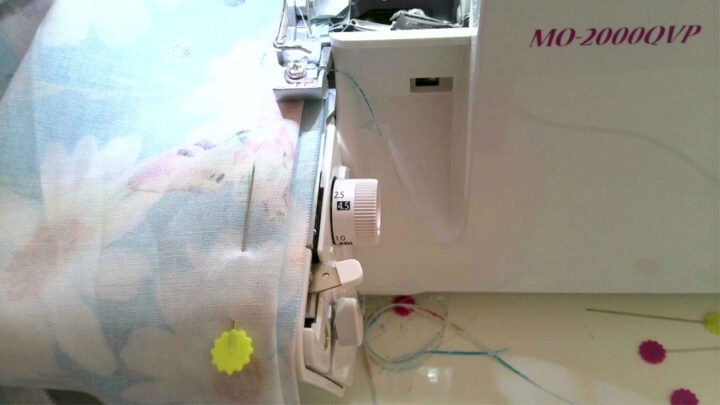
You will need to set your serger to a 3-thread 1-needle overlock serger stitch. Use the left needle for the blind hem. Adjust tensions on your serger.
The main thing is to lower the needle tension (we use the left needle) to almost 0. I put mine to 1. And then adjust the upper and lower looper tensions so the serger stitch looks nice – you will need to increase both tensions. Also, increase the stitch length – I put mine to 3.5.
These were my settings. Your loopers’ tensions will be different but don’t forget to set the needle tension to 0 or 1.

When setting up your serger, it’s important to choose the right thread. For best results, use a thread that matches the color of your fabric. This will help to ensure that the small stitches that you can see on the right side of the skirt will be hardly noticeable.
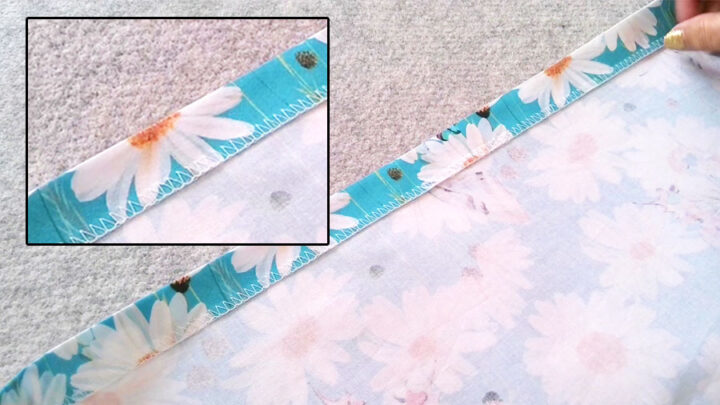
Fold the fabric on the desired hemline (toward the wrong side of the fabric of course) and pin the fold. I prefer not to press the fold with an iron yet. Next, fold the fabric again so the wrong side is facing up as you see in the image below. Pin the fold. The hem’s edge will be sticking out.
It’s important to position the presser foot correctly. The needle should be lined up so that it stitches right into the edge of the fold and slightly catches the fold of the hem. Use marks on the presser foot.
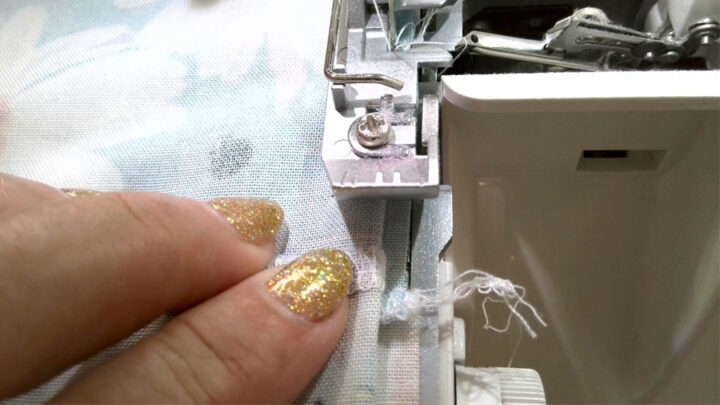
Sewing a blind hem stitch can be tricky, as the length of the blind stitch will depend on how close or far the needle pierces the folded edge. You’ll want to make the stitch as small as possible. This will help ensure that the blind stitch is barely visible on the right side of the fabric. But at the same time, you don’t want to skip stitches altogether.
The best way to practice getting the perfect blind hem stitch is to start with a scrap piece of fabric. Fold over one edge of the fabric, and then sew a blind hem stitch along the fold. Try to keep your stitches even and consistent, and pay attention to how close or far away from the fold you are piercing the fabric with your needle. Take your time and sew slowly.
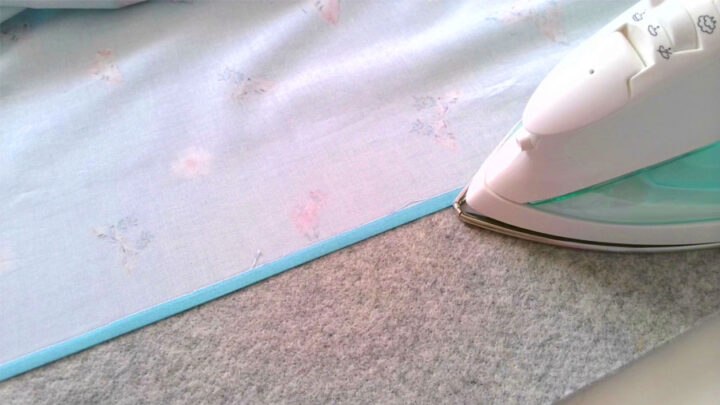
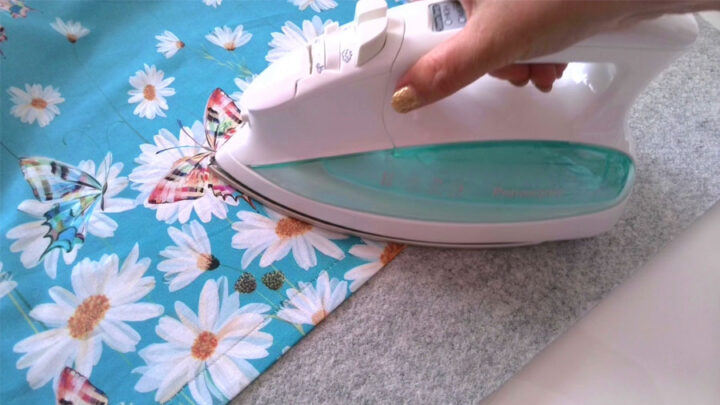
Once you have sewn the entire length of the hem, it is time to press it flat. Set the iron to the appropriate heat for the fabric. Start by pressing the hem on the wrong side first, then press it on the right side. This will help to set the stitches and give the hem a neater appearance.
In conclusion: I finished the skirt and I’m really happy with how it turned out! Thanks for following along and feel free to ask any questions you may have.
Did you like this tutorial? If you want to save it for future reference and use it later when you need this information on how to sew a gathered skirt, pin this image to your sewing board on Pinterest and follow me on Pinterest for more tips, tutorials, and inspiration.

latest posts
- Butterfly Quilt Block Tutorial – Foundation Paper Piecing
- How To Sew Quilt Squares So The Corners Match
- Sewing With Fork Pins: How They Help With Pattern Matching, Slippery Fabric, And Seams
- How Much Fabric Do I Need? 21 Helpful Tips For Calculating Fabric Yardage
- Easy Simple Sewing Project: Fabric Jar Opener
- DIY Oven Mitts: Step-by-Step Sewing Tutorial
- Easy DIY Potholder: New Design
- Tailor’s Clapper: What It Does, Why It Works, And How To Use It Right
- Heat Resistant Batting for Sewing: What It Is, How It Works, and What Makes a Difference