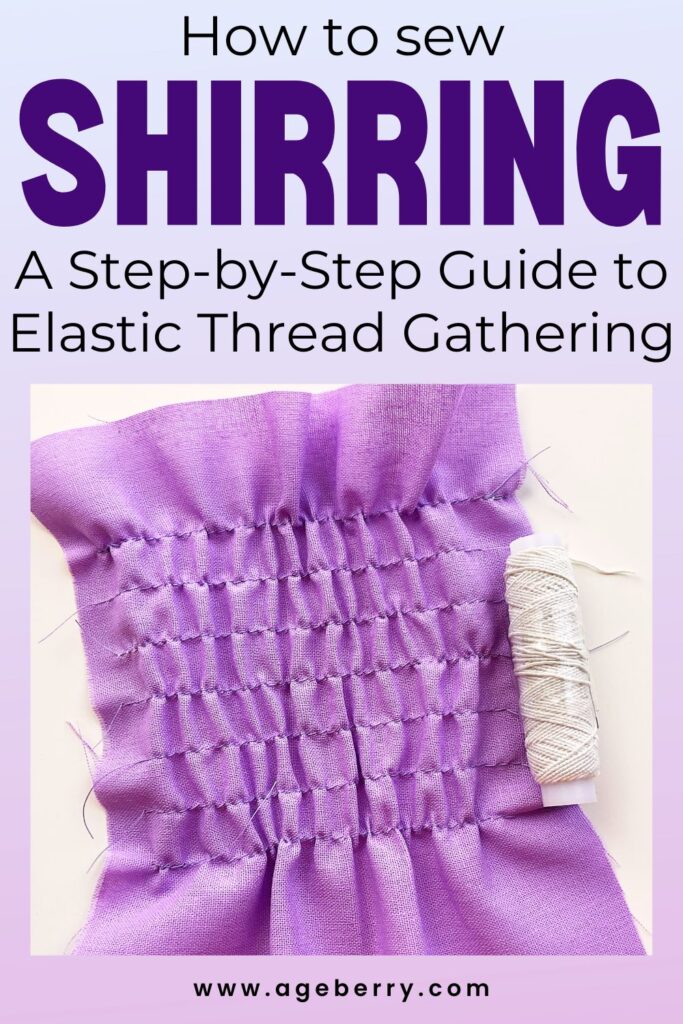
How to Sew Shirring: A Step-by-Step Guide to Elastic Thread Gathering
Gathering fabric with elastic thread is a versatile sewing technique called SHIRRING. It creates soft, stretchy gathers. This method is ideal for creating gathered embellishments on garments and accessories without adding bulk. The lightweight nature of the gathers ensures comfort and ease of wear.
What Is Shirring
Shirring involves sewing with elastic thread in the bobbin of a sewing machine to create multiple rows of gathers, which causes the fabric to bunch up and become stretchy. It’s a popular technique used in garment sewing to add stretch and decorative volume to waistbands, cuffs, and various other parts of clothing. Shirring can be a simple way to create a fitted look without the need for zippers or buttons.
Attention! If you prefer visual learning and love to see every detail in action, don’t miss the YouTube video version of this tutorial. You’ll find the link right at the end of this post. For a comprehensive learning experience, I suggest exploring both the video and the written guide.
Benefits Of Using Elastic Thread For Gathers
Shirring offers several benefits that make it a popular choice for both amateur sewists and professional designers.
- Shirring can be applied to a variety of garments, including dresses, blouses, skirts, and can be both functional and decorative.
- The elastic nature of shirred fabric allows for a snug yet comfortable fit that adapts to different body shapes and sizes.
- Shirring provides a way to give shape to garments without the need for precise tailoring or fitting, as the gathered fabric stretches to conform to the wearer’s dimensions.
- The texture added by shirring can enhance the overall look of a garment and give it a unique and stylish appearance.
- With shirring, garments can often be designed without the need for zippers, buttons, or other closures, simplifying the design and construction process.
- Shirring is a relatively easy and quick technique to learn and execute.
Recommended Tools and Materials
These are the tools if you want a smooth sewing experience and a high-quality finish.
- Elastic thread ( I used one from Dritz brand)
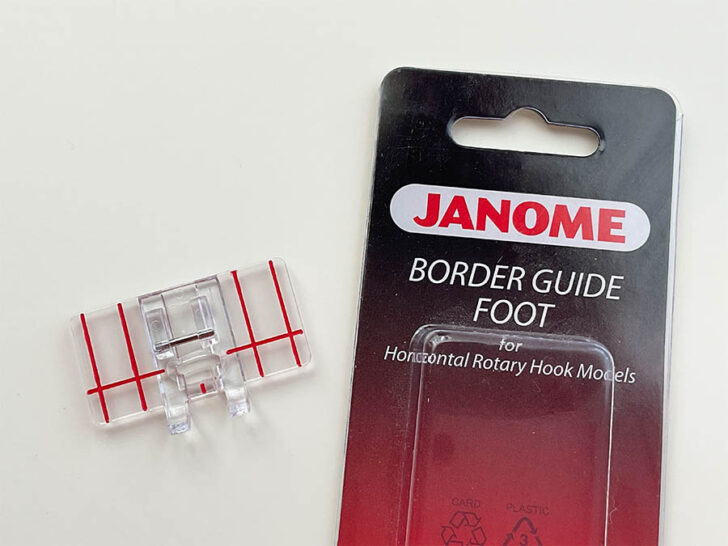
- Border Guide presser foot from Janome or a quality generic alternative
- Self-threading hand sewing needle
- Sewing machine
Quality elastic thread like Dritz’s is essential for durability and consistent stretchiness (if you would like to buy elastic thread, see my links at the end of this tutorial).
A specialized presser foot like the Border Guide foot from Janome can help guide your stitching, while a self-threading needle makes the finishing steps more efficient.
Choosing the Right Fabric
Not all fabrics are suitable for shirring. The best choices are lightweight fabrics that have a soft hand, which allows the gathers to form easily and drape beautifully.
Fabrics such as cotton voile, chiffon, lightweight linen, and certain types of knit work well with this technique. Avoid heavy or rigid fabrics that may not gather as nicely or could damage the elastic thread.
Step 1: Winding the Elastic Thread
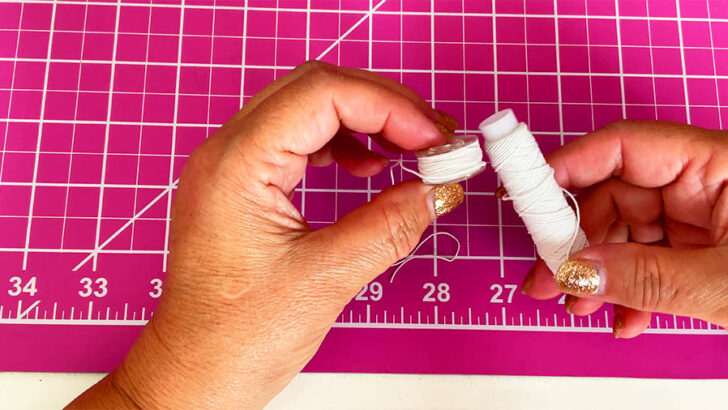
Before you start sewing, you’ll need to wind the elastic thread onto your bobbin by hand.
Long time ago, I tried to wind the bobbin on my sewing machine using elastic thread. When I tried to remove the bobbin, it was stuck; it had been wound so tightly that I couldn’t dislodge it from the bobbin winder. I had no choice but to take my machine to a shop to have the bobbin professionally removed, an inconvenience that taught me an important lesson.
Now, I always wind my bobbins with elastic thread by hand, and here’s how to do it.
- Gently and evenly wind the thread around the bobbin, taking care not to stretch. Use a consistent pace and ensure that the thread lays flat against the bobbin, distributing it evenly across the entire surface.
- Maintain a light tension on the thread. This is necessary to prevent overstretching and to allow the elastic thread to retain its elasticity. Use just enough tension to keep it in place on the bobbin.
- Don’t overfill it, as this can cause issues when it’s placed back in the sewing machine.
- Once the bobbin is sufficiently full (but not overfilled), cut the thread.
Step 2: Setting Up Your Sewing Machine
For successful gathers, adjust your sewing machine’s tension to the lower setting, typically 0 or 1. This allows the elastic thread to create more pronounced gathers.
Set your stitch length to 3.5 mm for optimal results.
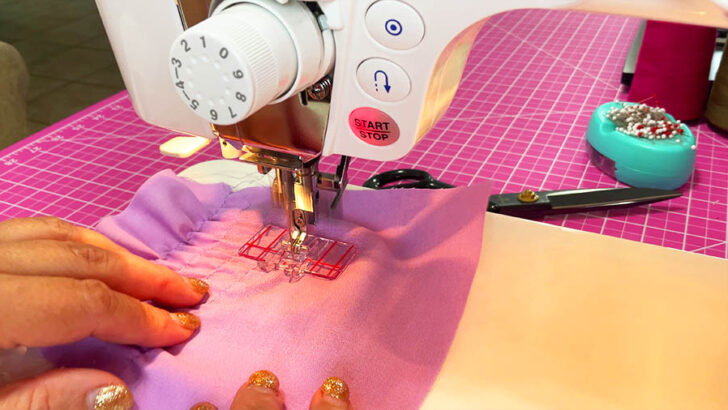
Replace your standard presser foot with the Border Guide foot which is a clear foot with red guidelines. This foot will help you sew straight and evenly spaced rows.
Make sure that the elastic thread bobbin is correctly set in your sewing machine.
You should use a regular sewing thread in the needle. Standard thread pairs well with the elastic thread in the bobbin, ensuring that the stitching on the top of the fabric looks neat and consistent while the elastic thread beneath creates the desired gathered effect. It’s best to choose a good quality strong all-purpose thread that matches the color of your fabric for a seamless finish.
What threads do I use? I usually buy Brothread threads from Amazon. This is my affiliate link. I like their quality and also their price. I never have to worry about my thread ripping or fraying mid-stitch. They come in a wide range of colors, so I can always find the perfect match for whatever project I am working on.
As for the sewing machine needle for shirring, I typically use a universal needle, size 80/12, which is a great match for most lightweight to medium-weight fabrics.
Step 3: Preparing the Fabric
Use a fabric marker to draw a line where you want your gathers to be. This line will serve as a guide for your first row of stitching and ensure that your gathers are placed exactly where you want them.
Step 4: Sewing the Gathers
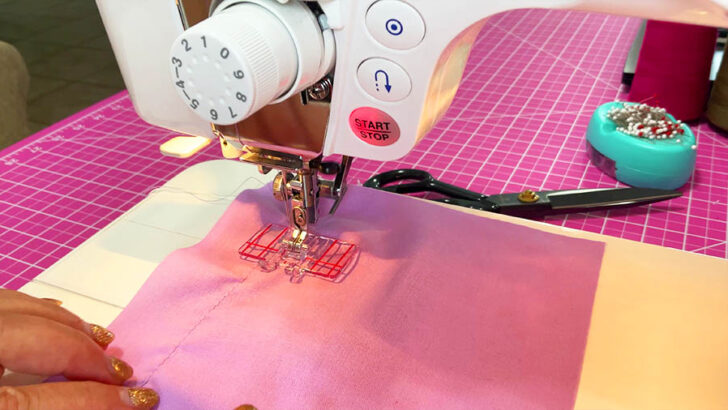
In this tutorial, I’ve chosen to work with a simple piece of lightweight lilac cotton fabric to demonstrate the technique of shirring. This fabric is good for practice because it gathers beautifully and is easy to handle. I’m not creating a specific garment from this practice piece.
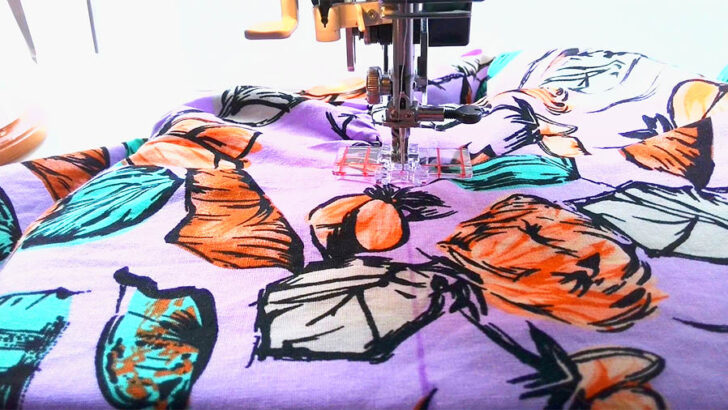
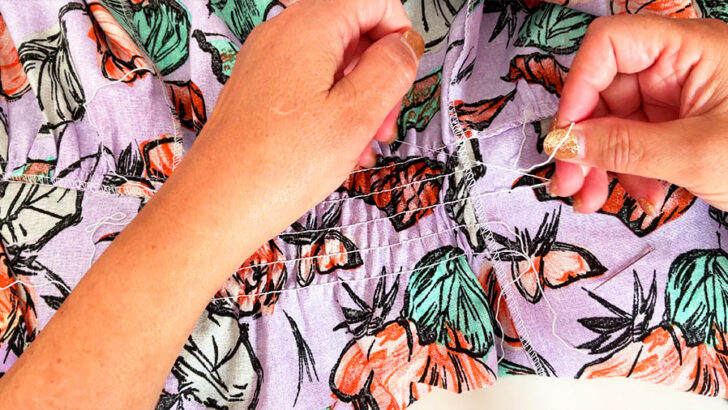
To give you a real-life example of how to sew shirring, I’m also using a dress with a flower print that I’ve made recently.
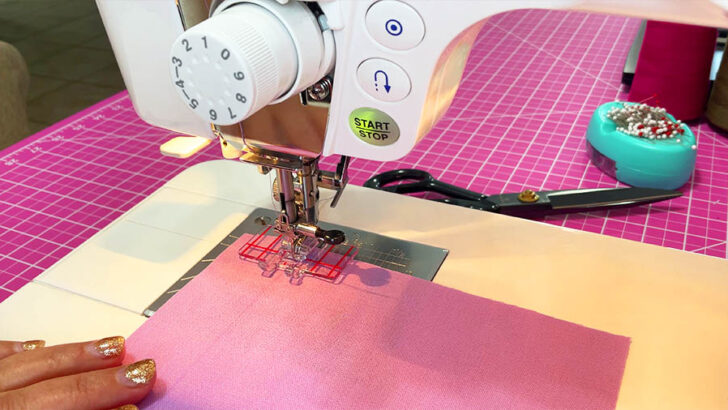
Begin sewing along the marked line, leaving thread tails at the beginning and end for knotting later on. As you sew, the fabric will start to gather.
Let the machine naturally feed the fabric without forcing it through. As you sew, you’ll notice the fabric beginning to form gathers, which is exactly what you want to see.
When you reach the end of your marked line, remember to leave another set of thread tails before cutting the threads. These tails are necessary for securing the gathers once you’ve completed sewing.
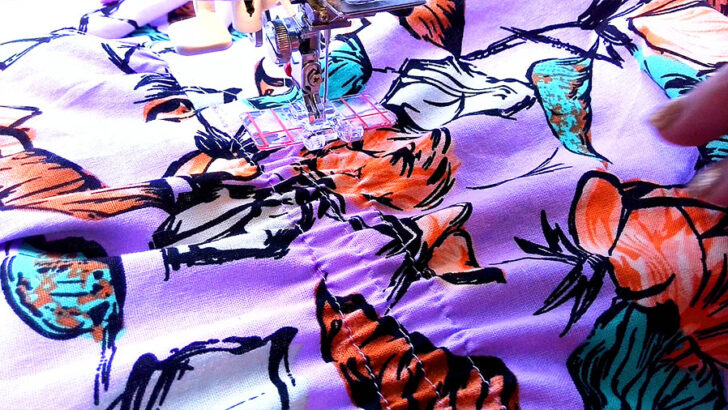
For subsequent rows, use the guidelines on the presser foot to maintain an even distance from the previous row. This consistent spacing is necessary for achieving neat, symmetrical gathers.
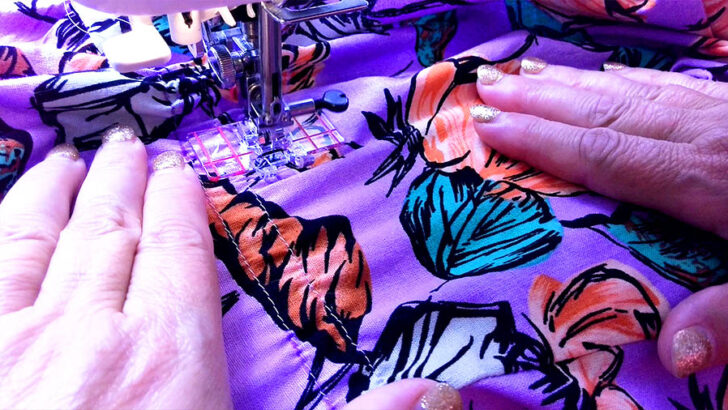
Continue to sew each new row, ensuring to leave long thread tails at both the start and end of each row. After sewing all your rows, you will have a piece of fabric with evenly distributed gathers.
Step 5: Securing The Gathers
Once you’ve completed sewing all the rows of gathers with your elastic thread, you need to secure them to ensure they stay in place.
Some people use backstitching to secure shirring, it’s certainly fast. But I prefer to leave long thread tails and tie them off manually. This is how I do it.
- Bring the needle thread to the wrong side of the fabric and tie the top thread and the bobbin thread (elastic thread) together. Do this as close to the fabric as possible to prevent the gathers from unraveling.
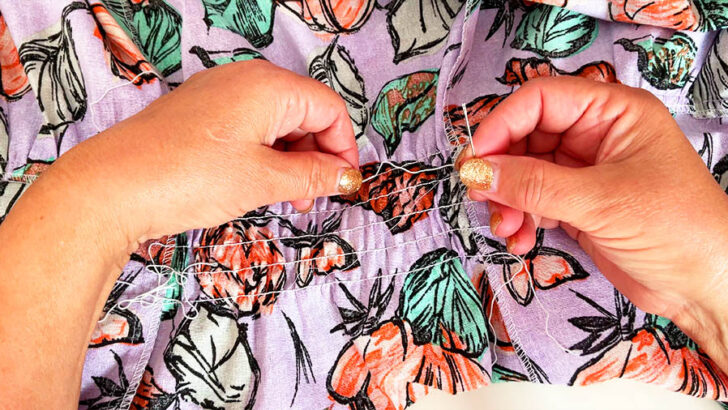
2. For added security, consider tying a second and third knot over the first. This reduces the risk of the knot coming undone, especially if your fabric will be subject to movement or stretching.
3. Using a self-threading hand sewing needle, thread it with the elastic thread tail. Create a small loop and pass the needle through this loop to form a knot. Pull it tight to create a small, secure knot that lies flat against the fabric. This will add another layer of security to your gathers.
4. Once you are confident that the knots are secure, trim any excess thread close to the fabric.
5. Repeat this process on the other stitching lines.
Finishing Touches
After you have completed the sewing of your shirred sections, you can do some finishing touches to achieve a polished look and ensure the longevity of your gathers.
Distributing The Gathers Evenly
If you see that the gathers are not perfectly even across the fabric, try this.
- With your fingers, gently pull and spread the fabric along the elastic threads. This helps to distribute the fullness more evenly across the entire section.
- Work your way along each row, smoothing out any bunching and ensuring that the gathers look consistent.
Heat-Setting The Shirring
Heat-setting the shirring can improve the elasticity and recovery of the gathers, so they snap back into place after stretching or laundering.
- Set your iron to the steam setting and hold it just above the shirred fabric without making direct contact. The heat and moisture might help the elastic thread contract and “set” the gathers.
- Never place the iron directly onto the elastic thread, as this can melt or damage it.
Troubleshooting Some Common Issues
I like to use shirring in my projects, and honestly, I don’t run into problems very often. But, like any sewing technique, there’s always the chance of a little glitch.
The main problem I’ve encountered is the elastic thread getting stuck in the bobbin and not coming out. When this happens, I just cut the thread, remove the bobbin, check for any tangles or jams, and then start the row over. It’s a minor setback, but once you rethread the bobbin and ensure everything is set correctly, you should be back to creating shirring in no time.
Here is how to troubleshoot some other problems:
- Uneven Gathers
- Possible Cause: Uneven tension in the elastic thread or fabric not feeding evenly through the machine.
- Solution: Check that the bobbin is wound evenly with elastic thread and not too tight. Ensure your presser foot pressure is appropriate for the fabric type. Guide the fabric gently without pulling it.
- Elastic Thread Not Retracting
- Possible Cause: The bobbin tension may be too high.
- Solution: Adjust the bobbin tension if your machine allows it, so that the elastic thread can retract and form gathers.
- Thread Breaking
- Possible Cause: Elastic thread may be old and brittle, or the tension settings may be too tight.
- Solution: Replace old elastic thread with a fresh spool. Adjust the machine’s tension settings, make sure the top tension is loose enough to accommodate the elastic thread without breaking it.
- Skipped Stitches
- Possible Cause: The needle may be the wrong size or type for the fabric and elastic thread, or it may be damaged.
- Solution: Use a needle that is appropriate for the fabric weight and type. Make sure the needle is not blunt or bent.
- Fabric Puckering
- Possible Cause: The fabric may be too heavy for shirring, or the stitch length may be too short.
- Solution: Choose a lightweight fabric with a good drape for shirring. Increase the stitch length to allow the fabric to gather more easily without puckering.
- Gathers Not Holding After Washing
- Possible Cause: Knots not secured properly.
- Solution: Ensure all knots are tied securely at the end of each shirring row.
- Machine Not Sewing with Elastic Thread:
- Possible Cause: The sewing machine is not properly threaded, or the bobbin is inserted not correctly.
- Solution: Re-thread the sewing machine, making sure the elastic thread flows freely. Check that the bobbin is inserted correctly and that there are no obstructions.
Creative Applications
Shirring is a great technique to experiment with. Not only does it introduce an element of texture and visual interest, but it also creates a flattering silhouette. It’s a simple way to avoid zippers and buttons, and the stretchable fabric will adapt to your body shape.
Note: Some of the links on this page are affiliate links. This means I will receive a commission if you order a product through one of my links. I only recommend products I believe in and use myself.
Here are some inspiring ideas for you to consider. All these garments are available on Amazon.
- Add shirring to a summer top for a comfortable fit that’s both stylish and flattering.


- Incorporate shirring into the dress to allow it to stretch and conform to your body, accentuating your curves with ease.

- Shirred cuffs on blouses or dresses can add a bohemian flair and ensure a snug fit without feeling restrictive.
")

- A shirred waist on a blouse or dress can create a feminine hourglass figure.


- Even accessories like belts or headbands can benefit from a bit of shirring for a comfortable, custom fit.
")
- An off-shoulder top or dress with a shirred neckline is not only trendy but also versatile.

- Shirring is well-suited for kid’s clothing, offering stretchability that accommodates their rapid growth. A shirred dress or top can last much longer as they grow.

I like to use shirring in my sewing projects. Recently, I applied shirring to the back of a dress, and I love how it shows off my waist in a flattering way. It’s amazing how a few rows of elastic can highlight the waistline, even if I don’t have a pronounced waist. It’s like a little illusion that works so well.
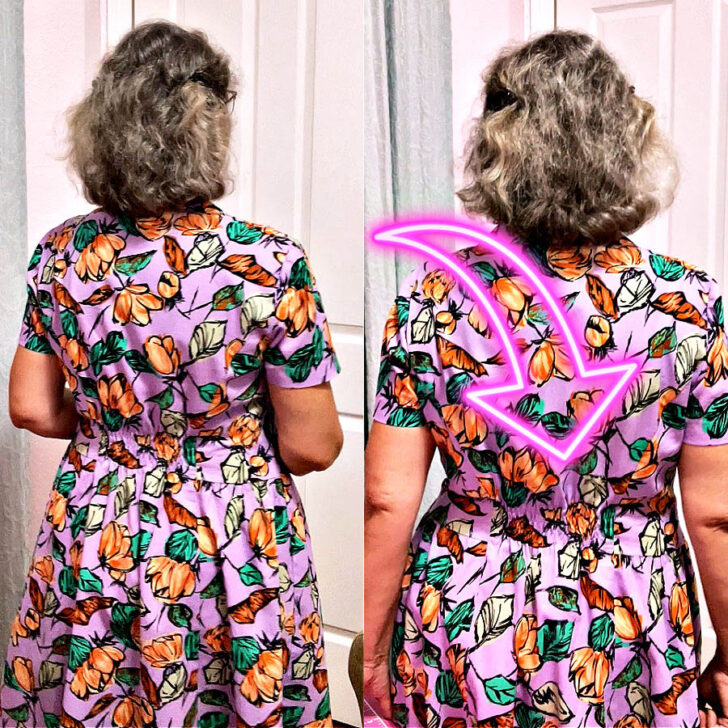
So, if you haven’t tried shirring yet, I highly recommend it.
What Tools To Buy For Shirring
Elastic Thread
Here is what I recommend.
- Gutermann Elastic Thread: Known for its strength and versatility, Gutermann elastic thread is suitable for both machine and hand sewing and comes in different colors.

2. Dritz Elastic Thread: Dritz offers a thin elastic sewing thread that’s ideal for lightweight fabrics.

Dritz 30 Yards Elastic Sewing Thread
3. TIHOOD Elastic Sewing Thread: This brand provides a spool of 0.5mm elastic thread that’s great for shirring and comes in black and white, suitable for a variety of projects.
")
TIHOOD Elastic Thread (Black and White)
4. Mandala Crafts Elastic Sewing Thread: This is another well-regarded elastic thread.

Fine Elastic Sewing Thread for Sewing Machine Knitting by Mandala Crafts
Border Guide Presser Foot
It’s a specialized presser foot designed to aid in the precise placement of borders and parallel lines of stitching. This presser foot is particularly useful when you want to create multiple rows of stitching that are evenly spaced without having to mark every row beforehand.
The key feature of the Border Guide Foot is the set of red guidelines marked on the foot itself. These red lines serve as a reference point for the placement of each new row of stitching. It’s compatible with a range of low shank sewing machines.
So here is my YouTube video. Check this out if you like to see a helpful video on how to sew shirring (instead of reading).

If you found this tutorial on how to sew shirring helpful, please consider pinning the image on Pinterest so you can easily find it again and share it with others who might find it useful. Simply hover over the image and click the “Pin It” button that appears. Also, don’t forget to follow me on Pinterest for more tips, tutorials, and inspiration related to sewing and fashion.
latest posts
- What Do You Call a Person Who Sews? I Asked My Readers and Got 1,408 Opinions
- DIY Round Purse: PDF Sewing Pattern and Detailed Instructions
- Mini Wonder Clips By Clover: Useful Sewing Tool Or Just Another Notion?
- Non-Slip Grips For Quilting Rulers: A Small Notion With A Useful Job
- Fabric Eraser for Sewing: What It Removes and When to Use It
- What Is The Best Thread For Sewing Machine Projects? Let’s Find Out!
- Butterfly Quilt Block Tutorial – Foundation Paper Piecing
- How To Sew Quilt Squares So The Corners Match
- Sewing With Fork Pins: How They Help With Pattern Matching, Slippery Fabric, And Seams