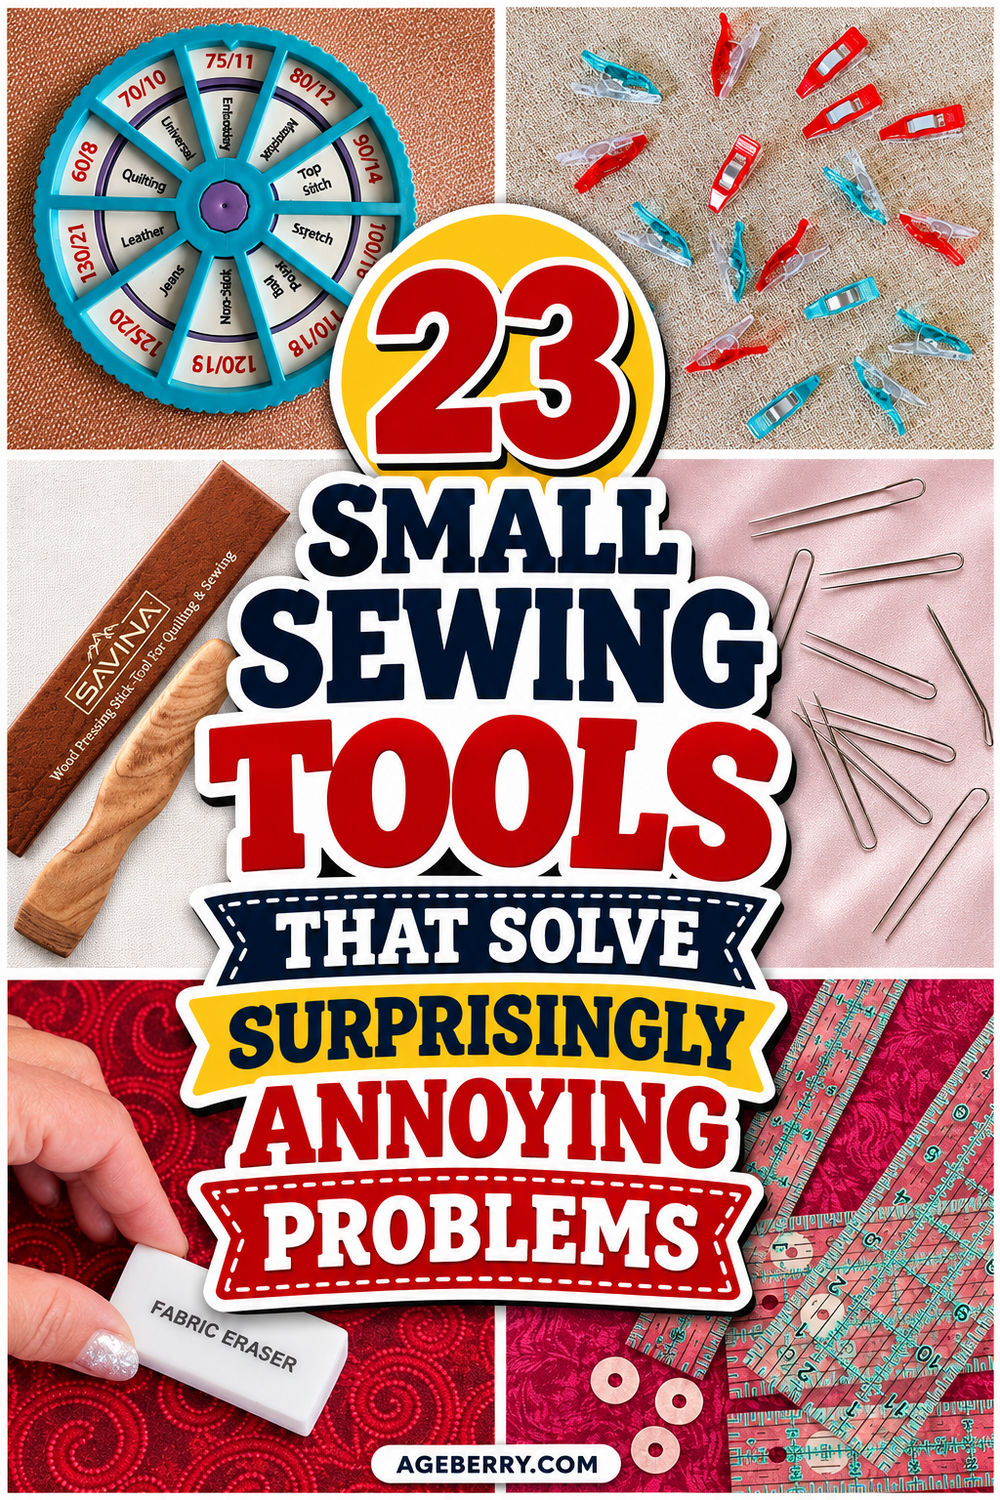
23 Small Sewing Tools That Solve Surprisingly Annoying Problems
Some sewing problems are big, like a broken machine or a cut in the wrong direction through your last yard of fabric. Others are small. They don’t ruin anything, but they quietly eat your sewing time, one tiny problem at a time. This article is about the small sewing tools that fix those.
I’ll start with mine.
When I made my first quilts, I finger pressed everything. Hundreds of seams.
By block six, my index finger was red. By block twelve, it had a heartbeat of its own. By the time the quilt top was done, that finger hurt more than my fabric bill, and I was typing emails with my left hand.
Then I found the finger presser. It’s a small tool with a smooth edge that presses seams the same way your fingernail does, minus the pain. It costs very little. I had spent weeks sacrificing a body part to a problem with a three-dollar solution.
That’s the thing about small sewing problems. They feel too silly to look up, so we just put up with them, sometimes for years. Meanwhile, someone already made a little tool for it, and it’s been hanging in the notions aisle the whole time.
Here are 23 of them. Read the list before you sacrifice another finger.
Note: Some of the links on this page are affiliate links. This means I will receive a commission if you order a product through one of my links. I only recommend products I believe in and use myself.
1. Finger Presser

The annoying problem: You just sewed a tiny unit for a quilt block. The seam needs to lie flat before you add the next piece, and the iron is across the room. A block with sixteen pieces turns into sixteen trips to the ironing board.
A finger presser lets you press that seam right beside the machine. Its tapered edge flattens the seam open or to one side. It also saves your fingernail, which gets sore after a few seams and never presses two seams the same way.
It doesn’t replace the iron. When I compared a finger-pressed seam with an ironed one, the finger-pressed seam was fine for piecing but still had a slight ridge. For precise quilt blocks, I finger press as I sew and use the iron for the final press.
Tips for using it:
- Keep it right next to your machine so you reach for it instead of your fingernail.
- Move in one direction. Rubbing back and forth can stretch bias edges.
- Give the finished block a real press with the iron before you trim it or join it to other blocks.
✅ Related tutorial: I Switched to Wooden Sewing Tools: Are They Worth It?
2. Point Turner

The annoying problem: You turn a zipper pouch right side out, and the corners look like little rounded thumbs. You poke them with a finger, then a pencil, then the closed tip of your scissors. The corners stay round, and now you’re nervous about the scissors.
A point turner has a narrow, smooth tip that reaches all the way into the corner and pushes the fabric out to a point. It works on pouch corners, collars, pockets, cuffs, pillow corners, bag flaps, and small fabric tabs. I use the narrow end for the tightest tips.
But have in mind, most of the work happens before you turn. A corner full of seam allowance can’t make a sharp point, however hard you push.
Tips for using it:
- Before turning, trim the seam allowance across the corner, close to the stitching but not through it. On thick fabric, trim the sides of the corner at an angle too.
- Turn the piece, then slide the point turner inside until it reaches the corner.
- Push gently in small nudges. The stitches at the very tip are the weakest spot, and a hard push can still go right through them.
- If the corner still looks rounded, pull the tool back a little and work the seam allowance into place from inside, one side at a time.
- Press the corner once it looks right, so it stays that way.
✅ Related tutorial: I Switched to Wooden Sewing Tools: Are They Worth It?
3. Mini Wonder Clips
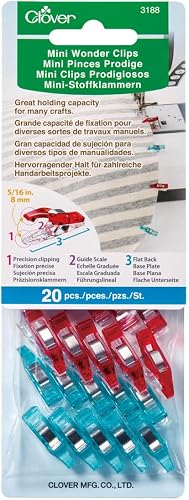
The annoying problem: You’re making a zipper tab. It’s a small folded piece of fabric, and the regular clip you grab is almost as big as the tab. It covers the edge you need to see and bumps into the presser foot.
Mini Wonder Clips by Clover are made for exactly this. The small size is the main reason to buy them. They fit tight spots where a regular clip feels awkward: zipper tabs, small folded edges, doll clothes, and small patchwork pieces. For such tiny clips, they hold surprisingly well.
They also help with vinyl and faux leather. Pins leave holes in these materials, and those holes don’t heal. The clips hold the layers without making a single puncture.
Tips for using it:
- Put the clip on with the flat side down so the fabric lies flat under the presser foot.
- Remove each clip before it reaches the presser foot. On a serger, remove it well before the blade.
- For thick bag seams, switch to regular Wonder Clips. They have more room to hold bulky layers.
✅ Related tutorial: Mini Wonder Clips By Clover: Useful Sewing Tool Or Just Another Notion?
4. Fabric Eraser

The annoying problem: You sewed right along your chalk line, and the seam looks great. The chalk line is still there, though, sitting next to the stitching like a reminder note you forgot to throw away. Brushing it with your hand only smears it around.
A fabric eraser removes chalk and light pencil marks from fabric. It gives you more control than a damp cloth, and it’s safer on fabric that might water spot.
Tips for using it:
- Test it first on a scrap or a hidden seam allowance.
- Work on dry marks only. Water can spread the mark or push it deeper into the fibers.
- Lay the fabric on a firm surface, such as a cutting mat or pressing mat. Support knits well so they don’t stretch.
- Rub in short, light strokes. If the mark is fading, keep the same gentle pressure instead of grinding harder. Hard rubbing can roughen the fabric.
- Erase before you press. Heat can make some marks much harder to remove.
- Brush away the eraser crumbs, since they look like lint on dark fabric. Then check the area in good light, because some marks look gone in dim light and come back in daylight.
- If the eraser picks up dark chalk, rub it on scrap paper before you use it on pale fabric.
It works best on quilting cotton, cotton poplin, canvas, denim, some linens, and firm cotton blends. Be careful with silk, rayon, velvet, wool, sweater knits, lace, loosely woven fabric, and metallic prints. It won’t remove permanent marker, wax, or heat-set marks, and a mark left for weeks may not come out at all.
✅ Related tutorial: Fabric Eraser for Sewing: What It Removes and When to Use It
5. Self-Threading Hand Needles

The annoying problem: You finished a line of quilting, and now there are two short thread tails that need to disappear inside the quilt. You need to thread both of them through the tiny eye of a needle, and the tails are only a few inches long. Your patience is shorter than the tails.
A self-threading needle has a slot at the top. You press the thread down into the slot instead of poking it through the eye. That makes it much easier to finish thread tails, even short ones.
Here’s how I use it:
- Quilting: Knot the thread tails close to the fabric. Load both tails into the self-threading needle, run it between the quilt layers, and bring it out about 1/2 inch away. Pull until the knot pops inside the quilt, then snip the tails.
- Coverstitch hems: Bring the two needle-thread tails from the right side to the wrong side through the slot. Then add the third tail and tie the tails off on the wrong side.
- Serger chains: Separate the needle threads from the looper threads. Load them into the needle, all at once for a 3-thread stitch or two at a time for a 4-thread stitch, and tie a knot near the edge.
Tips for using it:
- Hold the needle with the slot facing up and guide the thread straight down into it. Or hold the thread taut and bring the slot down onto it. Some people find the second method frays the thread less.
- Don’t snap the thread into the slot hard. A harsh snap can weaken or fray it.
- Buy a good brand, such as Clover, Dritz, Prym, Bohin, or SINGER. Cheap ones can have rough edges in the slot, and a rough edge frays thread very quickly. Replace any needle that starts catching or fraying.
- Pull gently through thick layers. A hard tug can pull the thread right out of the slot.
✅ Related tutorial: Are Self-Threading Needles Really Useful?
6. Seam-Fix Seam Ripper with a Rubber Tip

The annoying problem: The unpicking is done. The seam is gone. But hundreds of tiny thread bits are still stuck in the stitch holes, especially if you used dark thread on light fabric. They cling to the fabric, and your lint brush rolls right over them.
The Seam-Fix seam ripper has a rubber tip on the other end. Rub it over the fabric, and it lifts those little thread pieces out of the stitch line.
I used to pick these bits out by hand, one by one. Now the rubber tip clears them in a few minutes, even after long seams or rows of decorative overcast stitches. It works on seams that are already pressed open too.
Tips for using it:
- Finish all your unpicking first. Then come back with the rubber tip.
- Rub lightly over the old stitch line. You don’t need pressure, just a few passes.
- Brush or lint-roll away the loose bits.
- Work in good light so you can see when the stitch line is really clear.
✅ Related tutorial: Master the Seam Ripper: Your Ultimate Guide to Precision Stitch Removal
7. Fork Pins

The annoying problem: You nest two quilt seams together, pin them, and head for the needle. By the time the needle gets there, the intersection might slid out of line. Your corners don’t match, and you reach for the seam ripper again.
Fork pins have two points instead of one. The two points hold the layers on both sides of a seam, so the matched spot can’t twist or slide before you stitch it.
I bought Clover fork pins out of curiosity and used them on plaids, stripes, garment seams, and quilt blocks. They also held velvet and faux fur better than regular pins.
Tips for using it:
- For plaids and stripes, push one point through the matching line on both layers. Then set the second point almost right beside it to steady the layers.
- For seams, match the seams first with one regular pin. Then put a fork pin across the seam and remove the regular pin.
- Sew slowly and take each pin out before the needle reaches it. Never sew over them.
- Very bulky intersections are their weak spot. Fork pins couldn’t get through the center of my pinwheel block, so I used a regular pin there.
- The pins are thin and can bend, so don’t force them through fabric that resists.
- Store them in a dish. In my magnetic pincushion, they stuck together in a tangled little clump.
✅ Related tutorial: Sewing With Fork Pins: How They Help With Pattern Matching, Slippery Fabric, And Seams
8. Non-Slip Ruler Grips

The annoying problem: You’re cutting a narrow strip with a rotary cutter. Halfway down the ruler, it slides just a tiny bit. You don’t notice until the strip is wider at one end than the other, and now it’s a wedge.
Non-slip ruler grips are small, clear adhesive dots that go on the underside of the ruler. They give the ruler traction on the fabric. You can still lift and move the ruler, but once you press down, it stays put.
I use TrueCut TrueGrips. The package has 30 clear grips, 15 large and 15 small. They help most with long strips, bias cuts, and fabric that likes to shift.
Tips for using it:
- Turn the ruler over. The grips go on the underside.
- Keep the grips away from the cutting edge so the blade never hits them.
- Don’t cover the whole ruler. Four or five grips are enough for a 6 x 12 inch ruler. Too many make the ruler sticky and hard to slide into position.
- On a long ruler, space the grips along its length. On a square ruler, put one near each corner and one or two in the middle.
- Avoid covering markings you use often. The grips are clear, but clear doesn’t mean invisible under every light.
- Choose very thin grips. Thick ones lift the ruler, which lets it rock and keeps the blade from sitting tight against the edge.
- They also help on specialty rulers, like triangle and trimming rulers, and on older rulers with no grip texture.
✅ Related tutorial: Non-Slip Grips For Quilting Rulers: A Small Notion With A Useful Job
9. Hera Marker

The annoying problem: You need stitching lines on a pale quilt top. You don’t want chalk or ink on it, because you’re not sure it will come out. So you stand there holding a marking pen and worrying, which is a very slow way to quilt.
A Hera marker makes a crease instead of a line. Nothing is left on the fabric, so there’s nothing to wash out or erase later. I used it to mark straight quilting lines, then stitched along the creases with my machine.
I’ll admit it sat in my drawer for a while because I wasn’t sure what it was for. After I used it on a quilt, it became one of my favorite marking tools.
Tips for using it:
- Work on a firm surface, like a cutting mat. Hold a ruler in place and pull the Hera marker along its edge with firm, even pressure.
- Test on a scrap first. The crease shows best on smooth, tightly woven fabric, and it may barely show on textured or thick fabric.
- Check the crease with light coming from the side. Overhead light can make it almost disappear, and a lamp at a low angle makes it pop.
- Mark right before you quilt. The creases fade when the fabric is handled a lot.
- Stick to straight lines and gentle curves. Tight curves and detailed shapes are hard to mark evenly.
✅ Related tutorial: 15 Creative Ways to Mark Fabric for Sewing Projects
10. Gripping Bodkin

The annoying problem: You’re pulling elastic through a waistband casing with a safety pin. Halfway through, the pin pops open inside the casing. Or the far end of the elastic slips in after it and disappears. Now you’re fishing for elastic inside a fabric tunnel.
A gripping bodkin (also called a pinch bodkin) holds the elastic in a small set of jaws. You slide a ring forward to close the jaws, and pulling on the elastic makes the grip even tighter. It’s much easier to move through a casing than a small safety pin.
The pinch style took me a little while to get used to. After a few casings, it became very easy.
Tips for using it:
- Open the bodkin, grab the end of the elastic with the jaws, and slide the ring forward to lock it.
- Before you start, pin the other end of the elastic to the fabric outside the casing opening with a large safety pin. That end can’t escape if it’s pinned down.
- Pull on the metal bodkin as you work, not on the elastic. Pulling the elastic can make it slip inside the casing.
- Choose a bodkin that slides through your casing with a little room to spare. A wide bodkin in a narrow casing will jam.
✅ Related tutorial: What Is a Bodkin and How to Use It?
11. Tube Turning Set
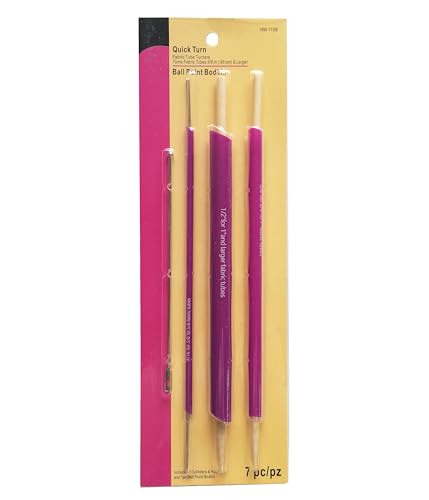
The annoying problem: You sewed a long, narrow tie for a bag or an apron. Now it has to be turned right side out. You start with a safety pin, and twenty minutes later the fabric is bunched up and stuck in the middle of the tube.
A tube turning set has plastic cylinders and matching rods in several sizes. You slide the sewn tube over a cylinder, push the matching rod in, and the fabric flips right side out in seconds. It works for ties, spaghetti straps, belt loops, and drawstrings.
Tips for using it:
- Choose the cylinder that fits inside your sewn tube with a little room. If it’s too tight, the fabric won’t slide. If it’s too loose, the tube can bunch.
- Trim the seam allowance before turning. Less bulk inside the tube means less resistance.
- Slide the tube onto the cylinder, with the closed end of the tube at the open end of the cylinder.
- Push the matching rod against the closed end, into the cylinder. Keep pushing, and feed the fabric along as it turns.
- Press the turned tie flat with the seam along one edge.
✅ Related tutorial: 17 Sewing Tools You’re Not Using (But Absolutely Should Be)
12. Duckbill Scissors

The annoying problem: You need to trim the batting close to the stitching on an oven mitt. With regular scissors, the lower blade sits right on the fabric, and one small slip leaves a hole in the mitt.
Duckbill scissors have one regular blade and one wide, flat blade shaped like a paddle. The paddle sits against the layer you want to protect, so only the layer above it gets cut.
I started using them after I cut into my stitching and a bit of fabric while trimming appliqué with regular scissors. In my oven mitt tutorial, I use them after the quilting lines are stitched. I trim the batting right up to the stitched outline. The flat blade stays against the fabric, so the fabric underneath stays uncut.
They’re also great for appliqué, trimming inside an embroidery hoop, grading seam allowances, trimming interfacing close to a seam, and trimming one edge of a flat-felled seam.
Tips for using it:
- Slide the paddle blade under the layer you’re trimming, against the layer you want to keep.
- Keep the paddle flat. Tilting it lifts the blade’s point toward the fabric you’re protecting.
- Clean the paddle after each use, since lint builds up on it quickly.
- If you’re left-handed, buy left-handed duckbill scissors. Right-handed pairs won’t work for you.
13. Thread Spool Pin Adapter

The annoying problem: The thread keeps catching, twisting, or snapping, and you can’t find anything wrong with the threading. You rethread three times. You change the needle. The thread breaks again in the same spot.
This happened to me while I was hemming a stretchy T-shirt with a twin needle. I was using Eloflex, a stretchy thread that comes on parallel-wound spools. Both spools sat on the vertical spool pins of my machine. The threads snagged, one broke, and one twin needle bent.
The cause was the spool position. Parallel-wound thread is made to unwind from the side of a spool that turns freely. On my machine, the spool couldn’t turn, so the thread kept catching.
A thread spool pin adapter fixes that. It attaches to the spool pin and holds the spool so it can rotate, and the thread comes off the side the way it’s meant to. Once I added it, the threads stopped breaking, the needles stayed straight, and the hem stretched without popping.
It won’t fix every cause of thread breakage. I still check the thread path, needle, and other possible causes. But when the problem is how that particular spool unwinds, changing the setup can help.
Tips for using it:
- Check how your thread is wound. Parallel-wound thread lies in straight, side-by-side rows. Cross-wound thread forms an X pattern and usually feeds well from a vertical pin.
- Attach the adapter to the vertical spool pin or the bobbin winder pin, depending on your machine.
- Line it up with the machine’s thread path to avoid tension problems.
- Check for wobble after you install it, and tighten the screw if needed.
✅ Related tutorial: Unique Sewing Tool You Didn’t Know Existed: Thread Spool Pin Adapter
14. Thread Nets

The annoying problem: You’re sewing with metallic or rayon thread. The loops on the spool are so slippery that they slide down and pile up at the base of the spool. Then they wrap around the spool pin, and the thread snaps.
A thread net is a small, stretchy mesh sleeve that fits over the spool. It holds the wraps in place so they can’t slide down. The thread still pulls off freely through the mesh. Thread nets are inexpensive and easy to find.
Tips for using it:
- Slide the net over the spool so it covers all the thread. It should be snug but not tight. A tight net adds drag and can affect the tension.
- If the net is longer than the spool, fold the extra under the bottom of the spool or trim it.
- Pull the thread end out near the top of the spool, then thread the machine as usual.
- Watch the first few inches of stitching. If the thread feeds unevenly, loosen the net a little.
- Use them in storage too. A net keeps slippery spools and cones from unwinding in the drawer.
✅ Related tutorial: Metallic Thread For Embroidery And Sewing: Top 10 Tips You Must Know
15. Magic Bobbin Genies

The annoying problem: You’re sewing fast, or sewing through several layers. The bobbin thread starts feeding unevenly, and the stitches on the underside get messy.
Magic Bobbin Genies are small, thin, slick disks that go in the bottom of the bobbin case, under the bobbin. They reduce the friction between the bobbin and the case, so the bobbin thread unwinds more smoothly. I’ve found they help, especially at higher speeds and with layered fabrics.
They aren’t a fix for every tension problem. Most tangles under the fabric come from the top thread. A washer can’t fix that. Newer machines also feed the bobbin smoothly enough without one.
Tips for using it:
- Check that the Genies match your bobbin size and bobbin case before you buy.
- Drop one disk into the empty bobbin case, then insert the bobbin as usual.
- Sew a test line on a scrap and look at the underside.
- If you still see tangles, rethread the top thread with the presser foot up and clean out the bobbin area before you blame the bobbin.
16. Expanding Sewing Gauge

The annoying problem: You need six buttons evenly spaced between the top and bottom button. You measure, divide, measure again, and mark. Then you decide seven buttons would look better, and you get to do all the math again.
An expanding sewing gauge looks like a folding fence with evenly spaced points. When you stretch it open or squeeze it shut, the spaces between the points stay equal. Each point marks a button or buttonhole position, and you skip the measuring altogether.
Tips for using it:
- Mark the first and last button positions on the fabric.
- Put the first point of the gauge on the first mark. Then expand or close the gauge until another point lands on the last mark.
- To use fewer buttons, count off only the points you need and use the last one of those for the bottom mark.
- Check the spacing by eye before marking. Then mark each position with a pin or a marking tool.
- Before you buy one, check that the pivots move smoothly but hold their position, and that the markings are easy to read. Loose pivots won’t stay where you set them.
✅ Related tutorial: Buttonhole Basics and Beyond: Tools and Methods That Work
17. Buttonhole Chisel

The annoying problem: Your buttonhole came out beautifully. Then you cut it open with a seam ripper, the ripper slips, and it slices right through the bartack at the end. One second undid all that careful stitching.
A buttonhole chisel is a small, sharp blade with a handle. You set it between the stitched sides and press down once. It cuts one straight, neat slit. I used to cut buttonholes with scissors, but they’re clumsy in such a small space and easy to push into a bartack. Now I use a chisel.
Tips for using it:
- Always cut over a wood block or a cutting mat. It protects your table and gives the blade a firm surface.
- Choose a blade that’s shorter than the opening between the bartacks. For a long buttonhole, cut it in two presses instead of using a blade that’s too long.
- Place the blade inside the stitched sides, away from the bartacks, and press straight down.
- To be extra safe, stop the cut just short of each bartack. Then work the tip of an awl into the last bit and ease it toward the bartack. The fibers part gradually, and you won’t slice the stitches.
- Some chisel sets include a small round punch for the round end of a keyhole buttonhole.
✅ Related tutorial: Buttonhole Basics and Beyond: Tools and Methods That Work
18. Seam Jumper

The annoying problem: You’re hemming jeans, and you reach the side seam. The fabric is suddenly very thick. The presser foot tilts up, the stitches get tiny, and the machine slows down or stops.
The problem is the tilt. When the foot tilts over the thick seam, the feed dogs lose steady contact with the fabric. The stitches can shorten, skip, or stall.
A seam jumper is a small plastic tool that fills the gap under the presser foot so the foot stays level. It’s also called a hump jumper, a bulky seam aid, or a Jean-a-ma-jig. It helps at jeans hems, pocket corners, waistbands, and bag straps.
How to use it:
- Slow down before the thick seam. Stop before the foot starts to tilt.
- Keep the needle down in the fabric, then raise the presser foot.
- Slide the seam jumper under the back of the foot, close to its back edge. Lower the foot.
- Sew slowly across the thick part. Use the handwheel if it’s very thick.
- Once the foot is on top of the thick section, remove the jumper from behind it.
- If the foot drops off the seam awkwardly, put the jumper in front of the foot. Sew until the foot is back on regular fabric.
Tips for using it:
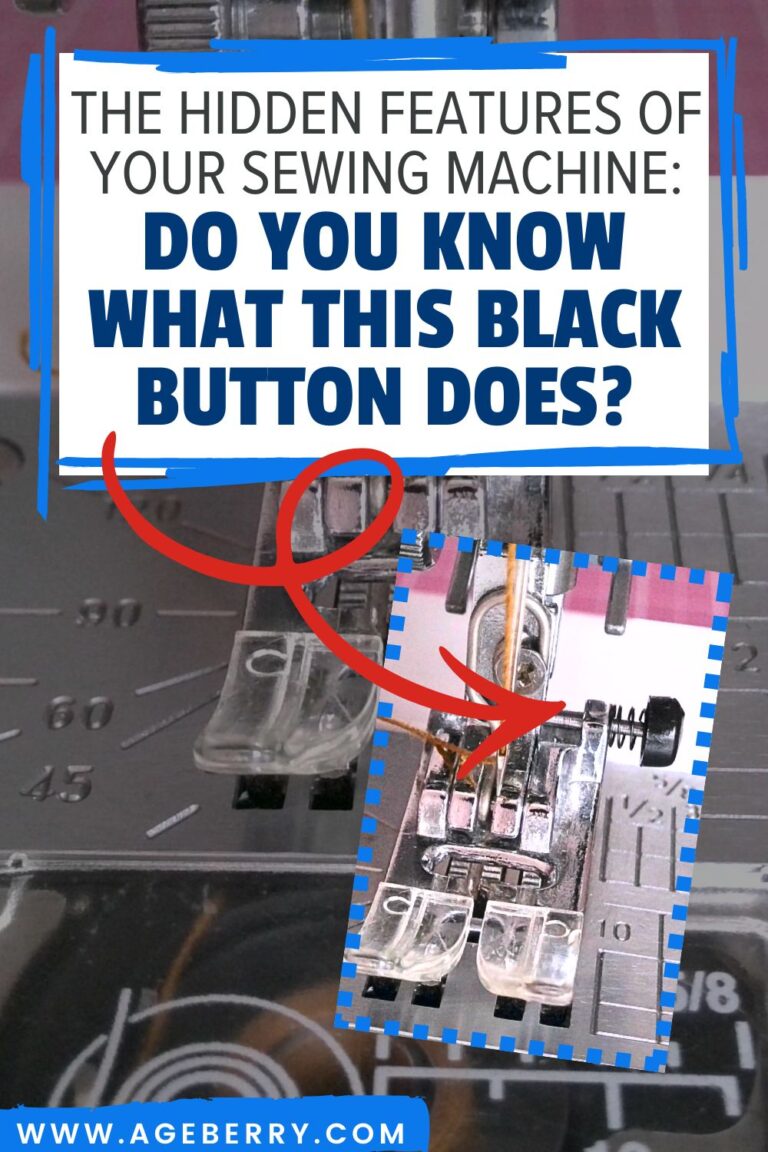
- If your presser foot has a black leveling button, try that first for smaller bumps.
- Use the seam jumper for seams that are taller, wider, or longer. You can also use both together.
- Practice on a denim scrap with a folded seam. It feels awkward the first time and simple after a few tries.
- The goal is a level path for the foot, not forcing the machine through the seam.
✅ Related tutorial: 7 Essential Tools and Settings for Sewing Denim on a Regular Sewing Machine
19. Silicone Needle Pullers

The annoying problem: You’re hand sewing through several layers. The needle tip comes out the other side, but your fingers keep slipping on it. You pinch harder, it slips again, and your fingertips start to hurt.
Silicone needle pullers, also sold as needle grabbers, are small, soft grips that hold the needle for you. It gives you traction your fingers don’t have.
A needle puller and a thimble do different jobs. A thimble protects your finger while you push the needle in. A needle puller helps you grip the needle and pull it out the other side. For thick layers, many sewists use both.
Tips for using it:
- Push the needle through the layers first, with a thimble if needed.
- Pull straight out, in line with the needle. Pulling at an angle can bend a fine needle.
- If you’re struggling on every stitch, check the needle. One that’s too fine for the fabric may bend, and one that’s too large leaves holes. Match the needle to the fabric weight and the thread.
✅ Related tutorial: Top 10 Hand Sewing Tips: Smart Hacks, Essential Tools, and Simple Techniques Every Sewist Can Use
20. Clover Thread Pic

The annoying problem: You finish quilting, hold the quilt up to the light, and there it is. A dark thread is trapped between the layers, right under a pale part of the quilt top. It’s quilted in now, and you can’t reach it from either side.
The Clover Thread Pic has a very fine shaft with a tiny hook at the tip. The shaft is thinner than a sewing needle, so it slips between the threads of the fabric without leaving a mark. You slide it in, catch the stray thread with the hook, and pull it out or move it where it won’t show.
This is a different job from burying thread tails with a self-threading needle. Those tails are threads you meant to leave. This is a thread that got in by accident.
Tips for using it:
- Find the exact spot of the stray thread in good light.
- Insert the Thread Pic as close to the thread as you can.
- Move slowly and try to catch the thread with the hook. It may take a few tries.
- Ease the thread out between the fabric threads. If it won’t come out, pull it into a darker area where it won’t show.
- Next time, check the back of the quilt top for loose threads and trim them before you baste. It’s the easiest fix of all.
21. Zipper Jig

The annoying problem: You bought zipper tape by the yard so you can cut any length you need. Now you have to slide the pull onto both sides of the tape at the same time. You need one hand for the pull and two hands for the tape, and most of us only have two hands.
A zipper jig holds the zipper pull for you. Your hands stay free to line up both sides of the tape and feed them into the pull evenly.
The one I’m using is the Gypsy Quilter Zipper Jig. It works with size #3, #4.5, and #5 zipper pulls and tape. Its retailer notes that it doesn’t work with YKK zippers, so check the size and brand of your zipper before you buy one. There are other types, like SAVINA Zipper Jig Tool, which promise to work with any size zippers.
Tips for using it:
- Cut the zipper tape to the length you need, plus a little extra.
- Place the pull in the channel that matches your zipper size.
- Hold both ends of the tape together so the ends line up evenly.
- Feed both sides into the pull at the same time and push them in until the teeth catch.
- Zip it up and down a few times before you sew. If one side is ahead of the other, the zipper will twist, so take it out and try again.
22. Needle Noter

The annoying problem: You change needles often, moving between knits, quilting, embroidery, and other projects. A few days later, you remember what you sewed. Which needle is still in the machine is another matter, and the only way to check is to take it out and squint at the tiny numbers on it.
The Needle Noter keeps that information visible on the machine. Its movable discs let you select the needle type and size, and an arrow marks the combination. It attaches with a hook-and-loop backing, so you can glance at it without removing the needle or searching for its package.
I change needles a lot, so this is how I keep track. For example, after I install a Stretch 75/11, I set the discs to Stretch and 75/11.
The link above is for Amazon; but the device can also be purchased directly from the owner’s site; and if purchasing directly, there is a little goodie in my latest newsletter: a coupon for a 20% discount!
Tips for using it:
- Update the setting whenever you change the needle. The Needle Noter only shows what you selected. It doesn’t identify the needle on its own.
- Stick it where you can see it from your sewing chair.
- Keep the needles you removed but plan to reuse in a needle storage pillow, so you know their type and size too.
✅ Related tutorial: Sewing Machine Needle Organization: A Clever System I Tried
23. Clover Wonder Pins

The annoying problem: You’re pin basting a quilt with regular safety pins. Each one has a tiny clasp that has to be opened and closed. Multiply that by a few hundred pins, and your fingertips are done long before the quilt is.
Clover Wonder Pins are curved basting pins with an easy open-and-close design. Opening and closing them is much easier on your fingers during a long basting session. The curved shaft scoops through all three layers and comes back up without bunching the backing. The plastic-covered head is easy to hold and bright enough to spot on the quilt. The pins are sturdy, sharp, and thin enough to avoid large holes.
Tips for using it:
- Tape or clamp the backing right side down on a flat surface. Add the batting, then the quilt top right side up.
- Start pinning in the center and work out toward the borders. Smooth out wrinkles before you place each pin.
- Space the pins about a hand’s width apart across the whole quilt.
- Count your pins before and after. A forgotten pin is a nasty surprise for whoever uses the quilt.
Bonus: Magnetic Scissor Guide

The annoying problem: Your pattern doesn’t include seam allowances. That means tracing a line 3/8 inch outside every edge of every piece with a ruler before you can cut. By piece four, you’re wondering if you really need this dress.
A magnetic scissor guide attaches to the side of your scissors. It rides along the edge of the pattern while the blade cuts a set distance away. You add the seam allowance as you cut, without drawing it first.
Tips for using it:
- Set the guide to your seam allowance and measure from the blade to the guide before you start.
- Pin or weight the pattern well, so it can’t shift as the guide slides along its edge.
- Cut a test piece from a scrap and check the allowance with a seam gauge.
- Keep the guide pressed lightly against the pattern edge. Go slower on curves so the guide stays at the same distance.
- Check the allowance on both a straight edge and a curve of your first real piece. Very tight curves may still need to be marked by hand.
Since I am a subscriber to Burda, I have a huge collection of patterns that do not have seam allowances on the paper; I was very interested in this device. But …
The catch: I could not find it for sale anywhere outside Europe! I found a version here but I did not test it myself.
✅ Related tutorial: Seam Allowances in Sewing Patterns: What They Are and How to Use Them
✧✧✧ 🪡 ✧✧✧
These tools take care of the small problems that eat your sewing time.
You will probably not need all 23 at once. Pick the problem that bugs you most, get the tool for it, and enjoy the extra time. Then come back to this list the next time something small slows you down and you can’t remember what that little tool was called.
Save this post to your Pinterest sewing board so it’s there when you need it. It’s much easier than remembering the name of a tool you saw once. And follow me on Pinterest for more sewing tips, tools, and tutorials.

latest posts
- 23 Small Sewing Tools That Solve Surprisingly Annoying Problems
- Serger Buying Guide: What to Know Before You Buy
- Envelope Pillow Cover Tutorial for Beginners: Easy DIY with Just Two Seams
- Easy Christmas Sewing Project for Making Fabric Gift Bags in Different Sizes
- Secrets to Sewing with Difficult Fabrics: Tips for Perfect Results
- How to Add a Fabric Insert to a Hemmed Edge: The Wrap-and-Turn Trick
- The Little Triangle Trick for Clean Hem Corners
- 25 Little Sewing Habits That Make Your Work Look Better
- How to Sew a Pointed Fabric Zipper End Tab