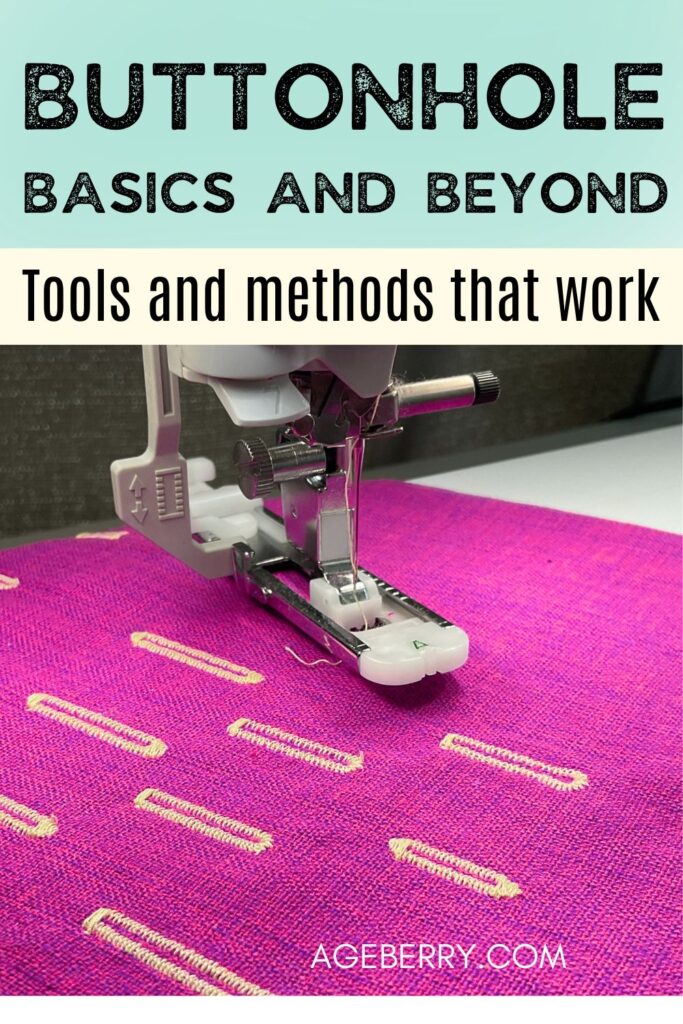
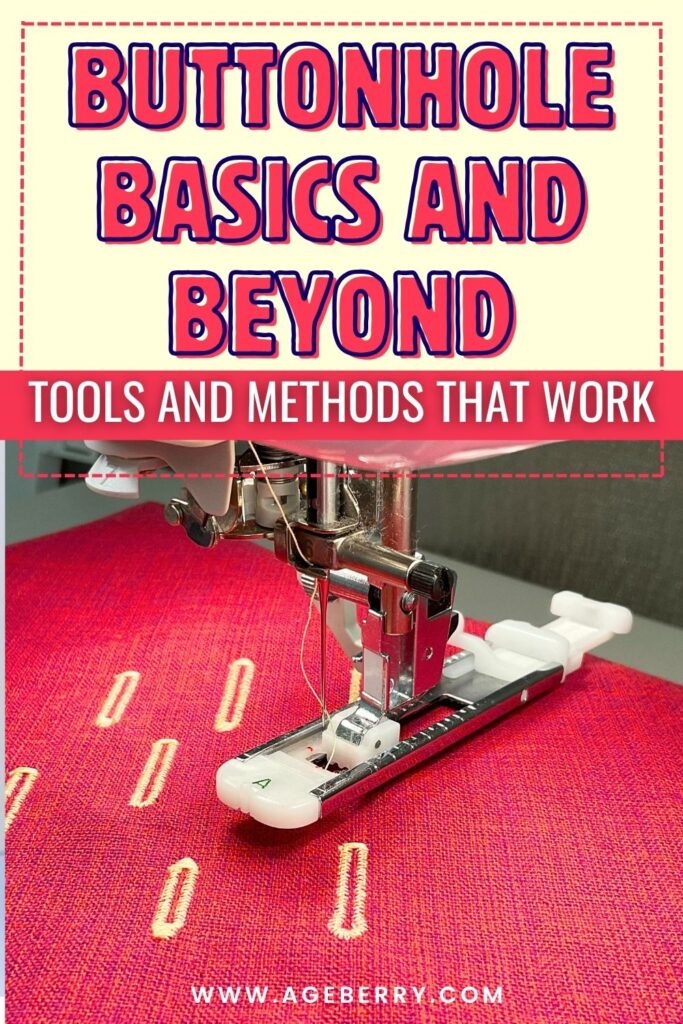
Buttonhole Basics and Beyond: Tools and Methods That Work
I like a crisp, well-finished buttonhole. I also know the chaos that shows up when fabric, feed dogs, and a presser foot do not agree, when fabric puckers, and satin stitches wander off-course. A buttonhole might be small, but it can quietly make or break the look of a garment.
In this guide, we’ll start with what actually counts as a “correct” buttonhole — not just one that fits the button, but one that lies flat, looks even, and keeps its shape after repeated wears and washes.
Then we’ll move into the tools that make buttonhole sewing easier, from the traditional standbys to some modern gadgets you may not have tried yet.
Finally, I’ll share five different ways to sew a buttonhole so you can match the method to your fabric, your machine, and the finish you want.
Consider this your go-to guide for keeping those tiny stitched rectangles neat, even, and ready to impress.
What counts as a “correct” buttonhole?
A correct buttonhole is like a good handshake. It feels secure, looks neat, and doesn’t leave you wondering if something awkward just happened.
Technically speaking, a correct buttonhole has a few non-negotiables. It should be exactly the right size for the button. Too small, and you’ll need the strength of a locksmith to fasten it. Too big, and your button will slide out like a toddler on a playground slide.
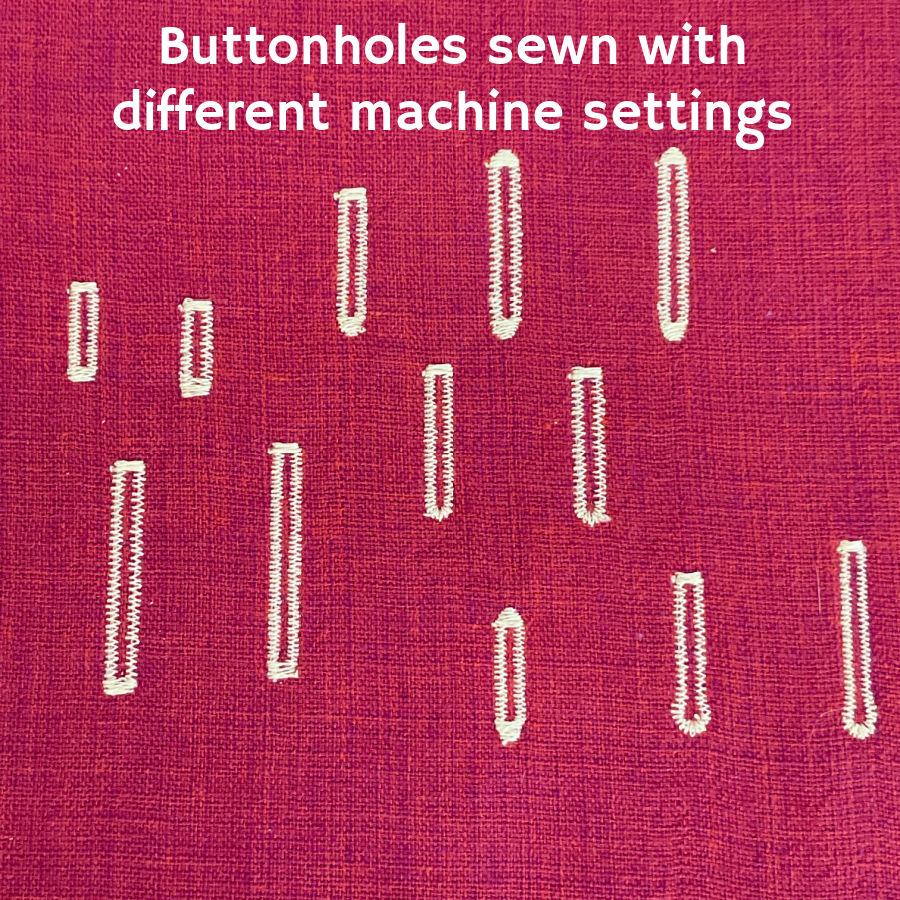
The stitches should be dense and even, forming a sturdy edge that resists fraying. This keeps the fabric from stretching out over time and helps the button glide through smoothly. Both ends of the buttonhole should have reinforced “bars” (or tack stitches) to stop the fabric from tearing.
It should also be placed in the right spot. A perfect buttonhole on the wrong line is like wearing matching shoes in two different sizes — technically fine, but not doing its job.
And finally, a correct buttonhole matches the fabric and the project’s style. A silky blouse might call for a narrow, delicate buttonhole, while a thick wool coat needs something bold and reinforced.
In short, a correct buttonhole:
- Fits the button without struggle or slack.
- Has smooth, even stitching all the way around.
- Includes strong bartacks at both ends.
- Is positioned exactly where it belongs.
- Matches the weight and character of your fabric.
A well-made buttonhole tells you someone cared enough to get it just right.
Sewing Tools That Make Correct Buttonholes
Even the most experienced sewist can struggle with buttonholes if the right tools aren’t in reach. There are plenty of gadgets and helpers — both classic and modern — that take the guesswork out of getting neat, even results. In this section, we’ll look at the tools that keep fabric steady, stitches balanced, and buttonholes looking like they belong on the garment.
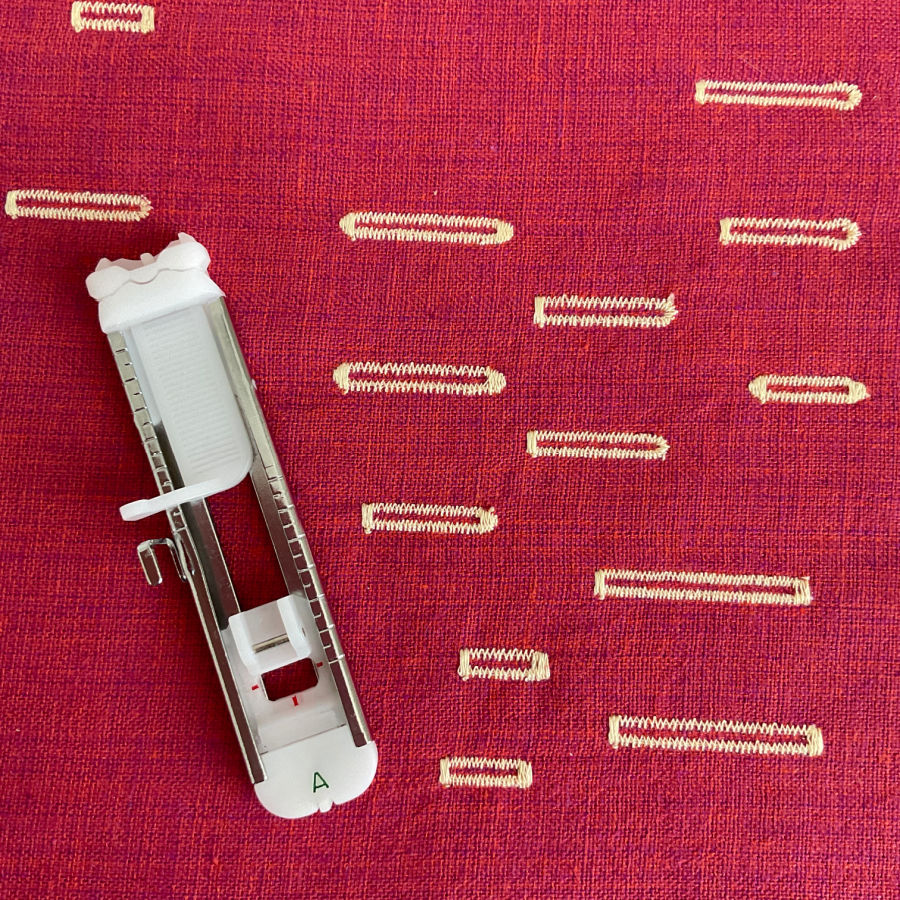
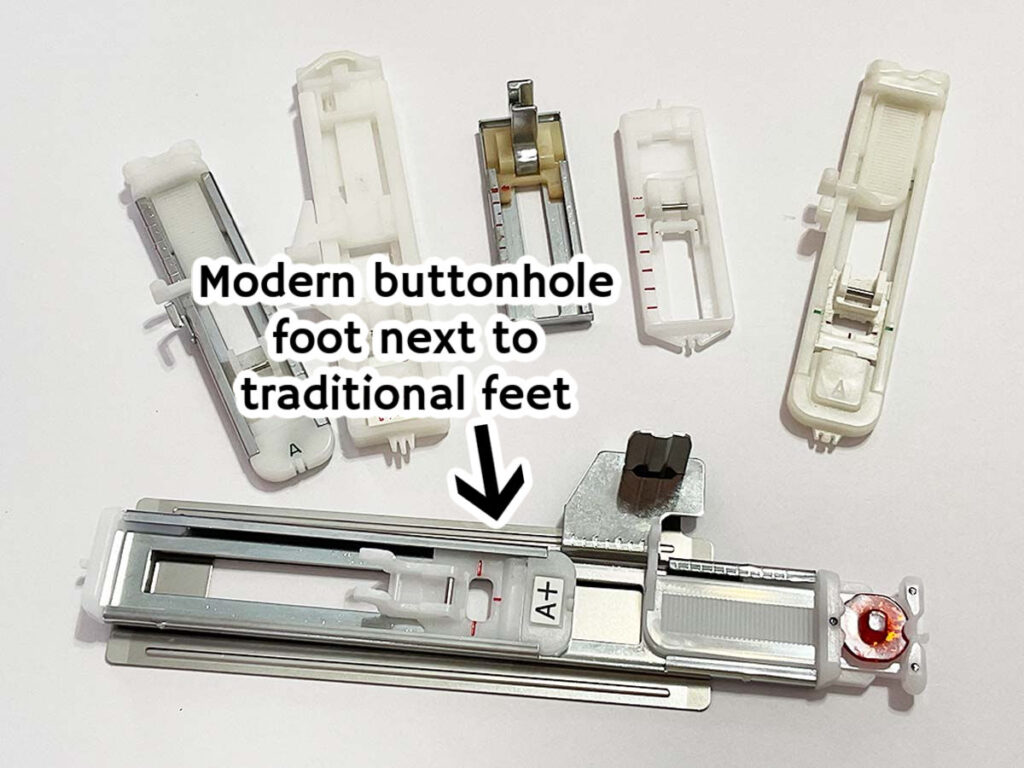
Buttonhole feet
Buttonhole feet are quite different from your standard presser feet. They’re longer, have all sorts of odd shapes and grooves, and even moving parts. That’s because their only job is to make neat, identical buttonholes without letting your fabric wander off course.
You can find them in both plastic and metal. I’ve used both, and honestly, they each get the job done. Plastic ones are usually lighter. Metal ones feel a bit sturdier in hand and may slide over thicker fabrics more easily. But neither is “better” — it mostly comes down to what you have on hand.
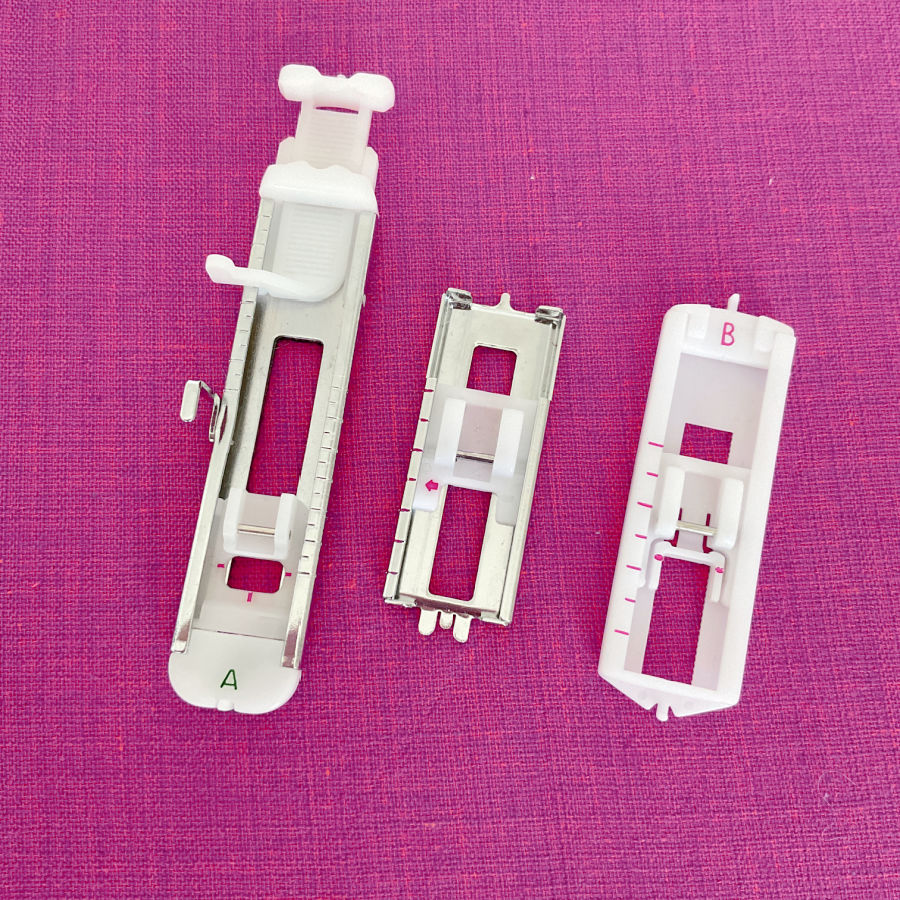
One-step buttonhole foot
Most modern machines come with this style. You pop your button into the sliding gauge at the back (or the front) of the foot, and the machine decides the exact length. Then it sews the whole thing in one go — sides, bar tacks, and all — without stopping.
Every buttonhole comes out the same size, so your shirt doesn’t end up with that awkward middle one that’s mysteriously too tight.
Check that your foot has built-in cording slots. They’re usually tiny grooves at the front that hold the cord in place while the satin stitches wrap over it to give the buttonhole a firm, raised edge. It’s especially nice for coats, denim, or anything that gets heavy use. Not all buttonhole feet have them, especially on older models.
✅ Related tutorial: Buttonhole Presser Foot 101: What It Is And How To Use A Buttonhole Foot To Create Nice Buttonholes
Four-step buttonhole foot
This one’s more old-school and is still common on basic or mechanical machines. You sew each part in turn: one side, bottom bar tack, the other side, and top bar tack. It’s a bit more hands-on, but you get full control over each stage.
You can stop and adjust the fabric if it’s drifting, which can be handy on tricky materials.
You can use cording here too.
Have they changed in the last 15 years?
Surprisingly, buttonhole feet haven’t reinvented themselves much. The basic shape and purpose are the same. The modern ones sometimes have smoother plastic that glides better, clearer markings for start and stop points, and slightly improved mechanisms for holding the button in place.
But if you’ve got a good 15-year-old foot that fits your machine, it’ll still make solid buttonholes today. The “upgrade” is really in the machine’s buttonhole stitch programming, not so much the foot itself.
But if you sew on machines like a Brother Luminaire or Baby Lock Solaris, you’ve probably noticed the buttonhole foot looks… well, supersized. These aren’t your dainty, standard feet. They’re wide, long, and clearly built for more than a blouse button. Think coat buttons, chunky cardigan buttons, even those statement buttons that deserve a proper runway of stitches.
You can easily go up to 1 3/4 inches in buttonhole length, which covers most “big button” territory in the sewing world.
How to pick the right buttonhole foot for your fabric
Choosing a buttonhole foot isn’t just about what came in the machine’s box. The right one can make life easier, especially if you sew a mix of fabrics. Here’s what to think about:
- For thick or layered fabrics
A metal foot often slides more smoothly over bulk, especially if you’re making buttonholes across seams or on heavy coats. Some metal feet have a slightly thinner base, so they’re less likely to get “stuck” on ridges. - For delicate or lightweight fabrics
A plastic foot is a bit lighter, so it won’t press hard creases into fine fabrics like silk or voile. - For textured or slippery fabrics
Look for a foot with non-slip grooves on the underside. These help grip without dragging, so your satin or corduroy stays in place as the stitches form.
Note: Some of the links on this page are affiliate links. This means I will receive a commission if you order a product through one of my links. I only recommend products I believe in and use myself.
The stabilizer plate
Here’s a little gadget most sewists don’t even know exists — the stabilizer plate. It’s a flat add-on that clips under your buttonhole foot, and its one job is to give tricky fabrics a solid, even ride under the stitches.
Why would you need one? Imagine trying to sew a buttonhole across the thick seam of a denim jacket, or on a spongy fleece, or on that sweater knit that keeps bouncing away from you.
Without extra support, the fabric can dip, stretch, or shift just enough to make the stitches uneven. The stabilizer plate keeps everything level so the feed dogs and foot work like they’re on calm, flat ground.
Janome makes one for their Foot R, and plenty of sewists swear by it for feeding uneven layers without drag. You may find similar plates for some other brands, and some machines (like certain Brother models) even include one with the buttonhole foot.
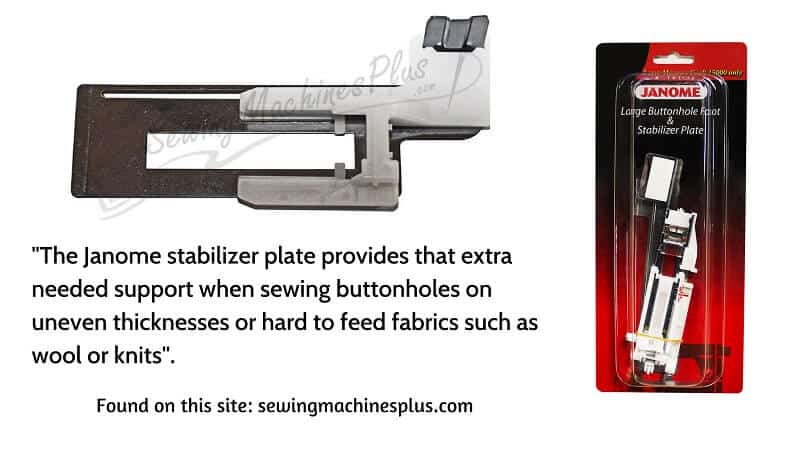


If your buttonhole is heading straight into a bulky seam, or if your fabric feels springy and unpredictable, click on the plate. You’ll notice the stitches look denser, straighter, and far less “help me” than they would without it.
Stabilizers that help buttonholes
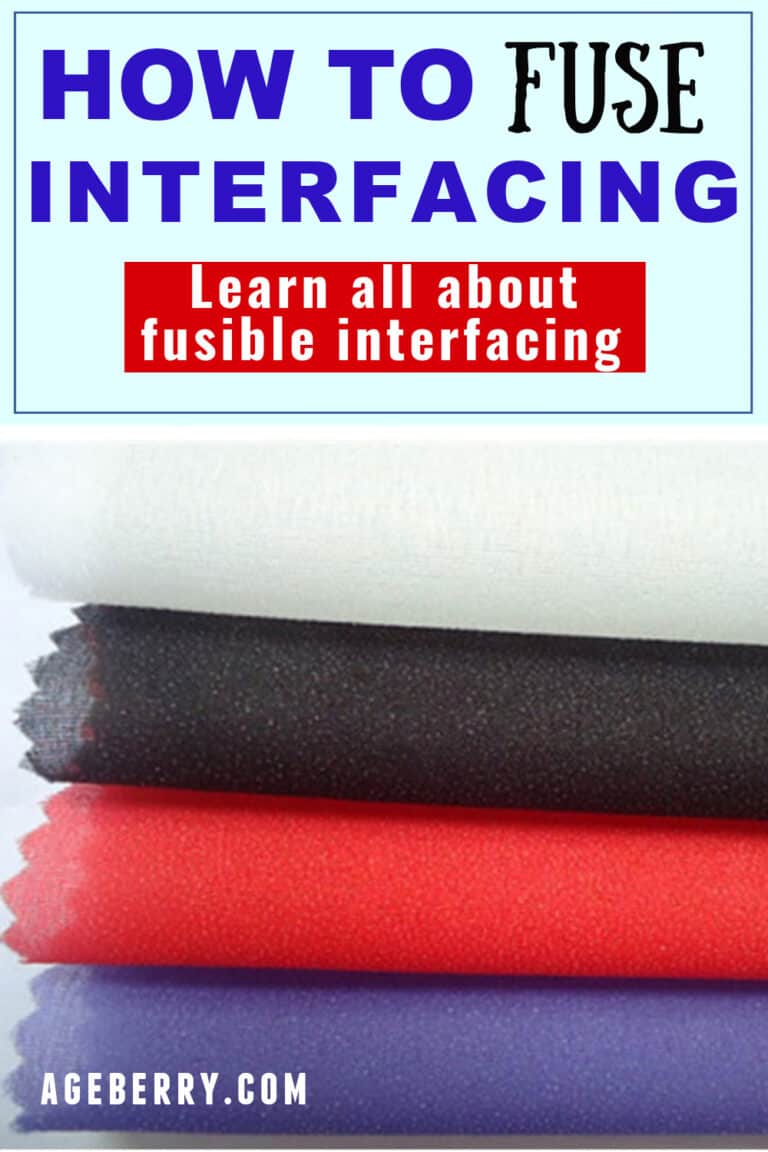
When we talk about stabilizers inside the garment, we really mean fusible interfacing. And no, they’re not just for collars and waistbands. They can make a huge difference in keeping your buttonholes looking neat instead of stretched or wobbly.
Inside the garment
Use woven fusible for woven fabrics and tricot fusible for knits. Cut a rectangle that’s big enough to cover the buttonhole area plus about 1.5 cm all the way around. That extra bit keeps the stitches stable and stops fraying from creeping in. On knits, it also keeps the fabric from stretching out as you sew.


✅ Related tutorial: How To Use Fusible Interfacing (Video + Tips And Tricks)
On top as a “slider”
If you’ve ever stitched on plush, terry towels, sherpa, faux fur, velvet or anything with texture, you know how those satin stitches can disappear into the fluff. A wash-away topper (the same stuff used in machine embroidery) acts like a smooth temporary surface so the stitches sit nicely on top instead of sinking. Once you’re done, it can be dissolved in water.

Temporary holding aids
Sometimes it’s not about adding body, but about keeping layers from shifting while you sew. Wash-away Wonder tape or a light mist of temporary spray adhesive can hold everything steady while you mark, position, and stitch the buttonhole.


Spacing Tools
Rulers
A basic ruler can do the job, but not all rulers are equal when it comes to marking buttonholes. The wrong ruler will slide around, have markings you can barely see, or make thick, imprecise lines that peek out from your stitches. That’s how you end up with buttonholes that slowly “drift” off alignment down the placket.
A good choice is a clear quilting ruler with non-slip grips and fine, high-contrast markings. You can see the fabric underneath, line it up with seams or edges, and mark exactly where you need without losing your spot. Quilting rulers like the Omnigrid 6″ or similar options on Amazon are a safe bet — they stay put and make precise marking much easier.


Oh, by the way, non-slip grips are tiny textured spots or strips on the underside of a ruler that help it stay put while you mark. They’re especially handy on smooth fabrics like cotton poplin or silk, where a plain acrylic ruler tends to skate around. With grips, you can press lightly and the ruler won’t budge — no awkward hand contortions to pin it down.


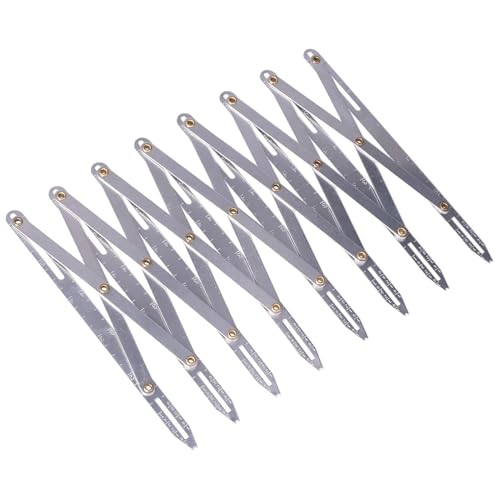
Expanding Gauge
The SimFlex-style expanding gauge is like a shortcut to perfect spacing. You stretch it open, and each arm shows exactly where a buttonhole should go. No endless measuring, no “oops, that last one’s too close.”
When using an expanding gauge, check that the pivot points are firm but smooth — too loose and it won’t hold its position, too stiff and it’s frustrating to adjust. Make sure the measurement markings are clear.
It’s a small tool, but it can save you a lot of time and make your buttonhole layout look intentional instead of “close enough.”

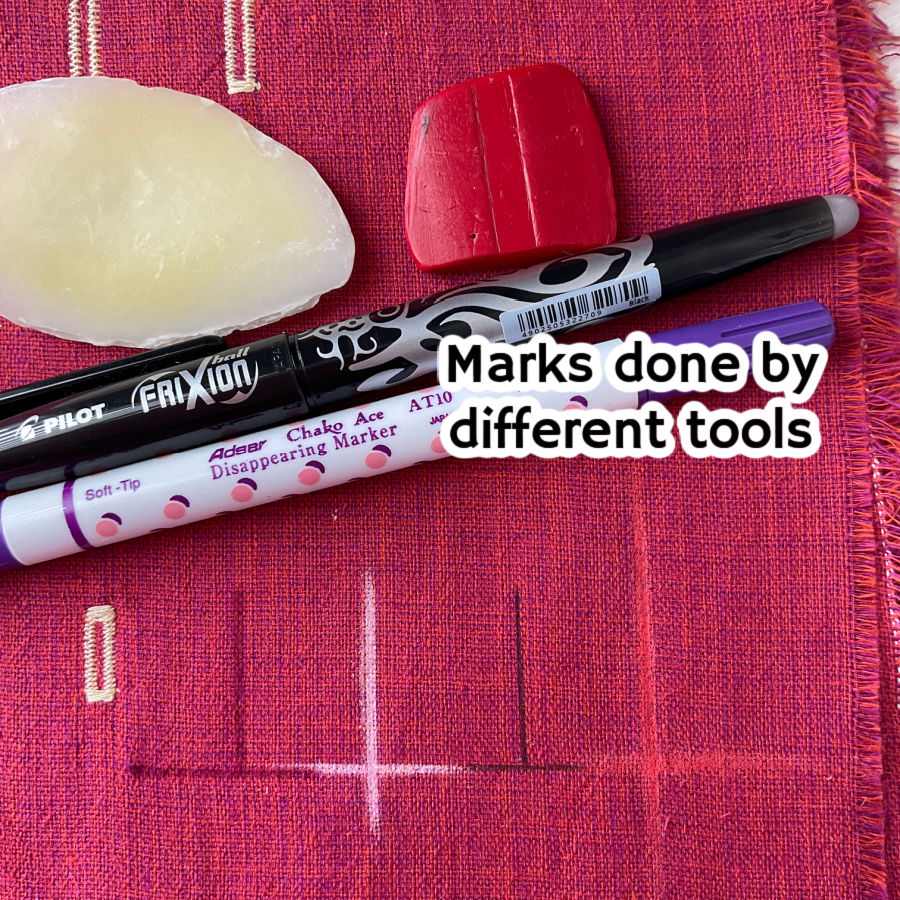
Marking Tools
The marks you make for buttonholes need to be thin, sharp, and easy to see — but not so bold that they peek out from your stitches. A chunky line can throw off your placement and show on the finished garment, especially if your thread is lighter than the fabric.
There are plenty of modern marking tools that give you a fine line and still stand out enough to follow while you sew. I often use a Frixion pen because the lines are crisp and disappear with heat. But Frixion isn’t everyone’s favorite — on some fabrics, the lines can leave a faint “ghost” mark, so it’s best to test first.
✅ Related tutorial: 15 Creative Ways to Mark Fabric for Sewing Projects
Other options include ultra-fine water-soluble pens, heat-erasable gel pens in multiple colors, and mechanical chalk pencils that let you refill with different chalk colors for contrast. Air-erasable pens are also handy for short-term markings, as they fade on their own within hours or days (depending on the brand and humidity).
The main thing is to choose a marking tool that:
- Makes a thin, clear line
- Shows up against your fabric color
- Can be removed completely without damage
Test on a scrap first, and you’ll never have to worry about permanent “oops” lines hiding under your stitches.
Buttonhole Chisels and Sets
I used to cut buttonholes with scissors. Not anymore. Scissors can be clumsy in tight spots, and it’s far too easy to nick a bartack you just stitched.
A buttonhole chisel, on the other hand, makes one clean slit with a single press. The sharp blade slices through the fabric with light pressure, leaving a smooth, straight opening. Always use it over a wood block or cutting mat to protect your work surface and keep the cut clean.
Cutter Sets With Round Punch
Some chisel sets come with a tiny round punch. This is for making the rounded end on a keyhole buttonhole. When you seat the punch in the right spot, it cuts a perfect circle through even thick fabric layers. No frayed edges, no uneven curves.


The Awl Trick
The awl method is a gentle way to finish opening a buttonhole without risking damage to your bartacks. First, use a chisel to cut almost — but not quite — to each bartack. Then place the tip of the awl in the small gap that remains and slowly twist or ease it toward the bartack. The fabric fibers part gradually, so there’s no sudden “snap” that could slice right through your stitching.
Threads, Needles, and Density That Flatter the Fabric
The thread you pick for a buttonhole is more than just a way to hold stitches together — it’s the polish that makes your work look finished. The wrong choice can make even a neatly sewn buttonhole look clunky or out of place.
Think about weight first. A fine 50 or 60 weight thread (like Gütermann Sew-All or Mettler Metrosene) blends beautifully into lightweight fabrics without making the buttonhole look bulky. For medium-weight fabrics, a 40 weight thread gives enough presence without overpowering the weave. Heavy fabrics like wool coating or denim shine with a 30 weight thread or even topstitching thread for a bolder, more defined look.
Color matters just as much. A perfectly matched shade makes the buttonhole melt into the fabric for a subtle finish. A contrast color draws attention — which can be striking, but it also means every stitch shows, so your technique needs to be on point.
Needle choice is equally important. The wrong needle size can shred thread, pucker fabric, or leave oversized holes. For fine fabrics, a size 70/10 or 75/11 Microtex or Sharp works well. For medium weights, a size 80/12 Universal is a safe bet. Heavy fabrics benefit from a 90/14 or even 100/16 if you’re using thicker threads.
✅ Related tutorial: 19 Types of Sewing Machine Needles and What They’re Used For
The goal? A buttonhole where the stitches are smooth, even, and dense enough to cover the raw edges without creating a stiff ridge. When the thread, needle, and stitch density match your fabric, the buttonhole looks intentional — and you won’t be tempted to hide it under the button.
Fray Sealants
Even the neatest buttonhole can start to look fuzzy after a few trips through the wash or a season of regular wear. That’s where fray sealants come in. A tiny drop along the cut edges helps lock the threads and fabric fibers in place, so the slit stays crisp instead of sprouting little whiskers.
Products like Fray Check or Fray Block are the go-to choices. They dry clear, stay flexible, and work on everything from lightweight cotton to heavy denim. Fray Block is a bit thinner and soaks in more easily, while Fray Check has a thicker consistency that sits on top a little longer. Both do the same job — it’s just a matter of which texture you like using.
To apply, run a fine bead right along the raw edge of the buttonhole opening. Less is more — too much can stiffen the fabric or leave a visible halo. Let it dry completely before you try to button anything through it.
It’s a small extra step, but it can keep your buttonholes looking new long after the garment is finished.


Tools for Sewing Buttonholes by Hand
Hand-sewn buttonholes have a classic, slightly raised look that feels both sturdy and special. They do take more time, but with the right tools, the process is much smoother — and the results are worth it.
✅ Related tutorial: How to sew a buttonhole by hand
Sharp hand-sewing needles
Choose a fine, sharp needle that can still handle a slightly thicker thread. Sizes 7–9 embroidery or crewel needles work well for most fabrics. They have a sharp point for piercing woven fibers and an eye large enough for heavier thread.

Thread
Silk thread glides through fabric without snagging and has a soft sheen that makes the stitches stand out. Brands like Gütermann, Superior Threads or YLI offer good-quality silk threads.

You can also use a strong polyester topstitching thread for a similar look with more durability on heavier fabrics.
Beeswax
Running your thread through beeswax before sewing makes it stronger, less likely to tangle, and smoother to pull through the fabric.

What You Need to Make Buttonholes on an Embroidery Machine
To stitch buttonholes on an embroidery machine, the main thing you need is a proper buttonhole design file.
A good buttonhole design is more than just a rectangle of satin stitches — it’s carefully digitized so the stitches form in the right order, with the right density, and with clean, reinforced ends.
Look for designs made specifically as functional buttonholes, not just decorative shapes. Functional designs will have:
- Dense, even satin columns that fully cover the raw edge once cut
- Bar tacks or keyhole ends to lock the stitches in place and prevent fraying
- Proper stitch sequencing, so the edges are anchored before the final satin cover stitch goes on
- Size options that match your buttons, so you’re not stretching or squeezing the button through
Many embroidery design companies — and even some sewing machine brands — offer downloadable buttonhole sets in multiple lengths and styles. This makes it easy to match the design to your fabric weight, button size, and garment style.
And then there are decorative buttonholes — the kind that turn a functional opening into a little piece of art. You’ll find designs with scalloped edges, tiny flowers along the sides, or even motifs like stars or leaves integrated into the ends. These aren’t for every garment, but they shine on pieces where the buttonhole is part of the design, not something you’re trying to hide. Think children’s clothing, summer blouses, costumes, or statement coats where the buttons and their openings are meant to be noticed.
The key takeaway: even with a high-end embroidery machine, the quality of the buttonhole comes down to the design file you load. Choose a functional one for durability, a decorative one for show, and always test it on scrap before committing to your final project.
Choosing the Right Method
Before you start stitching buttonholes into your project, decide which method matches your fabric, design, and available tools. Each approach has its strengths — the right choice will make the process smoother and the result more durable.
Using a Buttonhole Presser Foot (Machine-Sewn)
Best for: Most everyday garments, home décor projects, and knits.
Why choose it:
- Produces fast, consistent buttonholes once the machine is set up.
- Works well on stable woven fabrics and on knits.
- Perfect for shirts, blouses, dresses, pillow closures, cardigans, and knitwear that needs neat openings.
Considerations: The quickest option for most projects. Once you’ve tested the settings, you can make dozens of identical buttonholes in very little time, which makes it the go-to method for garments with multiple closures.
Using a Zigzag Stitch Without a Buttonhole Foot
Best for: When your machine doesn’t have a buttonhole setting, the foot is missing, or the buttonhole is too large for the automatic foot.
Why choose it:
- Gives full control over stitch width, length, and spacing.
- Works well on very large buttonholes for coats or specialty closures.
- Useful for thick fabrics that might not fit under an automatic foot.
Considerations: Requires more time and precision, but allows you to create buttonholes in sizes and shapes your machine can’t make automatically.
✅ Related tutorial: How to Make a Buttonhole with a Zigzag Stitch without a Buttonhole Foot
Hand-Sewn Buttonhole
Best for: Couture garments, heirloom sewing, tailored coats, and high-value pieces where a refined, durable finish is essential.
Why choose it:
- Traditional in couture sewing for its strength, beauty, and ability to be shaped precisely.
- Can be sewn in a variety of thread types for decorative or matching finishes.
- Allows for perfect alignment with the garment’s design, even when placement is unconventional.
Considerations: Time-intensive and requires practice, but the finish is unmatched for formalwear, bridal, and custom tailoring.
Lapped Buttonhole
Best for: Leather jackets, outerwear, and tailored coats.
Why choose it:
- Sturdy construction that conceals raw edges completely.
- Handles thick and non-fraying materials beautifully, including leather and heavy wool.
- Gives a polished, traditional look for high-end outerwear.
Considerations: More construction steps and precise cutting are required. Works best on firm materials that hold a crisp edge.
Embroidery Machine Buttonhole
Best for: Decorative garments, bespoke pieces, and high-end fashion where precision and customization matter.
Why choose it:
- Produces identical, perfectly shaped buttonholes every time.
- Can incorporate decorative stitching, monograms, or specialty shapes.
- Excellent for small-batch couture sewing where aesthetics are a priority.
Considerations: More costly in terms of time and resources than standard methods, but unmatched for creative or specialty designs.
Like what you read? Then don’t just scroll away and hope you remember it later. Pin it now — before it disappears like your last seam ripper. And if you’re the kind of person who enjoys helpful sewing tips sprinkled with a bit of fun, follow me on Pinterest for more tips, tutorials, and inspiration!
latest posts
- What Do You Call a Person Who Sews? I Asked My Readers and Got 1,408 Opinions
- DIY Round Purse: PDF Sewing Pattern and Detailed Instructions
- Mini Wonder Clips By Clover: Useful Sewing Tool Or Just Another Notion?
- Non-Slip Grips For Quilting Rulers: A Small Notion With A Useful Job
- Fabric Eraser for Sewing: What It Removes and When to Use It
- What Is The Best Thread For Sewing Machine Projects? Let’s Find Out!
- Butterfly Quilt Block Tutorial – Foundation Paper Piecing
- How To Sew Quilt Squares So The Corners Match
- Sewing With Fork Pins: How They Help With Pattern Matching, Slippery Fabric, And Seams